
And sometimes you forget to hit the “Publish” button after you write a blog post! It was supposed to be on my blog Friday, but I forgot to push the button! Anyway, here is this fun and easy gift bag you can make in no time!
It might be time to make a few gift bags to have on hand this time of year. You probably have graduations coming up or lots of summer birthdays, hostess gifts for parties, maybe even Father’s Day! You can make your own small gift bag in just a few minutes and decorate for the particular occasion.
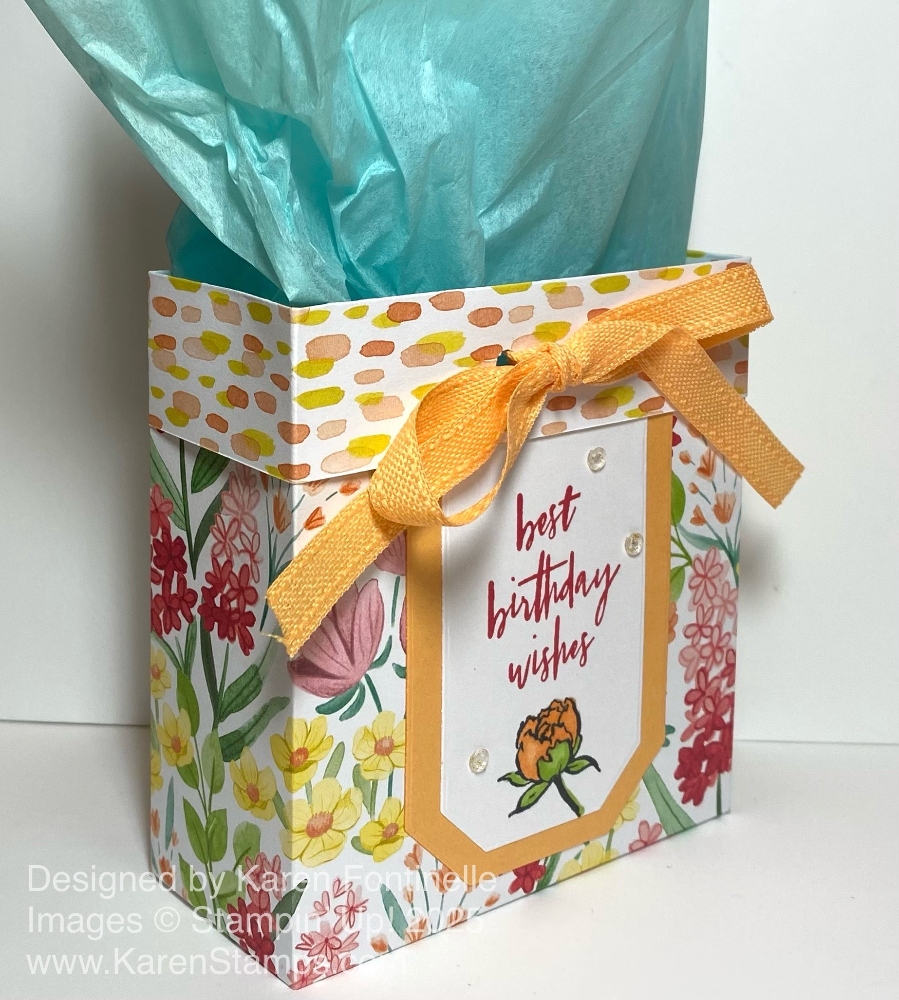
This particular pattern of gift bag is made with just half a sheet of 12″ x 12″ sheet of paper, whether card stock or designer series paper. This finished gift bag is 4 1/4″ tall, 4″ wide, and 1 3/4″ deep. It is large enough for a small gift or maybe a gift card and a congratulatory card. You could put a cello bag with a few cookies or candies in there. So it is small but not tiny!
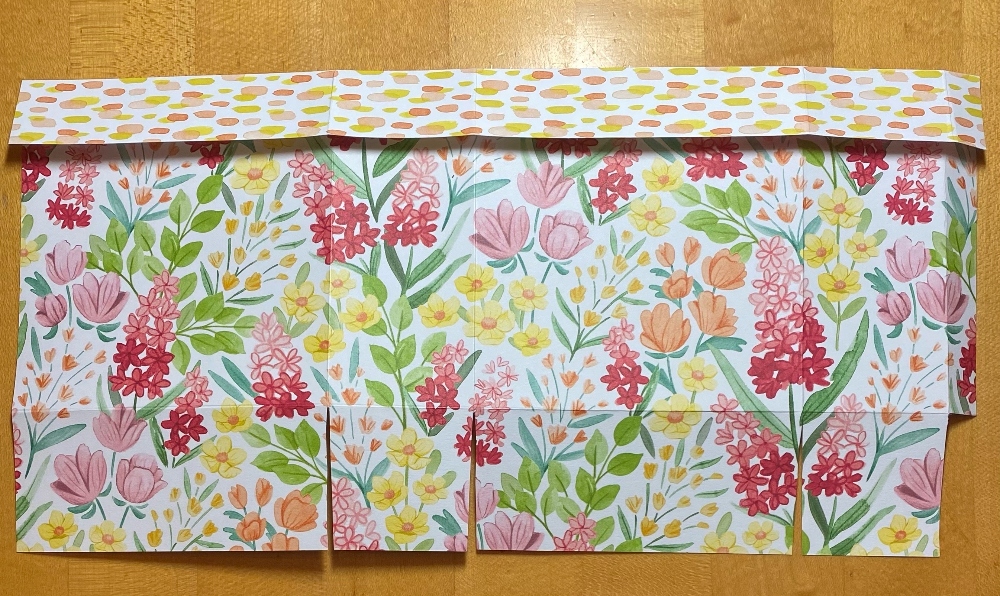
While you can cut the paper at 6″ x 12″, I made mine 7″ x 12″ so that I could fold the top edge down 1″ to show the other side of the paper for a little interest on the bag. Either way the rest of the measurements and scoring are the same.
For this bag, I used this floral pattern in the Florals In Bloom Designer Series Paper. You’ll find it in the Annual Catalog. It is part of the Florals In Bloom Suite Collection. Make sure any pattern on any paper is going in the direction you want it to go on your project when you cut your paper and when you score, depending on the project.
Start with a 6″ x 12″ piece of paper (or if you want to fold over the top make your paper 7″ x 12″). Score at 4″, 5 3/4″, 9 3/4″, and 11 1/2″. Turn the paper so the short edge is at the top and score at 1 3/4″. This will make the bottom flaps of the bag. Cut those short bottom tabs up to the 1 3/4″ score line. Cut off the little 1/2″ tab on the bottom. Fold on all the score lines and crease well with the Bone Folder. Adhere the tab on the end to the other side to assemble the bag. Then adhere the flaps on the bottom. I used Multipurpose Liquid Glue for the ease of getting things lined up properly before it sticks together or you can use Tear & Tape Adhesive.
Have fun decorating your bag! I folded over the top 1″ before assembling the bag. You can punch holes front and back to tie ribbon through in order to close the bag or just do it decoratively with a bow as I did. I stamped a Basic White Countryside Corners diecut (dies on the Last Chance list) with a greeting in the Poised Peony Stamp Set (retired). You can use whatever greeting you have. I layered this diecut on the next larger die in Peach Pie cardstock. The greeting is stamped in Strawberry Slush ink and the little peony is stamped in Memento ink and colored in with Peach Pie and Granny Apple Green Stampin’ Blends alcohol markers. I stuck this up underneath the folded over top edge and I think it fits just fine. It looks a little like a banner. I added a few of the new Strawberry Slush & Pretty In Pink Gems to the greeting for a little sparkle.
And that’s how easy making this basic gift bag is!
SHOP STAMPIN’ UP! ONLINE HERE!


