Tag Archives: Perfectly Penciled Designer Series Paper

Perfectly Penciled Colored Flowers Card

Perfectly Penciled Colored Flowers Card

The other day, on this post, I made a card with the Perfectly Penciled Designer Series Paper but left the design black and white. Here is another card using the same designer paper, but with a smaller floral pattern. This time I colored in the flowers to make the Perfectly Penciled Colored Flowers Card. I find coloring in these images to be easy and fun. With the coloring techniques we have, you really don’t have to be too perfect. You don’t have to exactly stay inside the lines or color every single spot. Just get some color down in the area and it will look fine.

This card has a base of So Saffron and a layer of Pool Party cardstock. For the Pool Party, however, I stamped around the edge with one of the small flower stamps in the Happiness Abounds Stamp Set. The designer paper piece is cut at 3″ x 4 1/4″ and colored with Stampin’ Blends. Just use whatever colors you like. I was using light colors such as Petal Pink, So Saffron, Pool Party, Highland Heather, and Granny Apple Green for the leaves.

The greeting is also in the Happiness Abounds Stamp Set. It is stamped in Pool Party ink and then die cut with a stitched circle in the Stylish Shapes Dies. I almost put the greeting as is on the Basic White on the card, but then decided to add a Pool Party layer die cut with one of the scalloped circles in the Layering Circles Dies. I think it adds a lot.

I colored the White 1/4″ Crinkled Seam Binding Ribbon with a Dark So Saffron Stampin’ Blend Marker to add some embellishment to the card. I adhered the designer paper to a piece of Basic Black and then adhered a strip of ribbon around and added a bow. For a final touch, I added three Iridescent Rhinestone Jewels to the bottom of the greeting. This card is a simple one yet has several areas of interest so it’s not too plain.

SHOP STAMPIN’ UP! ONLINE!

SHOP SEPTEMBER WEEKLY DEALS!

Perfectly Penciled Black and White Card For a Friend

If you asked me what my idea or thought process was for this card I wouldn’t know! This Perfectly Penciled Black and White Card For a Friend just came about from the designer paper itself! I looked through the package of paper and decided to do something with just the designs, not the floral images on “the other side” of the paper. I wasn’t sure at all how it would turn out! Sometimes you have to just work with an idea!

I thought maybe I could use strips of three of the different designs of the designer paper. This Perfectly Penciled Designer Series Paper has pretty floral designs on one side of the paper and graphic designs on the other side. You can certainly use it just black & white as I did on this card or you could color in the images as I have done on other cards like THIS ONE. And THIS CARD uses the paper’s floral and graphic design sides in just black & white! As you can see, this paper is fun to play with!

For this card, I chose three patterns of paper, cut them into strips, and planned to run the strips vertically on the card. But once I got them together I liked them going horizontally better! I adhered them to a piece of Basic White thinking I might tie some ribbon around that layer before adhering to the Basic Black card base. If you do that and you have some edges that aren’t perfect, just trim them down a tiny bit so the underneath layer isn’t showing. These strips are just a “smidge” over 1 1/4″ wide. A “smidge” means maybe about another 1/16″ more! They don’t have to be super-exact because we don’t want to ruin our fun cardmaking with a lot of math!

I decided to cut out a square 3″ x 3″ of one of the pretty floral images and then layered it on a piece of Basic Black. I wasn’t sure what ribbon to use at first, but decided to just use a strip of this White 3/4″ Frayed Ribbon that didn’t go around to the back of the card. I really like it! For a greeting, I stamped the “friend” in the Happiness Abounds Stamp Set and cut it with one of the circle dies in the Stylish Shapes Dies.

Remember, Sale-A-Bration ends on this Wednesday, August 31 so if you need any Stampin’ Up! supplies, be sure to shop by then to get your FREE product with every $50 purchase!

SHOP STAMPIN’ UP! ONLINE!

Coloring on Perfectly Penciled Designer Paper

Coloring on Perfectly Penciled Designer Paper

I’m not crazy but yes, I did color in this whole card front on this Coloring on Perfectly Penciled Designer Paper card! If you like coloring, you’ll understand that coloring is fun, and if you don’t like coloring, then you can stick to the beautiful black and white images on this paper!

The Perfectly Penciled Designer Series Paper has hand-drawn black and white floral images on one side of the paper that you can use beautifully as is or add color in any of many different ways. On the other side are generic graphic patterns that you can use as backgrounds on cards. It’s really great paper to use!

I simply cut the Perfectly Penciled Paper to have the floral design I wanted in the center of my card. You may have to think a little bit unless your paper has already been cut into, to get the design that you want to work with. Maybe it doesn’t matter how the images show up on your card design. Just so you are happy with it. I colored in the floral pattern and then I designed the rest of the card.

I started with the large flowers in the center and decided to color those with the Light and Dark Pale Papaya Stampin’ Blends. The leaves are mostly Granny Apple Green, some with a touch of Daffodil Delight, and a few smaller leaves colored with Old Olive Blends. The star-shaped flowers are colored with Melon Mambo, which at first I thought was too bright, but once I got the whole thing done, I liked that pop of bright color. Other flowers and buds are Daffodil Delight Blends and some Flirty Flamingo pinkish buds down in the lower-right corner. There is one little butterfly on the card which I colored with a purple and orange, but I’m not happy with it! Luckily it is off to the side and partially obstructed by the bow! I could have left the colored images as is, but I sometimes love coloring in the background, too! For this card, I used the Light Pool Party Stampin’ Blend. If you just kind of scribble around lightly, it’s not that difficult to color in the whole background. If you bear down with the point of the marker, trying to color in perfectly every nook and cranny, it will probably be an unpleasant experience…unless that is really what you want to do!

To make the actual card, I decided to layer and piece of Pale Papaya under the designer paper and then adhere that to a card base of Melon Mambo. The greeting is in the Celebrating You Stamp Set, a great set to have for sentiments for lots of occasions. It is stamped in Melon Mambo ink and then die cut with a die in the Meadow Dies. It looked like too much to layer it on Melon Mambo so I left it as is. The ribbon across the lower portion of the card is the pretty Pale Papaya Open Weave Ribbon. The bow is tied separately and adhered to the card with Mini Glue Dots. For a finishing touch, I couldn’t resist adding some Iridescent Rhinestone Basic Jewels plus one little Brushed Brass Butterfly!

This card could be for almost any occasion if you just change the greeting. Actually, this greeting is perfect for almost any occasion! It could be for a birthday, thinking of you, congratulations, wedding, anniversary, or even sympathy. Here is another card I made recently by coloring the black and white design using Blending Brushes and ink and not trying to color inside the lines at all!

You’ll find the Perfectly Penciled Designer Series Paper in the brand-new Stampin’ Up! Annual Catalog!

Perfectly Penciled Colored With Blending Brushes Card

Perfectly Penciled Colored With Blending Brushes

Even though I love this designer paper just in its black and white design, one of my first thoughts was one of the ways to add color would be to use Blending Brushes or some kind of sponge. It could be soft and intermittent or more precise, as far as this coloring could go.

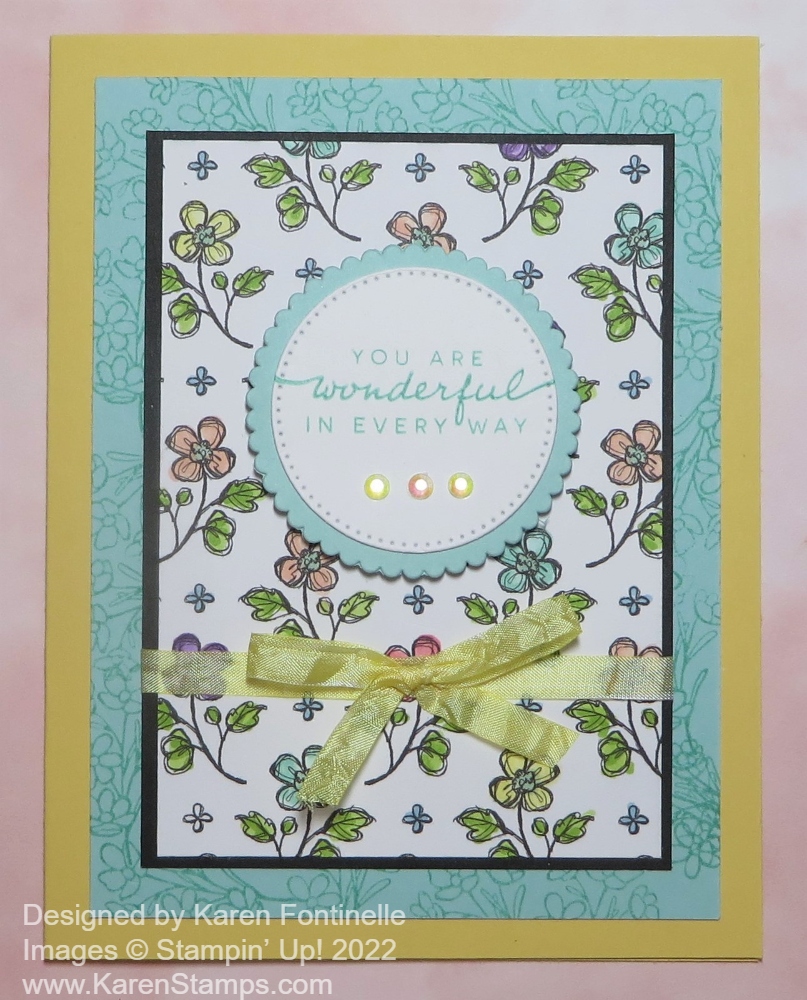
This new black and white paper is the Perfectly Penciled Designer Series Paper. While black and white can be very stunning on their own, it also begs for the rather new trend of coloring in! Coloring takes us back to our childhood! I think of some times when my mother would sit down and color in our coloring books with my brother and me with crayons and we thought her coloring was perfection!

Stampin’ Up! has so many different ways you can color in stamped or printed images. With this designer paper, you don’t have to worry about which ink to use or if anything will smear. We have two different kinds of markers, Watercolor Pencils, ink and Blender Pens, ink and Water Painters, Pastels, and more. It’s all fun!

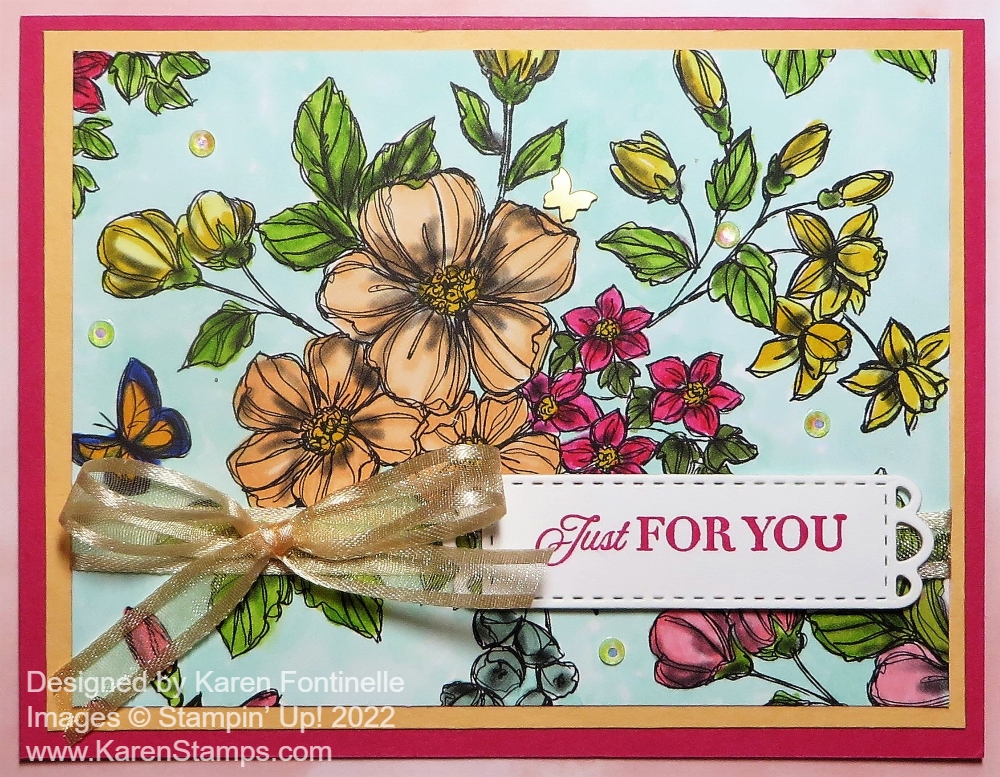
For this card, I colored this floral pattern of the Perfectly Penciled Designer Paper using ink pads and Blending Brushes. Blending Brushes come in a set of three. That’s all I have, at least at the moment. I have found that I can rub them on scrap paper really well after using a color and then go on to use another color. After using them, you can just wash out the ink, but if you wanted to use them over and over, you probably wouldn’t want to work with a wet blending brush. Some people like to have more so they can use a clean brush for every color.

For most of the flowers, I just rubbed the Blending Brush on the ink pad and lightly colored on the paper already cut into a layer for the card. After picking up some ink on the brush, be sure (usually) to lightly rub the brush on scrap paper so you don’t get too dark of a color on your image. After I had lightly colored some of the images, I decided to add a darker layer of color to some of the flowers. Obviously, with this method, you cannot color precisely on any image, which makes it easy because you don’t have to worry about going out of the lines! It’s all out of the lines! The colors I used for the flowers were Daffodil Delight, Calypso Coral, Mango Melody, and Granny Apple Green for the leaves. You can use any combination of colors you want. I also added a layer of Calypso Coral cardstock under the Perfectly Penciled paper. Before adhering, I added a piece of Pale Papaya Ribbon around the lower part of the paper. Even though I didn’t use Pale Papaya as a color, the ribbon looks perfect on the card. It blends in with the other colors and doesn’t compete with all the other pattern and colors happening on the card. I tied a separate bow and adhered it with a Glue Dot.

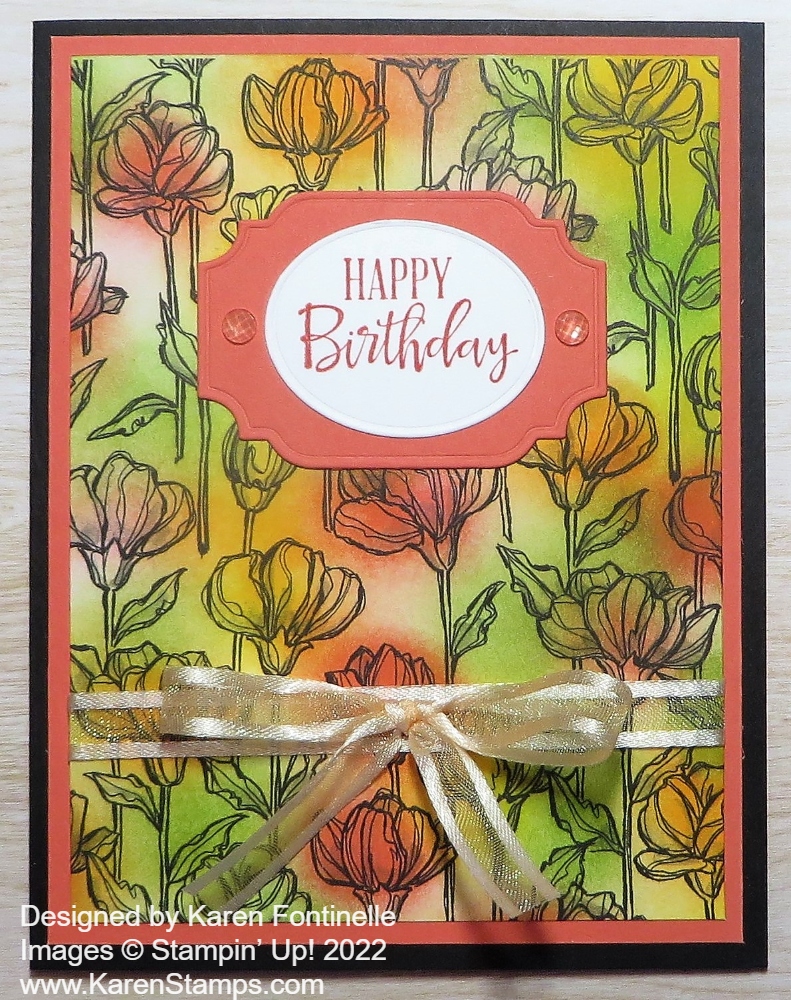
For the greeting, I stamped “Happy Birthday” in the Peaceful Moments Stamp Set in Calypso Coral ink. It is die-cut with the oval in the All That Dies set and then layered on a Calypso Coral piece also in the die set. For embellishment, I added an Elegant Faceted Gem to each side of the die-cut.

Since the card base is Basic Black, you will need to add an inside layer so you can stamp a greeting or write a personal message on the inside of the card. You could also make the card without the black card base and just use the Calypso Coral or whatever color you like.

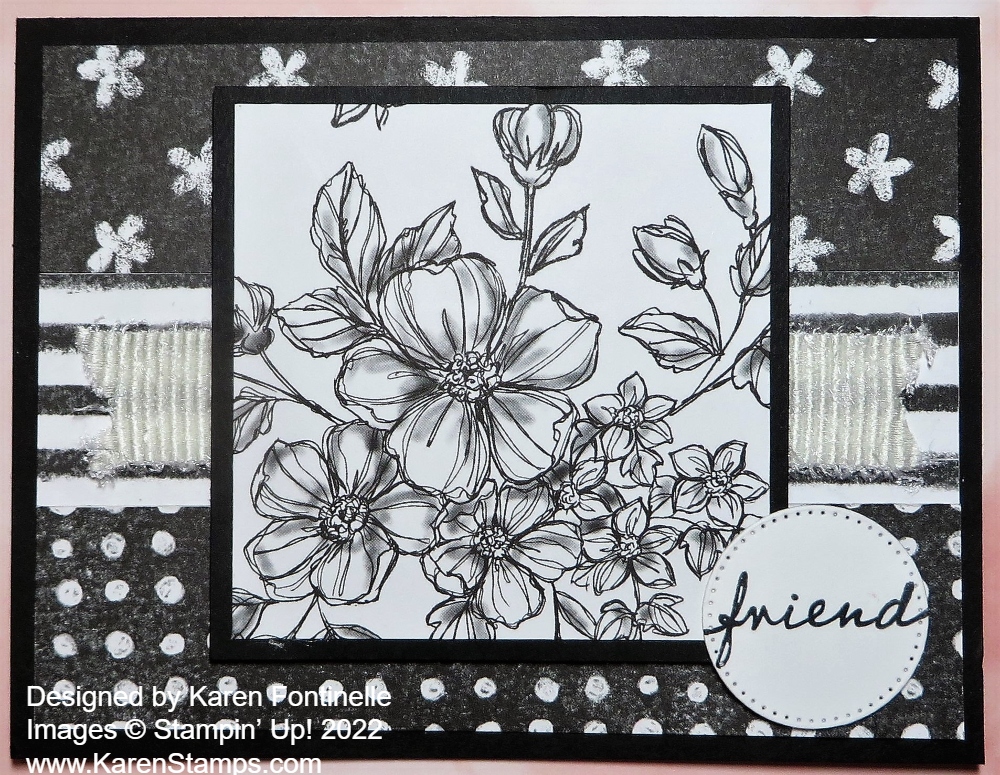
If you want to see a card that is just left black and white, check out THIS POST of a card I made with the Perfectly Penciled Designer Series Paper.

Just play with this paper and see what you come up with as I did with this Perfectly Penciled Colored With Blending Brushes Card.

SHOP STAMPIN’ UP! ONLINE HERE!

Perfectly Penciled Black and White Hello Card

Perfectly Penciled Black and White Hello Card

Today I wanted to play with the new designer paper, Perfectly Penciled, that has all black and white patterns. These papers are fun because you can leave them black and white or color them in with various techniques and materials. For this Perfectly Penciled Black and White Hello Card I simply layered the papers and added a greeting.

You’ll find this new designer paper in the new Stampin’ Up! Annual Catalog. It just came out last week so if you do not have a Demonstrator you are working with and would like a hard copy of the catalog, I’d be happy to help you if you send me your contact information. You can view the catalog online and the products in the Online Store as well.

The card base is Basic Black with a layer of one of the “other sides” of the designer paper, not the floral side. Then I cut a layer of a pretty floral pattern, but I wanted the dotted layer to show so I had to cut it down smaller to 4 1/2″ x 3 1/4″. Just to help it stand out a little bit from the background pattern, I added a Basic Black layer, just a tiny bit larger, about 1/16″ bigger on all sides.

I was tempted to get out my Stampin’ Blends and color in the flowers but I decided to keep this card black and white as was my original intention. I’ll try a colored version another time.

For the greeting, I simply reached for a stamp set and the first one on my shelf suited the purpose, Artistically Inked. I liked the not too large “hello” greeting and makes a good all-purpose card! You could add any greeting you wanted or needed to a card like this. First, I cut out a scalloped rectangle in the Scalloped Contours Dies (thankfully carried over to the new catalog because I like these dies and use them a lot!) from Basic Black. Then I just measured the inside area and cut out a Basic White rectangle to fit and stamped the word “hello” in Memento Ink.

I had debated what ribbon to use before I came up with the greeting. Was the Black & White 1/4″ Gingham Ribbon enough to stand out against the paper or should I break my black & white idea and use a colored ribbon? After deciding on how to design the greeting, I decided a small piece of the gingham ribbon would be just fine. I popped up the greeting and die cut piece on Stampin’ Dimensionals® and just let the end Dimensional hold down the ribbon.

Since I like to use jewels as a finishing touch, I used two Matte Black Dots on the greeting. I thought maybe I should use something sparkly but I do like just the black dots! So you never know!

With the card base being Basic Black, I needed to add a Basic White layer inside the card. To decorate it, I simply cut out by hand one of the same little flowers from the paper I used on the front of the card and glued it in the corner of the white cardstock. So cute!

As you look over all the very pretty papers we have in the new catalog, be sure to take a look at the Perfectly Penciled Designer Series Paper and see if that is something you’d like in your paper collection!

SHOP STAMPIN’ UP! ONLINE HERE!