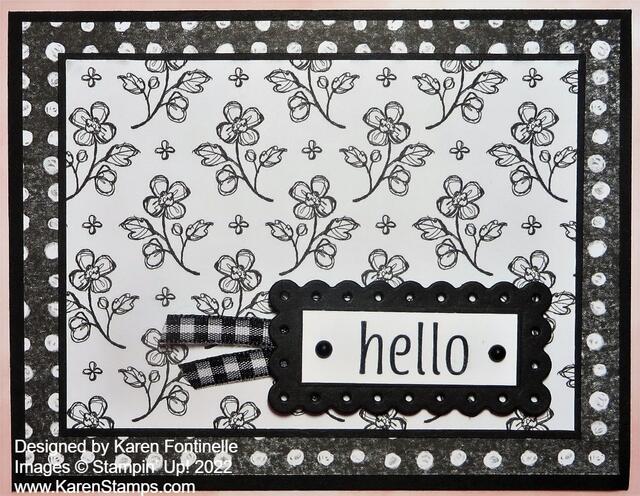
Today I wanted to play with the new designer paper, Perfectly Penciled, that has all black and white patterns. These papers are fun because you can leave them black and white or color them in with various techniques and materials. For this Perfectly Penciled Black and White Hello Card I simply layered the papers and added a greeting.
You’ll find this new designer paper in the new Stampin’ Up! Annual Catalog. It just came out last week so if you do not have a Demonstrator you are working with and would like a hard copy of the catalog, I’d be happy to help you if you send me your contact information. You can view the catalog online and the products in the Online Store as well.
The card base is Basic Black with a layer of one of the “other sides” of the designer paper, not the floral side. Then I cut a layer of a pretty floral pattern, but I wanted the dotted layer to show so I had to cut it down smaller to 4 1/2″ x 3 1/4″. Just to help it stand out a little bit from the background pattern, I added a Basic Black layer, just a tiny bit larger, about 1/16″ bigger on all sides.
I was tempted to get out my Stampin’ Blends and color in the flowers but I decided to keep this card black and white as was my original intention. I’ll try a colored version another time.
For the greeting, I simply reached for a stamp set and the first one on my shelf suited the purpose, Artistically Inked. I liked the not too large “hello” greeting and makes a good all-purpose card! You could add any greeting you wanted or needed to a card like this. First, I cut out a scalloped rectangle in the Scalloped Contours Dies (thankfully carried over to the new catalog because I like these dies and use them a lot!) from Basic Black. Then I just measured the inside area and cut out a Basic White rectangle to fit and stamped the word “hello” in Memento Ink.
I had debated what ribbon to use before I came up with the greeting. Was the Black & White 1/4″ Gingham Ribbon enough to stand out against the paper or should I break my black & white idea and use a colored ribbon? After deciding on how to design the greeting, I decided a small piece of the gingham ribbon would be just fine. I popped up the greeting and die cut piece on Stampin’ Dimensionals® and just let the end Dimensional hold down the ribbon.
Since I like to use jewels as a finishing touch, I used two Matte Black Dots on the greeting. I thought maybe I should use something sparkly but I do like just the black dots! So you never know!
With the card base being Basic Black, I needed to add a Basic White layer inside the card. To decorate it, I simply cut out by hand one of the same little flowers from the paper I used on the front of the card and glued it in the corner of the white cardstock. So cute!
As you look over all the very pretty papers we have in the new catalog, be sure to take a look at the Perfectly Penciled Designer Series Paper and see if that is something you’d like in your paper collection!

