This Nature’s Sweetness Easy Explosion Box is something fun and easy to make and makes a cute little gift or favor for someone. There are variations of this little project but I came across this idea while cleaning out some old computer files! You never know what you might find!
Some explosion boxes have sides that fall open when you remove the lid. I’ve made that kind too which can be used well as kind of a folding scrapbook or photo album. This one I made has sides that just fold in. Put a greeting on the inside, maybe a little treat or gift. You could write messages on the sides inside or adhere some small photos.
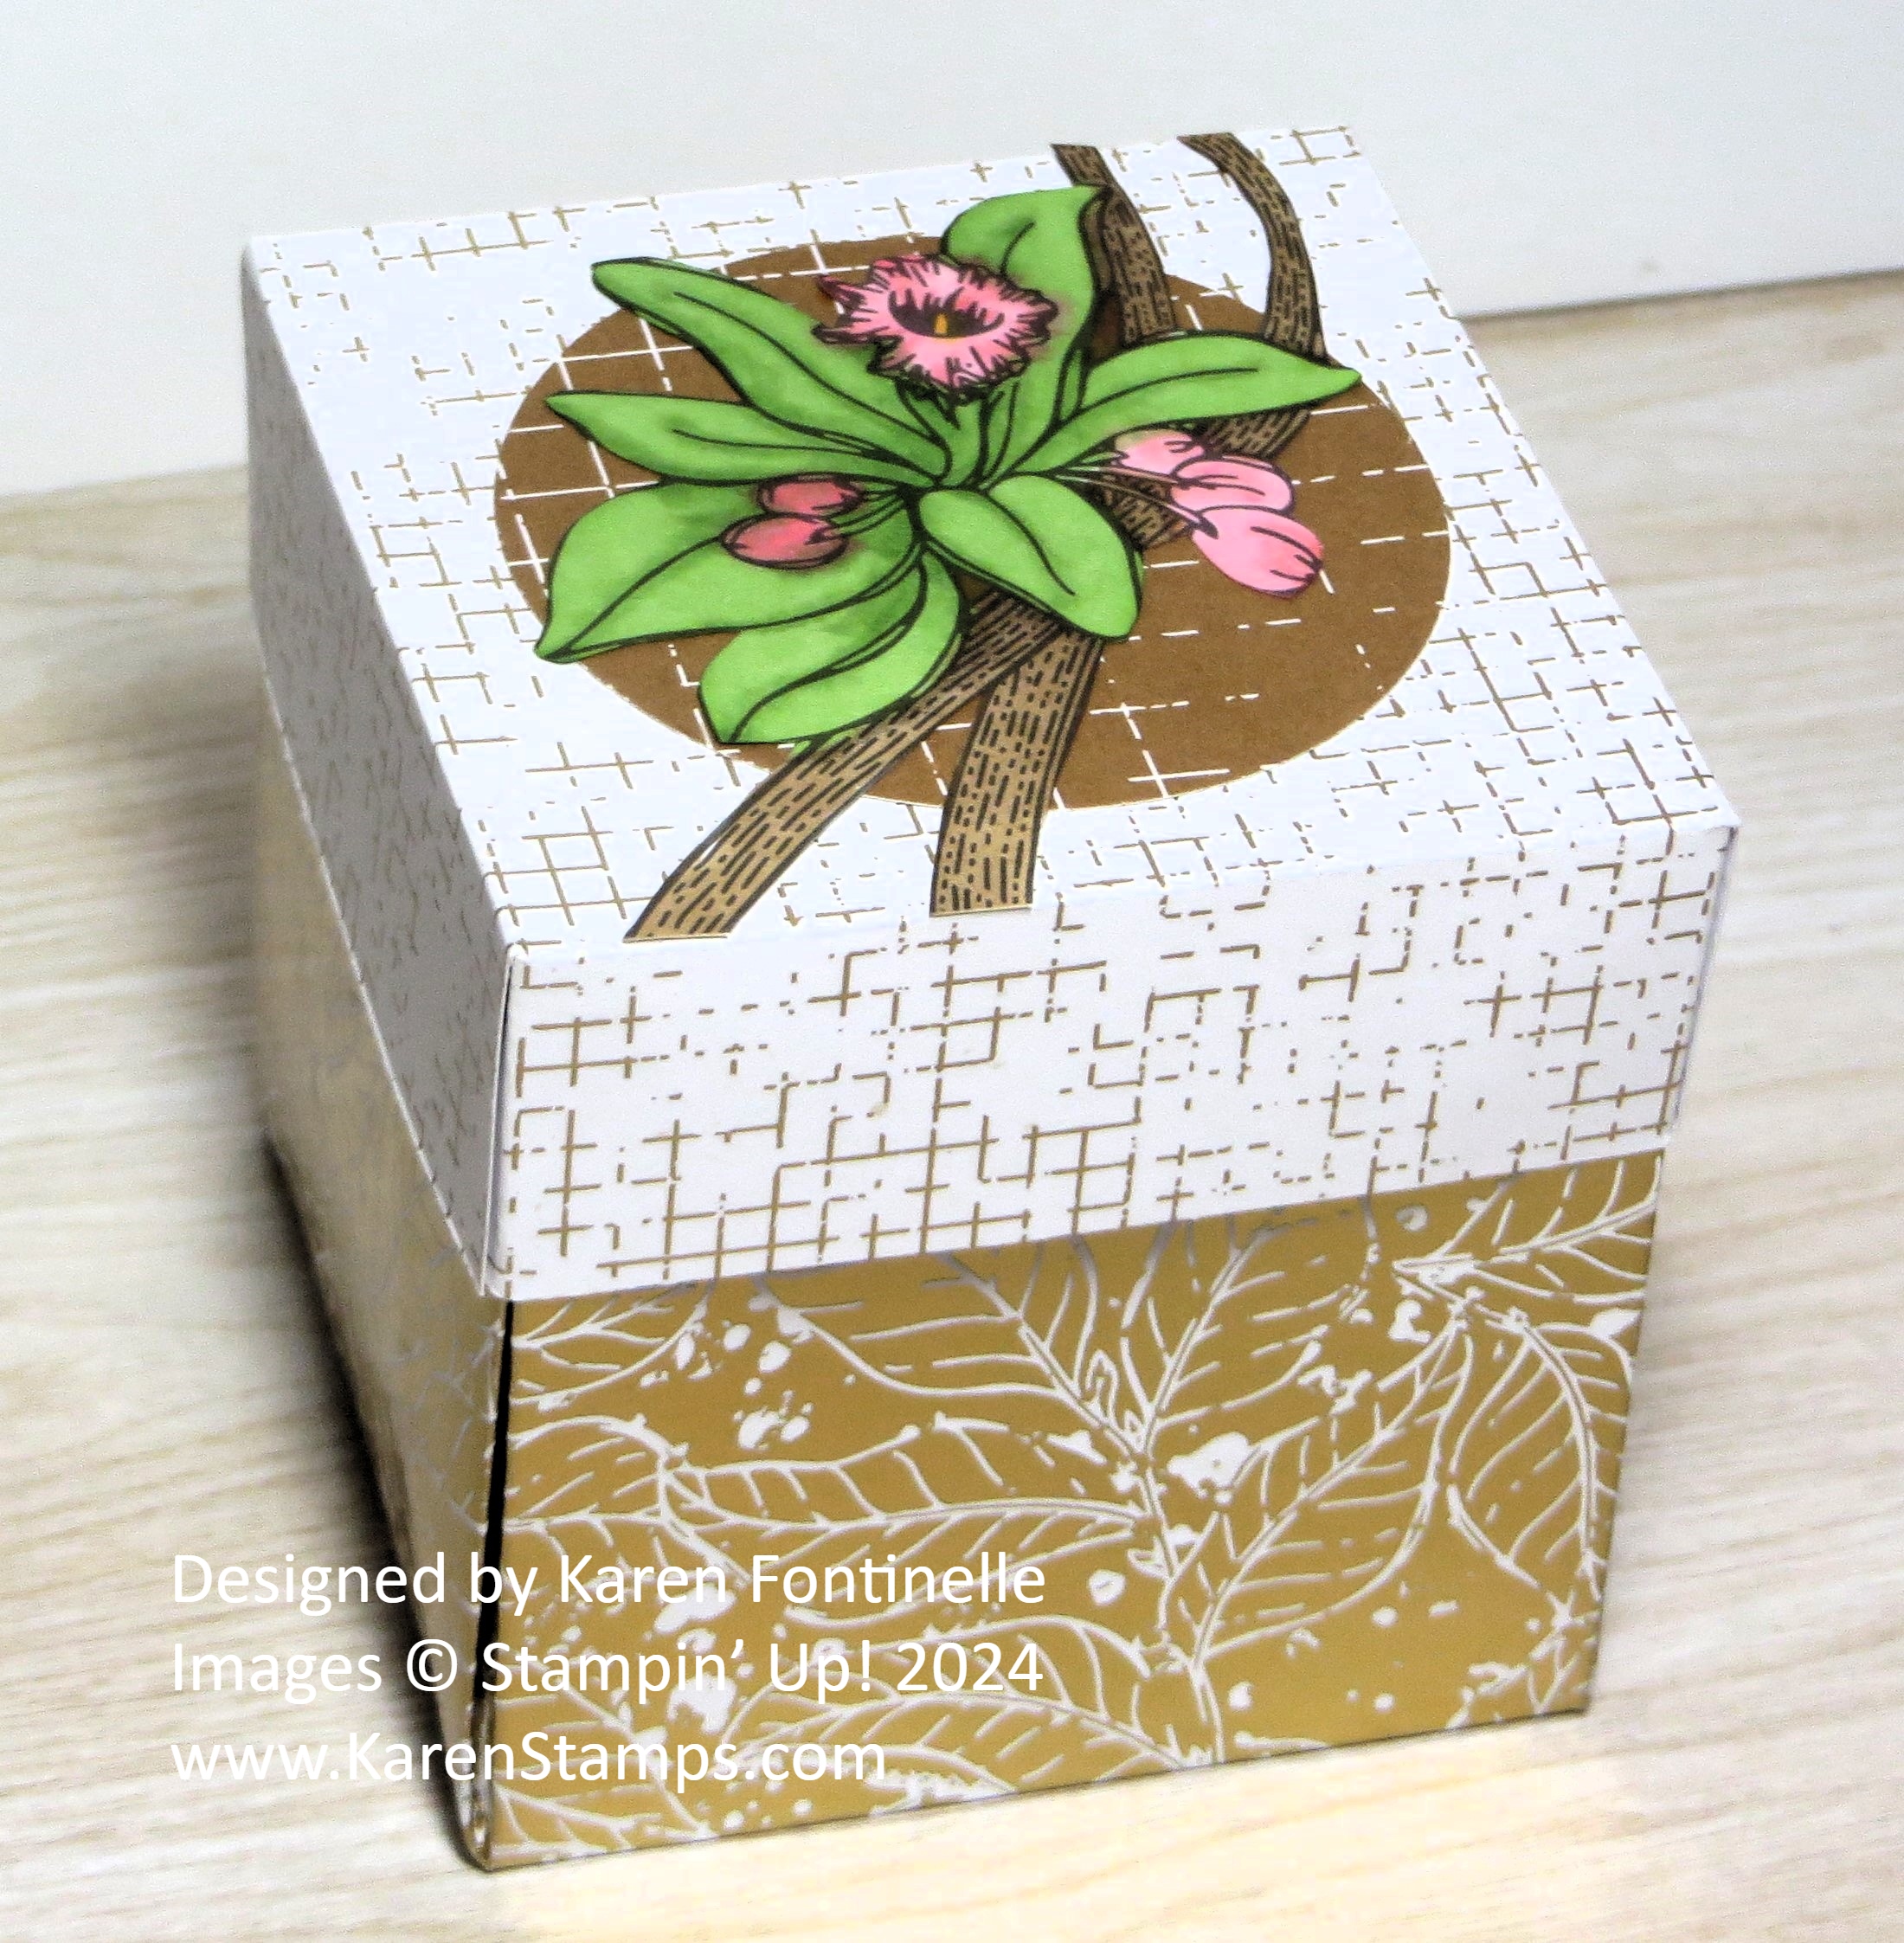
This explosion box uses the Nature’s Sweetness Specialty Designer Series Paper. For my box, I used a very gold pattern for the box and a white and gold pattern for the lid. These papers have another design on the other side. You do want to pay attention to the direction of any patterns on your paper choice.
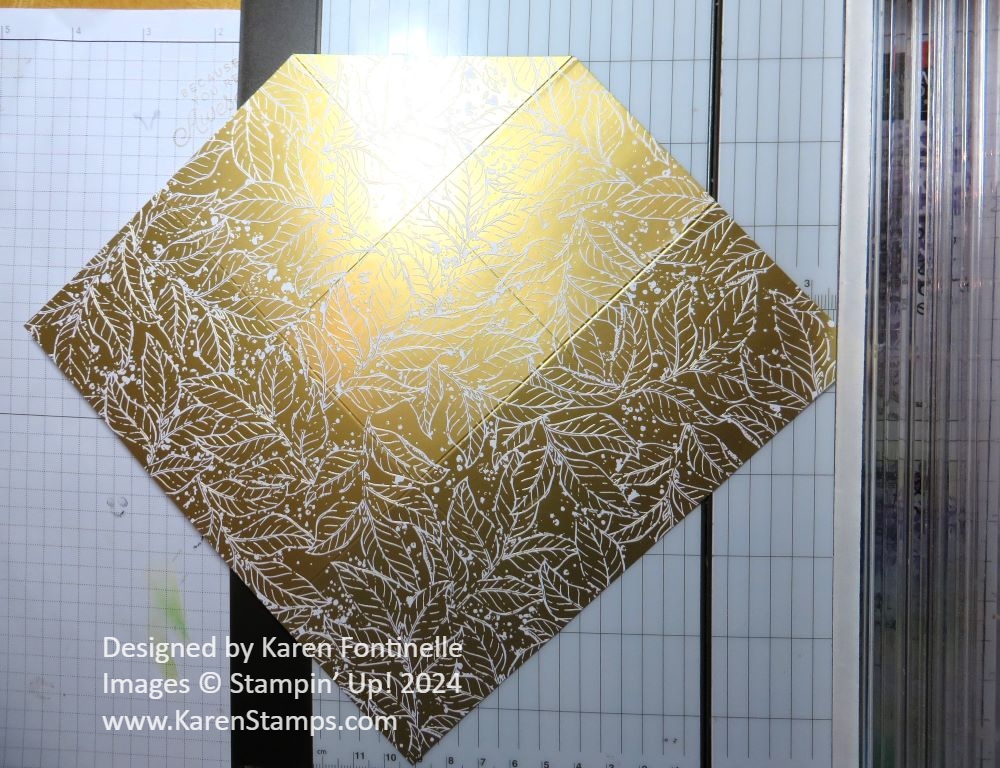
Start with a 7 1/2″ x 7 1/2″ square of paper for the box. Score at 2 1/2″ on all sides, like a tic tac toe board. Or think of it as scoring at 2 1/2″ and 5″. After you have done the scoring, cut off all four corners on a diagonal. You can use your Paper Trimmer, just lay the two points on that cutting groove.
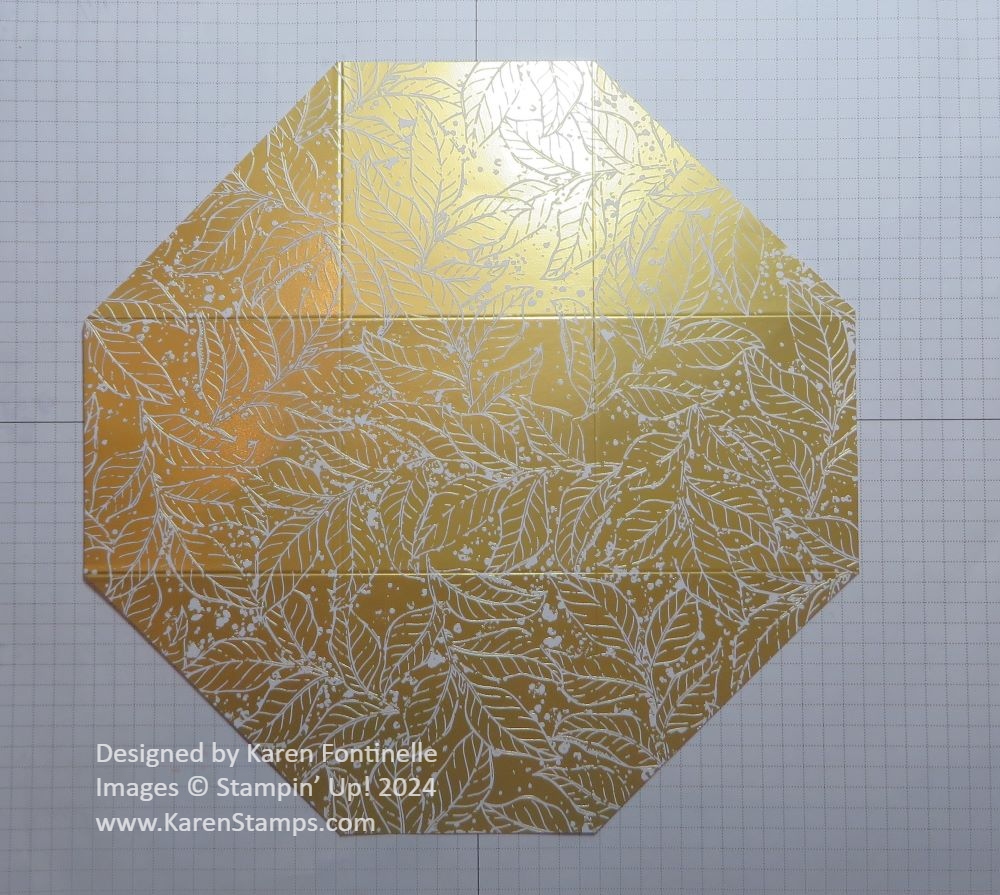
Fold and crease all the score lines and by hand, fold the corners to the inside to form a box. Give those fold lines a good crease with your fingers or lay on the table and use your Bone Folder.
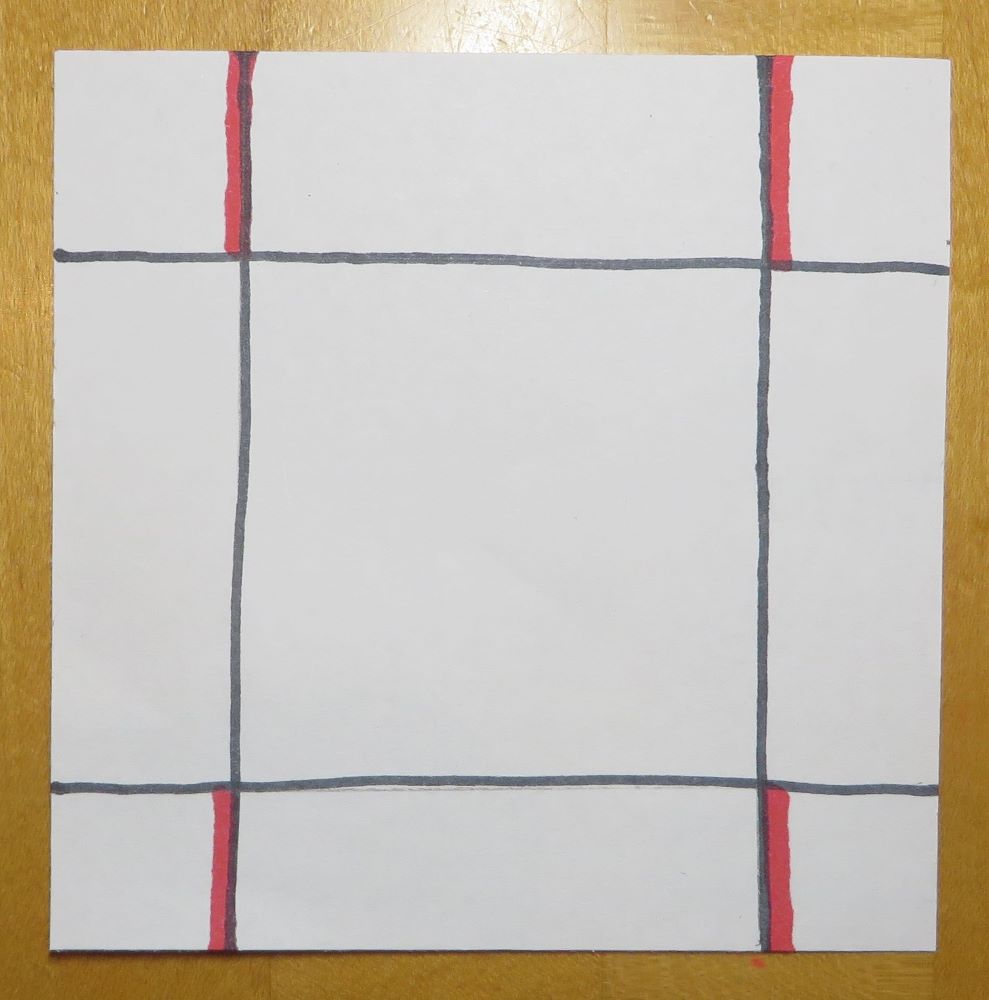
For the box lid, cut a square 4 1/4″ x 4 1/4″. Score on all four sides at 7/8″. Then make four snips as shown in red below to make the flaps. Cut toward the outside of the scoreline a tiny bit. I think this gives just that tiny bit of extra room for the lid to fit over the top of the box without pinching in the sides. I didn’t do mine as perfectly as I should have but it turned out all right.
Fold and crease all the score lines and then fold in the flaps and adhere to make a lid.
On the inside of the box, you can put a little greeting of any kind. I cut another square of one of the designer papers and then layer a greeting or message on top of that. I stamped a greeting from the Lovely & Sweet Stamp Set.
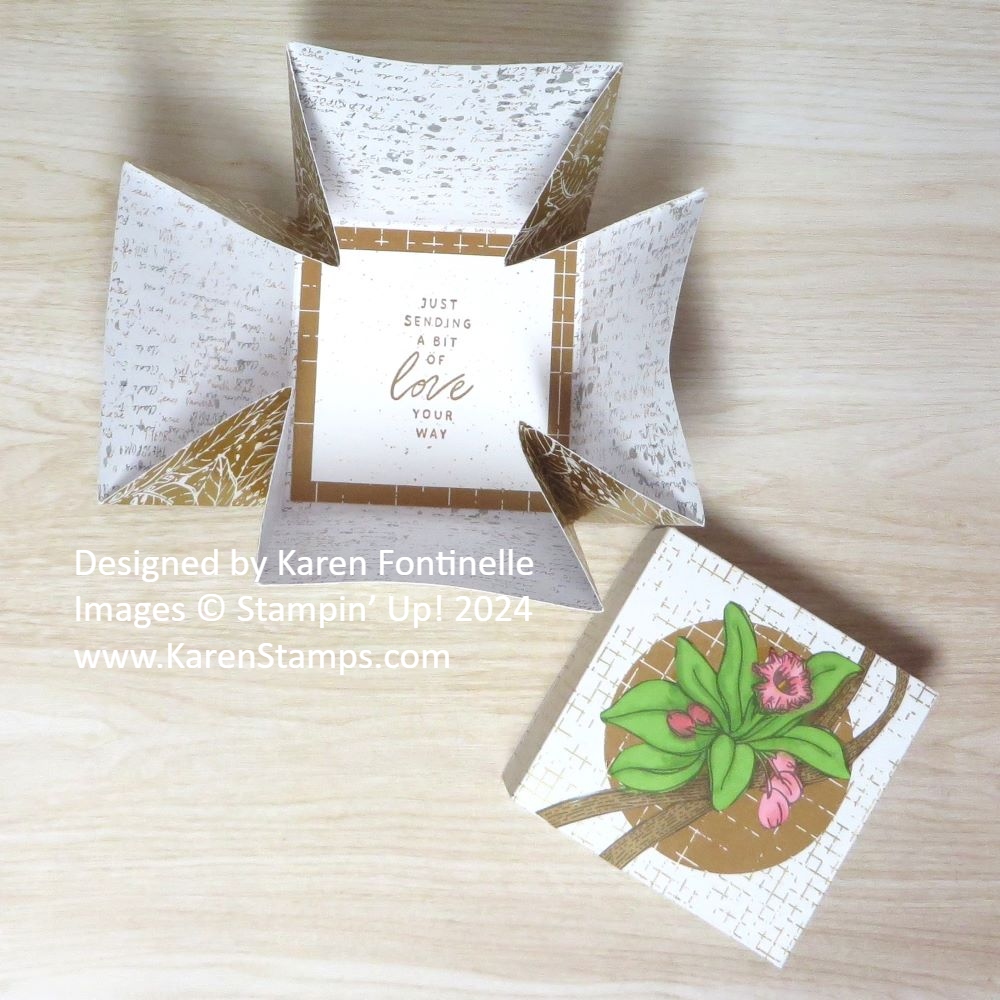
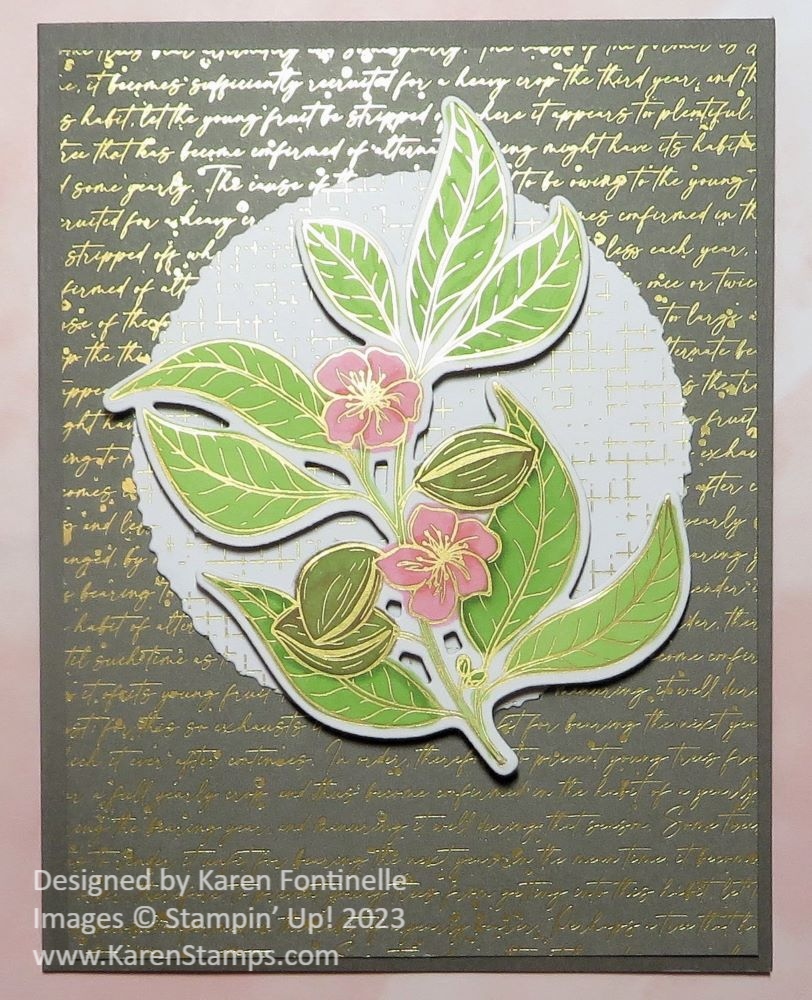
You can decorate the top of the lid, or if you prefer tie a ribbon around the box with a bow on top. For mine, I roughly cut out this flower and leaves from the gold embossed sheet in the Nature’s Sweetness DSP. The image is colored with Stampin’ Blends and then cut out with one of the dies in the Lovely & Sweet Dies. I layered the diecut on a circle punched out with the 2″ Circle Punch.
This is an easy little project so give it a try! Some designer papers are heavier than others or you might want to try using cardstock which you can stamp on or add layers of designer paper to decorate. The sky is the limit! Have fun!