Tag Archives: Greetings For You Ephemera Pack

Christmas Tags & More Ornaments Card

Christmas Tags & More Ornaments Card

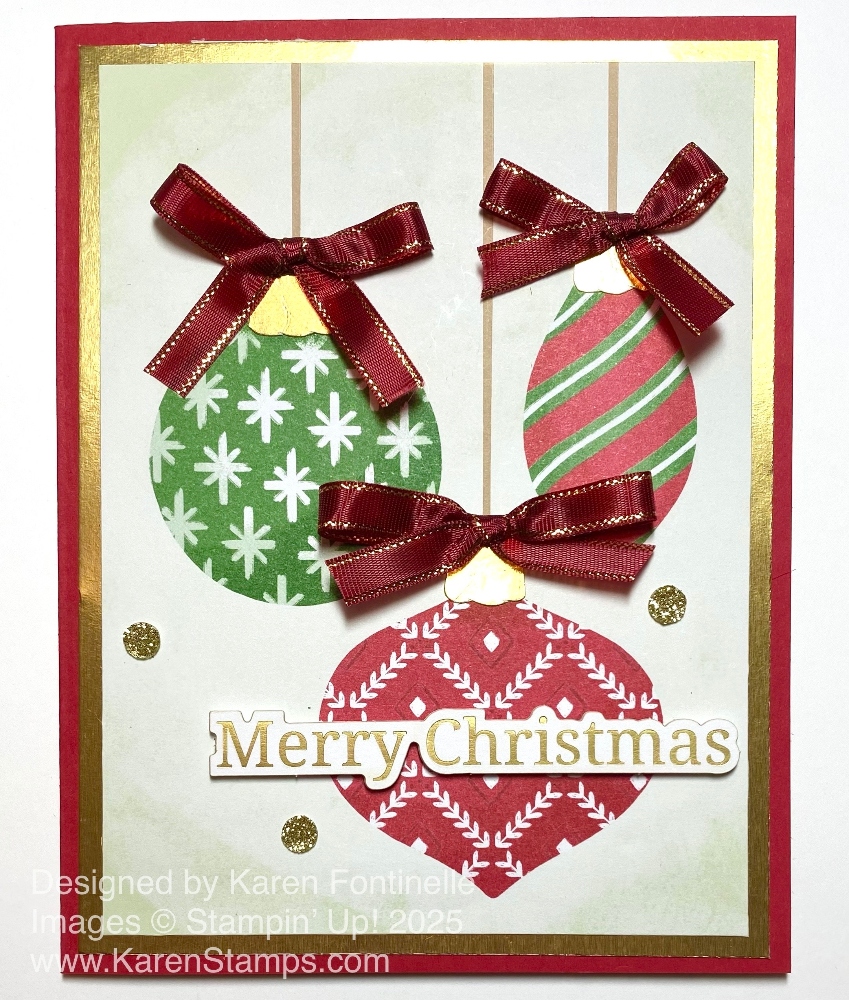
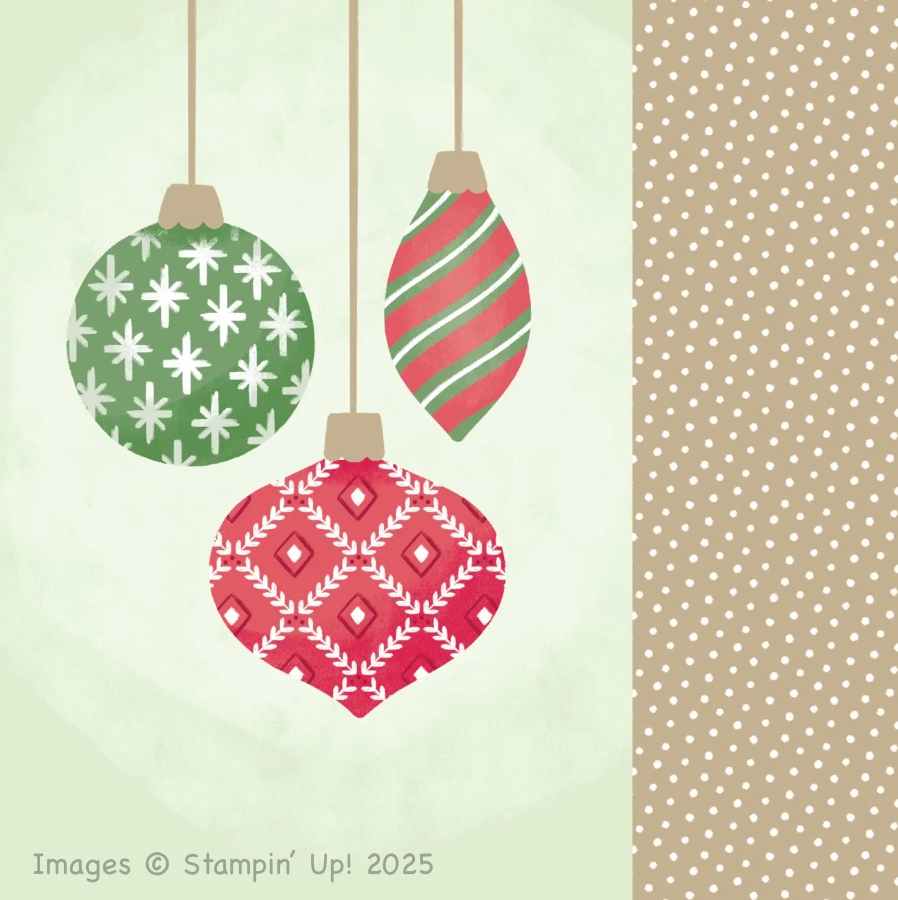
This Christmas Tags & More Ornaments Card is easy to make with the versatile pack of 6″ x 6″ designer series paper called Christmas Tags & More! Besides the pretty holiday designs and tags in the paper, there are some sheets of diecut ephemera images you can use any way you like on cards or scrapbook pages and other projects for the holidays.

This card starts with a card base of Real Red cardstock, although you could use another color that matches the ornaments. There is a layer of Basic White cardstock for the background because I felt like I wanted the card to be very simple.

For the string holding the ornaments, I used a recently retired green baker’s twine. You could use whatever you have. A gold trim would be pretty, too. The ends are adhered under the sides of the white cardstock. Make it fairly tight going across but you want a little dip in the string. I chose three ornaments from the ephemera pages in the designer series paper, plus two pieces of mistletoe. To adhere the ornaments I put a Stampin’ Dimensional on the back of each one at the center to bottom and then a Mini Glue Dot to adhere to the string. The mistletoe is adhered flat on the card. Then I tied three small bows to adhere with a Mini Glue Dot to the top of each ornament.

Before I added the greeting, I had to play around with papers and layers trying to find the right thing for the bottom of the card. All of a sudden, the right combination came about! I added a strip of the red and green plaid pattern with a layer of Real Red under the greeting to highlight the gold foil wording. But I didn’t want it covering up very much of the plaid design.

The greeting is found in the Greetings For You Ephemera Pack. I have loved this pack with all kinds of gold foil greetings for the holidays that are ready to go and even are backed with adhesive. Just peel off the backing and adhere to the paper. Or if you’d rather use some other adhesive or pop up the greeting with Dimensionals, just leave on the backing paper and do it your way.

For just a tiny bit of embellishment, I added two gold Traditional Sparkling Sequins at each end of the greeting. I think they highlight the greeting a little bit and even a little on a card is nice!

Just get out all the papers and the diecut images and play around with all the possibilities!

Elegant Pine Snowflakes Scrap Cards

Elegant Pine Snowflakes Scraps Cards

Do you know what today is? Today is October 25, TWO MONTHS until Christmas Day! Wow! That puts things into perspective for us crafters, right?! I wanted to post a Christmas card today to remind all of us that even though it isn’t Halloween yet, it is almost Christmastime! Here are two cards, Elegant Pine Snowflakes Scrap Cards, that you can easily make with brand new paper or the scraps that you have left after making other cards. And you can use any paper you have! In fact, you can make this same kind of card for a birthday or any occasion, just change the theme and greeting of course!

Elegant Pine Snowflakes Merry & Bright Card

This card is made with a Real Red card base. As you may have guessed, I used the Elegant Pine Snowflakes Designer Series Paper in the Online Exclusives since September. You could use Cherry Cobbler cardstock or one of the greens. The paper strips are cut at 1 3/4″ x 4″. I adhered mine directly on to the card base. However, sometimes it is easier to cut a piece of cardstock the same size as the three strips together and adhere the strips onto that layer, then the whole piece on to the card base. Or you can make a layer that is larger (if you cut your strips smaller) and have that layer show around the margins of the strips. Very versatile design. These strips are all touching, but you can also make them smaller and narrower and leave a space in between.

The greeting is one of the gold foil sentiments in the Greetings For You Ephemera Pack. It is layered on a Gold Foil diecut circle from the Stylish Shapes Dies. This eventually is layered on a larger Real Red diecut circle. First, however, I used the Real Red 1/2″ Shiny Ribbon back and forth behind the gold foil layer and held in place with Stampin’ Dimensionals. I often put some Stampin’ Seal on the paper to hold the ribbon in place until I get it just right and then add the Dimensionals.

For some pizzazz, I added five gold Traditional Sparkling Sequins for sparkle. With this design you can make hundreds of other kinds of cards. It’s a great way to use more than one pattern of our beautiful paper!

Elegant Pine Snowflakes Joy Card

Here is a second card, made with the same Elegant Pine Snowflakes Designer Series Paper, but with the strips switched around and a different greeting and ribbon. This card base is our old favorite, Old Olive. The greeting is also in the Greetings For You Ephemera Pack, but the whole word punches out. It is layered on an Old Olive Stylish Shapes circle with Gold Striped 3/8″ Mesh Ribbon, which is so pretty. Just like the first card, the greeting is popped up on Dimensionals. This time I used the Real Red Traditional Sparkling Sequins for some sparkle on the card. Just add a greeting or write a message inside the card and you are set to go!

Since today is only two months until Christmas (and that’s Christmas Day when ALL the work and preparation is over with!) let’s all try to make at least three Christmas cards today, maybe more, just to get in the mood and into gear!

SHOP STAMPIN’ UP! ONLINE HERE!

Ornament Trio Christmas Card

Ornament Trio Christmas Card

This Ornament Trio Christmas Card is another idea for a Christmas card! Keep it simple and use a few embellishments plus the greeting. Since this one uses designer series paper, you would only be able to make a certain number of this particular card, with as many sheets of this pattern of paper that are in the packages. This card was made with one square sheet with the ornaments printed on about 2/3’s of the paper and a polka dot border to one side in Crumb Cake. But it can also give you an idea for a Christmas card cutting out or stamping some ornament shapes out of the supplies you have, adhering them to a card with a background layer, and embellishing them.

This card starts with a card base of Real Red cardstock and has a layer of Gold Foil to match the bit of gold foil on the card front, the little ornament caps below the ribbon. The Gold Foil also makes the card look a little richer and special. These ornaments came from the Christmas Tags & More 6″ x 6″ Specialty Designer Series Paper. This paper is called “Specialty” because it comes with diecuts as well as paper. Some of the paper is practically ready-made gift tags if you just cut them apart!

The patterned paper with the three ornaments on it is what I used on this simple card. I trimmed it down to 3 3/4″ x 5″, trying to keep the ornaments centered. To jazz them up a bit, I cut out three gold foil caps to cover the ones printed on the paper and make the ornaments look more authentic. I didn’t have to think very much about what greeting should go on the card. I found one that fit just right in the Greetings For You Ephemera Pack. I could have peeled off the backing of the “Merry Christmas” greeting I chose in the package to use as a sticker, but instead, I just added some Mini Dimensionals to pop up the greeting for a little interest. These greetings are SO handy and so pretty, especially with the gold foil. Be sure you put at least one, maybe two packages, on your order.

If you prefer, there are diecut ornament images in the package and you could make a similar style card using those instead of the patterned paper. There are SO many possibilities for holiday cards and projects in this one 6″ x 6″ pack of designer series paper, which is more than just normal designer series paper.

To embellish the ornaments, beside adding the gold foil ornament topper, I added some retired Cherry Cobbler and Gold Ribbon, which I still had in my basket and was the only narrow red choice I had. I thought the wider ribbon in Real Red that I have would be too large for these ornaments. Use what you have. You could use a narrow gold ribbon, bakers twine, whatever you have! I also added some Traditional Sparkling Sequins in gold near the bottom portion of the card.

Besides ordering the very fine Greetings For You Ephemera Pack (or two!), I would suggest you get one or two of the beautiful Traditional Sparkling Sequins which can be used beyond Christmas. They are such pretty, sparkling embellishments and are flat on the card, a great advantage for mailing.

October is speeding by so start thinking about Christmas and holiday cards, invitations, gifts, favors, and giftwrap ideas!

Christmas Tags & More Ornament Sheet

SHOP STAMPIN’ UP! ONLINE HERE!

Christmas Card With Gold Metallic Rub-on

Except for cutting the paper, this Christmas Card With Gold Metallic Rub-on is probably one of the easiest cards you can make! I had ordered these Metallic Textures Rub-Ons quite awhile back, then kept forgetting to try them out. Finally I did to make this card and loved how easy they were to use and how pretty this one turned out!

I started with one of the large tags in the A Touch of Gold Tags Ephemera Pack. I am loving ALL of the ephemera packs Stampin’ Up! has now! I used the wreath Metallic Rub-on on this tag. The directions are easy. Cut out the design you want to use. Remove the backing. Place it on the cardstock where you want it with the pretty design face up. Just use your finger to rub across the design thoroughly. Carefully lift it up, making sure the metallic design transferred. Mine did perfectly!

Metallic Rub-on Application

Christmas Card with Metallic Rub-on Tag

Christmas Card with Metallic Rub-on Tag

For the greeting, I used one from the Greetings For You Ephemera Pack. I like these so much I bought an extra pack so I have plenty for Christmas cards and other projects. These are printed in gold foil and are peel-and-stick adhesive on the back. There are duplicates of each greeting. You can leave the backing on if you want to use your own adhesive or want to pop them up on Dimensionals. This one fit just right.

Christmas Card with Metallic Rub-on Tag

I originally thought I would add some Cherry Cobbler Berries to the wreath, but then I decided to leave it all just gold and white.

The card base is Basic White. I cut a layer of Basic White that I could layer the Gold Tag on. My layer is 3 1/4″ x 4 3/4″. Then I layered that on Gold Foil, a piece 3 1/2″ x 5″. Finally, I added a bow tied with the Gold Striped 3/8″ Mesh Ribbon and adhered with a couple of Mini Glue Dots.

That’s all there is to this card and I think it looks very nice with all the gold! These rub-ons are in the Stampin’ Up! Annual Catalog near the bottom of page 124 so they are for any occasions and designs, not just holidays. I feel like they could be easily overlooked on that page in the catalog because of the light color and all the interesting embellishments on the next page that draws your eye! This wreath I used could just be for summer or any time. Half of the sheets in the package are silver, so you get both gold and silver in the package.

Check out the Metallic Textures Rub Ons (165270) and put a package on your next order! You’ll love them! I think Stampin’ Up! had some many years ago and we rubbed them with like a popsicle stick. These you just use your finger. So easy and fun!

SHOP STAMPIN’ UP! ONLINE HERE!

Elegant Pine Snowflakes From Our House To Yours Card

Elegant Pine Snowflakes From Our House To Yours Card

This Elegant Pine Snowflakes From Our House To Yours Card is an easy one to make. When you are making a lot of Christmas cards, you need to think of designs that make it easy to make multiples. Of course, you might also want to make some extra-special cards for extra-special people! That is what is so fun about cardmaking – you can make “easy” cards that don’t take a lot of time but still look lovely, or you can spend more time and use more products to make something “fancy”. It’s all fun and all creative!

This card came about just because I was cutting up some designer series paper to send as little thank you samples to send to customers who had ordered from me. Since I just got this Elegant Pine Snowflakes Designer Series Paper in my order the other day, it was one I knew they didn’t have yet. Sometimes when you are just flipping through a package of designer series paper, maybe one pattern in particular will just jump out at you and you’ll want to use it next time you make a card. As I was cutting samples of this paper, this pattern just “spoke to me” and I wanted to use it for the next card I made.

The card base is Shaded Spruce cardstock. It matches perfectly with the foliage in the designer paper. I liked the red berries in the paper, so I added the Real Red 1/2″ Shiny Ribbon. I just took enough ribbon to wrap across the front and around to the back a little bit on each side. This saves a couple inches of ribbon since you don’t wrap it completely around the card. After the ribbon was attached, I could adhere the designer paper to the card base.

For the greeting, I chose a greeting in the Greetings For You Ephemera Pack in the Holiday Mini on page 15 at the top. Stampin’ Up! has quite a few ephemera packs of all kinds and they are so handy and fun to use! These are peel-and-stick stickers of gold foil Christmas greetings, even multiples so you can make more than one card with each greeting. I’ve already ordered a second pack to have on hand. And you can use them on tags, gift bags, and other projects, not just cards. For a background, I diecut a label from the Unbounded Love Dies, now retired, but you can use something similar or simply cut a rectangle piece of cardstock. I used Shaded Spruce with a partial layer of Real Red. The way to “fake” another layer when you don’t have a larger die is to cut it out, then cut it in half, horizontally as I did here or vertically, if you want it to show on the sides. Then glue one half to the top just showing a little border and the other half to the bottom. On the back, there would be a space between the two halves. I do this a lot! The greeting is popped up with Stampin’ Dimensionals right over the ribbon.

To embellish the card, I tied a bow out of the ribbon and adhered it to the card with Mini Glue Dots. It is easier than trying to wrap the ribbon all around and tie a bow, but you could do that. I also added the beautiful Traditional Sparkling Sequins, the small gold ones, to the greeting and on the designer series paper. I’m telling you, these are gorgeous and I think you should order a package or two soon while they are in stock! They won’t only have to be for Christmas either. You will be able to use them on any cards and projects where you want some sparkle!

Here is another card, the first card, I made with the Elegant Pine Snowflakes Designer Series Paper. It comes in a Suite in the Online Exclusives if you would like ALL the things!

SHOP STAMPIN’ UP! ONLINE HERE!

Holiday Mini Catalog Cover SeptDec 2025

September-December 2025 Mini Catalog (Holiday Mini Catalog)

Online Exclusives