Teddy Bear Baby Shower

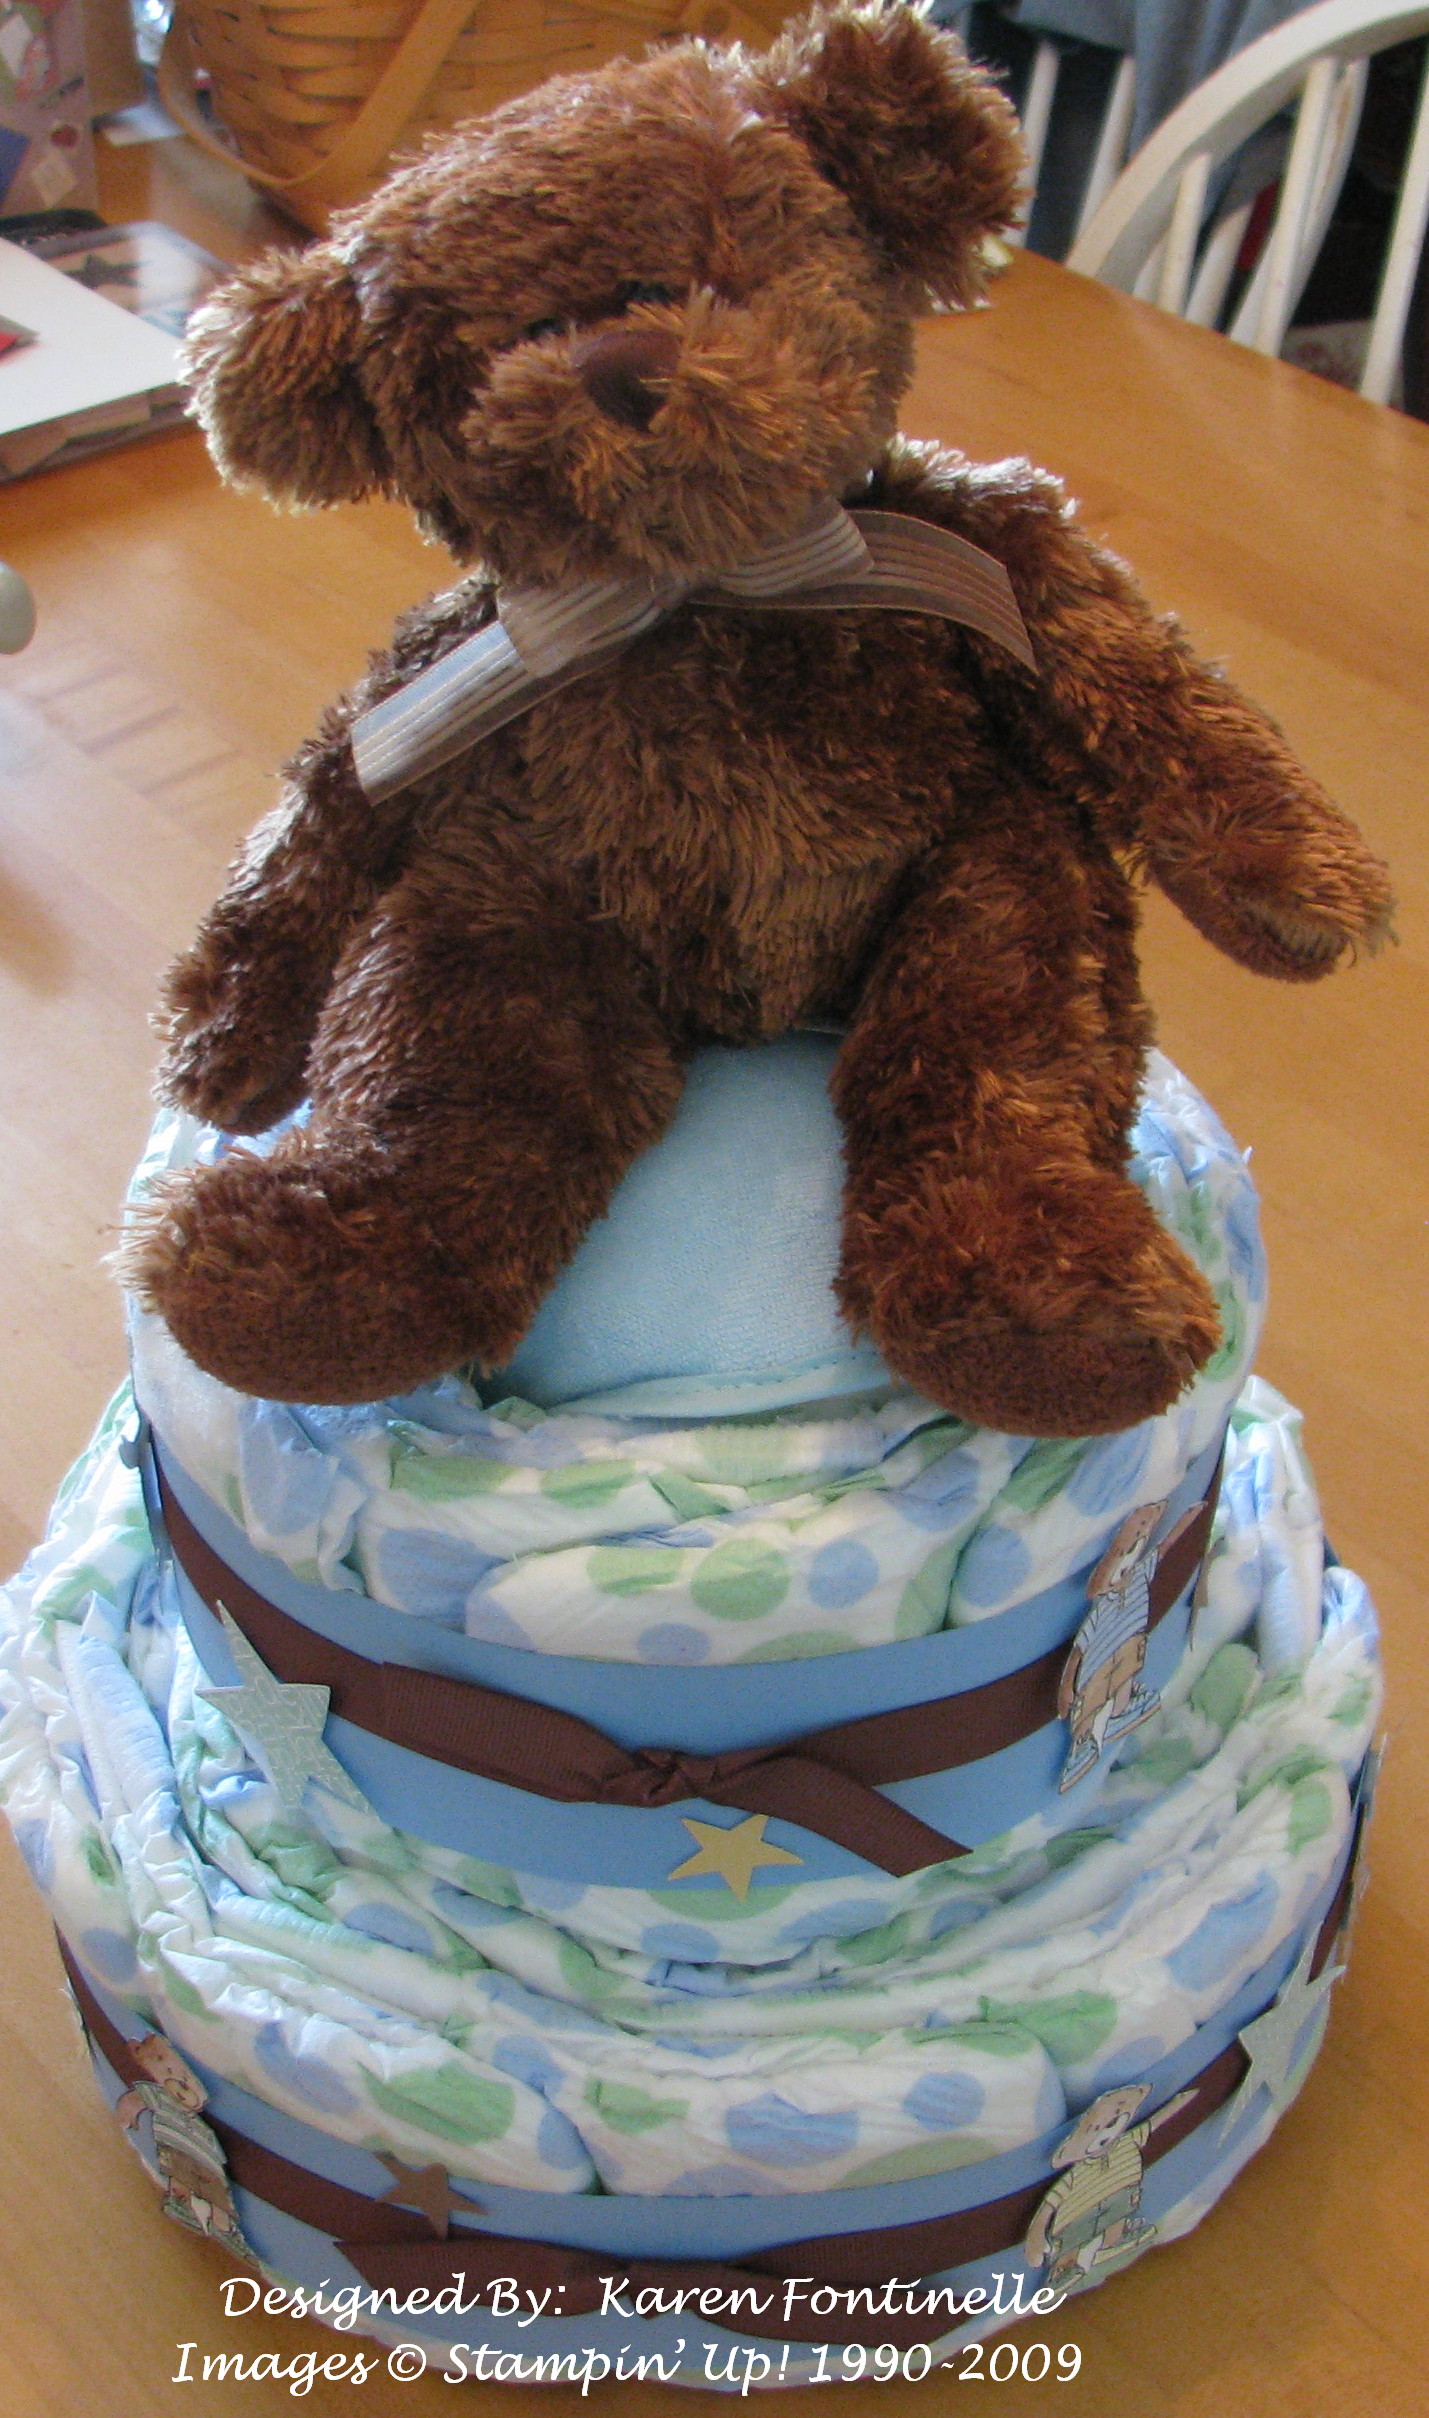
A few weeks ago I was asked to make some centerpieces for a baby shower.  As I was about to go on vacation, it became a "rush" job, but I knew it would be fun to tackle this project!  Since it was a teddy bear theme, I knew the Stampin' Up! Build-A-Bear would be perfect!

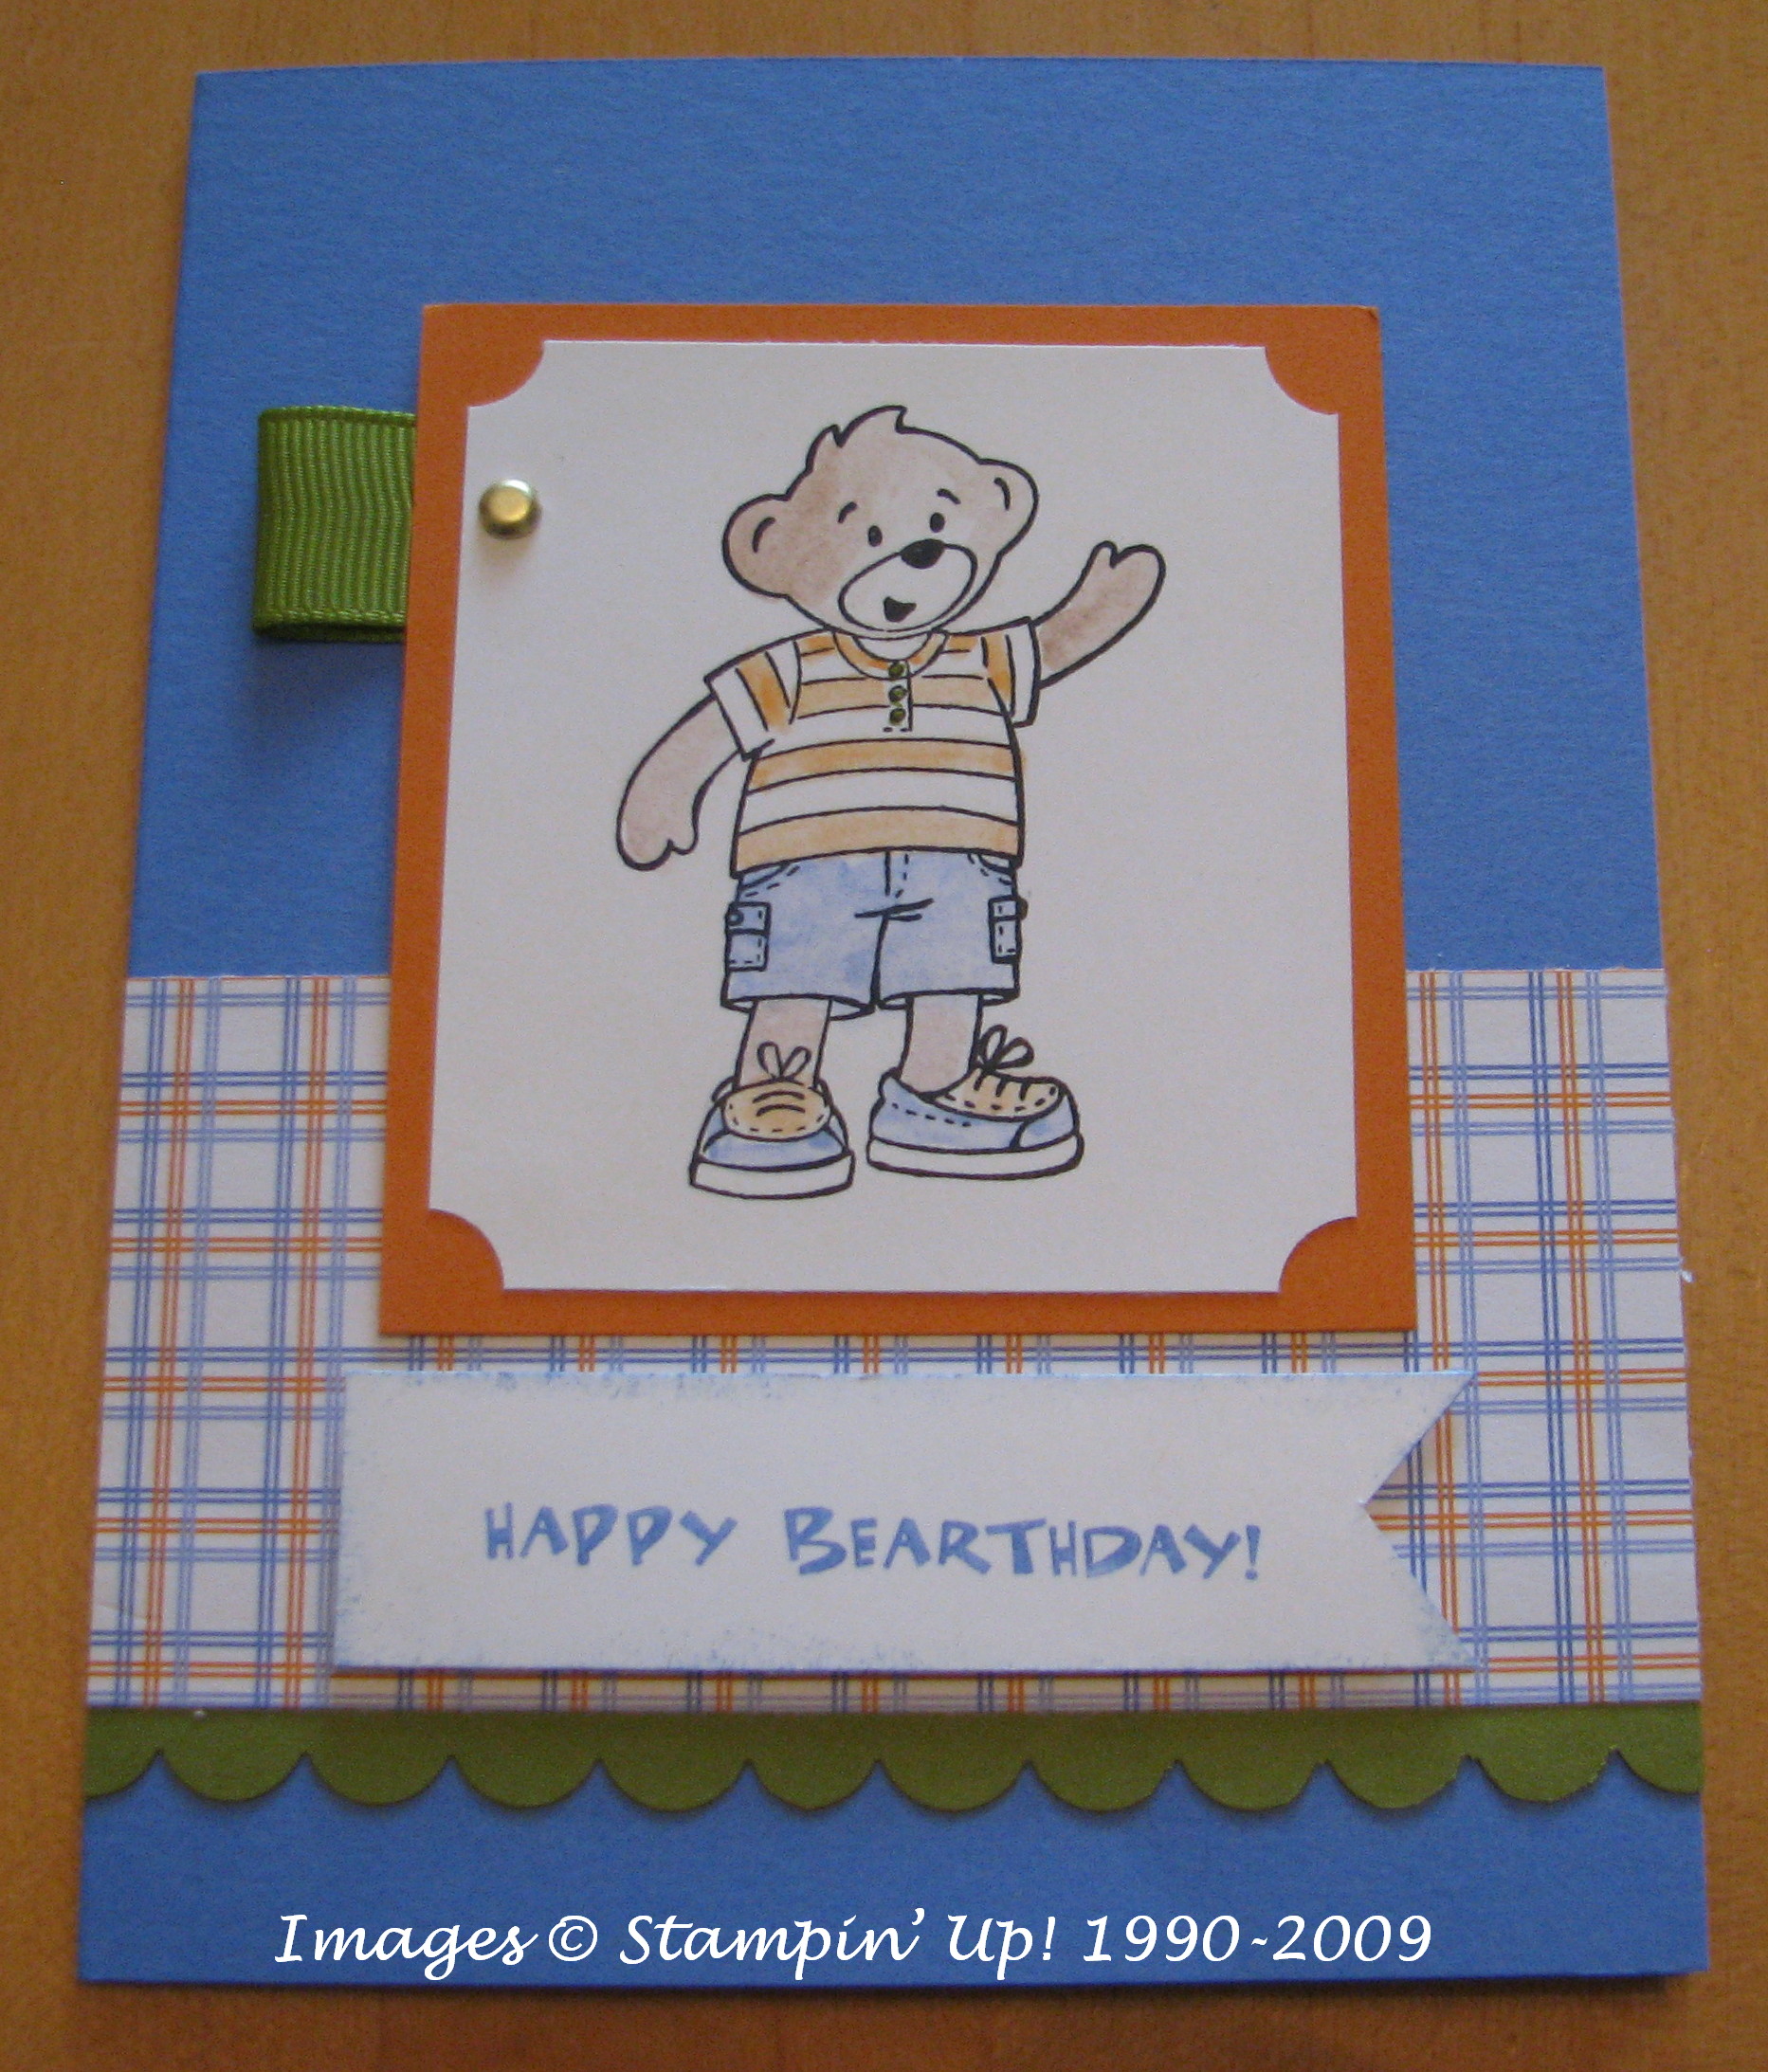
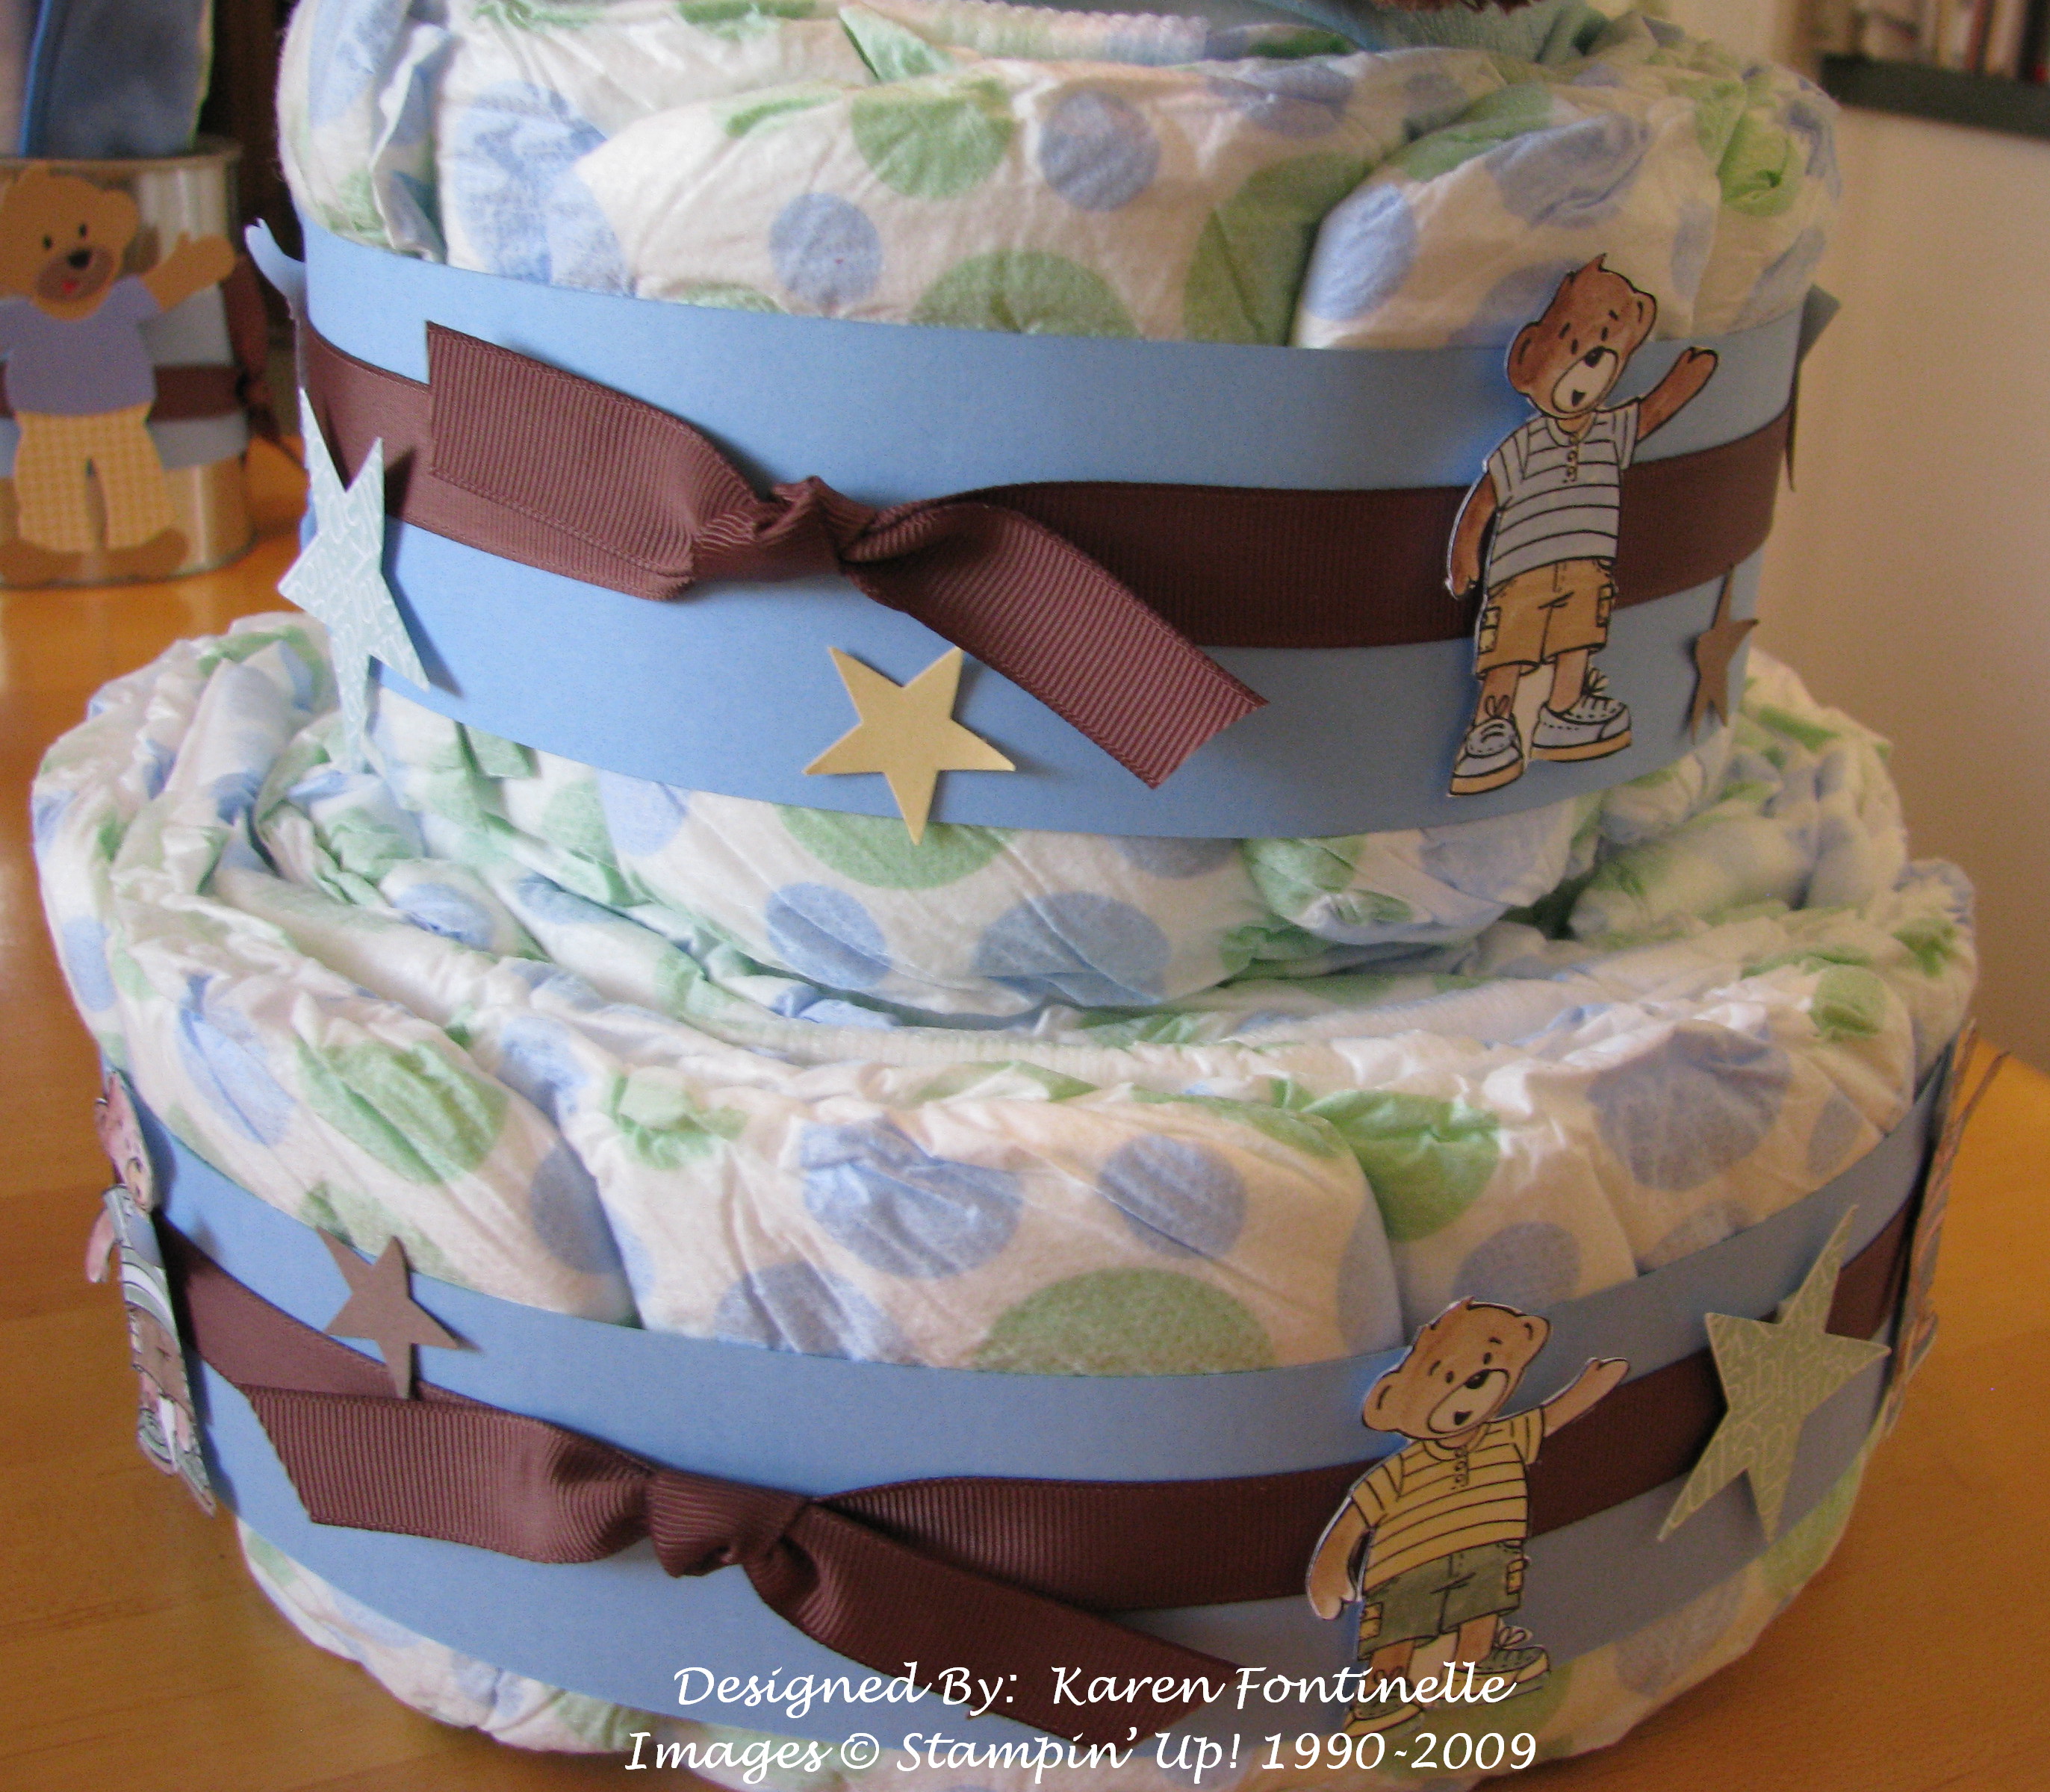
After getting some ideas, I decided to make a "diaper cake" for the main centerpiece.  I suppose there are several ways of making diaper cakes and this was my first, but I just added the diapers sideways around in a circle to make the layers of the cake and then decorated with "Build-A-Bear".  For the cake, I used the boy bear in the stamp set Beary Best Friends and cut him out.  The teddy on top of the cake is smaller than he looks in the photo and just a cute little one I picked up to fit on top of the cake.

TeddyBearDiaperCake 

TeddyBearDiaperCakecloseup 

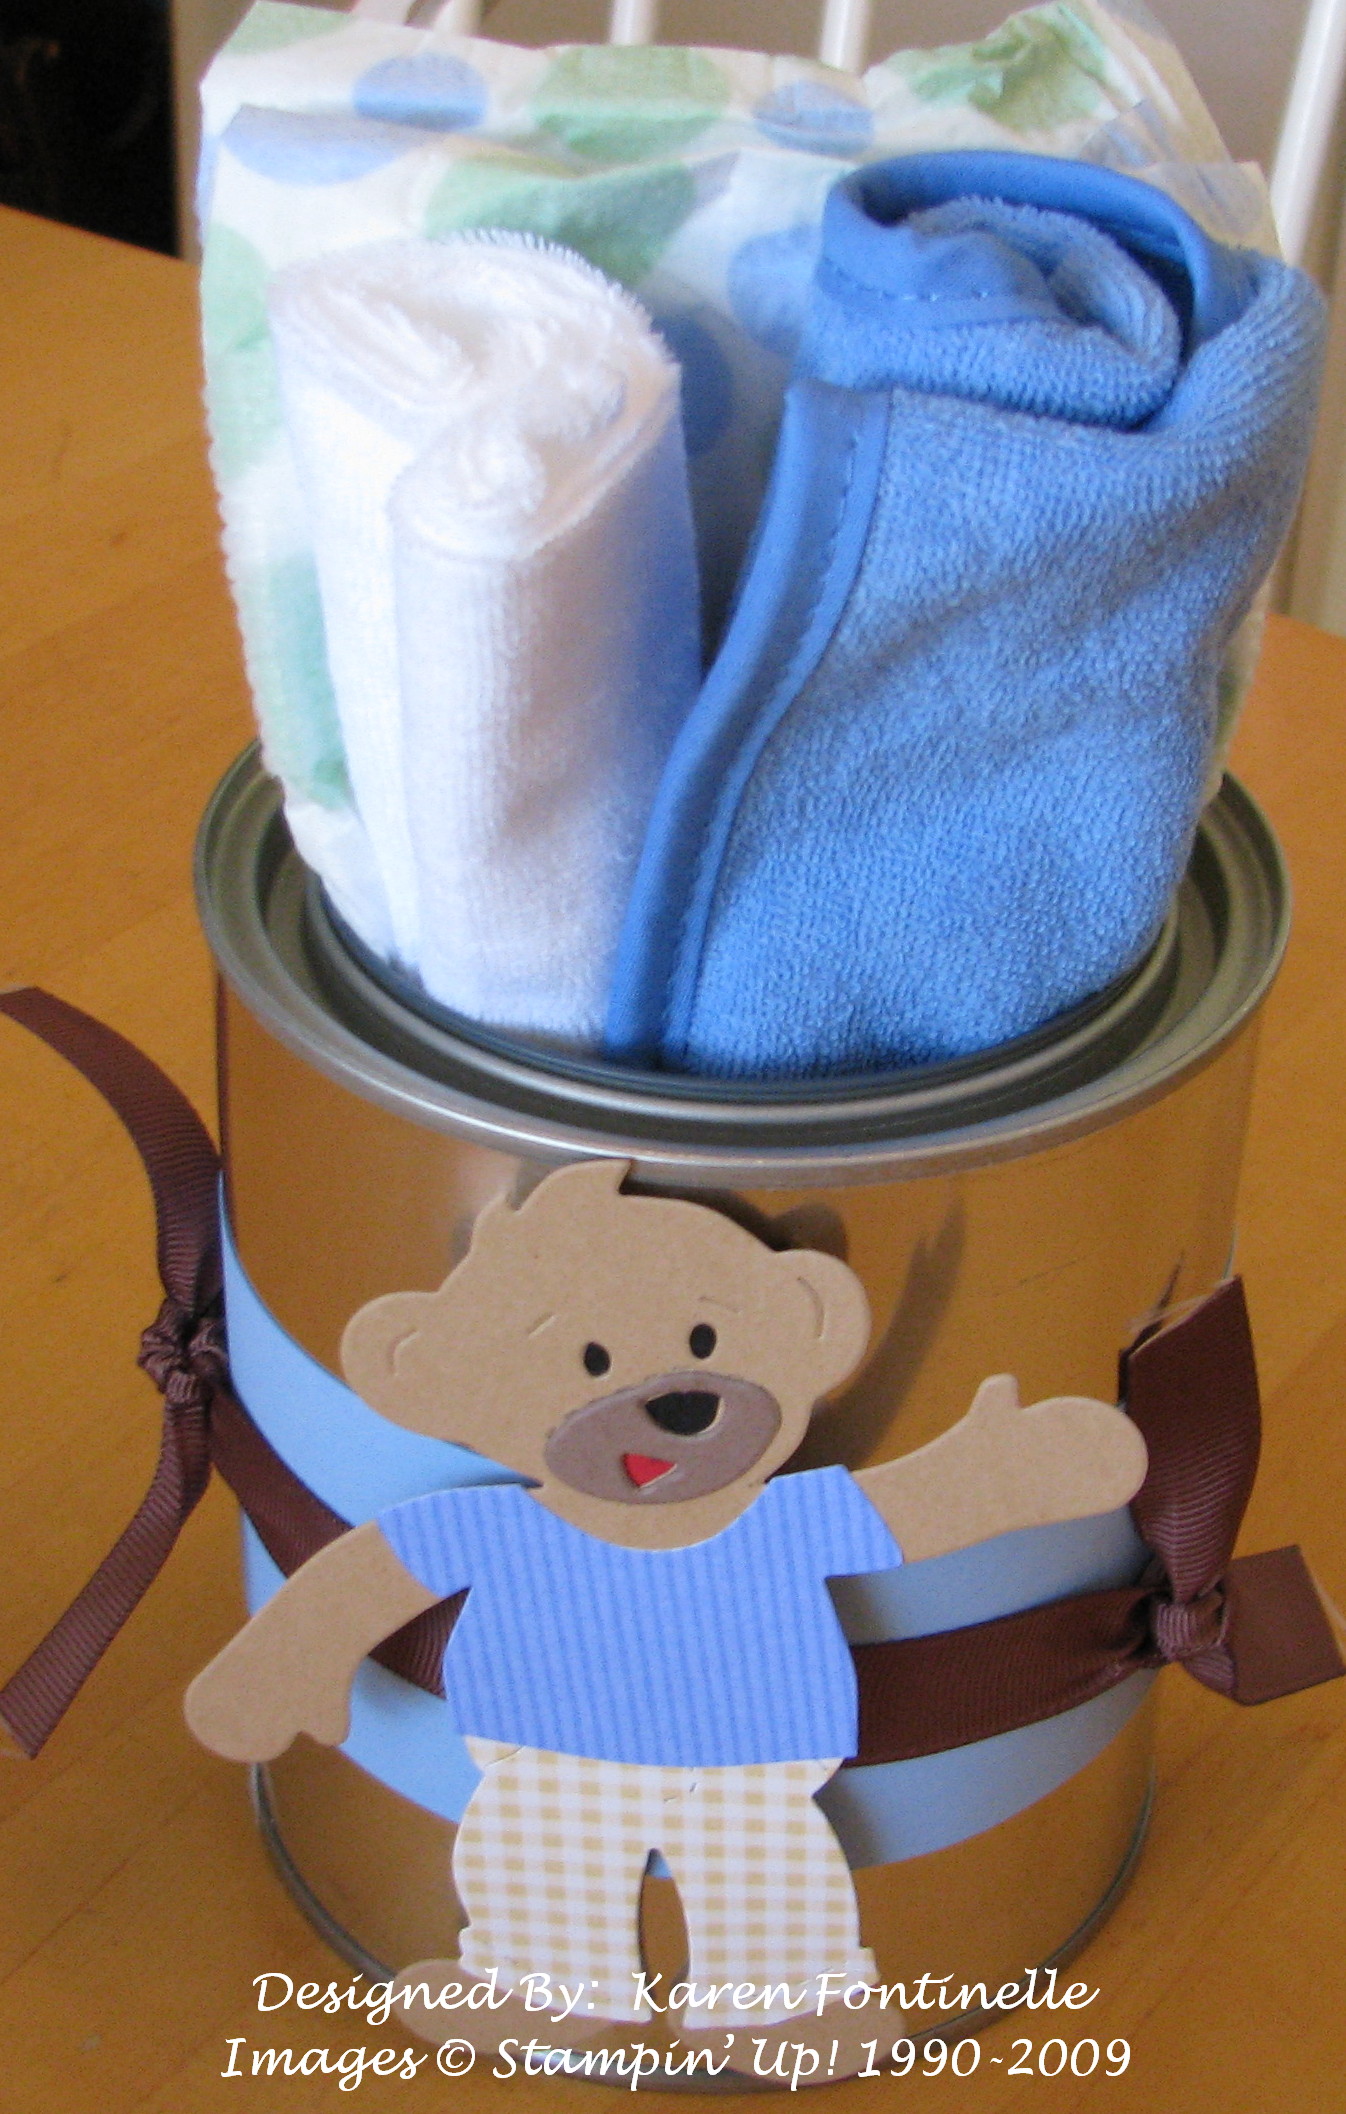
And then for the table centerpieces, I just used new paint cans, filled with a diaper, a bib, and baby wash cloths and decorated with bears from the Stampin' Up! Bear die in the Build-a-Bear Collection.  If I'd had more time I probably would have done them up even a little more, but I think they turned out pretty cute as is.

TeddyBearPaintCan

If you are interested in starting or adding to your Stampin' Up! Build-A-Bear Collection, just email me and I'll help you decide what you'd like to start with!  Of course, you need it all!

Autumn Splendor

I had purchased this stamp set, Autumn Splendor, in the Stampin' Up! Holiday Mini, thinking about our upcoming (at the time) New England fall foliage trip.  I knew it would make beautiful cards and scrapbook pages with fall colored leaves.  Here is a card I made.  I stamped the leaf with Basic Brown ink so I could watercolor the leaf with my Aquapainter and Watercolor Crayons to give it the fall colors.  Then I painted over the leaf with the new Shimmer Paint in the Holiday Mini (Champagne Mist).  The shimmer kind of covered the colors of the leaf but I think it still turned out well and I hope you can see the shimmer in the photos.  You'll love the new Shimmer Paint!  If you need any suggestions or tips on using it, please email me.

LeafShimmerCard 

LeafShimmerPaint

The card base is made with Dusty Durango card stock and the Designer Paper layer is Autumn Meadows from the Holiday Mini.  Those are actually the two sides of the paper you see in the photo!  The ribbon is Dusty Durango polka dot turned around so you just see the solid side.  And for a greeting I used Teeny Tiny Wishes punched out with the Oval Punch and layered on the Scallop Oval Punch.  You'll notice the leaf layer is sponged on the side, which I do think adds a lot….but just so you know, I decided to do the sponging after somehow getting extra ink from my fingers on the edges of the card.  See!  There are no mistakes in stamping!  You can probably click on the photos to see them enlarged.

Here are some more photos from our trip!

IMG_6526 

IMG_6538

IMG_6541

IMG_6598

IMG_6604 

IMG_6606

IMG_6618

IMG_6627

IMG_6630 

Wouldn't you love to stamp some colored leaves??!


Halloween Decor Element….Toil and Trouble

ToilandTroubleDixie 

Isn't this the CUTEST Halloween frame???!!!!!  If you were thinking Stampin' Up!'s Decor Elements were for walls only, think again!  My demo friend Dixie and her friend Gerrie got together to make these the other day for a play day! Don't we all need to just stop and play once in awhile?  They used the Old Olive "Toil and Trouble" Decor Element in the Definitely Decorative catalog on page 7 in this frame and decorated with "Cast-A-Spell" Designer Series Paper around the edges, a little sponging with black ink, some other little stick on "jewels" and some "real" plastic spiders!  It is SO CUTE, I wish you could see it in person!  (sorry for the glare from my flash)

You can order these Stampin' Up! items and any other Halloween or fall products tonight in your pajamas at my online store and have them in time for Halloween!

And if you are interested in "My Digital Studio" there are some new Halloween downloads available today!

Item # Product Name Price
118114    Cast A Spell Designer Series paper – digital download  $4.95
118115    Night & Day Designer Series paper – digital download  $4.95
118124    Medallion stamp brush set – digital download   $1.95
118126    Circle Circus stamp brush set – digital download   $5.95
118116    School Days II stamp brush set – digital download  $9.95
118121    Great Moments II stamp brush set – digital download  $9.95
118122    Pumpkin Patch stamp brush set – digital download  $5.95

Week #2….Deals of the Week

During the month of October, Stampin' Up! will offer several discounted products as "Deals of the Week." No limits and no minimum purchase required.


Week 2 Deals of the Week

Item

Description

Special Price

115961

Perfect Setting Bigz XL die

$25.99

114515

Flower Burst Embosslits die

$5.99

116760

Pop-Up Three Tier Cake Bigz XL die

$25.49

The Week 2 deals are good from Oct. 12 through Oct. 19 at 9:50 am (MT).


Click HERE to read about all of Stampin' Up!'s current promotions!

Back from Fall in New England

             IMG_6176

If you noticed my blog posts lacking it is because my husband and I were on a dream trip to New England to see the fall foliage….and New England!  Even on a ten day trip, there wasn't enough time to see everything and go everywhere.  I would like to think we'll go back someday but we'll see!  Since we don't get much in the way of "fall foliage" here in Houston (until Nov. or Dec.) it was a real treat to see the colored leaves.  Timing is everything and we must have hit it right because if the leaves weren't at peak color, I don't know how much more gorgeous they could be!  The only thing that could have been better was the weather.  It was cloudy and chilly almost the whole time, with a little drizzle thrown in now and then, and maybe bits of sunshine on a few days.  Naturally, the day we had the ocean view room in Bar Harbor, Maine it rained.  Fortunately you can still enjoy colored leaves even in cloudy weather and you could even make the case that it adds to the atmosphere of fall……but a little more sunshine to make the leaves sparkle would have been very nice.

We flew into Manchester, NH and drove straight to Woodstock, Vermont. Right away the leaves looked beautiful, and we couldn't restrain ourselves from saying, "Look at those leaves!"  "Look at that tree!" every few seconds! Woodstock was a really cute place and we stayed in our first B&B, the Ardmore Inn.  We weren't sure how we would like a B&B but it seemed to be the thing to do in this part of the country.  Charlotte was a great hostess and made our first experience a perfect one.  If the delicious breakfasts and afternoon cookies weren't enough, she certainly had me with the fall and Halloween decorations!

IMG_6241
IMG_6243 

IMG_6246
Our first covered bridge:

IMG_6143
Some scenery…..and thank goodness for our new GPS to figure out where we were on this ride and get us back to town!  Amazing!  We had fun with our GPS lady!

IMG_6169
Vermont was everything you would imagine it to be!

IMG_6280
A side trip to Fort Ticonderoga in New York after taking a ferry across Lake Champlain:

IMG_6343 

A beautiful "Kodak spot" in Stowe, VT….we saw so many beautiful white steepled churches on this trip.

IMG_6412 

More leaves….can't resist!!

IMG_6539 

I think you can click on the pictures to enlarge.

I do hope I scrapbook some of these photos now!  I think "My Digital Studio" is calling my name!

Little Boo Ghost Halloween Card

BooGhost

Yesterday I told you about the Little Boo ghost stamp on the "Under $10" page in the Stampin' Up! catalog.  I decided to stamp my own Halloween Designer Paper for this card using Little Boo!  To make the ghost in the center of the card, I used the Wide Oval Punch and just trimmed with a scissors to make the wavy bottom of his body.  The arms are made from theModern Label Punch, cut in half.  The eyes are punched with the 1/4" circle punch, or you could just color them in with black marker.  I drew in the mouth and sponged the edges of the ghost with More Mustard just to make him show up a little better.  The "Happy Halloween", from All Holidays, is punched with the Modern Label Punch (gotta have it!).  It is separate from the layering under the ghost, I just liked the way it fit right at the bottom of the layered piece.

Time to order your Halloween stamping supplies!  Go to my online store HERE and click the "Show Now" button!

The Clearance Rack at Stampin’ Up!

Clearance Rack

Stampin' Up! now has a Clearance Rack in the Online Store!!  These will be retired, discontinued items offered at a substantially reduced price.  These items will only be available while supplies last, therefore they are only offered in the online store.  All sales of Clearance Rack items are final.  No returns or exchanges will be accepted, except in the case of defective product.

Click HERE to go to my online store and then click on the Shop Now button.  Then in the left hand column you will see "Clearance Rack" under "Holiday Mini".

Have fun shopping!!

Little Boo

I think this is the cutest little stamp for Halloween……Little Boo!  And it is only $6.95!  Have you visited the "Under $10" page in the Stampin' Up! 2009-2010 Idea Book & Catalog?  It is the last page (p. 208) in the catalog.  I made some cute "Little Boo" cards, just 3×3 size!  So fun!  Take a look at those "Under $10" stamps…..you might want to get some for gifts for the holidays….and a few for yourself!

Ghost3x3

I stamped Little Boo on Whisper White cardstock and punched out with the 1" circle.  Then a circle punch layers of Green Galore and Black and the fabulous Scallop Circle Punch.  The greeting is from Teeny Tiny Wishes.

Shimmery Leaves

Made another fall card today with the leaves from Lovely As a Tree and decided to make it shimmery!  I stamped the leaf with Basic Brown since it is good to use with watercoloring and colored in with my Aquapainter and some drops of reinker.  To add the shimmer, I just used the new Champagne Mist Shimmer Paint.  Just shake the bottle and whatever is in the cap is probably enough.  I used a small paintbrush I had to apply the shimmer just like paint.  You'll love playing with these new Shimmer Paints!


Order 24/7 in your pajamas on my website HERE!  Click the Shop Now button!  Get your fall items right away!

LeafCard

LeafShimmer

See the shimmer?!

Celebrate Fall!

I've been so busy planning a fall trip, I haven't had time to think about today being the first day of fall!!  Normally in Houston we would still be sweating to death and wearing shorts and running the a/c, but today we were blessed with a rainy day to give us just a little sense of fall!!  I'm still wearing shorts and running the a/c but at least the day shows a little fall spirit!


Here's a card I made to commemorate the day, and it literally only took about five minutes!  I LOVE this stamp set, "Season of Friendship"!  It is so much fun to stamp the leaves on the tree!  Stamping is so easy and fun!  To make it interesting, I decided to use the baby wipe technique.  As you can see in the photo, I just folded up a baby wipe, dropped a few drops of several colors of reinker for fall (Old Olive, More Mustard, Pumpkin Pie and Really Rust) and inked up the leaves on that instead of an ink pad. Worked like charm!  It looks like the leaves are just starting to change color!

Wipeinkpadleaves

Falltree

What Would We Do Without “Lovely As a Tree”?

If you don't already own the stamp set "Lovely As a Tree" you should really add it to your collection right away! We all held our breath when Stampin' Up! retired stamp sets this last time because "Lovely As a Tree" has been around for awhile!  But it just is the most versatile, necessary stamp set to have on hand!  It is perfect for making cards for men, which is often a bit of challenge, but it can also be made into a beautiful Christmas card or a sympathy card or used on scrapbook pages and gifts.  Since my husband and I are planning a fall foliage trip to New England, it seemed perfect to make yet another "Lovely As a Tree" card for his birthday yesterday, this time with colored leaves and the new Autumn Traditions Designer Series Paper in the catalog.


LovelyTreeFallBDBob

I used an old technique called "thumping" to ink up this stamp of trees.  It is a little hard to describe, but you just hold your Stampin' Write Marker loosely and let it flop up and down onto the stamp!  Kind of a tapping thing I guess.  I used various fall colors, like More Mustard, Old Olive, Ruby Red, to make the leaves.  Then I just kind of colored in the tree trunks and branches with the new Soft Suede marker, just hitting the lines as well as I could…..plus some green marker for grass lines on the stamp.  When I got the trees stamped, I decided to sponge in some blue ink for the sky and some green for the grass.  The card might be a little "busy" with that particular DSP, but too bad, I wanted the one with the colored leaves!


Here is the inside of the card using another stamp in the set.  The greeting is from the Level 3 Hostess Set "Kind & Caring Thoughts".  To color in the leaves I just colored with a marker on the lid of the stamp box and picked up the ink with my Aquapainter.  I love to color that way!

LovelyTreeFallBDBobinside

Shimmery Snowflakes

Another "copy" of a card in the Holiday Mini……..I just love the picture on page 26 of the Holiday Mini of the "Snow" scrapbook page, a "Season's Greetings" card and a little box.  I wanted to try out the beautiful "Serene Snowflakes" stamp set along with the new Shimmer Paint.  The Shimmer Paint (page 27 Holiday Mini) is easy to use….just shake the bottle and in most cases just use the little bit of paint inside the lid, picking up with a sponge dauber or paintbrush.  You can ink up your stamp, then apply the Shimmer Paint to the stamp right over the ink and then stamp…..OR just apply the Shimmer Paint directly to the stamp and stamp.  There are three colors of Shimmer Paint available and I may have tried them all out on this card!  You can't detect the "shimmer" on the card but I think you can see how the look of the snowflakes change as you move the card.  You should be able to click on the photos to make them larger.  The Shimmer Paint is just something fun to give a subtle, elegant look to your projects!

SnowflakeMini

SnowflakeShimmer

Beary Best Friends Card

BearyBestFriendsboy

Here's a card I made with my new Beary Best Friends stamp set in the Holiday Mini.  I kind of copied the example of the card in the Holiday Mini on page 35……which shows that YOU can do that too when you need an idea!  It was fun to get out my Aquapainter and the Watercolor Crayons to color in the little bear guy!  The Designer Paper is in the mini also, Pawsitively Prints, and is just perfect with all the Build-A-Bear products!  The greeting I used is from Beary Nice Wishes on page 36 of the Mini.  If you want to start working on your creative Build-A-Bear projects, just go to my website and click on the "Shop Now" button or contact me if you need any help or have questions!