New from Stampin’ Up! Paper Pumpkin Monthly Kit!

SU Paper_Pumpkin_Logo

A big announcement out of the Stampin’ Up! Leadership Conference in Orlando this morning!  Stampin’ Up! is starting a new monthly kit program for you! Once you sign up for the program, every month you will receive in the mail a cute red box with a project inside. All the materials you need….stamps, ink, paper, and accessories…will be inside, except for adhesive, all measured and cut for you. Projects might include cards, journals, decor, and more!

Once you sign up, a new kit will be shipped to you every month around the 15th. However, you can cancel at any time or skip a month. The price will be $19.95 a month which includes shipping.

You can find out more about the Paper Pumpkin Kit here at www.MyPaperPumpkin.com. ( I just had to edit this link to get the correct one!  Sorry)

Remember, this news is “hot off the press” this morning out of Leadership so I’m sure we will find out more about it in the near future! Let me know if you have any questions and I’ll find out the answer. They promise projects you will want to pin on Pinterest!

My Stampin’ Up! Online Store for all your stamping needs!

Pinwheel Sizzlit Cloudy Day Embossing Folder Card

Pinwheel and Cloud Embossing Folder Card

I tried out my new Pinwheel Sizzlit Die yesterday and used the Cloudy Day Embossing Folder for the background on my card. Both of these products can be found in the new Stampin’ Up! Spring Catalog. If you don’t have a Stampin’ Up! Demonstrator and would like a copy of the Spring Catalog, please email me.  I’ll be happy to mail one to you. Be sure to scroll down to see my little tutorial on using the Pinwheel die.

The Pinwheel Sizzlit Die was really fun to play with! Just put a little piece of paper over the die, run it through your Big Shot Die-Cutting Machine, and you have a pre-cut pinwheel to work with!

Pinwheel Sizzlits Die

I found that if I curled the paper a bit with my Bone Folder, it made it easier to fold the corners over to the center. Just a tiny bit, to loosen up the paper.

Pinwheel Die Cut

Then, using your Stampin’ Pierce Mat and the Paper-Piercing Tool, fold the corners with the little holes in them over to line up with the center hole in the die-cut. You can use the Paper-Piercing Tool to keep them lined up. While holding the corners in place as best you can, remove the piercing tool and insert a brad through the center hole. Unfold the brad on the back and press down securely to flatten.

Pinwheel Sizzlits Die Corners

It’s fun making pinwheels, and won’t they really give your cards and scrapbook pages a feeling of spring….when spring arrives!

The little greeting on my card is a stamp set in the Spring Catalog called Ciao, Baby! It is punched out with a new punch coming during Sale-A-Bration (Jan. 22 – Mar. 22), Petite Curly Label Punch. It seemed to still need something, so I punched a scrap piece of paper with the Word Window Punch, cut out a section for the middle to give me two shorter pieces and used those for the ends.

If you want any of these Stampin’ Up! products, just visit my Online Store here.

More Amore Hearts Valentine Card

More Amore Hearts Card

When I was playing with the More Amore Specialty Designer Series Paper the other day, I decided to make another card right away. This hearts card could be a valentine or just an ordinary handmade card. The base is Primrose Petals card stock with a layer of Pool Party.  Those are coordinating colors of the More Amore paper. I used the Scallop Trim Border Punch for the bottom to fancy it up a bit and tied some Primrose Petals 3/8″ Stitched Satin Ribbon around the bottom edge. The really fun part was just punching out six hearts with the Full Heart Punch from the More Amore paper.

Then for just a little something or a greeting of some sort, I chose the Ciao, Baby! Stamp Set. If you check out the stamp set, you will see that the stamps are designed for the 7/8″ Scallop Circle Punch and the Petite Curly Label Punches. The “love” stamp fits the Petite Curly Label Punch (coming in the Sale-A-Bration Catalog!)….but I wanted a circle….so I just colored in the word with the Primrose Petals Stampin’ Write Marker and stamped on Very Vanilla card stock. It is punched with the 3/4″ Circle Punch and layered on the new 7/8″ Scallop Circle Punch in the Stampin’ Up! Spring Catalog. Finally I added some Basic Jewel Rhinestones.  I probably should have stopped at one, but rhinestones are so pretty….who can resist?!

So for an easy valentine, get out some designer paper and a heart punch and go to town!  The Stampin’ Up! Spring Catalog has so many beautiful embellishments you can choose from it you want to gussy it up a bit!

Stampin’ Up! Spring Catalog Valentine Card

Stampin' Up! Spring Catalog Valentine Card

Here’s a card I made with new products from the Stampin’ Up! Spring Catalog. It could certainly be a valentine card, but it doesn’t have to be! It could be a nice card for anyone special in your life for almost any occasion. Hearts aren’t just for Valentine’s Day!

I started with a Very Vanilla base and a layer of Primrose Petals card stock, which is a color I haven’t used very much. I added a layer of the More Amore Specialty Designer Series Paper #129309.  The opposite side of that paper is the strip on the side with the hearts, which I moistened and then crumpled. The big red heart is from one of the laser-cut sheets in the More Amore DSP as is the little doily circle at the bottom. Then I stamped a heart on Very Vanilla from the Hearts a Flutter stamp set and cut it out with the Hearts a Flutter Framelits #130159 and added a framelit die cut heart from another sheet of the More Amore DSP. My “love” sentiment is from the Tiny Tags stamp set. To finish it all off, I spritzed the whole card with my Gold Glow Smooch Spritz #118770.

Don’t forget….you can save money by ordering the Hearts a Flutter stamp set and Framelits together in the Hearts a Flutter Bundle! Check it out on page 11 of the Spring Catalog or at my Online Store.

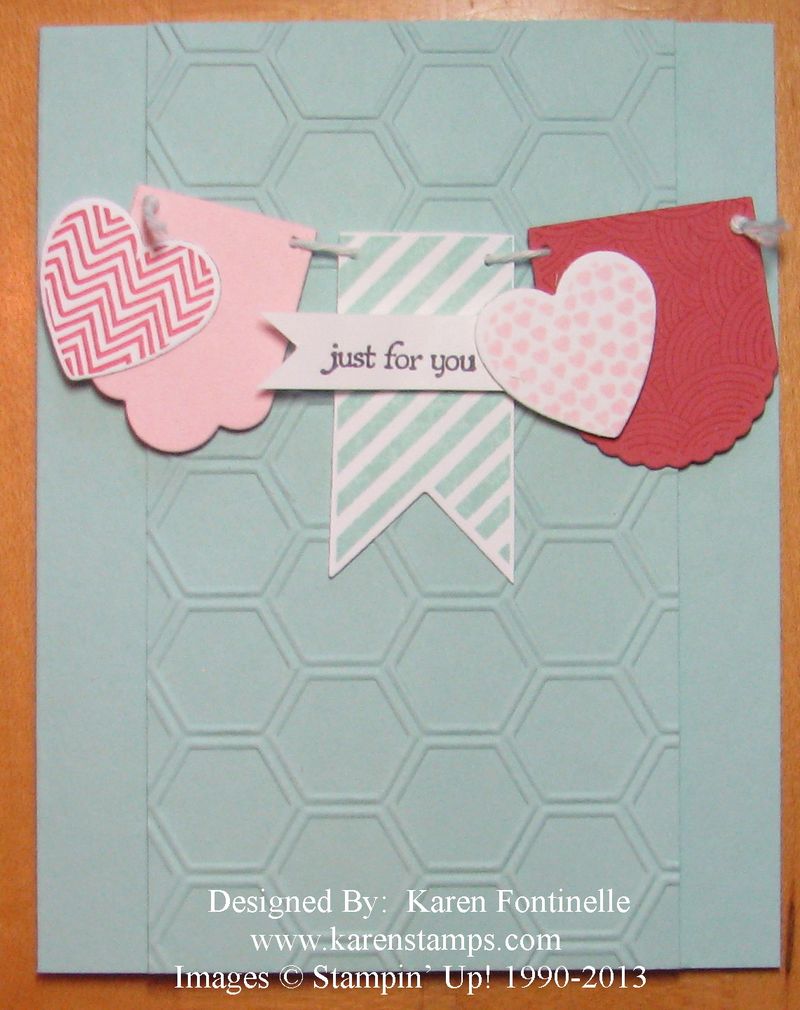
Hearts a Flutter Just for You Card

Hearts a Flutter Just for You Card

I’m trying to do some stamping today with my “new stuff” from the new Stampin’ Up! Spring Catalog that just came out yesterday, so I copied a card that was in our demonstrator magazine, Stampin’ Success. I love the cute little banner made with the Hearts a Flutter stamp set and Hearts a Flutter Framelits Dies.  The center panel of the card is embossed with the Honeycomb Textured Impressions Embossing Folder. These products come in a bundle, the Hearts a Flutter Bundle, which saves you 15%! You might as well get both….I’m sure they will be a big hit!  Remember, hearts aren’t just for Valentine’s Day.  This card could be a valentine, a birthday card, an all-occasion card, even home decor! Be sure to check out the really cute little chalkboard in a frame on page 11 of the Spring Catalog showing a little banner using these stamps and framelits. If you need a Spring Catalog, please email me if you don’t have your own demonstrator. I’d be happy to mail one to you…and the Sale-A-Bration brochure, too!

My stamping supplies are still scattered around in different locations due to Christmas decorating so stamping today is more like a scavenger hunt!  What should I get organized first??!

Use this banner idea on a scrapbook page as well!  Just think of a card as a small scrapbook page!

Stampin’ Up! Spring Catalog is Here!…Plus Valentines!

SU Spring Catalog Banner 2013

It’s the beginning of a new year and the beginning of Stampin’ Up!’s 25th anniversary year! So what can be more appropriate than a beautiful Stampin’ Up! Spring Catalog?! This new catalog begins today and runs through May 31, 2013. It has a beautiful journal of the front cover, bundles of coordinating products inside to save you money, and tons of new accessories, tools, stamps, and paper. Don’t miss the new Honeycomb Embossing Folder with hexagon shapes or the Paper Doilies for your Valentines! There’s an Artisan Embellishments Kit with all kinds of goodies in it, new punches, new framelits, a giant butterfly, even real cross-stitching! Check it out today by clicking here or the image or link above! You’re sure to find lots to like!

Go to my Online Store here, click “Spring Catalog”, “All Products” and then “Show:  ALL” to quickly scan through all the products in the new Spring Catalog.

You’ll also notice a section with Holiday Catalog Favorites that are still available.

And in case that is not enough….!  Stampin’ Up! has a special Valentine promotion for you!

Stampin' Up! Valentine Special 2013

Click here to read the flyer!

There are actually two offers:

  • 20% Off a Valentine Treat Bundle…a heart single stamp and cello bags.
  • Free Sealed With Love Simply Sent Kit when you purchase the My Little Valentine Stamp Set.

Check it out here in my Online Store!  These are special offers only available

Jan. 3- 21, 2013!

Last Day for Stampin’ Up! Holiday Catalog!

Holiday Catalog 2012

January 2, 2013 is the last day for the Stampin’ Up! Holiday Catalog!  Wow! How time flies! I feel a bit sad since everyone loved this catalog….so many great products for everything from Halloween to Hanukkah to Christmas to cookies to jars to fall to love to My Digital Studio! If you received your new Stampin’ Up! Spring Catalog you will see that some items from the Holiday Catalog can still be ordered….and who knows what might pop up in the new Annual Catalog when that comes out…..but you better take a minute today to browse through here at least one more time and see if there is anything you can’t live without!

Then hop over to my Online Store and place your order! Be sure to check the Clearance Rack because Stampin’ Up! added 15 new items over the holidays.  Only available while supplies last on the Clearance Rack!

And if you are tired of the holiday stuff and are ready for the gorgeous new products in the Spring Catalog, just hold on ONE MORE DAY!

If you don’t have a demonstrator, and would like a copy of the new Spring Catalog, please email me and I’ll send you a copy in the mail.

Lovely As A Tree Snowy Christmas Card

Lovely As A Tree Snowy Christmas Card


Once again I recognized the feel of a Stampin' Up! envelope in the mail yesterday ( I know it sounds crazy, but that's how good Stampin' Up! envelopes are!). I actually gasped when I pulled out this card from my friend Annette because it is SO beautiful! There's that Lovely As a Tree stamp set that I keep telling you about! There is nothing like it! I don't even know exactly how she made this card but I can tell you it is even more gorgeous in person than in this photo! She probably used some masking technique. And of course there is nothing like a little Dazzling Diamonds glitter to add just the right finishing touch!

Annette and I were friends WAY WAY back when when our husbands worked together and when I was first married (and before!). Even though we haven't seen each other in over thirty years since we got transferred to Houston, we have always kept in touch with Christmas cards. So if you have ever wondered if there was any point in sending Christmas cards, even to people you haven't seen in years, this proves it is absolutely a wonderful thing to do to keep in touch! A couple years ago Annette wrote me after Christmas and said she had liked my stamped card and that she had been trying to do some stamping herself. Of course I sent her a Stampin' Up! catalog and we began calling and emailing about stamping. It's been so nice to have a renewed friendship over stamping.  And I feel SURE that someday we are going to get together in person and just have a stamping extravaganza!

Stampin’ Up! Christmas Cards

Merry Christmas everyone!!  I hope you are having a wonderful Christmas Day with your families and loved ones. I just had to share a few Stampin' Up! Christmas cards I received.

One I knew was from my dear friend who got me started stamping in the first place. She has always had a simple, beautiful style.

Jan's Stampin' Up! Christmas Card

We received this card from my husband's cousin who I heard was making cards or maybe doing Stampin' Up!  Well, as I was sorting through the mail that day, I could tell by touch that the envelope was Stampin' Up!  Stampin' Up! has the nicest envelopes! They have a nice smoothness to them and you can stamp on them so well.  Now I'm looking forward to hearing from this cousin again and hear how she got started stamping! (I had to hold the card up so I could get a good photo of the sparkly reindeer!)

Ann's Stampin' Up! Christmas Card

And today I received a card from a cousin of my mother's, and again, I thought, "This feels like a Stampin' Up! envelope!"  Well, sure enough, there was a Stampin' Up! card inside, stamped by someone named "Judy" on the back.  She didn't comment in her note how she got the card…maybe it was stamped by a daughter-in-law or grand-daughter or just some other stamper.  But what a surprise to receive a Stampin' Up! card from this lady!

Vera's Stampin' Up! Christmas Card

Sure, it's faster to send an email or e-card, but I hope real cards in the mail never die out. I believe it is a real gift to receive any card or note in the mail from someone, but what an extra-special treat to get a handmade card! And that handmade card deserves a Stampin' Up! envelope!

I hope you received lots of Christmas cards from your friends and family! It's one of my favorite parts of Christmas!


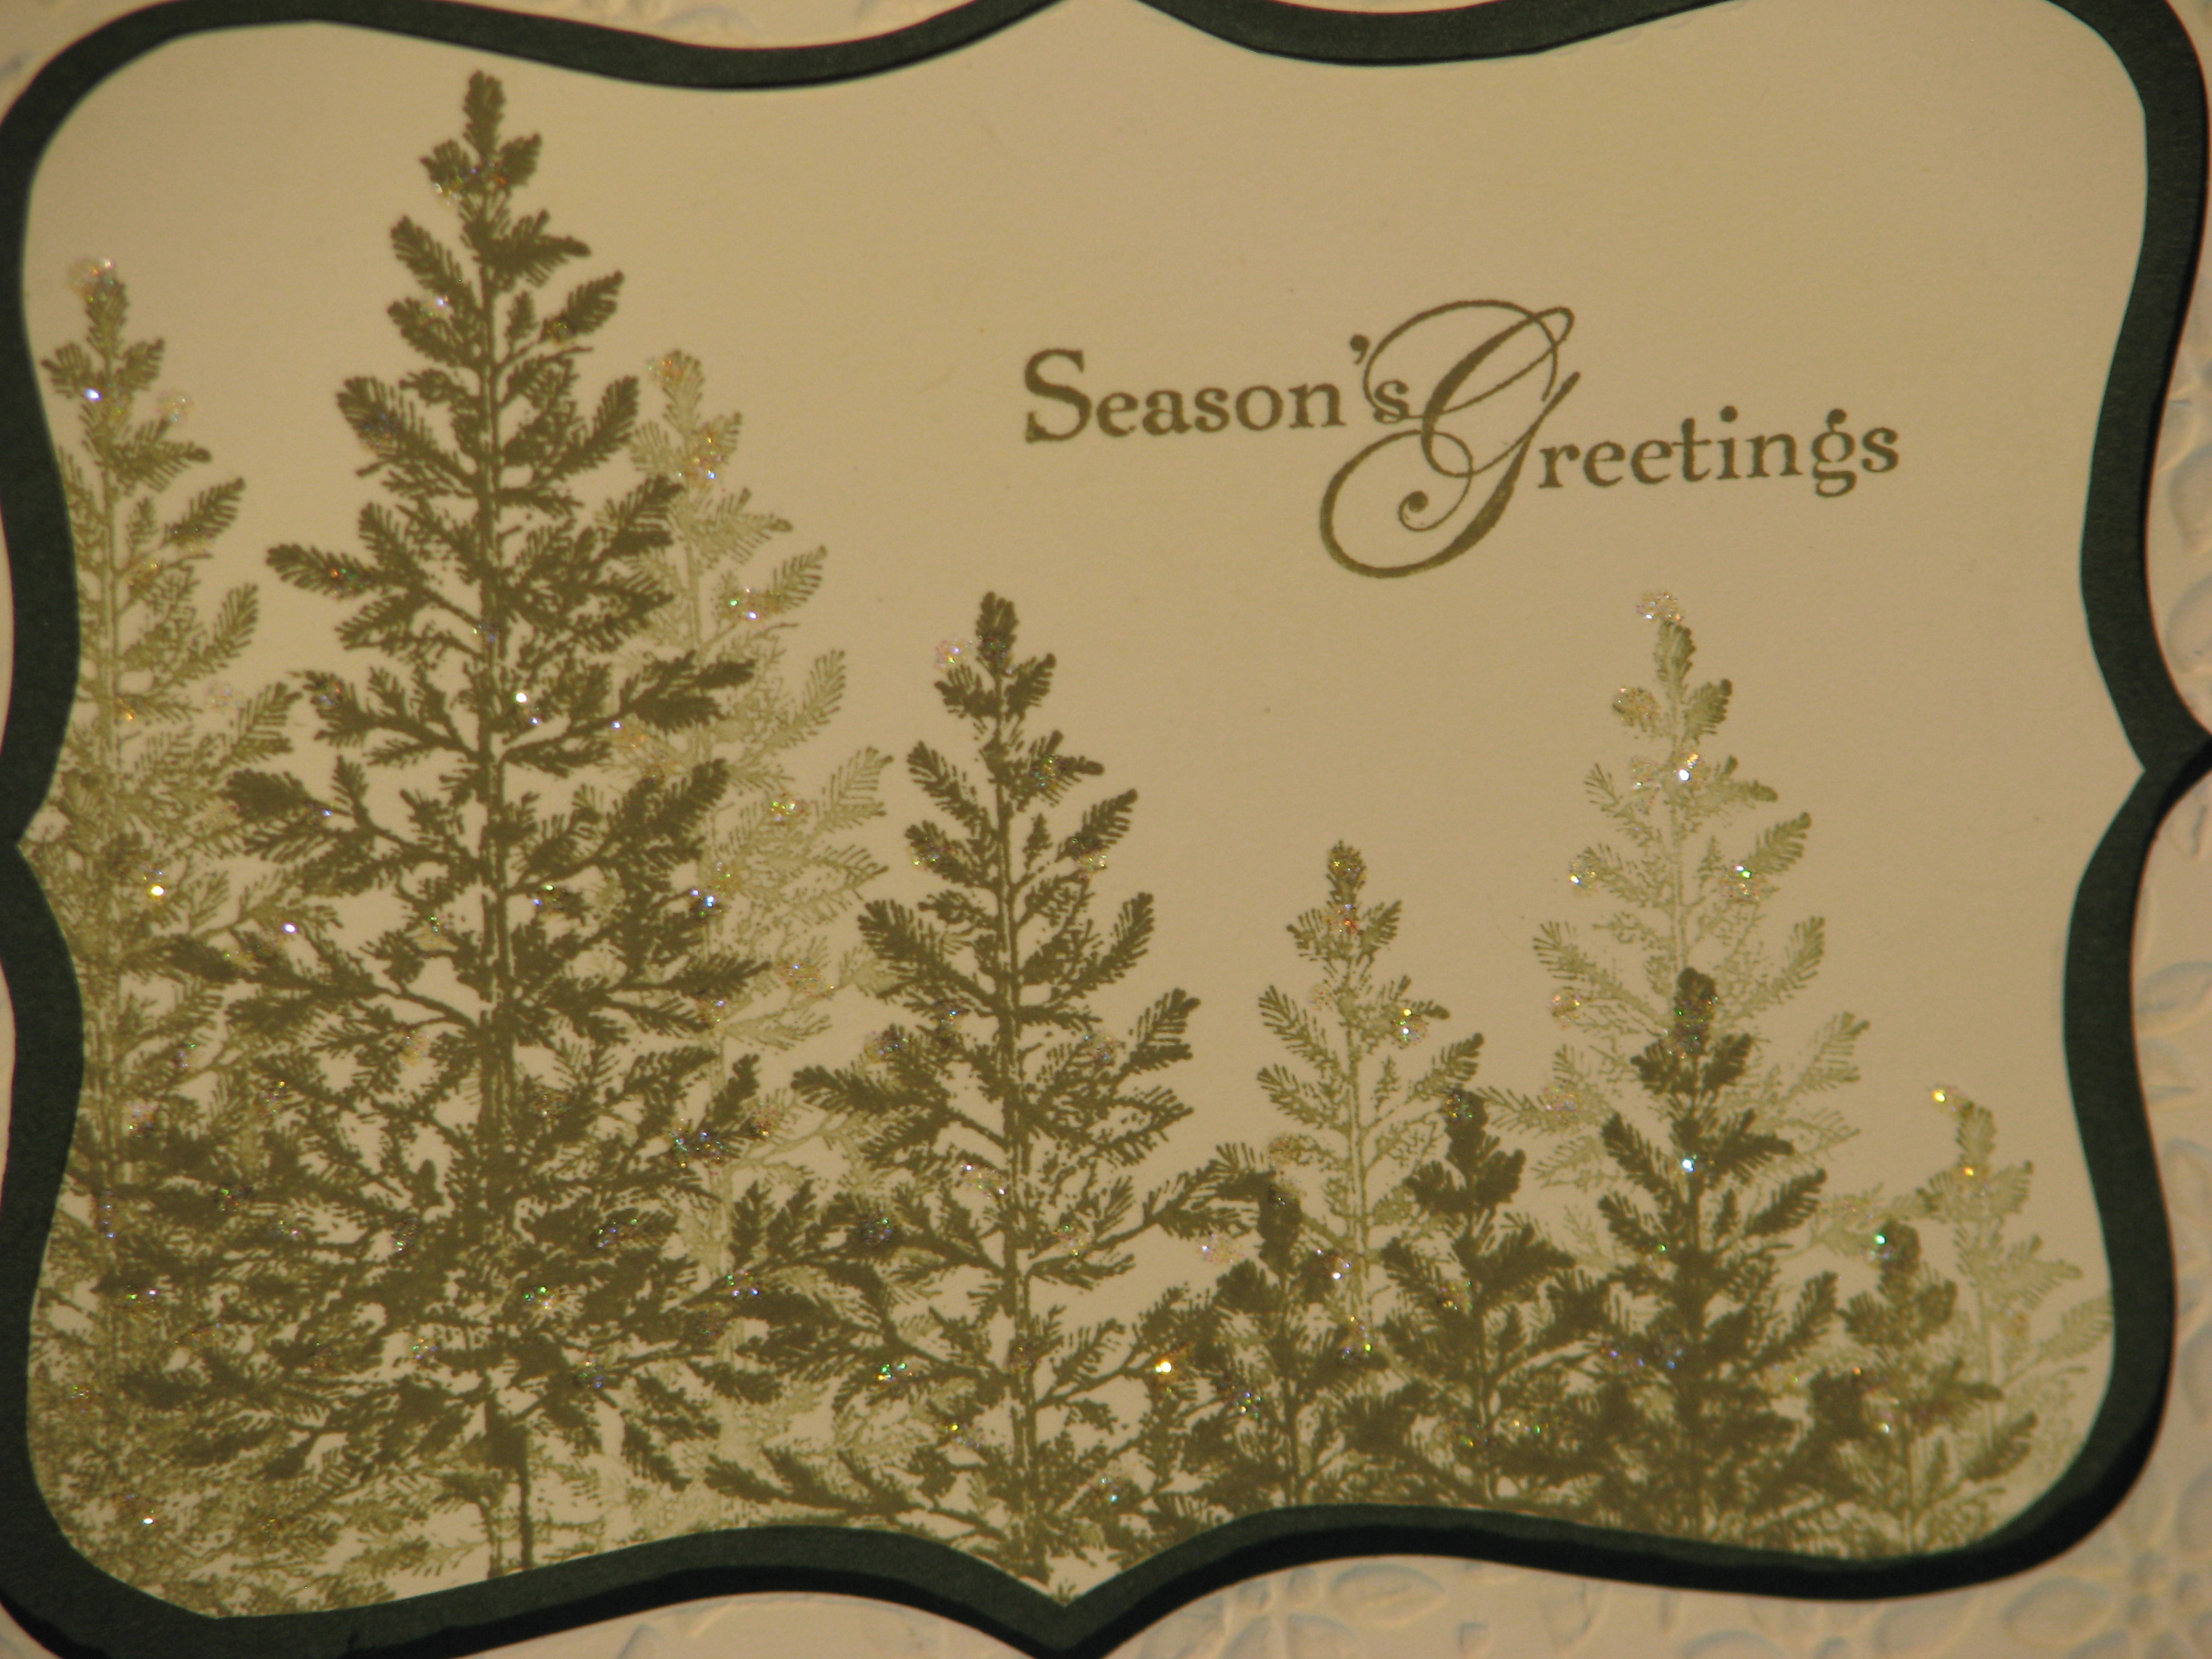
Lovely As a Tree for Christmas Cards and Tags


Lovely As a Tree Christmas Card

If you need a last minute Christmas card or gift tag, I highly recommend using the tree in Lovely As a Tree.  If there is a stamp set you are likely to own, it is this one (and if you don't, I would put it on your after-Christmas list!).  This is a display card from a Stampin' Up! Convention, but I have made a similar card over and over again in all my years of stamping.  Just ink up the tree, stamp it and without re-inking, stamp again to give that lighter image.  Before you know it, you can have a forest of beautiful trees. For some lovely glitz, add some Dazzling Diamonds glitter with the Two-Way Glue Pen, just scribbling, nothing fancy.  You will be amazed at the beautiful card you can make in a minute!

You Want the New Stampin’ Up! Paper Trimmer!

If you haven't heard yet, Stampin' Up! finally has a new Paper Trimmer #126889…and now, you can also buy the extra replacement cutting and scoring blades!

The following Stampin' Trimmer accessories are now available for purchase: 

  • Stampin' Trimmer Cutting Blades (item 126995) 
  • Stampin' Trimmer Scoring Blades (item 126996)

You can store the extra cutting and scoring blades in the compartment under the Stampin' Trimmer base. 

Be sure to put this new paper trimmer on your next order….and if you are lucky enough to already own it, be sure to order the extra cutting blades and scoring blades.  This is the same cutter featured in the Stampin' Up! Catalog but there was a long delay in being able to order it. Click here to order or read more about it and to watch a video about the Stampin' Up! Paper Trimmer.

Believe me, this trimmer has every feature we have all ever wanted!


Gift Wrap in a Second!! For real!

 Quick Christmas Gift Bag

I have a gift for someone in my family that has to be refrigerated! So it also has to be "hidden" from sight in the refrigerator….not easy! While I was sticking the gift in a brown lunch sack to hide it, I naturally folded over the top of the sack and was planning to attach a note saying to "Keep Out!". But then I thought, why not just punch some holes in the top of this bag and tie a ribbon through, attach a Snow Festival Designer Printed Tag that I can later write the "To & From" on and it's done! It's nothing fancy but then I don't want fancy if it is going to be sitting in the refrigerator until Christmas Day!

So don't forget to use something simple that you can personalize that will save you time with your wrapping!

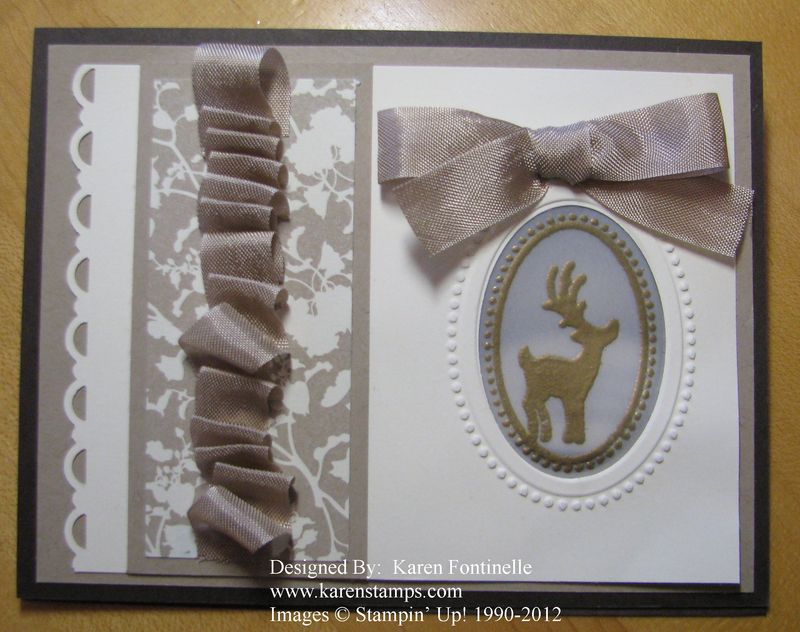
Joyous Celebrations Tealight Christmas Card

Joyous Celebrations Tealight Card

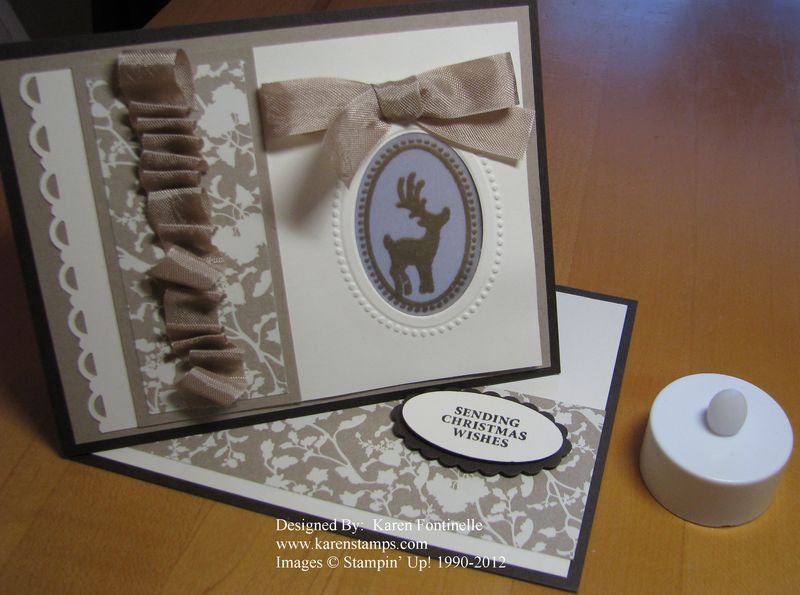
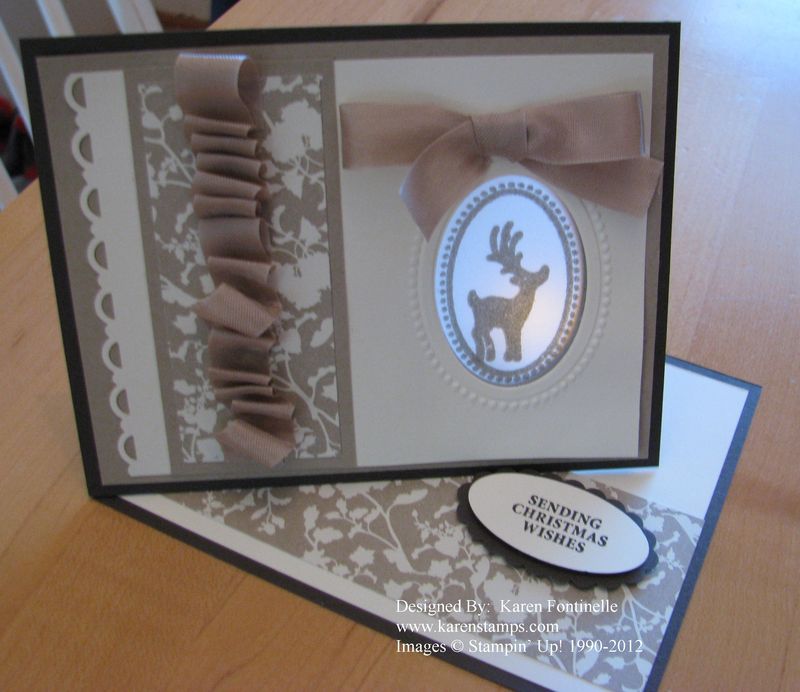
This is a beautiful Christmas card with a special fold made with the Joyous Celebrations stamp set, the Designer Frames Embossing Folder, and paper from the Festival of Prints Designer Series Paper Stack. I copied it from another demo, Dawn Griffith, who learned to make it with some other demos while they were at Founder's Circle.

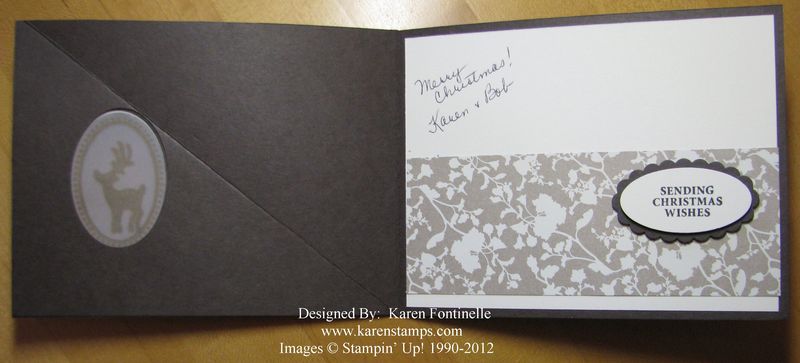
Joyous Celebrations Tealight Card Inside

Here is the inside of the card.  You can see that the ovals are punched through all the card layers after just that front portion of the card is scored on the diagonal.  The reindeer image is stamped and embossed on a 3"x3" piece of vellum card stock.

Joyous Celebrations Tealight Card Open

Here is the card opened up with that fold, and the greeting popped up with Stampin' Dimensionals holds it open.  Then just put one of those little tealights behind the oval to light it up!  So cute!

Joyous Celebrations Tealight Card Lit

Here is the card with the little tealight behind the reindeer showing through the vellum. Thanks to Dawn and some other demos for sharing the projects they made with their friends!