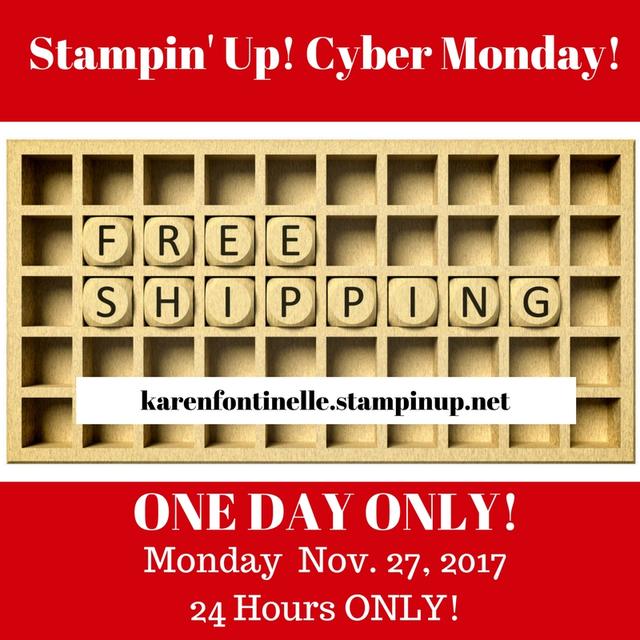
A pretty rare special from Stampin’ Up! to offer FREE SHIPPING, but certainly one we all like! Be sure to check over your “Need” list and your “Wish” list and decide if this is a good time to order! You have plenty of time to get your order for making Christmas cards and gifts or to order something for a gift for someone! Write out YOUR Wish LIst and have your loved one order for you and get what you REALLY want for Christmas! They will save on shipping! It’s a win-win!
FREE SHIPPING runs from November 27 12:00 AM to November 27 11:59 PM MT. Stampin’ Up! is in Utah, in Mountain Time, so always keep that in mind in figuring times!
Today, Nov. 26, is the last day of the Stampin’ Up! Online Extravaganza, so be sure to check out those sales and deals! The Online Extravaganza Deals end on Sunday, November 26 at 11:59 PM. MT.
Figure out which is best for you – Order today to get the Extravaganza Deals or order tomorrow and get FREE SHIPPING from Stampin’ Up! on Cyber Monday!
If you need a last minute idea for a Thanksgiving card or treat, try these from past years on my blog! All you need is the idea and you can use whatever paper, supplies, creativity you have!
Quick and easy wine bottle topper to take to your host or decorate your own bottle or beverage.
Don’t work too hard today! And if you have a few minutes, don’t forget to check out the Stampin’ Up! Online Extravaganza going on this week!
Remember, all these ideas are interchangeable and you probably have enough materials at home to make any of them! Who wouldn’t love that turkey candy bar at the top?!
Try these last minute ideas for whatever Thanksgiving cards, treats or bags you need.
I think I have posted these little Thanksgiving turkeys before, but in case you need some fun little Thanksgiving favor or something, these are something I have made for years! These would be great to put at each place at the Thanksgiving table or take along to your hostess where you are going!
You will need chocolate Kisses, candy corn, caramels, and fudge-striped cookies.
Put a few caramels on a plate and just barely heat in your microwave. You want to just soften them, not melt them. Do a few for a test and see how your microwave operates. I did mine about 10 seconds or a tiny bit longer. You can probably do about 4 at a time and still make them all before the caramel hardens again.
Soften the caramel (take off the wrapper first!). Have the Kisses unwrapped also and candy corn and cookies handy. As soon as the caramel squares come out of the microwave, press the caramel on top of a Kiss for the base. Then smoosh the fudge-striped cookie up against the back of the caramel until it sticks. Take the candy corn and smoosh it into the caramel as you see in the photo. This is supposed to look like a turkey!
Someone taught me how to make these a million years ago! There are other versions out there but these are super simple. I used to make them for preschool Thanksgiving lunches and on to elementary school for the kids, as well as our own dinner. It’s always fun to have a Thanksgiving favor for everyone at the table or to take to a party!
Don’t forget the Stampin’ Up! Online Extravaganza is underway! The stamp sale is over, but plenty of select products are available for 10% – 40% off! And a to-be-announced FLASH SALE of something next Monday!
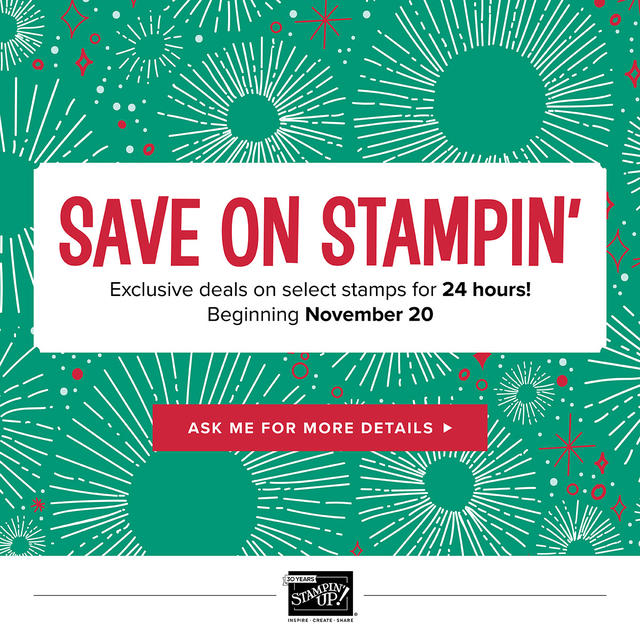
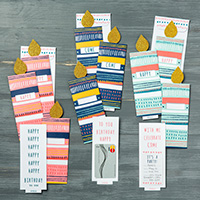
Today is the day! The Stampin’ Up! Online Extravaganza begins! Check out all these sales! And today, for 24 hours only, these select stamp sets are 20% off! Stamp Sale starts November 20 12:00 AM and ends November 20 11:59 PM.
These are the regular catalog prices show here. Take off 20% for the sale price! Or click any stamp set to see the sale price in the Online Store.
The next part of the sale are the Exclusive Deals for November 20-26. These are not the sale prices. Click on any item to go to the Online Store to see the sale price. These products 10% – 40% off!!
Beginning tomorrow, Monday November 20, 2017 Stampin’ Up! begins their Online Extravaganza! On Monday only, there is a 24-hour sale on select stamp sets! Stamp Sale starts November 20 12:00 AM and ends November 20 11:59 PM. Don’t delay! Choose the stamp sets from the list that you want!
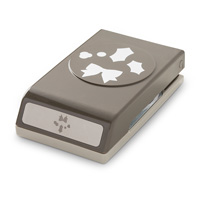
In addition, beginning Monday Nov. 20 – 26, you can choose other items that are on sale! There are ribbons, thinlits, framelits, embellishments, Watercolor Pencils, In Color markers, punches, and more! Check the list! Click on the PDF below to print out the list. Tomorrow you will be able to go to my Online Store and see the sale items in the store.
Today you can look over the list and be prepared to order tomorrow if you want the stamp sale and other things or any other day if you don’t want to take advantage of the stamp sale.
AND – Once this sale ends on November 26, there will be some sort of FLASH SALE on Monday, November 27! Stay tuned to find out what that flash sale will be! Stampin’ Up! has not unveiled it yet!
Tomorrow, Monday November 20 check my Stampin’ Up! Online Store to see all the items on the Online Extravaganza Sale! Remember, the stamp sale is ONLY Monday, Nov. 20, but the other items will be on sale all week through Nov. 26.
If you are going as a guest somewhere to a Thanksgiving dinner, perhaps you will be taking along a bottle of wine or some beverage as a hostess gift, so why not make a special Thanksgiving Wine Topper to personalize the gift?!
This is really simple. Basically, just cut a piece of cardstock that will be the correct width and length for the wine bottle. Add the extra section that will go over the neck of the bottle. Punch a hole in the top. For mine I used the 1 3/8″ Circle Punch. Then just decorate the front for whatever occasion!
Today, November 16, is the first day that we can all “reserve” the new Stamparatus, the Stampin’ Up! stamp positioning tool! Beginning this afternoon, the first “window” to “preorder” your Stamparatus, will open at 2:00 pm MT.
1:00 PM Pacific Time
2:00 PM Mountain Time
3:00 PM Central Time
4:00 PM Eastern Time
Here’s how to reserve your Stamparatus! You know you want one!
Go to my Online Store as if you were placing an order. You must have an account, which you do if you have ordered online from me before. Make sure you see my name and information on the top right corner of the Account page. If you don’t have an account, just look on the left side, under the Stampin’ Up! logo and click “Create Account”.
You will surely see some big banner about the Stamparatus! It is not there now as I write this. Click that and it will take you to a reservation page. Or here is the link to the Reservation Page (which is not “live” yet).
Fill out the form with your name and credit card number. Your credit card will not be charged today! It is just a “reservation”.
In early February, you will receive an email from Stampin’ Up! saying the Stamparatus is in your Shopping Cart! Be sure not to accidentally delete it or it will be gone!
Now you can add other products to your order like usual, at any time, or simply order the Stamparatus. Remember, in February it will be Sale-A-Bration (spend $50, get a Sale-A-Bration product FREE!) so it will almost be like getting a bonus for ordering the Stamparatus! The cost of the Stamparatus is $49.
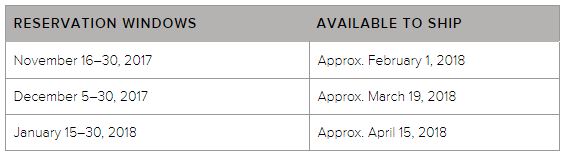
If you miss the November 16 -30 window, there will be two more “windows” during which you can reserve the Stamparatus. This November window will have expected delivery of the Stamparatus around February 1st. Reservations will be taken in each window only as long as supplies last. If you think you are interested, I would go ahead and try to do this November window. You can always delete your reservation.
Here’s how to reserve your Stamparatus!
And if you missed the video from Stampin’ Up!, here is Carrie explaining all about it!
I know this is a busy time for everyone, including me, but if you are excited about the Stamparatus, I would try to put in your reservation TODAY or very soon. That way it will be done before Thanksgiving and hopefully they will not fill all the spaces! I would guess the website will be VERY busy right at the time it opens so just be patient. We often crash the website when something big is happening!!
If you have any questions, please let me know! Remember, this is just reserving the tool so you can get your hands on one around February 1st when Stampin’ Up! gets them in stock! I’m sure there will be heavy demand. Eventually it will be available in the new 2018-19 Annual Catalog and ordering will be as usual. This method is just to get it available to us as soon as possible!
One of the best sources for inspiration when you want some is to look in any of the Stampin’ Up! catalogs, even past ones! This card, however, is from the Holiday Catalog on the page with products from the Painted Autumn Suite. I didn’t copy it exactly, but pretty much! Usually once you get started, even if you think you are going to copy exactly, your own creativity takes over and you see ways that YOU want to create your card or project! I even cut extra pieces for more cards while I was at it. Better to do it as you go along and make cards assembly style than to start over completely each time!
This card base is Garden Green Cardstock, which I would think that I don’t use very often, yet my package is empty and I have a new pack coming in my order today! But any other color of green would be fine too. Some of the other cards I plan to make will be in Old Olive. This card has the Garden Green layered on the Garden Green card base. You could have another color, like Very Vanilla, for the card base.
To begin, I stamped the fern-like image randomly on the card layer in the same Garden Green color. You could also use Versamark Ink. The strip of designer paper is Painted Autumn, some of the most beautiful paper we have had, in my opinion! I hate to see the fall season end.
For some texture, I added a piece of the 5/8″ Burlap Ribbon, which wrapped around the designer paper strip and the card layer. The piece of Baker’s Twine is Crushed Curry.
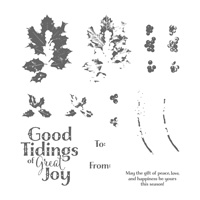
The greeting is stamped from the Painted Harvest Stamp Set, as well as the leaves and acorns. Although there are no dies to use to cut out these pieces, we do have a fun punch, the Leaf Punch. You can even save 10% by purchasing the Bundle with the stamp set and punch!
I”m sure you have a few people you would like to send or give Thanksgiving cards to in gratitude. Look in the Holiday Catalog if you need ideas for the stamp set you want to use. I’m sure you will get ideas and you can change it up to make it simpler, faster, or easier than the sample in the catalog. Or if you have time, go ahead and take some crafting time for yourself and enjoy making a deluxe card for someone special!
Check out the Painted Autumn Suite for Thanksgiving card ideas!
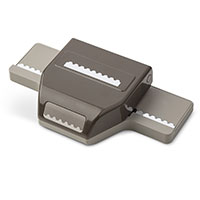
A new tool from Stampin’ Up! that positions your stamps precisely, stamps multiples with ease, easily creates 2-step, 3-step, and 4-step stamped images, compatible with red rubber and photopolymer stamps, and more!
I feel like we should play “Jeopardy”! “What is the STAMPARATUS, Alex!”
Yes, we are getting a new stamp positioning tool called the Stamparatus! How about that name??! As you probably know, there are other similar products out there on the market, but Stampin’ Up! has stepped up all the features in order to be the BEST stamp placement tool on the market!
Watch the video below from Stampin’ Up! to hear and see Carrie explain how to use this new tool coming SOON!
Since this tool is brand new, first announced at the Stampin’ Up! OnStage event over the weekend and announced to the public yesterday, there is going to be a new way to order your Stamparatus! Sort of like a preorder! You will reserve your spot and Stampin’ Up! guarantees shipment as soon as the product arrives in the warehouse.
This is how it will work:
From Nov. 16-30, 2017 you can RESERVE your Stamparatus. There will be a limit of 1. Reservation quantities are while supplies last. I suggest you plan to reserve yours as soon as possible. You will be required to provide your credit card information, but it will not be charged until the product ships from Stampin’ Up! During this reservation window, the Stamparatus will likely ship around February 1st, 2018.
You will go HERE to my Stampin’ Up! Online Store on Nov. 16 (or after) beginning at 2:00 PM Mountain Time. You will click on the banner for the Stamparatus and follow the instructions. These are the steps you will take on the day you RESERVE your Stamparatus HERE.
You will need to have your own Stampin’ Up! online account set up, which is easy to do, if you haven’t ordered from me as yet. Just click HERE to go to my Online Store, then under the Stampin’ Up! logo on the left side of the page, you will click on “Create Account”. That’s all there is to it!
It’s a lot of information to take it all at once, but I think we will all figure it out! Basically, you can order/reserve a Stamparatus beginning Nov. 16 at 2:00 pm MT and it will ship around the first of February. This gives Stampin’ Up! a better way to control inventory since it is a new product.
If you aren’t ready to reserve the Stamparatus Nov. 16-30, the second window is Dec. 5-30 with availability approximately March 19, 2018. The third window to reserve will be January 15-30, 2018 with estimated availability April 15, 2018. The Stamparatus will be available in the new annual Stampin’ Up! catalog for 2018-19 and ordering will be as usual at that point.
When the Stamparatus is available after you have reserved one, the reservation will be put into your shopping cart in your account. At that time, whenever you are ready, you can add other products to your order if you like, just don’t delete the Stamparatus reservation from your account or you lose it! Then you just complete your order as usual and your order will be shipped to you.
Just circle November 16 2:00 PM on your calendar and check it out! If you really want to reserve a Stamparatus, go ahead and do it as soon as you can in that window of Nov. 16-30. Be patient with the website early on, I suspect a lot of people will be on it! I will be one of them!
Let me know if you have any questions! I will TRY to answer them! Watch the video, especially to the end to see the extra special features of the new Stamparatus, the new stamp positioning tool!
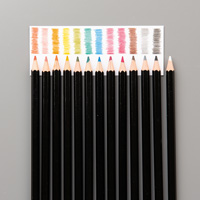
The new alcohol markers from Stampin’ Up!, Stampin’ Blends, are here and ready for purchase! These markers will take your coloring to new heights! Everyone can look like an artist!
The markers have dual-tips and each color has a light and dark shade. You can buy the markers individually or in a complete collection. The Memento ink is recommended to use with the alcohol markers. You can use Whisper White Cardstock, but it is recommended to use the Thick Whisper White Cardstock. The Shimmery White Cardstock also works well and is pretty as well! The ink from the markers is likely to bleed through the paper so you always want to have a scrap piece of paper of some kind underneath your work.
Watch these videos to learn more about the Stampin’ Blends Markers and how to use them! They really have a delightful feel to them when you color!
As you can see in the videos, you can start with the most basic coloring just to get used to the feel of the markers. Then add in blending and even blending different colors together rather than just the light and dark shades of one color. As Brandi showed at the end of her video, she used various colored markers to make different skin tone colors. You can be as basic or as stepped-up as you want! They are your markers to use!
I think you will find the Stampin’ Blends have a really nice feel to them when you color. And we know coloring is good for the soul! Just sit and color and relax, forget everything else for awhile! I remember how I used to love it when I was young if my mother would sit down and color with me because, of course, I thought she did the best coloring in the world! Now you can do the best coloring in the world with the Stampin’ Blends Markers!
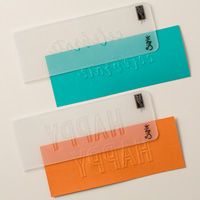
If you want to make a quick and easy birthday card, use the Birthday Memories Designer Series Paper and the Happy Birthday Thinlits Die! I LOVE this die! It is just perfect to put on so many birthday cards.
The card base is Real Red to match the Happy Birthday diecut. Actually I had already cut out this red diecut for another card, but it didn’t look right on that card so I just saved it. To make this card, I looked through the Birthday Memories Designer Paper and picked out this plainer background for this card. Real Red is one of the coordinating colors of this designer paper so it was perfect to use this diecut in red.
For something else on the card front, quick and easy, I decided to cut out one of the birthday cakes from one of the patterns in the Birthday Memories package. I just cut it out by hand, only took a few seconds, and adhered it to the card front with the Multipurpose Liquid Glue.
You have a few options for gluing down the Happy Birthday diecut. This time I just put tiny dots of the Multipurpose Liquid Glue all around on the back. Very tiny. I could have also sponged on some of the glue. Or I could have used the Multipurpose Adhesive Sheets if I would have stuck one onto the back of the cardstock before I diecut it!
If you would like to see the Happy Birthday diecut on another card, there is THIS POST with one of my favorite cards ever because of the beautiful background paper!
That is all there is to this card! Simply make the card base, adhere a plainer piece of designer paper, adhere the Happy Birthday Diecut, and cut out a birthday cake, or maybe some other image from the Birthday Memories Paper. There you have a quick and easy birthday card with the Birthday Memories Paper!
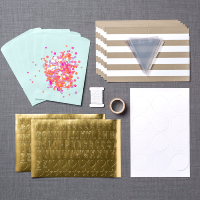
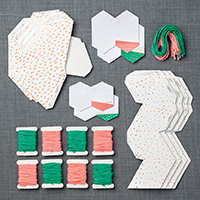
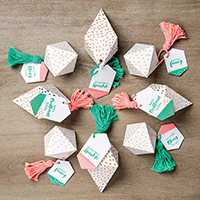
Don’t miss out on the November Paper Pumpkin Kit! Today is the last day to sign up to have it arrive in your mailbox mid-month! It promises to be some kind of gifting item, I believe, and if it is from Stampin’ Up! you know it will be cute!
Stampin’ Up! says “When they open the box they’ll find ten little somethings that they might want to hang by the chimney with care—or on a wrapped gift or a neighbor’s door.”
And considering the October Season of Style kit came in the green and black plaid box, you won’t want to miss the black and white plaid box that it surely is coming in! Total cuteness!
Watch the Paper Pumpkin video for the October Kit to get an idea of what a Paper Pumpkin kit is like!
Paper Pumpkin Kits are fun for everyone! Crafter or not, adult or child, old or young, friend or loved one. All you do is open the box for crafting fun! All the supplies are there, an exclusive stamp set, and an ink spot (a tiny ink pad) to make the project! All you have to do is sit down and enjoy!