A Toil & Trouble Halloween Treat Bag Topper

A Toil & Trouble Halloween Treat Bag TopperI just love using the Toil & Trouble Designer Series Paper to make Halloween cards and other projects, like this simple little Toil & Trouble Halloween Treat Bag Topper.  If you have children or neighbors or office workers to whom you want to give a little candy treat, just make a simple little topper with cardstock and some decoration to close a bag of Halloween candy or treats!

Start with the 3″ x 6″ Gusseted Cellophane Bags that will hold some Halloween candies. If you don’t want to be quite so generous with the candy, partially fill the bag with some “shred” like in gift bags or crumple a piece of colored tissue paper….or cut the bag down from the top to make it a little smaller.  Put the treat inside and fold the top over once or twice.  Adhere with some Snail Adhesive or Fast Fuse (some refills still left on the Clearance Rack!).

Make the bag topper just a bit wider than the bag.  Mine is 2″ x 3 1/4″ folded in half, so 4″ x 3 1/4″ to start with.  I cut out some of the images from the Toil & Trouble Designer Paper in the Holiday Catalog and adhered them to the topper.  The greeting is stamped in Granny Apple Green from the Trick or Tweet Stamp Set and punched with the Classic Label Punch.  I thought I needed something besides just the Basic Black Cardstock in the background so I put a piece of the polka-dot pattern on the topper. I think it sets off the cutout images better. Just adhere the topper to the bag.

Be sure to check out the Clearance Rack and don’t forget to spend your Bonus Coupon Codes from August if you earned some!

If you want the September Paper Pumpkin Kit,  the Frights & Delights Kit, you will need to subscribe first so then you can purchase the “past kit” in the Online Store.  If you are already a subscriber and want more of the treats, buy just the refill.  Subscribe to Paper Pumpkin HERE and get the October Kit in mid-October.  You must join by October 10th.

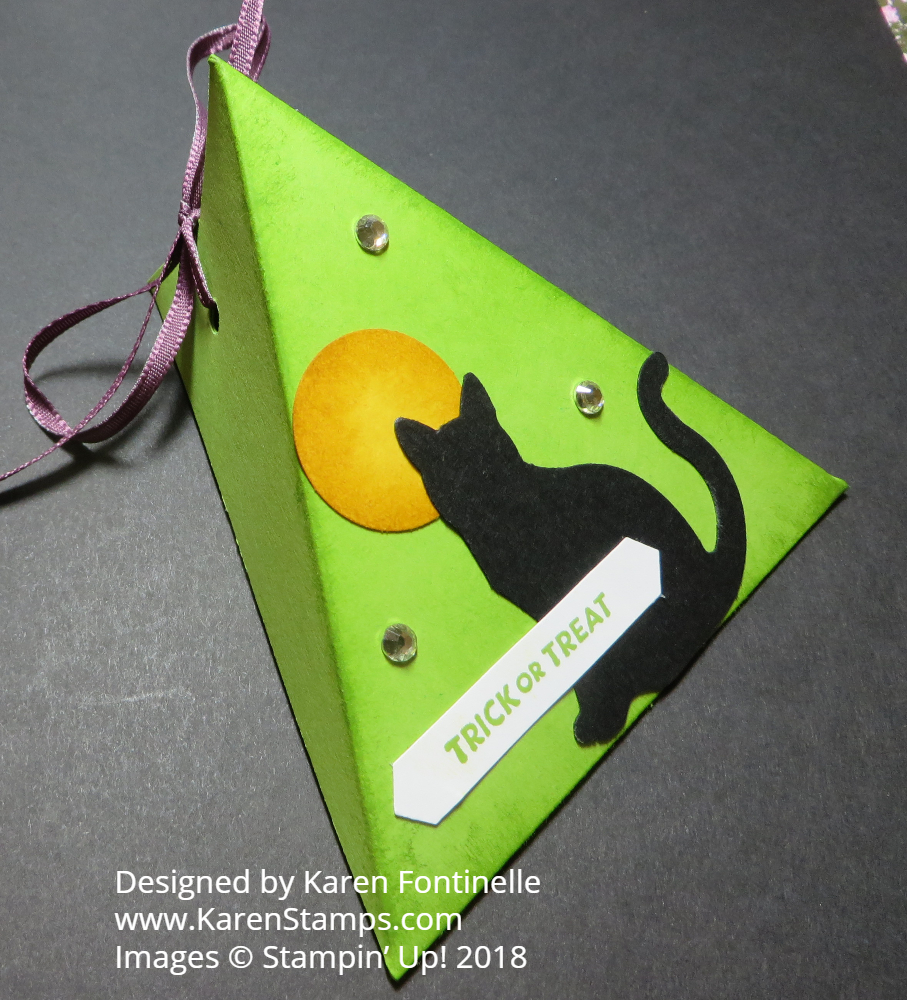
If you would like another Halloween treat idea, click HERE to see my Clear Tiny Treat Boxes decorated with the Cat Punch.

And if you want to make your own Halloween treat bags, try something like my Toil & Trouble Halloween Treat Bag Topper and have fun making up some treats!

Animal Expedition Kangaroo Little Hello Card

Animal Expedition Kangaroo Little Hello CardThis Animal Expedition Kangaroo Little Hello Card came about quite by accident!  While my mind is mostly on holiday projects, this Animal Expedition Designer Series Paper kind of jumped out at me.  When I pulled out some Crumb Cake Cardstock to use with it, there were already two 4 1/4″ x 4 1/4″ card bases in with the cardstock so that’s what I used!

I don’t have a fancy cardstock storage system.  I leave the paper in the plastic that it comes in (until it rips and falls apart!) and I stick cardstock scraps into the bag also. Then I just stack the packages by color family on a few plastic paper sorter things. It works for me. So if I made a card base and then didn’t use it,  I just put it back in that package of cardstock to be discovered sometime when I do want to use it!

This card began with the Animal Expedition Paper and since I wanted to use the big kangaroo on one of the sheets of paper, I chose a sheet with a lot of greenery for the background layer. To cut out the kangaroo, I chose the Layering Ovals Framelits DiesI chose a scalloped oval because it seemed to fit around the kangaroo better without cutting into some other animals on the paper.  It did cut into two little birds although that hardly would have been noticeable, but I just cut out two birds by hand from the paper and adhered them over the partially showing birds.  It gives it a little bit of a 3D look and makes it a little more fun.

Since I already had the two 4 1/4″ x 4 1/4″ card bases ready to go in my package of cardstock, I chose to go ahead and use one of those.  Sometimes it is fun to use a different card size. For this size, just start with a piece of cardstock 8 1/2″ x 4 1/4″ and fold in half.  The layer of designer paper is then 4″ x 4″.

For some embellishment on the card, I used the 1/8″ Shaded Spruce Ribbon in the Metallic Ribbon Combo Pack.  I just adhered a piece around the center of the card and then tied two little pieces of ribbon onto each side.

The layered kangaroo piece is popped up on Stampin’ Dimensionals.  The greeting is stamped from the Itty Bitty Greetings Stamp SetI could have used lots of different greetings.  I think this would make a cute baby card, for example. Or it could have been birthday or “thinking of you” or others.  The greeting is punched out with the Classic Label Punch.  Then I even used this punch to make the flagged ends of the greeting.  It is popped up with the new Mini Stampin’ Dimensionals.

Pretty easy card to make and the Animal Expedition Paper is oh so cute! This Animal Expedition Kangaroo Little Hello Card would be fun to send to a friend in the mail!

SHOP STAMPIN’ UP! ONLINE!

Don’t forget to use your Bonus Coupon Codes from August this week before October 1st.

Check out the Clearance Rack!  Need items were added, some items are sold out, but check it anyway!


First Day of Fall Pumpkin Thinking of You Card

First Day of Fall Pumpkin Thinking of You Card

Today is the Autumnal Equinox so here is a First Day of Fall Pumpkin Thinking of You Card to celebrate!  Equinox means equal light so most places will see equal amounts of daylight and night. I was hoping the Autumn Equinox would mean Houston, Texas would cool off to comfortable temperatures with low humidity, but I don’t think that’s what it means!  In fact, it means the opposite! It’s not going to feel like fall here for a long time yet!

My card is one that came out of nowhere. I couldn’t really think of what to make but I knew I wanted to use the pumpkins on the paper in Toil & Trouble.  Eventually, I chose another paper in the package for the background on the card that would go with a few of the cut-out pumpkins. I just cut out a few pumpkins with my Paper Snips.  I chose the Crumb Cake 3/8″ Classic Weave Ribbon to tie around the front of the card. I chose the greeting from the Rooted in Nature Stamp Set because I didn’t want it to be a Halloween card.

Just to make sure I stamped the greeting just right on the designer paper, I used my Stamparatus! I used a piece of vellum over the paper on which I was going to stamp so that I could “test” the stamp to make sure I had it positioned correctly. When it looked okay, I removed the vellum and stamped right on the designer paper.  I wasn’t sure the ink was dark enough, so I just reinked the stamp and stamped again!  You can’t do that without a Stamparatus!  If you don’t have a Stamparatus yet, you might want to get one for yourself!

I hope you will have a lovely first day of fall!  I wish I was going to be seeing colored leaves and wearing a warm flannel shirt and jacket tomorrow!  But I will be starting to think about pumpkins and fall and Halloween decorations that will be coming soon!  I hope this First Day of Fall Pumpkin Thinking of You Card gets you in the mood for a lovely fall season!

SHOP STAMPIN’ UP! ONLINE!

(Be sure to use your Bonus Coupon Codes from August if you earned some!)

Triangle Treat Box For Halloween

Triangle Treat Box For HalloweenOne of the easiest things to make is this Triangle Treat Box For Halloween.  Triangle Boxes are so easy and the size can be varied. It just involves a strip of cardstock scored a certain way and folded up.  Decorate the outside according to the occasion, put your treat inside, punch some holes in the side and tie shut with ribbon.  Easy peasy!

For this triangle box start with a strip of 4″ x 8″ cardstock, in this case, Granny Apple Green.  It is scored in half, like a card, at 4″.  Then on each end, put a pencil mark at the center point. Next, score on a diagonal from that center point on the end of the paper to the center score line on each side.  Essentially you are making a point at each end.  See the diagram below.  Just angle the paper on your Stampin’ Trimmer so that both the center score line and the center point on the end are on the track on the Trimmer and then score.

Triangle Box Drawing

To decorate the box, I sponged a little Granny Apple Green ink around the edges of the front of the box.  I was going to use some cut-out image from the Toil & Trouble DSP, but changed my mind and punched out the black cat with the Cat Punch.  I thought the cat could use a moon so I punched a circle of Crushed Curry Cardstock with the 1″ Circle Punch and even sponged it with some Crushed Curry ink.

The greeting is stamped from the wonderful Itty Bitty Greetings Stamp Set.  I think this stamp set is a must-have.  You can always find some sort of greeting you can use in this stamp set. It replaces Teeny Tiny Wishes, my previous favorite and highly used stamp set.  I stamped it in Granny Apple Green Ink and punched out with the Classic Label Punch.

I thought the box still needed a little something, like some shiny little stars. I added some small Rhinestone Jewels to the front of the box or I could have used some sequins.

If you want another idea, here is a Halloween triangle box I made to look like a Witch’s Hat.  It shows how the paper gets folded into the triangle if you need more information.

These Triangle Boxes can be made for Christmas gifts or birthdays or any other when you want to place a small gift or treat inside! Try it!  So easy! It’s just a little over five weeks until Halloween! Oh my!!  Make a Halloween Treat Box for Halloween and give to someone for a surprise!

SHOP STAMPIN’ UP!

All Is Bright Happy Holidays Card

All Is Bright Happy Holidays Card

This All Is Bright Happy Holidays Card is fun and easy to make with just a bit of designer paper and the greeting die cut with the Big Shot. This card could be made a little plainer if you wanted even quicker and easier or you could jazz it up even a little bit more. Most cards are like this, that they can be made very simple and easy or they can have lots of embellishments and bling.

I started with just a card base of Real Red (which I have a hard time remembering that it is not in the “Brights” color family anymore!) and a strip of the Christmas stockings cut from a piece of paper in the All Is Bright Designer Series Paper.  I layered the strip of designer paper on a piece of Garden Green cardstock. The greeting is die cut from Gold Foil Paper with the word dies in the Merry Christmas Thinlits Dies.  Had I been able to find my Multipurpose Adhesive Sheets I would have used these on the back of the Gold Foil Paper before die-cutting. That way no glue is required on the very narrow letters. But since I didn’t have the Adhesive Sheets at hand, I did just use very tiny dots of the Multipurpose Liquid Glue.

I finally decided that the Real Red card base was a little plain, so I embossed it with the Tufted Dynamic Textured Impressions Embossing Folder. I thought this folder gave an elegant look to the card and kind of went with the stockings since sometimes Christmas stockings have that quilted, tufted look. This is one of the “dynamic” folders that is thicker and heavier so it is best to just spritz the cardstock with a bit of water before embossing.  That softens the paper fibers so you get the best embossing.

After embossing the card front and adhering all the pieces, I thought why not add a little bit of Garden Green & White Baker’s Twine to the stocking on the designer paper for a little embellishment.  And that’s all there is to the card!  Like I said in the beginning, the card could have been made with just the plain card front, the greeting and the designer paper and layer adhered to the card front and it would be done and look fine. Certainly if you were making a lot of the same card it would be easier to keep the card simple.

Remember that if you earned any Bonus Coupon Codes in August, you can use them on any purchase in August. And be sure to check out the Clearance Rack since more items were added the other day.  Some are already gone, but get what you can while supplies last!  There are plenty of products on there that you could be using right now for the holidays, maybe with adding new designer paper or new cardstock colors to freshen things up!

Check out this other Christmas card I made using the All Is Bright Designer Series Paper.  This paper has those photographic images as the design which makes it so pretty.  I plan to make more of this card!  I like to make lots of different designs since we have so many great stamp sets and papers to use for Christmas cards, so I make a few cards of each design.  And yes, then it is hard to decide who to send which card to at mailing time!

Be sure to order your supplies early so you won’t have backorders to deal with if you want to make a card like this All Is Bright Happy Holidays Card.

SHOP STAMPIN’ UP! ONLINE!


New Items Added to the Stampin’ Up! Clearance Rack!

Clearance Sign with Confetti

New items have been added to the Clearance Rack in the

Stampin’ Up! Online Store!

Supplies are limited, and with discounts up to 60%, products will go quickly. Shop now and stock up.

If you were a fan of Fast Fuse Adhesive or would like to try it, Fast Fuse is back temporarily, while supplies last, on the Clearance Rack.  Stampin’ Up! had retired it and everything, but then the vendor contacted them because they had manufactured a surplus of Fast Fuse applicators and Fast Fuse refills and offered to sell it to Stampin’ Up!  Since Stampin’ Up! had heard from a lot of Demonstrators that we liked it (it’s a good, strong adhesive), they purchased the Fast Fuse and are offering it on the Clearance Rack at a discount

I like to use Fast Fuse. I would say it has a bit of learning curve to get the hang of using it, but there are plenty of tips out there for applying it. But it is a strong adhesive that works well so I would advise that you try it!  Only available while supplies last so don’t delay, just in case!

Remember, stock will change by the minute so whatever is available at the time is what is available!  You can use your Bonus Codes you earned in August on your purchase as well.  Be sure to use them before the end of September. Read HERE how to apply the codes to your order and get your discount.

You can shop from the Holiday Catalog and Annual Catalog plus add Clearance Rack items to your order!

CHECK OUT ALL THE ITEMS AVAILABLE ON THE CLEARANCE RACK TODAY!


Hello Card With Frosted Floral and Varied Vases

Hello Card With Floral Frost and Varied Vases

This Hello Card With Floral Frost and Varied Vases came about from thinking I would get away from the holidays and look in the Stampin’ Up! Annual Catalog for something with a stamp set that maybe I hadn’t used since the Stampin’ Up! Holiday Catalog came out.

I stopped on page 45 of the Annual Catalog and got some ideas from the samples for the Varied Vases Stamp Set and the Vases Builder Punch.  When I looked at my designer paper in case I wanted to use some, it was the Frosted Floral Specialty Designer Series Paper that caught my eye! So I didn’t avoid the Holiday Catalog after all, but it does show you that you can use this beautiful paper for projects other than holiday ideas!

Somehow or other, this card turned out!  It starts with a card base of Mint Macaron cut at 4 1/4″ x  8 1/2″ folded in half so that you end up with a 4 1/4″ square card.  Kind of fun to make a different size card once in a while! The little floral pattern of this shimmery paper is cut at 4″ x 4″.  The Shimmery White Paper is punched with a 2″ Circle Punch and layered on a  scalloped circle in the Layering Circle Framelits Dies.

The little vase is stamped in Berry Burst ink and punched out with the Vases Builder Punch.  Once you place it where you want it on the circle you can see where to stamp the flower stems with Pear Pizzazz Ink right on the circle (remove the stamped and punched vase firs!). I also stamped the narrow leaves on scrap paper and punched those.  The flowers are stamped on scrap Whisper White and punched out.  I even colored them a little with the Clear Wink of Stella Glitter Brush. Everything except the leaves and stems is popped up with Stampin’ Dimensionals, the regular size, and the Mini Dimensionals.  The tricky part was stamping the word “Hello” because if I messed that up……..well, there are no mistakes in stamping so I just would have had to stamp it on paper and adhere it over the messed up stamped word. I got lucky, though, and had no problem stamping the greeting!  I thought just a little strip of the Berry Burst 3/8″ Metallic Edge Ribbon was just enough under the circle (also popped up on Dimensionals).

I have two pieces of advice for making this card:  1:)  If you don’t know what you want to make, look through the Annual Catalog for ideas and 2:)  Buy the Frosted Floral Designer Paper!  It’s SO pretty!  You must have it!

Wouldn’t this Hello Card With Frosted Floral and Varied Vases make a friend’s day to find this card in her mailbox?!

SHOP STAMPIN’ UP! ONLINE TODAY!

How To Make a Baby Fold-Out Mini Album

Baby Girl Mini Album

Over the years I have made many of these mini baby albums for gifts! They are easy, not too big, and a nice place for new parents to keep at least a few photos of their precious child. Of course this kind of fold-out album could be made for any occasion, not just babies!  You do, however, have to PRINT OUT some photos off your phone or camera to get the full effect! It’s great having photos on our phones, but it’s not the safest place and sometimes it’s better to have a little album to show someone or look through ourselves.

The only difficult thing about this album is that you need 12″ x 12″ paper. Stampin’ Up! just carries assortments these days, which is fine for most things.  You can also purchase a full pack of Whisper White 12″ x 12″ cardstock and use that for the base of the album and then decorate to your heart’s content!

You’ll start with a piece of cardstock 12″ x 5″, scored at 3 1/2″, 4″, 9″ and 9 1/2″. This makes the back and the fold over front top and bottom pieces.

Cut two pieces 12″ x 4 3/4″ also out of the base color, which will be the pieces that open out to the sides of the album.  Score these at 4 3/4″ and 9 1/2″. Crease all score lines on all the pieces back and forth.  You will figure out which way you want the sides to fold in after you get them assembled into the album.

With the first 12″ x 5″ piece placed vertically, adhere the two side pieces into the center (the part that will be the inside of the back of the album). This will be the 2 1/2″ section of each piece that you will adhere just inside the score lines of that back piece. Then adhere a piece of 4 3/4″ x 4 1/2″ over that two ends to cover them up.

Now you are ready to start decorating! Determine which way you want your album to fold…..the shorter piece on top or the bigger piece, depending on how you are going to decorate it so you have your inside patterns going the right direction.  Now use whatever designer paper, stamps, cardstock, stamping, embellishments you want to decorate each of the pages and the outside cover.  On this sample you will see some retired paper and stamps, but when I make a gift or custom order for someone, I use whatever I have in my current or past stash that I think works!

Baby Girl Mini Album

These next two photos show the back sides of the fold out sections.

Baby Girl Mini Album

Baby Girl Mini Album

I made a belly band to hold the album closed.  When you fit this around, whatever width you like, you don’t want it to be too tight because, after all, you have scored a 1/2″ space to make room for photos.

This is a really easy and fun album to make so I hope you will give it a try. Use what you have. Order some 12″ x 12″ paper from Stampin’ Up! and you will be all set to make these little mini fold-out albums!

SHOP STAMPIN’ UP! ONLINE HERE!

Trick or Tweet Scary Halloween Animals Card

Trick or Tweet Scary Halloween Animals Card

Halloween is so much fun and this Trick or Tweet Scary Halloween Animals Card is great to send to someone and spread the Halloween spirit!  I love these little costumed animals, ready to stamp and color in how you like!  It’s the Trick or Tweet Stamp Set!  Cute name, too!

Just stamp each animal on some Whisper White Cardstock and color in with Stampin’ Blends markers or your choice of coloring.  I love the alcohol markers! You can use whatever coloring method you like.  Then you can punch out or die cut the animals in circles and layer on a scalloped circle.  I used Berry Burst Cardstock for the layers.

The background layer on the card is embossed with the Oh My Stars Embossing Folder.  I used Lemon Lime Twist Cardstock. This piece is layered on Berry Burst Cardstock and layered on the Basic Black card base.

There wasn’t a good space for a greeting, so I stamped the greeting and cut apart the words!  It’s a technique I see now and then but rarely think to use it myself!  The greeting comes in the Trick or Tweet Stamp Set.  The greeting is stamped in Berry Burst Ink and layered on Basic Black.  I just used my Paper Snips scissors to cut these apart by hand.  Just glue onto the black and then trim that out.  Doesn’t have to be perfect because, after all, it is a spooky Halloween card!

That’s all!  A fun Halloween card!  Be sure to mail it to arrive before Halloween!  Or use these individual little characters as a topper on a Halloween treat bag or box.  Lots of possibilities!  Here is a treat box I made with the little Halloween bird as the decoration!

Wouldn’t someone you know be pleasantly surprised not just to find a card, but a Halloween card, in their mailbox from you?!  Have some fun making cards and treats for Halloween like this Trick or Tweet Scary Halloween Animals Card!

First Frost Flower Bouquet Card

First Frost Flower Bouquet Card

This First Frost Flower Bouquet Card will be a good one to send to someone for almost any occasion, just change the greeting.  You can stamp the flowers in any color, make the whole color scheme of the card in any appropriate colors. First Frost is just a pretty stamp set with nice greetings you can use.

As you can probably see, I stamped the flowers randomly and then die cut with the Frosted Bouquet Framelits Dies.  You could also stamp the flowers on the card and then stamp an extra one or two to die cut and add to the bouquet.  I did stamp the stems and leaves and some of the little wispy flowers or berries, whatever they are. (And they can be either!)  Notice the stamps themselves give that kind of “not full-on ink” impression, a softer look, like watercolor.  It’s a very soft, not bold, stamp set.  So pretty I think!

To save 10%, just purchase the First Frost Bundle that contains the stamp set and the coordinating dies.

To finish off the card front, I adhered a little strip of the Frosted Floral 12″ x 12″ Designer Series PaperIf you don’t buy anything else in the Suite, I would buy this Frosted Floral Paper because it is shimmery and GORGEOUS!

On the inside of the card, you can add another die cut flower down in the corner!

You’ll find this whole grouping of products in the Stampin’ Up! Holiday Catalog!  Be sure to check out this gorgeous new catalog online!  And if you would like a copy of your own, please send me your contact information.  I would be happy to help you and send you a complimentary copy of the catalog.

You can actually use this Frosted Floral Suite to make holiday cards!  Or you can make birthday cards or sympathy cards or “thinking of you” cards or wedding cards!  How many stamp sets can you say something like that about?!

I hope you can be inspired by this First Frost Flower Bouquet Card and copy it or make something a little bit different for your special occasion to send or give to someone!

SHOP STAMPIN’ UP! ONLINE!


Last Day! Join Paper Pumpkin Today to Get This Spooky-Cute Kit!

Paper Pumpkin Sept 2018 Ad New

It’s September and time to sign up for the September Paper Pumpkin Kit and get a Halloween papercrafting kit!  If you love Halloween, don’t miss this kit!  Usually we don’t know what will be in the monthly kit, but this time…..based on the time of year, the ad you see above, and a little hint from Stampin’ Up! about the quantity being 24 treat holders…..I think we have a good idea it’s Halloween!

You must sign up by September 10th which is today!  I can’t wait to get my kit!  They will ship out soon after the 10th of the month so you will receive your kit around the 15th.  You can skip a month or cancel any time, just go into your account by the 10th of any month and update it. But if you like Halloween, go ahead and try Paper Pumpkin right away!

I have used past Halloween Paper Pumpkin kits for trick-or-treaters or to give to friends or maybe the office staff at a doctor’s office. Almost any treat holder you know is going to be fun to make and give away!

Kits are $19.95 + tax, but that includes shipping.  You get an acrylic block with your first kit, an exclusive stamp set you can use again later, a Stampin’ Ink Spot (it’s great to use with your Stamparatus!), and all the materials you need for the project, even adhesives.  Most pieces are die cut so you just punch them out.  There is a video online if you like to watch the whole process and also printed directions, of course, in the kit.  Make any kit exactly like the directions, or do something different on your own.  You will find alternate ideas online a little while after the kits have been received and people have started creating! So you do get a lot for your money and the value of the crafting fun you will have is immeasurable!

Sign up today for the Paper Pumpkin Halloween papercrafting kit that anyone can make!

JOIN PAPER PUMPKIN TODAY!


Don’t Miss Out on the Spooky Paper Pumpkin Kit

Paper Pumpkin Spooky Banner 2018October is on its way, and that means you creatively-minded people will be searching in every spooky nook and cranny for a bit of papercrafting fun. Paper Pumpkin has just what you need—a frightfully delightful kit in a scary-cute, special edition box.

So if you love Halloween, like I do, now’s the time to join Paper Pumpkin or even sign up again if you’ve tried it before.

You’ll get the handmade Halloween look without the fuss. This exclusive Halloween kit and special box will give you a fun crafting opportunity to get you in the mood for fall and have something to show for it and USE when you are finished!  I’m sure this will be a fun kit!  Try it!  You deserve it!  You’ll be glad you did!

Click HERE to join Paper Pumpkin and get the

September Kit mid-month!  

Toil & Trouble Witch’s Broomstick Halloween Card

Toil & Trouble Witch's Broomstick Halloween Card

How fun is it to use this designer paper with the witches’ brooms all over it and then put a Halloween witch holding a broomstick on the front of the card as in this Toil & Trouble Witch’s Broomstick Halloween Card!

This Halloween designer paper from Stampin’ Up! in the new Holiday Catalog is called Toil & Trouble Designer Series Paper.  It has lots of cute images for all kinds of Halloween cards, bags, tags, and other projects!  You will have fun making all kinds of cards and things out of it! I just started with a card base of Pumpkin Pie and a layer of Basic Black.  Next comes the designer paper pattern with the broomsticks.

For the focal point of the card, I cut out the witch by hand from the Toil & Trouble DSP and mounted her on two ovals, one using Crushed Curry.  You know you can find out the coordinating colors of any designer paper by looking on the back of the paper.

To finish off the card I tied on a piece of Crumb Cake twine from the Nature’s Twine package of 4 colors.  After that, I realized I didn’t really have a good place to put a greeting, so I left it off.  I can stamp something on the inside or just a personal note.  It’s not a rule that every single card has to have a greeting on the front!

I hope you will check out this Toil & Trouble Designer Series Paper and see if it gets your Halloween spirit moving!  Here’s another card I made with this designer paper by cutting out the witch and a cauldron!  Don’t forget to join Paper Pumpkin, too and get a spooky cute box this month!

Shop Stampin’ Up! Online HERE!

Are You On My Stamping With Karen Mailing List??

Stamping With Karen Mailing List Sign Up Mailbox

Are you on my Stamping With Karen Mailing List? I do love to invite anyone who is interested in stamping, papercrafting, memory-keeping, and Stampin’ Up! to join my Mailing List and keep up with any Stampin’ Up! news and get exclusive detailed tutorials.  I love to have new subscribers at any time!

But I’m going to give you a hint that you REALLY want to sign up soon so that you will receive my annual free gift to my subscribers, The 12 Weeks of Christmas  weekly newsletters!  Believe it or not, we will be starting that pretty soon!  Each week you will receive a special email with one holiday project. We will do cards, gift ideas, and gift bag & tag ideas. You won’t find these ideas on my blog or Facebook, they will only be for my subscribers!  If you are not on my list, you will miss out!

Feel free to invite your friends to sign up, too!  The more the merrier!  I always have a great response to these holiday emails and I enjoy sending them out!

It’s not time yet, but it won’t be long!  And in the meantime, you will want to keep up with any news about the new Holiday Catalog or any other offers and news from Stampin’ Up!

Current subscribers do not need to sign up again to get the 12 Weeks of Christmas!  You are already on my list!  And my Holiday List!

Just put your name and email in the red box on the right side of this blog page or click HERE.

Thanks for joining us!  Be sure you get your FREE Gift for signing up!

Making Christmas Bright Christmas Card

Making Christmas Bright Christmas Card

This Making Christmas Bright Christmas Card is one copied from a sample in the new Stampin’ Up! Holiday Catalog. Look at the sample on page 6.  Those cards on that page and this Making Christmas Bright Stamp Set were some that really caught my eye the first time I looked through the catalog!  One of the things that says “Christmas” the most are pretty Christmas lights!

Don’t let all those little bulbs scare you off!  It just took me a minute with my Stampin’ Blends markers to color those in. They practically only take a dot of marker!  I’m not sure what it is that is SO relaxing about coloring with those Stampin’ Blends but I love it!  You can also use the regular Stampin’ Write Markers, like Real Red and Crushed Curry.  The Stampin’ Up! sample colors in the white bulbs with the Wink of Stella Brush.  I colored with the Call Me Clover green.

I used Call Me Clover Cardstock for the card base and used Real Red plus Whisper White and a piece of Sparkle Glimmer Paper.  The circle around the greeting is Crushed Curry.

There are lots of possibilities with this stamp set.  You can purchase the Bundle, which adds the Christmas Bulb Builder Punch.  Bundles save you 10% over the full price!

Making Christmas Bright Christmas Card Closeup

When you are stamping the strings of lights, if one is too long and going to run into an area where you don’t want it, just put down a piece of scrap paper where you do not want it to stamp.  If you don’t want to do the coloring of the bulbs, you could make a monochromatic card by just stamping everything in red or green.  I might try that!

This is a good time to get started on holiday cards while we are so enthused with the new products and stamping will be so much fun, instead of rushing at the last minute!  But I say that every year!  Maybe this year I will really get an earlier start!

Remember to use your Bonus Coupon Codes if you have one or more!  Directions are in this post of how to add your Coupon Codes.

If you are a kid at heart with Christmas lights, I think you will enjoy this stamp set or Bundle when you make a card like my Making Christmas Bright Card!