Time is getting short for shopping for Christmas gifts, but you do have time to make fudge for Christmas, don’t you?! You will LOVE this fudge recipe! All you need is a printer, stamps and paper! Or even just a pen! Maybe you have one of those impossible to buy for people on your list, but here is a solution! Print out this poem and buy one of those gigantic candy bars (or any size candy bar) and put this poem on it! Maybe you want to update the words a little if you are creative with poetry!
Type up this poem and print out on your computer. Likely you can put a sheet of Whisper White cardstock in your printer and print it on that. Wrap the candy bar with designer paper or cardstock. If you want, do a little stamping on the poem, like these little snowflakes, then adhere to the top of the candy bar. Wrap a ribbon around or put in a cello bag and you have a fun little gift or stocking stuffer!
It’s an oldie but goodie, around as long as I can remember, but it’s still a good, creative idea! Time is of the essence right now! You will probably think of other creative things you can do with food at the grocery store to make it into a lovely gift! In the meantime, go make some “fudge” to give your neighbors or put in someone’s Christmas stocking!
Need a few last minute Christmas card ideas? Here are some from 2017, just to refresh your memory. Maybe you have these stamps or paper, or you can use the current supplies you have, just copy the layout.
You could make this card with the Buffalo Check background stamp from this year. Just add a greeting and a little bling with the sequin trim or some ribbon! Click the photo or HERE to see the details on my blog post.
Here’s an easy card, much like the first one, but with the punched Decorative Ribbon Borderas an added feature. Click HERE or on the photo to see my blog post.
Here’s that designer paper from last year with the check, but you can make your own this year with the Buffalo Check Stamp. Everyone loves it and it gives such warmth to your card! Click HERE or on the photo to see my blog post. This card uses the classic Lovely As a Tree Stamp Set, but we have trees in this year’s stamps. Or substitute another image. Just use the basic design!
Whether you use last year’s trees and die cuts or the new ones we have this year, put a few trees on one side and a greeting on the other. Maybe add a little ribbon or some sequins for some bling! Try out an unusual color or cardstock for a Christmas card that stands out! Click on the photo or HERE to read this blog post.
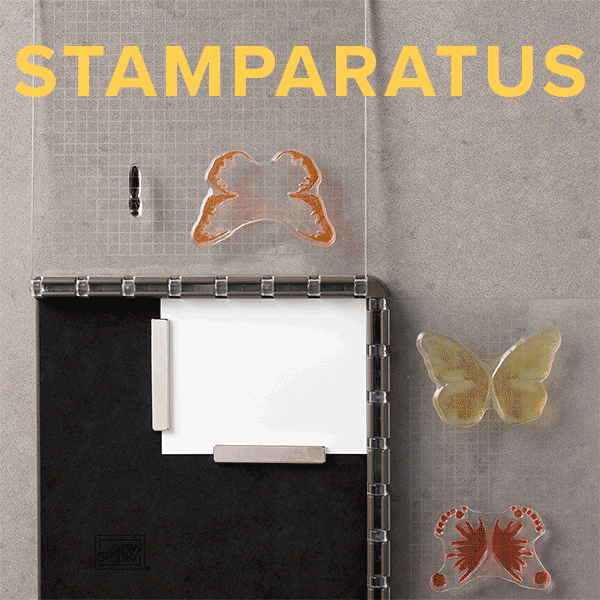
Last year at this time the Stamparatus® was only a new tool on a reserved order! Remember that system when it first came out? We had to wait until the New Year to receive it and I remember thinking last year what a help it would be in making Christmas cards, especially when you are doing multiples.
This year I have it and am using it with almost every card! I’m making several different designs and maybe ten cards of each design. So many fun cards out there to make! I can stamp the inside message over and over again and have it perfect every time once the stamp is centered and lined up just right. If the image doesn’t stamp perfectly, as long as I don’t move anything, I can ink up the stamp again and re-stamp. This has come in handy over and over.
The Stamparatus also came in handy stamping die cuts. Make the die cuts you want with the Big Shot, then make one extra to have a template for the Stamparatus. Place the template in the Stamparatus and then place the die cut in the template and stamp over and over. No worries you won’t fit the greeting perfectly on the die cut.
You might not have time to receive the Stamparatus® in time for this Christmas (although there is Expedited Shipping!), but be sure to put it on your order in January during Sale-A-Bration so you can use it all year and especially next Christmas!
With the two double-sided plates and the hinges, you can have several stamps all set up on the Stamparatus to stamp multiple images on your cards and projects! Here is a postwhere I moved the plate down a notch each time and stamped to make a Thank You card.
It’s like an early Christmas present for stampers who like bargains! Stampin’ Up! has added products to the Clearance Rack today!
Click on any photo to go to the Clearance Rack! Remember, the early Christmas bird gets the worm! Don’t delay! Any of these items can go fast. This is what is available as I write this blog post!
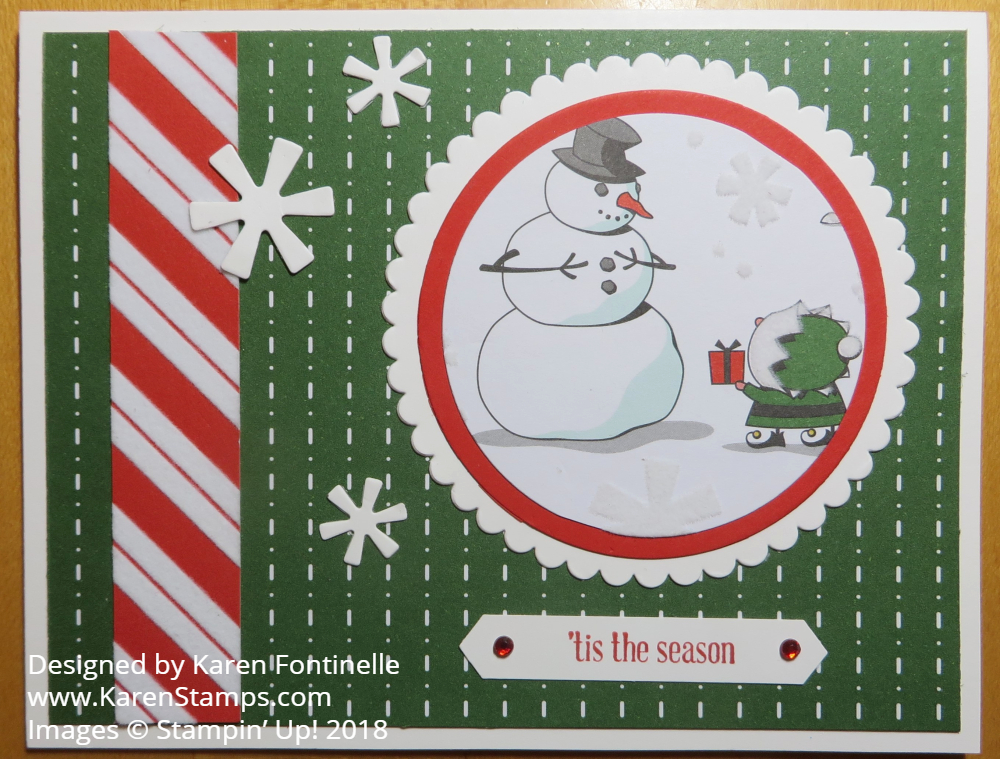
It’s a Christmas card factory at my house this weekend and this Snowman Christmas card is a slight variation of one of my favorite Christmas cards I am making. Much earlier, I made this card. The snowman image is die cut from the Santa’s Workshop Specialty Designer Series Paper. Some of the sheets in this package have flocking on them which you might be able to see in this photograph of the snowflake on the snowman image. The red and white striped paper strip on the side of the card also has the flocking. The snowflakes are punched from the Santa’s Signpost Framelits Dies. Unfortunately, these products are no longer available due to their popularity, but maybe you already purchased them or you can use the idea with something else you have! The greeting is from Itty Bitty Greetings, a must-have stamp set if you ask me.
I’m making 10 cards of each design I choose because there are so many fun ideas! Actually, I could probably make cards from now until next Christmas from all the ideas I’d love to make! I posted this card because I only had enough of the background paper to make 9 cards! So instead, I chose this green paper, but I like it pretty well! Also, the snowman and elf are facing a different direction.
I have to say, I am LOVING having my Stamparatus® this year to make Christmas cards!! I can set up the stamp on the Stamparatus and stamp a bunch of images one right after the other without any concern of getting the image crooked or not stamped well, etc. If you don’t own a Stamparatus, put one on your Christmas list and order it in January during Sale-A-Bration! Then you will all set for next Christmas!
Here is my original card on which I just changed the designer paper. You can easily make variations of your cards even if you don’t run out of paper!
Which card do you like best?
Don’t forget about the Stampin’ Up! Year-End Closeout Sale going on now through January 2, 2019.
You must make this Rudolph The Reindeer 2-4-6-8 Gift Bag just for fun! It wouldn’t take you long to make several of these for favors at everyone’s place setting at Christmas dinner! You could put a few pieces of candy inside or a little gift.
Just use whatever brown cardstock you have. I used Soft Suede, but Crumb Cake would be good too! Cut the paper at 6″ x 8 1/2″. Then score at 2″, 4″, 6″ and 8″ along the long side. Turn the paper and score at 2″. Cut each of the flaps and crease on all the score lines.
Your paper will look something like this, although the measurements will be different. Same idea.
Before assembling the box, figure out which panel will be the face of the reindeer and decorate with his eyes and shiny nose. Use the Sprig Punch to punch two antlers for the reindeer. Just put a tiny bit of glue on the bottom of each sprig and glue inside the bag. The eyes are punched with the 1/2″ Circle Punch in Whisper White Cardstock. The tiny black pupils are punched with the little oval on the Detailed Trio Punch. You could also just color in the eyes with a black marker! The nose is punched with the 3/4″ Circle Punch. I had some retired Red Glimmer Paper scraps that I used.
Assemble the box using some strong adhesive, like Tear & Tape or Multipurpose Liquid Glue. If you want the bag to be closed at the top, punch two holes in the top and thread some ribbon through and tie. I used the Gold 3/8″ Metallic-Edge Ribbonbut some red ribbon would be perfect, too!
The idea for the reindeer box came about after I made the little small gift bag on yesterday’s postbut I wanted the reindeer to be a little narrower. Then I remembered the 2-4-6-8 Box, an oldie but goodie! I knew it would be the right size I was looking for, but you could use any size you like.
If you wanted to leave the top open, more like a treat box, then maybe I would tie a bow with some ribbon and adhere the bow at the bottom on the reindeer.
It’s almost time to be wrapping gifts and preparing everything for Christmas (that is if you have done your shopping already!) so here is a Small Gift Bag you can make with half a sheet of designer paper. Put a small gift inside, a gift card, or some candy treats! Easy to make and a good way to use up that designer paper you are hoarding! It might save a trip to the store to buy more wrapping paper!
To begin, cut a 12″ x 12″ piece of designer paper or card stock in half at 12″ x 6″. I used the All Is Bright Designer Series Paper. You can also make the bag out of cardstock and decorate with a piece of designer paper on the front. Score the paper at 1″, 3 3/4″, 6 1/2″ and 9 1/4″. Then turn lengthwise and score at 2″. The 2″ area will be the bottom flaps, so pay attention to the pattern on your paper. If I had scored this paper at the 2″ mark on the other side, the stockings would be upside down.
Crease all the score lines and cut the flaps as shown. Rather than just cut straight up on the score lines, I cut a little bit of an angle at each score mark. It just makes it easier to fold, in certain cases, where the bulk of that score line sometimes interferes with a smooth fold and fit. Use some strong adhesive on that side flap, like Fast Fuse, Tear & Tape, or Multipurpose Liquid Glue. Fold in the bottom flaps and adhere. Stick something down inside the bag from the top, like a Bone Folder or ruler to get the flaps to stick together.
Now depending on what you want to make, you can squeeze in on the sides a little bit to bring the top of the bag together, punch holes in the top, and tie shut with ribbon. Or use a clip on the top. If you prefer, leave the top open or even make a lid. It’s very versatile!
For this gift bag, I stamped a greeting from the Sincerely Santa Stamp Set, punched a hole in the top and tied it on the bag with the Whisper White Sheer 1/8″ Ribbon. I could have made it fancier, layered it on some Real Red Cardstock, or adhered it to the front of the bag, but I liked it fine the way it was. I did add a Red Rhinestone Jewel to the bottom of the tag. (These Red Rhinestones are discounted right now in the Online Store for the Year-End Closeout Sale!)
Try your hand at making this cute little gift bag or treat holder! It’s fun, easy and cute! Once you do it, you will be able to make them over and over again when you need a small gift bag!
It’s here! My order of a few pre-ordered Occasions Catalog merchandise, some necessities, some Year-End Closeout Sale items, and my new Stamparatus Bag arrived late last night. Even though we live 5 minutes from the UPS center, I guess we are last on the route!
This bag actually looks like it would make a cute stylish purse, although that wouldn’t be very handy with zippers that zip all the way down the sides! Very pretty dark blue, I would say Night of Navy, plus the pretty handles of a different color. I think the handles are Coastal Cabana, although I don’t know if that is official! There are pockets inside to put anything you want, maybe the Small Grid Paperor the extra Stamparatus plate, maybe window sheets if you use those to get correct placement of your greeting, etc. Maybe even some chocolate bars!
This Craft & Carry Stamparatus Bag makes a great Christmas present for yourself! Or hand it to your husband and tell him this is what he is giving you for Christmas! And if you don’t already own the Stamparatus, be sure to get that! You will love using it, especially in certain cardmaking situations!!
Stampin’ Up! recommends ordering by today for Christmas arrival. Depending on where you live, you might be able to fudge on that a little if you know how long your orders take to get to you. Or there is expedited shipping you can choose on your account (like 2nd Day Air for an EXTRA $20 shipping…..but so worth it sometimes! Don’t ask me how I know!). Or just make a card and say a gift is coming! There’s always a way!
Time is getting short and maybe you want to make some simple and basic Christmas cards! This Simple and Easy Labels To Love Christmas Card might fit the bill! Even if you don’t have the exact paper or stamp, you can use the basic idea with what you have.
The card base is Cherry Cobbler, layered with a piece of designer paper from the All Is Bright collection. Before adhering the designer paper to the card, I wrapped around some Cherry Cobbler 1/4″ Double-Stitched Ribbon. The greeting is stamped with the Christmas stamp in the Labels to Love Stamp Set.To make it super simple, just stamp in the Cherry Cobbler ink pad. Since I wanted green trees on it, I colored in all of the stamp with the Cherry Cobbler Stampin’ Write Marker and the trees in Shaded Spruce. You could also stamp the whole stamp in Cherry Cobbler and then remove the ink from the trees with a Blender Pen. I cut out the stamped image along the lines so I could layer it on a punched piece of Cherry Cobbler, punched with the Everyday Label Punch.
Since the card base is a dark color, you probably will want to add a piece of Whisper White Cardstock layered inside the card for your stamped or written message. Maybe add a strip of the same designer paper inside.
Now this card is pretty basic, so if you wanted to jazz it up a bit, you might want to try adding some small punched or die cut gold stars, maybe sequins, or maybe some Red Rhinestones. Maybe just a couple rhinestones on the greeting would be enough. Just play around and see what you think!
If you shrunk this card down, in your mind, you could make a cute tag with the same basic design! Sometimes a tag is just a very small card!
Paper Pumpkin has become so popular that Stampin’ Up! was not even able to offer the December papercrafting kit to new subscribers, but here is your chance for January 2019 to get the Paper Pumpkin Goes Wild Kit and make Valentines with the Cute Critters that match the Animal Expedition Suite in the Annual Catalog.
Here are some details:
Makes 24 adorable Valentine’s treat packages
Coordinating colors: Crumb Cake, Flirty Flamingo, Lemon Lime Twist, Melon Mambo, Petal Pink, and Pool Party
Remember, the kit is designed for you to make something wonderful with the directions and kit contents, but you can use the stamps, ink spot, and all the materials to make whatever you like. If you don’t want or need treats, then make cards and vice versa. Whatever is fun for you!
Stampin’ Up!/Paper Pumpkin will reveal alternate project ideas that combine the January kit with products from the coordinating suite, Animal Expedition, for even more stamping fun! Perhaps you already own some products in this suite or perhaps you will want to purchase some during Sale-A-Bration. I purchased the cute Animal Expedition Designer Series Paper after seeing some cute samples online and I have LOVED using it! This is a really cute Suite for many occasions.
Even though we are all busy with Christmas, we crafters know that Valentine’s Day is not far behind! Even if you no longer have young children around for class valentine treats, you might like some treats on hand to pass out to neighbors or friends or office mates. Paper Pumpkin Kits are just handy!
You can subscribe TODAY for the January Paper Pumpkin Kit and I would advise doing so as soon as you can just in case this kit becomes very popular as word gets out and they run out of kits to send! The link above goes directly to my Paper Pumpkin sign-up page to make it easy for you! If you are working with another Demonstrator, please just go to Paperpumpkin.com and search for their name. But I welcome any and all new subscribers because I so enjoy getting my new kit in the mail every month!
Join Paper Pumpkin NOW and get the Be Mine, Valentine Kit in mid-January. It’s just that easy! You will not be charged until your kit ships. The cost is $19.95 but that already includes the shipping so only tax is added! With your first kit you will receive an acrylic Paper Pumpkin block. Otherwise, each kit will include an exclusive stamp set that you can use any time, an ink spot for stamping, and all the materials, including adhesives and die cut papers plus any embellishments…..everything you need….to make the project. Usually it is a surprise, but sometimes, like this month, you get a hint! You can skip a month if you like after you subscribe. AND all subscribers have access to past kits and refills that may be available in the Online Store! And those little ink spots are great to use with the Stamparatus!
At Christmas time there are lots of opportunities where you might like to make some candy holders or party favors so here are two ideas for Christmas Paper Roll Candy Holder Favors. These are simple to make, especially the Santa one, and you can just use your imagination and make them however you like, no particular templates or instructions to follow.
These candy holders are made with a paper towel roll cut in half (sort of!). First I made the elf, copying a candy bar wrapper I made several years ago in THIS POST. I just wrapped the tube in Old Olive Cardstock, wrapped it in a piece of Real Red at the top with a little triangle cut out to look like short pants, and two strips of the red and white striped flocked paper from the Santa’s Workshop Designer Paper (no longer available).j You can make your own striped elf legs with Whisper White Cardstock and a Real Red Stampin’ Write Marker. The shoes I just cut by hand out of a small piece of Basic Black. You could just use a rectangle shape if you wanted to. Then there is a little Old Olive belt around his shorts with a black buckle.
Here is the secret of making buckles, as on both of these favors……. cut a square of the color for the belt buckle and adhere. Then cut a smaller square of the color of the belt to center on top of the belt buckle square. That way you are not cutting slits and sliding the “belt” through the buckle or anything! Sometimes there is a punch that is suitable for the buckle.
The Santa party favor is even easier. Just wrap the tube with Real Red Cardstock. Make some “fur” on his coat. I used the Decorative Ribbon Border Punch to decorate the edges of the Whisper White strip. Maybe it is too frilly for Santa? You could also just tear the edges to look a little furry. The black buttons are punched with the 1/2″ Circle Punch. Just wrap around a black belt and make a buckle out of Gold Foil Paper or Gold Glimmer Paper. Add that center Basic Black piece to look like a belt.
Then just add some candy or treat in a cello bag or glue on a little bottom piece of cardstock at the bottom of the tube and fill with candy. Easy and fun Christmas Paper Roll Candy Holder Favors for you to make!
About a week ago I posted about this video, the music being the theme song for the Stampin’ Up! OnStage event in November in Orlando. For those of us who have been to Stampin’ Up! conventions, the theme song is new and exciting every year and usually sticks in your head forever! I thought this video was really cute!
Yesterday I saw that other Demonstrators had pulled up some past Stampin’ Up! videos with theme songs that we loved! I thought you would enjoy seeing them, too, ….and perhaps singing along! This one was certainly a favorite!! This was made at the Stampin’ Up! Home Office in Riverton, UT outside Salt Lake City. You can see the offices and also where and how your orders ship! Really fun video! And lots of these Stampin’ Up! employees have plenty of musical talent!
And this one, a highlight reel from Convention 2013 (I was there!) with the “Be The Difference” theme song.
And the one from Convention 2011 – Grow (I was at that one, too!)
Besides listening to the music, these highlight reels might show you how much fun it is to be a part of Stampin’ Up! Click on THIS LINK to learn about joining Stampin’ Up!
The story about the “Love, Live, Share It” video I posted first is this from Stampin’ Up! If you enjoy this music, you might like to purchase the song by itself or the whole collection of Stampin’ Up! music. (expired) The money goes to supporting organizations that help with autism, in keeping with Stampin’ Up!’s Making a Difference program #sudifferencemaker.
From Stampin’ Up!: “Each year we offer a special, limited-time product or promotion dedicated to supporting a designated cause versus a specific charity. The money raised from this limited-time product or promotion is then donated to organizations that support the cause in North America, the South Pacific, and in Europe.
This year, our employee Heart of Stampin’ Up! recipient, Rett Christensen, proposed making our past and present theme songs available for purchase and donating the proceeds to Autism organizations. Having a son with Autism, Rett understands how important it is to support the community.
So thanks to Rett, you can own a piece of Stampin’ Up! history and make a difference in the lives of those with Autism at the same time!
Dates: November 13–December 31, 2018
Two options:
Full Collection of Stampin’ Up! Theme Songs – $15 USD*
Single Love, Live & Share It Today – 30-year anniversary song – $5 USD*
Stampin’ Up! will donate 100 percent of the funds raised to the following Autism organizations: Autism Speaks, Autism Speaks Canada, The National Autistic Society, Autism Europe, Autism New Zealand, Autism Spectrum (ASPECT), and the Japan Autism Society
Fun fact: Rett was also a primary contributor in composing Love, Live & Share It Today (along with a group of other Stampin’ Up! employees).
*There are NOT country-specific prices for this offering. During the purchasing process, the amount will be automatically translated into what the current exchange rates are.”
Just go to THIS PAGE to find out about purchasing these Stampin’ Up! songs!
If you have finished your Christmas shopping or at least done a lot of it (I haven’t!), you might be ready to do some Christmas wrapping. (I’m not!) It’s very easy to decorate a Christmas Gift Bag that you just happen to have around the house. If you don’t have one of the handled kraft gift bags from a store, you can also buy a package of them at a craft store and then you are all set.
It is so simple to decorate and personalize a gift bag for any occasion! I wonder why stampers just don’t do this all the time for gifts! Often the store bag will have the store logo or name printed on the front. Don’t let that stop you because you will just cover it up with paper.
I die cut the greeting with the Merry Christmas Thinlits Diesusing Gold Glimmer Paper. When I placed the words on the designer paper, they barely showed up with the busy background. To solve this problem, I layered the words on pieces of Real Red Cardstock and adhered these to the paper. They don’t take up so much room that you can’t see the designer paper but they do make the words stand out.
That’s all there is to it. You could also tie a bow around the handle. Make it all as fancy and pretty as you want.
Congratulations if you are farther along with your Christmas shopping than I am and ready to do the gift wrapping! Take a few minutes to decorate a shopping bag that you have and make your own gift bag!
Sad, if you ask me, that it is time for the Holiday Catalog to come to an end! Stampin’ Up! is letting us know what products are retiring so you have a chance to get them before they are gone and also discounting some surplus products. Time to shop to your heart’s delight here near the end of the Holiday Catalog. Of course, you can still order what is available from the Holiday Catalog until January 2, but some of these products will only be “while supplies last”.
Get ready! If you already own a Stamparatus® (the Stampin’ Up! stamp positioning tool), you might like to have the Craft & Carry Stamparatus Bag to store and carry it in! Maybe Santa will bring it if you just tell him! Or order it yourself and hide it in the chimney for Santa to find and deliver on Christmas! The Stamparatus Bag has extra pockets
The Craft & Carry Stamparatus Bag will be available beginning tomorrow, December 5th in the Stampin’ Up! Online Store. It will be listed under the Stamparatus category. There are also extra accessories you can buy, including special Grid Paper to fit the Stamparatus perfectly. This bag will also be available in the next Annual Catalog.
Craft & Carry Stamparatus Bag Item #149695 $29
Tomorrow also! The Stampin’ Up! Year-End Closeout Sale!
During this promotion, you will be able to save on a selection of retiring and surplus items—while supplies last. Be sure to place your order sooner rather than later, because supplies are limited and the Year-End Closeout ends on January 2.