What could be more fun that watching videos using some of the new products in the Stampin’ Up! Holiday Catalog?! Usually these are saved until after the catalog goes live, but this year Stampin’ Up! has released them early for all of you!
This new Holiday Catalog is so full of new products that 10 videos don’t even cover everything! But you will get a good idea while you wait for your catalog to arrive! One of my customers told me she received her catalog today so they must be on their way!
Once you watch the video above, the next one will appear. But if you want to see the page where all the videos are or choose which ones you want to watch, just click HERE.
The new Stampin’ Up! Holiday Catalog goes live on September 1, 2016. Amazingly, August is half over so September is not far behind! It won’t be long!
If you are new to me and aren’t working with a Demonstrator currently, just email me with your contact information and I would be happy to mail you a catalog when they come out. Email me at Karen@KarenStamps.com. You will love this catalog!! It will be online Sept. 1st as well.
If you can’t wait until September 1st to order, you may want to become a Stampin’ Up! Demonstrator yourself! We Demonstrators have been able to do a pre-order and you could too! It only takes minutes to sign up! Join the Stampin’ Up! family!Let me know if you have any questions I can answer for you!
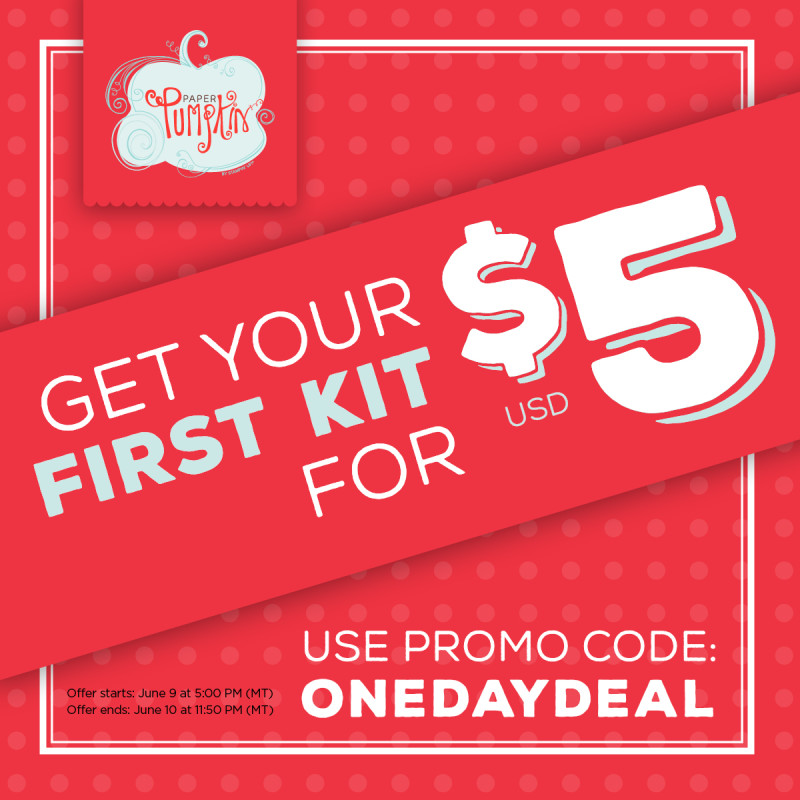
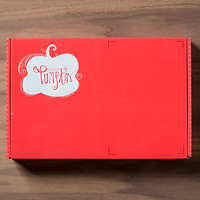
Here is a rare sneak peek from the upcoming June Paper Pumpkin Kit, shipping out mid-June! Read below about the special FLASH SALE going on right now! Today is the last day! Order your Paper Pumpkin Kit before 11:50 pm Mountain Time tonight!! It’s only $5! Don’t miss it!! Use the promo code: ONEDAYDEAL Join Paper Pumpkin today!
It’s a One Day Deal for Paper Pumpkin! The special offer started last night but it runs all day today until 11:50 pm Mountain Time!
Have you ever said, “One day I’ll sign up for Paper Pumpkin.” Well, THAT DAY is today. For 31 hours, first-time subscribers can get their first kit for only $5 USD! This deal doesn’t last long so don’t delay and forget!
What is Paper Pumpkin anyway??! It’s a complete kit to make a papercrafting project of some kind! It’s almost always a surprise and could be cards, home decor, a calendar, holiday items, a mini album, etc. Every once in awhile there is a sneak peek!
In your first kit you will receive a clear acrylic block on which to mount your stamps. Every Paper Pumpkin Kit includes a set of exclusive stamps, an ink spot, and all the paper, pieces and embellishments to make the project, already die cut and ready to go! Instructions are included plus a link to a Stampin’ Up! video. Anyone can make the project, newbie or experienced stamper.
Details
The price of the kit is $5. Shipping is included.
This offer is open to first-time subscribers only. Discount applies to one kit for June 2016. After the first month, the price for the subscription will return to $19.95 USD/$26.95 CAD. You can cancel at any time or simply pause your subscription when you need to.
Offer starts on Thursday, June 9 at 5:00 PM (MT) and ends Friday, June 10 at 11:50 PM (MT).
Available for month-to-month subscriptions, not prepaid subscriptions.
It’s time to think about treating yourself to a Stampin’ Up! monthly Paper Pumpkin Kit that comes to you in the mail! Each kit comes with a stamp set and all the materials inside, cut and ready to go, to complete the project. Past kits have been cards, a calendar, home decor, spring wreath, mini album, holiday decorations, gift packaging and more! Each month is a surprise (although occasionally there is a sneak peek!).
Even if you are not interested in Paper Pumpkin, please watch the fun video above just for fun! I think you will enjoy it!
No risk because you can try it and cancel or get most months, but pause your subscription when you want to. Pay by the month (only $19.95 + tax per month which includes shipping!) or add one kit or more months to your regular Stampin’ Up! order. Once you are a subscriber, you can purchase any past kits or refills that are still available!
Whether you subscribe by the month or order the prepaid kits, the fun will arrive in your mailbox around mid-month. Just be sure to get signed up by the 10th of any month to get that month’s kit.
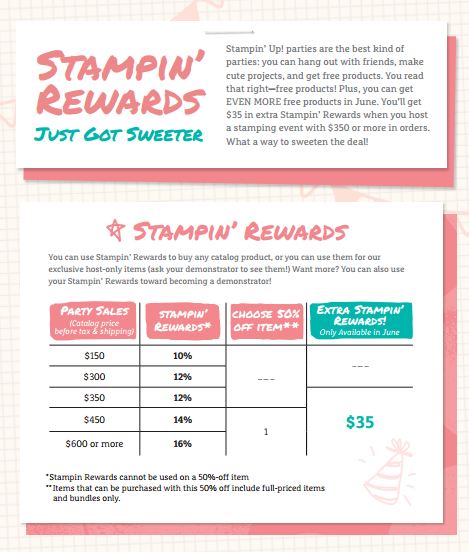
What could be as exciting as getting the new Stampin’ Up! Catalog in June? Maybe getting extra hostess rewards with your order?!! During the month of June, Stampin’ Up! will offer hosts with a $350 or more event (or your own order!) an EXTRA $35 in Stampin’ Rewards! Stampin’ Rewards can even be used on Starter Kits if you wish to become a Stampin’ Up! Demonstrator and start your own business.
If you would like to have some friends get together and have a stamping party or class, let me know and we can plan something. Or do what some of my customers do out-of-town, get some friends to stamp together for fun, and gather orders together along with your own. I can give you a Hostess Code to use if you want to tie several individual orders together and get credit toward your hostess total, whether or not you reach the $350. As long as you have an order total of $150, you qualify for 10% in Hostess Rewards.
For a new catalog sneak peek and for your viewing pleasure, please watch this Stampin’ Up! video about the upcoming Perfectly Wrapped Project Kit (#1424390) page 159 in the new catalog.
In the meantime, you can shop at Stampin’ Up! Online while you wait for the new catalog to begin on June 1, 2016!
The Stampin’ Up! Paper Pumpkin Kits for April 2016 have been delivered to subscribers! If you don’t want to miss out on the next kit in May, be sure to get yourself subscribed!
Add a Prepaid Paper Pumpkin Subscription to your Stampin’ Up! order! You’ll receive a code via email right after you order. It will tell you to set up your account on the Paper Pumpkin page and you will be set to go!
Sign up either way by May 10th to receive the May kit.
Watch for your Paper Pumpkin kit in your mailbox around mid-May!
Everything you need comes in your kit! A stamp set, an ink spot, a clear block with your first kit, and all the paper and supplies you need to make the project. Sometimes it is cards, sometimes it is something else. It’s always a surprise.
No risk! If it doesn’t suit you, just cancel. If you are busy and want to skip a month, just go in to your account and pause your subscription. Resume when you are ready.
Give Paper Pumpkin as a gift! I send one to my daughter as a gift and if she is too busy, she just pauses her subscription for a month or two.
Who do you need a gift for and want something different? Who do you know could use a little “me” time to just sit down and relax while they have some crafting time? Who do you know would enjoy a little surprise gift who doesn’t even craft? Paper Pumpkin is for everyone and anyone!
Take a look at April’s Paper Pumpkin Kit! Sometimes there are plenty of extra pieces left over that you can make even MORE projects with! If you don’t like the project or you don’t want to make all the cards or whatever, just go with your own design and creativity. Nothing says you can’t change it up! Just have fun with it! That is what Paper Pumpkin is for!
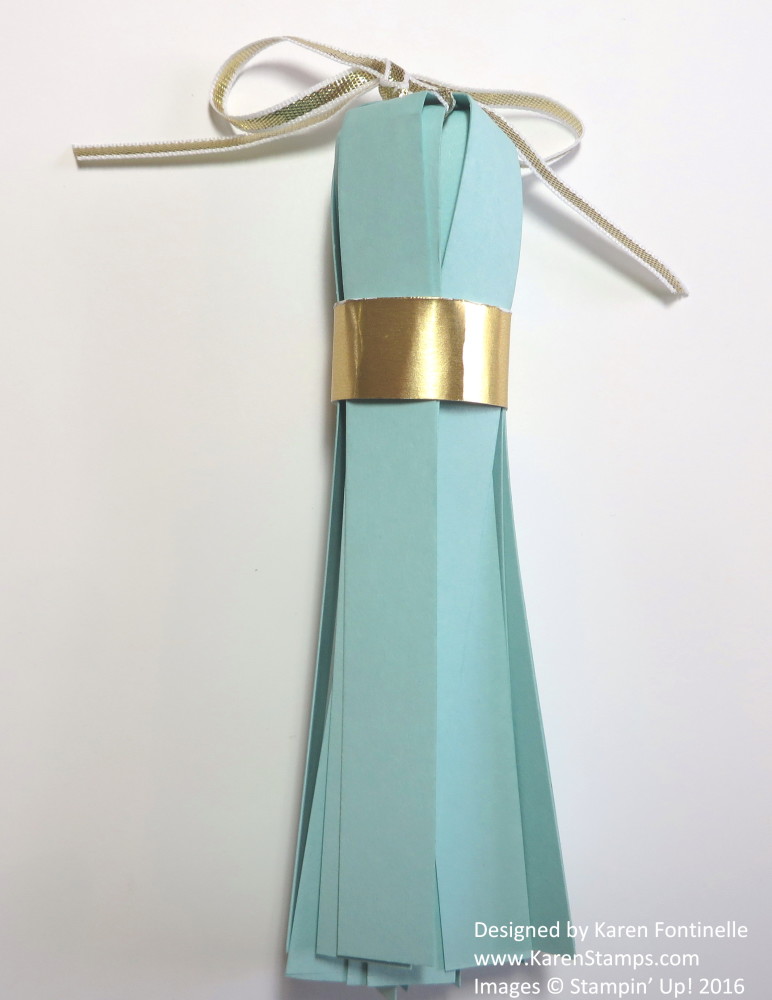
Did you ever think about making a paper tassel with your cardstock? I didn’t until I saw this idea in a magazine! Tassels seem to be the trendy thing right now, especially in jewelry. Why not add them to your papercrafting?!
I’m sure you can modify these instructions to suit the look you want as you play around with the idea.
Cut card stock 6″ x 10″.
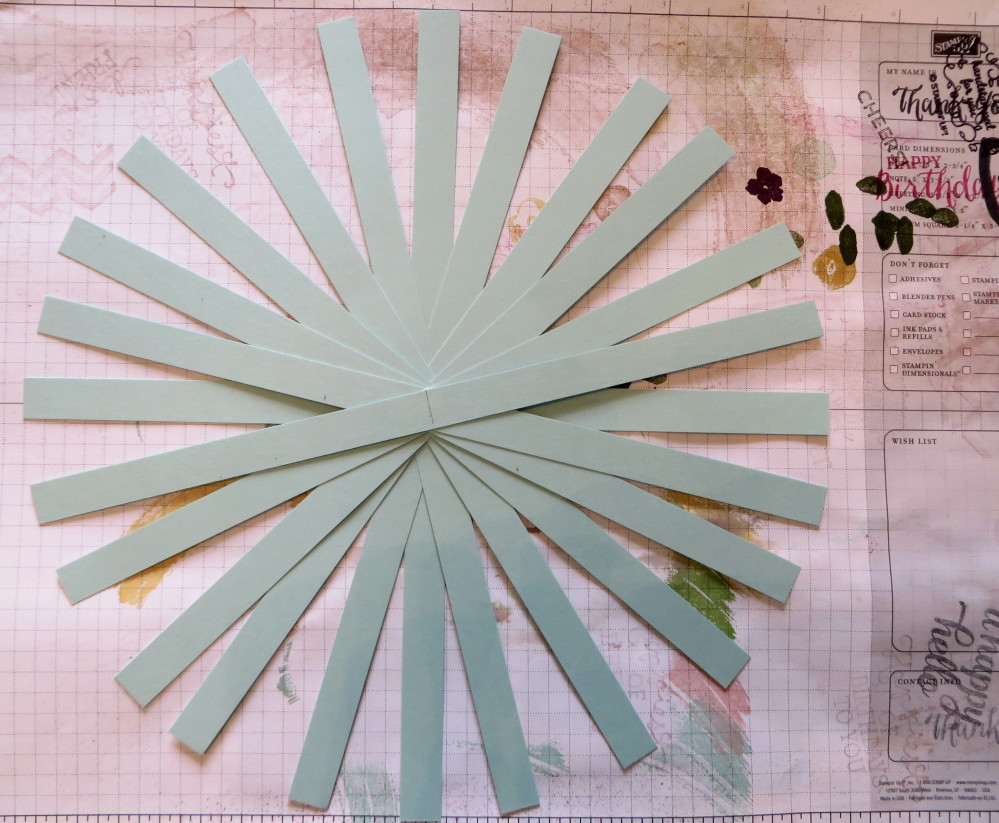
Cut strips 1/2″ x 10″.
Measure the center of each strip and put a pencil mark (just if you want something closer to perfection! Otherwise just eyeball it!)
Lay the strips in a starburst pattern, glueing each one on top of the other. I used the Multiipurpose Liquid Glue (sometimes know as the “green” glue for the color of the bottle!). Let dry. (See photo below)
With the center of the starburst in the palm of one hand, gently cup the strips together to form the tassel.
Take a piece of ribbon and lay it through the inside of the tassel so that you can tie it on to something later if you want.
Take another strip of cardstock (I used Gold Foil Sheets) and make the piece that ties around the bundle about one inch down from the top of the tassel. I used Fast Fuse to adhere the ends of the Gold Foil sheet.
That’s it! Tie the tassel on to a package, a gift box, a banner, whatever you like!
Try variations like using different shades of the same color card stock or designer paper.
To celebrate shipping one million Paper Pumpkin kits, Stampin’ Up! is putting a bonus stamp set in the April kit! The only way to get it is to be a subscriber and today is the last day to sign up to receive the April kit! They will ship by mid-April so sign up today (April 10) to be a current subscriber! No risk, no obligation! Pause your subscription for a month or two when you want to (just don’t do it for April or you will miss the bonus stamp set!).
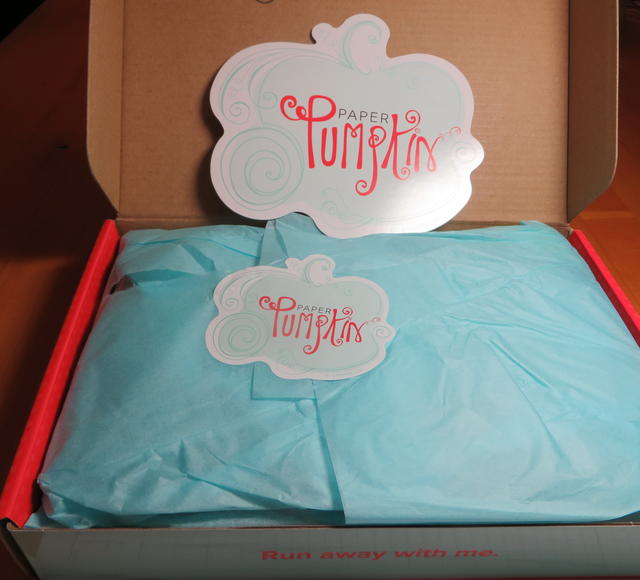
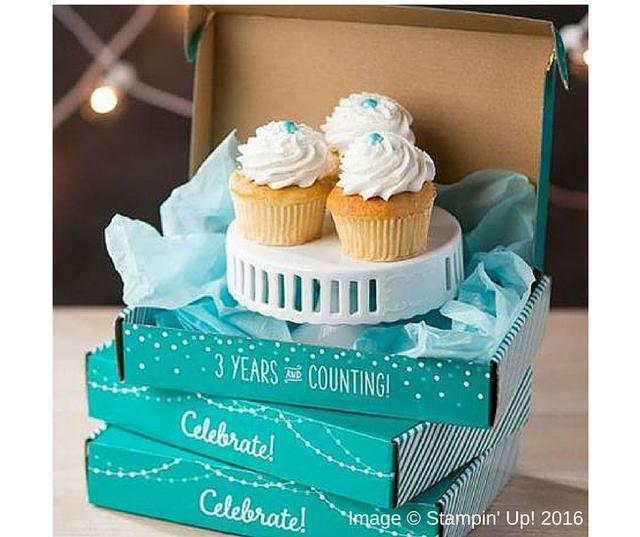
Today is the day! It’s March 10th so join Paper Pumpkin TODAY in order to receive this month’s Paper Pumpkin kit, the papercrafting kit that comes to you in the mail. Paper Pumpkin says since they can’t send everyone a piece of birthday cake for Paper Pumpkin’s 3rd Birthday, they are decorating the boxes instead! (Those cupcakes do look yummy though!!)
Paper Pumpkin is a surprise papercrafting kit that comes with stamps, an ink spot, and all the supplies to make the project. It might be cards, home decor, treat bags or boxes, a mini album…..always a surprise! It’s a treat to spend some time once a month to do some easy crafting with everything provided. No need to design something or gather supplies! Just open the box and ENJOY! Or gift someone with Paper Pumpkin!
And if your electricity goes off, you can pass the time by working on your Paper Pumpkin Kit! (See THISpost!!) You don’t have to think about what to make or stumble around in the dark to find the right color ink and paper, etc. Just sit by a window and make your kit!
You must join Paper Pumpkin by the 10th of any month to get that month’s kit. Click HERE to check out the Prepaid Kit options. So join today and get the March kit. Join after today and you receive the April kit. The cost is $19.95, but that includes shipping. And with your subscription, you can go back and purchase any kits or refills from past months that you may have missed if they are still available. No risk because you can cancel any time or just skip a month or two if you want.
If you are putting in a Stampin’ Up! order, you may want to consider the prepaid kitsthat count toward your order total and may earn you a free Sale-A-Bration item or help you reach Hostess benefits. You will be sent a link via email telling you how to activate your account. Or you can send that email on to someone if you are gifting the prepaid subscription.
If you prefer to just subscribe month by month, CLICK HERE for more information and to join. Treat yourself to a monthly Paper Pumpkin KIt and help celebrate Paper Pumpkin’s 3rd birthday!
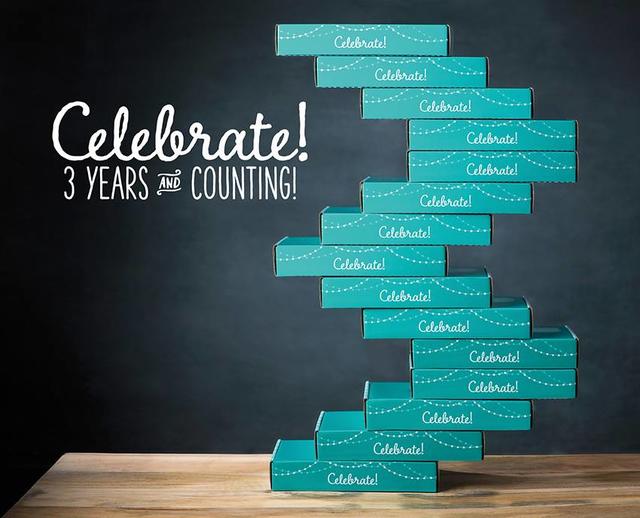
Stampin’ Up! is celebrating the 3rd birthday of Paper Pumpkin, the papercrafting kit that comes to you in the mail, with these pretty blue limited edition boxes for the March kit! If you are not already a Paper Pumpkin subscriber, you need to join before March 10th so that your March kit will be on it’s way when they go out mid-month! (Notice how they stacked the boxes in a “3” shape??!)
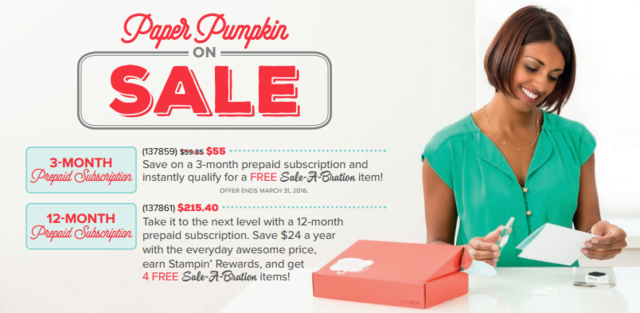
Order prepaid subscriptions on your regular Stampin’ Up! order. With a 3-month prepaid subscription, save $5 and earn a free Sale-A-Bration item!
Either way, just get signed up and activate your account by March 10th in order to receive the March kit. Do it after March 10th and receive the April kit.
Your first kit will include an acrylic block to use with the stamps included in each kit. Each kit includes everything you need for your project, including an ink spot. Depending on the project, you might need adhesive and scissors, but often the appropriate adhesive is included. Kits are not always cards, each month is a surprise!
Email me if you have any questions at Karen@KarenStamps.com! Or click on the links above for more information. You can pause or cancel your subscription any time.
Don’t look if you haven’t received or opened your Stampin’ Up! Paper Pumpkin Kit yet!
Mine is still unopened in the box, but it was a busy week and I think this weekend might be a good time for some Paper Pumpkin time! Don’t delay too long with your kit as there is a time factor involved! And I have to remind myself of this, too — you can use the stamp set that comes in the kit for other stamping projects! I often use it for the kit project and then put it away! I missed out on using the greetings in one kit on other cards for a holiday because I just didn’t think about it! Some people store their photopolymer Paper Pumpkin stamps in the Project Life by Stampin’ Up! Photo Pocket Pages and then in an album for easy access. I think I need to get organized and do that!
OK, so if you are still reading then you probably want to see what the Stampin’ Up! January 2016 Paper Pumpkin Kit is all about! Here is the Stampin’ Up! video that shows how to put the kit together. Keep in mind, with each kit you can follow the directions….or not! Sometimes you can make part of the kit as they describe and then make alternate projects with the remainder of the pieces. It just depends. Each month’s kit is different! And I love that Stampin’ Up! provides a video to watch, if you want, for each kit. So besides reading the directions, you can also watch how to make the kit.
If you would like to receive a Paper Pumpkin Kit in your mailbox once a month (or whenever you choose), the best deal right now during Stampin’ Up!’s Sale-A-Bration promotion is to order the 3-Month Prepaid Subscriptionand save $5. This will qualify you for a free Sale-A-Bration item from the Sale-A-Bration Brochure! I recommend adding some other products to your order because you will be paying the normal $6.95 minimum Stampin’ Up! shipping for your free SAB item. Might as well get some adhesive and Paper Snips or ribbon or cardstock along with it to make the shipping worthwhile! That’s my opinion anyway!
When you order before the 10th of any month, you will receive that month’s kit! So order before February 10th and get the February kit. Order later in February and you will receive the March kit. Whatever you prefer. Once you have subscribed, if you want to pause (or, heaven forbid, cancel!) your subscription, just do it before the 10th of the month because Paper Pumpkin starts shipping out around the middle of the month.
You can order extras for gifts! On the prepaid kits, you will receive an email from Stampin’ Up! telling you have to set up and activate your account with a special code.
Either way, I think you will really enjoy the thrill of getting that Paper Pumpkin box in your mail every month! And who doesn’t need some “happy mail” once a month!
Click for more information!
Don’t forget the Stampin’ Up! Weekly Deals for this week and always check the Clearance Rack! And for every $50 you spend with Stampin’ Up! through March 31, 2016 you will get to choose a FREE Sale-A-Bration product! (Some products are only available until February 15th and then a few new products will be introduced!)
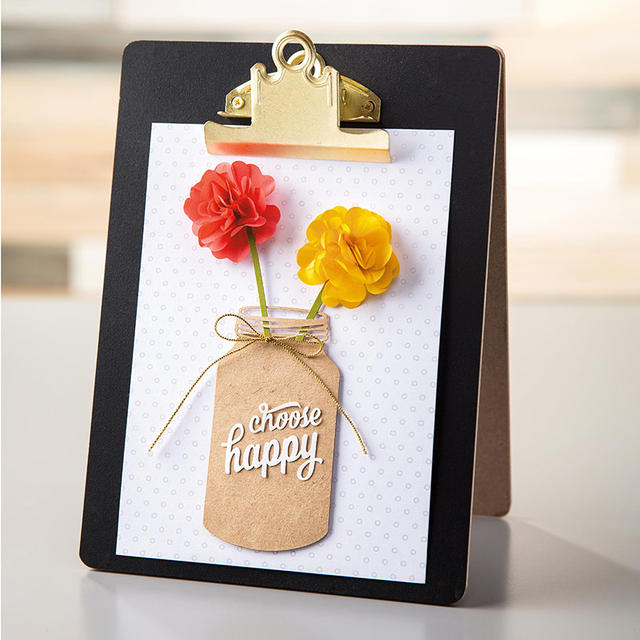
I guess there are so many wonderful new things in theOccasions Catalog, that I completely missed this Enjoy the Little Things Project Kit on page 33. It was only when I read online somewhere about the “easel kit” in the catalog that I went back and looked and found out what this project kit is all about! And it looks like a cute one!
You get a ton of materials to make 13 display pieces for this nice easel. If you watch the video, you will see (and hear!) that it is very sturdy, almost like a chalkboard, with a gold clip on top, of course. You can change the display piece out as you desire, some are certainly seasonal, but others are not. It all comes in a nice box in which to store the extra pieces while they await their turn on the easel! And if you wanted to make an extra one of these (or more!) for a gift, you have the gift box right there for a nice presentation.
You will want to purchase the stamp set that goes with it, Enjoy the Little Things, which you can use in plenty of other projects and cards, it won’t just be for this project kit. In the catalog you will see what other inks and adhesives you will need to make this project.
Watch Brandi in the Stampin’ Up! video below tell you all about the kit and give tips on assembling each display page. It’s fun to watch someone make something, I think, even if you aren’t doing it yourself at the moment!
If you are new to Stampin’ Up! or don’t have a Demonstrator that you are working with, I would be happy to send you copies of the catalogs. You can view them online, but, in my opinion, there is nothing like a Stampin’ Up! Catalog in your own hands! Just email me at Karen@KarenStamps.com.
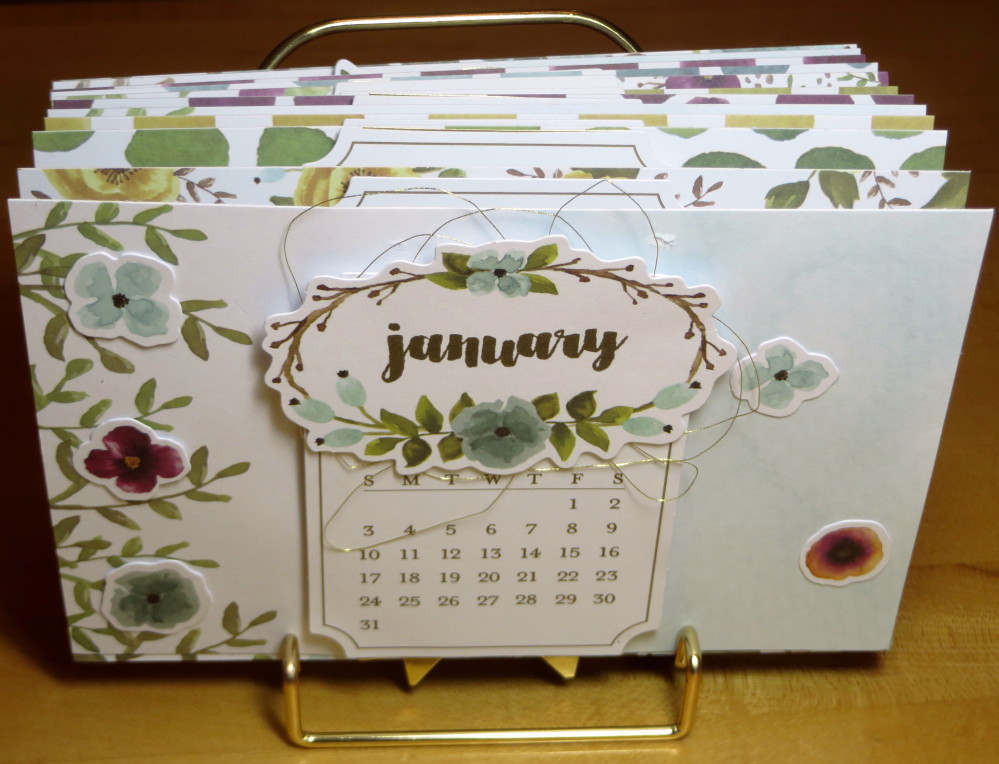
I received my December 2015 Paper Pumpkin Kit in the mail before Christmas and finally got around to making it! I knew it was a calendar so I knew I better get it made! As cute as it is as a calendar, I don’t really need a calendar like this, so I looked for alternate ideas, which you can do with any of the Paper Pumpkin kits. I actually found a great idea on the Stampin’ Up! Blog HERE, to make the pages into a photo album rather than a calendar. I can choose a photo for every month as the year goes along. For this project, I turned the calendar pages sideways rather than vertical as designed in the kit. And actually I can still have it sitting out as a decorative calendar for 2016 and make it into an album at the end of the year!
It was fun putting this calendar together and doing some stamping! Stampin’ Up! always provides a video showing how to assemble the project and all materials you need (except maybe glue and scissors) plus the instructions. With your first kit, you receive a clear block for mounting the photopolymer stamps that come in the kit. So each Paper Pumpkin kit has a set of stamps, an ink spot, and all the supplies to make the papercrafting project!
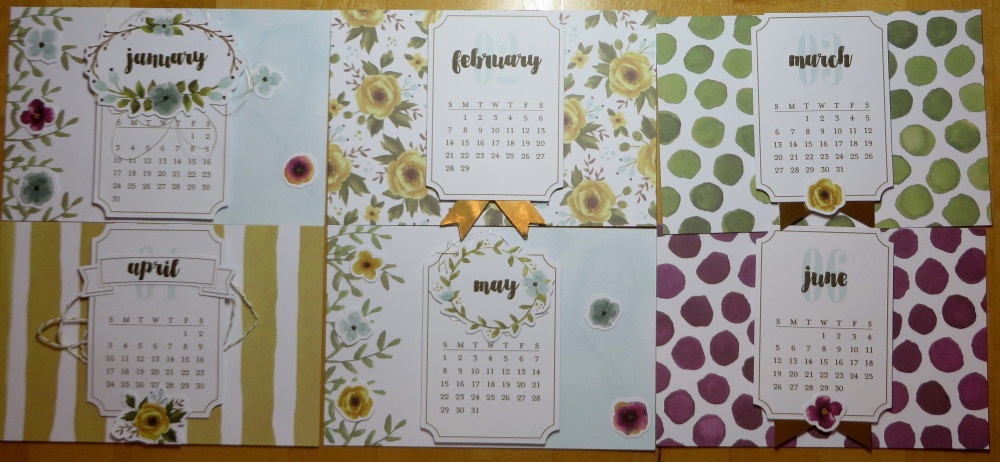
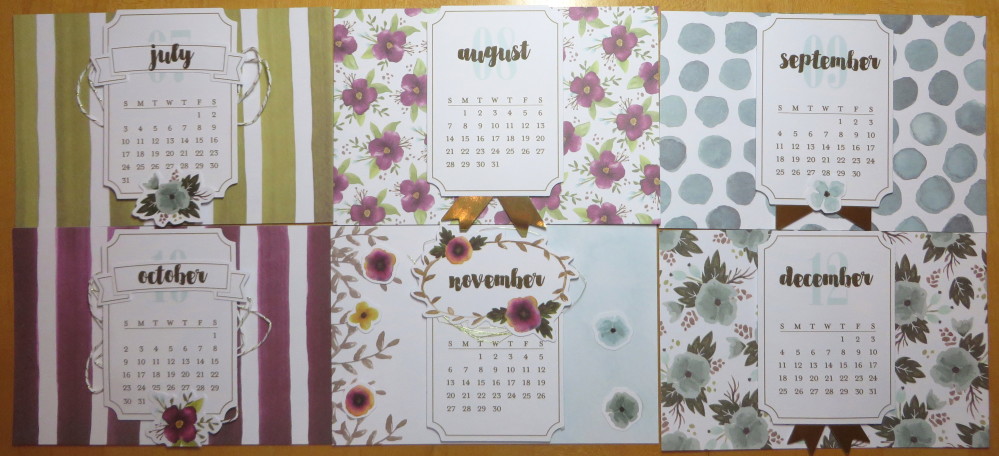
Here are the months for the calendar.
The Paper Pumpkin Kits are getting so popular that the refills for this kit sold out very quickly. To avoid seeing something you like but being unable to purchase it, you should become a Paper Pumpkin subscriber yourself! You can subscribe by the month, or you can add a subscription to your Stampin’ Up! order.
Stampin’ Up! will be offering a special on a 3-Month Prepaid Paper Pumpkin Subscription starting January 5th, when Sale-A-Bration starts! Instead of paying $59.85 for a 3-month subscription, you will only pay $55. And when you spend over $50, you instantly qualify for a FREE Sale-A-Bration item, just by purchasing the prepaid Paper Pumpkin Subscription for 3 months!
Do something special for yourself and get a Paper Pumpkin Kit! You will look forward to that red box showing up in your mailbox each month! Put a prepaid subscription on your Stampin’ Up! order between January 5-10 so that you receive the January kit!
I love getting mail and I especially love getting my Paper Pumpkin Kit by Stampin’ Up!in the mail every month, so if you need a quick Christmas gift for someone, just give them a subscription to Paper Pumpkin! It’s a papercrafting kit that comes in the mail! Every month is a new surprise and comes with all the materials you need except perhaps adhesive and scissors. You receive a set of stamps, an ink spot and all the materials for the project. Sometimes there are even leftovers you can use another time. Follow the directions or do your own thing! Paper Pumpkin is good for anyone and I would even hazard a guess that someone who never crafts would even enjoy it. It might surprise you! And maybe YOU deserve a subscription for a little crafting time every month after all the time you have put in making everyone else’s Christmas a happy one!
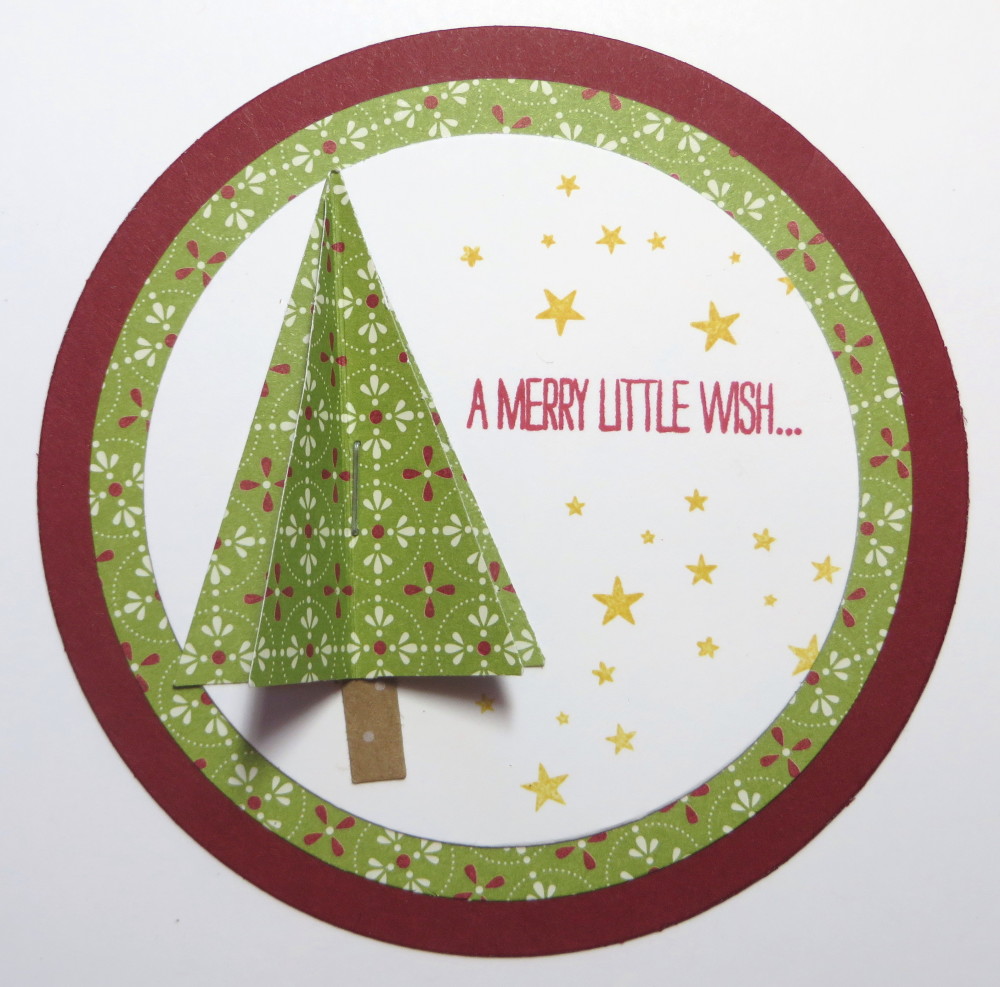
Here is my Tree Punch Christmas Tree Tag, a sample tag I had made for our tag-making day last weekend. The designer paper I used is retired, from last year I think, a paper stack called Festival of Prints. This was a sample to see if I liked the tree so it didn’t matter what I used. Of course you can use any paper or stamped card stock. I also had cut out circles of Gold Glimmer Paper to use as layers instead of the designer paper and that looked really pretty too – just didn’t take any photos. The tag base is Cherry Cobbler (because I was out of Real Red, if you can believe it!) The stars are stamped in Crushed Curry ink from the To You and Yours Too Stamp Set.This is the stamp set that coordinates with the To You & Yours Shaker Card Kit.
To make the tree, just punch two trees with the Tree Punch and either cut off the tree trunks and add one you cut yourself from a sliver of a scrap or leave the bottom one on. Fold the trees in half lengthwise, open, then using the Stampin’ Up! cute Handheld Stapler, staple in the center longways on the fold. This will hold the trees together but allow them to be separated and fluffed up to look 3D. I guess no reason you couldn’t staple three trees together for more oomph! Punch a hole in the top and string ribbon through for a tag or use it for an ornament!
It’s time to remind you about Paper Pumpkin! The 10th of the month is always the date to be signed up by to receive that month’s kit. Sign up today or tomorrow and get the December kit in the mail around mid-month. Order extras and give as a gift or give it to yourself as a gift for all you are doing for everyone else right now in this busy season! Paper Pumpkin is a monthly subscription from Stampin’ Up! with a surprise inside that comes in the mail. Each month is a new papercrafting/stamping kit complete with all the supplies for the project except for basic adhesive and scissors (if even needed). You receive a set of photopolymer stamps, a small ink spot, and all the supplies for the project. It might be cards or gift boxes or a mini album or a decor piece or party favor or candy holder — it’s always a surprise! Paper Pumpkin has gotten tons better since it started so if you tried it way back when, you really need to try again and see how it has improved. Lots more stuff!! Make the project the way it is designed or do it your own way. No obligation, stop when you need to or just pause your subscription for a month or two.
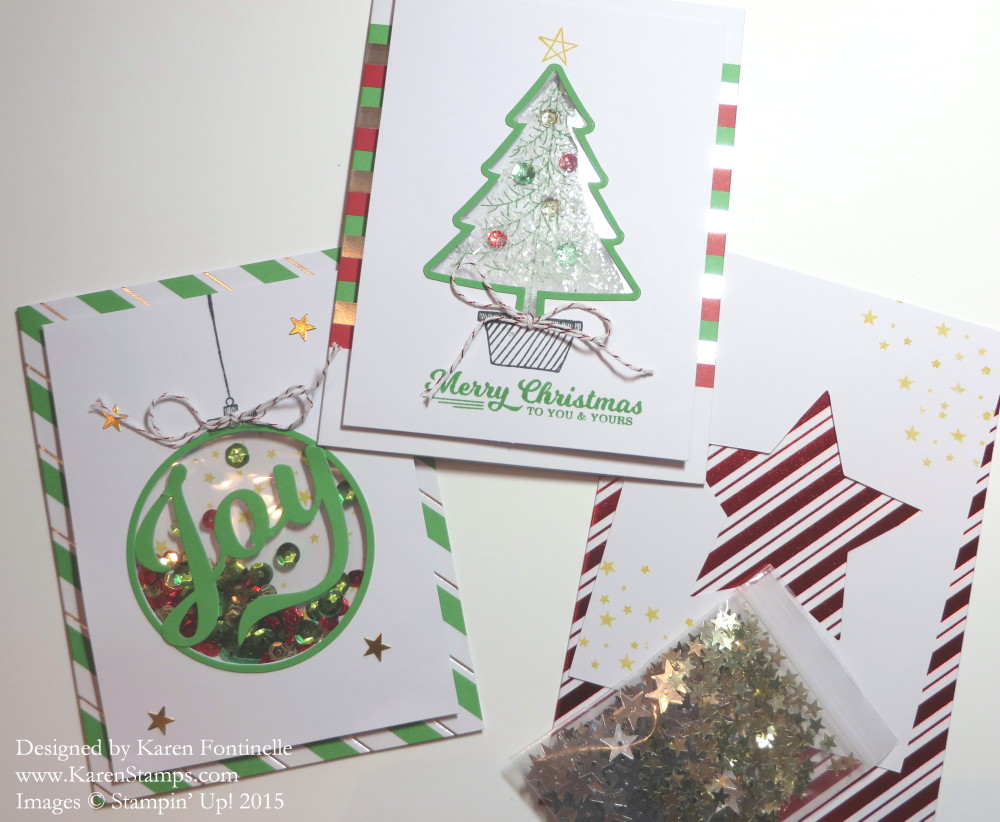
I had such a nice time putting together this To You & Yours Shaker Christmas Cards Kit to make these fun shaker cards. Shaker cards have some kind of “container” that holds glitter or sequins or beads so that when you shake the card, the fillers move around. I think the recipients of these kind of cards will really enjoy them. You don’t want to overfill any shaker cards because then they won’t “shake” and you won’t see the background image, but you want just enough that the person can see the filling and enjoy shaking the card!
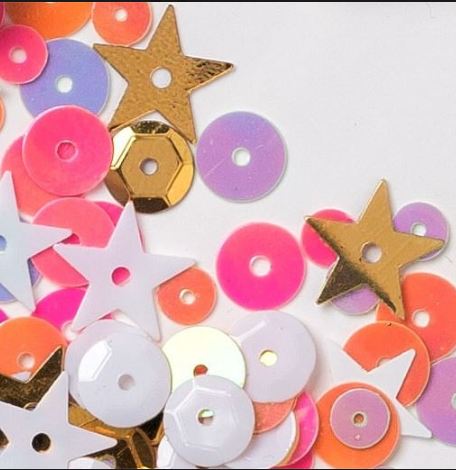
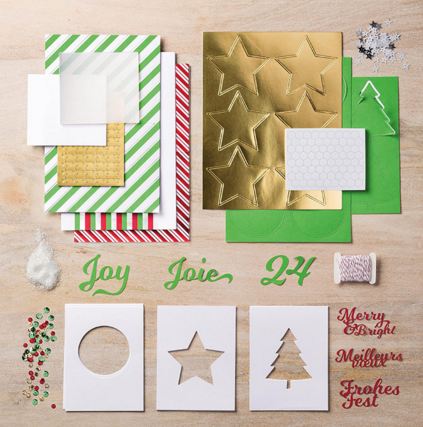
Here are the pretty supplies that come in the To You & Yours Shaker Card Project Kit, including some words in other languages since this is a “global” product. The kit makes 18 cards, 6 each of 3 designs. After you make all the cards, I still had plenty of glitter, sequins and stars leftover, plus some of the “negatives” left behind after pulling off the outline adhesive images that went around each window that I can use on other projects,
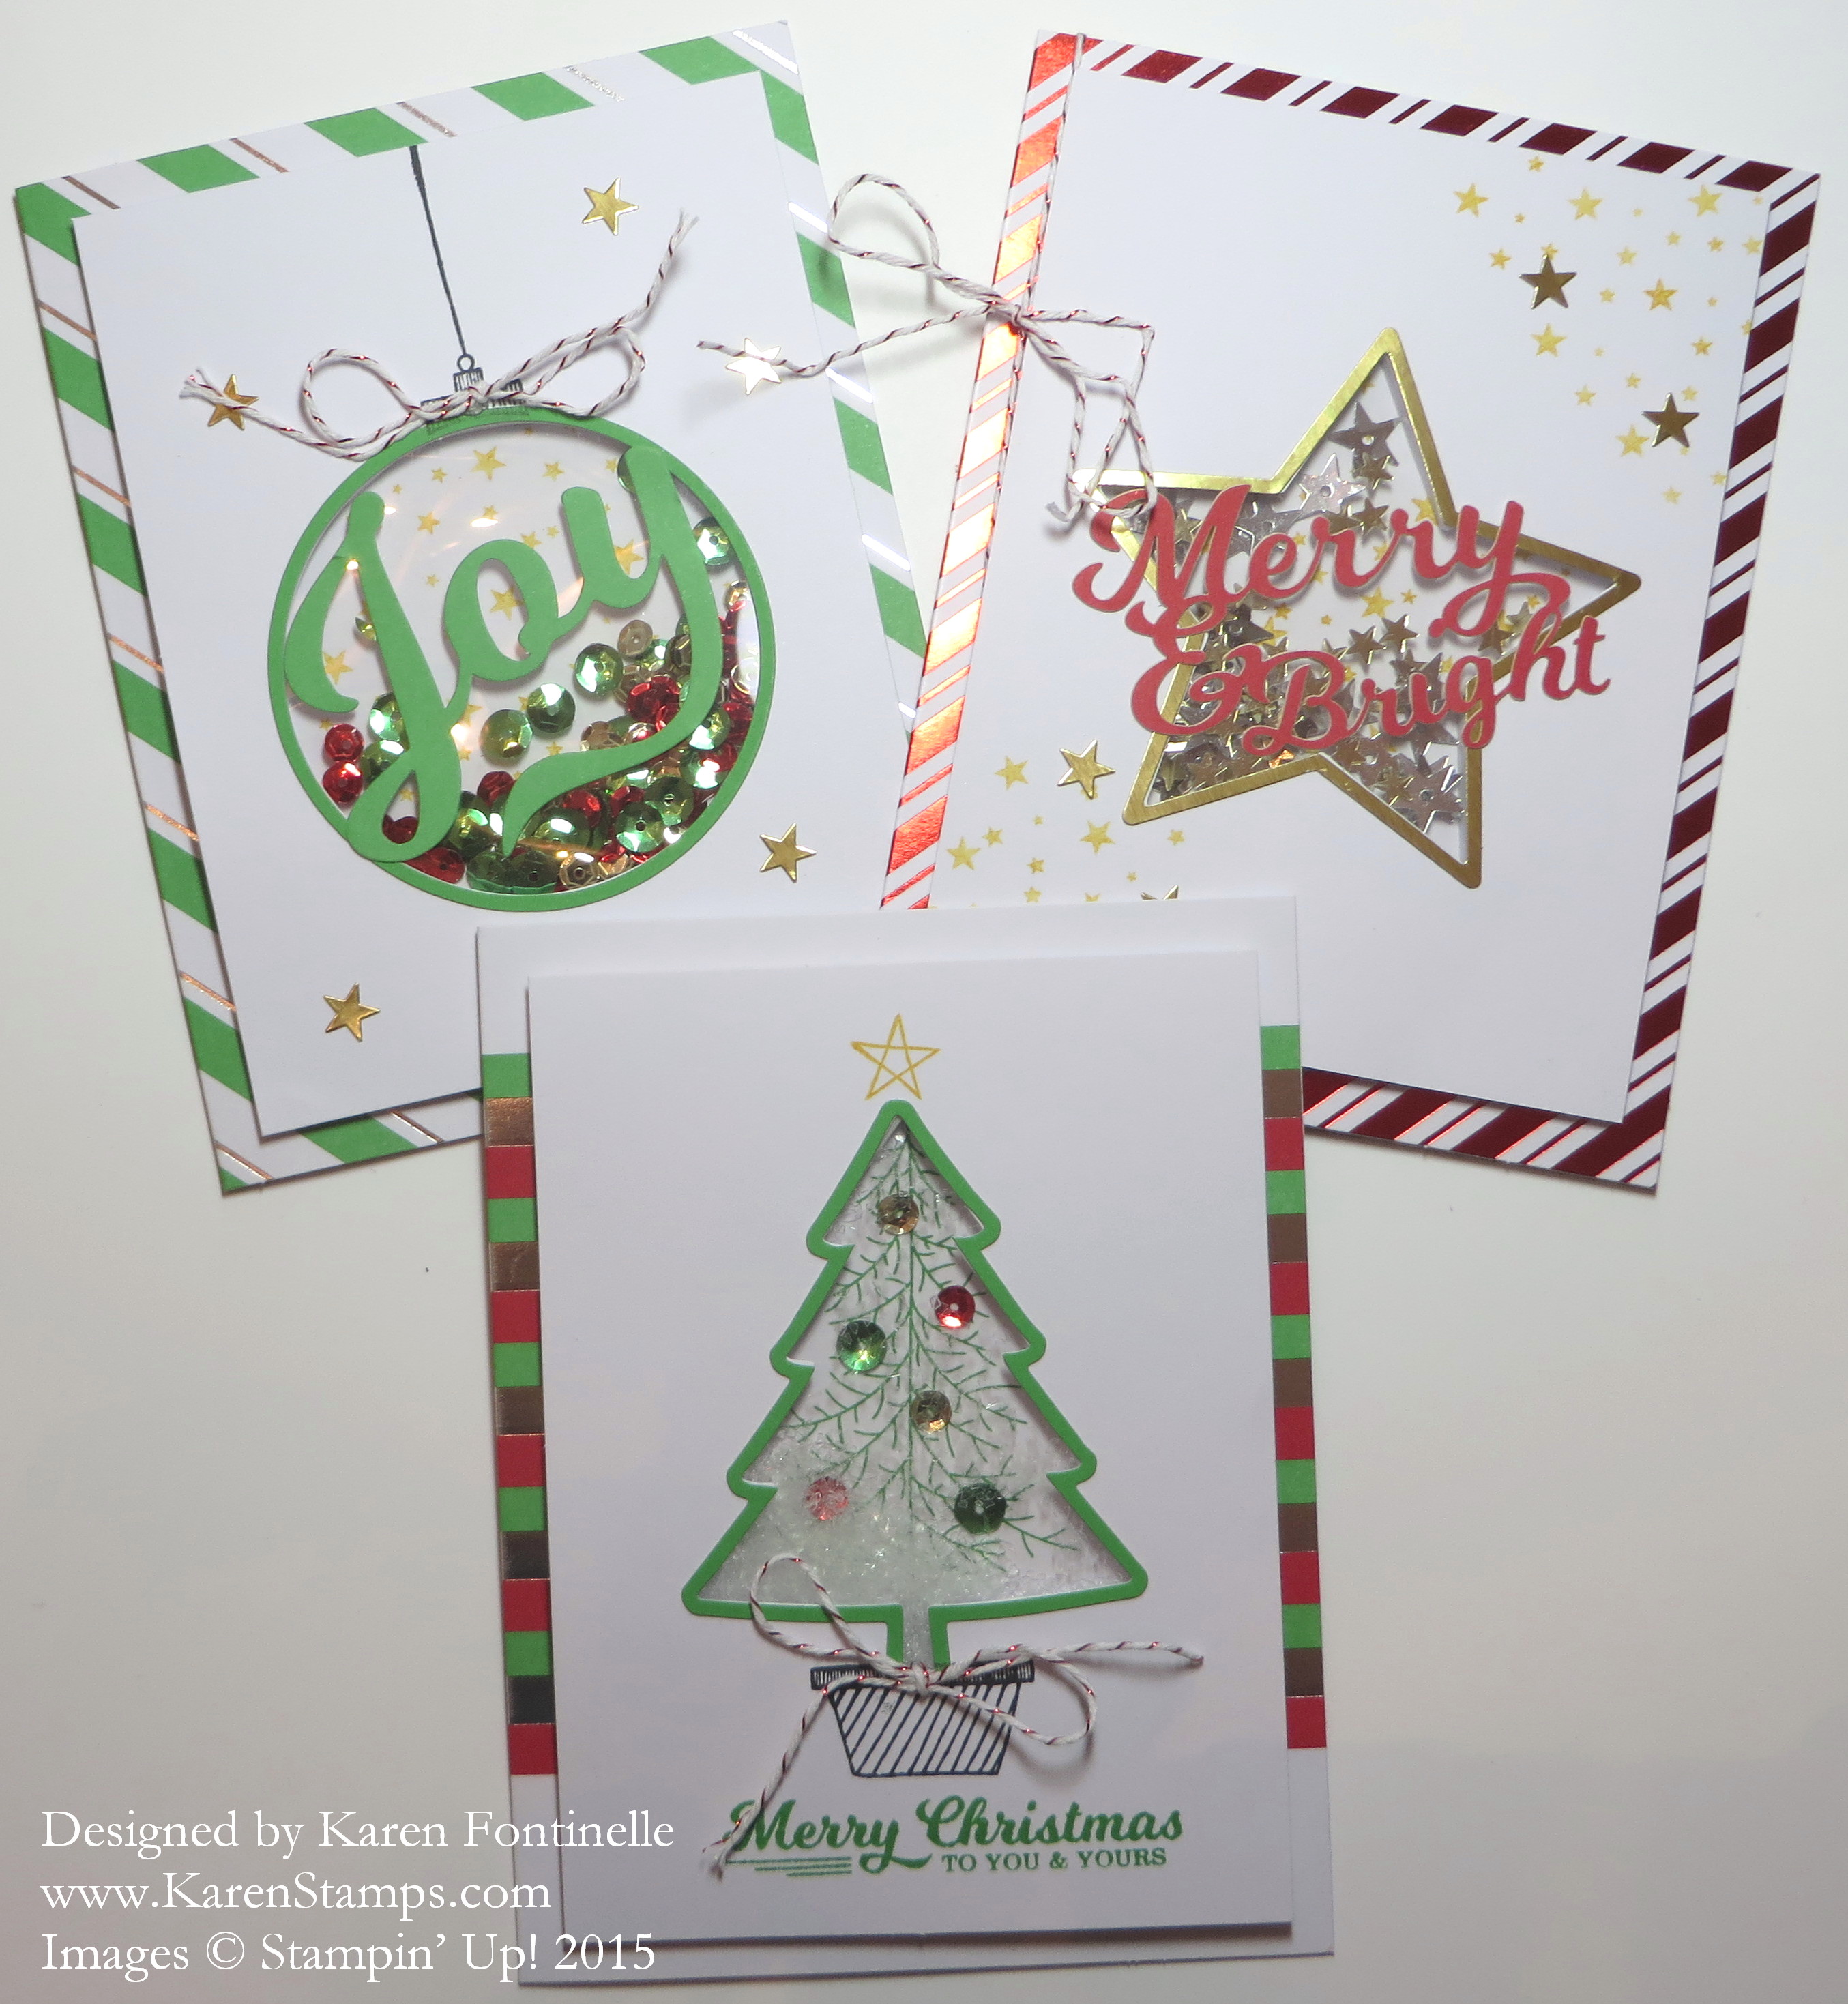
Here are close-ups of the individual cards, a little difficult to photograph with the window sheet and foil on the card base.
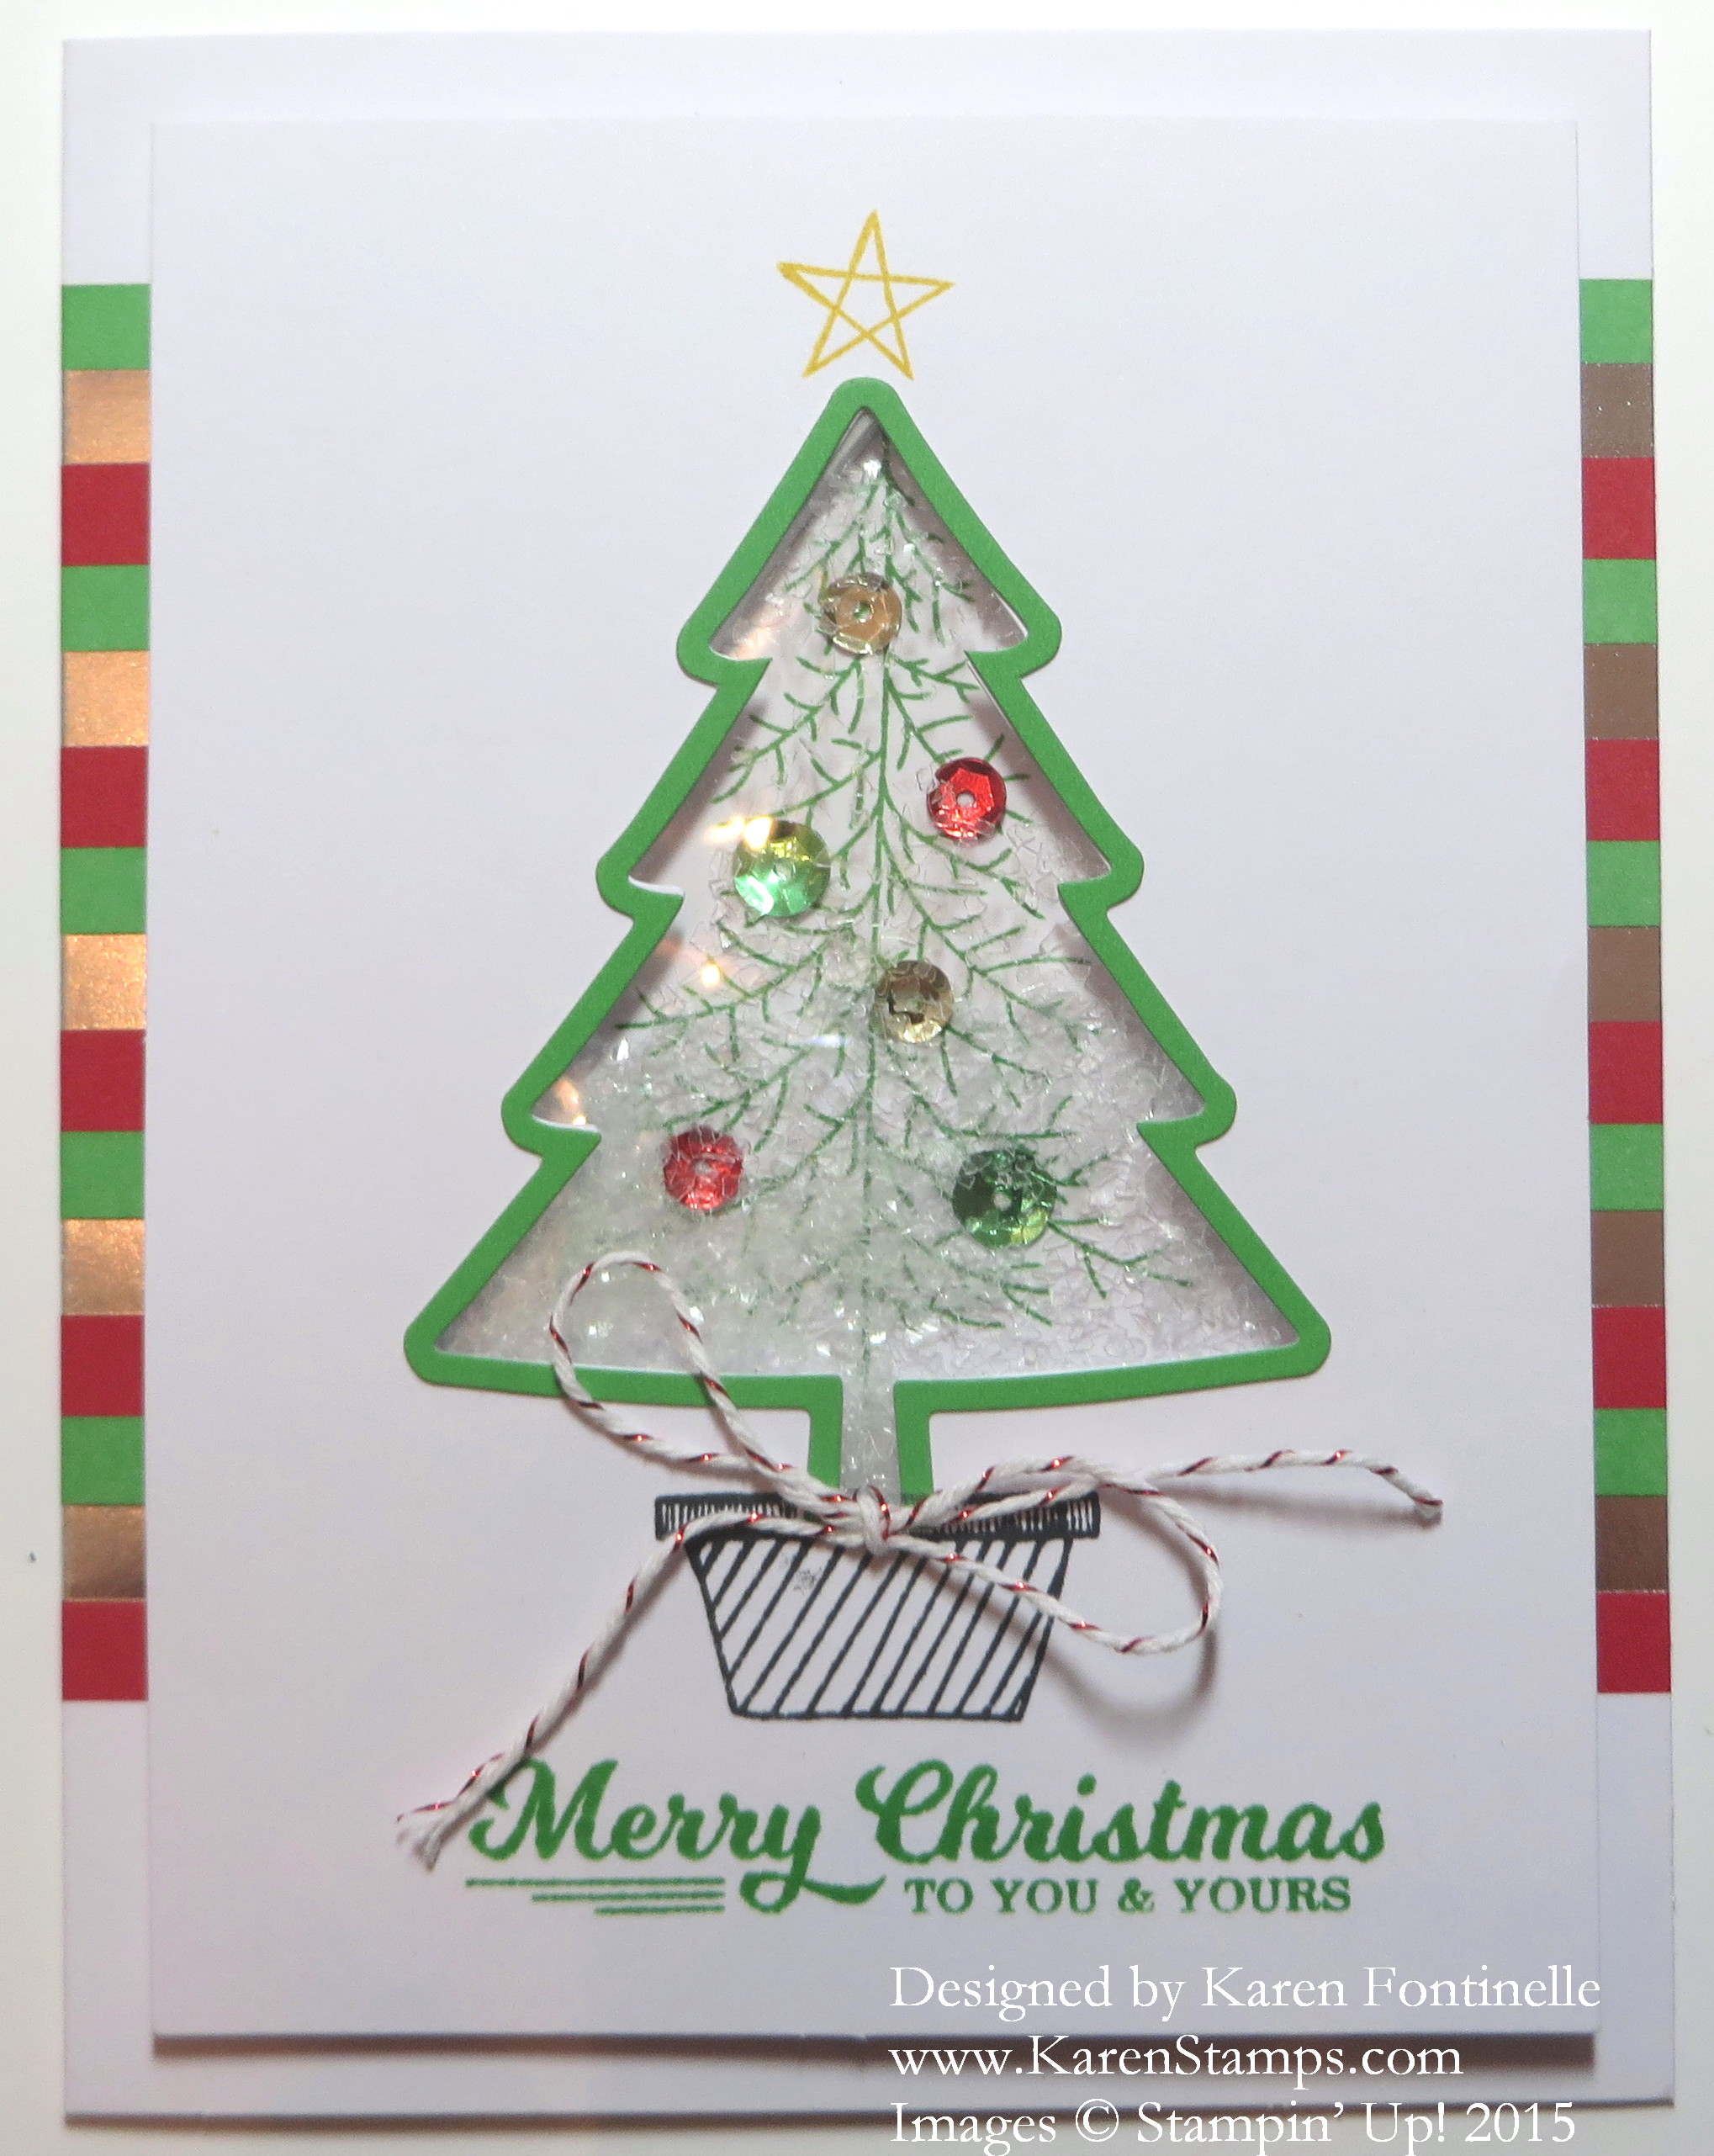
On this Christmas tree card, the tree branches are stamped on the background piece and then the colored sequins are glued on. You can see the white glitter inside the shaker.
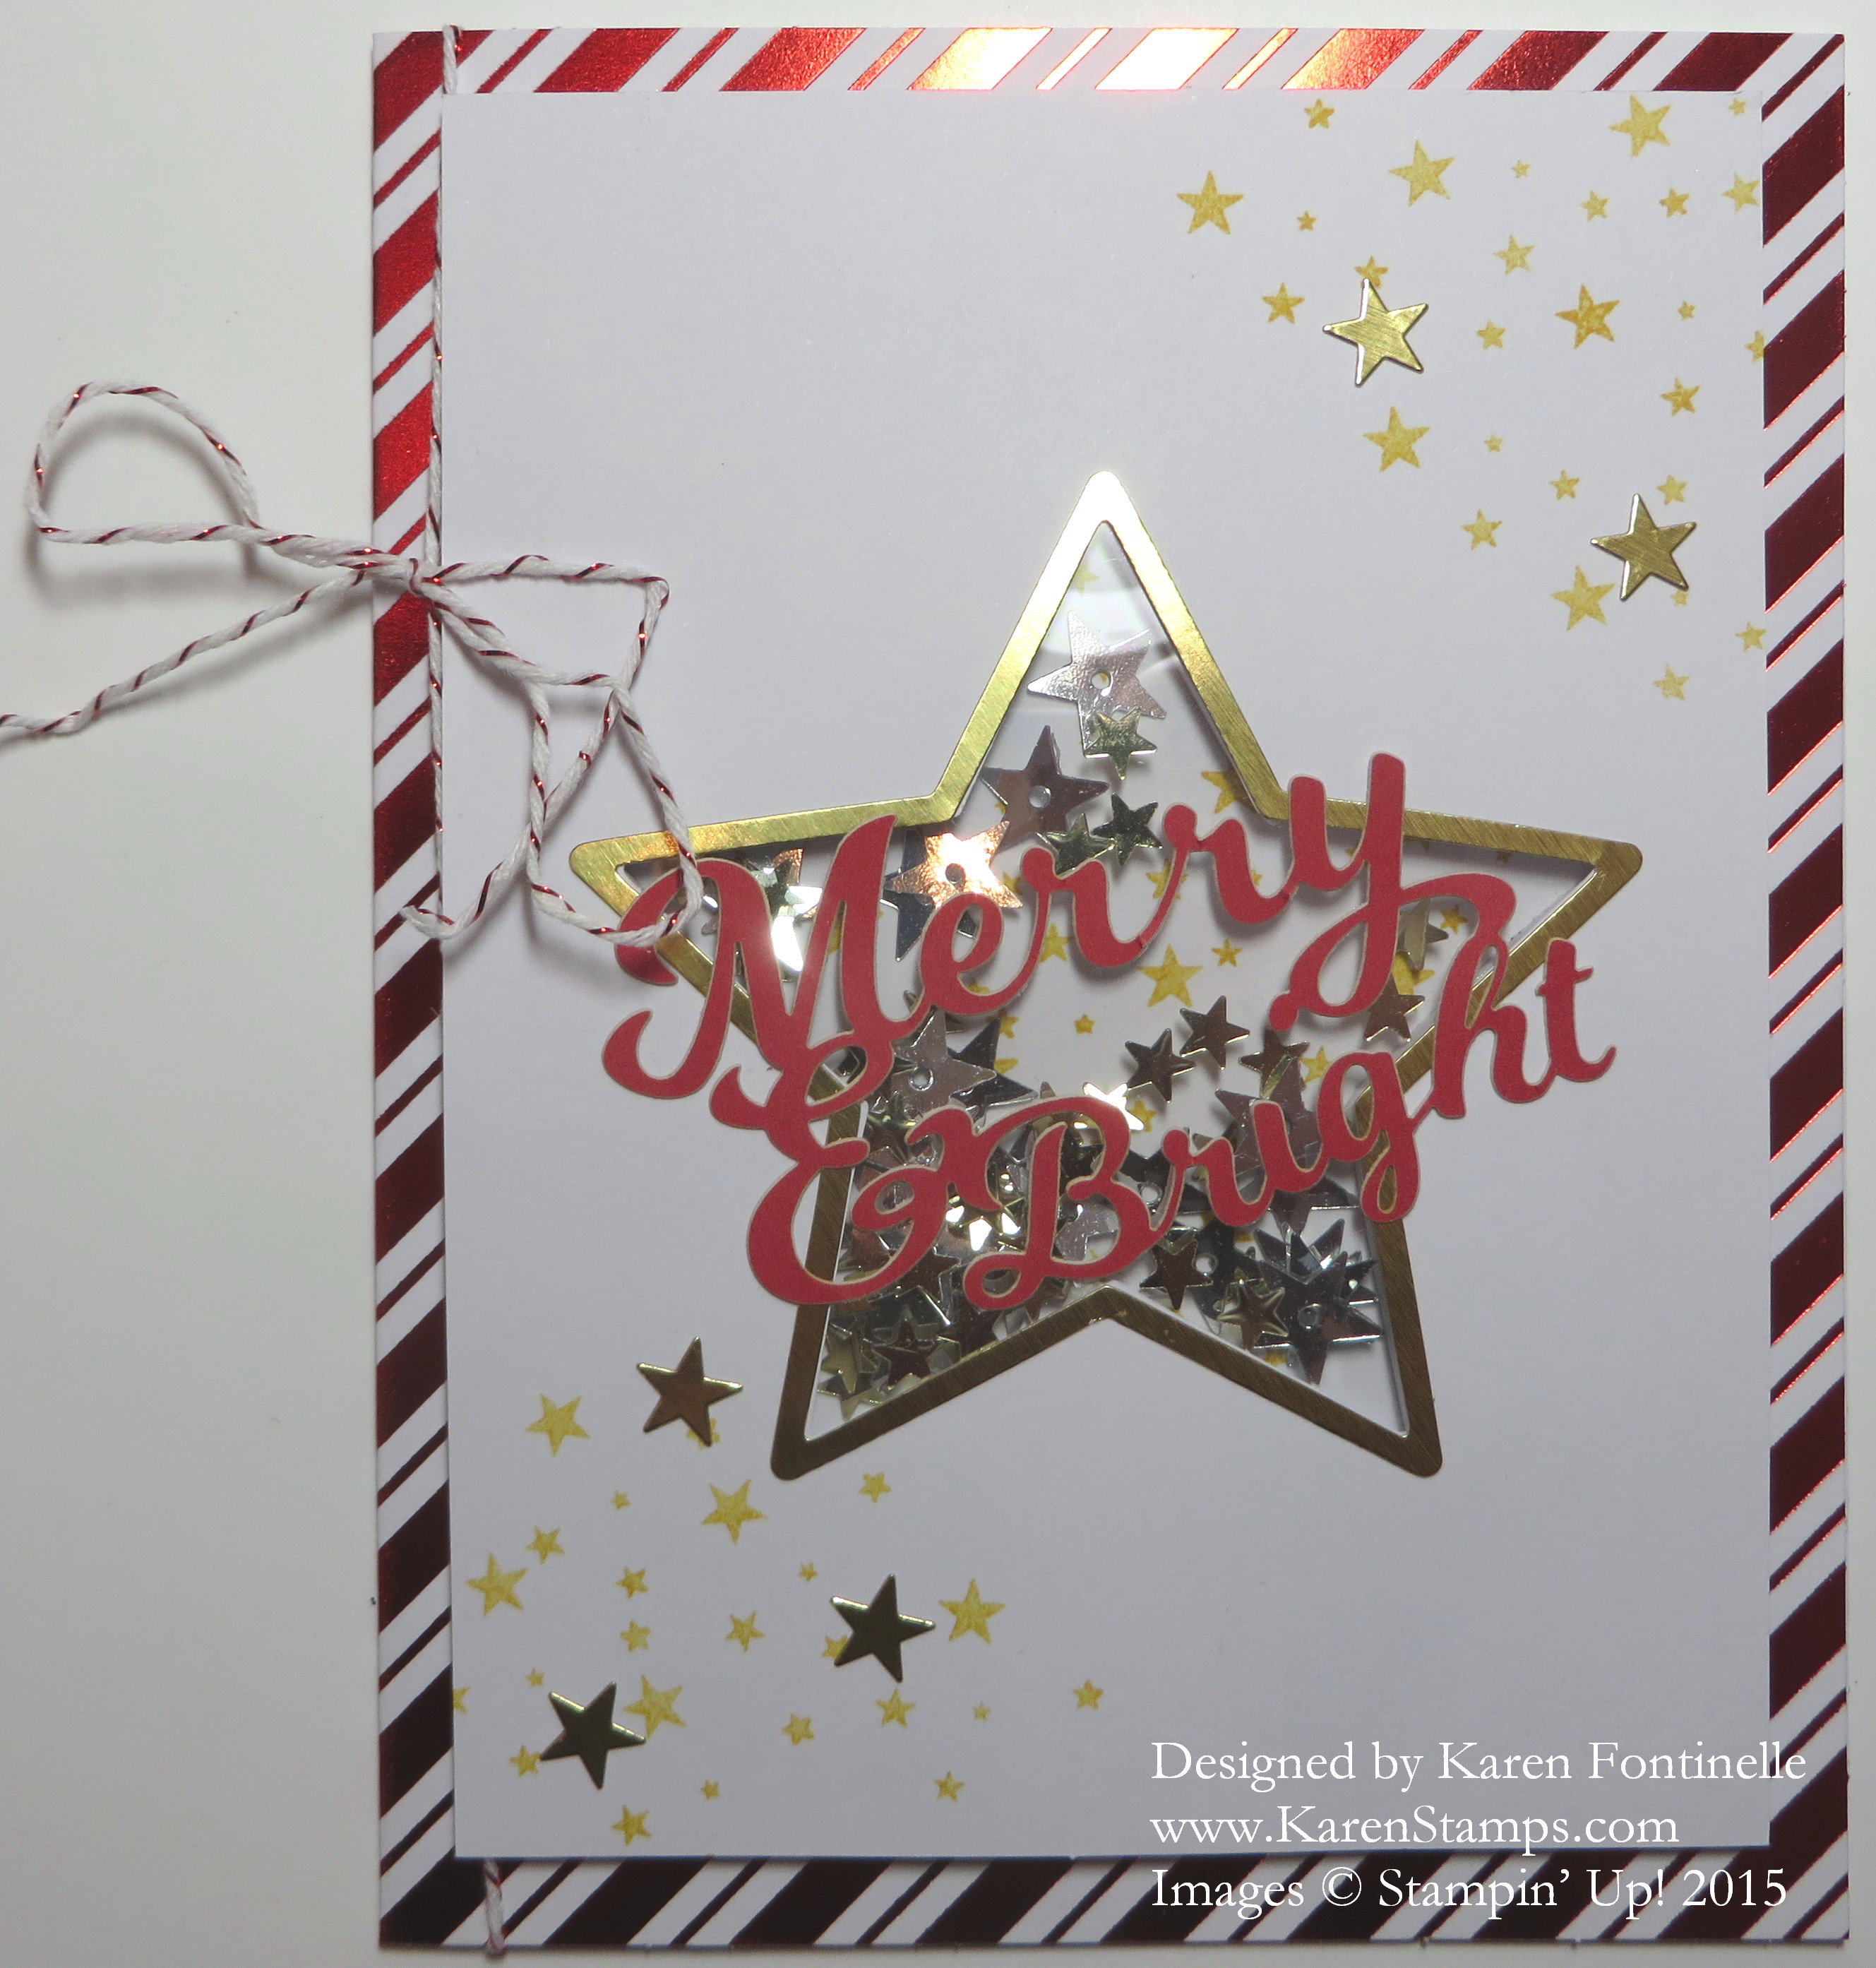
This Christmas star card has some stars stamped on the background in the window and also on the corners of the card. Then you get star sequins that go inside plus some tiny adhesive stars to stick on the front of the card.
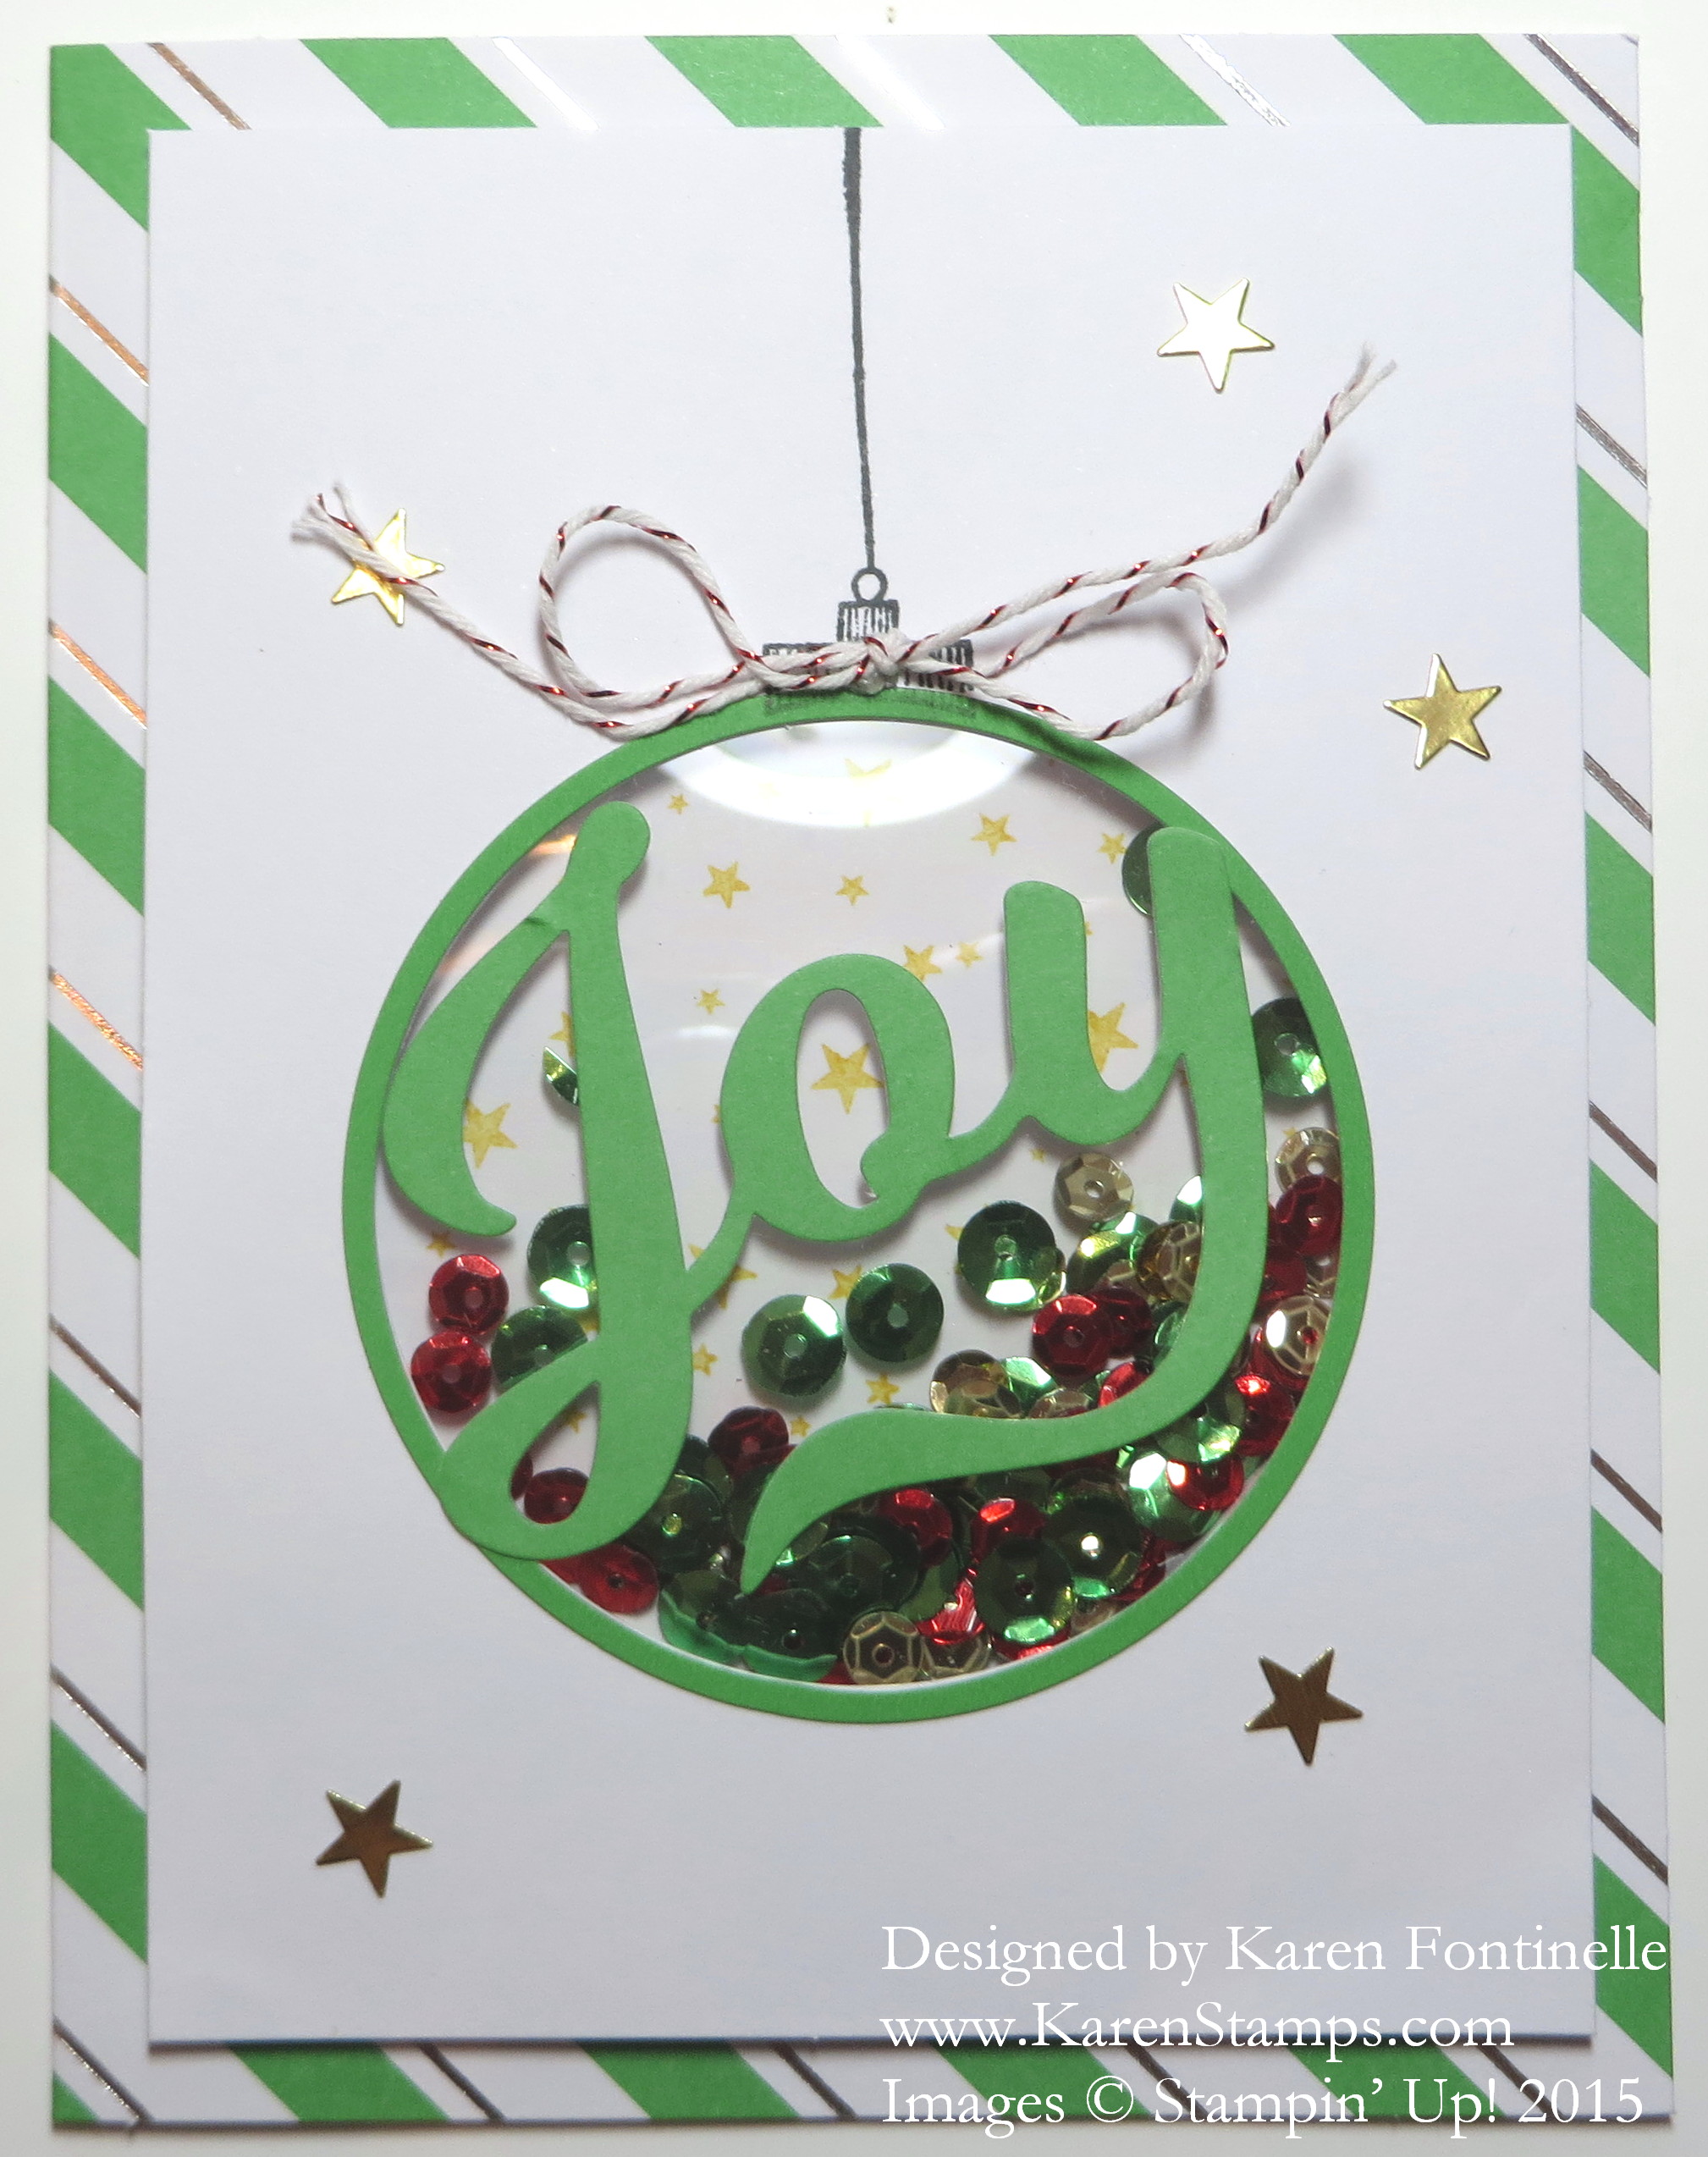
The Christmas Ornament card has colored sequins inside with stars stamped on the background behind the window.
Whether you use this kit or make them yourself, try making a shaker card for fun! If you are interested in this To You & Yours Shaker Card Kit to make these Christmas cards, you can find it in my Stampin’ Up! Online Store HERE.
The card kit in the Stampin’ Up! Holiday Catalog, To You & Yours Shaker Card Kit, was one of the first things I ordered, but as quite often happens, only got around to making the cards yesterday! The kit comes with lots of fun stuff! The card bases each have some shiny foil stripes on them and of course each shaker element has stars or sequins or glitter to put inside. The kit comes with die cut card fronts, window sheets to cover the opening and then narrow foam strips to apply behind that opening to form the pocket to hold the glitter, sequins, etc. Then there are sticker stars and two word elements to place over the window and pretty baker’s twine with which to tie a bow on each card. There is also some stamping to do on the card fronts and on the background sheet behind the shaker area. The suggested stamp set to use is the To You & Yours Too Stamp Set. If you didn’t want to purchase this stamp set, you might find something you can use in your stash.
I didn’t get around to making the star card yet but I will do that today! It’s a nice way to spend an afternoon, working on Christmas cards! Put on some Christmas music on your phone to have playing to get you in the mood!
There is still time to order this kit and make these To You & Yours cards and even get them mailed out before Christmas. I do not see them as being backordered so get yours while you can! The kit comes with envelopes also and all the pieces you need except for the stamps, ink, and basic adhesive (I used the Multipurpose Liquid Glue to adhere the window sheet to the back of the card front and also for the few sequins adhered to the Christmas tree). I also used Glue Dots to adhere the bows but you could use a dot of the glue. Dimensionals are included in the kit.
Here is the Stampin’ Up! video with tips for making the cards. I really suggest watching it.
Impress your friends and make your cardmaking easy! Make your own fun To You & Yours Shaker Card Kit cards by shopping at my Stampin’ Up! Online Store HERE.