Category Archives: Halloween

Halloween Stamped Candle

After getting out my Halloween decorations yesterday and some candles, I remembered this old technique from several years ago of how to stamp on candles!  Actually you stamp on tissue paper and then heat and melt it into the candle.  Pretty easy, really.  Here I have taken you through the steps.

Stamp on tissue paper that will fit on the candle….best to cut your tissue paper as close to the stamped image as possible. (I forgot that part!)

Candlestart 

"Stick" the tissue paper onto your candle….I used a bit of glue stick to hold it for these photos.

Candle2 

Wrap a piece of wax paper around the stamped tissue paper, best to have extra in the back to grab and hold to keep your hand away from the heat gun.

Candle3waxp 

Heat with your Stampin' Up! Heat Tool (a very good quality product…others will konk out sooner) until the wax melts a bit…..you'll be able to see it.

Candle4 

Candle5 

I did the sentiment on the back with a separate piece.

CandleBack 

What a fun project and great gift!  Just think what you could do for the holidays!!

Stamp sets used:  Pumpkin Patch (in the Holiday Mini) and Holiday Best, Level 1 Hostess set

Medallion Halloween Card

Here are the Stampin' Up! Deals of the Week, good until Monday, Oct. 26 at 9:50 am MT!  In looking at this list, I think you would enjoy any and all of these embellishments to use on your cards, scrapbook pages, or any projects. 

 Week 3 Deals of the Week

Item

Description

Special Price

114348

Basic Jumbo grommets

$4.49

109857

Mini Library clips

$8.99

112571

Circle Designer brads

$3.99

 112581

 1/2" Library clips

 $3.99


 I decided to make a card showing the Basic Jumbo grommets.  Since I had played around with the "Medallion" stamp this weekend, I was in the mood to use it on this card somehow.  The other stamp set is "Eat, Drink & Be Scary".  The little strip of designer series paper is called "Cast-A-Spell" in the Stampin' Up! Idea Book & Catalog.

HalloweenGrommetCard 

Here's a close-up of the grommet….very easy to use…..just poke it through the paper and fold down the tabs on the other side.  Stick a bow in the center just using some mini glue dots.

Grommet

When you have an order ready to place, be sure to check the Deals of the Week  during the month of October!


Halloween Decor Element….Toil and Trouble

ToilandTroubleDixie 

Isn't this the CUTEST Halloween frame???!!!!!  If you were thinking Stampin' Up!'s Decor Elements were for walls only, think again!  My demo friend Dixie and her friend Gerrie got together to make these the other day for a play day! Don't we all need to just stop and play once in awhile?  They used the Old Olive "Toil and Trouble" Decor Element in the Definitely Decorative catalog on page 7 in this frame and decorated with "Cast-A-Spell" Designer Series Paper around the edges, a little sponging with black ink, some other little stick on "jewels" and some "real" plastic spiders!  It is SO CUTE, I wish you could see it in person!  (sorry for the glare from my flash)

You can order these Stampin' Up! items and any other Halloween or fall products tonight in your pajamas at my online store and have them in time for Halloween!

And if you are interested in "My Digital Studio" there are some new Halloween downloads available today!

Item # Product Name Price
118114    Cast A Spell Designer Series paper – digital download  $4.95
118115    Night & Day Designer Series paper – digital download  $4.95
118124    Medallion stamp brush set – digital download   $1.95
118126    Circle Circus stamp brush set – digital download   $5.95
118116    School Days II stamp brush set – digital download  $9.95
118121    Great Moments II stamp brush set – digital download  $9.95
118122    Pumpkin Patch stamp brush set – digital download  $5.95

Little Boo Ghost Halloween Card

BooGhost

Yesterday I told you about the Little Boo ghost stamp on the "Under $10" page in the Stampin' Up! catalog.  I decided to stamp my own Halloween Designer Paper for this card using Little Boo!  To make the ghost in the center of the card, I used the Wide Oval Punch and just trimmed with a scissors to make the wavy bottom of his body.  The arms are made from theModern Label Punch, cut in half.  The eyes are punched with the 1/4" circle punch, or you could just color them in with black marker.  I drew in the mouth and sponged the edges of the ghost with More Mustard just to make him show up a little better.  The "Happy Halloween", from All Holidays, is punched with the Modern Label Punch (gotta have it!).  It is separate from the layering under the ghost, I just liked the way it fit right at the bottom of the layered piece.

Time to order your Halloween stamping supplies!  Go to my online store HERE and click the "Show Now" button!

Little Boo

I think this is the cutest little stamp for Halloween……Little Boo!  And it is only $6.95!  Have you visited the "Under $10" page in the Stampin' Up! 2009-2010 Idea Book & Catalog?  It is the last page (p. 208) in the catalog.  I made some cute "Little Boo" cards, just 3×3 size!  So fun!  Take a look at those "Under $10" stamps…..you might want to get some for gifts for the holidays….and a few for yourself!

Ghost3x3

I stamped Little Boo on Whisper White cardstock and punched out with the 1" circle.  Then a circle punch layers of Green Galore and Black and the fabulous Scallop Circle Punch.  The greeting is from Teeny Tiny Wishes.

What a New Stamper Can Do!

Over Labor Day weekend my son and his girlfriend came home for a visit. She ASKED me if we could stamp because she wanted to make something for her friend!!  I didn't even have to FORCE her to stamp!!  We stamped the first time she came to visit back in July so I guess she really did like it! (But then, who wouldn't??!)


First she stamped this card using "Season of Friendship" and we added pumpkins from "Pumpkin Patch" in the Holiday Mini  just for fun.  I knew the tree from "Season of Friendship" was SO much fun to stamp with!  I thought she did a great job, even varying a little bit from how I did mine.  Actually hers turned out looking better than mine!

Heathertreecard

And then we needed to play with my new Stampin' Up! Bear Big Shot Bigz Die!  We cut out the bear and then dressed it up using the new Pawsitively Prints Designer Series Paper cut out with the Stampin' Up! Beary Essentials Bigz Die.  These are all new products in the Holiday Mini!  Stampin' Up! is partnering with the Build-A-Bear Workshop so we have an exclusive and exciting collection of new products you will enjoy!

Heathergrannybear
Heather decided to make her bear a Granny Bear and made some little glasses for her out of the retired Stampin' Up! wire we used to carry and added half-pearls on her jacket from the Pretties Kit!  She thought maybe the bear could use a hat, but that wasn't quite right…neither was a bow….so we finally tried a Flower Brad and that seemed to work!

I know it is going to be LOTS of fun playing with all these bears!!

Halloween Sweet Treat

SweetTreatCupHall

I decided to get into the Halloween mood today with my new Sweet Centers stamp set and the new Sweet Treat Cups from the Stampin' Up! Holiday Mini I found bags of Halloween colored M&Ms at the store yesterday!  This is just a 4"x4" card layered with some "Cast a Spell" Designer Series Paper.  I used the Sweet Centers stamp set and punched a hole with the 1 3/4"circle punch to insert the new Sweet Treat plastic cup filled with candy!  The circle I punched out I layered and stuck up in the corner of the card!  So many fun things to do with these Treat Cups!  You'll love them!  And you get 12 in a box!  

Shop online at my store 24/7 right HERE!  Then click the "Shop Now" button and you're there!

Trick-or-Treat! Happy Halloween!! Last Minute Halloween Cards!

Wow!  This morning a black cat ran right across the street in front of my car as I was driving back into my neighborhood!  Is that real Halloween or what?!  I know it is bad luck to have a black cat cross your path, so that freaked me out a little bit!  Hopefully today will be nothing but good luck because I love Halloween (it would help if we had some fall leaves here in Houston!) and I get to see my boys.  One was nearly born a Halloween goblin because he arrived just 45 minutes before Halloween!  But that was twenty years ago!  More about his birthday card later.

I usually have a lot of trick-or-treaters at my house, but it is often about 80 degrees, at least when the kids start out after dinner, sweating in their costumes.  When I was growing up in St. Louis it was often a problem on Halloween with the weather being very cold, and we had to wear a winter coat…..either over our costume, which meant no one could see the costume, or under the costume, which of course looked ridiculous!  "Back in the olden days" we always had to have a joke ready to tell people before they would give us candy.  I don't think they do that anymore.

Here are some Halloween cards I've made (okay, mostly copied from somebody else!) to help celebrate the day!

Halloween Boo Eye card 

Halloween Haunting wheel 

Halloween Owl candy bag 

Halloween test tube 

Origami Bat 

Halloween Haunting Moonlight 

HalloweenCandyWrapper

Halloween Witch Hat Card

Here is a picture of the card I made for our demo group swap.  I saw it in a magazine and changed it a little bit.  It didn't give directions, but I just cut two triangles and then the band on the bottom has a fold which holds the triangles together.  The stars are punched, of course, and the big one is sprinkled with our chunky glitter, adhered with some Tombow Multi glue.  Fun card to make!

WitchesHatCard 

WitchesHatCardopen


Fall and Halloween Swaps

Our "demo group" meets once a month and we always enjoy making some project, swapping, and having lunch.  We still refer to it as our demo group, even though not everyone is a Stampin' Up! demo, but it is still fun.  That's why not everything you see here is Stampin' Up! but it displays a lot of talent regardless.  So here is a photo of all the swaps I received last week!

OctoberSwaps

Easy Gift Wrap

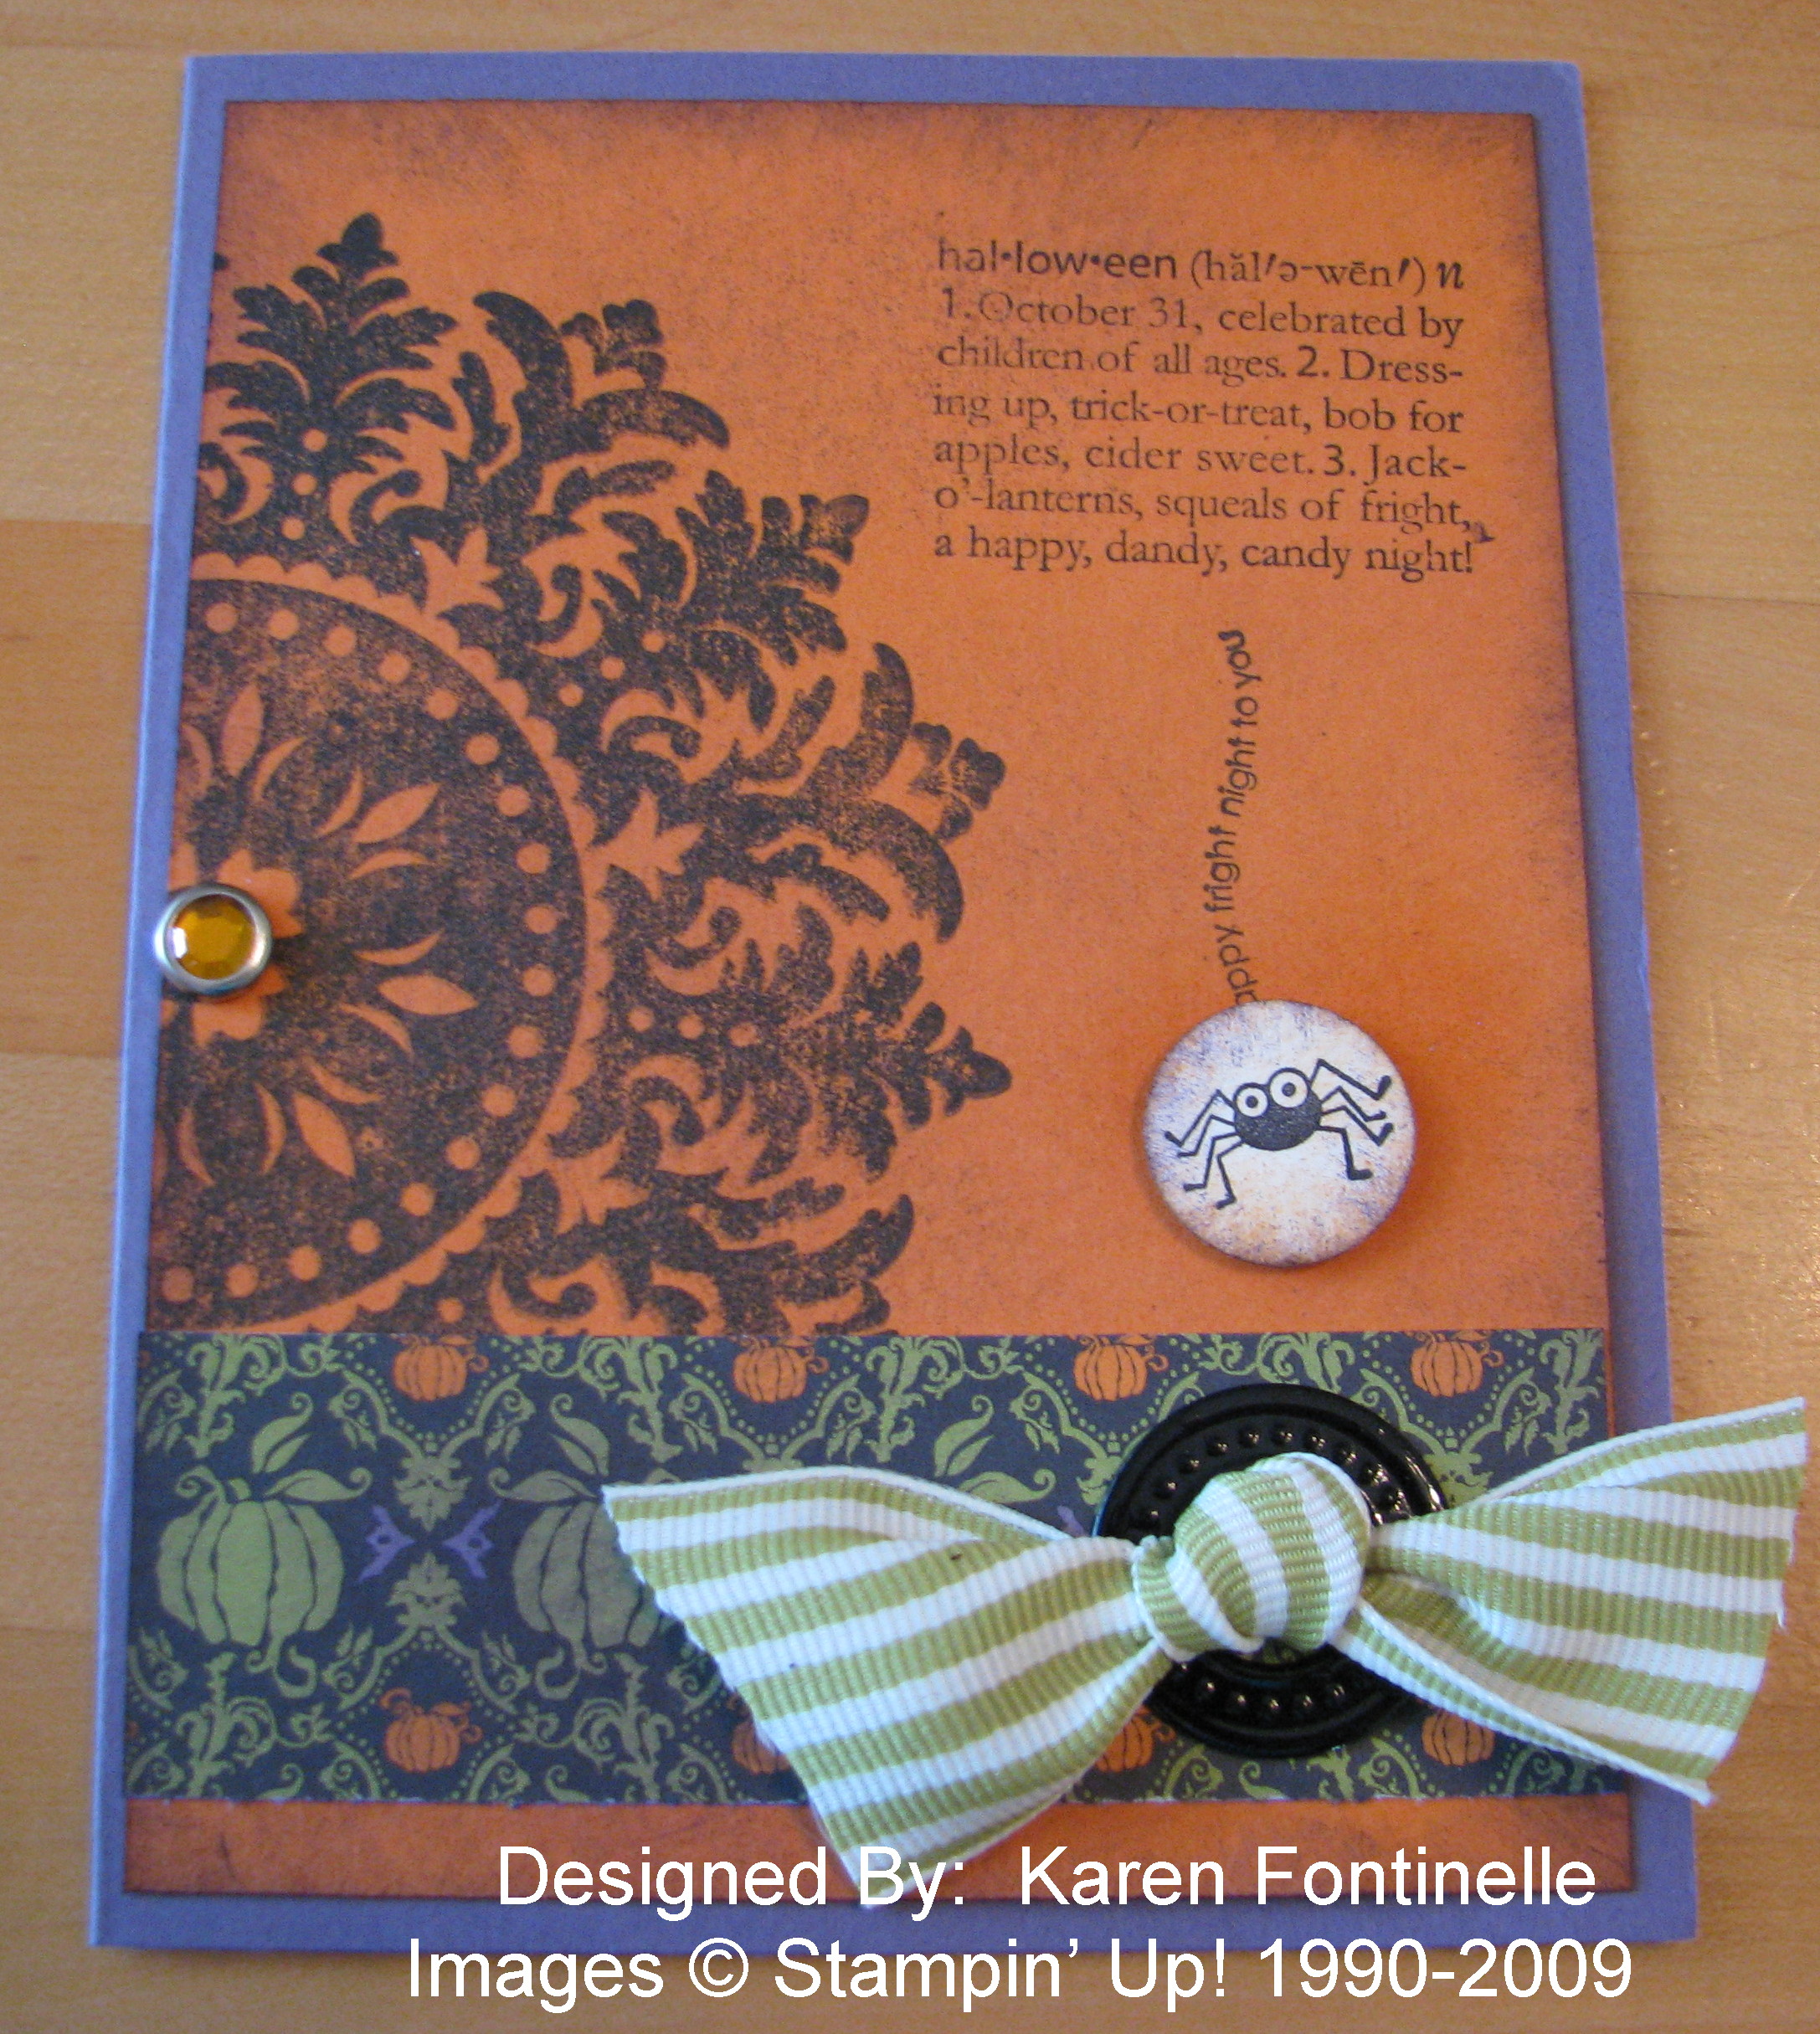
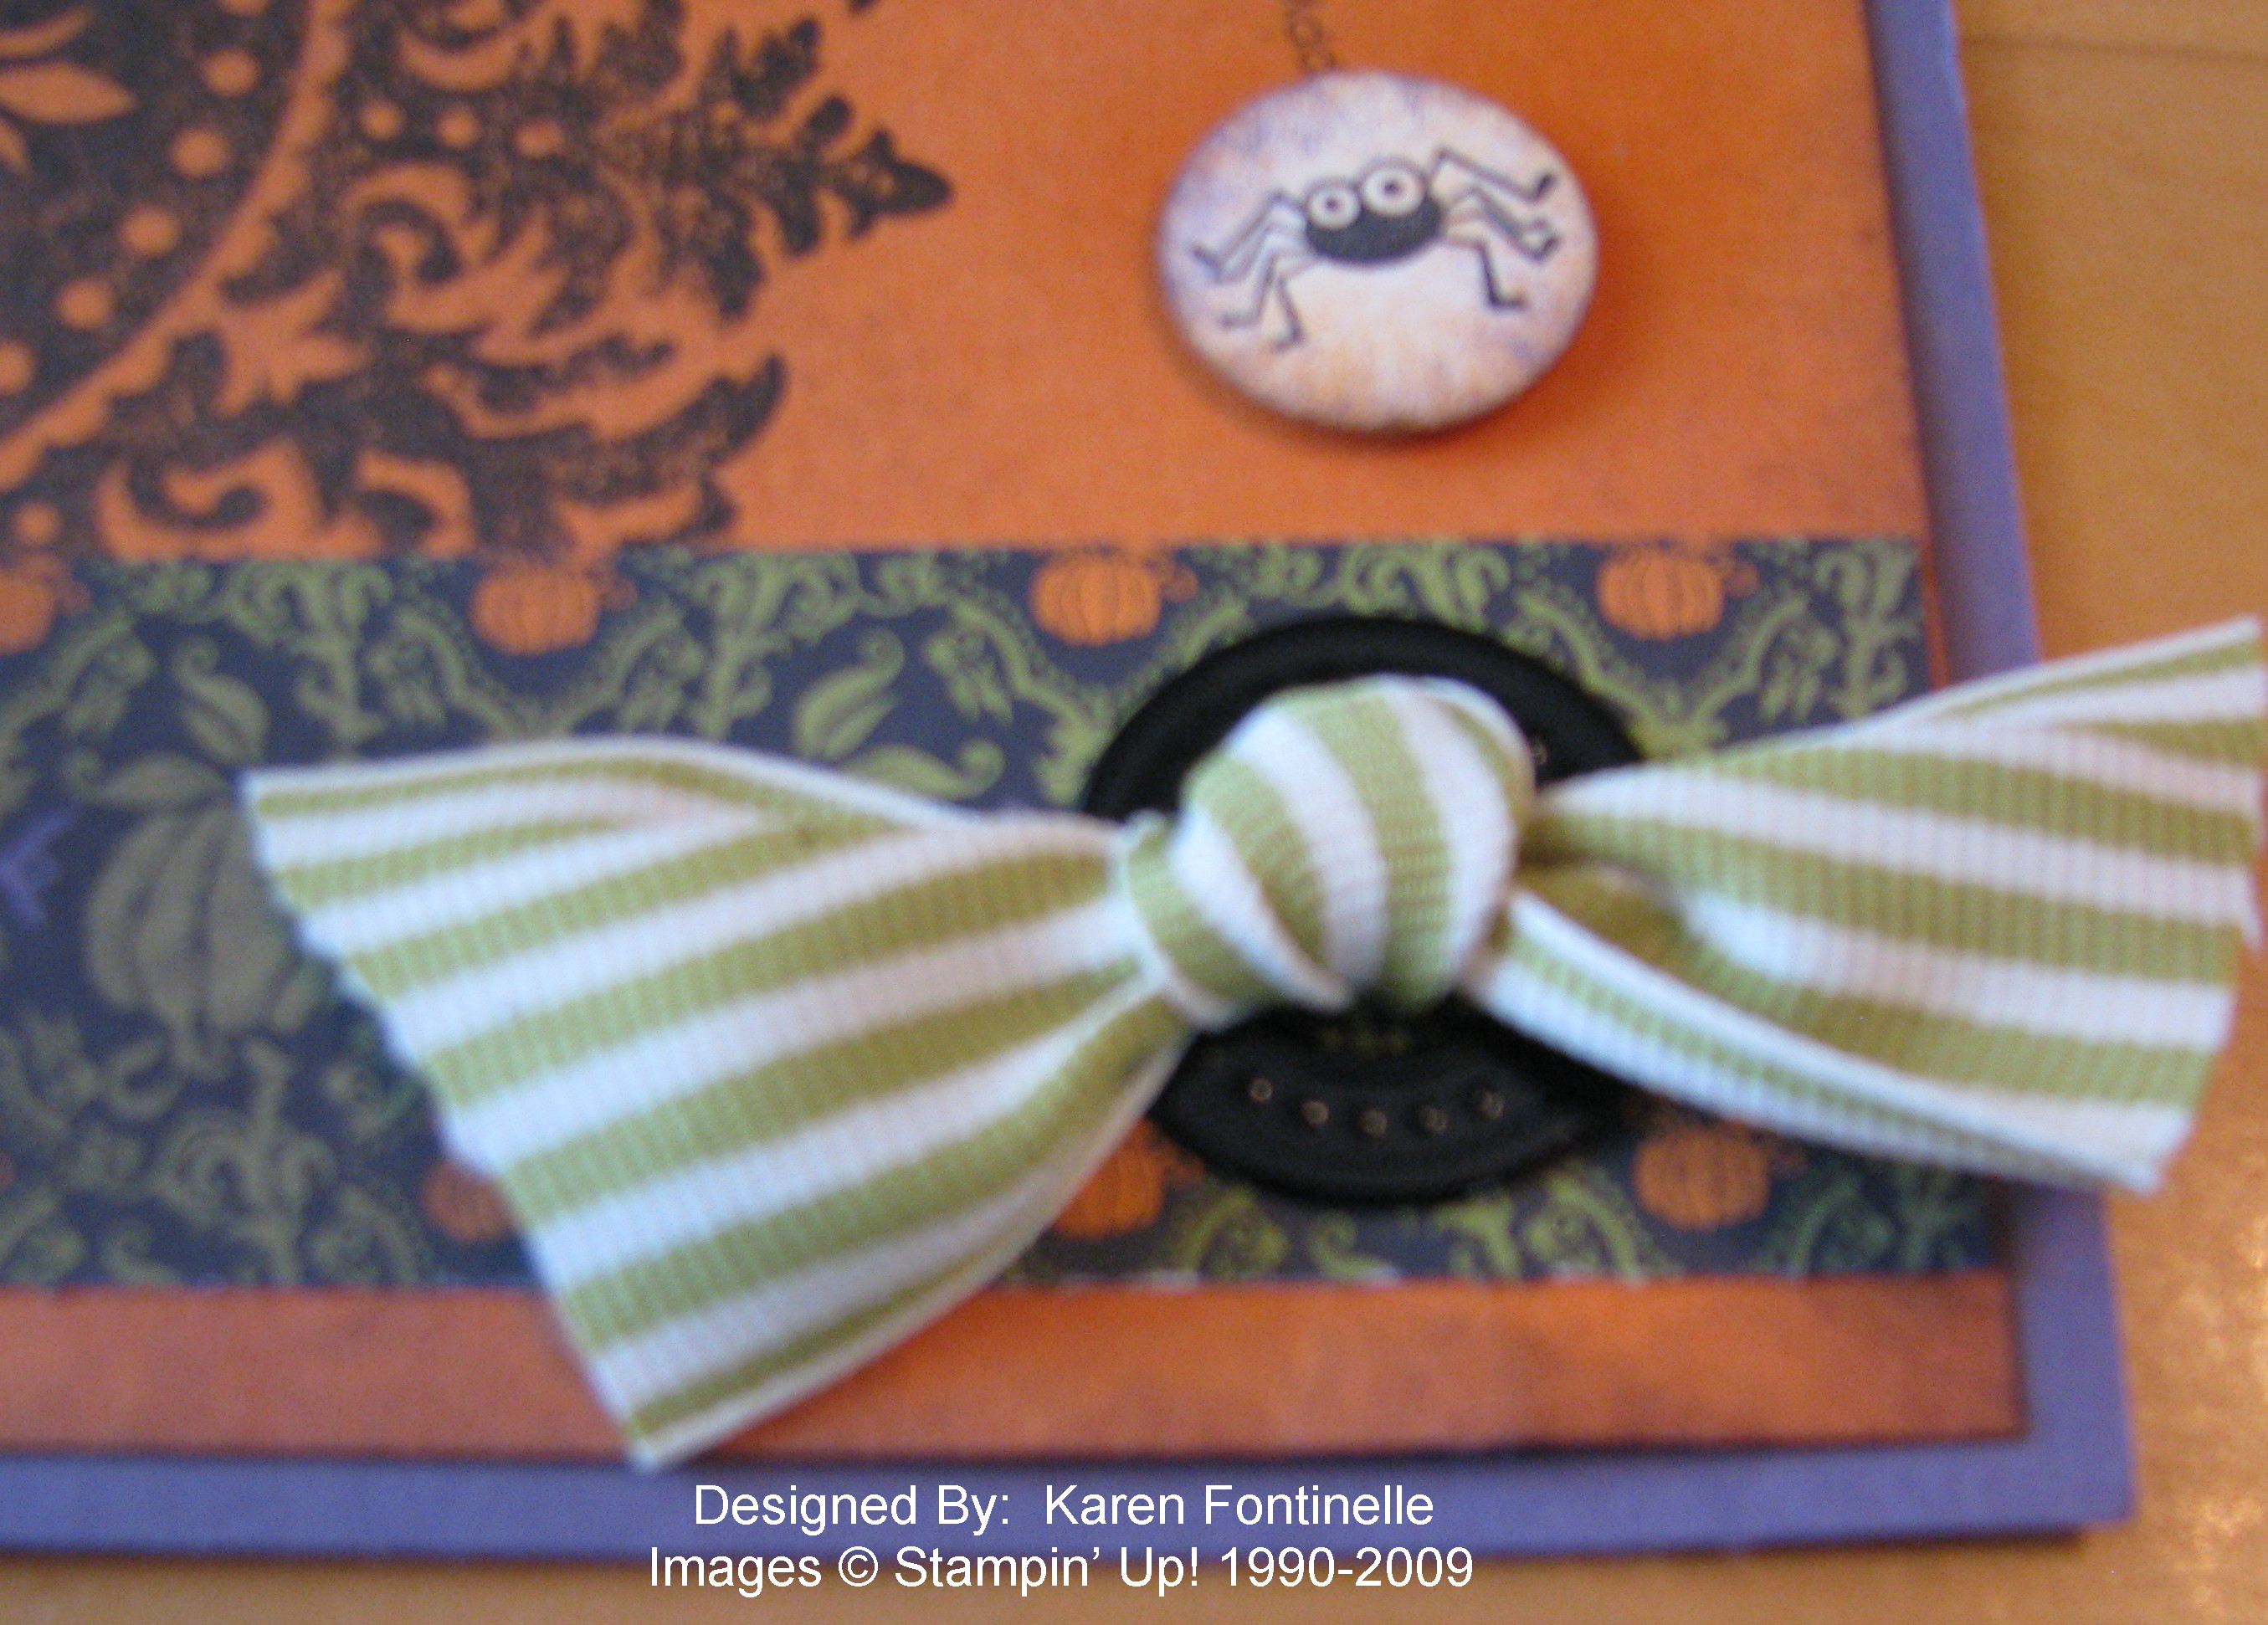
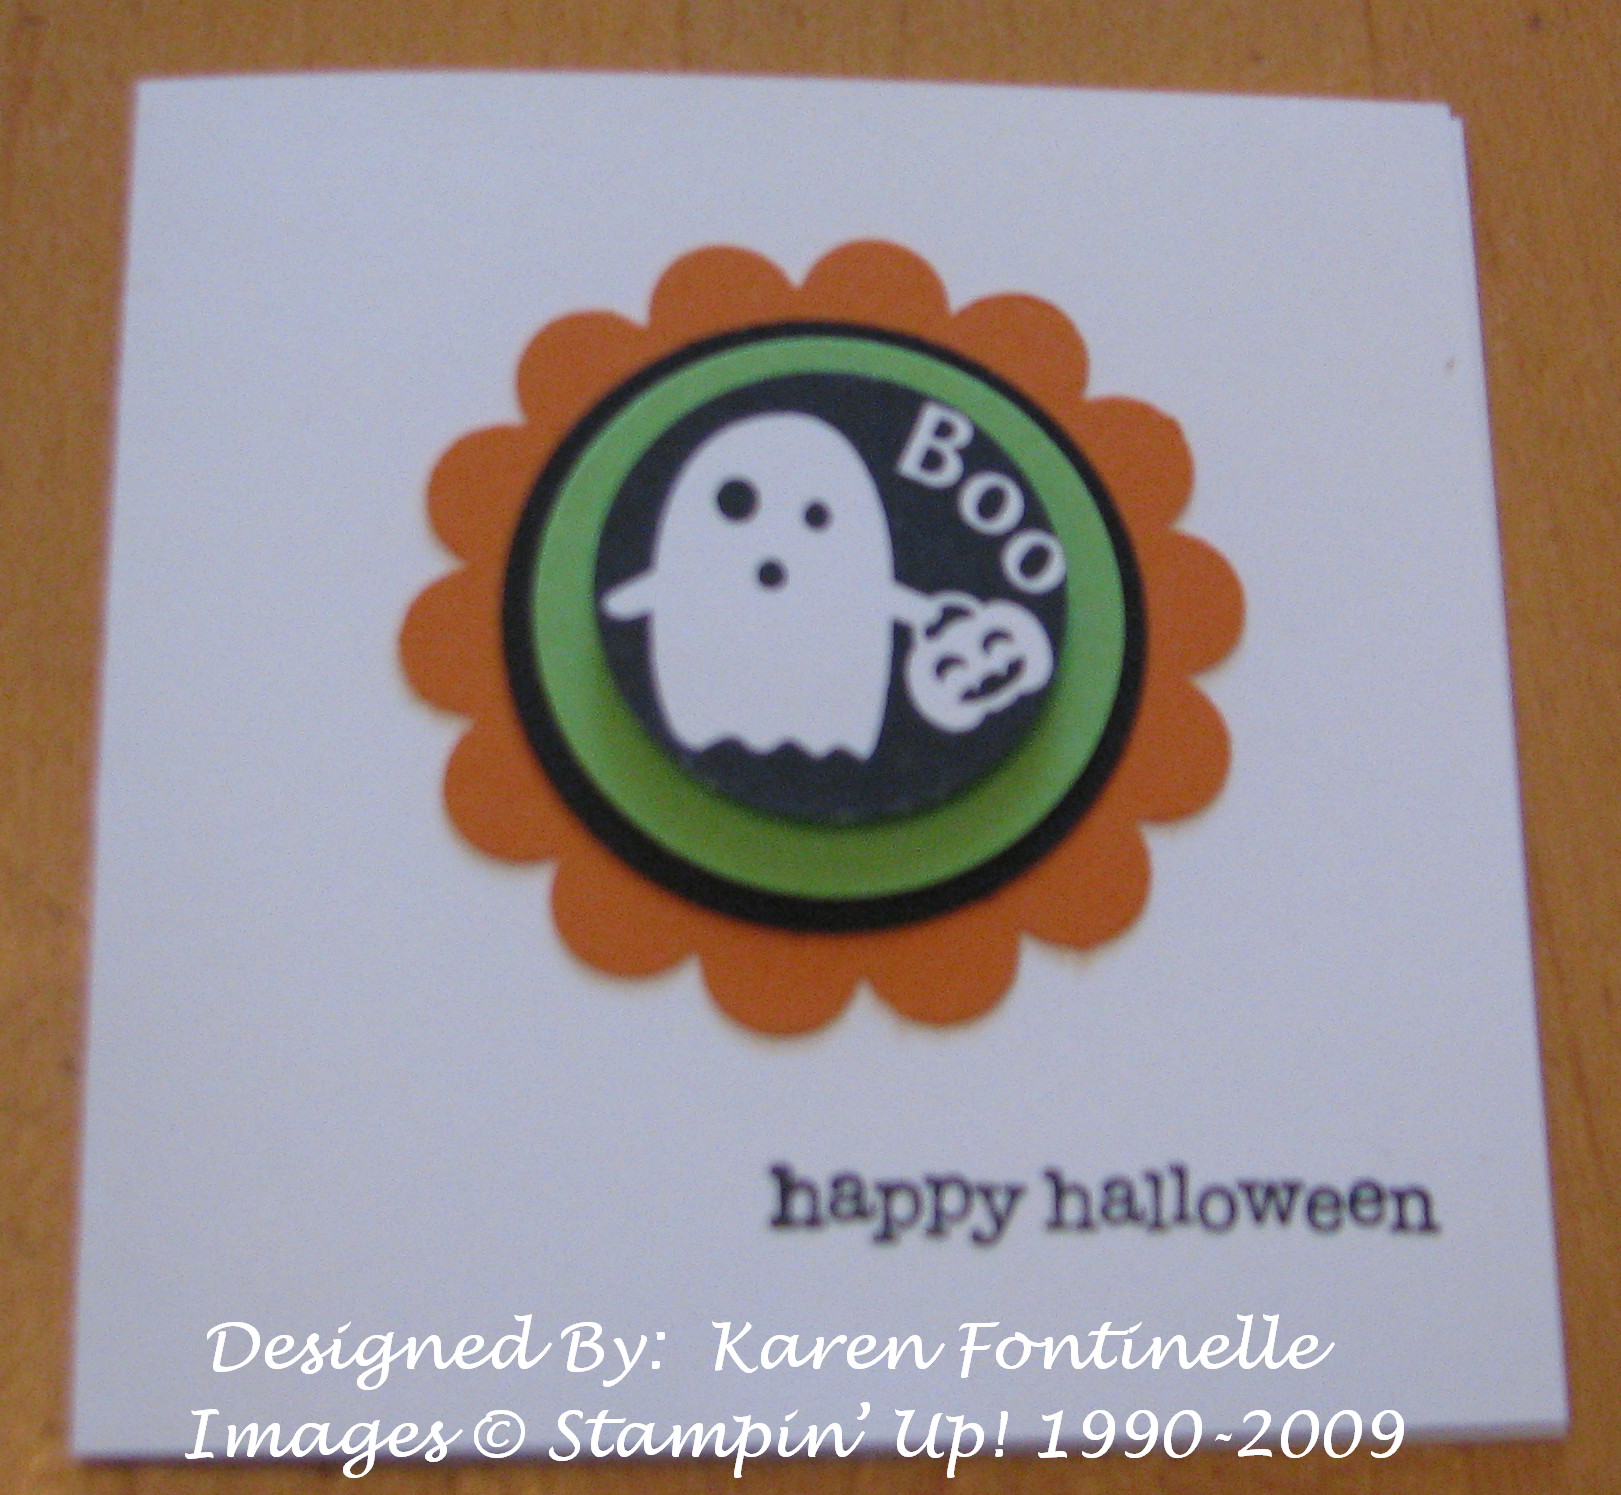
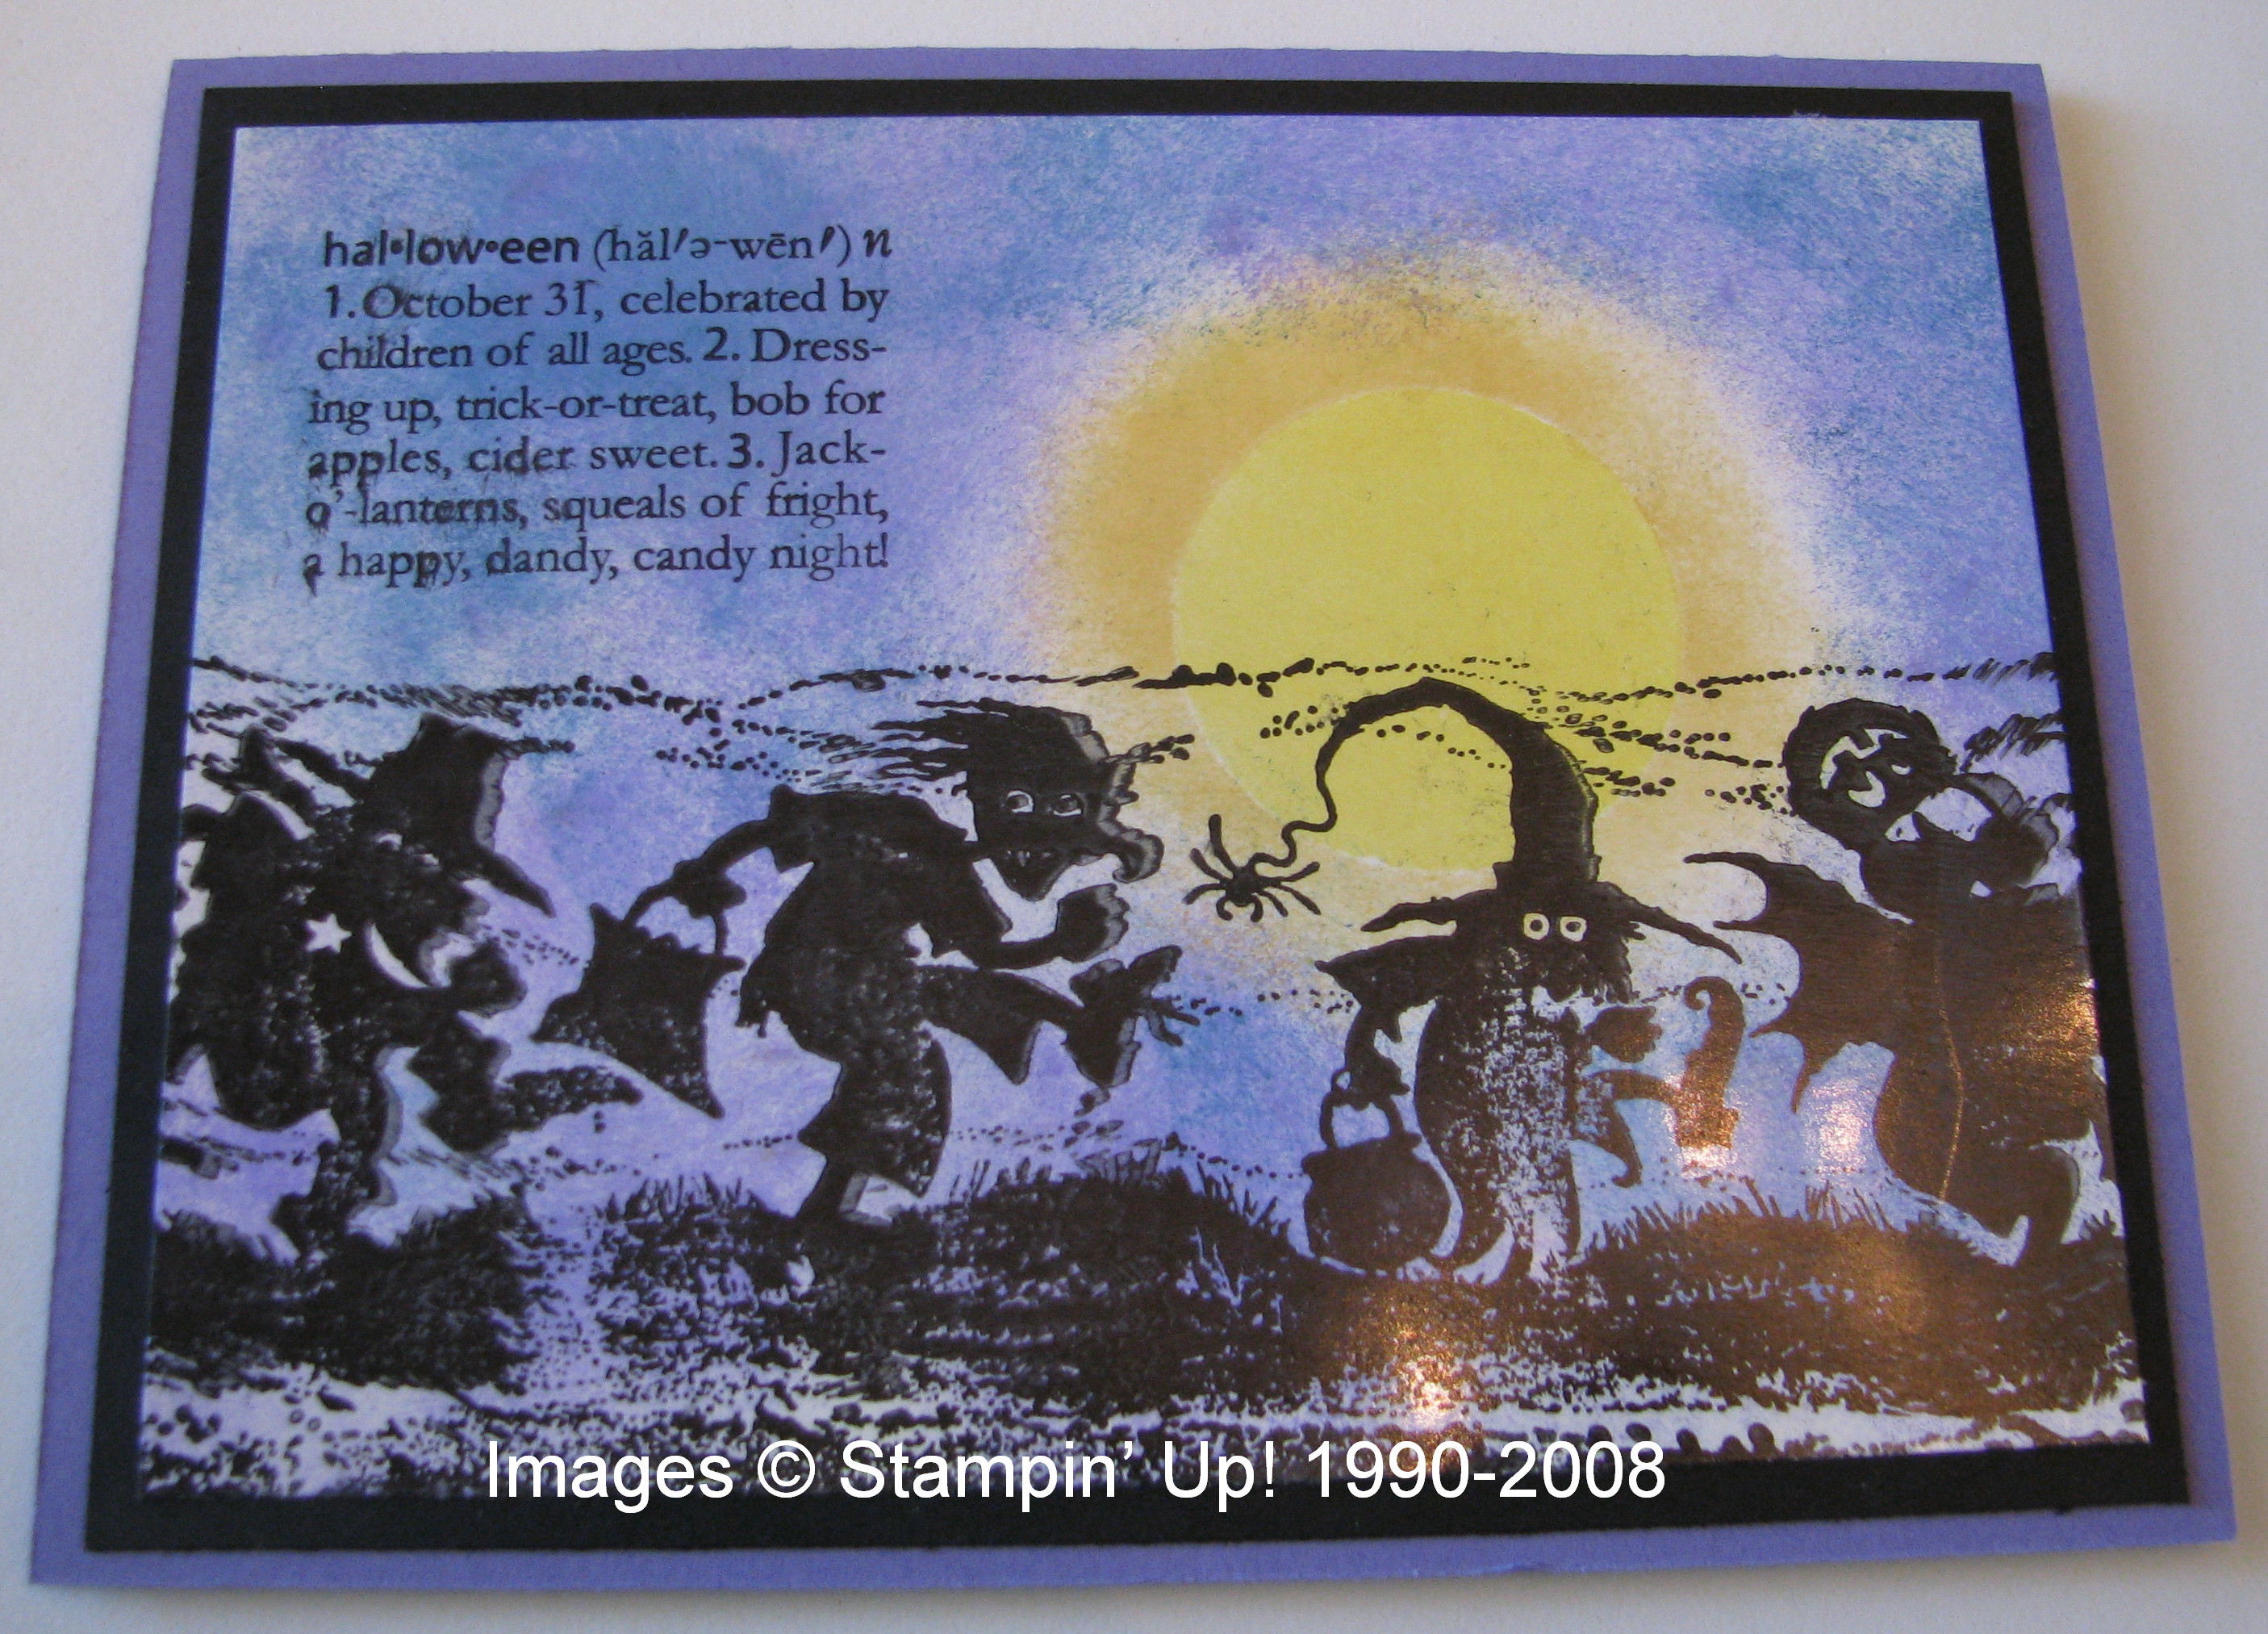
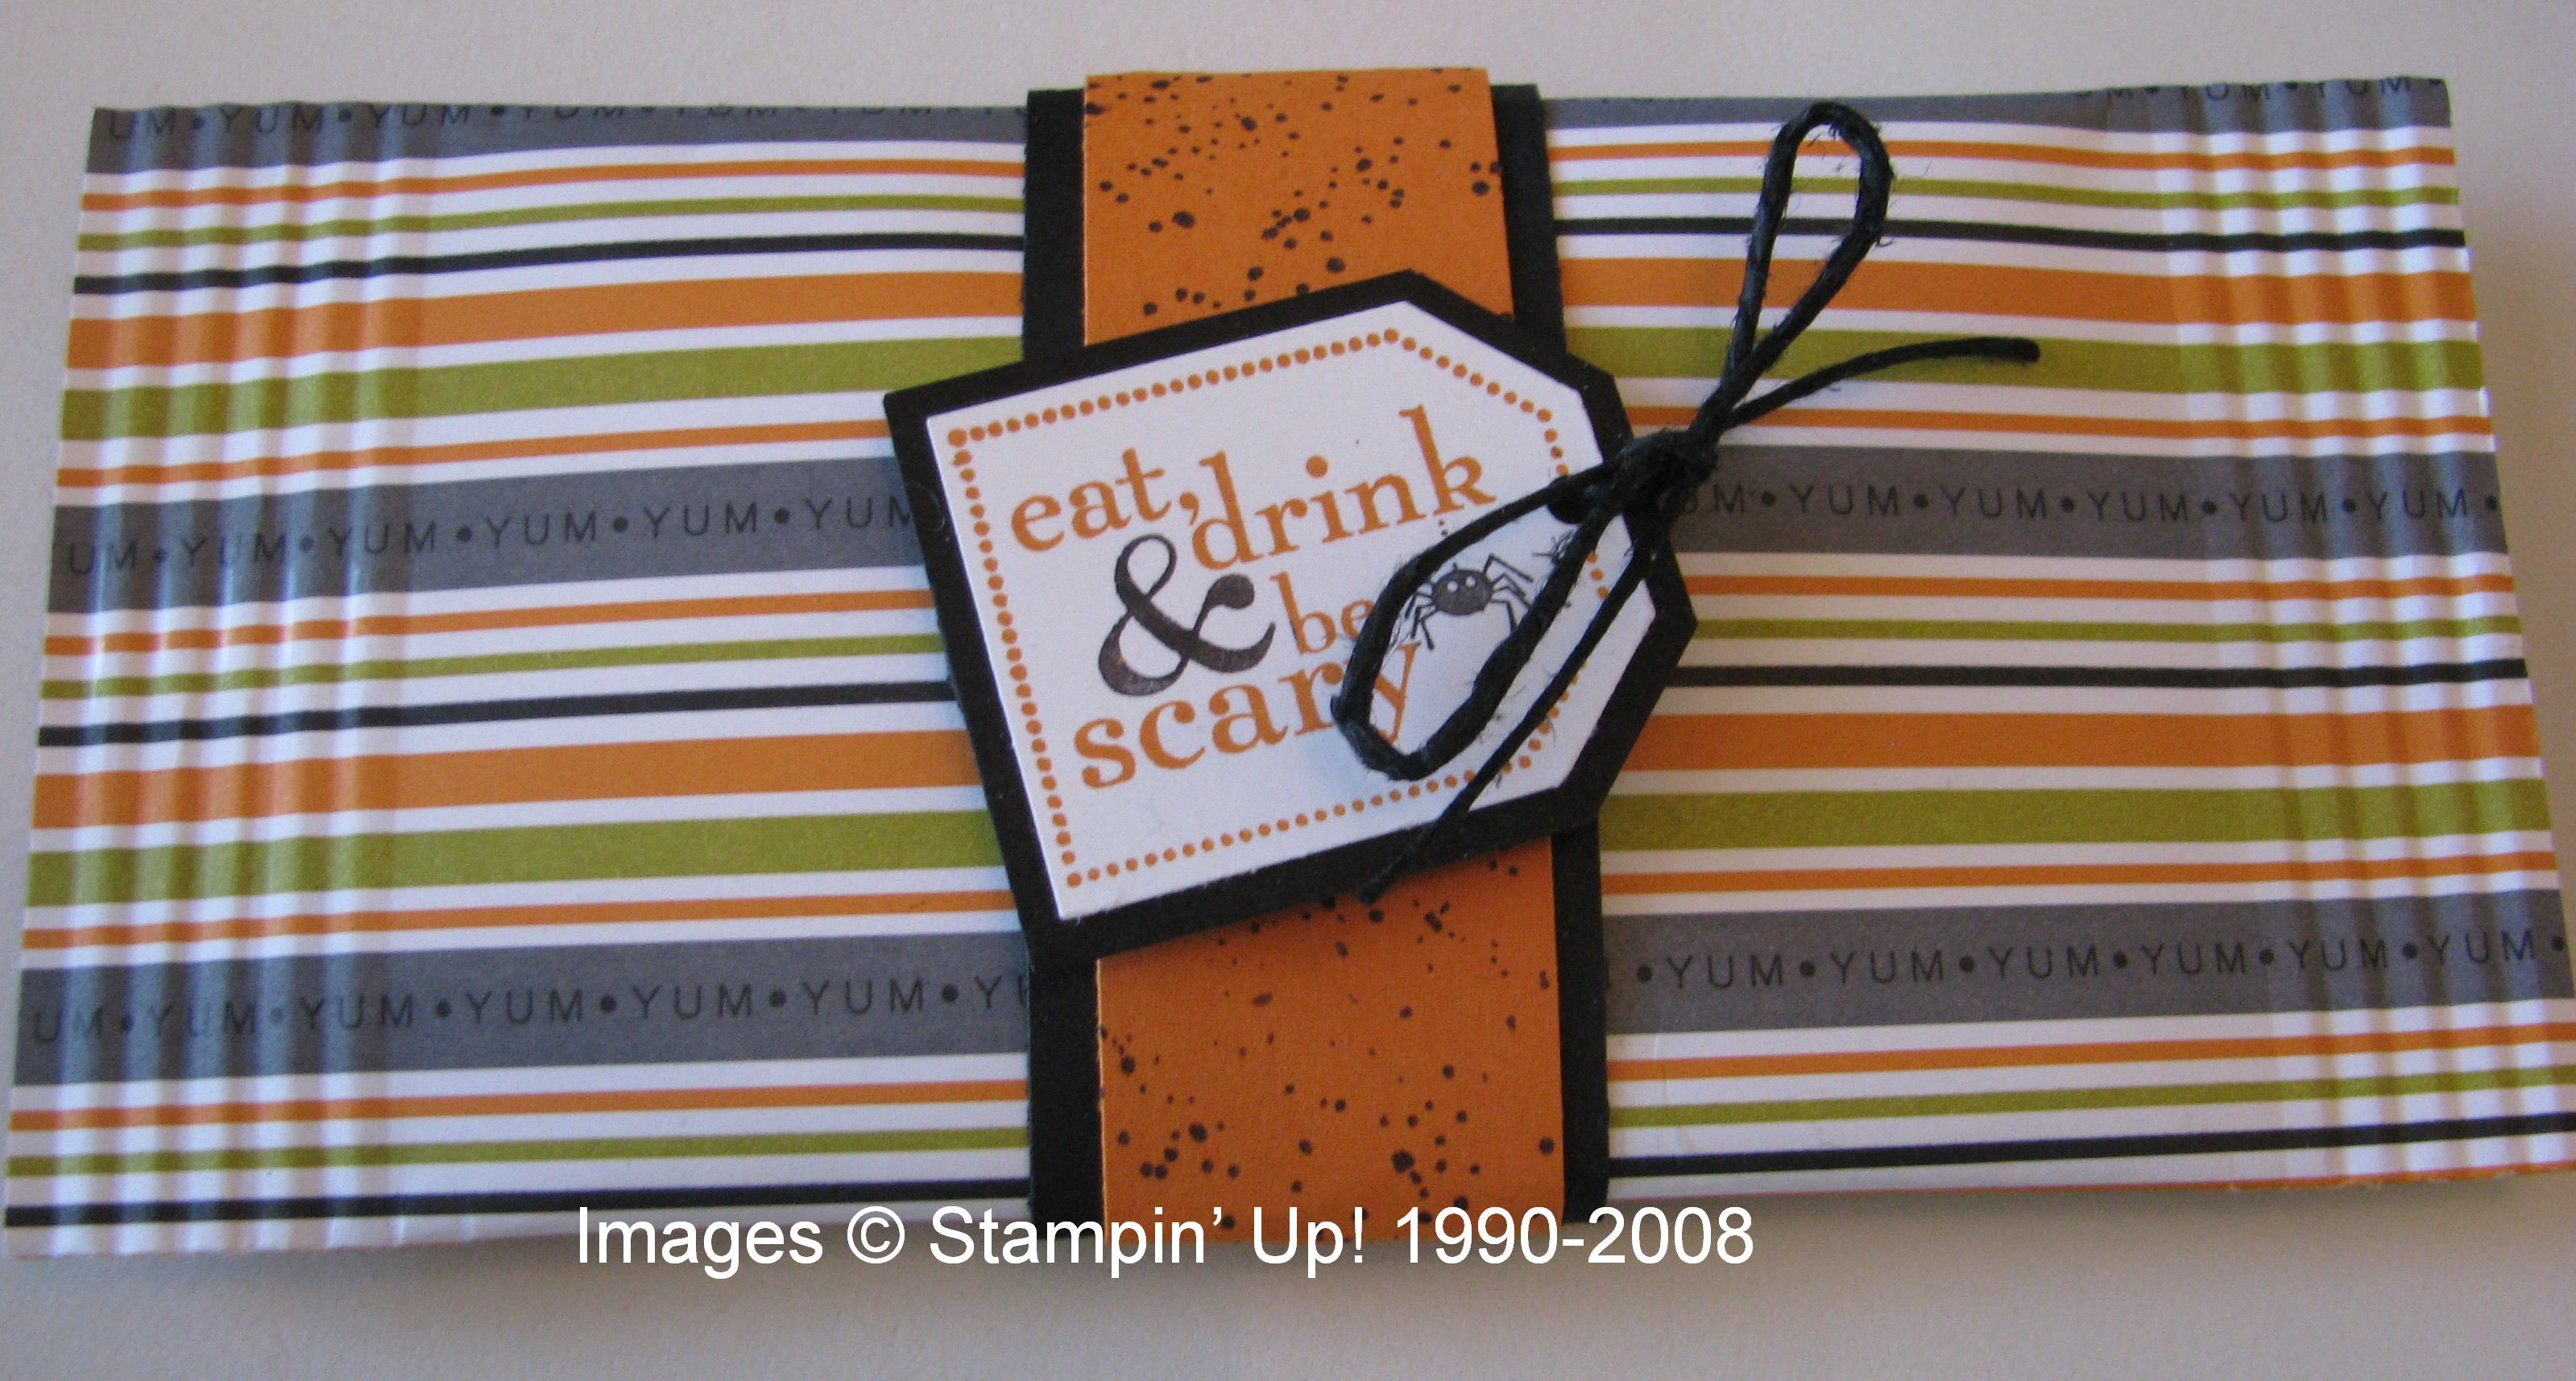
Like a lot of people recently, I have been excited about making Halloween cards and papercrafts, and that is how I first saw this idea….as a candy wrapper.  The first one I made, after seeing a lot of them on the internet (where I spend way too much time, but I love all the ideas!) is for Halloween.  I think the idea and directions I first saw came from another demo, Diana Gibbs.  Here is my Halloween one:

HalloweenCandyWrapper 

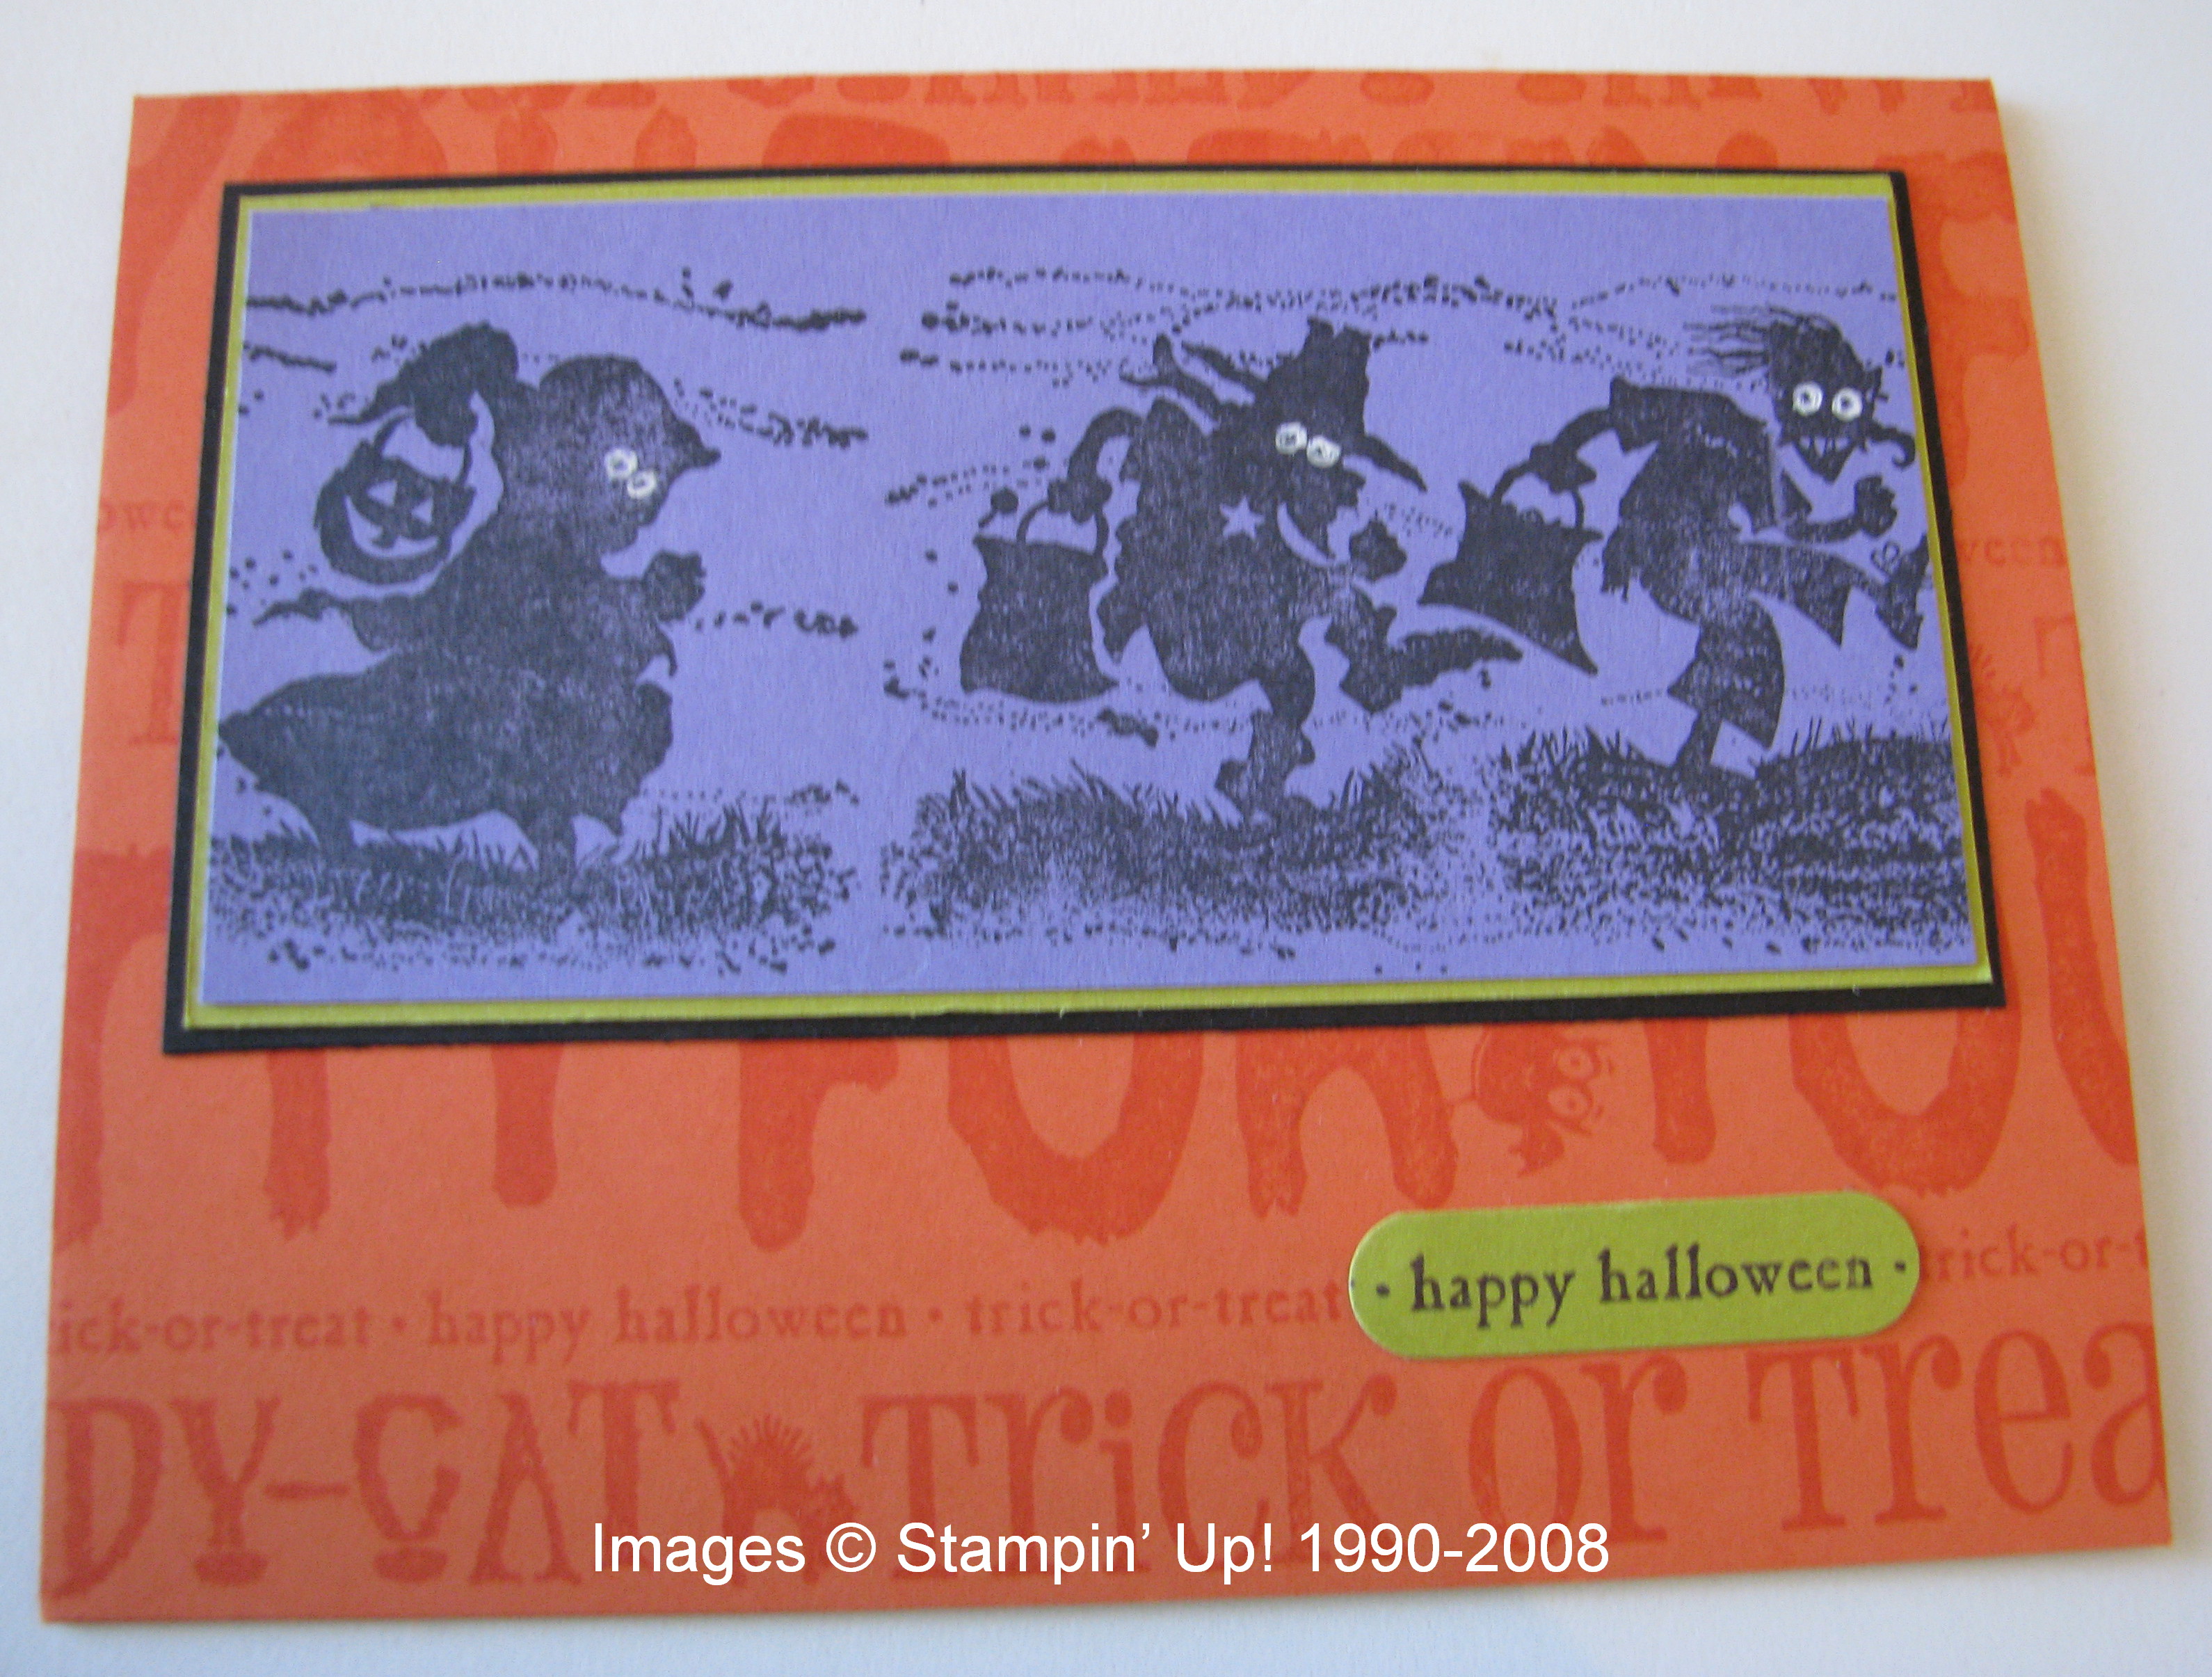
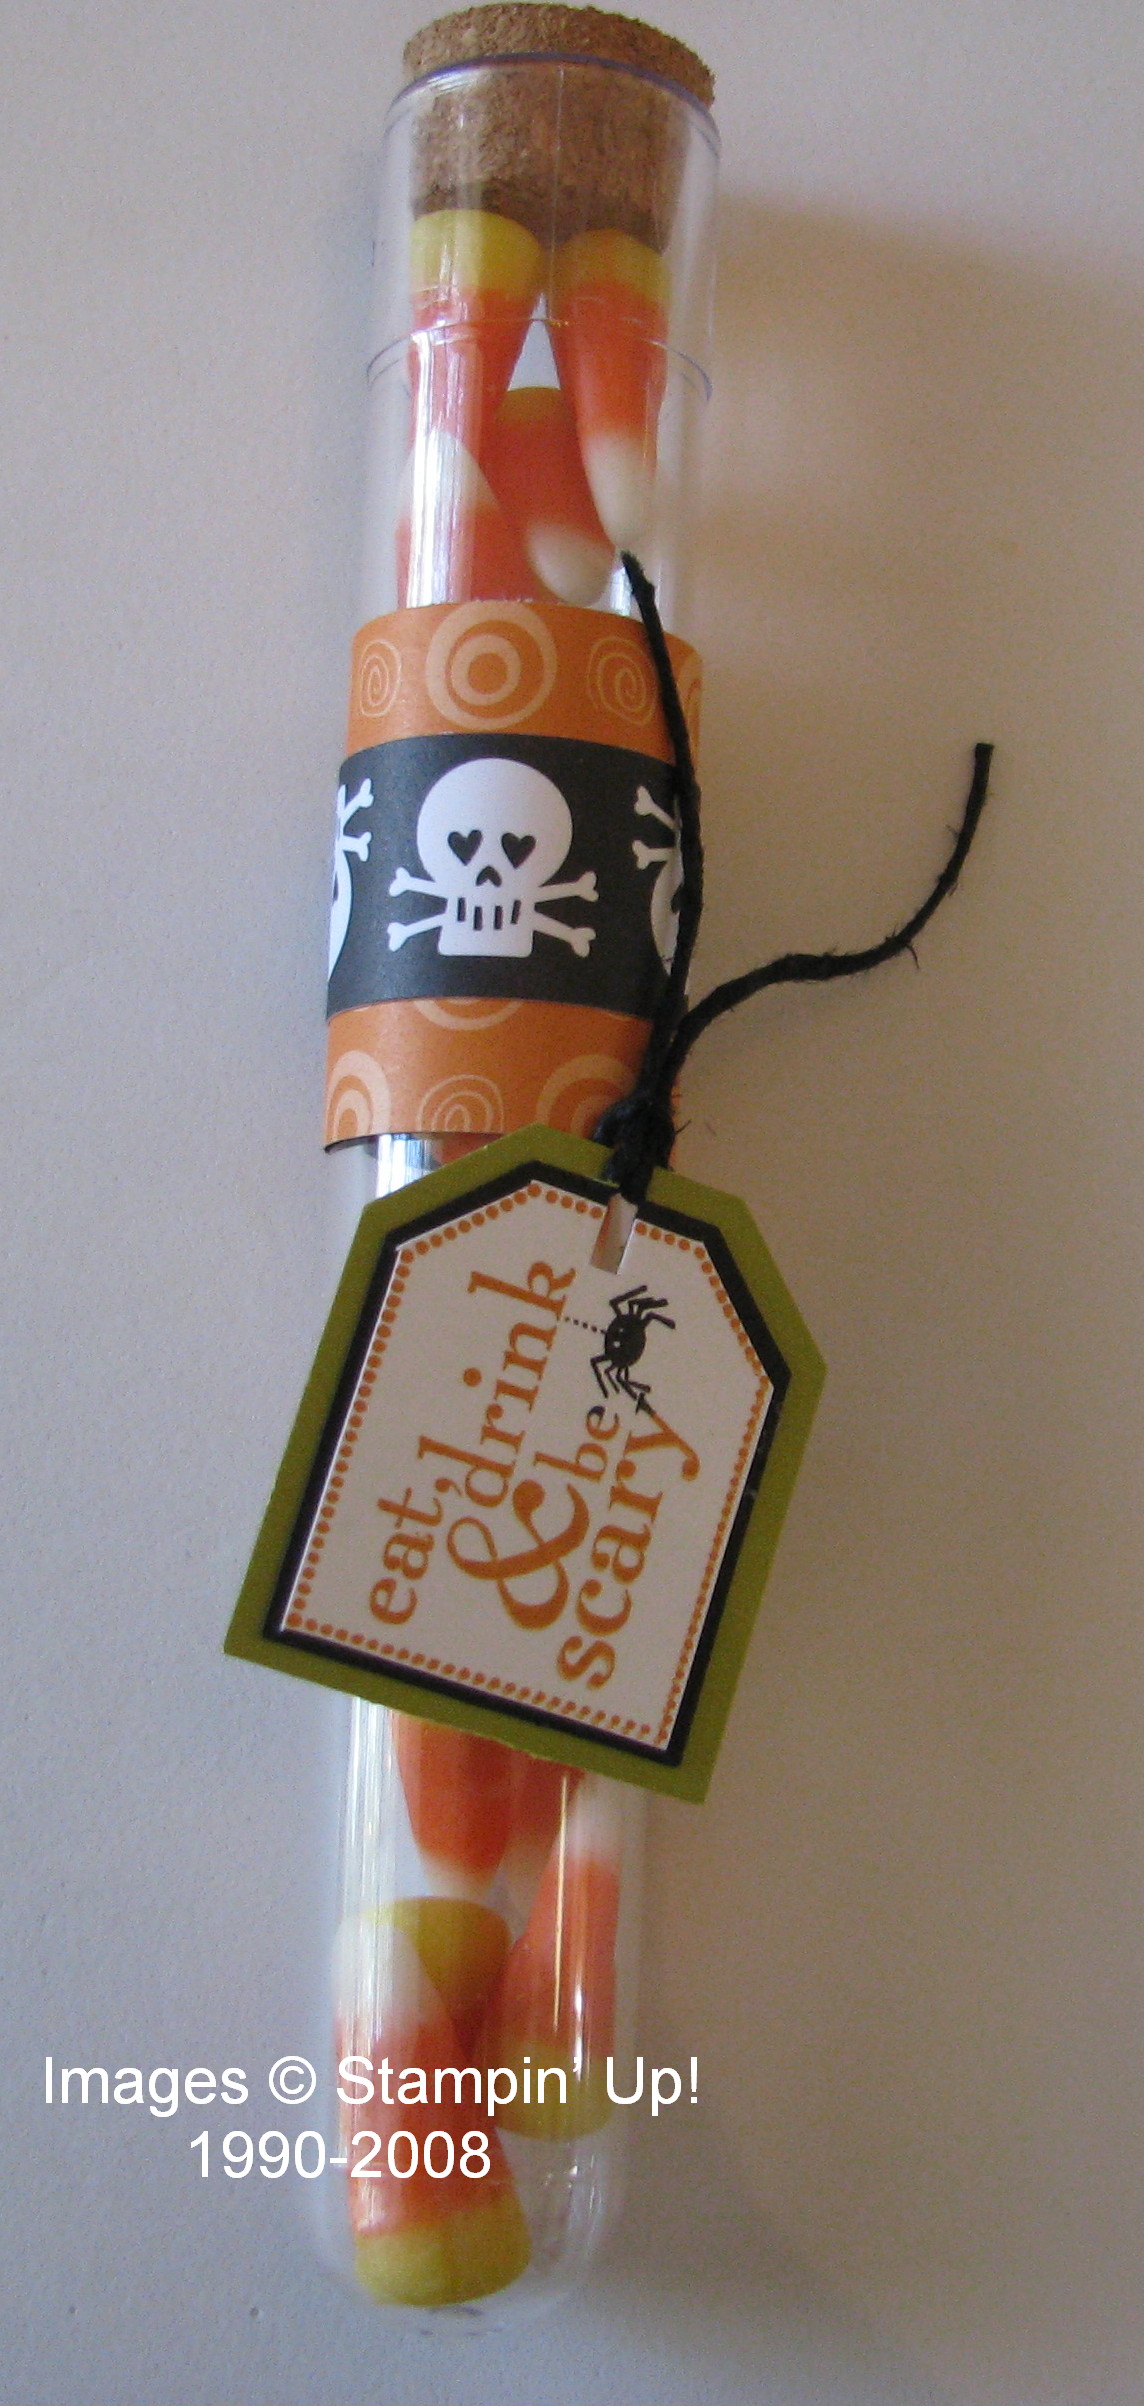
This is a 6×6 piece of the Halloween Designer Paper (page 170) in the Idea Book & Catalogcalled "Ghostly Greetings".  You'll need a piece of Sticky Strip tape along one side at the edge, and I just used some SNAIL on the two sides.  I placed a small bag of candy in the center and folded the side with no Sticky Strip down over it, like when wrapping a package, and folded the side with the Sticky Strip up to adhere.  The two ends are then crimped which helps hold them shut while also adding interest to the package.  I added just a simple "belly band" with black and Pumpkin Pie cardstock and stamped with that old favorite, "Itty Bitty Backgrounds"!  The tag is stamped with the new set in the Holiday Mini on page 5 called "Eat, Drink & Be Scary" and has a little bow made with the  SU black hemp twine.  So easy and too cute!

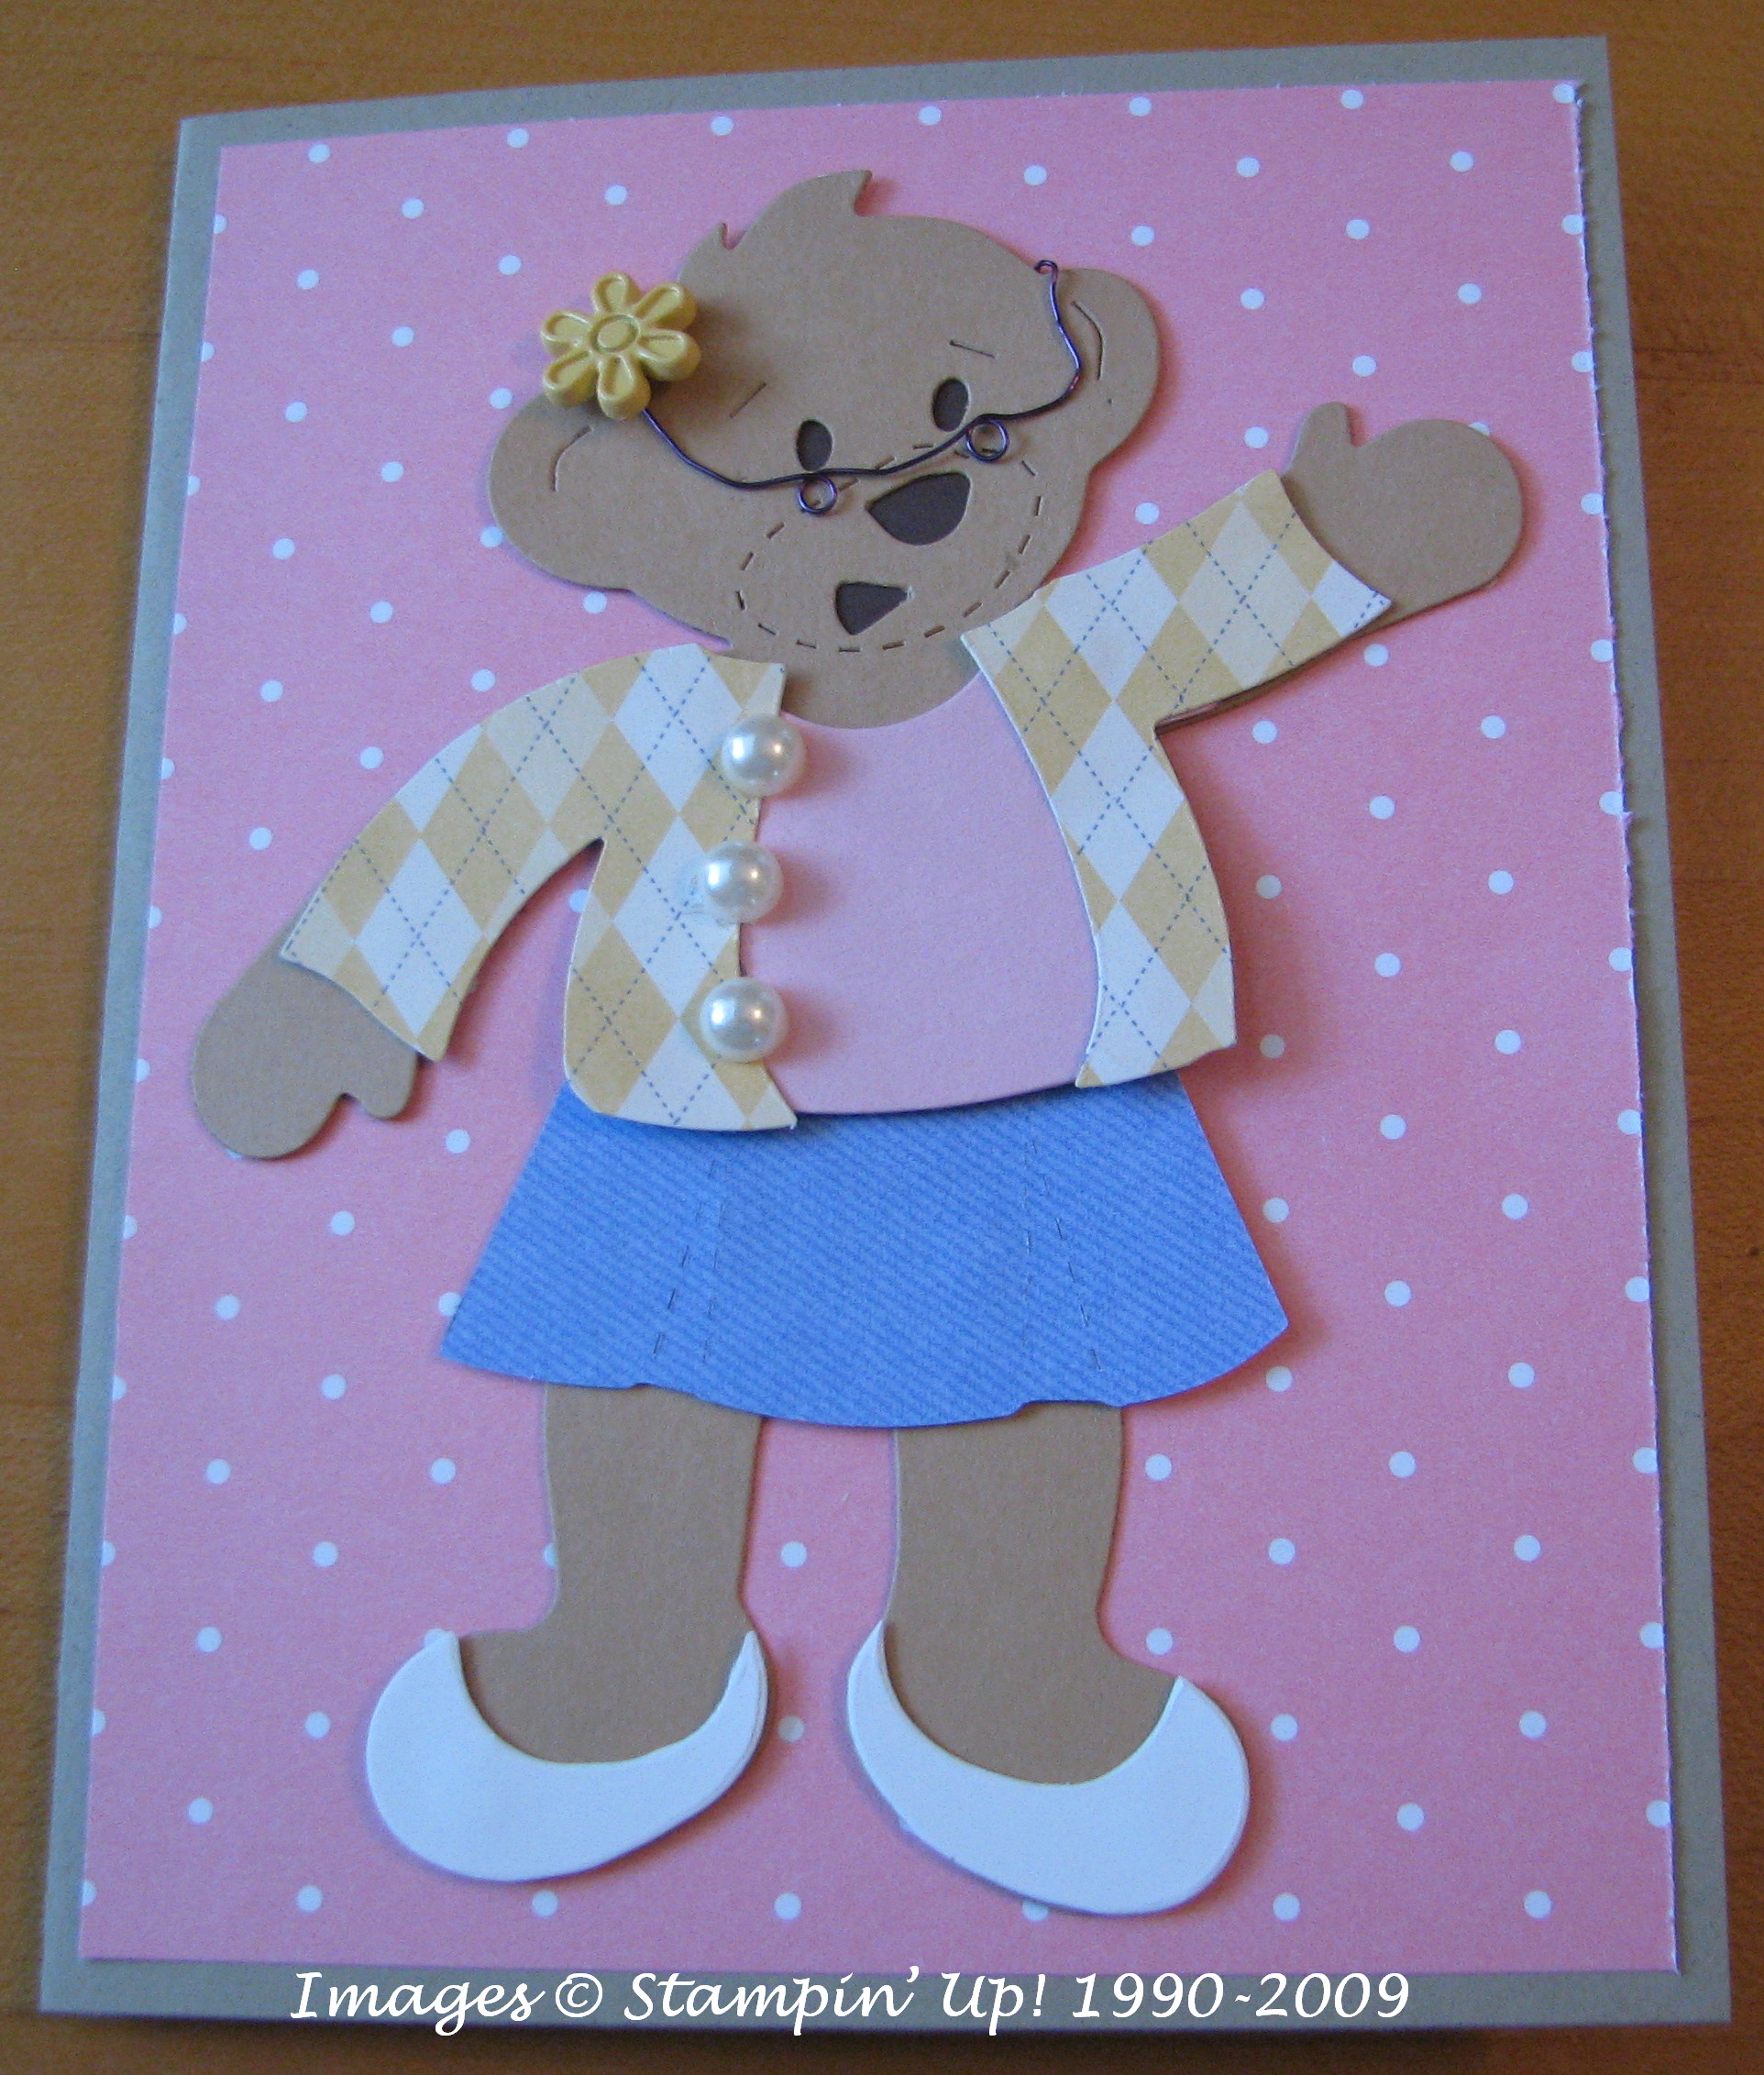
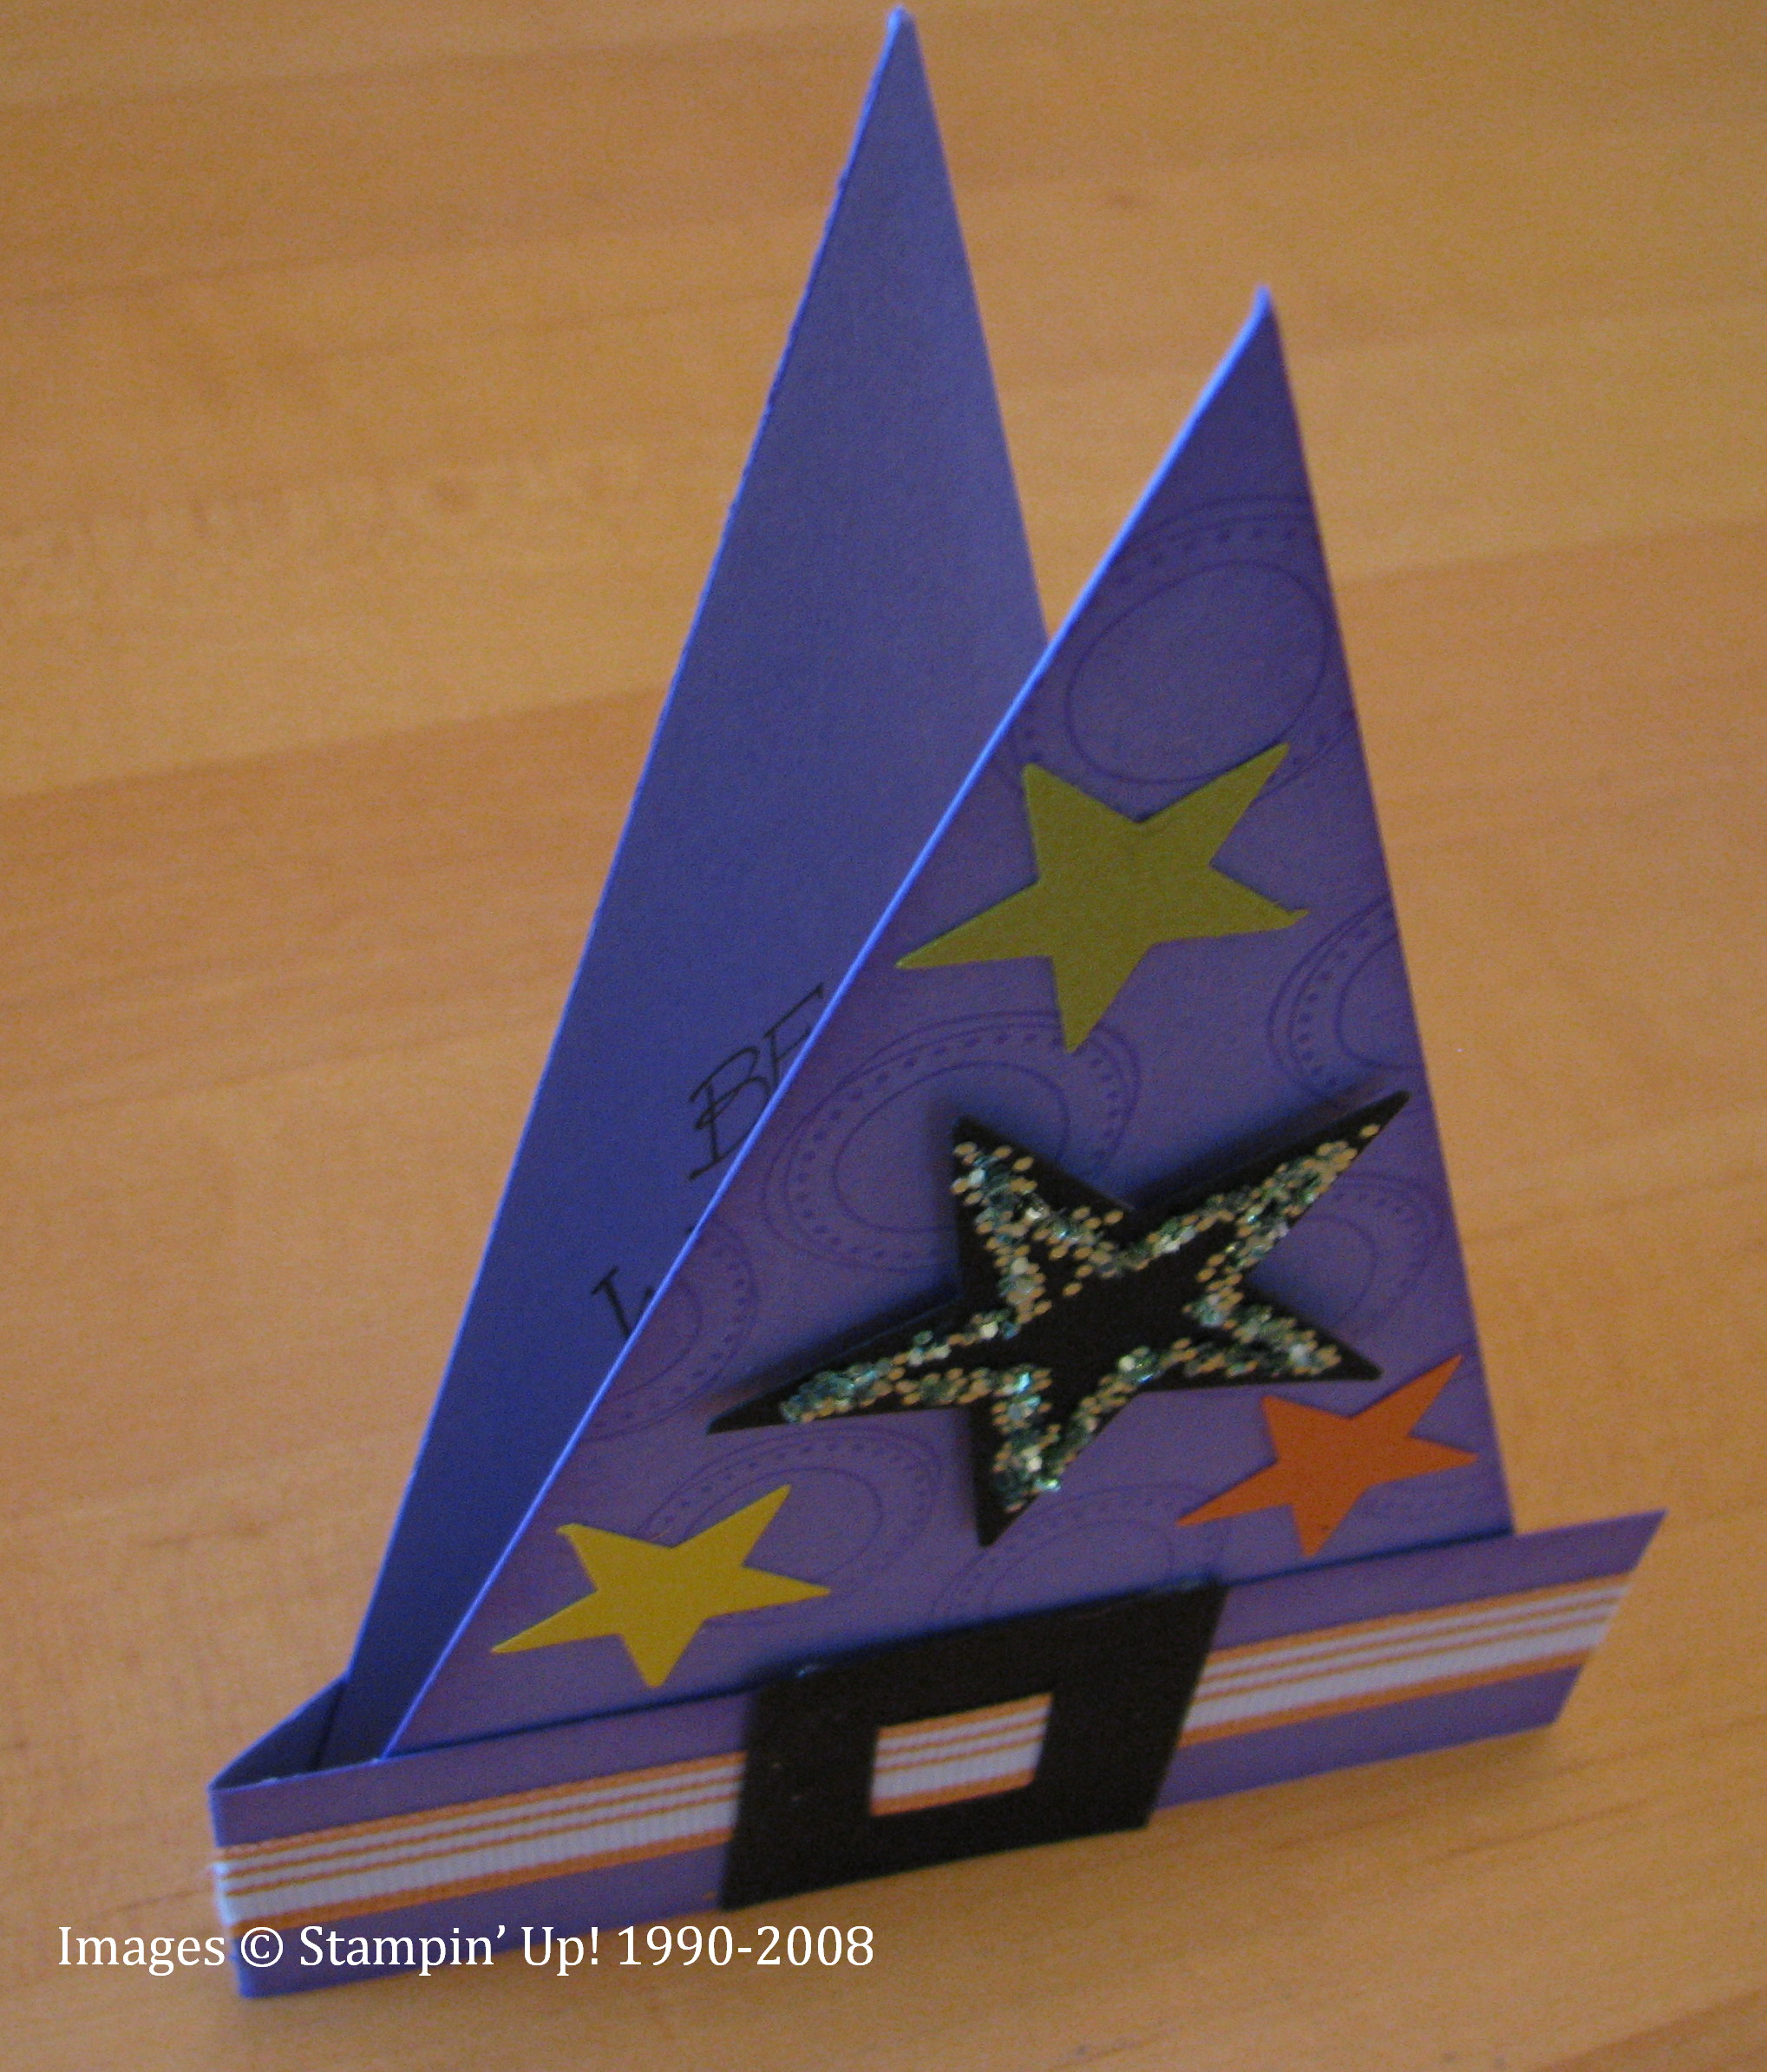
A couple days later I needed a quick package for my niece, Carrie, and wanted just a flat little package that wouldn't take much effort in mailing!  I happened to think of this same idea for gift wrapping and then I could just slip it into a mailing envelope and get it sent out quickly in the mailbox.  I had a little necklace for her so I chose some retired designer paper and made the same type of package.

GiftPouch 

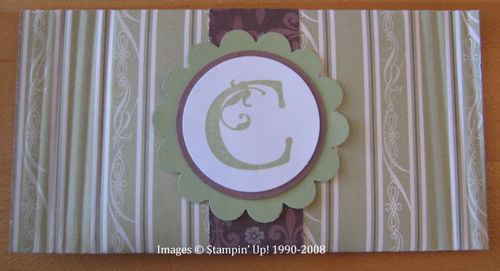
To decorate the package, I stamped her initial with the wonderful stamp set, "Lovely Letters" and used the circle punches and the Scallop Circle Punch.  The belly band is just a piece of the coordinating designer paper.  Both ends are crimped with the "crimper" on page 192 although it doesn't show up very well in this photo.  The Crimper has been around as long as I can remember but it sure has its uses!

If you need any of these supplies to simplify your gift wrapping, check out my 24/7 online ordering at www.karenfontinelle.stampinup.net.