
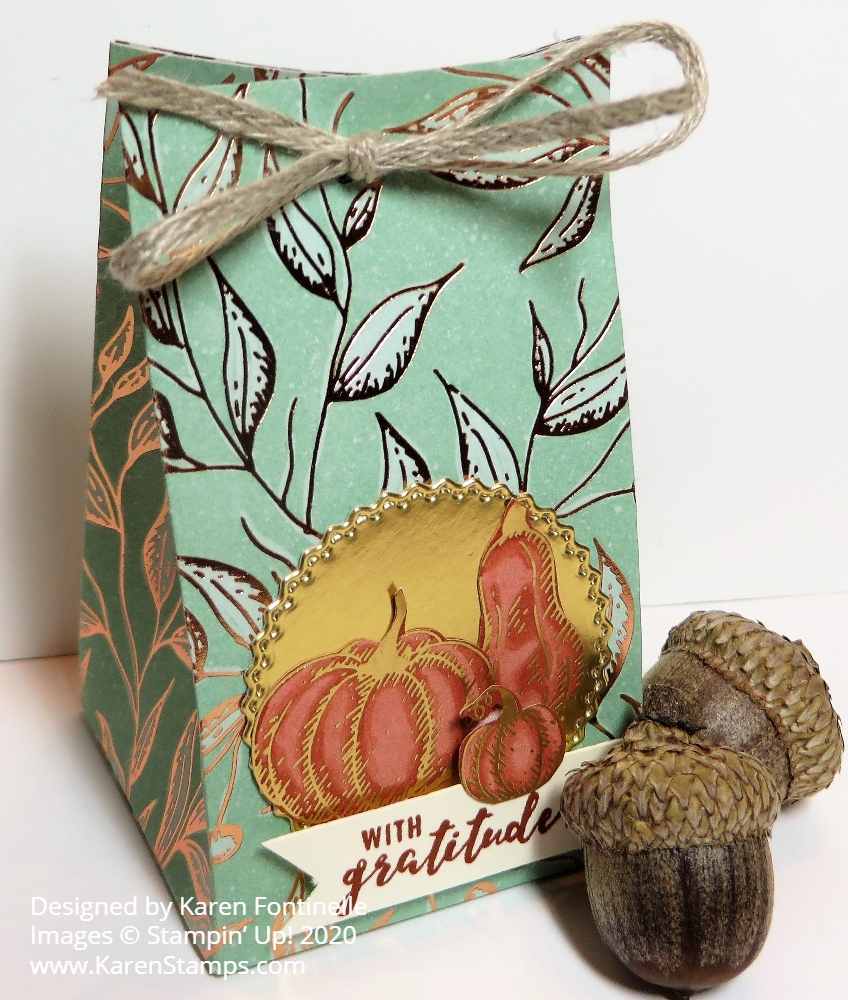
If you want a little autumn treat for someone or maybe for Thanksgiving dinner favors, this little Gilded Autumn 2-4-6-8 Fall Treat Bag would meet your needs! These little 2-4-6-8 bags, as we like to call them, are really easy to make out of cardstock or designer paper and then you can decorate them for any occasion. You can make them taller too with a larger piece of paper.
For this treat bag, you just need half a sheet of paper, 5 1/2″ x 8 1/2″ if using cardstock or cut designer paper to this size. I used the pretty Gilded Autumn Specialty Designer Series Paper with gold and copper foil accents, which makes it extra special. If you want a taller bag, then cut it more than 5 1/2″.
Score at 2″, 4″, 6″ and 8″. Turn and score at 1 1/2″ (or 2″). These will be the bottom flaps so pay attention to the pattern on your paper, watching which way it is going so it doesn’t end up upside down. Cut the bottom flaps up to the score line. Cut off that very small 1/2″ piece on the end. See the photo below. (This isn’t the paper I used, and it is taller, but you can get the scoring and cutting idea.)
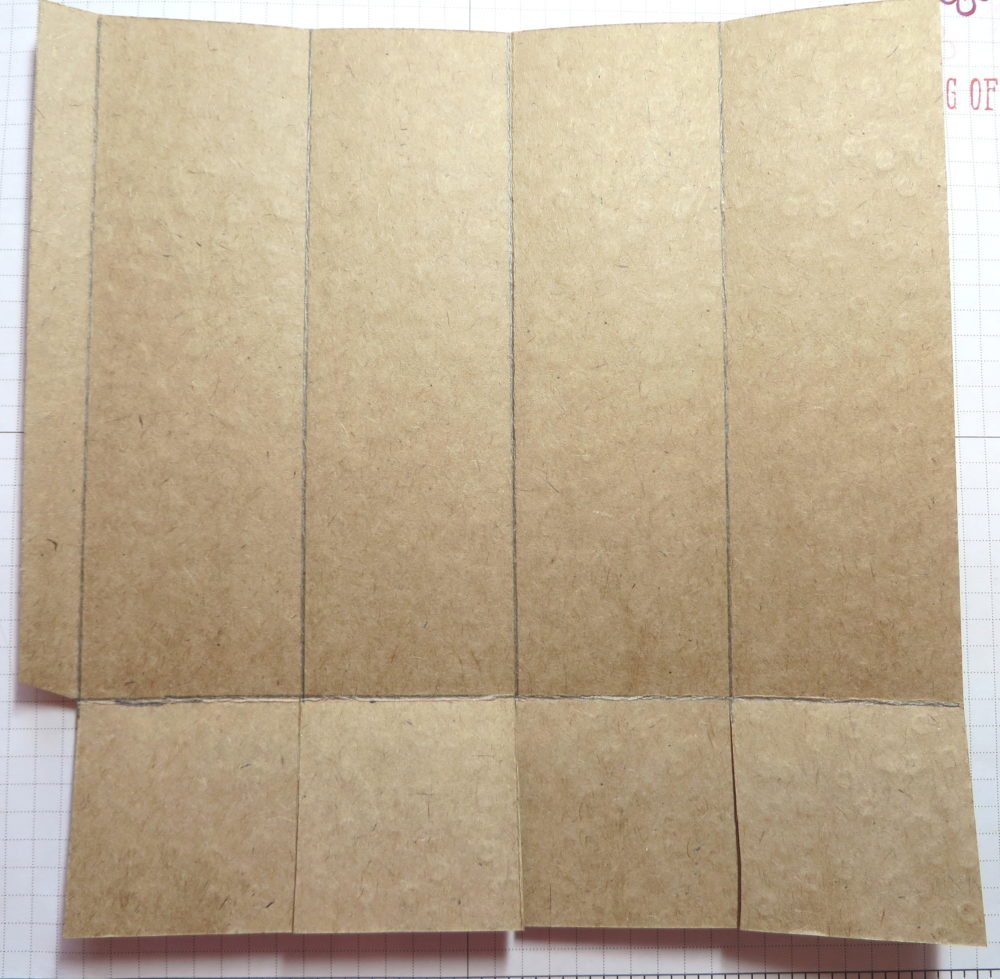
Assemble the box, putting adhesive on that 1/2″ piece on the side. Then pay attention to where the seam is and try to have that face the back. Fold in the bottom flaps, trying to make the front of the bag look nice with a flap fold, not the edge.
Now all you have to do is decorate the front of the bag. You can even leave it open at the top if you prefer or if you want to put maybe a cello bag of treats inside. But if you want to close the top, just pinch in the sides of the bag and push the top together. Punch holes for ribbon or add a clip of some kind to keep it closed. Be sure to put the treat in first!
For this little Gilded Autumn bag, I die cut a piece of Gold Foil using the Tasteful Labels Dies. Out of the designer paper with pumpkins and gourds all over it, I cut out a pumpkin, a gourd, and a teeny tiny pumpkin! I love that paper! I adhered the large pumpkin and gourd onto the Gold Foil circle with Stampin’ Seal+. After stamping and cutting out the greeting, from the Itty Bitty Greetings Stamp Set, I adhered that at the bottom of the pumpkin and gourd, then popped up the tiny pumpkin with a Mini Dimensional just at the very top so that it would partially layer over the greeting.
To finish off the treat bag, I used my old Cropodile to punch two small holes in the top of the bag and I tied a piece of Braided Linen Trim at the top. You could use some other ribbon as well.
This 2-4-6-8 pattern is so versatile and so easy to make! Try it for whatever occasion you want. Halloween is coming up so that would be fun!