
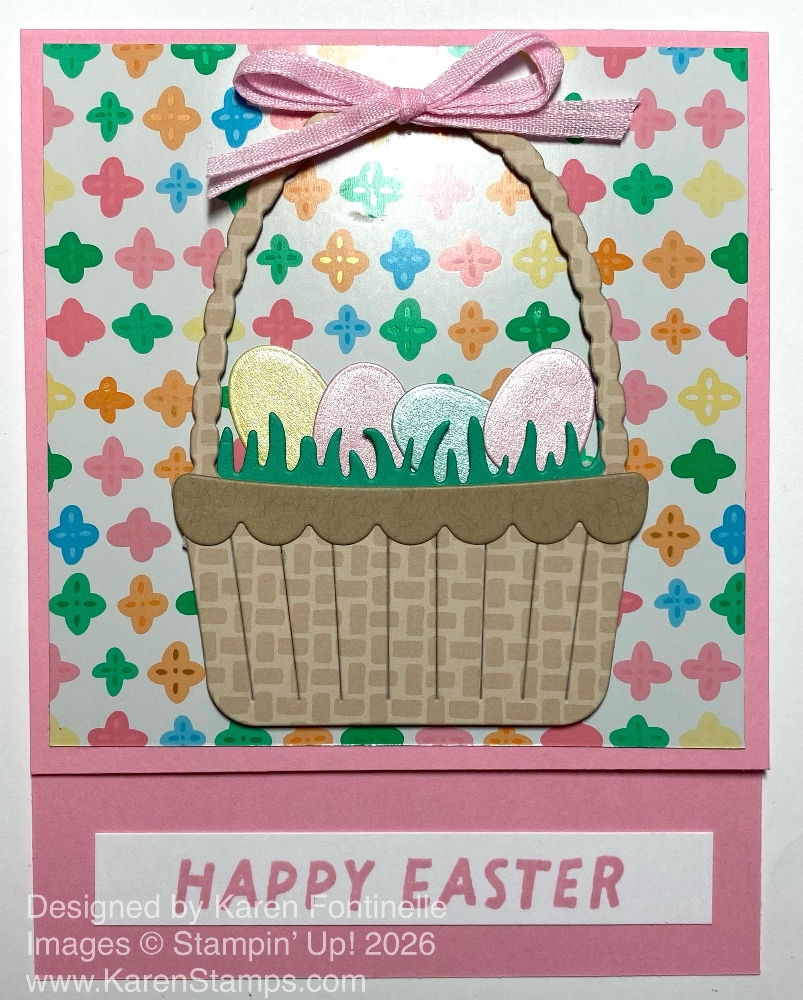
This Easter Card With Basket of Eggs was fun to make and has a slightly different design just to make life interesting! You may notice that the top flap of the card does not come all the way to the bottom of the card. That just makes it a little more fun to open up this card for Easter!
The card base is Pretty In Pink (although in the photo it almost looks like Melon Mambo or some darker pink). Cut the full sheet of cardstock in half vertically at 4 1/4″, then score at 5 1/2″. That will give you either a side fold or a top fold. This card design will have the fold at the top, although you could really do the same type of design with a side fold.
On the front flap of the card, cut off whatever measurement you would like to shorten it. I cut off 1 1/4″ from the bottom of just the front of the card. That leaves space showing from the inside of the card on the outside on which you can add decorative paper, stamping, or a greeting. Stamp the greeting either right in that empty space or stamp it on another paper and adhere it, as I did.
The background layer for the card front is just a whimsical design in the Easter Joy Specialty Designer Series Paper. It has many colors, so you can choose any for your card base. I chose Pretty In Pink. This is a retiring In Color soon, so if you need more, perhaps you should stock up! This piece of DSP is cut at 4″ x 4″.
The Easter basket is cut from one of the papers with a basket weave look and color to it. Then I added a Crumb Cake scalloped edge to the basket. The Shy Shamrock green grass in the basket is also diecut. All of these dies are part of the Easter Basket Dies, which are currently unavailable. Hopefully, you have these dies already. I also diecut some Easter eggs out of the Pastels Shimmer Paper and put those in the Easter basket! At the top of the basket handle, I added a double bow tied with the Bubble Bath 1/8″ Faux Linen Ribbon. I love this ribbon even though it is not an exact color match. It is often just the right size to use when you don’t have space for wider ribbon.
On the inside of the card, I added a 4″ x 4″ Basic White cardstock piece. To the bottom of that, I added a piece of the Easter Joy designer paper in green, added a stamped, diecut, and colored tulip plus stamped a bunny right on the paper. He has a little color and shading with Stampin’ Blends.

At the bottom of the card, I added a “Happy Easter” greeting on a scrap strip of Basic White, which is adhered in that space. This is stamped with the Easter Basket Stamp Set in Pretty In Pink ink. It would also be pretty to stamp the greeting directly on the Pretty In Pink with Pretty In Pink ink plus some little image, too.
This is an example of how just one simple thing, making the front flap of the card shorter, makes for an unexpected, extra-special card design!