Category Archives: Cards

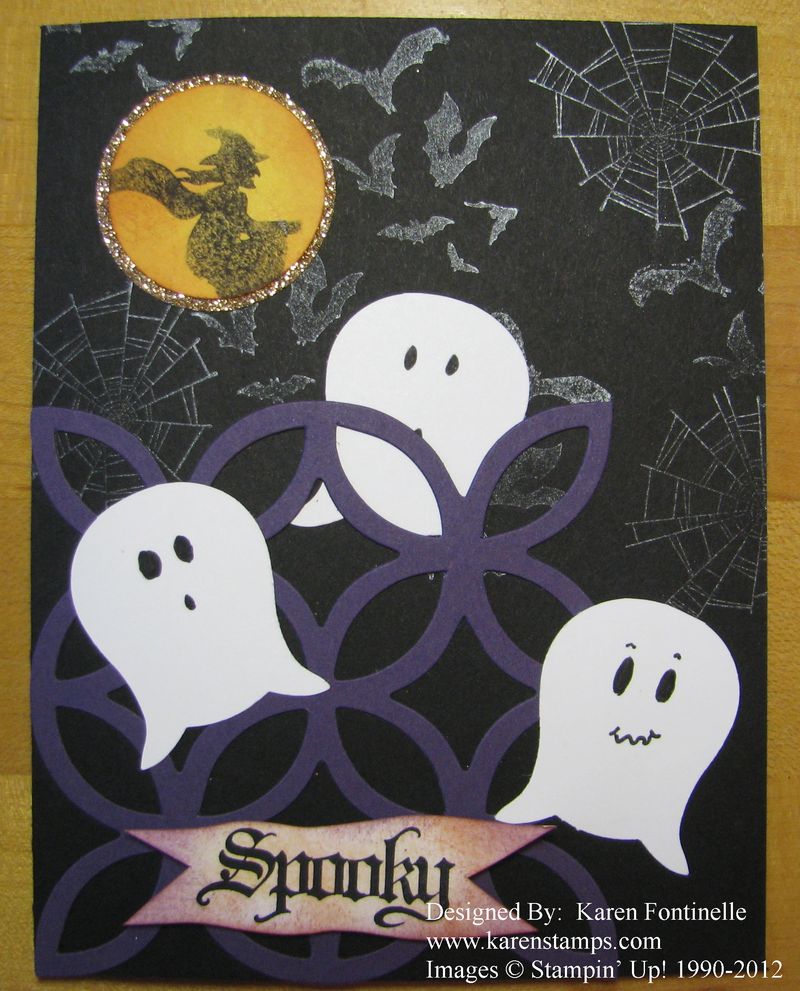
Halloween Glittery Spider Web Card


Halloween Card Spider Web

If you need a Halloween greeting card with a glittery spider web, this is the card for you! The Stampin' Up! Embossing Folders make it so easy with the Big Shot to jazz up your cards!

For this card, I just ran my Basic Black card stock card front through the Big Shot Die-Cutting Machine #113439 with the Spider Web Folder #120889 and sponged a little White Craft Ink #101731 over the raised edges.  But for some extra glitz, I couldn't resist using the 2-Way Glue Pen #100425 and some Dazzling Diamonds Glitter #102023 on parts of the spider web.

To make the label and greeting at the top, I stamped the "For You" frame image from Layered Labels (p. 103 in the Catalog) and cut out with the Apothecary Accents Framelits #127003. Since there isn't a large framelit to layer, I just cut out a slightly larger layer by hand.  Using your Paper Snips #103579  makes it an easy job. And then if you stamp the Layered Label again and punch out the words with the Oval Punch, you can layer that on top, popped up with a Stampin' Dimensional.

The little red spider is from Googly Ghouls in the Stampin' Up! Holiday Catalog p. 27. I don't know if any spiders are red, but I thought this one would be cute in red! I just cut him out by hand, again with my Paper Snips.

For the finishing touches, I added a couple of Rhinestone Jewels to the label and tied the Gumball Green ribbon around the side of the card.  Remember, you can get a spool of that ribbon FREE with a $40 purchase in September!

It's time to order your supplies for your Halloween projects!  You can do so easily at my Online Store!

Punch Art Panda Card

Panda Punch Art Card
While in St. Louis a few weeks ago, we were able to attend the Lantern Festival at the Missouri Botanical Garden. It was a beautiful and colorful display of wire forms covered with silk, and after dark they lit all the displays and scenes. One of the displays was called "Panda's Paradise".  My sister-in-law's friend was able to get us all tickets to go, so when I heard her say she loved pandas, I knew I would make her a punch art panda card!
I know I found this idea somewhere on the stamping internet, but I modified it a little bit and added the red glimmer heart for my thank you. I thought the Lattice embossing folder made a good background. Can you guess that the panda's face is made with the Ornament Punch with the little top cut off?
Stampin' Up! sells a great variety of punches, and plenty of talented stampers, demos and customers alike, come up with all the creative uses for them, not just what you first see! So you know you will get your money's worth out of all the punches!
You can shop here for your Stampin' Up! punches  and any other papercrafting supplies! Of course if you prefer to email me your order, I'm happy to place it for you.

Layered Labels Trick or Treat Halloween Card

Trick or Treat Halloween Card
While I already had out the Layered Labels Stamp Set  and the cute Polka Dot Parade Designer Series Paper I decided to make another card in the same mode as yesterday's post.  Well, it turned out to be a Halloween Card! Notice how I did the "Trick or Treat" greeting! I'll tell you about that in a minute.
In stamping the large background image, which has "Heartfelt" on it, I used the new Illuminate Glimmer Watermark Stampin' Pad #126857.
Illuminate Glimmer Pad Stamping
The photo really doesn't pick up the slight shimmer of the ink, which is why it just looks white. The Holiday Catalog describes it as "a luminescent shimmer" and "watermark ink for tone-on-tone shimmer stamping.  Acid free." I also stamped the little bats on my card from Googly Ghouls with this Illuminate Glimmer pad.
To make the multi-colored "Trick or Treat" on the Layered Label, I colored the image randomly with markers.  I started with the lightest color first (because you don't want to mess up your markers with other colors!) and just colored here and there with one color, then did the same with the next color.  Of course it is very hard to tell if you hit all the spots except to look carefully and see if all the areas of the stamp are wet.  I got pretty lucky on this one, although after looking at the photo, I can see some tiny areas I missed!  But overall I loved the way it turned out!
Here is a close-up:
Halloween Layered Labels on Card
Instead of a ribbon bow at the top, I used three Glimmer Brads. I also sponged the labels with Pumpkin Pie ink to take off a little of the bright white.  I love the way it turned out!
It's time to order your supplies for your Halloween crafting!  My Online Store is always open!

Rubber Stamped Layered Labels Congratulations Card

Rubber Stamped Layered Labels Congratulations Card
Sometimes you need to say "congratulations" to someone so it is good to make some rubber stamped cards to have on hand. This versatile card is made with the stamp set Layered Labels, found in the Stampin' Up! Catalog on page 103. I actually used the sample on that page to duplicate this card. And the Apothecary Accents Framelits Dies (p. 191) make it easy to cut out the frame with the Big Shot. I stamped the same frame again in Real Red and used my Paper Snips to cut out just the word "Congratulations".
The card base is Marina Mist card stock and the designer paper is the new fun Polka Dot Parade. The bow is made with a little piece of Daffodil Delight Seam Binding Ribbon. And for a little bling, I added a couple of Rhinestone Jewels. You gotta have some rhinestones now and then!!
The Layered Labels stamp set and the Apothecary Accents Framelits Dies work so well together to help you make lovely cards and other projects for all occasions.
You can find these stamping supplies and more at my Stampin' Up! Online Store! Put in your own order online….or if you prefer, call or email me with your order any time.

Perfectly Preserved Stamp Set and My Jar Quilt

Perfectly Preserved Stamp Set
Images copyright Stampin' Up! 2012

When I first saw the Perfectly Preserved Stamp Set with its jar and some fruits and vegetables for its contents, I couldn't help but think of my jar quilt!

Many years ago I took a quilting class where we were going to make a quilt that would look like jars lined up on a black background filled with different things.  It was five jars across and then 4 jars going down. The jar shape was made out of print fabric that could have bugs or monsters or whatever you wanted "in" your jar and another strip of fabric for the lid of the jar. Little triangle pieces of black fabric would make the shape of the jar.

I'm not an expert seamstress so mine started as a disaster! In my own defense, I think it was the sewing machine that clumped all the thread together. What a mess! Some other lady taking the class tried ripping mine apart so I could start over, even as the teacher was worrying that the lady was using her class time to try to fix my quilt! I actually thought I had some part of mine put together but apparently not!   Like lots of unfinished craft projects, this was found in a drawer barely started!

Jar Quilt Pieces

I don't remember if the sample quilt had "jars" of bugs or not, but I knew I didn't want mine to be all about bugs….so I found fabric pieces of baseballs, monsters, play money, soccer balls, candy corn, vehicles and many other things. I think it would have been cute if only I had finished it! Maybe someday!!  

I think you could use the same idea with the Stampin' Up! Perfectly Preserved Stamp Set, use some other stamps, like sports balls or butterflies or ornaments or whatever to "fill" the jar! It doesn't have to be about food!

You can find the Perfectly Preserved Stamp Set in the Stampin' Up! Holiday Catalog on page 29.  If you are also interested in the matching Cannery Set Framelits Dies, then get the Perfectly Preserved Bundle and save 15%!

Let me know if you need any help in ordering or just go to my Online Store any time! And don't forget, if you spend $40, you can choose a free roll of 3/8" Stitched Satin Ribbon.  Spend $80 and get two rolls!  You'll love that ribbon!

A Text a Stamping Mother Would Love!

My son was coming home today with his girlfriend to attend a friend's wedding this evening.

This was the text I received from him this morning:

"Could I possibly commission you for one of your world famous handmade cards? 🙂 "

Wouldn't any stamping mother just love that??!

So if we ever think that what we do isn't valued or appreciated by our family, this is one of those moments that we have to savor!

I was glad that I had several wedding cards already in my stash so he and his girlfriend were able to go through my pile and pick one out.  She happened to love the one with the little wedding birds from Easy Events. Naturally I don't have a picture of it, but the stamped birds are centered on the card with the (retired) Lace Ribbon Punch behind it across the card and a couple of rhinestones.  I think the background was embossed with the Perfect Polka Dots Embossing Folder.  So you get the idea!

Easy Events Stamp Set

This is a great stamp set as I've said many times.  It covers most occasions and you can even leave off the words and just use the image! You can order the stamps in either wood- or clear-mount.  You can even cut the words apart from the image and use them separately.

If you need a good versatile stamp set, this would be one I would recommend.  Just visit my Online Store!

Don't forget the free ribbon promotion with every $40 you spend!


Googly Ghouls Sparkly Halloween Card

Googly Ghouls Sparkly Halloween Card

I hope you enjoy this Googly Ghouls Halloween card with some sparkly Iridescent Ice embossed over the ghouls!  I think you can see the sparkle in the photo. I simply stamped the Googly Ghouls with Stazon Black ink #101406, colored in with markers, tapped the Versamark pad #102283 all over it and embossed with the Iridescent Ice embossing powder #101930.  We have a new Heat Tool in the new Stampin' Up! catalog as well, on page 159, #129053. And for a finishing touch, I added some Googlie eyes #127539.

As I was putting this card together, I found I just loved the combination of this sheet of the Howlstooth & Scaringbone Designer Series Paper #126906 with the Raspberry Ripple #126842 and Basic Black #121045 card stock. I'm going to have to make something else with that combination!

Don't forget that the Stampin' Up! Holiday Catalog has "Bundles" on the inside of the front page to save you money!  And if you are in a Halloween mood, be sure to check out the Ghoulish Googlies Bundle on page 27.  Choose which stamp set you want, wood- or clear-mount and the Ghoulish Googlies Designer Kit together and save 15%. You'll get the stamps, the googly eyes, the bags, the tags, and the Baker's Twine. Believe me, it is such a fun purchase!

To get your Halloween stamping supplies, just go to my Online Store here.

Scentsational Season Candy Cane Christmas Card

Scentsational Season Candy Canes Christmas Card

The Scentsational Season stamp set and matching Holiday Collection Framelits Dies will practically make an easy Christmas card FOR you! Just stamp the image and run it through the Big Shot Die-Cutting Machine with your framelits die and you've got easy cutting! I ran the Gumball Green card stock through the Big Shot with the Perfect Polka Dots Embossing Folder. For some added color and trim, I used the Finishing Touches Edgelits Die to make those pretty edges on top and botton. Since I didn't really leave room for a greeting, I stamped the little "Merry" tag from Tiny Tags and adhered it to the candy cane. I think it turned out pretty cute!

It's not too early to be thinking about Christmas cards!  Why not start on them early so you can ENJOY the process and not rush?!

For all your beautiful stamping supplies, please shop my Stampin' Up! Online Store!

***If you are interested in this stamp set and these Framelits Dies, be sure to check out the Scentsational Season BUNDLE on page 16 of the Stampin' Up! Holiday Catalog! Purchase both together and save 15%! You can still choose from wood- or clear-mount stamps!

Merry Minis Christmas Card

Merry Minis Christmas Card
Stampin' Up! has a really cute Punch Pack in the Holiday Catalog called Merry Minis #126882, perfect for making a Christmas card! To save time stamping, I just punched the little tree out of designer series paper in the Festival of Prints Paper Stack #126904. These sheets are small, 4 1/2" x 6 1/2", but you'll be able to use the designs for more than Christmas!

I used a greeting from Word Play, colored in with Lucky Limeade and Cherry Cobbler markers and punched out with the Labels Collections Framelits Dies #125598. After I punched out the Cherry Cobbler layer piece, I thought it looked a little bland…but then I remembered the Festive Paper-Piercing Pack #127857. I used that (and the Stampin' Pierce Mat #126199) and the Paper-Piercing Tool #126189) to put a little pierced border around the inside edge of the Cherry Cobbler piece.  Lovely!

Paper-Piercing Tools

Don't you love the Silver Glimmer paper at the bottom edge?!  Stampin' Up! carries three colors of Glimmer Paper now….Red and Silver in the regular Stampin' Up! Catalog and the new Champagne Glimmer Paper #127885 in the Holiday Catalog. Check it out!

If you would like a Stampin' Up! Holiday Catalog to hold in your hands rather than look at online, please email me at Karen@KarenStamps.com.

Fabulous Florets and Pretty Periwinkles for Stamping Inspiration

We have lots of pretty periwinkles blooming in our backyard right now as well as some cute, delicate little pink flowers, Gaura, back by the fence.

Pink Periwinkles

White Periwinkles

Pretty Periwinkles

Gaura Pink Flowers

So if you ever wondered where we stampers get our inspiration and ideas sometimes, these pretty flowers made me think of making a card with little pink and white flowers. As I looked over my stamps ets, the Fabulous Florets stamp set seemed to be the winner! I stamped some stems (in different directions as much as I could), then I stamped a few of the small and large flowers right on the card.  I also stamped flowers on Whisper White scrap paper with Black Stazon, colored some of them pink with Primrose Petals and left some white. With my trusty Paper Snips (they make detailed cutting SO much easier!) I cut out several flowers and played around with them on my card front until I was settled on a design. Once they were glued down with Stampin' Dimensionals, I added a little glitter with Dazzling Details.

Here's a tip:  Glue down the card front to the card base BEFORE adding the Dazzling Details or you will forget about the wet Dazzling Details and press your hand right into your glitter!

Fabulous Florets Flower Card

And maybe here you can see some of the Dazzling Details glitter!

Dazzling Details Flowers

Look out in your yard and see what catches your eye (or maybe your neighbor's yard!) and see what card or scrapbook page comes from that inspiration!

For all your stamping supplies, please visit my Stampin' Up! Online Store!


First Day of School in Houston TX


First Day School

Images copyright Stampin' Up! 2012

Today is the first day of school for about 200,000 children in the Houston Independent School District. Today is the first day in many years that I do not have a child starting school.  It's funny how your life revolves around a school calendar for so many years and then all of a sudden you don't even know when school starts!  But you can't help think about what a big day this is for SO many children, parents, teachers, administrators, bus drivers, etc. The first day my daughter went to kindergarten was probably the longest day of my life just wondering what she was doing every second (and yes, it was a full day of school!)

Don't you think it would put a smile on your child's face to find a little card or note from you in their lunchbox or backpack in these first few days of school…or even all year?  An easy way to do that is with My Digital Studio, digital papercrafting software from Stampin' Up!  Would you believe this First Day of School card started as a Christmas card in My Digital Studio?! It's always fun to start with a template and just change some or all of it according to your theme.

And while we liked My Digital Studio since it first came out, I can tell you that the new Version 2 is absolutely fabulous!  That little apple on my card was an all black stamp and I was able to color the stem and leaf green and the apple red with a digital brush…and let me tell you, that is a LOT of fun!  There's even a pencil hiding on that white panel but I colored it white so it would disappear because I didn't want it on my card!

If you are interested or curious about My Digital Studio, get the My Digital Studio FREE 30-Day Trial today at my Online Store and start making those cute little cards and gifts for your little ones…and even your big ones!  They'll all appreciate a little something from mom or dad!

Comfort Cafe Designer Series Paper Thank You Card

             Comfort Cafe Thank You Card

I think this Comfort Cafe Designer Series Paper looks beautiful with the Pool Party and Soft Suede card stock on this thank you card….if I do say so myself! The little flowers are made with the new 1 1/4" Scallop Circle Punch found on page 7 in the Stampin' Up! Holiday Catalog.  You have to put this punch on your next order!!

I intended to feature these cute little flowers in yesterday's post but some other card developed and didn't allow room for the flowers! But I love them on this card!  Actually I have them pretty flattened out as I will be mailing this card (gasp!) but I will tell the recipient she can "foof them up" when she gets the card.  However, I think the paper is so pretty that they look good even flattened out this way!

To make the flowers, just punch out three small scallops (or as many as you would like) for each flower.  I spritzed mine with a fine spray mist of water, then stacked them three in a pile and stuck in the Gold Metallic Brad after poking a hole with the Paper-Piercing Tool using the Stampin' Pierce Mat.  After you have them together, scrunch each layer up toward the center, even twisting each layer around a bit so they are offset.  So easy!  Let dry and apply to your project!

The greeting is from the Perfectly Penned stamp set on page 132 of the main Stampin' Up! Catalog.

If you need any stamping supplies, please visit my Stampin' Up! Online Store here.

Apothecary Art Birthday Card

Apothecary Art Birthday Card

This Apothecary Art birthday card is a nice one to send to someone and easy to make! Surprisingly, it is not what I intended to make today, but it's what turned out! Sometimes you just have to go with what creativity deals you and not force anything else!

The card base is Soft Suede which goes with the Comfort Cafe Designer Series Paper #126898.  I stamped the images from Apothecary Art (page 102) and cut out with the Apothecary Accents Framelits Dies #127003. The layer is the new In Color, Midnight Muse.

Just enjoy when you are stamping and creating and see what comes of it!

Create a Cupcake Birthday Card

Create a Cupcake Birthday Card

Let's celebrate one special birthday with a Create a Cupcake birthday card. August seems to be a big month for birthdays but I didn't think it was that way when I was growing up. There was mine and my grandpa's in August, making me on the young side when I started school.  By junior high I knew another girl that had a birthday in August. But now I know lots of people with August birthdays! And I need to make some cards!

This card started as being somewhat of a CASE of a card in the Stampin' Up! Catalog, but I went on to make my own version. The Create a Cupcake stamp set is a cute one and if you have the matching Cupcake Punch #121807 there's no cutting involved! I also made good use of the Big Shot Die-Cutting Machine #113439 with the background embossed with the Perfect Polka Dots Embossing Folder #117335, the pretty border cut with the Finishing Touches Edgelit #1217010 and the doily layer cut with the Delicate Doilies Sizzlit #126999. The little flowers stamped at the bottom with Versamark #102283 are also in the Create a Cupcake stamp set.

You can't see in the photo, but I embossed the tiny cherry with our Cherry Scented Stampin' Emboss Powder #127035. I think the cherry was too tiny to have an impact with the scent but it was fun to try. And for some bling I got carried away with the Basic Rhinestone Jewels #119246

Create A Cupcake Birthday Card with Rhinestones

Be sure to make the inside of your Create a Cupcake Birthday Card pretty as well!

Create a Cupcake Birthday Card inside

If you need any papercrafting supplies to make some special birthday cards for your friends and family, please visit my Stampin' Up! Online Store and place your order! They will be thrilled and surprised at your creativity!

Last Day for Reason to Smile


Reason to Smile

It's not really the last day to have a reason to smile, just the last day to purchase the Reason to Smile stamp set for only $5 with a $50 purchase! It was fun having a stamp set to buy for only $5!

  • Stampin' Up! has notified us that they are switching the type of liner used in the Snail Adhesive.  It is now tinted blue and thinner that the previous liner so the roll may look like it has less adhesive, but it does have the same amount.
  • Are you on my mailing list??!  Be sure to sign up at the top of the middle column of my blog!  My August newsletter will be coming out next!
  • The Stampin' Up! Holiday Catalog begins tomorrow!!  If you do not have a demonstrator you are working with and would like a Holiday Catalog, please email me. You will certainly LOVE this catalog!
  • The new Version 2 of My Digital Studio is supposed to come out tomorrow! Can't wait!!  If you would like to try first before buying, you will be able to order a free 30-day trial.

Enjoy your last day of July!!  We are one day closer to cooler weather (hopefully!!).

If you want to place a $50 order to get the Reason to Smile Stamp Set for only $5, you can shop until 11:50 MT tonight online!