It’s World Card Making Day so try a new kind of card fold, this Pop Up Corner Card With Frosted Floral Designer Paper. It’s really quite easy to make! How fun would it be for your friend or loved one to receive a card made like this!

Start with a piece of cardstock that is 8 1/2″ x 8 1/2″. Score with the Stampin’ Trimmer or the Simply Scored Tool. Score down the center (4 1/4″) vertically and horizontally. Then in the upper left corner, score horizontally. You can line up the tips of the paper at the top and bottom in the cutting channel. You could also use a ruler and stylus on a piece of foam or something soft like the Stampin’ Pierce Mat.
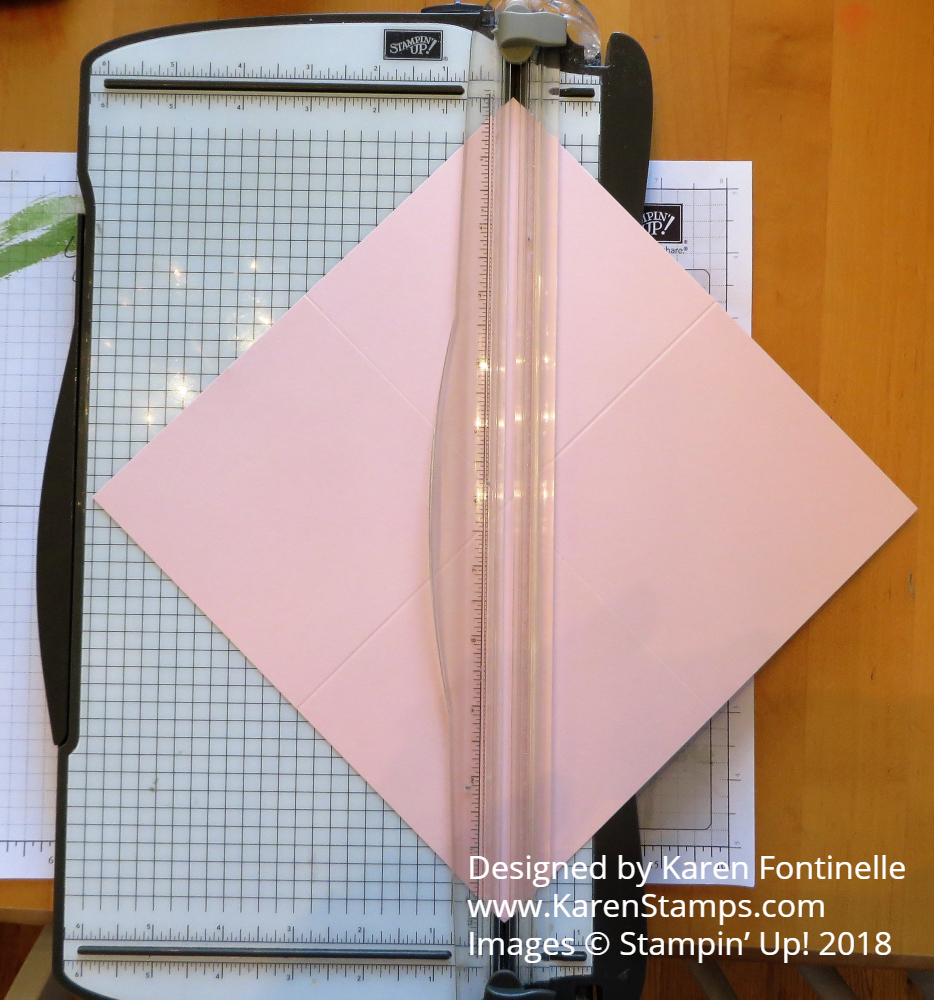 Next, cut along the score line as you see in the photo below. Fold and crease all the score lines. I find it is best to fold back and forth, both ways. If you find the edges don’t match up exactly, you might try trimming this scored line that you cut in the photo below just a very thin smidge off which might make that piece fold in better to get that extra bulk of the score off.
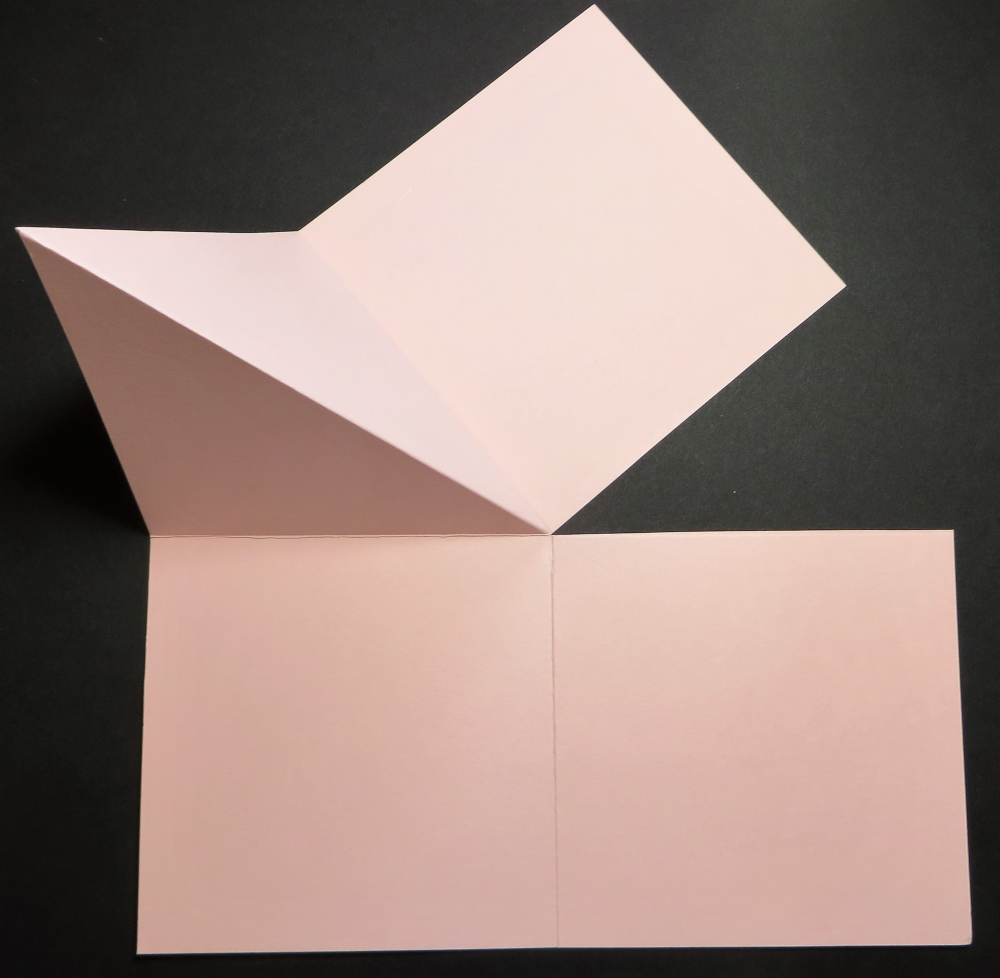
 Flatten out the cardstock and fold the top half down over the bottom half.
 Now lift up the right hand corner and fold it back along the diagonal fold forming an L-shape.
 Now pick up the right corner and fold over to the left. If you did the previous step correctly, you will be folding the right section over onto the diagonal score line. Just practice folding this card first without gluing anything to make sure you have it correct and understand the card. BUT after you have the hang of it, after you fold this right section over to the left, you will put adhesive on the face of that section. OR imagine it like this – after folding over the right section to the left, the piece above that will be folded down and adhered, so you can put glue on either the top piece or the bottom. At first just hold the pieces together so you can see how it will open up and make sure you know which section will be the front of the card.

Then fold the top section down. When you are ready, this is where you will put adhesive, between these two sections.

On this photo, you can see on the final fold the edges didn’t quite match up. This is where I went back in and trimmed a teensy tiny bit off the little bulk of the score line where I cut the straight line initially.
If you feel confident to plan ahead, you could write in pencil on the sections where you want to adhere other cardstock or designer paper or simply stamp to decorate. It’s easier to do all these things when the paper is flat. But otherwise, go ahead and assemble the card and then adhere the extra paper.
For this card, I chose the beautiful Frosted Floral Designer Paper. It has a shimmer to it that normal designer paper does not have. It is lovely!! I stamped the inside with some stamps from the First Frost Stamp Set. The greeting is from the Petal Palette Stamp Set, which is discounted 10% for the World Card Making Day Sale at Stampin’ Up!
Click HERE to see another Pop Up Corner Card I made a couple of years ago! I had fun making that one and made others ones, too.
Celebrate World Card Making Day today by trying a different fold or making any kind of card and sending it! Or start working on your holiday cards! Whatever you like but take a moment today to stamp! And check out the World Card Making Day Sale!