Category Archives: Birthday

Male Birthday Card…or Any Occasion Card!

You're Amazing Birthday Card

Twenty-four years ago today I was driving my daughter home from Sunday School and had to practically stop the car while I let a contraction pass. When I got home I called my parents in St. Louis to say probably something was happening. We four all ate lunch and in the afternoon I baked cupcakes for the cake walk at the Halloween carnival that would be down the street the next night. Naturally I had some licks of the batter and frosting! Since we would be at the carnival and trick-or-treating the next night, I decided to cook a special Halloween dinner that night. In the midst of batter-licking and frosting-eating and dinner prep, I decided maybe I needed to quit eating and go sit down and time the contractions. By half-time of the televised Sunday night football game (my husband always appreciated the timing!), it was time to calmly call my friend and ask her to come get the kids since we'd be going to the hospital sometime that night. She rushed over and by the time my husband helped get the kids buckled in their seats in her car I was more than ready to be going to the hospital. The nurse taking my information laughed when I told her my last meal was cupcake batter and frosting!  In just a couple of hours, Steven was born, just about 45 minutes short of being a Halloween baby! How can that be so long ago??!!

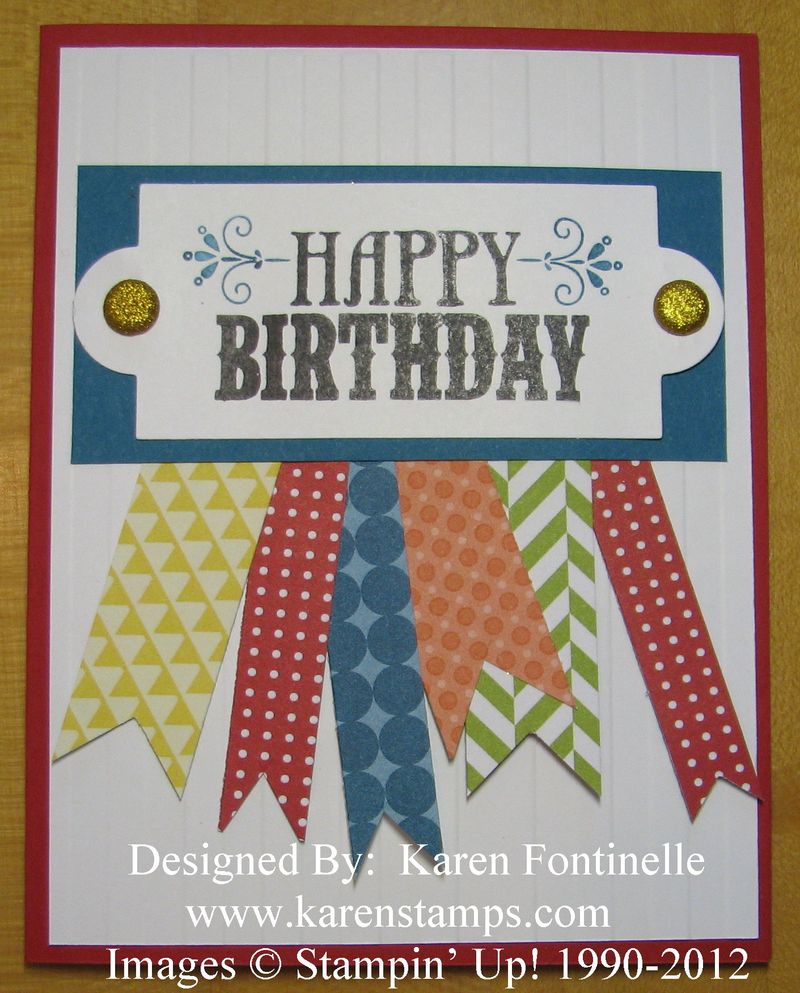
We think making a masculine card is hard since we crafters seem to often be using flowers and colors and other images that don't seem to be appropriate for a man or boy. I actually started off thinking I would copy a card I'd seen online, but once I changed the shape of my stamped greeting from "You're Amazing" by cutting it out with one of the Apothecary Accents Framelits, I came up with this design instead. Great way to use up paper scraps, great way to make a card for a male birthday, great way to make a card for ANY occasion! The background of the card is embossed with the Stripes Embossing Folder. And a couple of Glimmer Brads add some pizzazz without being too much bling for a boy!

The paper strips (Summer Smooches…and you wouldn't think that paper would work for a masculine card but it does!) are just cut to varying lengths and widths, no big deal, just whatever you want.  And then cut a little "v" out of the end or use a square punch to punch it out. (I think it is easiest to just snip).

Have fun stamping today!

Apothecary Art Birthday Card

Apothecary Art Birthday Card

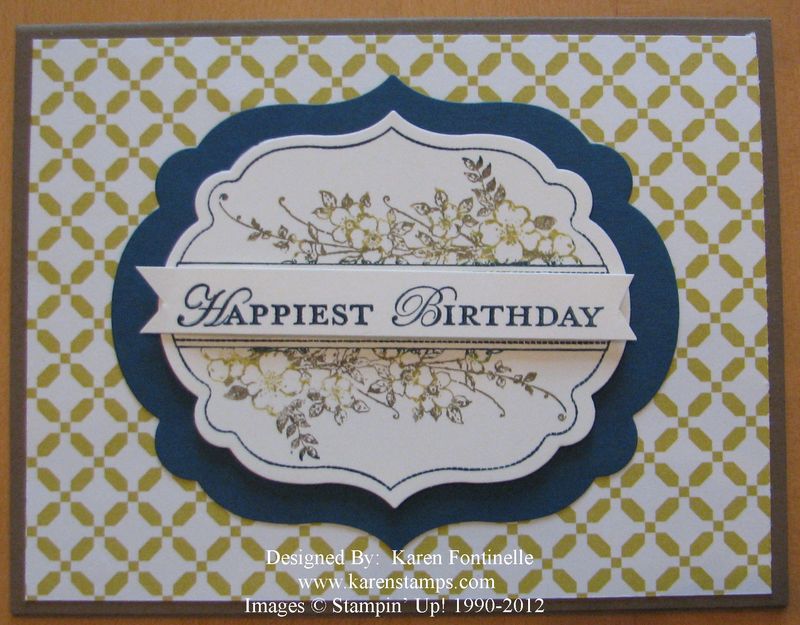
This Apothecary Art birthday card is a nice one to send to someone and easy to make! Surprisingly, it is not what I intended to make today, but it's what turned out! Sometimes you just have to go with what creativity deals you and not force anything else!

The card base is Soft Suede which goes with the Comfort Cafe Designer Series Paper #126898.  I stamped the images from Apothecary Art (page 102) and cut out with the Apothecary Accents Framelits Dies #127003. The layer is the new In Color, Midnight Muse.

Just enjoy when you are stamping and creating and see what comes of it!

Create a Cupcake Birthday Card

Create a Cupcake Birthday Card

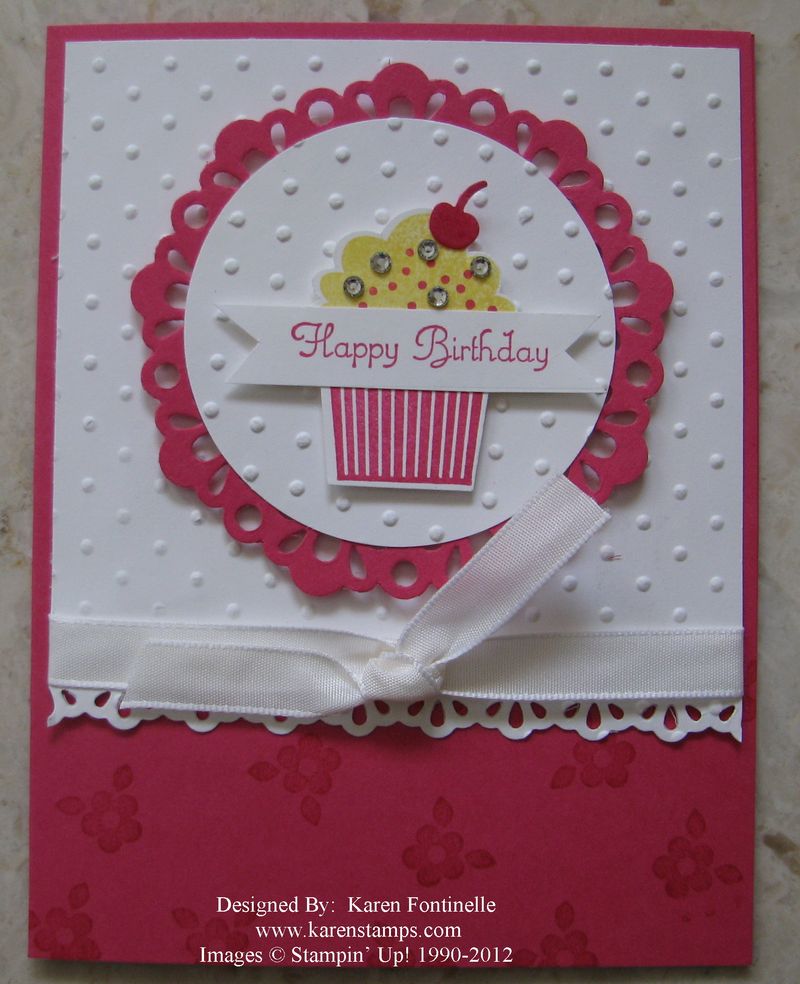
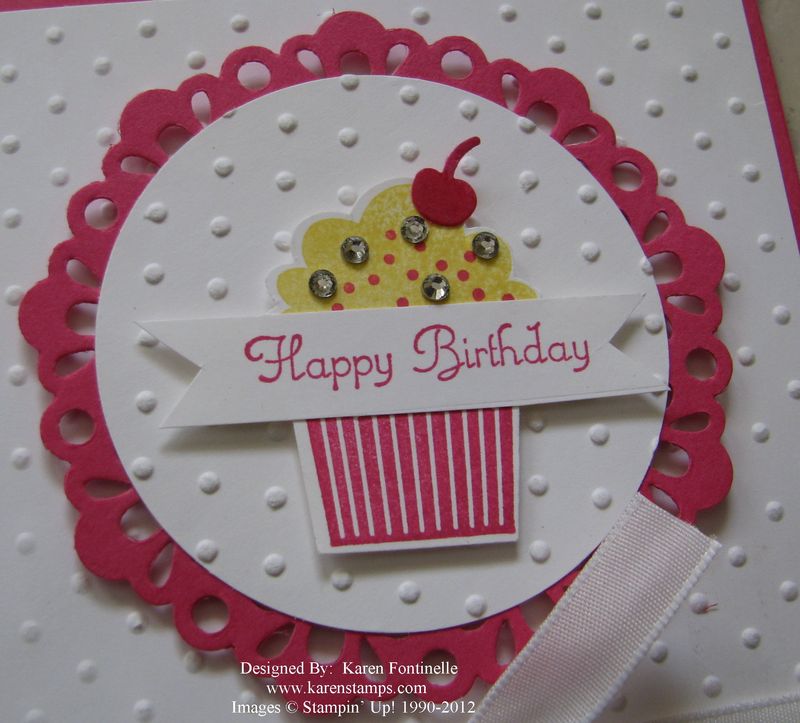
Let's celebrate one special birthday with a Create a Cupcake birthday card. August seems to be a big month for birthdays but I didn't think it was that way when I was growing up. There was mine and my grandpa's in August, making me on the young side when I started school.  By junior high I knew another girl that had a birthday in August. But now I know lots of people with August birthdays! And I need to make some cards!

This card started as being somewhat of a CASE of a card in the Stampin' Up! Catalog, but I went on to make my own version. The Create a Cupcake stamp set is a cute one and if you have the matching Cupcake Punch #121807 there's no cutting involved! I also made good use of the Big Shot Die-Cutting Machine #113439 with the background embossed with the Perfect Polka Dots Embossing Folder #117335, the pretty border cut with the Finishing Touches Edgelit #1217010 and the doily layer cut with the Delicate Doilies Sizzlit #126999. The little flowers stamped at the bottom with Versamark #102283 are also in the Create a Cupcake stamp set.

You can't see in the photo, but I embossed the tiny cherry with our Cherry Scented Stampin' Emboss Powder #127035. I think the cherry was too tiny to have an impact with the scent but it was fun to try. And for some bling I got carried away with the Basic Rhinestone Jewels #119246

Create A Cupcake Birthday Card with Rhinestones

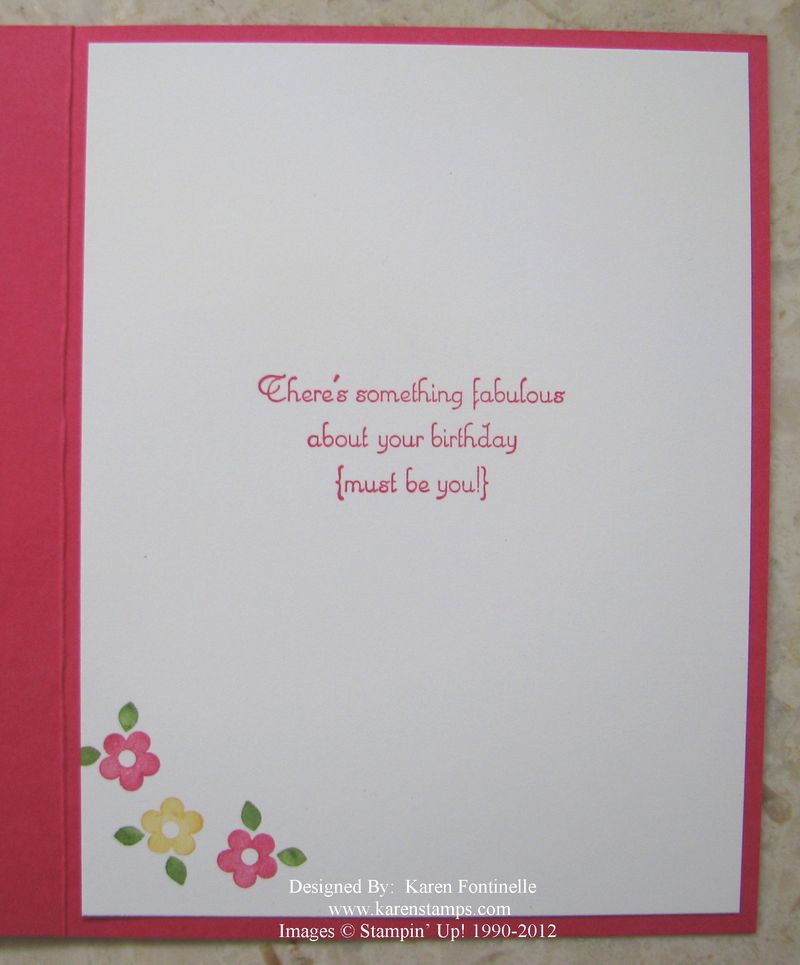
Be sure to make the inside of your Create a Cupcake Birthday Card pretty as well!

Create a Cupcake Birthday Card inside

If you need any papercrafting supplies to make some special birthday cards for your friends and family, please visit my Stampin' Up! Online Store and place your order! They will be thrilled and surprised at your creativity!

Perfect Punches Twitterpated Birthday Card

Perfect Punches Twitterpated Birthday Card

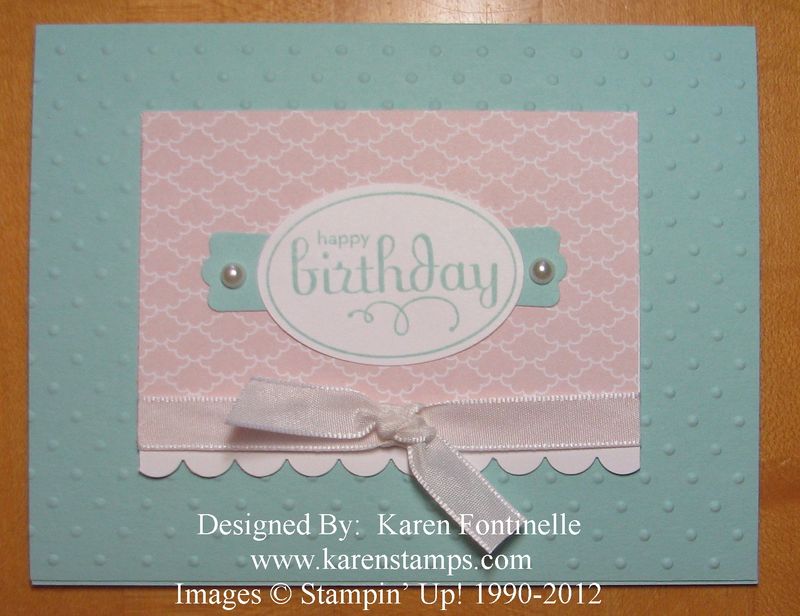
As I looked through some of the photos other demonstrators took at the Stampin' Up! Convention last week, I was inspired to make a birthday card using these colors.  Then I found a scrap with a scallop border punched with the Scallop Edge Border Punch #119882 so I just started with that. I covered the scrap of Whisper White with a piece of Twitterpated Designer Series Paper #125406 just down to the scallop edge. The card is embossed with the Perfect Polka Dots Folder #117335 (one of my favorites). The greeting is from the Perfect Punches stamp set (page 120).  If you noticed that the Modern Label Punch #119849 is unusually long to fit behind the Perfect Punch stamp, it is because I cut it in half so the ends would stick out on the sides of the greeting.  And then I added a pearl on each side.

So there you have a simple, soft pretty card perfect to send to someone special for a birthday!

If you haven't gotten your $5 Reason to Smile stamp set with a $50 order from Stampin' Up! yet, place your order today at my Stampin' Up! Online Store.

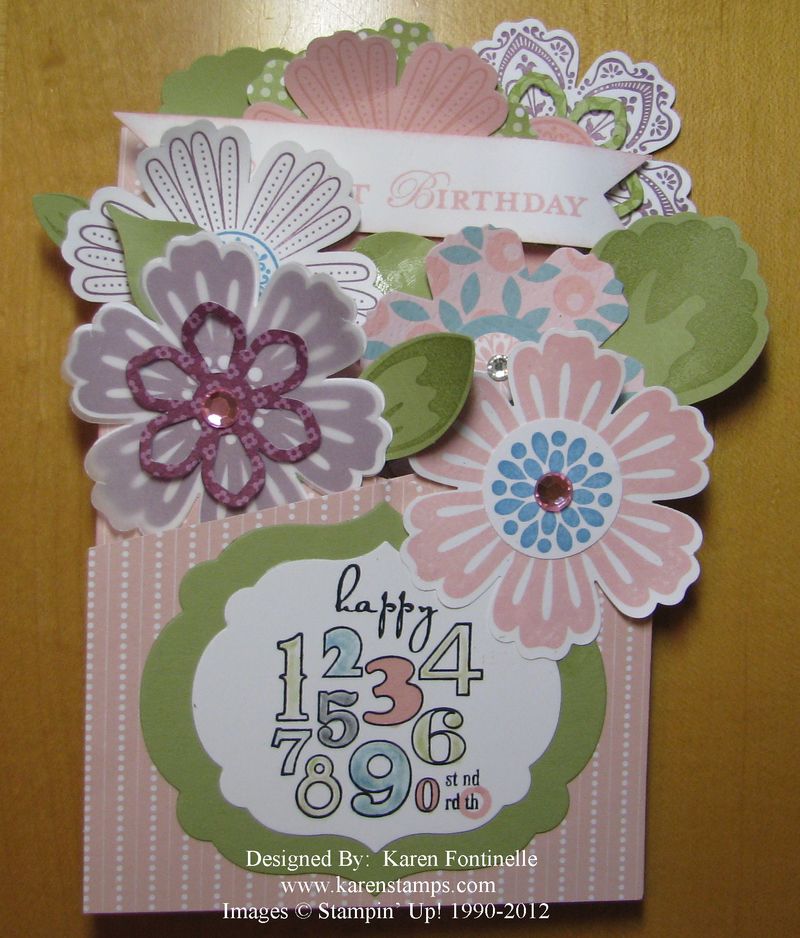
Cascade Mixed Bunch Birthday Card

Cascade Mixed Bunch Birthday Card Standing


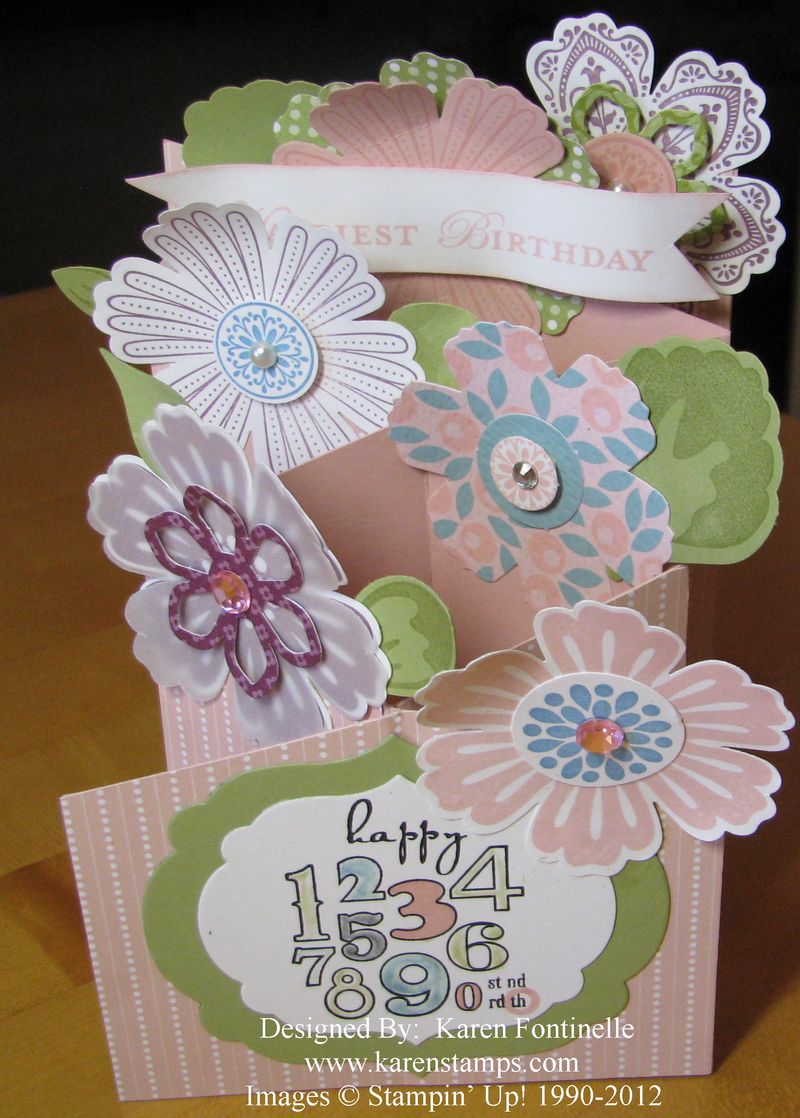
Maybe this will be my last Cascade Card for awhile…especially with the stamp set Mixed Bunch and the matching Blossom Punch #125603 ….but then it makes such a great card, you never know!  When you are making a special card for someone, it's fun to go as over the top as you want.  I added some bling with Basic Pearls and Rhinestones plus the pink rhinestones that came in the (now retired) package of Blossom Builders die cuts.  I punched the leaves with the Blossom Petals Builder Punch #121808. The greeting on the front is from the stamp set Bring on the Cake. The banner in the background (that you can hardly see) is "Happiest Birthday" (and I can't remember the stamp set it is from!!).

Try a Cascade Card this weekend!

If you want to place an order, just go to my Online Store HERE!

Here is the card folded flat for mailing.  I did use a larger envelope that I just had in my stash. Of course now you can make your own envelopes with the Simply Scored Scoring Tool #122334 and Simply Scored Diagonal Plate #125586.

Cascade Mixed Bunch Birthday Card

Another Cascade Birthday Card

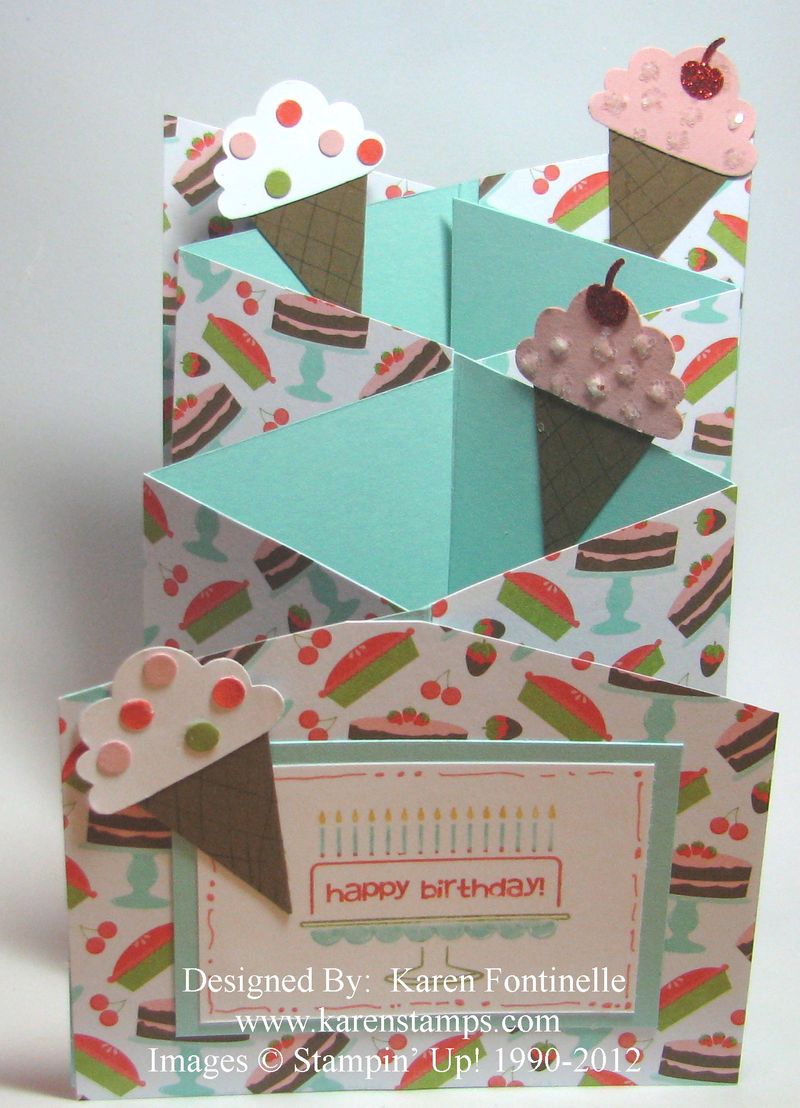
Cascade Cake and Ice Cream Birthday Card

And here's another cascade birthday card like yesterday, this time with cake and ice cream! The cascade design is made the same way….I used Pool Party card stock as the base and added the Sweet Shop Specialty Designer Series Paper (if you have some in your stash!)

The ice cream cones were fun to make.  I punched the cone with the Petite Pennants Builder Punch #122361 and made the ice cream topper with the Cupcake Builder Punch #121807.  The "sprinkles" on the vanilla ice cream cones come from the Cupcake Punch.  The "strawberry" ice cream cones have dots of glitter plus a Red Glimmer Paper cherry punched with the Cupcake Punch (I think that Cupcake Punch is mighty handy!) The greeting is from the stamp set Bring on the Cake.  I used markers to color in the stamp and added my own little squiggles and dots around the border with the thin end of the marker.

If you need any stamping and card-making supplies, just click HERE to go to my Stampin' Up! Online Store!  Be sure to check the Clearance Rack, too, when you are making an online order!!

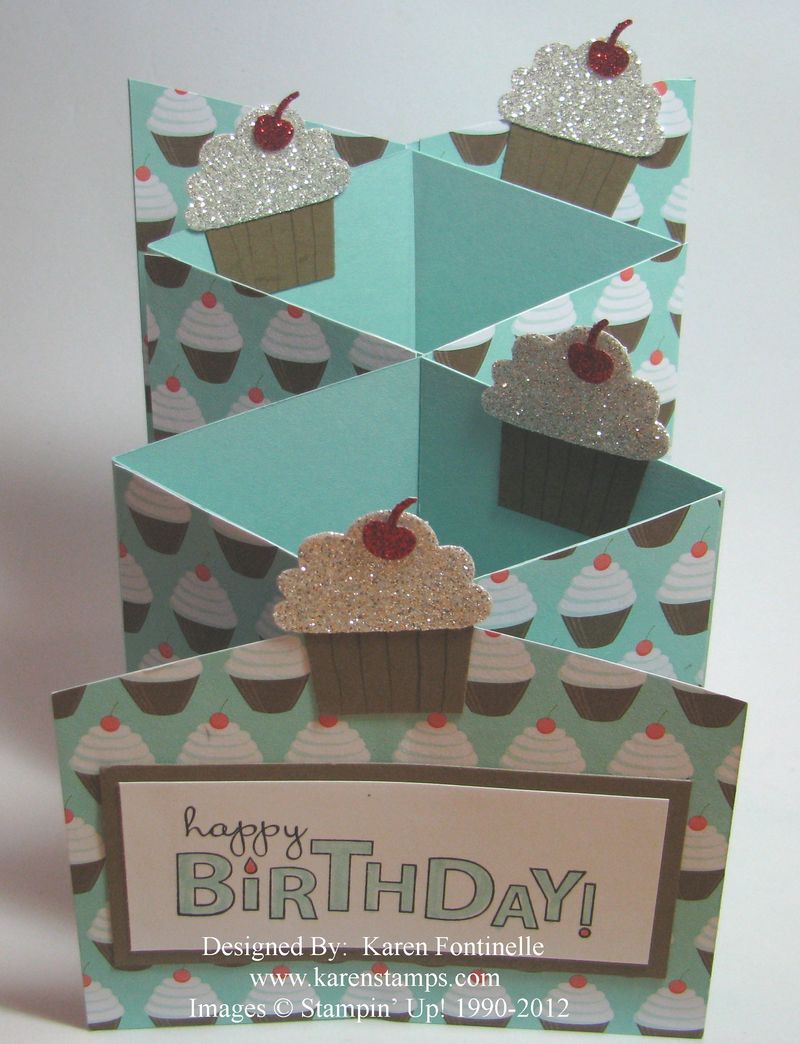
Cascade Cupcake Birthday Card

Cascade Cupcake Birthday Card


These cascade cards are really fun to make and hopefully make a great impression with the recipient! Aren't cupcakes great for a birthday card?! They fold flat for mailing but then they can be unfolded and placed on display if the person wants to. I saw a card similar to this one online somewhere and thought it would be so cute to make. I used Pool Party card stock but added the cute Sweet Shop Specialty Designer Series Paper (which I don't think is available any longer since it was in the Occasions Mini Catalog).

The greeting is from Bring on the Cake and the cupcakes are punched with the Cupcake Builder Punch #121807. Doesn't the Silver and Red Glimmer Paper add so much to this card?!

Come back tomorrow to see another birthday cascade card I made!

Don't forget…..lots of Stampin' Up! stamps and accessories are retiring on May 31st….which is next Thursday!  Don't miss out on something you want! Stamps will be available since Stampin' Up! manufactures them; however, accessories  are only available while supplies last and some are gone already! Check your list today before the last minute rush hits!  Order Online HERE!


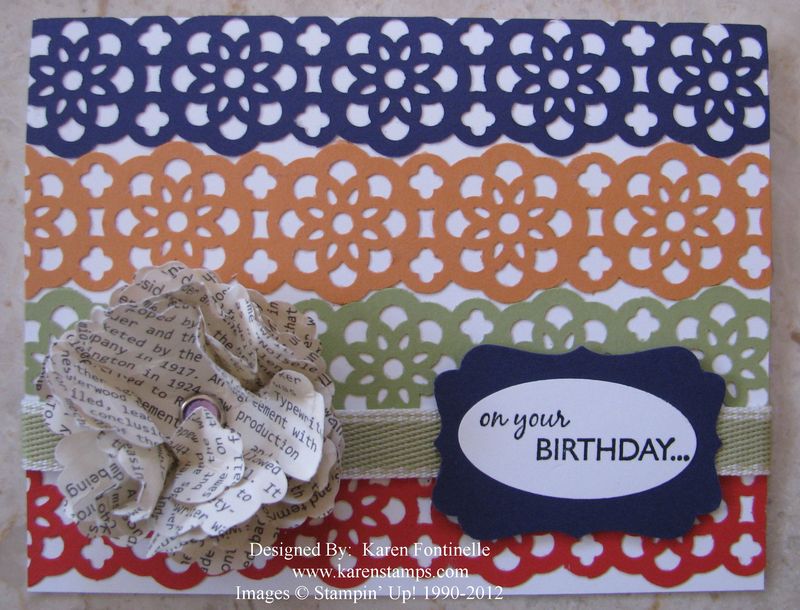
Lace Ribbon Border Punch Birthday Card

Lace Ribbon Border Punch Birthday Card

I've been wanting to make a card similar to this for awhile.  With the release of the Stampin' Up! Retired Accessories list yesterday, I saw the beautiful Lace Ribbon Border Punch #122362 on it and decided it was time to make this card!  I incorporated the retiring 2010-2012 In Colors as well…at least four of them:  Concord Crush, Pear Pizzazz, Peach Parfait, and Poppy Parade.  The First Edition Specialty Paper #121878 is not retiring.  I made the flower out of that and the Blossom Punch #125603 (in the Occasions Mini), secured with a retiring Circle Fire Rhinestone Brad #109110.  The brads are one of the discounted items on the retirement list. The ribbon on my card is the Pear Pizzazz 1/2" Stitched-Poly Ribbon #119265, also retiring.

Be sure to check the list of retiring Stampin' Up! Accessories HERE as soon as possible because they are only available while supplies last!

Also, check this list of Definitely Decorative items retiring HERE.

Inspired By Nature Card

Stampin' Up! Inspired By Nature

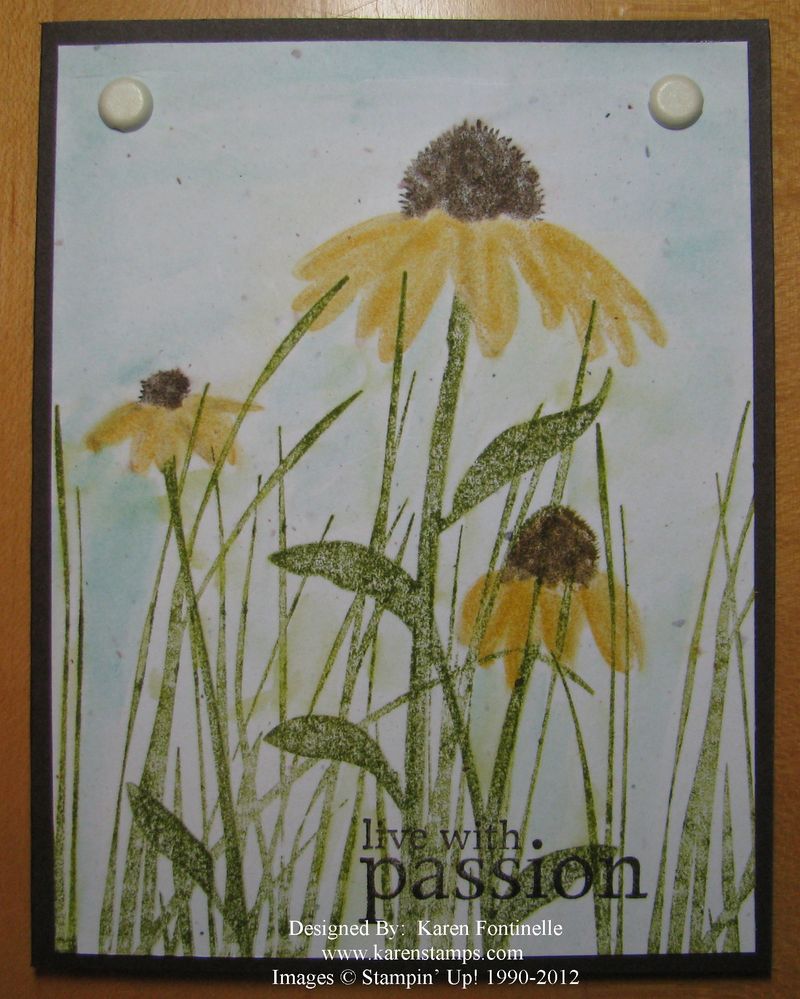
The Inspired By Nature #111656 stamp set by Stampin' Up! is one of the many retiring stamp sets come May 31st. It was quite a popular stamp set and you can see why….so versatile for many occasions.  Just change the greeting to convey your message. Two sentiments come with it, but of course you can add one from any other stamp set….or leave it plain. Can you see this stamp set being used for a graduation, birthday, get well, or just a note card?

*******

Stamps:  Inspired By Nature

Ink:  Old Olive, Baja Breeze, Early Espresso

Paper:  Early Espresso Card Stock, Confetti White Card Stock #102028

Accessories:  Stampin' Write Markers:  Daffodil Delight, Old Olive, Early Espresso; Aquapainter #103954, Jumbo Brads 5/16" Neutrals #112534

  1. Begin with a card base of Early Espresso. Use Confetti White Card Stock for the layer….a beautiful paper we don't use often enough. 
  2. Ink up grassy side of stamp (this one comes double-mounted on each side of one wood block) with Old Olive ink and stamp off lightly on scrap paper, then stamp on Confetti White
  3. Ink up the flower side of stamp using markers to color in the flowers, stems, and grass. Stamp over the grass on Confetti White. If any of it comes out too light, use your Aquapainter or Blender Pen to add some extra ink from markers or an ink pad or refill. Don't add directly with markers or it will be too dark. 
  4. Stamp greeting with Early Espresso Ink
  5. Use Aquapainter to add some Baja Breeze ink for the sky in the background, being careful not to get into the already stamped images or the ink will run. Just color lightly and without thinking too hard! 
  6. Add two Jumbo Brads to the top and adhere to card front.  
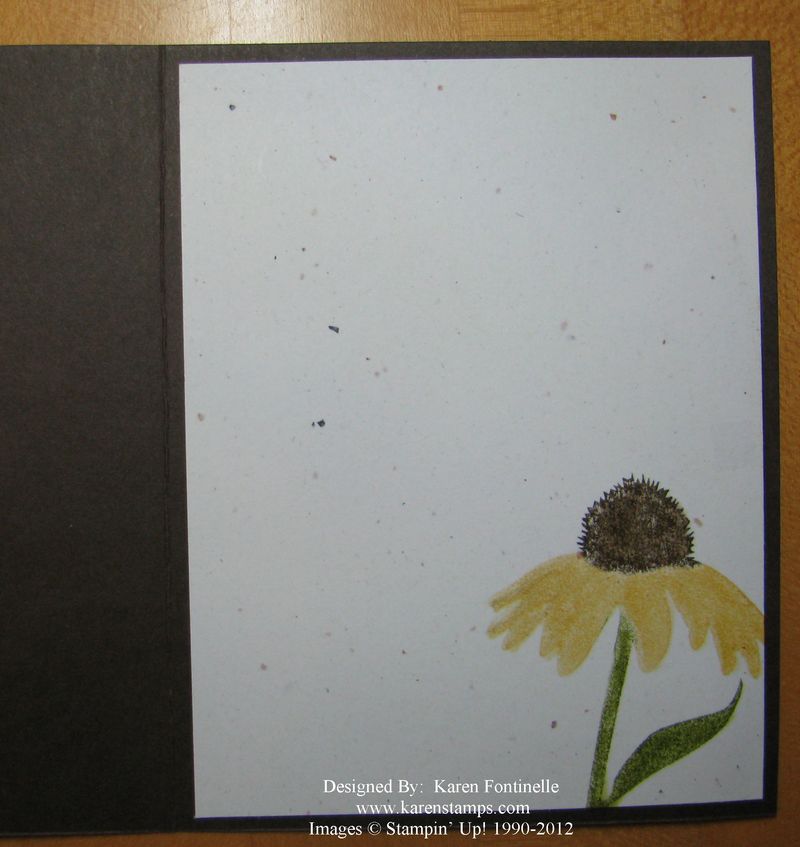
  7. Stamp and add inside page to write on.

Inspired By Nature Inside

Check the Retiring Stamps List HERE.

And then shop online HERE!

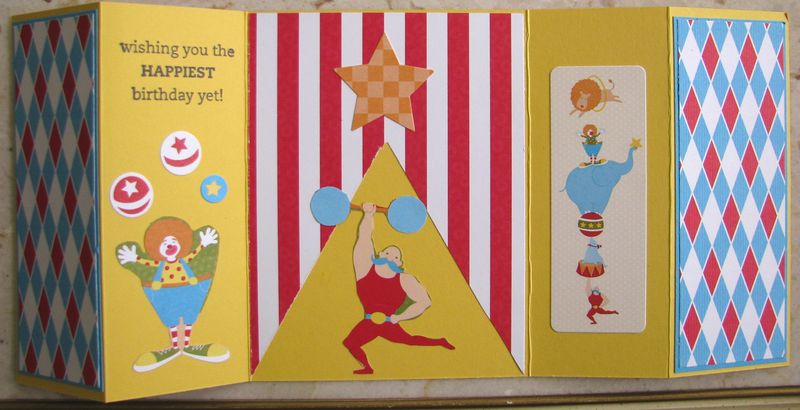
A Gate-Fold Circus Big Top Birthday Card for a Boy

Circus  Gate Fold Card

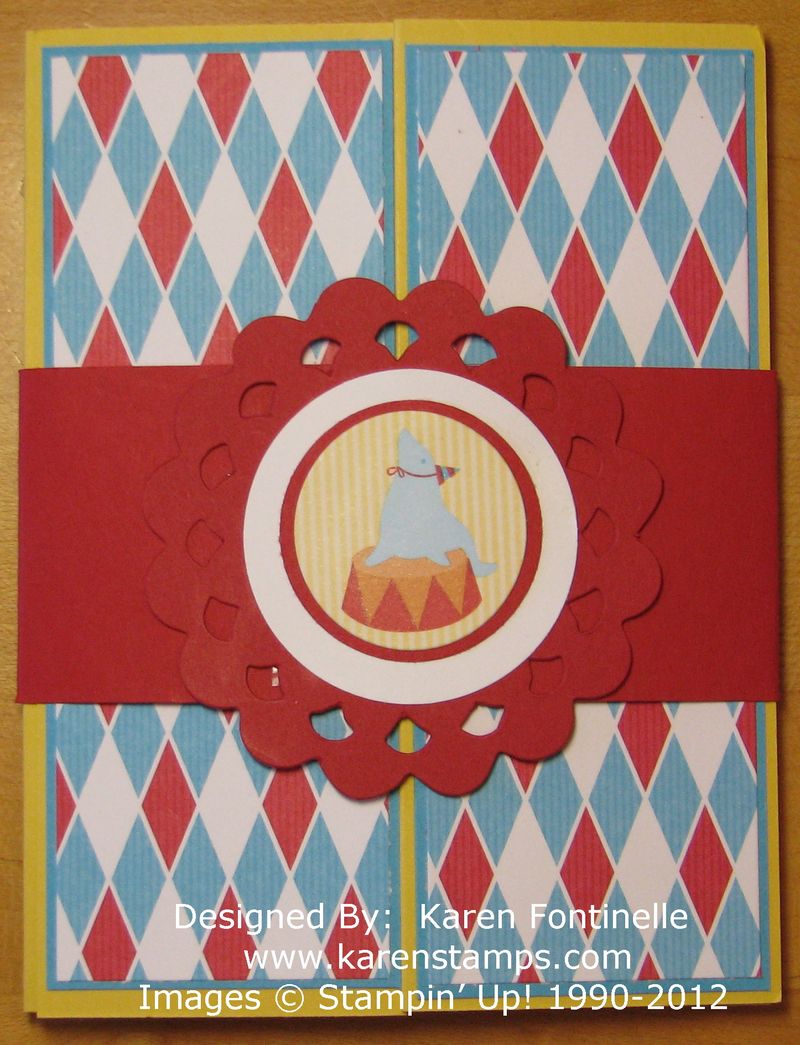
Often times we think it is difficult to come up with a card for a boy or a man, but once you put your mind to it, it's really not impossible!  And nothing says this card couldn't be for a girl, but I did need a card for a young boy.

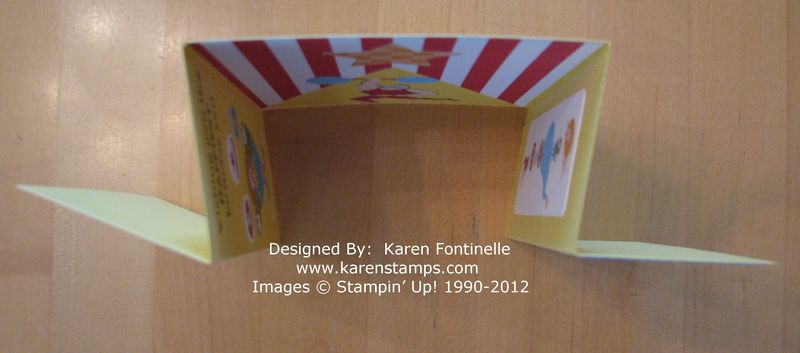
This is a gate-fold card, which is very easy to make. Once you have the idea, you could vary the size to whatever you need.  I started with a 5 1/4" x 12" piece of card stock for the base. It is scored at 2", 4", 8" and 10". That gives you a 4" center with each side (4") folded in half.

Circus Gate Fold Card top

Here is the inside decorated with the Big Top Birthday Designer Series Paper #122348. Besides just using the paper, I cut out some images to place on the card.  Also, another fun thing is to add die-cuts from the Big Top Birthday Quick Accents #122368.

Circus Gate Fold Card Inside

You can do various things with the front of the card.  I chose to make a belly band around, cut out a medallion from the Perfect Pennants Die #123126 and stuck on a self-adhesive accent from the Quick Accents.  You can find the designer paper and the Quick Accents on the main catalog on pages 186-7.  All of these papers and Quick Accents are great for scrapbooking, but you can use them for any kind of project!

To shop for any Stampin' Up! products, just click HERE.  Be sure to check the Clearance Rack if you are doing an online order (last week Stampin' Up! added a lot of new items to the Clearance Rack but inventory can change rapidly depending on demand)….and don't forget about the Retired List of stamp sets! (this is an updated list to print in black and white if you choose).

Happy Leap Day Birthday!

Leap Day Birthday Cake LED Candle Decorated

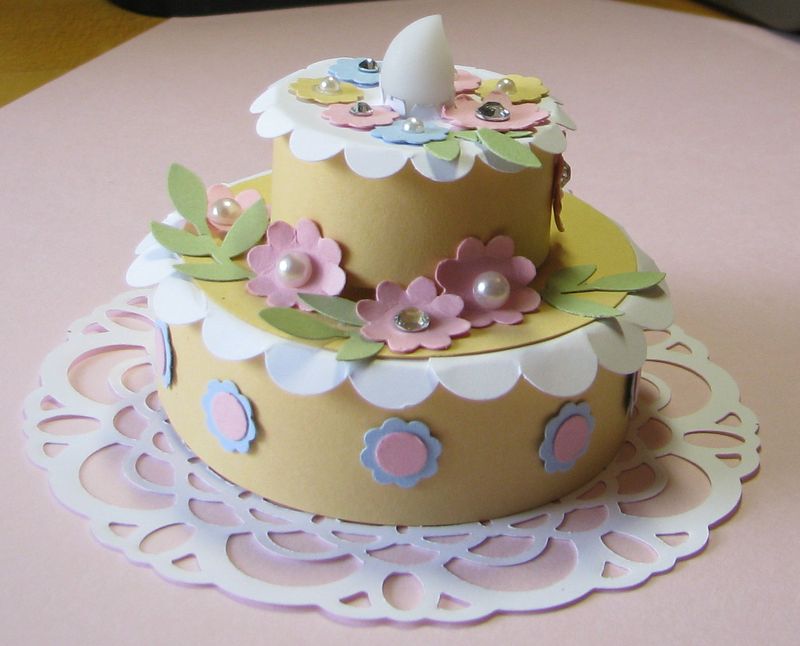
Every Leap Year it's an amazing thing to know of people who were born on February 29 and therefore only have a Leap Birthday every four years! I saw a lady on TV who said she was 11 years old, when on any other day she would be 44! So for those people with a birthday on Leap Day, February 29, this birthday cake is for you!

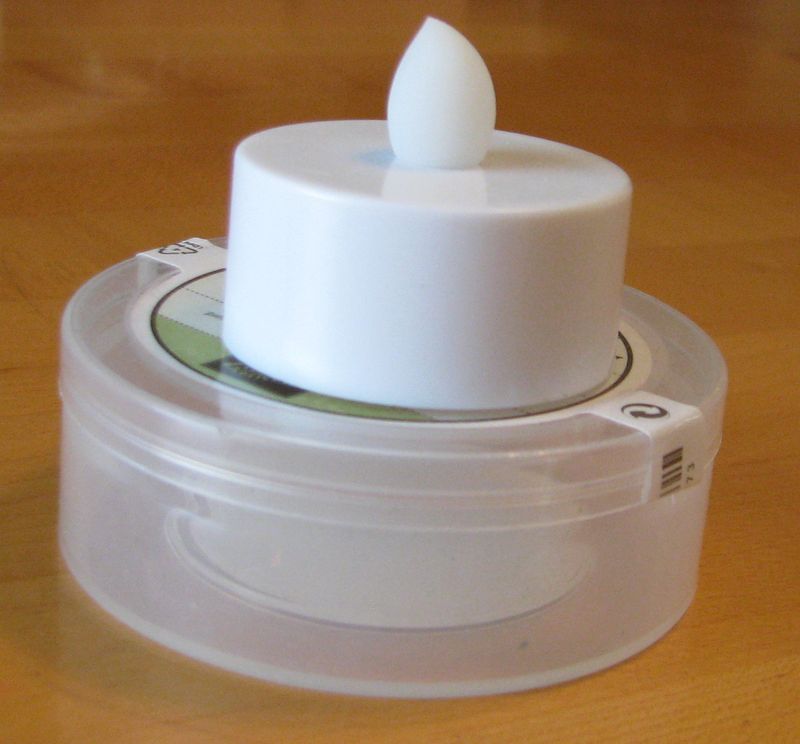
I started with one of those little LED candles, that just has a switch on the bottom to turn on the candle.  I got the idea to make a tiered cake by using one of my many empty containers that once held Stampin' Up! brads or buttons or whatever little accessories.

Leap Day Birthday Cake LED Candle

You can cover these with paper and then decorate to the hilt with punched paper flowers and leaves and lots of BLING!  Our Stampin' Up! Jewels make it so much fun to add Basic Pearls #119247 and Basic Rhinestones #119246!

To complete the look, place the papercrafted birthday cake on the new Stampin' Up! Paper Doily, cut with the Paper Doily Sizzlits Die.

Even if this isn't your Leap Birthday, it IS your Leap Day, an extra day in the year, so enjoy yourself and do something fun…..like I just did making this cute cake!

Stampin’ Up! Attic Boutique Side Notes Birthday Card

Attic Boutique Side Notes

You may have missed the Stampin' Up! Attic Boutique Side Notes #125413 in the Occasions Mini Catalog on page 24. It is a collection of die cut tags and accents that you can use any number of ways….on cards, scrapbook pages, gifts!  I hadn't played with mine yet but here they are all spread out on the table.  Next I got out my Attic Boutique Designer Series Paper #125407 and came up with this birthday card:

Attic Boutique Side Note Birthday Card

You can see that I stamped the birthday greeting on the Attic Boutique Side Note die cut with my stamp set Sincere Salutations and added a few little pearls.  Very easy, and with the Stampin' Up! coordinating products it turns out beautiful every time!

To order any Stampin' Up! products, please visit my Online Store HERE.

Card for a Male Birthday

Lots of birthdays in our family recently and mostly male!  I think I mailed my other son's card before photographing it, but my other little boy's birthday is today!  Okay, he's not so little any more, but you know how it is…when you are a mother, our children really never grow up in our hearts!  

I wasn't feeling so creative when I made this card, and of course was in a hurry to get it in the mail at the last minute.

Postage Stamp Punch Male Birthday Card

It often seems to be a challenge to come up with a "male" card, but look how easy this one is!  I just used the Postage Stamp Punch #122344 and scraps of Halloween paper, Frightful Sight #122351 on a card base of Cajun Craze. So don't put your Halloween paper away just because it is close to Thanksgiving!  Turn it over, look at the parts without a Halloween image, just see what you can use!  The squares are each popped up on Stampin' Dimensionals.

Here is the inside:

Male Birthday Card Inside

This stamp is from the stamp set "Bring On the Cake", available in wood- or clear-mount.

If you need any stamping supplies, please order from my Stampin' Up! Online Store or email me!

Star Wars Punch Art Birthday Card

Star Wars Birthday Card

Here is a Star Wars punch art birthday card with Darth Vader and Yoda I made for my favorite son-in-law.  Yes, he's my favorite….well, he's my only son-in-law, but he's still my favorite!  :) Apparently I hit a home run with it because my daughter says he really liked it!  He's a big Star Wars and all-kinds-of-other-stuff fan so I thought this idea would be perfect.  

Of course, it is not my original idea because I can't come up with creative things like this!  Fortunately, other demonstrators can and they share and it is okay to copy ideas!  I found this idea in our Stampin' Up! demonstrator website called "Stampin' Connection". (So if you want to be a Stampin' Up! demonstrator but feel you are not creative, this is one of many resources provided by Stampin' Up!)  A demonstrator from Canada, Rose Marie Coleman, had made these Star Wars punch art figures and I was able to figure out what she did! I'll add her blog link at the end.  

I have to tell you about my greeting on the front!  I didn't have much space left for one and I got the idea to have it be something Yoda would say. Would you believe there is a website that will translate anything you write into "Yoda-speak"?!  http://www.yodaspeak.co.uk/  Just type in what you want to say, and it will translate it for you!  Try several versions until you get something interesting!

Then I used several different stamps from On Your Birthday #111664, cut the words apart after I stamped them on scrap paper, and pasted them in order to make my own greeting!

My card is made with a Basic Black card base with a Brushed Silver card stock layer on the front (which doesn't photograph very well!). Here is the inside:

Star Wars Birthday Card Inside


If you need to add to your collection of punches so you can make interesting characters like this at a moment's notice, just Shop Online at my Stampin' Up! website.

Here is a link to Rose's blog post about how she made these characters…because I already don't remember how I did it and someone is sure to ask!  http://www.stampingwithrose.com/2010/05/star-wars-card-instructions-and-winner.html