Author Archives: Karen Fontinelle

Gift-Wrapping with Stampin’ Up! Washi Tape

Gingham Garden Designer Washi Tape Birthday Tag and Gift

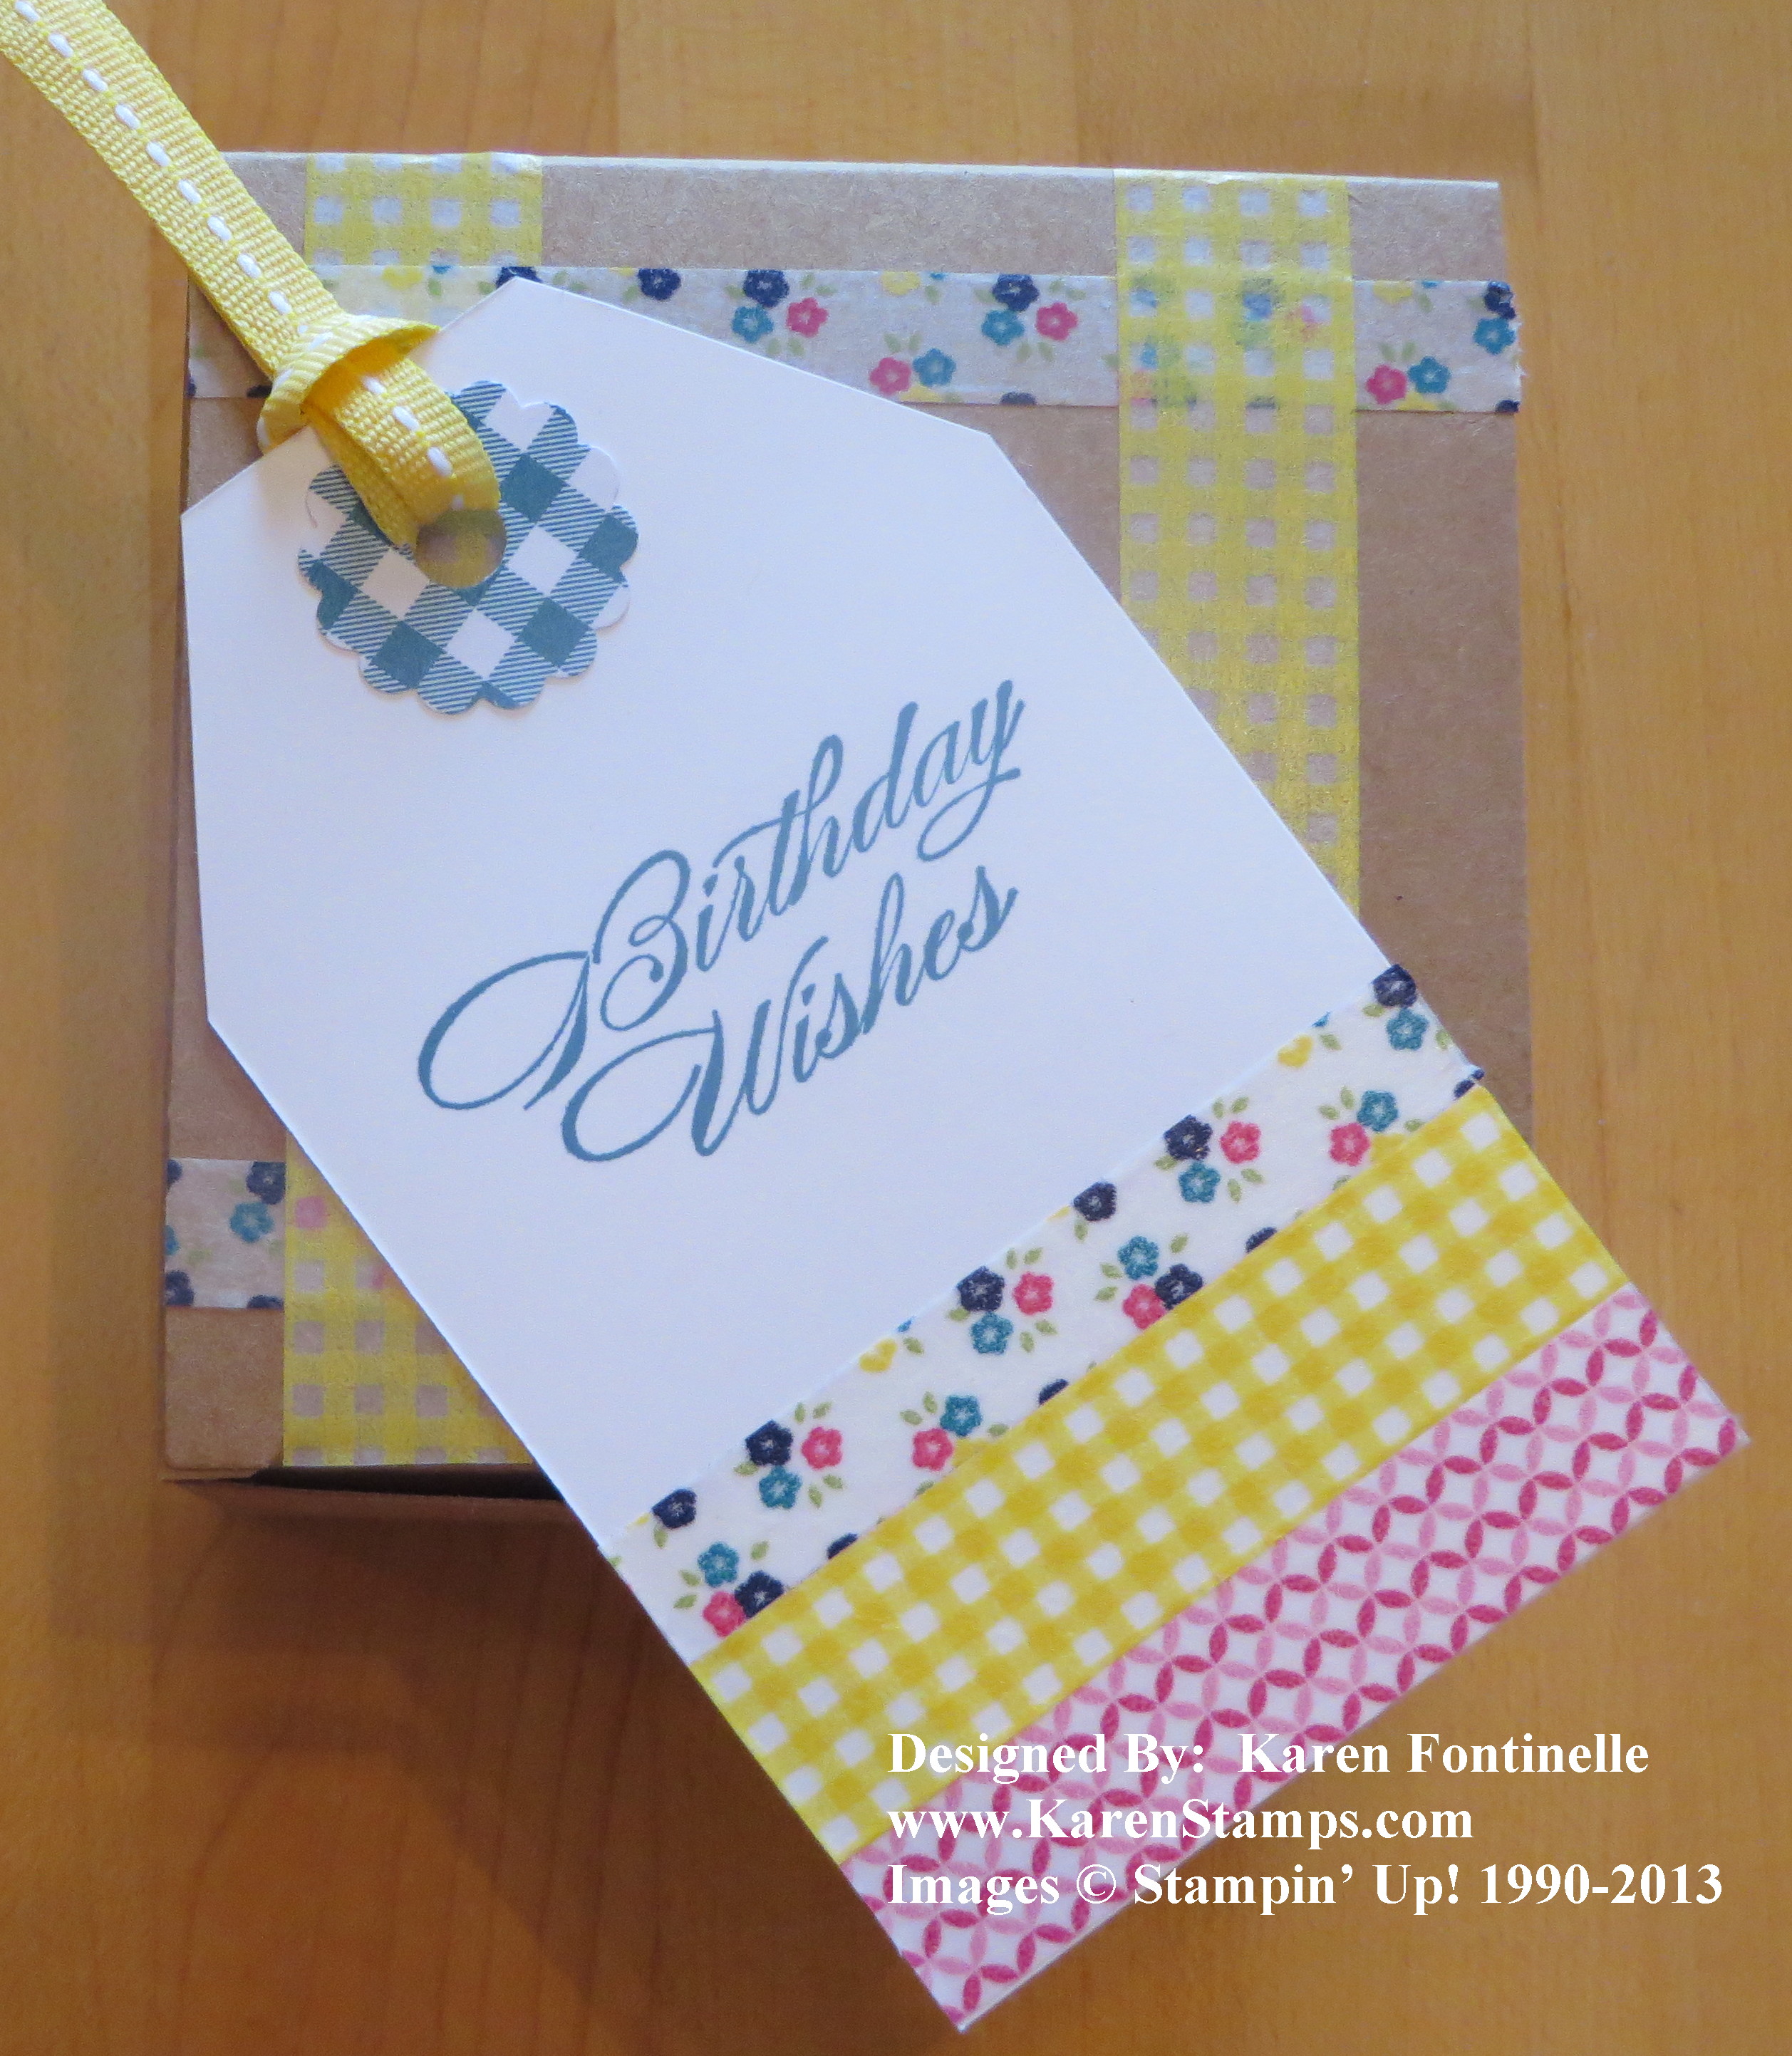
Now that Stampin’ Up! sells washi tape, we will find lots of ways to use it. You can easily decorate a Kraft Gift Box with strips of our new Gingham Garden Designer Washi Tape. It’s even repositionable, so I was able to lift one part up and put one strip underneath on the top of the box. You could also wrap the tape around the sides of the box or add matching designer paper.

The birthday tag is made by just snipping off the top corners of a scrap of Whisper White card stock.  I added some strips of Gingham Garden Washi Tape to the bottom of the tag.  Since you usually just tear washi tape, I let the lengths be longer than the tag by just a bit and then trimmed off the excess with my Paper Snips on each side.  Washi tape is translucent so keep that in mind when you are deciding on what colors of paper to use.  The surface you stick the tape to will show through somewhat.

To decorate the hole of the tag, I just punched a small scallop with the 7/8″ Scallop Circle Punch, adhered it to the tag, and then used a regular hole punch to punch the hole for the tag. To tie on the tag, I used the Daffodil Delight 1/4″ Stitched Grosgrain RibbonYou could hand write your greeting or your “To” and “From” on the tag or stamp something, or both!  I stamped a birthday greeting from Bring on the Cake in Island Indigo, one of the coordinating colors of the Gingham Garden Washi Tape.

If you want to try out some of the new Stamping’ Up! Washi Tape, just go to my Stampin’ Up! Online Store here.
Mixed Bunch Flower Birthday Card

Mixed Bunch Flower Birthday Card

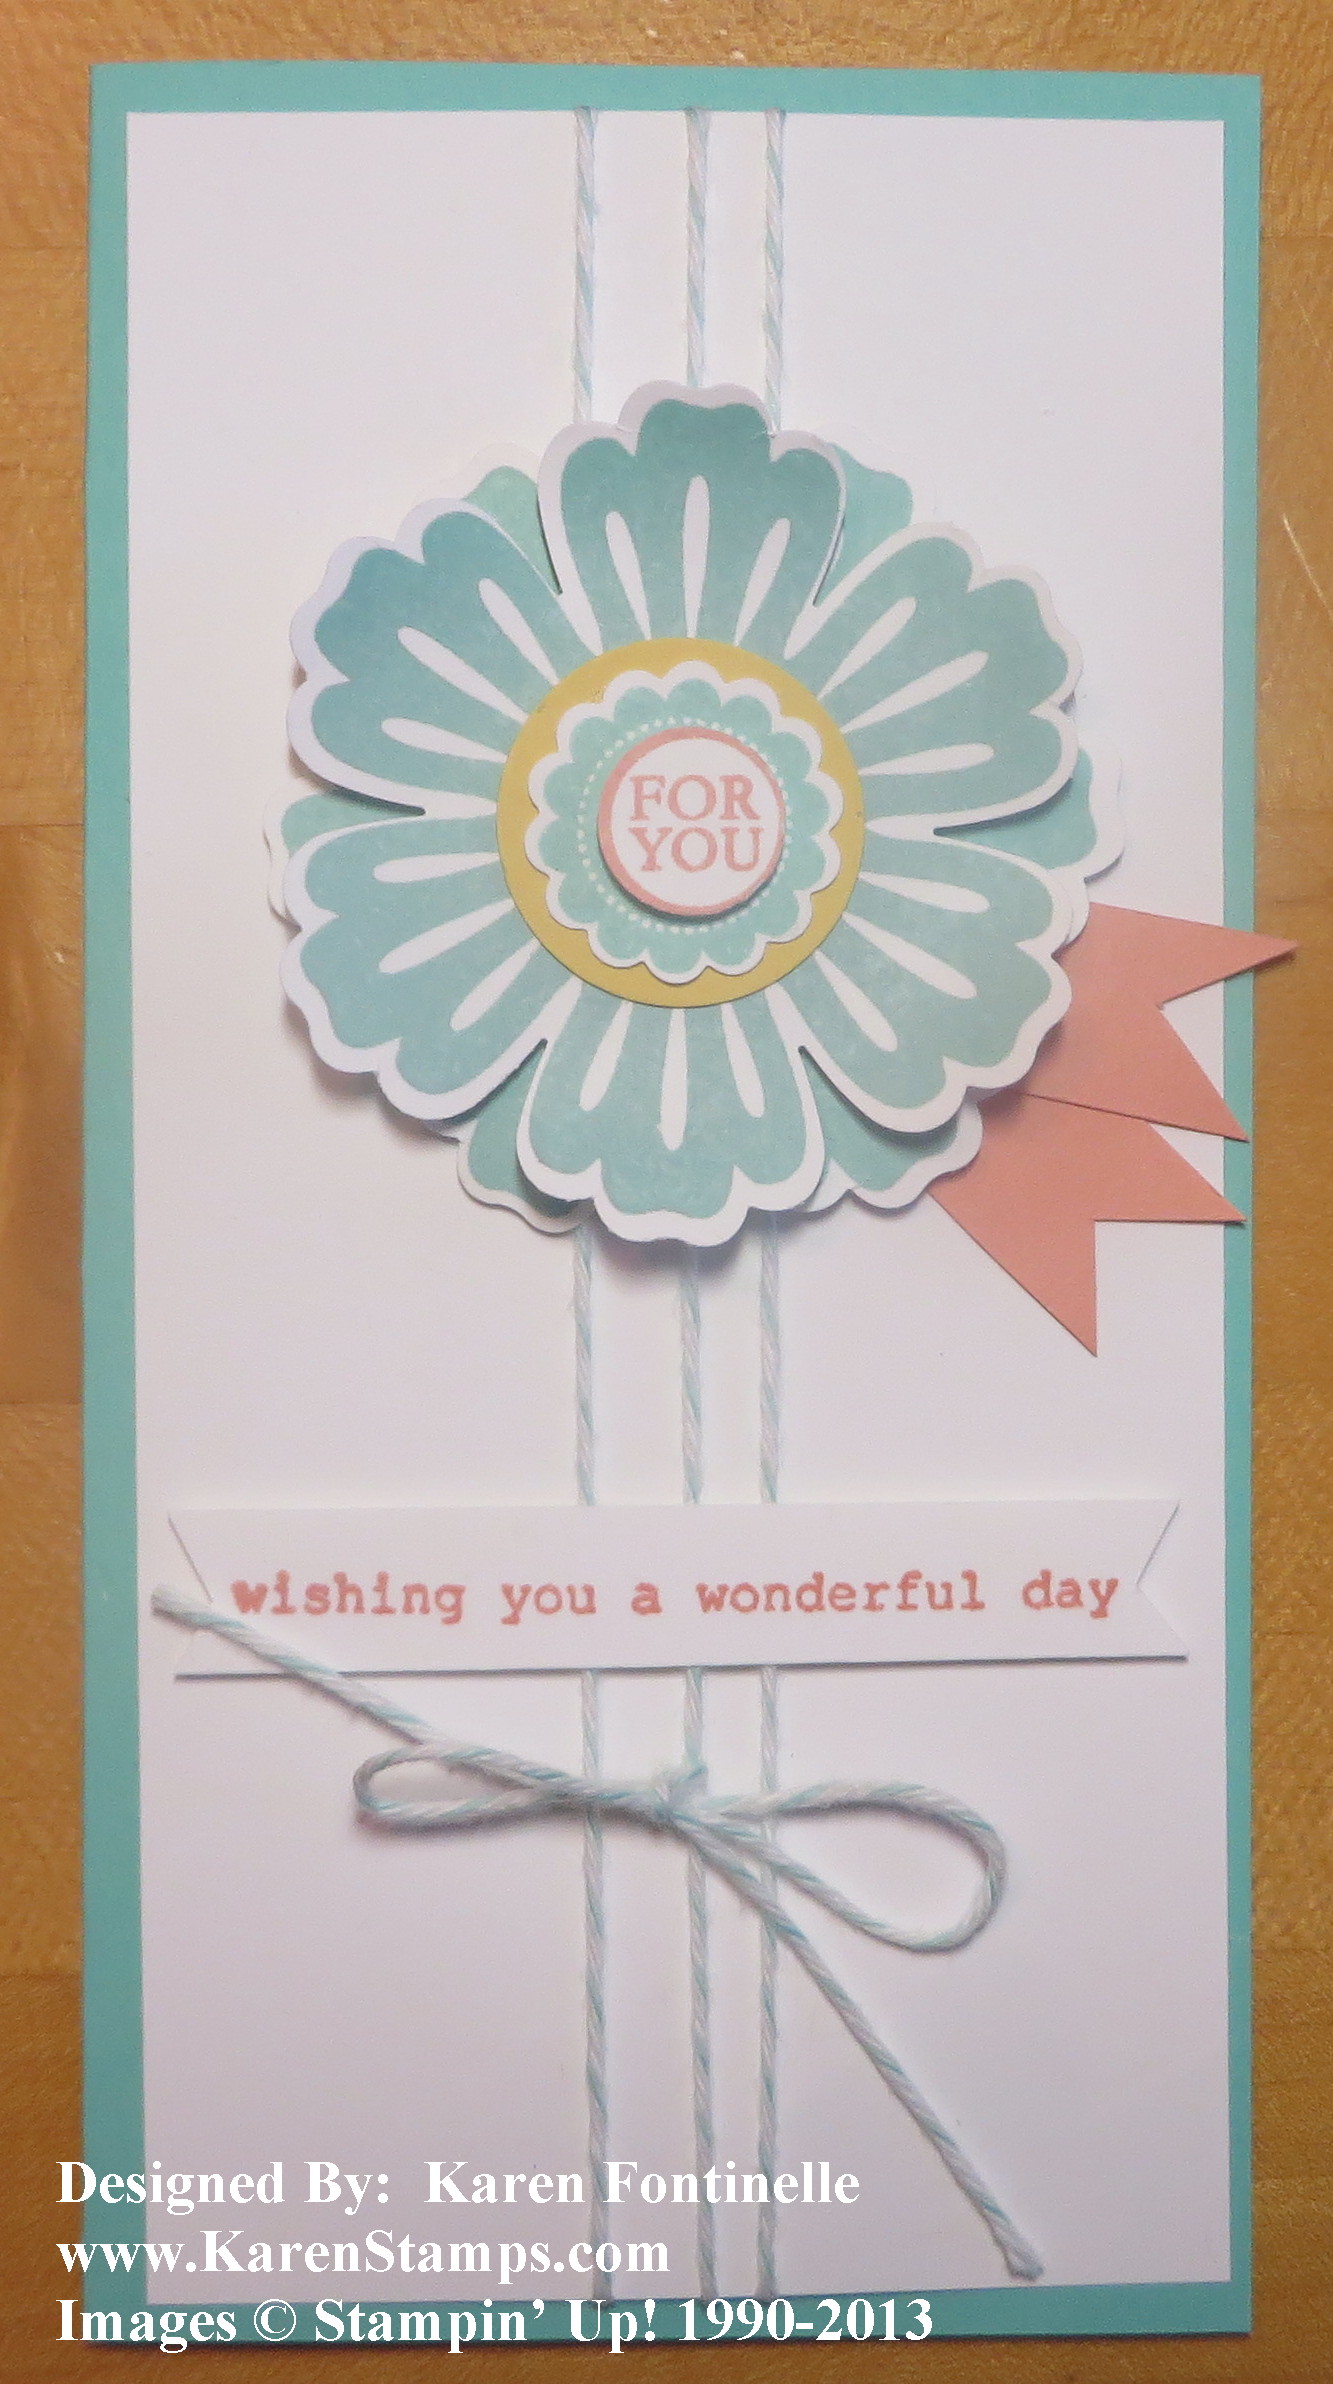
There are many places to get inspiration for our stamping, and for Stampin’ Up! Demonstrators, one of them is our Stampin’ Up! publication called Stampin’ Success. This card I made is pretty much like one in my magazine. I changed the center of the flower because I didn’t have the same stamp set they used, and I used a different color of Baker’s Twine to wrap around the card layer.

The base of the card is made with one of our new In Colors, Coastal Cabana, and the front layer is Whisper White. The sizes are different than our usual cards. The card base starts at 6 1/2″ x 6 1/4″ and folded in half to become 6 1/4″ long by 3 1/4″ wide. (If you want to make it a little easier for yourself without remembering all those numbers, cut a 6″ x 6″ square of card stock for the card base and fold in half!) Before adhering the Whisper White layer, I adhered three separate strings of Baker’s Twine (I used retired Pool Party) to the card stock on the back to save those extra inches I would have used wrapping around.  You can do it either way.  Then I just tied the bow to the center string.

The flowers are stamped with the Mixed Bunch stamp set and Coastal Cabana ink and punched out with the Blossom Punch.  I punched out two flowers so I could layer them and slightly curled the top flower with my Bone Folder to give it some dimension. For the flower center, I stamped the “For You” image from A Round Array twice–once in Coastal Cabana and once in Crisp Cantaloupe.  I used the 1/2″ Circle Punch to punch out the words in Crisp Cantaloupe and used the new 7/8″ Scallop Circle Punch to punch out the whole image in Coastal Cabana. Then I just layered the words on top of the scallop with a tiny Stampin’ Dimensional (part of one). You can layer whichever parts you want with dimensionals or just adhere them together in a flat fashion. The scallop is layered on top of a 1″ Delightful Daffodil circle. I made two little strips of Crisp Cantaloupe card stock and cut the ends like flags and stuck them underneath the flower for a little contrast.  The greeting is from Bring On the Cake but of course, you could use any number of greetings.  For the center of the flower you could place a button or other embellishment instead of the words.

This is a good basic card that you can modify for any number of occasions!

Here are some other ideas you could do:

  • Use ribbon instead of the Baker’s Twine.
  • Turn the card sideways, putting the flower on one side and stamp a greeting on the other side.
  • Stamp a flower or other image and wrap the Baker’s Twine or ribbon around the base of the layer.

If you need any stamping supplies to make cards like this one, please shop at my Stampin’ Up! Online Store here.
Dress Up Birthday Card

Dress Up Birthday Card

Now that my daughter has received her birthday card, I can post it here.  The paper is retired now, but most things are current for you to make your own card like this. The Dress Up Framelits are so fun to use! Just cut out a dress in whatever paper you like, maybe cut two and then have a different top and bottom to your dress, or even a jacket! Almost like playing with paper dolls!

Use the Oval Collection Framelits to die cut a background.  I used the birthday stamp from Petite Pairs for the greeting.  This stamp set is on sale now in the Grab Your Greetings offer for 25% off.  Be sure to check it out because it is a good sentiment stamp set to own.  The other two choices are good ones, also.

The Real Red border at the top and bottom of the retired designer paper is punched with the Dotted Scallop Ribbon Border Punch.  What I love about this punch is you can show just the tiny scallops on the edge or you can show the dotted part, so versatile!

If you would like to own the Dress Up Framelits and make oh so many cute projects with them, please visit my Stampin’ Up! Online Store here to place your order.

Gingham Garden All-Occasion Card

Out of the selection of designer series paper I was allowed to purchase during my demonstrator preorder from the new Stampin’ Up! Catalog, the Gingham Garden Designer Series Paper was my favorite! I’m so glad to be finished with the retirement lists and just start working on new stuff! Plus I have a new camera for taking pictures of my cards and projects for my blog so I am having to learn how to use it and get the photos off!  Always a learning curve!

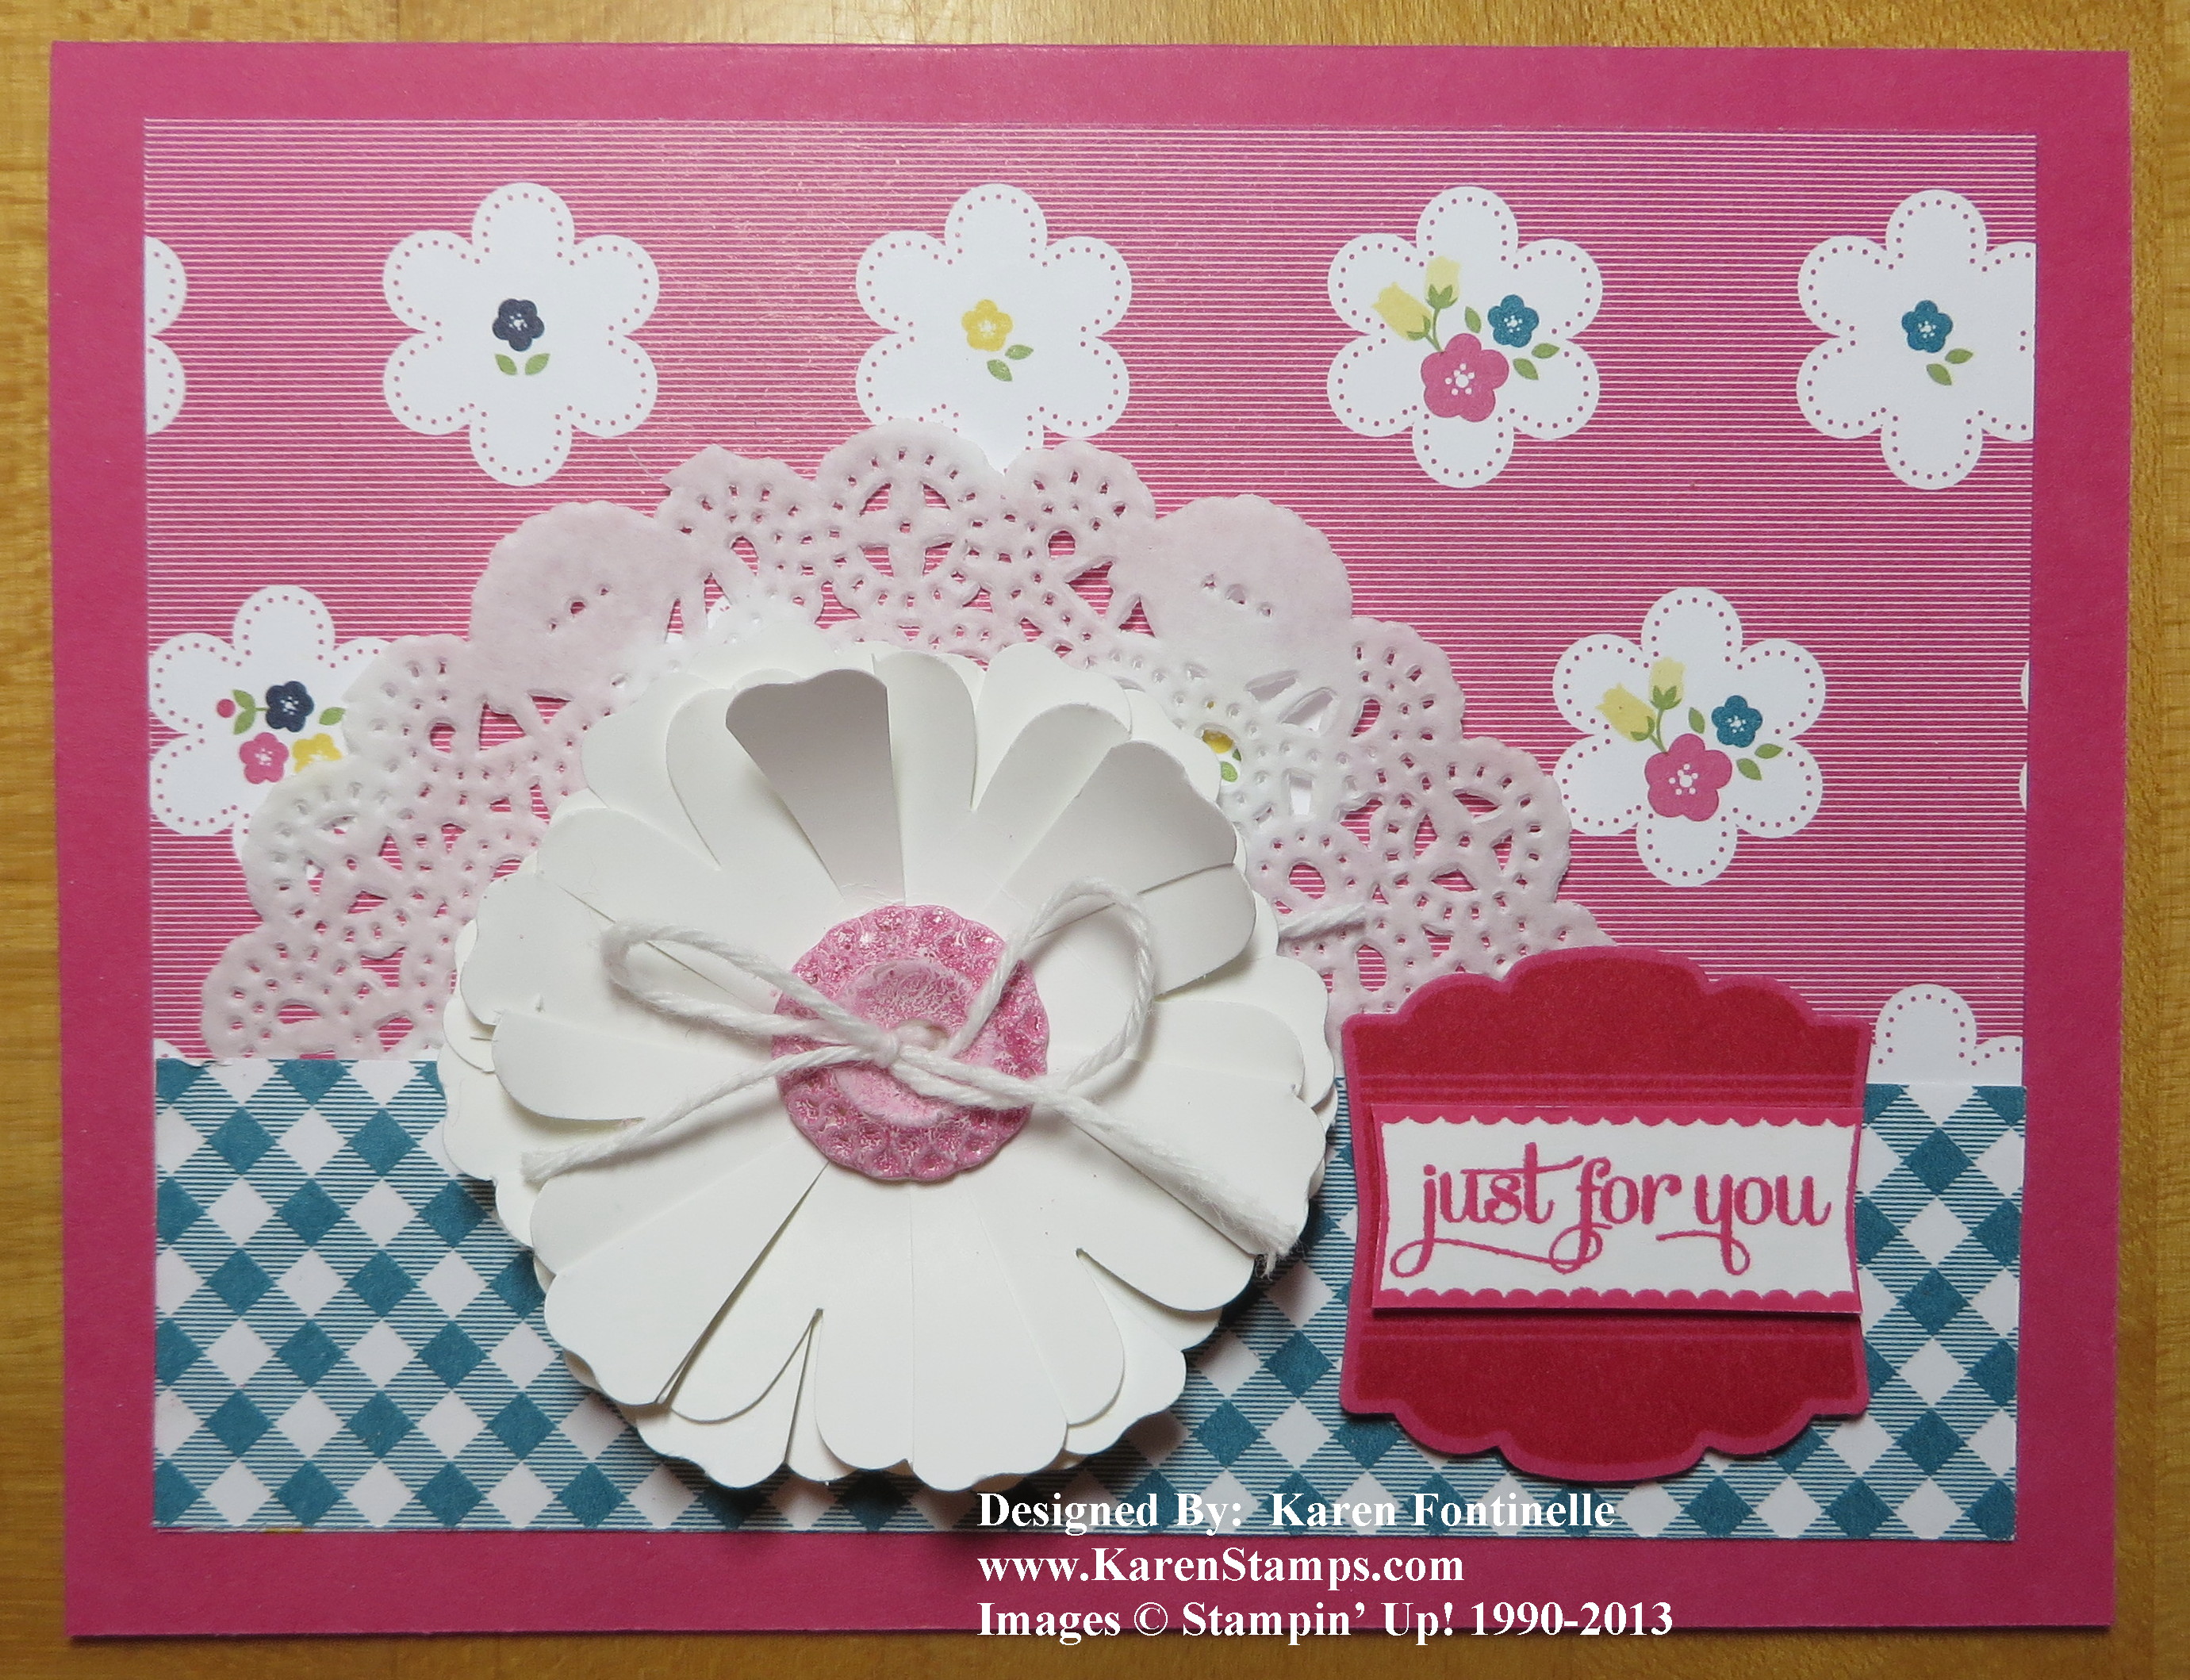
Here is my new card made with Melon Mambo card stock and two patterns from Gingham Garden Designer Series Paper.

Gingham Garden All-Occasions Card

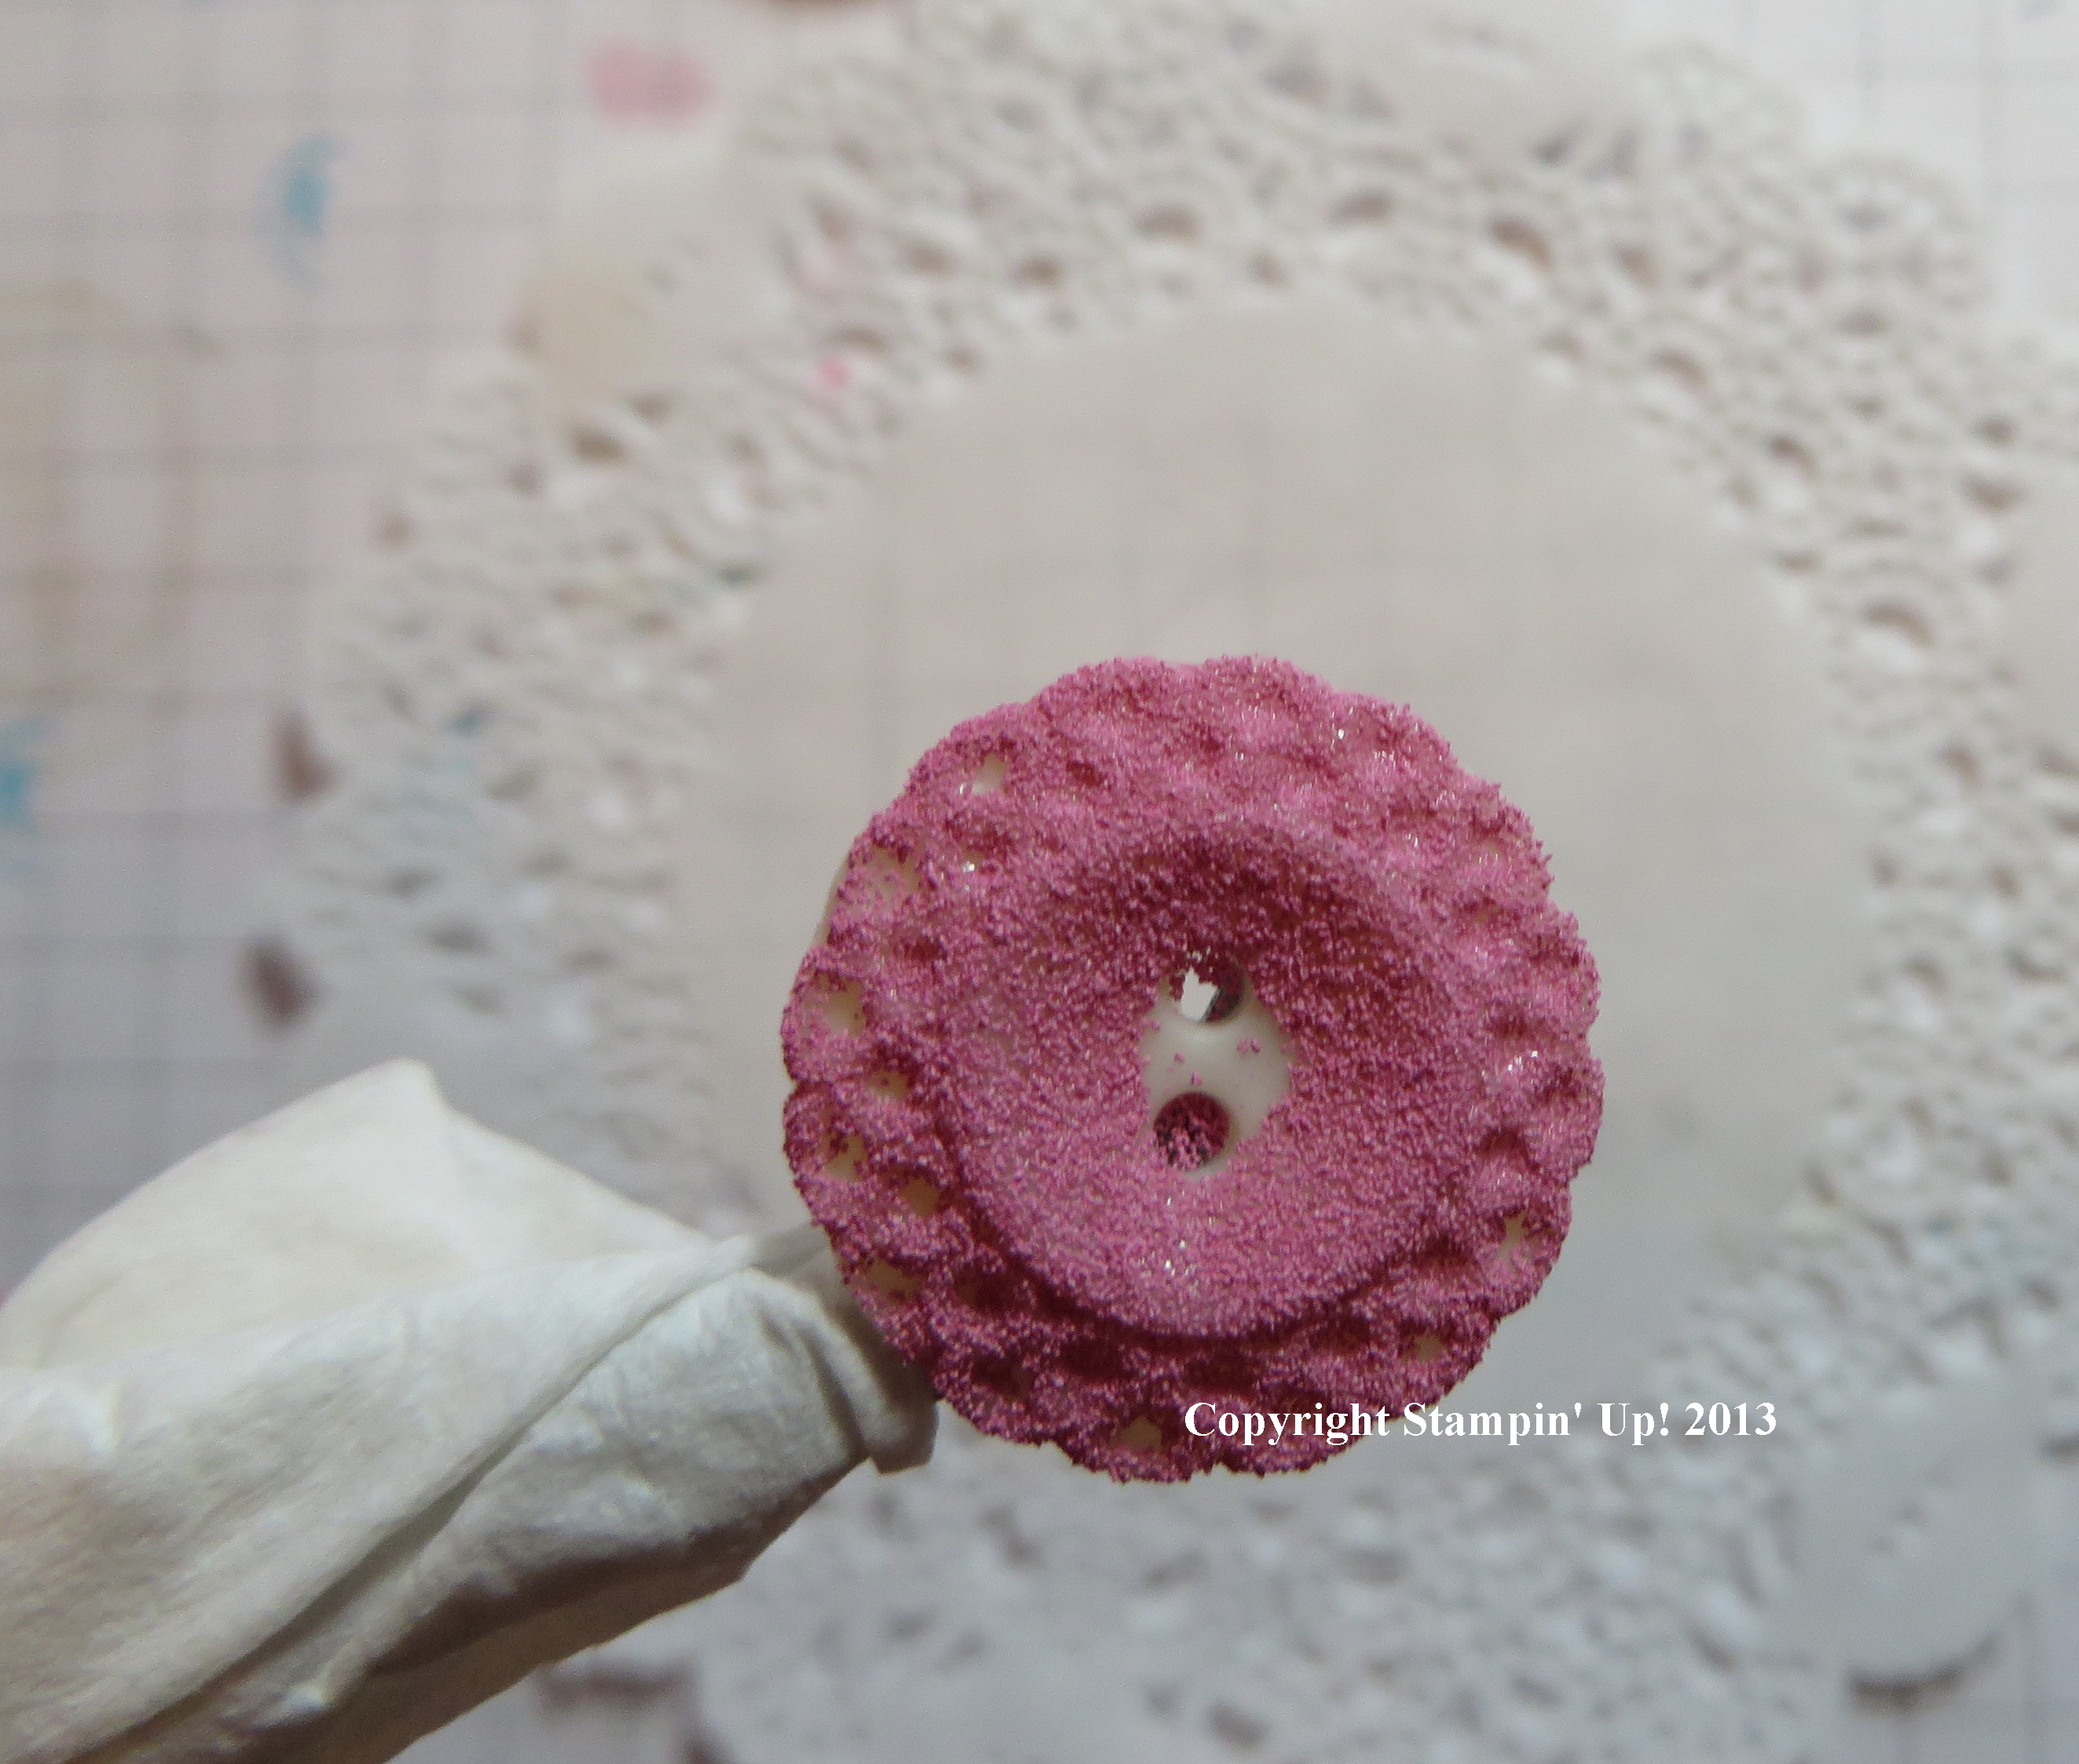
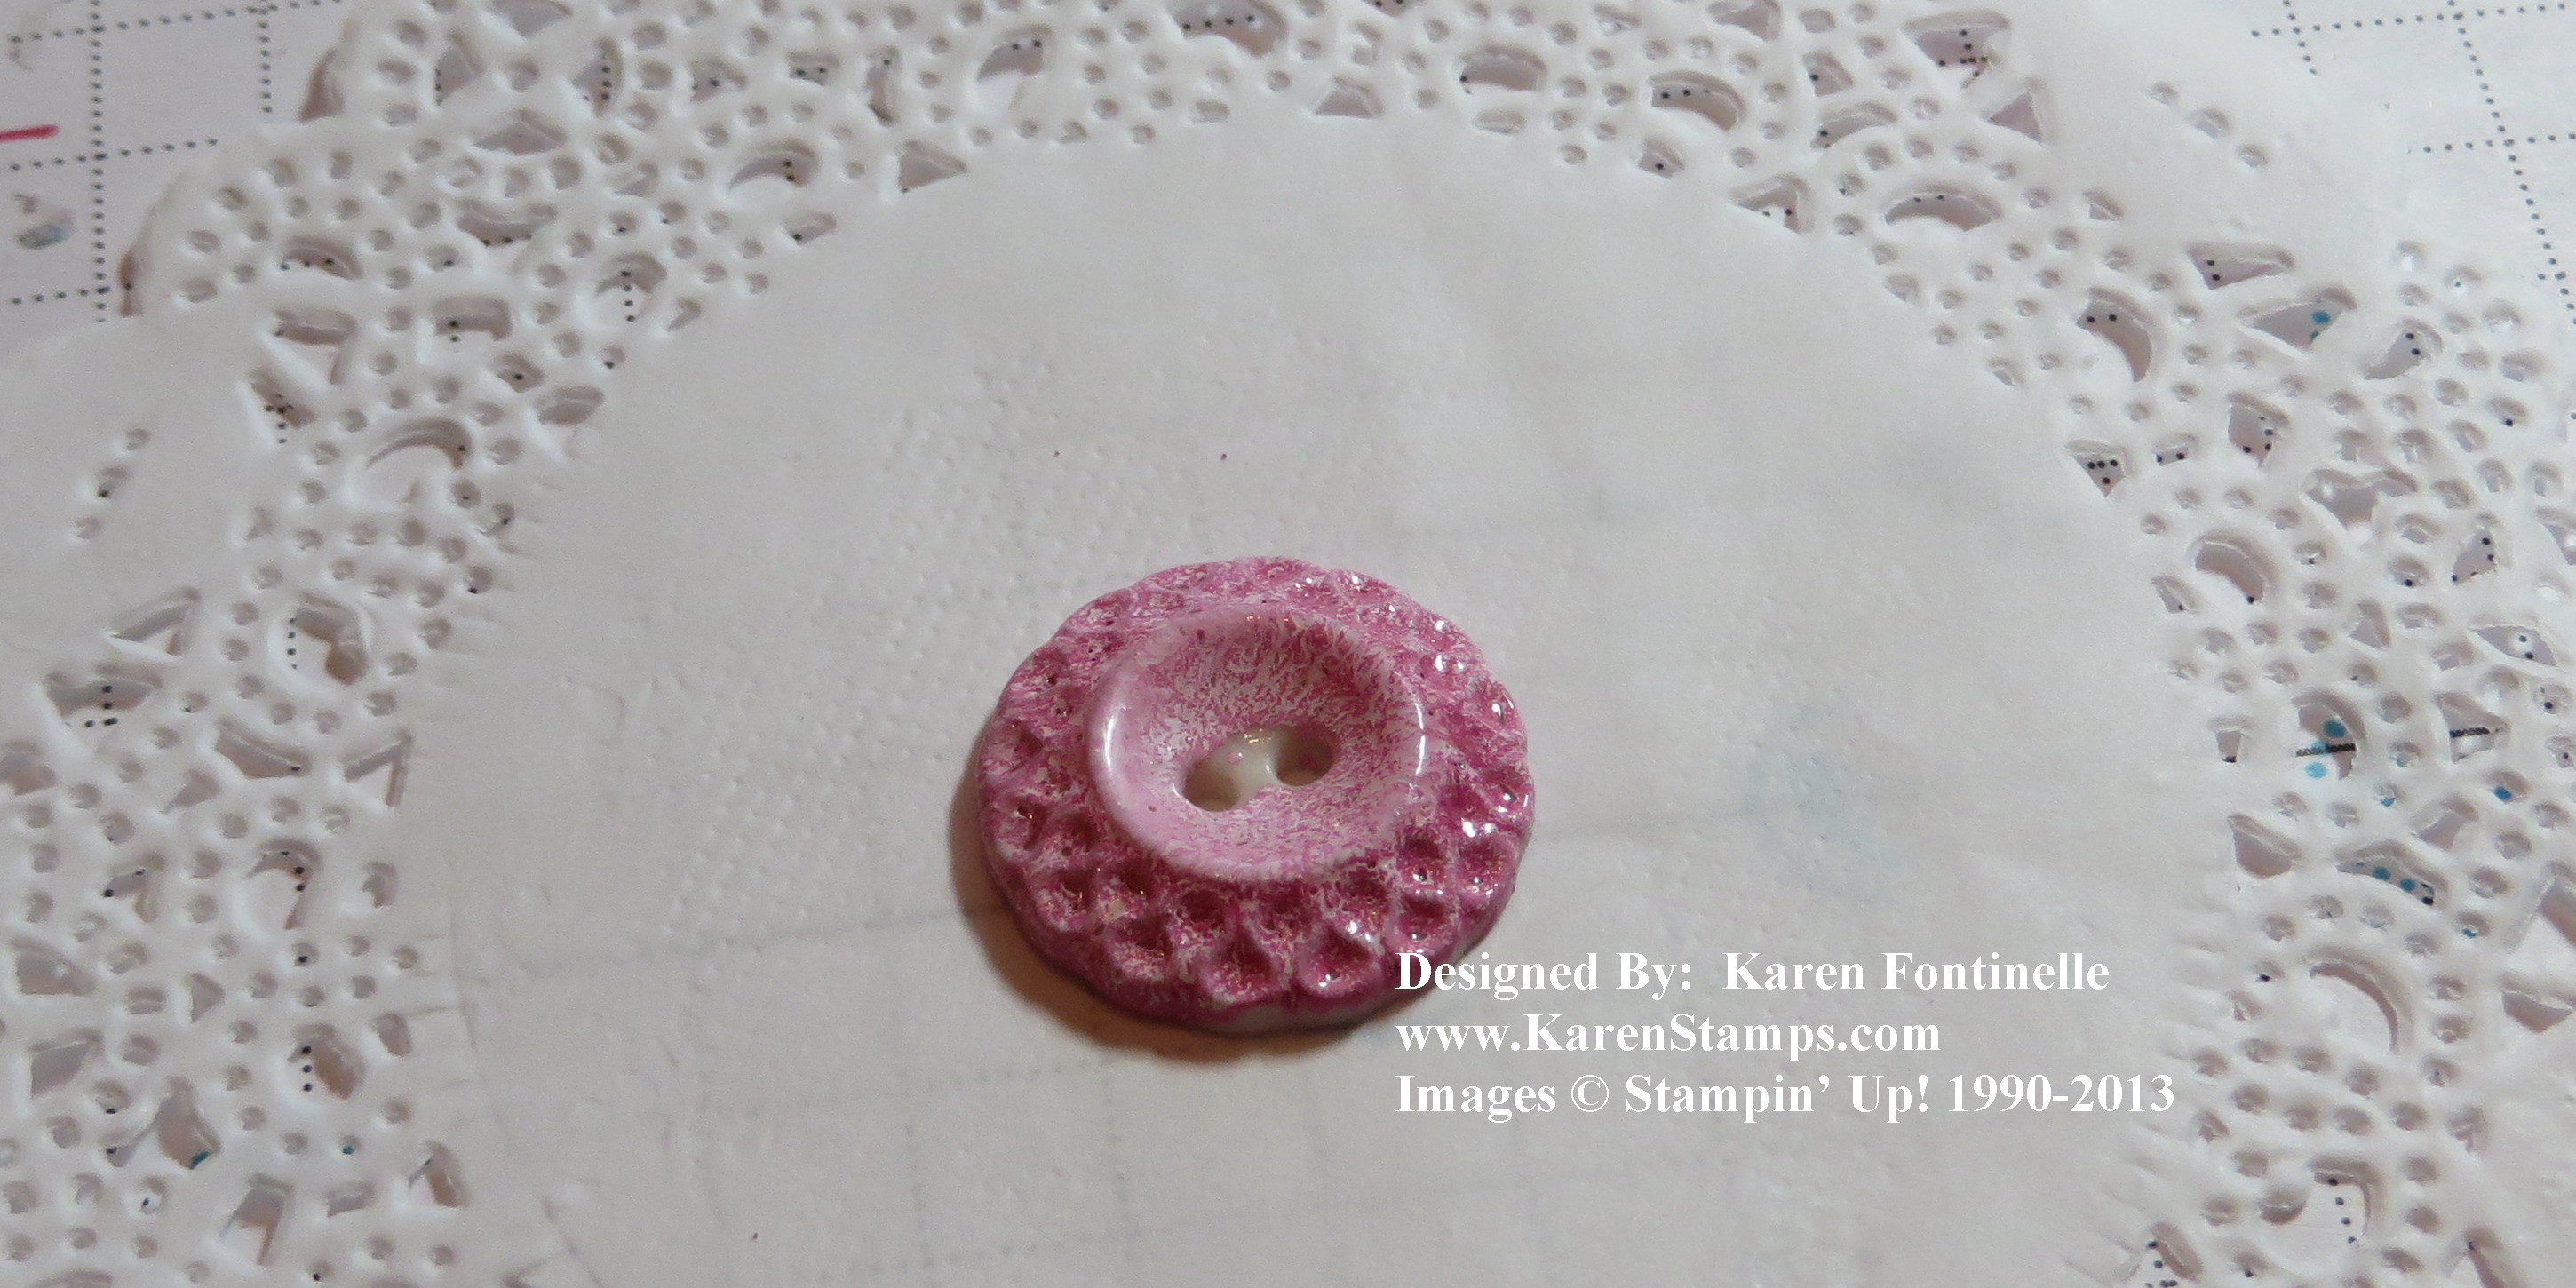
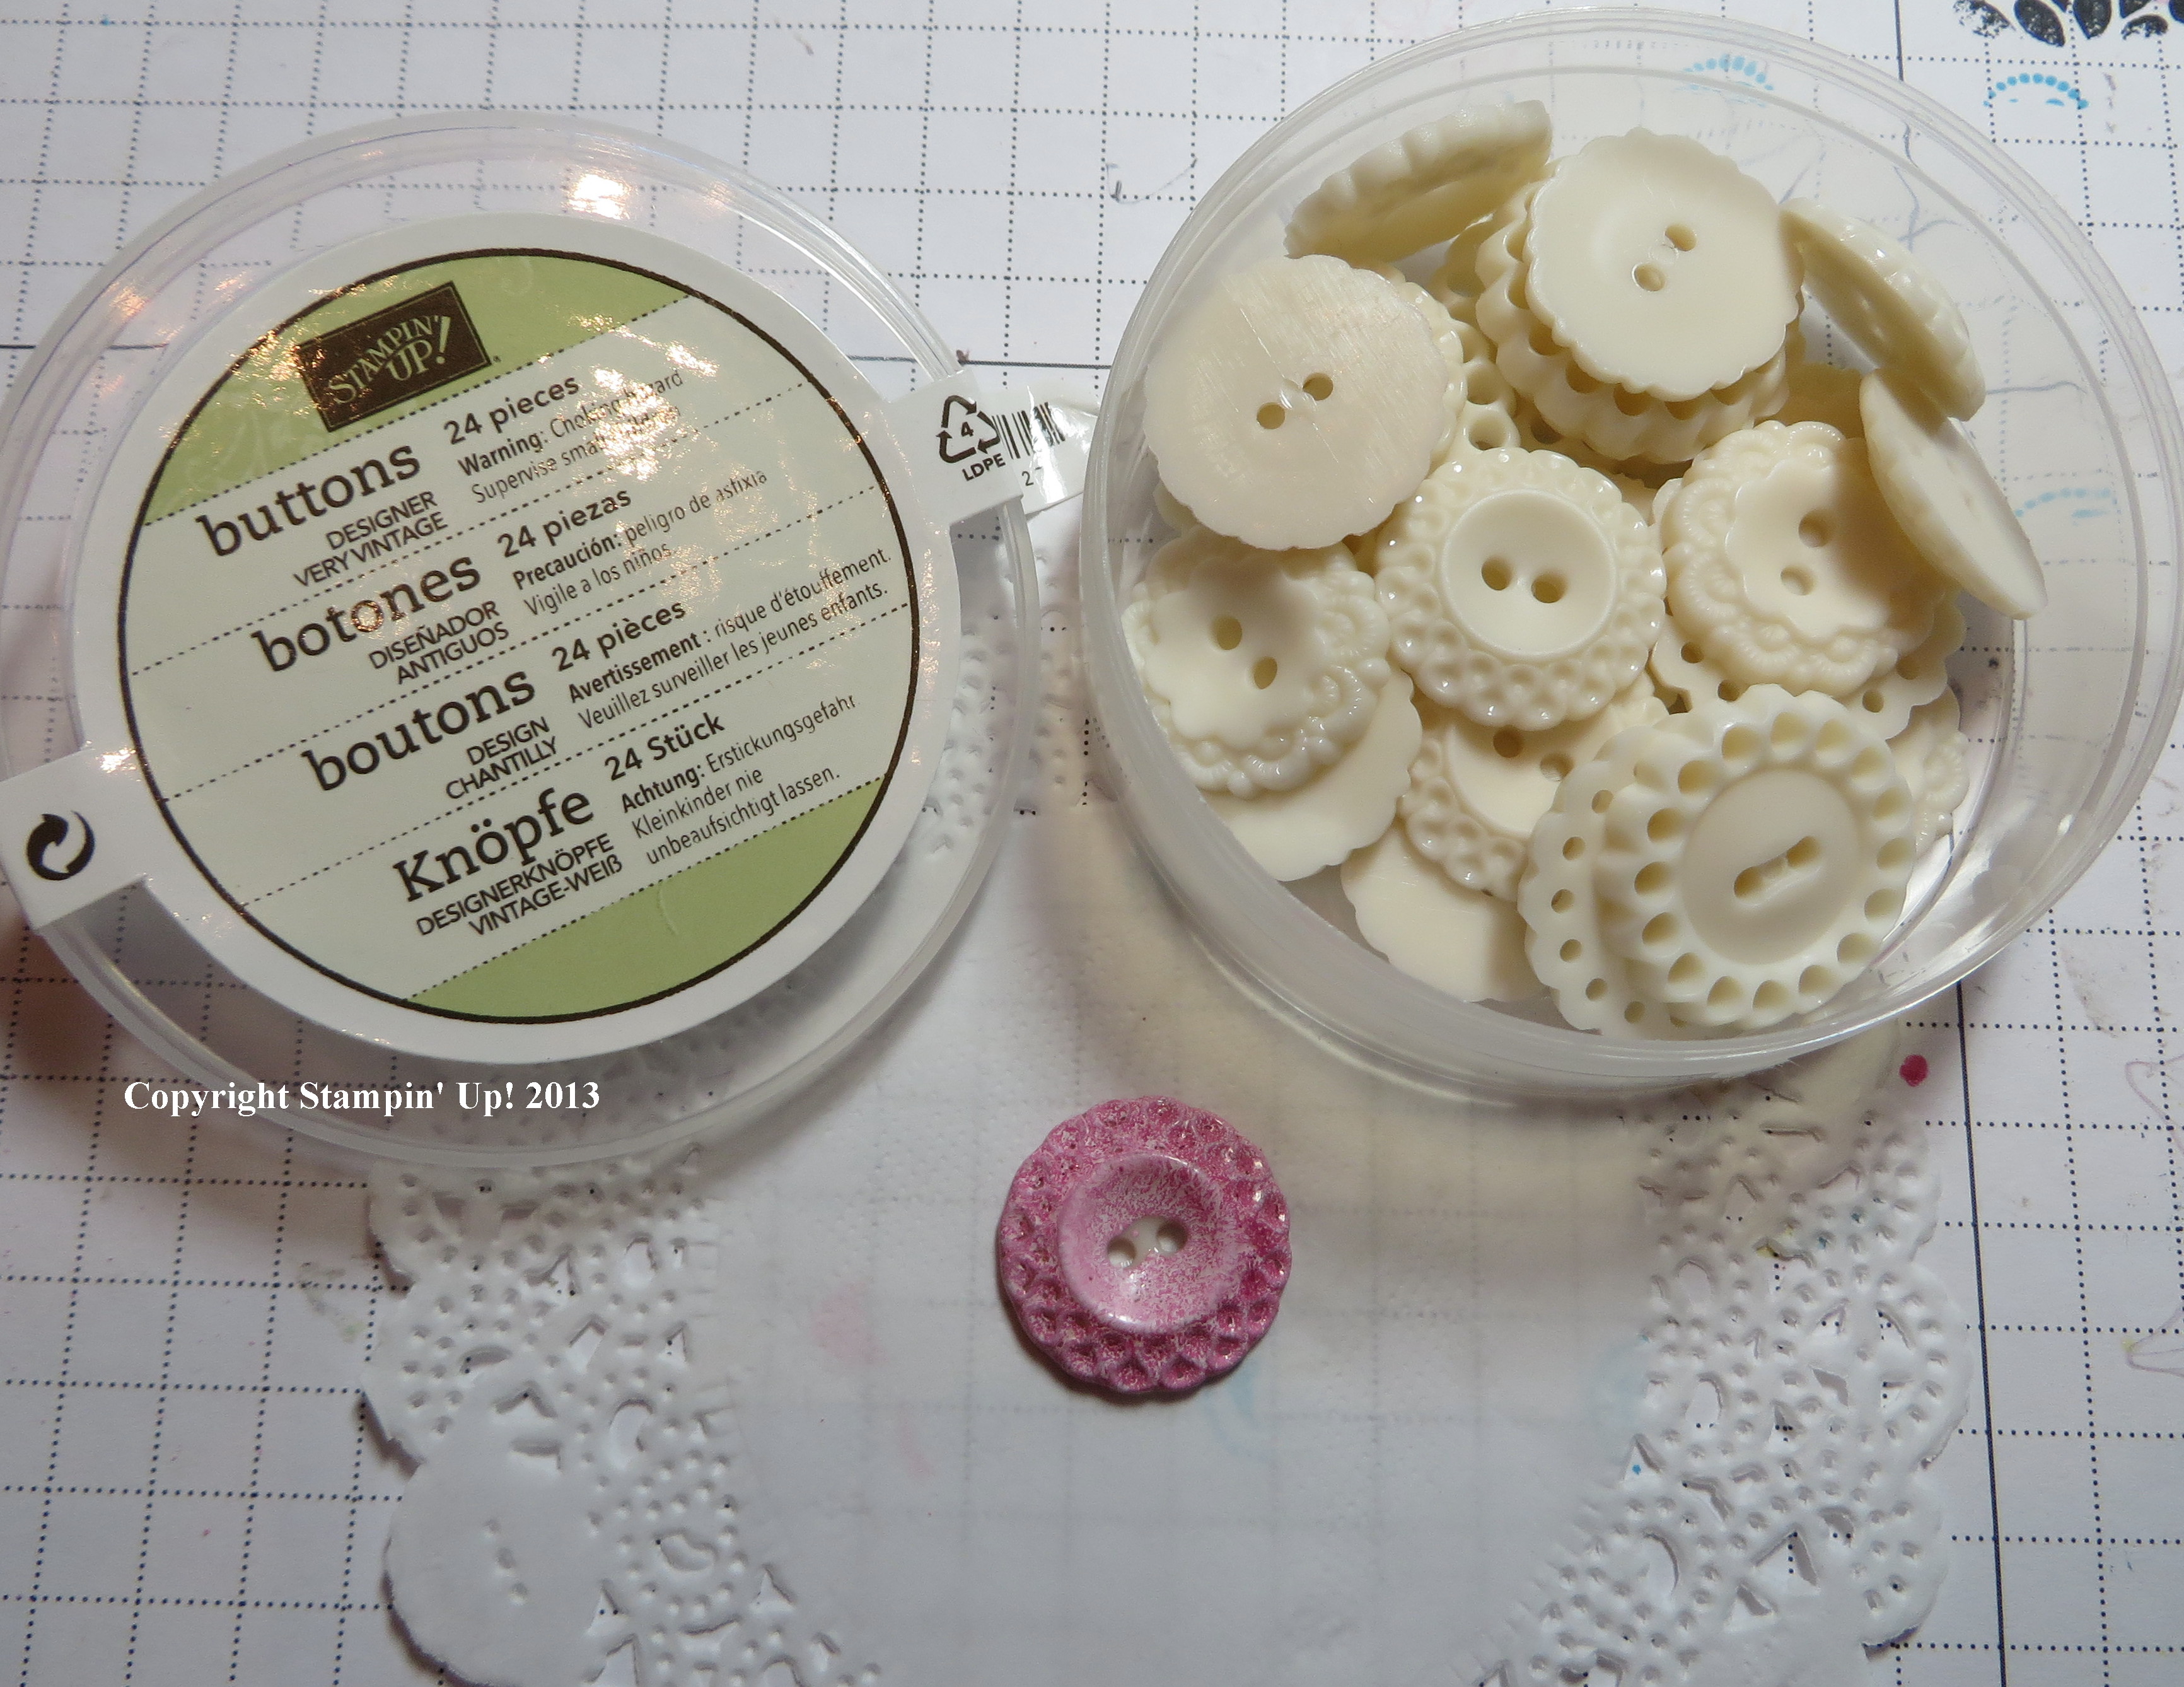
I did a lot of fun things on this card!  The button (Very Vintage Buttons) in the middle of the flower started out plain.  Since I already had some Melon Mambo Embossing Powder, I decided to try embossing the button!  I put some Glue Dots on the back of the button so I could hold it from the back with my long tweezers.  You could use anything you had.  I dipped it onto a Versamark Ink Pad and then embossed with the embossing powder and Heat Tool!  I like the way it turned out!The very center didn’t pick up any Versamark but that is covered with the Baker’s Twine bow.

Embossing Button

Melon Mambo Embossed Button

Melon Mambo Embossed Button

To make the flower (since I couldn’t find my Paper Daisies!), I punched three Whisper White flowers with the Blossom Punch and snipped the petals with my Paper Snips. The layers are glued together and the flower adhere with Stampin’ Dimensionals.  There is half of a Tea Lace Paper Doily stuck in behind the flower.

The greeting is stamped on Whisper White and also on Melon Mambo card stock and punched out with the new Artisan Punch. Then I used my Paper Snips again to cut out just the greeting portion and adhered that to the Melon Mambo piece with Stampin’ Dimensionals.

If you need any of these or other stamping supplies,please shop at my Stampin’ Up! Online Store HERE.

New Stampin’ Up! Catalog Day is Here!

The NEW STAMPIN’ UP! ANNUAL CATALOG BEGINS TODAY AT NOON MT!!

Stampin' Up! Annual Catalog 2013-14

View the Catalog online (Flash)

View the Catalog PDF

View the Stampin’ Supplies

This is the day we’ve all been looking forward to!  Stampin’ Up! will be transitioning the website over to the new catalog until noon MT today You can also order any retiring items, as well as from the Spring Catalog, while supplies last!  People are calling it the “trifecta of ordering” because you can order from all three catalogs at once…the old, the new, and the Spring Catalog!  Have patience because there will be a LOT of people ordering and sometimes there are glitches when everything is new!

Stampin’ Up! New Catalog goes live at:

  • 11:00 am Pacific Time
  • Noon Mountain Time (Stampin’ Up! Home Office Time)
  • 1:00 pm Central Time
  • 2:00 pm Eastern TIme

I always like the see the time written in my own time zone so I don’t have to keep figuring it out!

And that’s not all!!!!

Grab-Your-Greetings sale

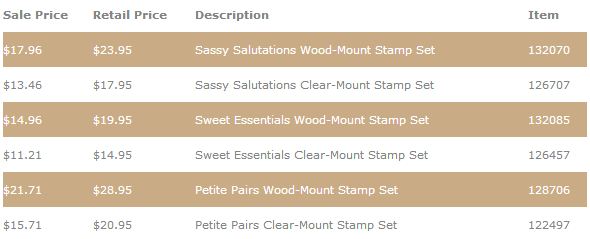
Three greeting stamp sets are on sale for 25% off starting today and going through June 30!  We always need another greeting set!  This is an easy add-on to your order!

Grab Your Greetings Chart

____________________________________________________________________

The Bracket Stamp personalized name stamp with 5 lines (item 131138) will not be available in time for the May 31 catalog launch, but we anticipate that it will be available soon. However, the other versions of Bracket Stamp, with 1-4 lines, will be available to order once the catalog is live.

________________________________

Remember……Ordering begins today at Noon MT (Stampin’ Up! Time!)

Current Catalog          NEW CATALOG           Spring Catalog

The Spring Catalog will END tonight at 11:50 pm MT!!!!!!!!!!!

Just go to my Online Store after Noon MT today and you can start placing your order!  If you have any questions, please contact me at Karen@KarenStamps.com or call at 713-981-7662.

If you plan to shop for your Stampin’ Up! supplies with me and want a brand new catalog to hold in your hands (even though it is online!) please email me or call with your contact information and phone number.

Close to the End for the Stampin’ Up! Spring Catalog

Sunshine & Sprinkles Rainy Day Card

I’m really sad to see the end of the Stampin’ Up! Spring Catalog, even with the excitement of the upcoming new catalog! You have today and tomorrow, May 31st, to order from the Spring Catalog.

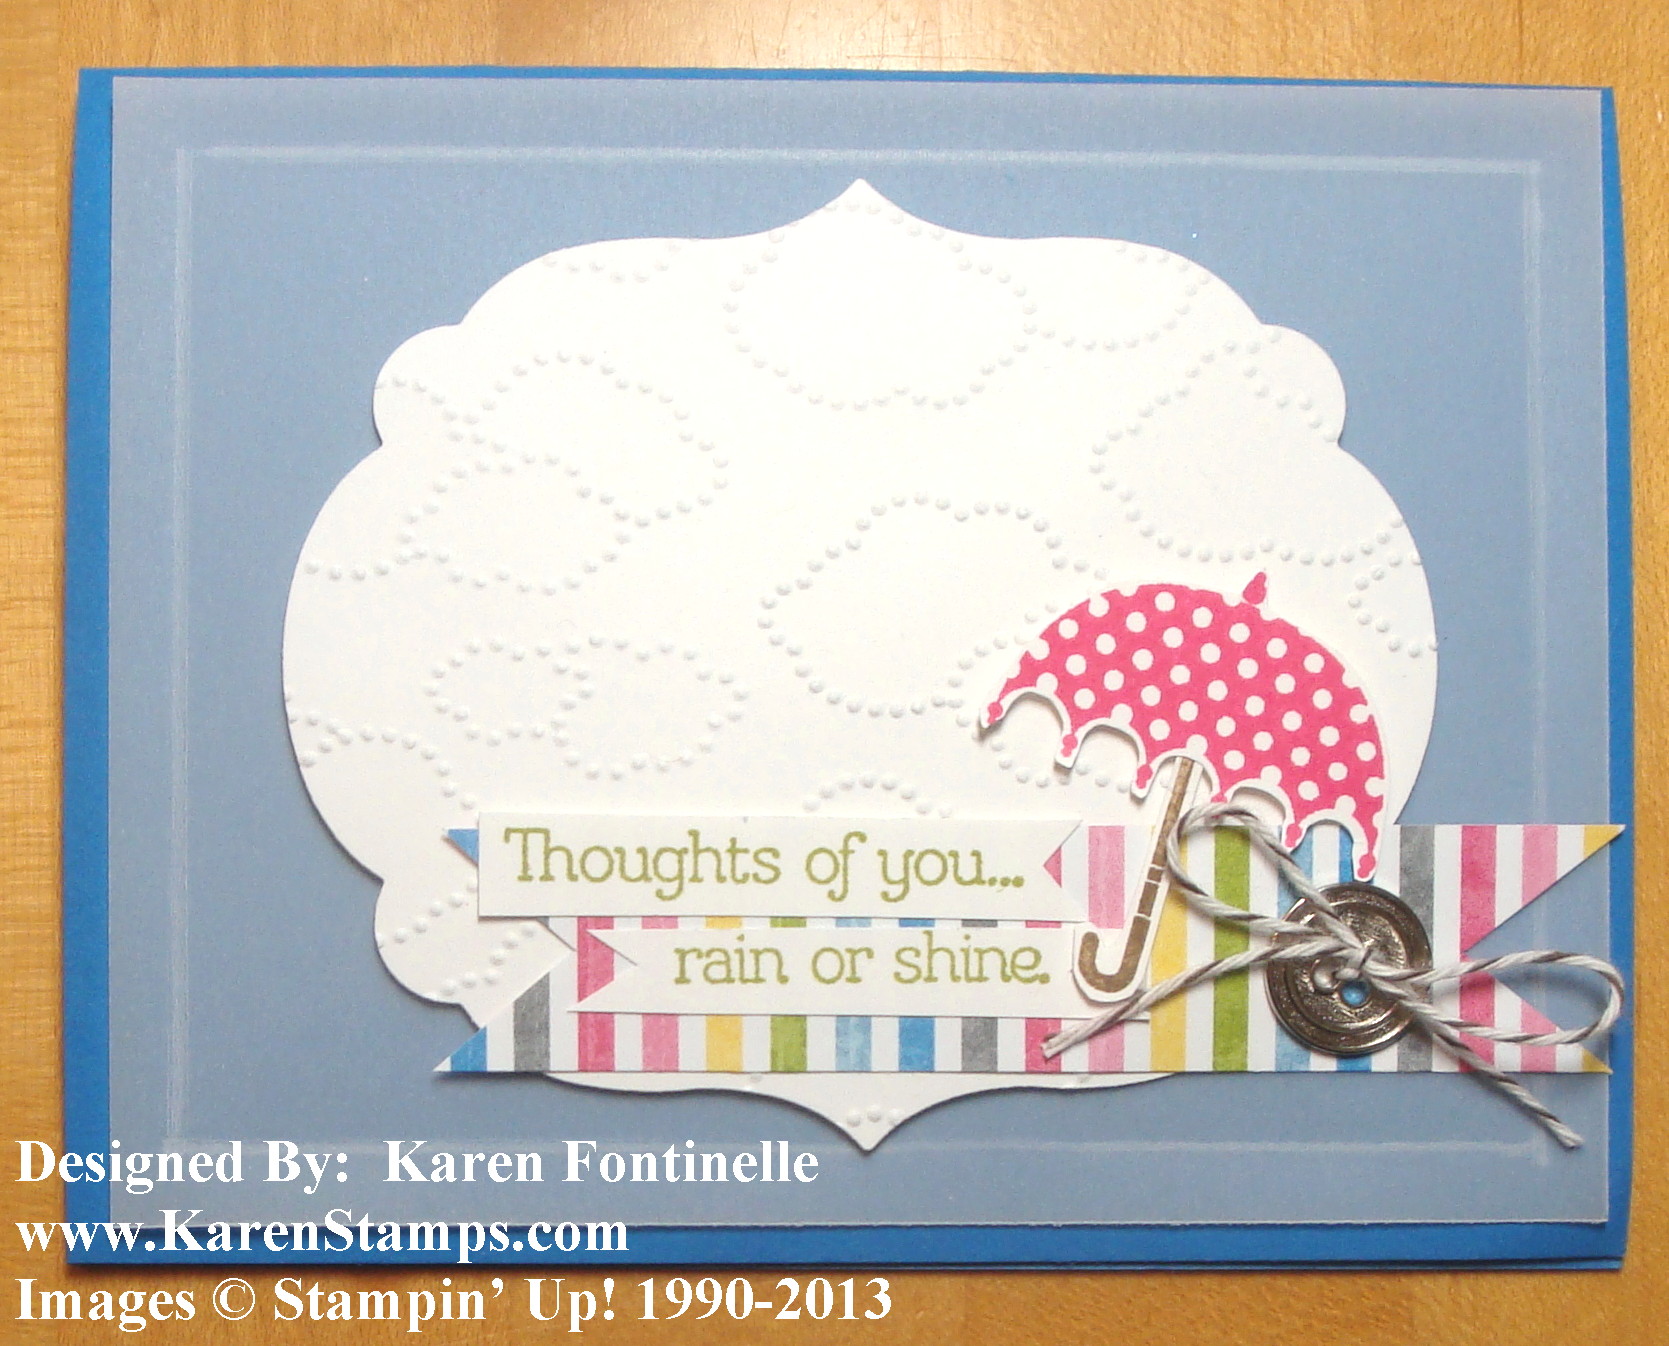
This card I pretty much CASED (copied) right from the sample in the Spring Catalog.  I think all the rain and storms around the country inspired me to do a cloud and umbrella card.  The card base is Pacific Point with a layer of Vellum Card Stock which is scored just around the edges at about 1/4″. I used the Labels Collection Framelits to cut the shape out of Whisper White and embossed it with the Cloudy Day Embossing Folder. The umbrella and greeting is stamped with the Rain or Shine stamp set.  The little strip of striped paper is from Sunshine & Sprinkles Designer Series Paper.  I love that colorful stripe!

Shop Stampin’ Up! Online all day today until midnight Mountain Time tonight!

At midnight Mountain Time tonight Stampin’ Up! will shut down ordering until Noon tomorrow May 31 Mountain Time when the NEW STAMPIN’ UP! CATALOG will go live!!!

When you have your order ready, just go to my Online Store HERE or contact me with your order and I’ll be happy to put it in for you!

Going to Miss the Two Tags Die

One of the many Stampin’ Up! products that I will miss when it retires next week is the Two Tags Die. You can make cards, tags, even little bags and boxes for treats and little gifts. Today I have used my Two Tags Die for two projects as well as two retiring stamp sets, retiring designer paper, and retiring colors, Regal Rose and Baja Breeze.

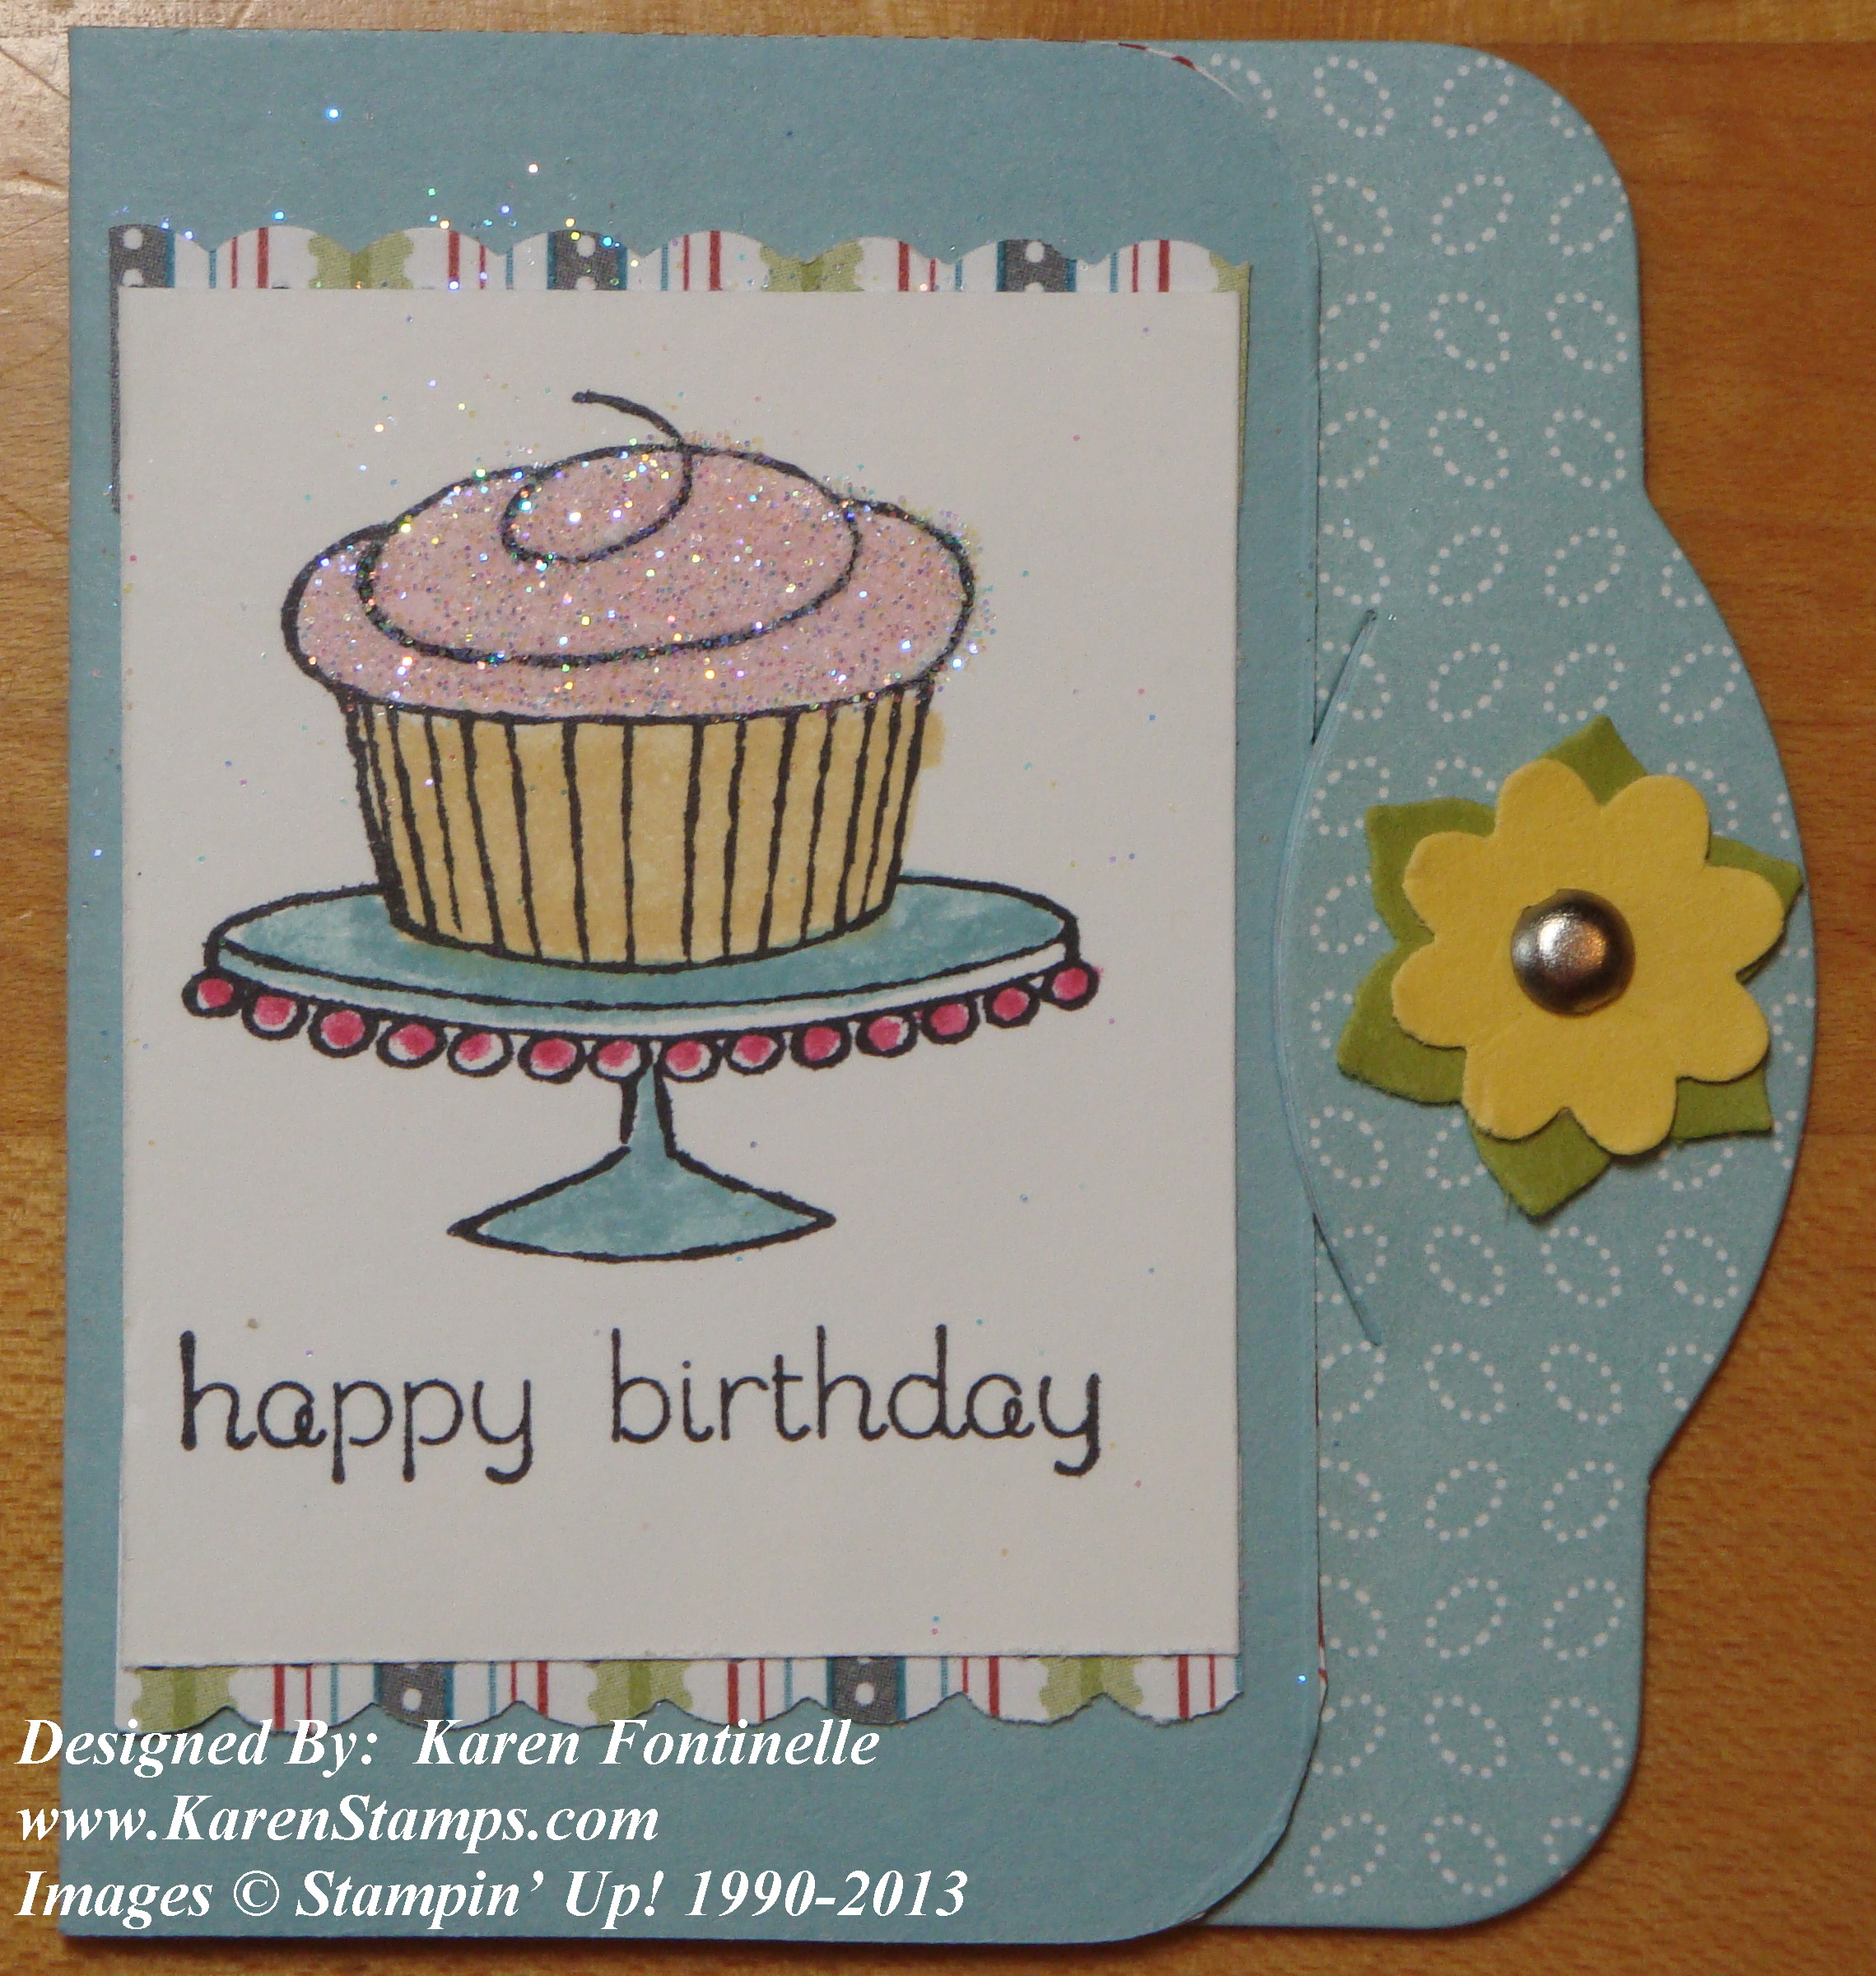
Two Tags Die BirthdayThere are actually two tag shapes on the Two Tags Die.  This one pictured above had a score line so can be folded in half and tucked under the little slit, which the die also makes.  I cut out the Twitterpated Designer Paper at the same time as the card stock so it fit perfectly. I stamped the cupcake image from the retiring Easy Events stamp set (a great set for all-occasions, especially for the beginning stamper!) and colored it in with Stampin’ Write Markers. For a little pizzazz I had to add some Dazzling Diamonds Glitter to the frosting with my 2-Way Glue Pen. And for a little trim above and below the stamped image, I used the versatile Dotted Scallop Ribbon Border Punch with only the scallop edge showing. The little flower on the edge is made with the Boho Blossoms Punch.

Two Tags Die Word Play Card
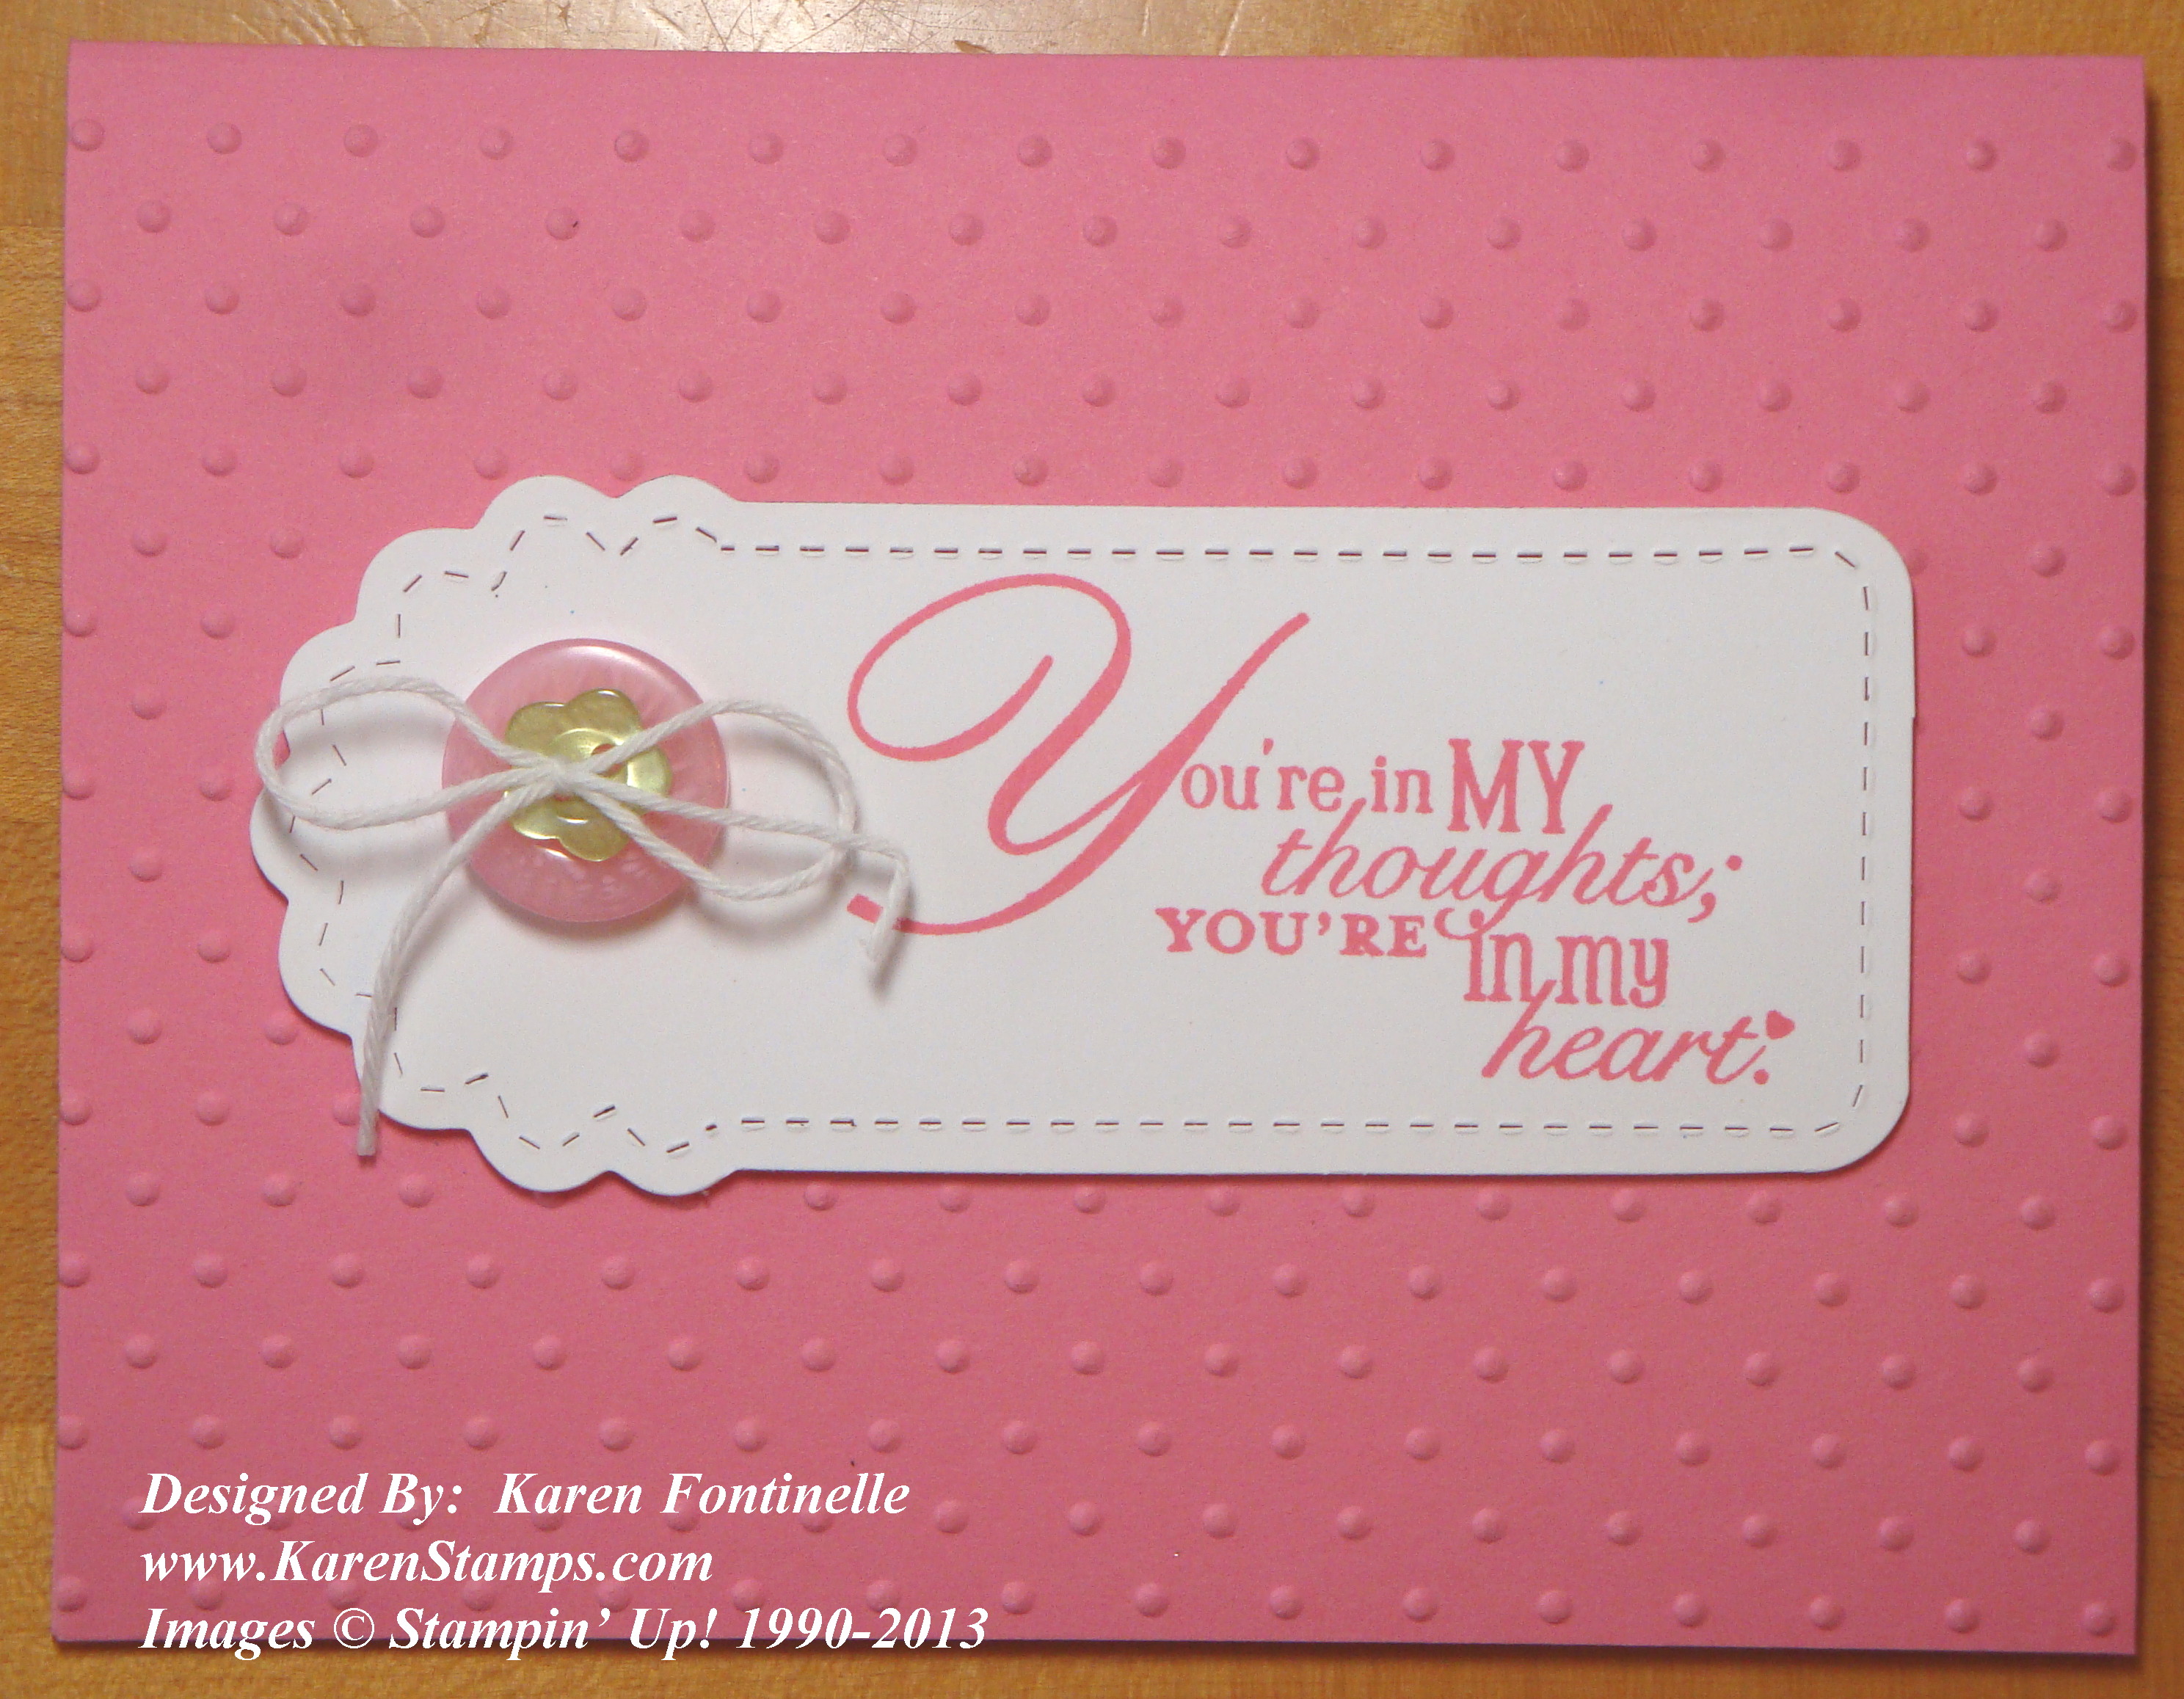
This card I made using the discontinued Regal Rose card stock (admittedly not one of my favorite colors in all these years, but it’s okay) and embossed with the Perfect Polka Dots Folder. The Two Tags Die is stamped with a greeting from the Word Play stamp set (another stamp set I hate to see retire) and decorated with a couple of Subtles Collection Designer Buttons tied with
White Baker’s Twine.  I made a similar card back in this post.

The Two Tags Die is a fun and handy die to own if you also own the Big Shot.  If it is still available, I would add it to your list of must-haves before the retirement period is over.

Remember, the new Stampin’ Up! catalog goes live at Noon Mountain Time on Friday, May 31.  Ordering will be down that morning and the night before so they can make the change to the new catalog.  You will still be able to order from the old catalog until June 3.  The Spring Catalog ends May 31.

Place your order today before time runs out at my Online Store or email me with your order at Karen@KarenStamps.com if you prefer.

.

Stampin’ Up! Retiring Products Going, Going…..!

Stampin' Up! Retired List of Products

May has flown by so fast I can’t believe we are nearly at the end.  This is the LAST week of May!!   And it’s already Tuesday after the holiday weekend! If you haven’t already, it’s time to get serious about the Stampin’ Up! retirement lists! Although the end of the month is May 31, you do have a little grace period with Stampin’ Up! holding open the ordering from the outgoing catalog through June 3, 2013. But remember accessories are only available while supplies last!

Some accessories are even discounted so be sure to check these out! You can see the discounted products here in my Online Store. Some are already sold out.

Click on this link for the Stampin’ Up!  List of Retiring Stamps

Click on this link for the Stampin’ Up! List of Retiring Accessories

Also, remember the Stampin’ Up! Spring Catalog will be ending on May 31.

Stampin’ Up! announced this morning that Online Ordering (and ordering through demonstrators) will be down from midnight MDT on Friday, May 31 through noon May 31 MDT  (that will be 1:00 pm Central Daylight Time) so that they may switch their ordering systems over to the new catalog!!

Go to my Online Store  where you can see all the retiring stamps, paper, ink, accessories….everything….which ones are discounted, which ones are still available for purchase.

Celebrate Memorial Day

memorial-day-shadow-soldier

Memorial Day is a federal holiday in the United States to honor men and women who died while in the military. I remember when it originally was called Decoration Day.  At many national cemetaries there are ceremonies and volunteers who place small American flags on all the graves. Amidst all the sales at the mall that seem to take over our holidays and the unofficial beginning of summer as many people use this weekend for traveling and summer fun, we should all pause to remember the real meaning of this holiday.

If you have family members who served in the military, you might want to check out www.Ancestry.com which is giving free access to draft, enlistment and service records through May 27th. It is SO fascinating to look up these records.  You just have to sign up for a free account.  I just looked up my grandfather’s World War I registration card.  He was just my youngest son’s age. It’s amazing to read his physical description, address, and see his signature in his own handwriting.  These records might be something you can use in your scrapbooking.

Enjoy your day!

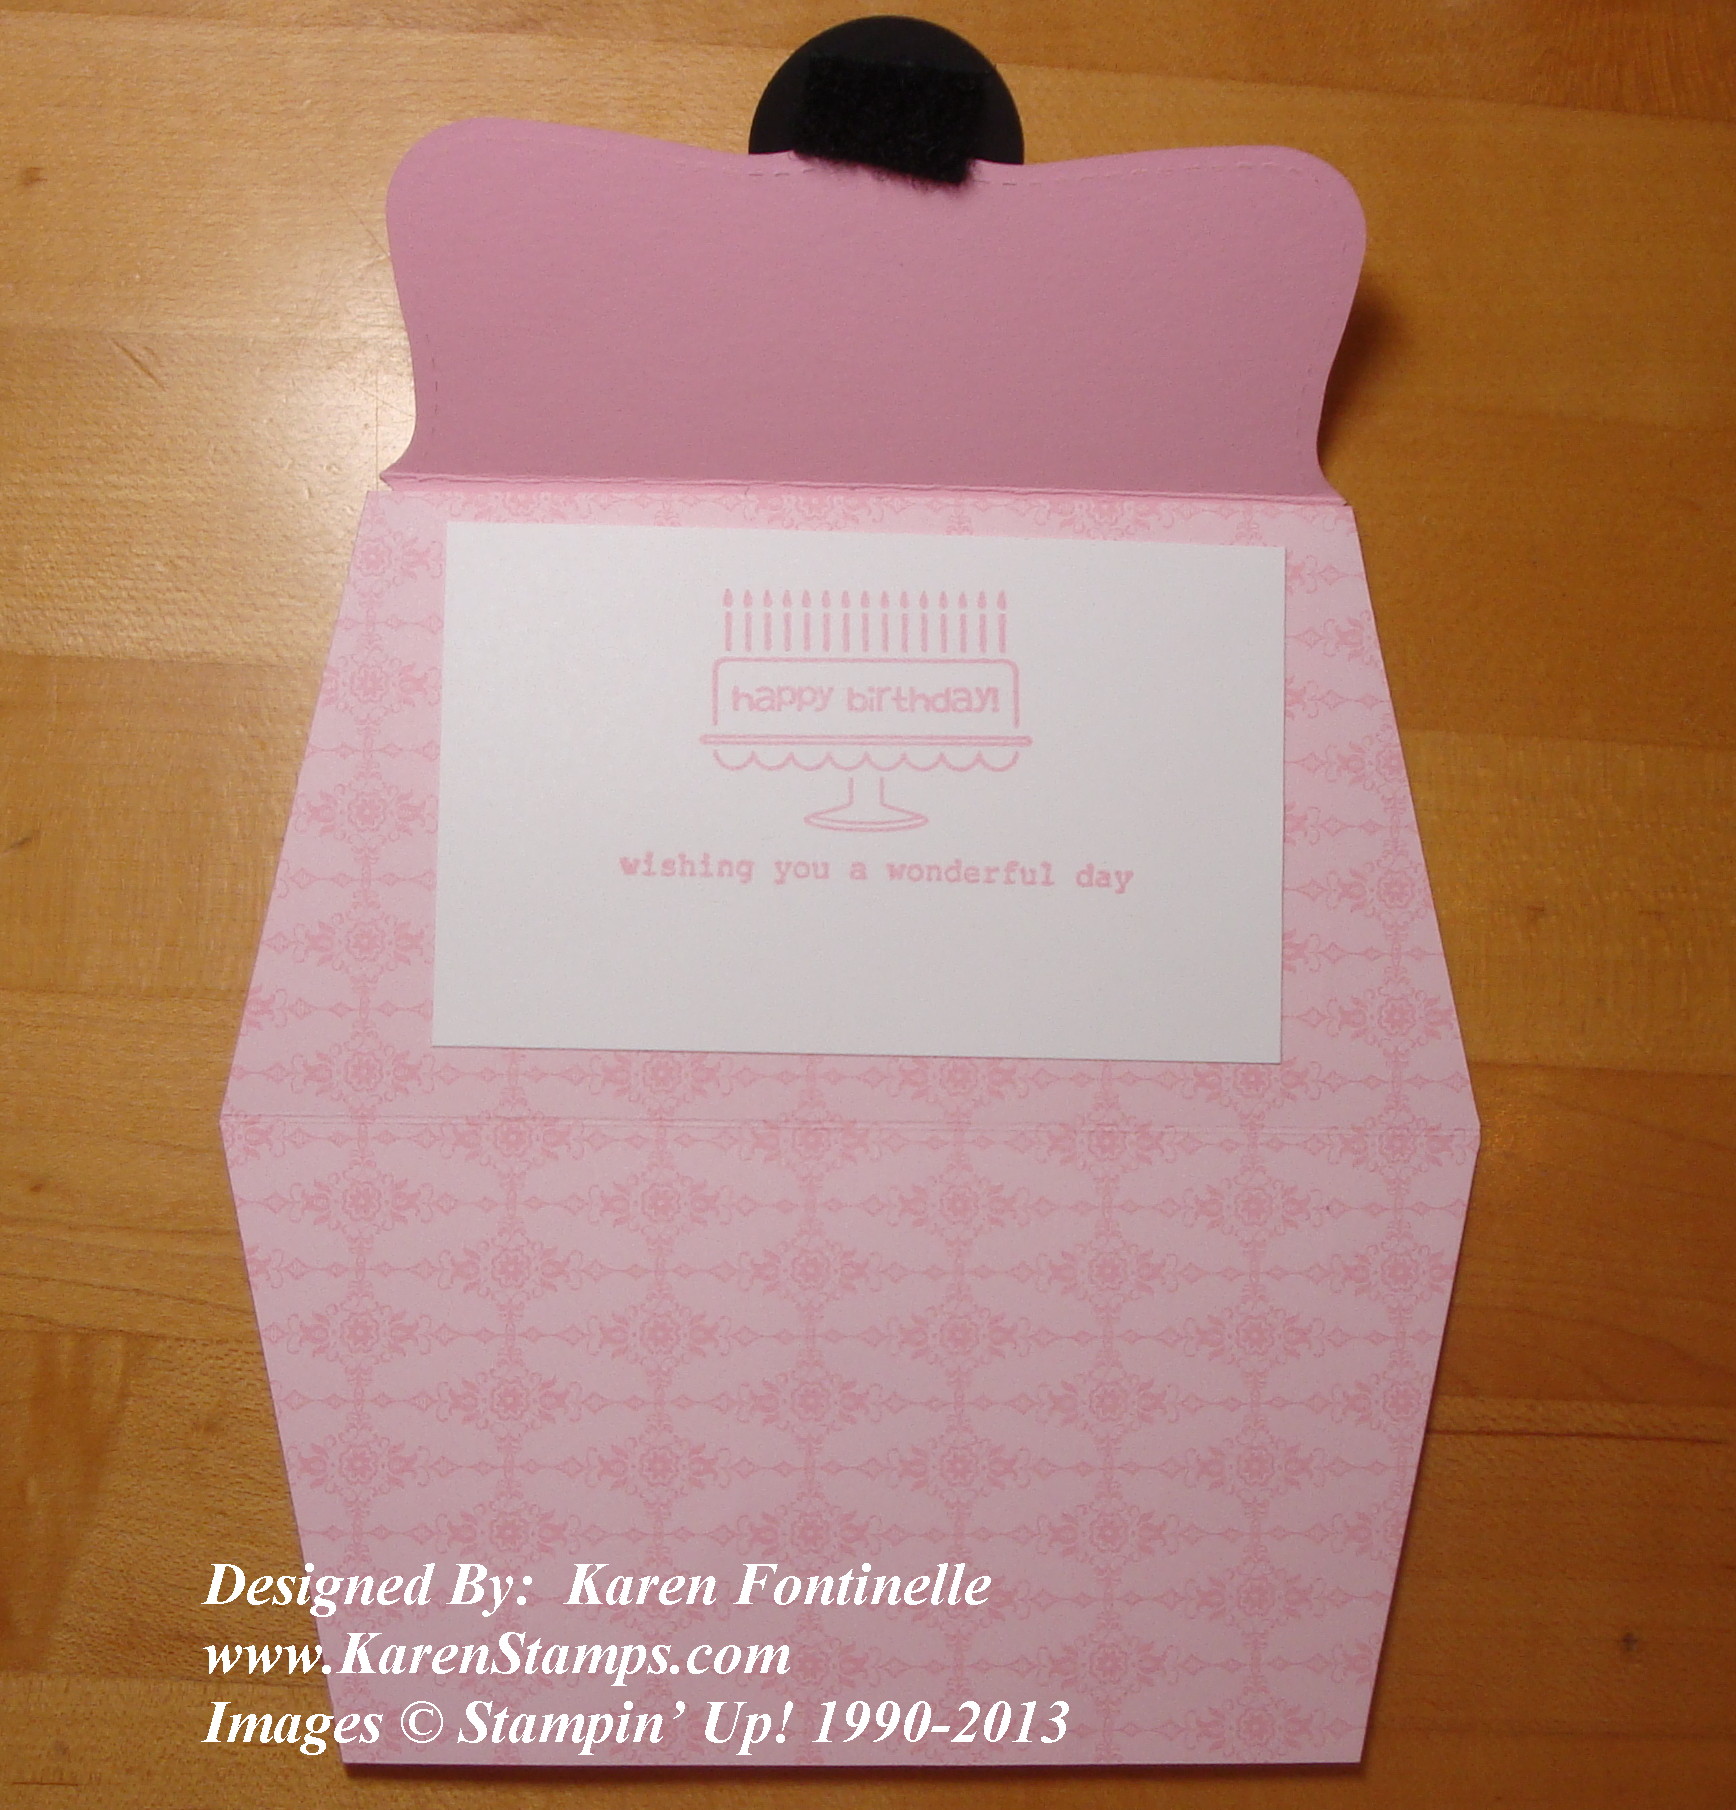
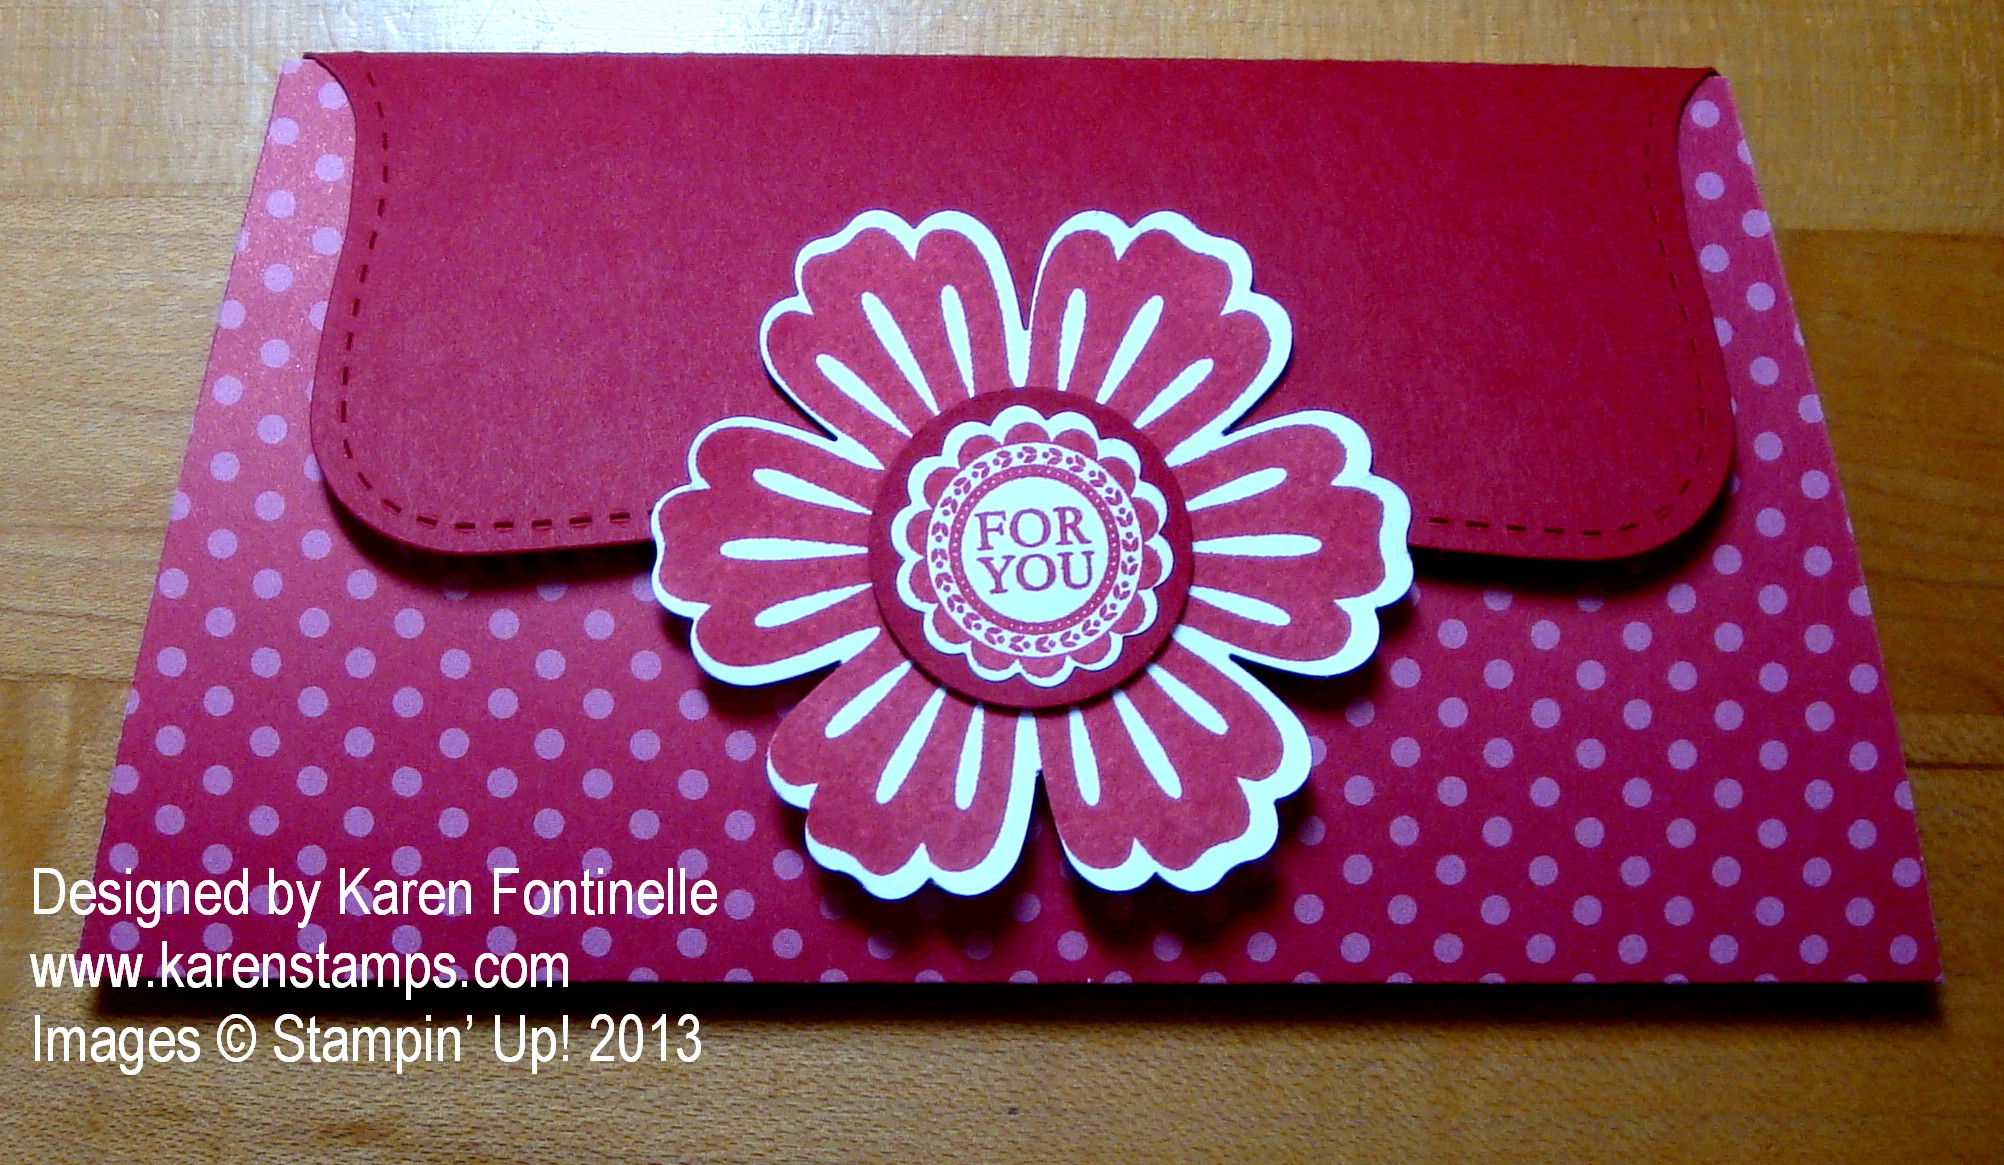
Another Birthday Purse Card

Pink Purse Card

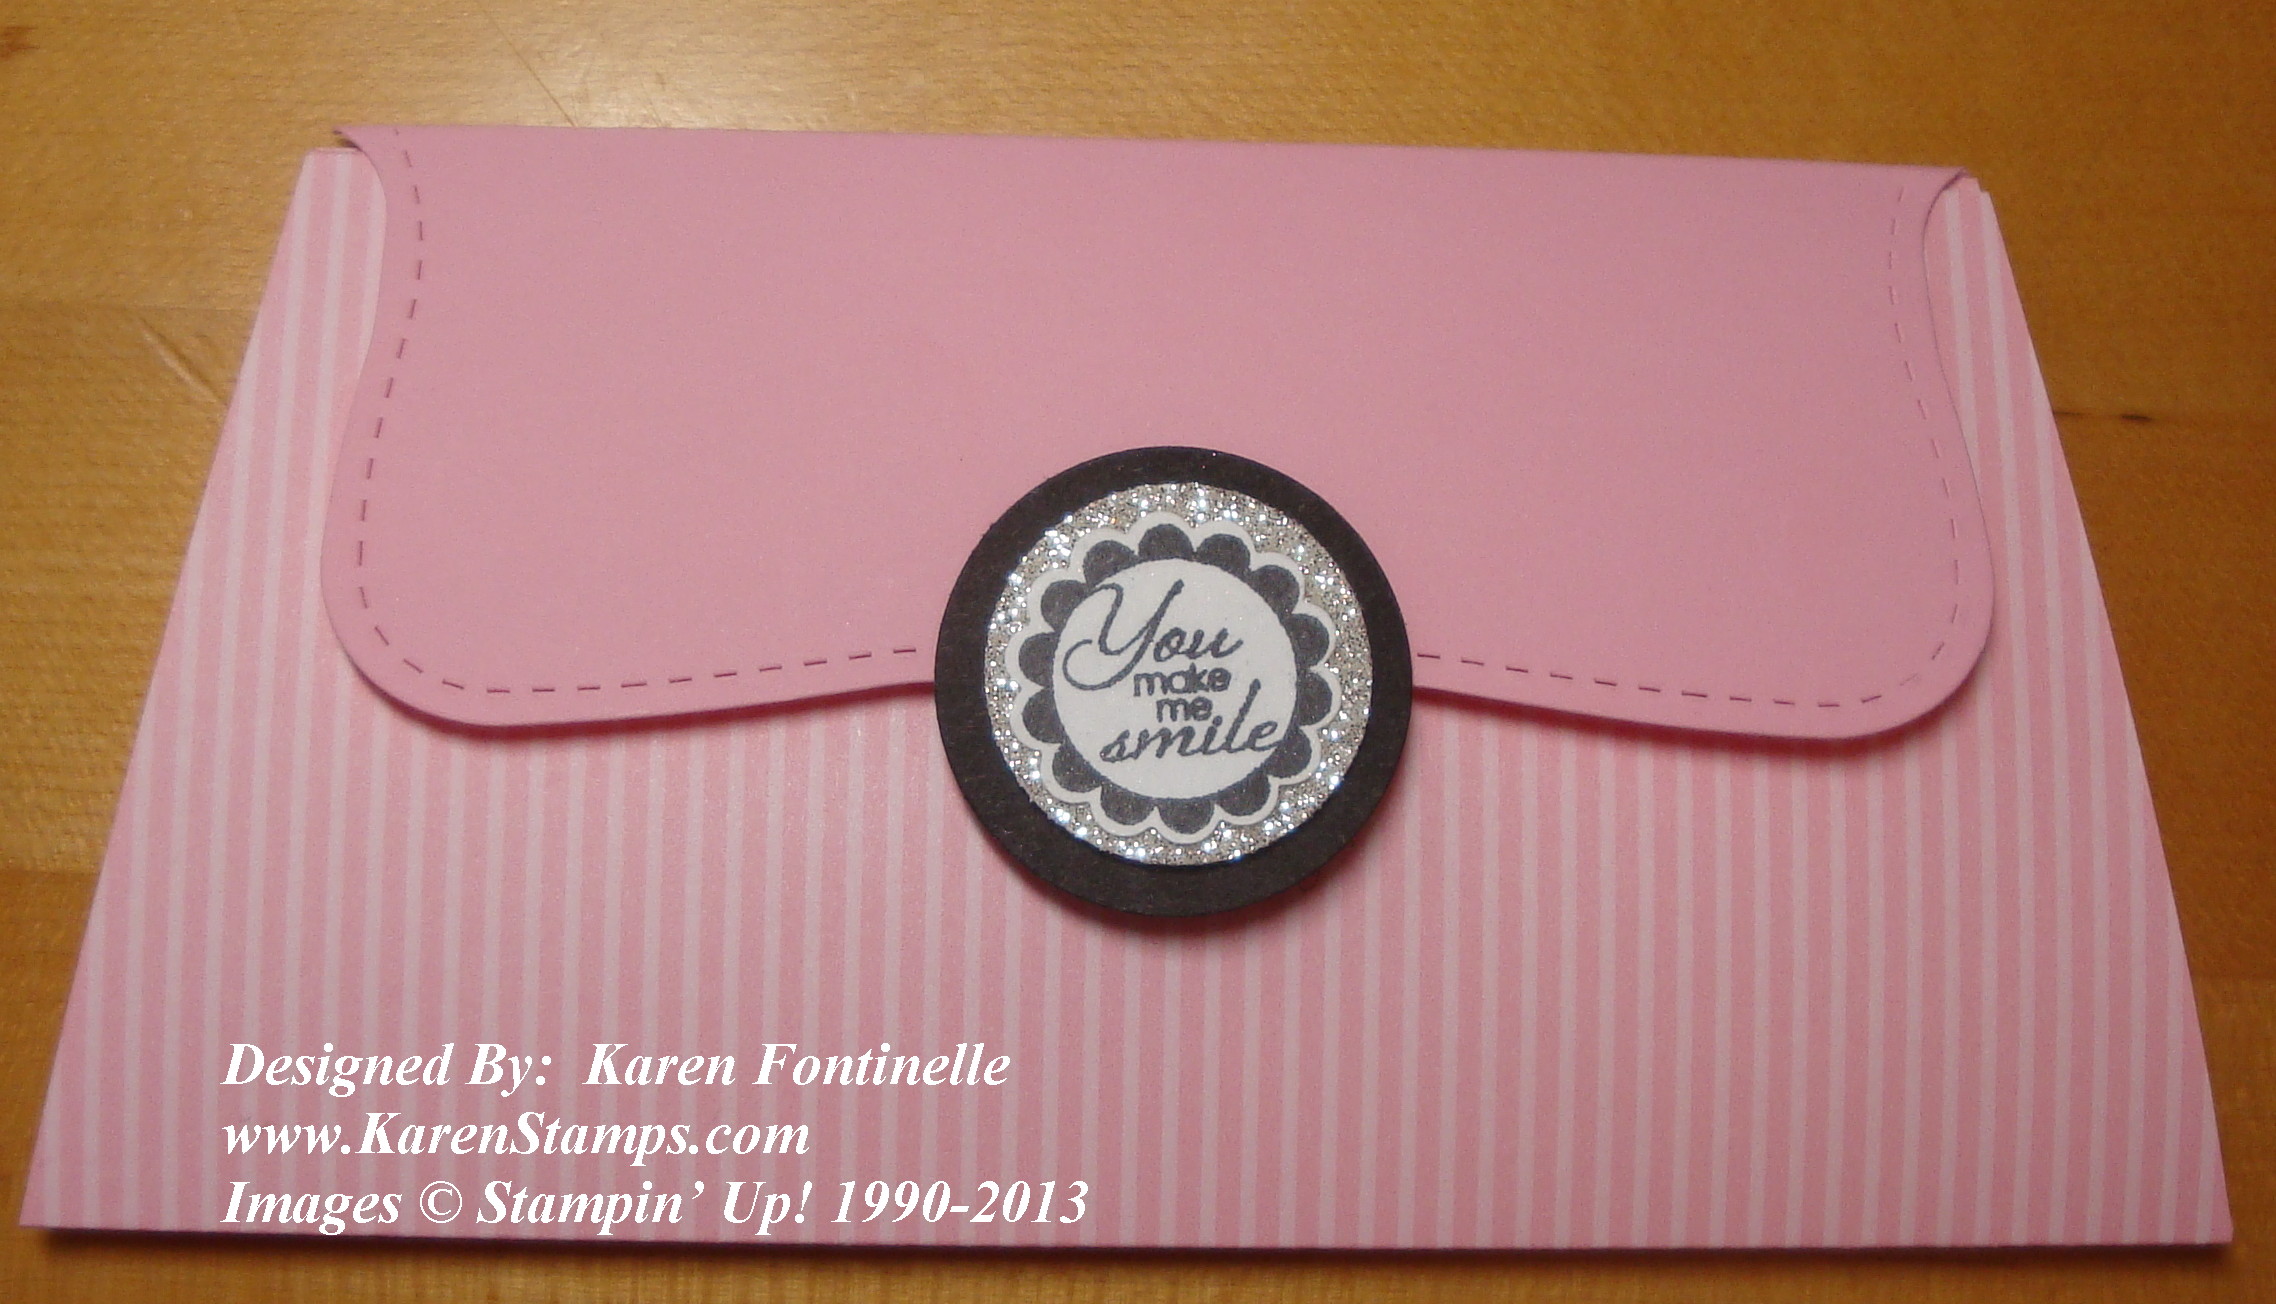
I think these purse-shaped cards make great birthday cards for young girls! They could also be more than a birthday card.  Instead of just putting a greeting on the inside, make a pocket of some sort and turn it into a gift-card holder.  It is graduation time and I read that cash is the most welcome gift!  Make a pocket inside the card and insert cash or a gift card or check.  My grandmother used to always say you can’t give someone a purse without putting a penny in it!  Must be bad luck or something! Even though I made these purse cards for birthdays, think of all the other fun occasions you could make them for and the ways you could change them out!  Make it super-fancy with some Glimmer Paper or a sparkly closure or flower on the front! Make party invitations out of this idea!  It’s one of those projects that once you make one, you want to make more!

You can barely see the fuzzy thing underneath the closure.  That’s a piece of velcro which will hold the card closed.

Shop for Stampin’ Up! supplies at my Online Store!  Be sure to check the Clearance Rack, too!

Pink Purse Card Inside

Make a Purse Card

Red Purse Card

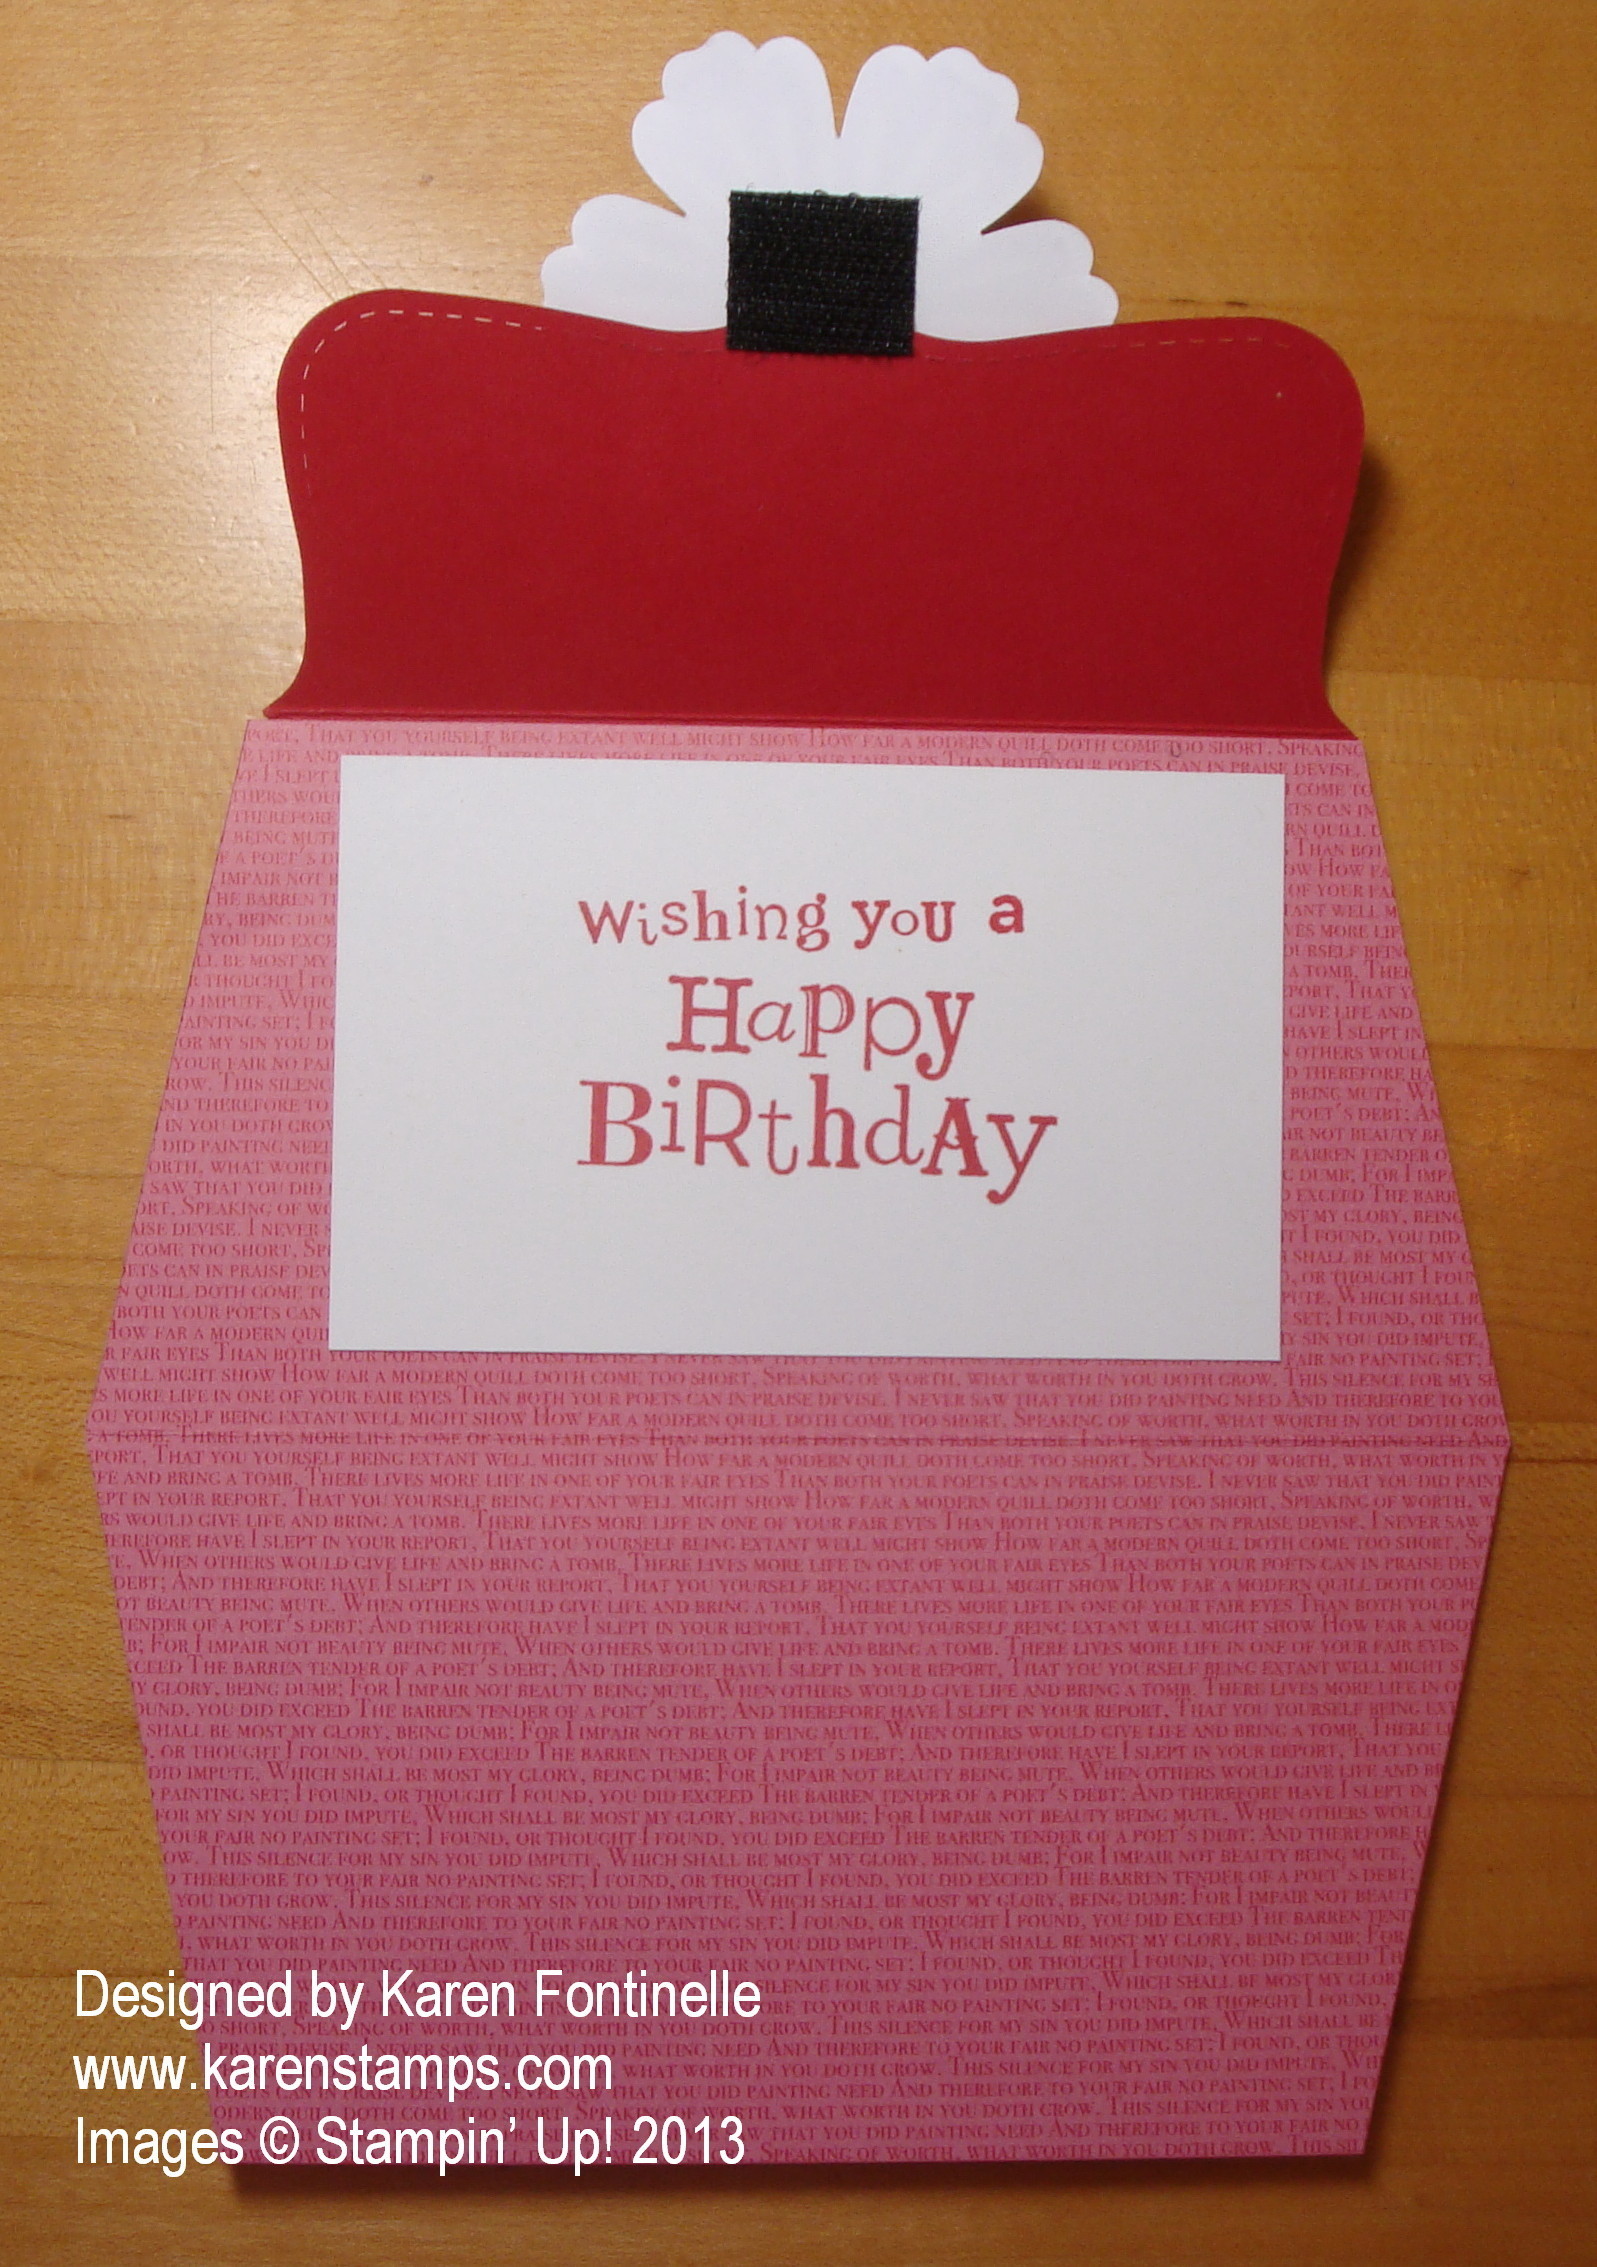
When I needed to make birthday cards for my twin nieces I found this idea of making purse cards for them. My cards just fold completely flat, but you could make yours more 3-D. I used a piece of designer series paper for the purse shape so that there would be a nice design on the inside when it was opened.  You could just as easily use card stock.  The Top Note Die folded in half is used for the top closure of the purse.  What would we do without the Top Note Die?! I’m glad it is not retiring next week!

  • Cut out the Top Note Die with the Big Shot. Score and fold in half lengthwise.
  • Cut a piece of designer series paper (DSP) 6″ x 6″. Score at 3″ and fold in half. Be mindful of which way the pattern is going and which side you want on the outside.
  • Now you will need to trim the sides of the purse from the bottom to the top edge on a diagonal. To do this, measure in on the top open edges about 5/8″ from each side. Use your paper trimmer to cut from that point on each side to the bottom edge of the folded side. You know, make it look like a purse shape!
  • Adhere the Top Note Die to the back of the “purse”. Make some sort of decoration for the front closure.  Adhere to front of Top Note Die on the front of the purse. Use a small piece of velcro in order to hold the purse closed.
  • Depending on your DSP design, you’ll probably need to stamp the greeting on a plain piece of card stock and adhere to inside of purse card.
  • If you want, you could make some ribbon handles for the top of the purse.

Here is the inside of the card.

Purse card Inside

To order any card-making supplies, just visit my Stampin’ Up! Online Store here. Remember, some stamps and accessories are only available for about one more week!
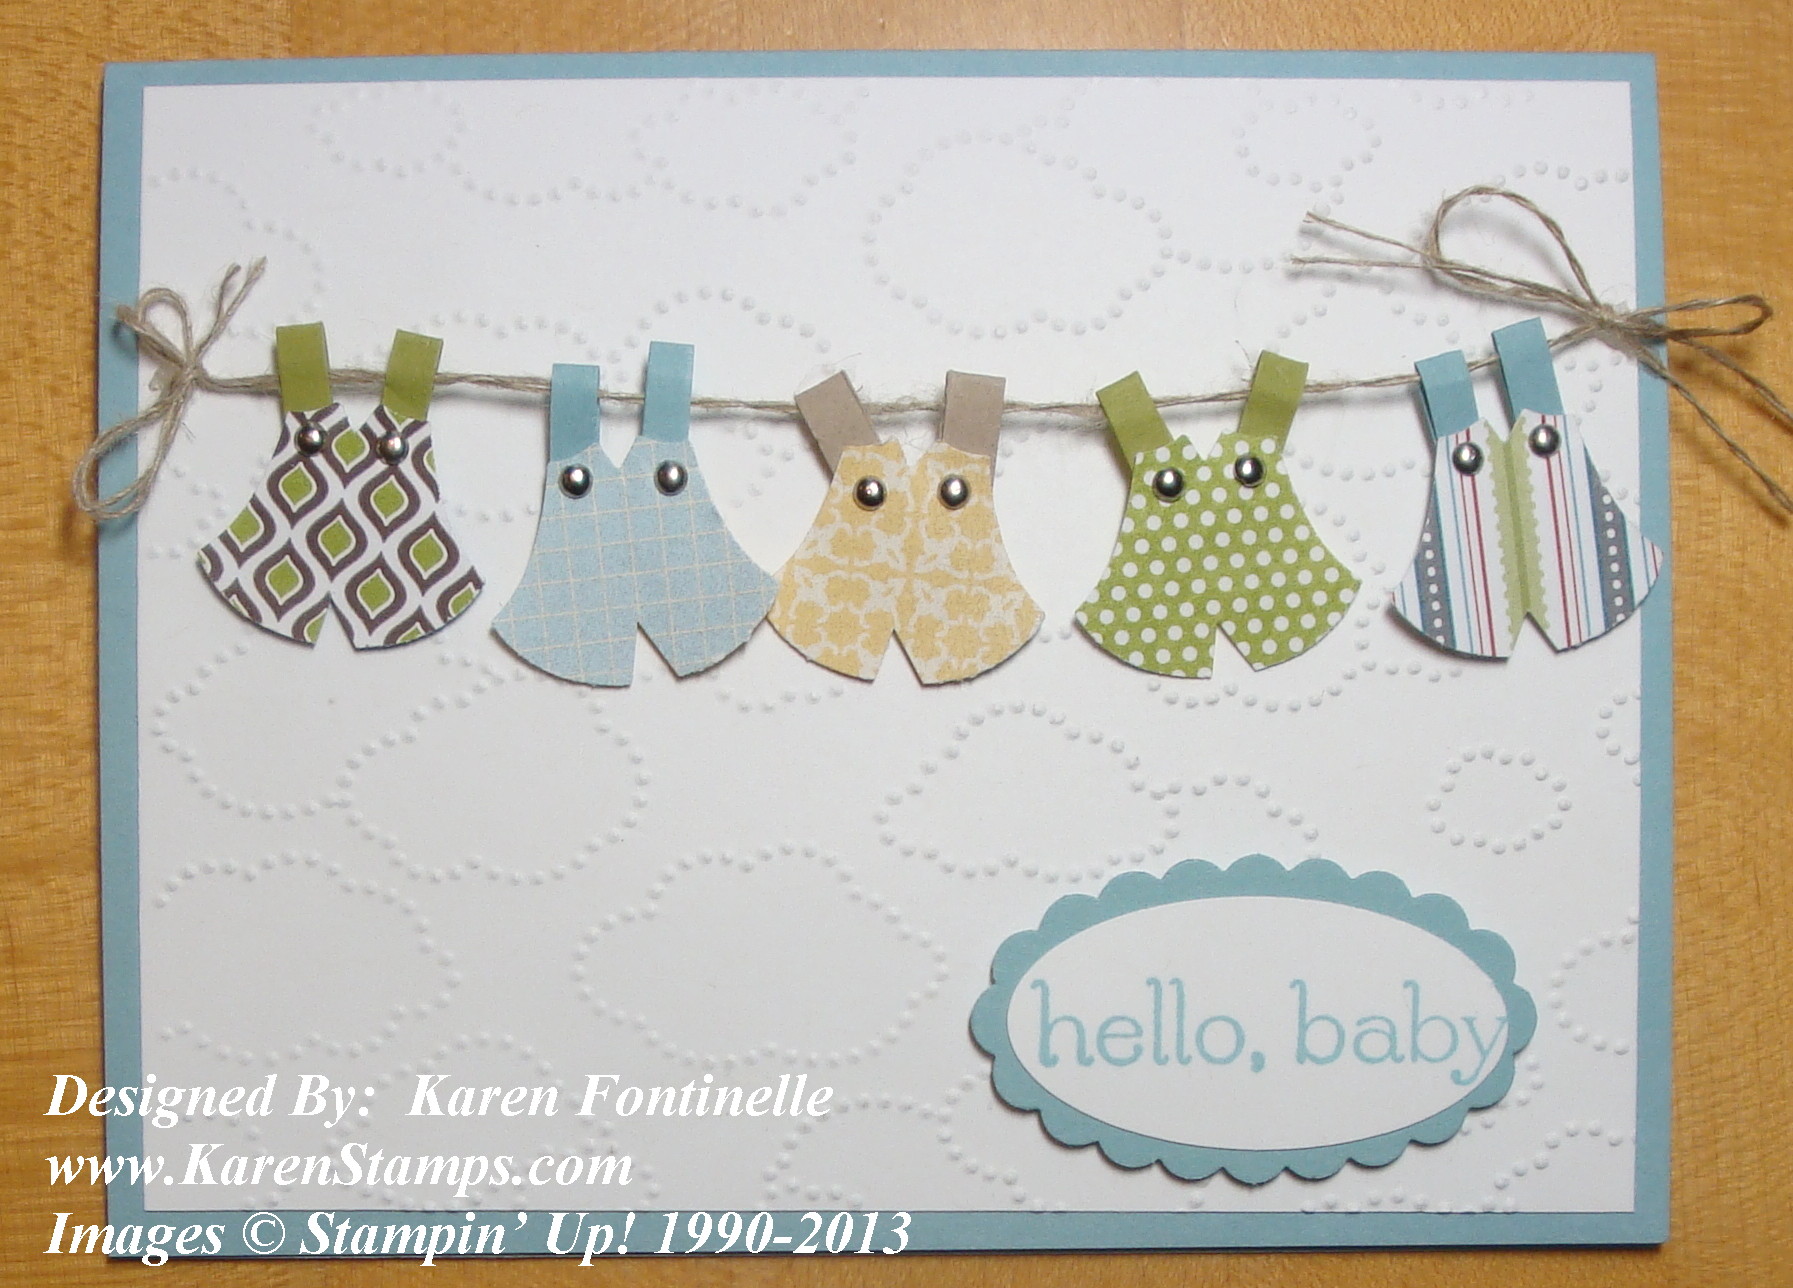
Using the Stampin’ Up! Owl Punch for a Baby Card

Owl Punch Baby Boy Card

The Stampin’ Up! Owl Builder Punch can be used for way more than owls! If you need to make a baby card, just get out your Owl Punch and get to work.

On this card, I made cute little baby clothes hanging on the clothesline with the Owl Punch. Use the piece that would be the front part of the owl. Then make a little triangle snip in the bottom with your Paper Snips to make the piece look like legs. Add some thin strips of card stock for the outfit straps (or pieces of ribbon) and secure with Mini Brads. Thread some Linen Thread through the outfits to “hang” on the clothesline. Adhere the outfit to the card using Stampin’ Dimensionals.

For the background, I used the Cloudy Day Embossing Folder and Big Shot Die-Cutting Machine to make it look like the sky.  The greeting is from Sweet Essentials stamp set.

If you don’t already own the Stampin’ Up! Owl Punch, you’ll want to add it to your order! You can order online at any time at my Stampin’ Up! Online Store here.  Big discounts on some retiring products right now!
Word Play Graduation Card

Word Play Graduation Card

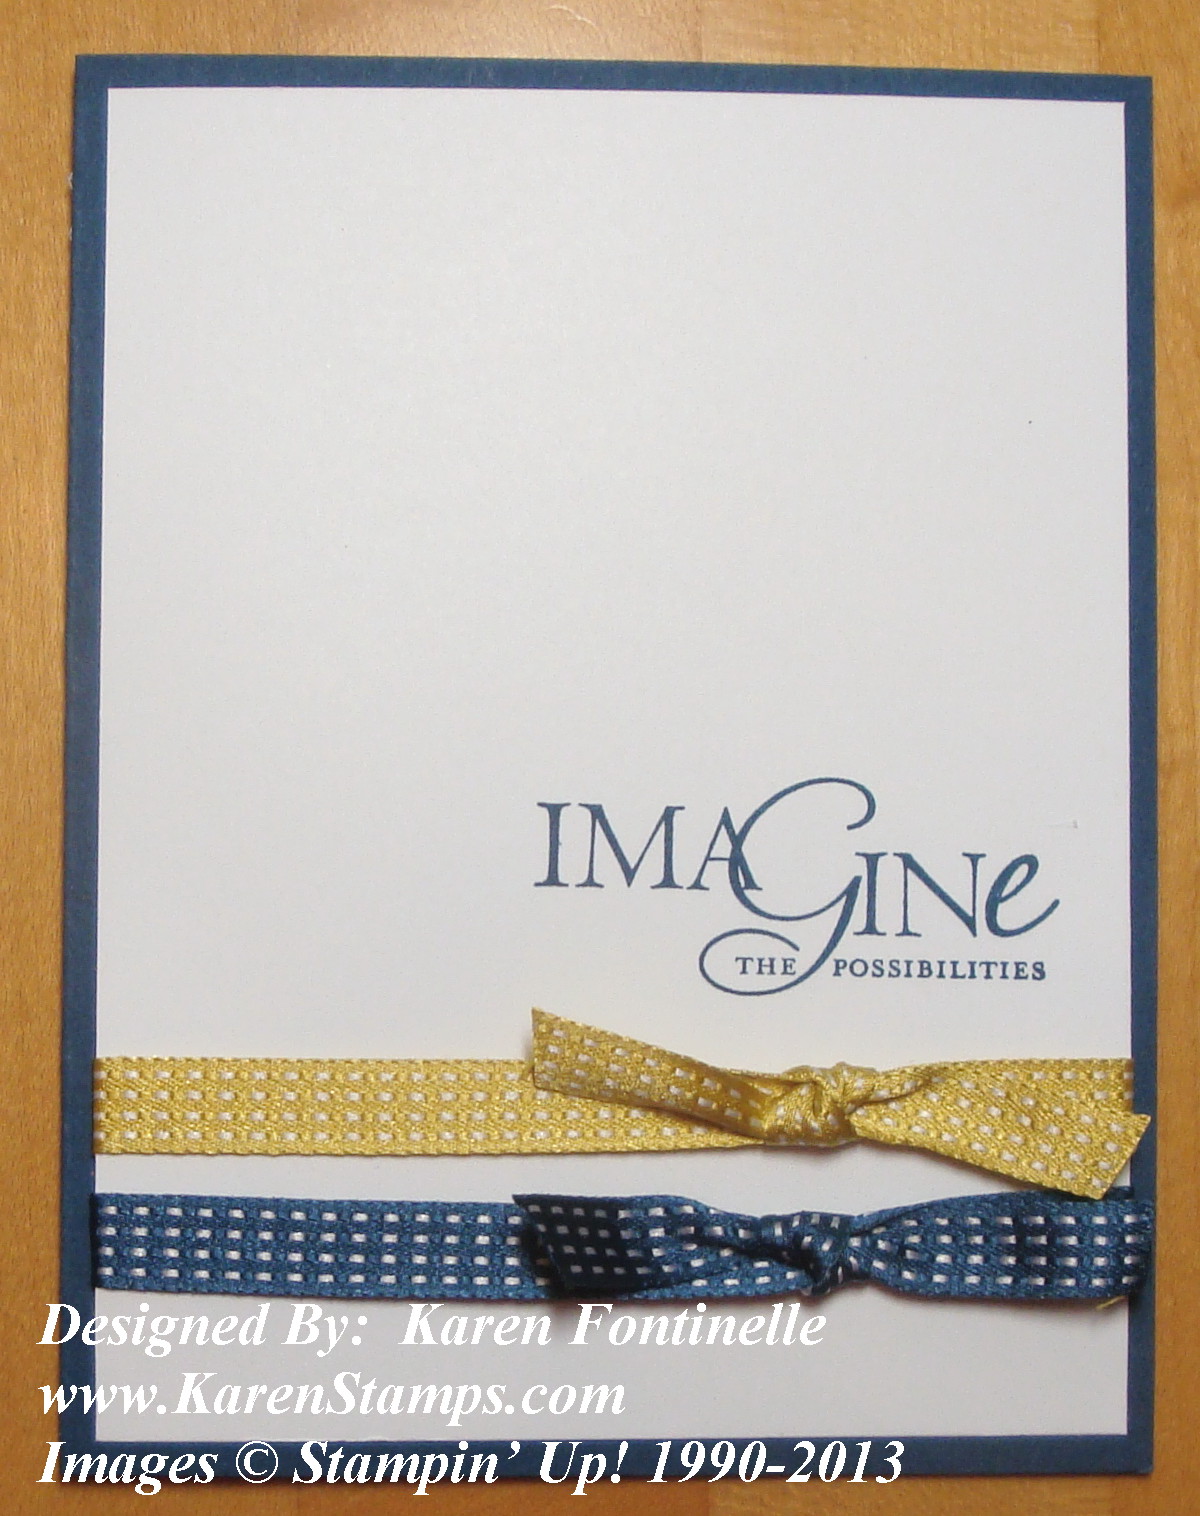
If you are looking for an easy graduation card to make in just a few minutes, here’s one! You can design it using the school colors if you like or any colors you know the recipient will like. I started with a card base of Midnight Muse and stamped the greeting from Word Play in Midnight Muse ink on the Whisper White card layer. You could use any appropriate greeting you had on a design like this. I adhered two strips of 3/8″ Stitched Satin Ribbon to the Whisper White, adhering the ends under the Whisper White and tied the knots with separate pieces of ribbon. Since the colors of my high school were blue and gold, I chose these two colors of ribbon for my sample…Island Indigo and Summer Starfruit!

I love the stamp set Word Play with so many great sayings in it….but it is retiring in a couple weeks, so don’t miss out!

Check the selection of retiring stamps and accessories here in my Online Store and place your order today!

Working on My New Blog!

My blog has been moved over to this new WordPress site and now the work begins! I’m slowly trying to get it set up how I want it, and so far, so good! This is my first post to see how it works.  I’ve added my Mailing List sign-up box, my Online Ordering button, and fixed the link for the catalogs. I heard of another demonstrator who worked all day and stayed up ALL NIGHT to work on hers!  I don’t think I will be doing that, but I am having fun so far!

If you are new to my blog, please join us by signing up for my Mailing List and I’ll keep you posted about these last couple of weeks of the current Stampin’ Up! catalog and the transition to the brand-new Stampin’ Up! Catalog! Hopefully you will see the Mailing List Sign Up Box in the right sidebar!

Feel free to email me at Karen@KarenStamps.com or if you have any trouble with that, use my regular email KSFontinelle@gmail.com.

It will probably take me a little while to get this all figured out, but thanks for your patience in the meantime!

Doing Some Remodeling

Desktop_computer_clip_art_9867

Spring seems to be the best season for remodeling and sprucing things up.  We just had the outside of our house painted and next is some dirt to fill in the low spots in the yard.  Then maybe some repairs to our wood floor in the kitchen…and maybe I’ll get my kitchen table and chairs all painted up instead of looking at the old chipped paint. There’s always something else to be done in a house!

Likewise, it is time to do some remodeling on my blog! It’s time for a fresher, more modern look and that’s going to be happening. So if things look a little messed up and out of the ordinary, don’t worry!  I’ll get it figured out!  Another new learning curve, I’m sure!

Sign up for my Mailing List in the form here on my blog in the upper right and you’ll be kept up to date on all the latest news and information from Stampin’ Up!

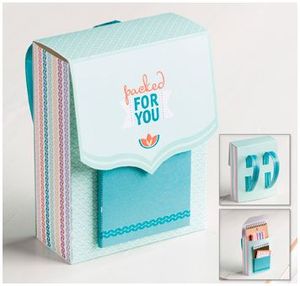
And I can’t believe I missed this yesterday!!  In telling you about the new MDS Downloads, I completely missed that one download, Packed For You, is FREE!!!

Packed for You MDS

Just go HERE to my Stampin’ Up! Online Store and “purchase” this download as you would any Stampin’ Up! product….but the price will be FREE!  And no shipping on MDS downloads!!  Then you’ll be able to download it to your computer and use it!

Download includes:
* 2-page décor template (8-1/2″ x 11″)
* 7 punches

Features:
* Digital exclusive
* Show all the teachers in your life that you care and appreciate them
* Fill the backpack with their favorite treats or a gift card
* Coordinates with the You Are So Nice Kit

Colors:
Apricot Appeal, Blushing Bride, Dusty Durango, Island Indigo, Pool Party, Rich Razzleberry, Wisteria Wonder

And now when you click on “Digital Downloads” in my Online Store, you’ll be able to shop by “Occasions” to find the downloads you want or need to purchase!

See you on “the other side” if my blog remodeling goes as planned!  Feel free to email me at Karen@KarenStamps.com if you have any questions or anything!  You can still order anytime at my Stampin’ Up! Online Store HERE.