Author Archives: Karen Fontinelle

Quick and Easy Easter Bunny Card

Quick and Easy Easter Bunny Card

Here is a quick and easy Easter Bunny card that is fun to stamp and make! The stamp set, Basket Bunch, has so many possibilities and it’s not just for Easter! This bunny is so cute, he can be used for Easter, spring or baby cards and many other occasions.

For this card, I simply stamped the bunny randomly on the Whisper White card layer in Soft Suede ink. To color in the bunny ears and bow, I used the Pink PIrouette marker. That’s all I colored at first, but then I decided to add some brown to the one bunny to let him stand out from the others. I colored very lightly with the Early Espresso Watercolor Pencil and then blended the color with a Blender Pen. So fun to color with the Watercolor Pencils!  I also thought about coloring the ears and bows on all the bunnies on the card. There’s no one perfectly right way to design this card. Just do what you like. The card base is Soft Suede cardstock.

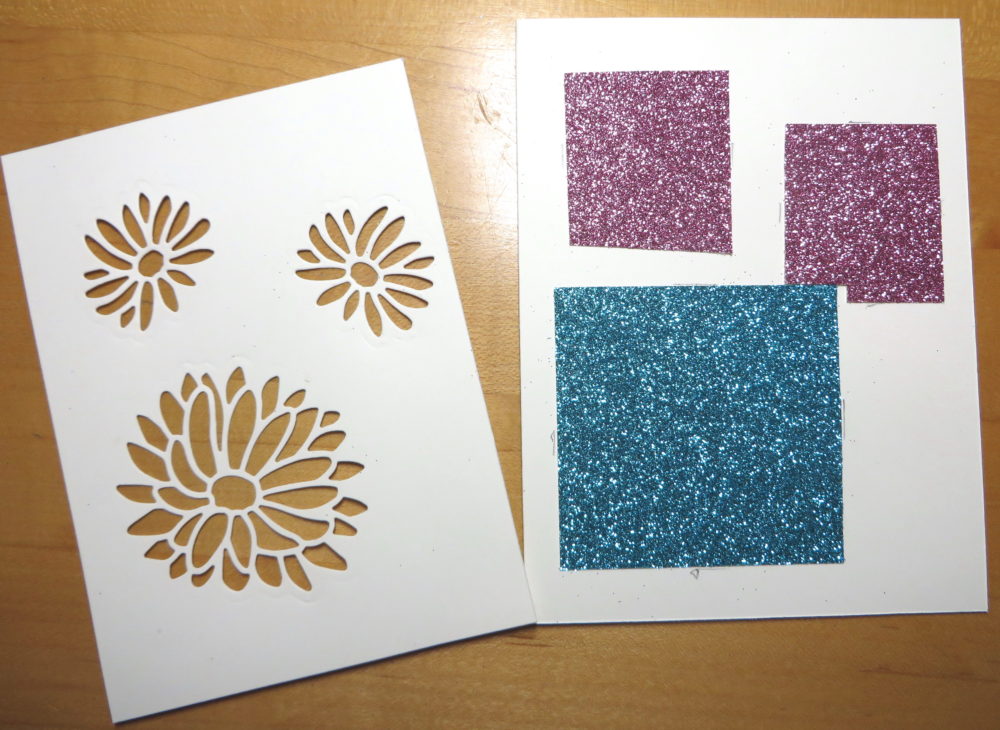
The greeting is one that is included in the stamp set.  I stamped it in Soft Suede ink and die cut with one of the ovals in the Layering Ovals Framelits Dies and also die cut a pink glimmer layer with one of the scalloped ovals in the same set. The glimmer paper is one of the Sale-A-Bration choices when you spend $50 on a Stampin’ Up! purchase.

If you are interested in the Watercolor Pencils, order them soon before the supply runs out!

The Basket Bunch Photopolymer Stamp Set is in the Occasions Catalog and also has coordinating Basket Builder Framelits Dies.  If you purchase the stamp set and dies together in the Basket Bunch Bundle, you will save 10% and have everything you need for this fun stamp set!

I hope you remembered to change your clocks for Daylight Savings Time! Just “spring” forward, this is when we lose an hour of sleep! But I think I’m looking forward to more daylight in the evening after dinner to go for a walk!

Try your hand at making a card like this Quick and Easy Easter Bunny Card with whatever stamps you have, just stamp randomly on the cardstock and see what you come up with! It’s so much fun to just stamp this way!

If you need any stamping supplies and want to take advantage of Sale-A-Bration before it ends March 31, just check out the Stampin’ Up! Online Store HERE!

How To Make An Easy All-Occasion DIY Gift Bag

DIY Gift Bag

Save yourself a trip to the store and learn how to make an easy all-occasion DIY gift bag out of designer paper! You can make a gift bag using the Stampin’ Up! Gift Bag Punch Board or you can make one by just scoring paper to determine the size you want. I use my Paper Trimmer as I cut the paper to score with the Scoring Blade, (one comes with the Paper Trimmer)  but you could also use the Simply Scored Board.

Decide what paper or cardstock you want to use.  I used the beautiful Falling In Love Designer Series Paper. While I could have used either side of paper, I had planned to use this soft bokeh-look pattern and that is what I cut.  But when I turned the paper over, I saw that the pattern on the other side was a butterfly print. Had I wanted to use that side and didn’t give it any thought, as you can see in the photo below, I would have the pattern going wrong, so be sure you check which way you want your pattern to go and make sure you cut the paper in the correct direction.

Designer Paper Pattern Wrong Direction

For this particular gift bag, I cut the paper at 6″ x 11 3/8″. I placed the paper “long-ways” (portrait) in my Paper Trimmer and scored at 1 3/8″ for the bottom flaps. Then I turned the paper “sideways” (landscape) and scored at 2 1/8″, 5 1/4″ 7 3/8″, and 10 7/16″. You can’t really see all the score lines in the photo below and the photo is not blurry!  That’s the design on the paper!

Designer Paper Scored for Bag

As you can see, I cut out that tiny little piece on one end that you will see after you score your paper. And just to make the flap easier to fold without the top and bottom edges showing, I trimmed off the edges of the flap. This flap is where you will put adhesive to start assembling your box. As for the bottom of the paper with the 1 3/8″ scored area, just snip each score line up to the 1 3/8″ scored line to form the flaps.  Assemble your gift bag and decorate!

To decorate my gift bag, I die cut a butterfly with the Big Shot and the Butterflies Thinlits Dies, the largest butterfly, out of a Gold Foil Sheet. (My daughter used to call butterflies “foof-flies”.) How beautiful is this large gold foil butterfly? And to make it even more elegant, I added some Pearl Basic Jewels to the body. After I punched a hole in the top of the bag I tied on a Whisper White 5/8″ Organza Ribbon (my all-time favorite ribbon!) using the ribbon with the gold accents in the Sale-A-Bration 3/8″ Metallic Ribbon Combo Pack (143601)You can also add a greeting or tag if you want for whatever occasion you need.

Check out another card I made when the Butterflies Thinlits Dies first came out. These butterflies are made with the smaller medium size butterfly die, cut out of designer paper.

Remember, Sale-A-Bration comes to an end on March 31 so don’t let time fly by and miss it! Remember, there are three new releases since February 21 so you have two brochures to view at that link above.  One thing that is no longer available is the gold-striped Card Tin. Everything is available only while supplies last so don’t wait too long!

Make some easy all-occasion DIY gift bags to keep on hand for any last-minute gifts!

Shop Stampin’ Up! Online HERE!

How To Make a Hexagonal Decorated Birthday Gift Box

Hexagonal Decorated Birthday Gift Box

This Hexagonal Decorated Birthday Gift Box is fairly easy to make and turns out really cute! I strongly suggest you watch the Stampin’ Up! video below on how to make the box, even if you have watched it before because you might need a review like I did!

To make this hexagonal gift box, use the Big Shot and Window Box Thinlits Dies by Stampin’ Up! This set of dies is amazing! Besides the basic hexagonal box shape, it has pieces to decorate the to and sides of the box with decorative little cutouts! There are also other little pieces, one makes a tag and one makes those flag ends on a strip of paper.

On this box, even though it has those decorative dies to use, I opted to just make the basic box and then decorate it with designer paper and balloons for a birthday! You can make these boxes for ANY occasion or holiday! I’ve even seen them online where it is like they are stacked to make a taller box.  I’ll have to learn about that and try it! After I made the Hexagonal Window Box, I die cut  a piece of the polka dot paper in the Party Animal Designer Series Paper package with just, the lid portion of the basic box die. Then I cut along the score lines or slightly inside, so that it would fit on the top lid of the box. Around the side of the box, I cut a strip of the candles pattern paper to go around. Luckily a 12″ strip does fit and even overlaps a little on the back. For the candle pattern, I cut it so that the candles themselves would be fully pictured, which meant I first cut off a strip on the edge that just had partial images of the candles. My strip is 1 3/4″ wide, but you can make yours narrower if you like depending on the pattern or look you want. Another choice would be to stamp on the box before you assemble it. After I had the paper around the side, I tied on some 1/8″ Taffeta Ribbon in Emerald Envy. For the top of the box, I stamped and punched three balloons with the Balloon Adventures Stamp Set and the Balloon Bouquet Punch. I attached some Whisper White Thick Baker’s Twine to the balloons and tied on a bow.  If I hadn’t tied the bow, I might have put a “Happy Birthday Banner” instead. This Hexagonal Decorated Birthday Gift Box is a cute box and can be made in any colors for any occasion. It’s big enough for a small gift or some candies or treats.

Hexagonal Birthday Gift Box

To make the window box (with or without windows!), die cut two of the basic box pieces. If you want the decorative inserts you can cut them now or cut them before you assemble the box.

Window Box Pieces

One thing to remember is to cut off the end tabs of the straight strip portion on ONE piece. That is because when you go to assemble the box, you won’t need two tabs matching up, just one. Use a strong glue like the Multipurpose Liquid Glue or the Tear & Tape Adhesive.

Window Box Assembly

Fold the scored lines for the tabs.  I think it is easiest to glue the beginning part with the box laying flat. Just make sure everything is straight.

Enjoy the Stampin’ Up! video to learn about and how to use these Window Box Thinlits Dies!

Now are you ready to make these beautiful boxes for gifts or even just decorations or party favors? Order yours today at my Stampin’ Up! Online Store HERE.  Get the Bundle with the Window Shopping Stamp Set  so you have everything you want and save 10% over buying them separately. The cost of the Bundle will earn you a FREE Sale-A-Bration product as well!

Order HERE at Stampin’ Up! Online During Sale-A-Bration!

Placing Glimmer Paper Under Die Cuts on a Card

Using Glimmer Paper Under Die Cuts

This blog post will be about placing glimmer paper under die cuts on a card so that you can use the beautiful new 6″ x 6″ Glimmer Paper Assortment Pack (143831) that you can earn FREE during Sale-A-Bration. You’ll find this Glimmer Paper Pack in the extra Sale-A-Bration Brochure that came out February 21 to give you a few more choices during Sale-A-Bration,  which ends March 31.

I love the beautiful Special Reason Stamp Set and especially the Stylish Stems Framelits Dies. If you buy both in a Special Reason Bundle you can save 10% and you will be all set to go! It seems that Stampin’ Up! never wants us to be without flower choices!  These dies are particularly unique in the way they can cut out the flowers so that makes them even more interesting.

This card isn’t what I started out making, and I have to say, I don’t like my card! But since it is really about how I made the card rather than if I loved it and since I’m a bit under the weather today, I don’t really care that this isn’t one of my favorite designs!

I was going to just die cut a big flower and two smaller ones and place the new Glimmer Paper underneath. But then I realized that what I was thinking of was having the top card layer popped up with Stampin’ Dimensionals, so placing the Glimmer Paper underneath was going to be just a wee bit trickier. I couldn’t just place the glimmer paper underneath the die cuts directly, seeing what I was doing. I was going to have to adhere the glimmer paper to the card base and have it lined up perfectly with the die cut images on the layer I was going to place over it.

Glimmer Paper Placement Under Die Cuts

There was just a bit more playing around to make sure the color was under the entire area of the die cut flower without sticking out underneath the sides of the top layer or running into an adjacent flower. Once I thought I had it placed perfectly, I put a few pencil marks where the glimmer paper would go and glued down with my Multipurpose Liquid Glue.

Next I added the Stampin’ Dimensionals, with a few in the center of the card for support.

Using Glimmer Paper Under a Layer

Finally I stuck on the top layer on which, of course, I had already die cut the flowers with the Stylish Stems Framelits Dies.

Now after I did that, I realized I should have already stamped a greeting on the card front! I did finally take a chance and stamped a happy birthday greeting from the stamp set but it doesn’t look that eye-catching on the card. But for today, “oh well”!

The card still looked like it lacked something so I die cut some glimmer paper leaves!  They are pretty but I’m not sure they worked that well on this card.  Maybe they did on the big flower, but then the little flowers didn’t have anything!  So I took a chance and stamped some leaves with Mint Macaron ink around the little flowers. That didn’t look great so I added Clear Wink of Stella to the leaves. That didn’t do much, so I added the Gold Wink of Stella to the leaves! Finally I stamped the leaf veins and then I liked it a little better!

Maybe you like the card after all!  In some moments I do, but I think I could do better. Sometimes you have to know when to STOP when you are designing something! My friend and I used to always say that back in the day when we were painting tee shirts and wine glasses and plates! Maybe I will give this card another shot later, but now you know one way to use the Glimmer Paper, one of the new releases for Stampin’ Up! Sale-A-Bration, with die cuts!

Take Advantage of Stampin’ Up! Sale-A-Bration Before March 31 and Get Something FREE!

Easy Stamped Flower Card with Special Reason Stamps

Easy Stamped Flower Card with Special Reason Stamps

Here is an easy stamped flower card with the Special Reason Stamp Set. I wanted this to be a quick and easy card and it was.  For the card base I just used the Whisper White Thick Cardstock and I have no layers except for the greeting. To stamp the flowers and leaves, I used the 2016-2018 In Colors, all of them except Dapper Denim.  The greeting is one that is in the stamp set, Special Reason, as well as the shape that it is stamped on. I forgot that the matching Stylish Stems Framelits Dies have a shape to cut out both the greeting shape and the layer underneath, so I actually just hand cut them with my Paper Snips! Not too hard at all if you don’t have the framelits!  The ribbon is one of the Sale-A-Bration FREE choices with a $50 purchase of Stampin’ Up! merchandise. It’s called the 3/8″ Metallic Ribbon Combo Pack (143601) and is on page 11 of the Sale-A-Bration Brochure. One ribbon is white with silver accents and the other is vanilla ribbon with shiny gold accents woven through. It’s very soft and easy to tie and very pretty! I’ve ordered it twice!

I find that stamping a LOT on a card or scrapbook page is therapeutic. It just feels good having that stamp and block in my hand and fun to stamp randomly and see what turns out. If you need to get some stress-relief, just get out a clean piece of cardstock, choose a stamp and some ink and just stamp all over! And after what happened in our neighborhood on Tuesday, some stress-relief was in order! As I sat down to eat lunch and checked my phone, I also checked our neighborhood website for new posts.  Wow!  There was  a warning for my street and some others nearby to stay inside, there were burglary suspects on the loose!! In about another hour, someone posted that they heard gunshots. Very unfortunately, a neighbor down the street who is a policeman, answered the call even though it wasn’t for him, and he and another policeman went into a backyard to check out a shed where the door was open. At least one suspect was in there and shot both officers, although the gang member criminal was shot and killed by a third officer. Luckily the other officer was hit “only” in the leg and foot but our neighbor was critically injured. At that point, even more police, helicopters, ambulances and news media flooded into our neighborhood and we were “sheltered -in-place” all day while they searched for the suspect who got away.  Our neighborhood is not like this at all but for some reason this all happened the other day. I guess we never know what can happen from minute to minute. I plan to stamp some notecards that the officer’s wife down the street can use later on if she has people to thank and I’m sure she will. At least it is reassuring to know that the whole police community will be by their family’s side through this.

So on a lighter note, consider this pretty Special Reason Stamp Set and the Stylish Stems Framelits Dies, which you can purchase in a bundle and save 10%. The stamps have just a little texture on them, so don’t think they didn’t stamp well if you see some lighter areas. You will be able to make lots of beautiful cards and projects with this stamp set and dies.

Sometimes you just need to do some stamping, and by that I mean really pounding that ink pad and stamp to paper!  Try it!  It feels good! And when you do some random stamping, you can make an easy stamped flower card like this one with the Special Reason Stamp Set!

Shop Stampin’ Up! Online Today!

A Great Card to Say Happy Mardi Gras!

Mardi Gras CardHere is a great card to say “Happy Mardi Gras” today!  Today, February 28th is Mardi Gras, also know as “Fat Tuesday”, the day of feasting and eating fatty, rich food before the fasting of the Lenten season begins tomorrow on Ash Wednesday. There are all kinds of parties and parades, great food, and beads, mainly in New Orleans, Lousiana, but not limited to New Orleans.  Mardi Gras celebrations take place in many places along the Gulf Coast. These parties, parades and celebrations in New Orleans have been going on for a couple weeks, but today is the culmination. Mardi Gras is actually a legal holiday in Louisiana!

The colors of Mardi Gras are purple, green, and gold. To make this great card to say “Happy Mardi Gras” to someone special, I used those three colors. The card base is Emerald Envy with a layer of paper from the Party Animal Designer Series PaperI liked the confetti look of the paper to go with this Mardi Gras card. I die cut an oval with the Layering Ovals Framelits Dies, the largest oval, to provide a backdrop for the balloons again the print paper. The balloons are punched with the Balloon Bouquet Punch out of Gold Glimmer Paper, Rich Razzleberry and Crushed Curry. Some are stamped with the balloon images from the Balloon Adventures Photopolymer Stamp Set as well as the greeting.

This was really an easy card to make once I had the idea!  And guess what?  It doesn’t have to just be a Mardi Gras card! I think it will be perfectly fine to mail to someone for their birthday! I happened to have some Mardi Gras beads from years ago when the man my husband worked for would have a Mardi Gras party every year since he was from Louisiana. It was always a fun party with delicious food!  And beads!!  I think Louisiana food is the best and I think he had a chef from Louisiana come prepare the food.

Whether or not you are celebrating Fat Tuesday today, or Mardi Gras, I hope you enjoy this card saying “Happy Mardi Gras” to you!

Shop Stampin’ Up! Online 24/7!

Stampin’ Up! Paper Pumpkin Kit February 2017

Stampin' Up! Paper Pumpkin Kit February 2017

Did you receive this Stampin’ Up! Paper Pumpkin papercrafting kit for February 2017 in your mailbox a few days ago? It has the directions and all the supplies you need to make nine cards, three each of three different designs. It’s a fun design where you pull the bottom tab to read the greetings through the peek-a-boo slot in the front of the card. It’s something different and we can even copy this idea and make more cards like this technique in the future. And if you choose, you can use the same supplies to make some other design of your choosing. There are always lots of alternative ideas for each kit online.

If you did NOT receive this February 2017 Paper Pumpkin Kit in the mail, perhaps you would like to join Paper Pumpkin now so that you WILL receive the March 2017 Paper Pumpkin Kit in your mailbox! And, as soon as you join Paper Pumpkin, you will be eligible to purchase any past kits or refills (just the supplies, not the stamps or ink spots) if there is something you liked in the past.

You have two options with Paper Pumpkin!

During Sale-A-Bration, you can purchase the 3-month Paper Pumpkin option on your Stampin’ Up! order, save $5, and earn a FREE Sale-A-Bration item! (Be forewarned that if you ONLY have this on your order, you will pay $6.95 to have your free product shipped to you….but surely, you want to add some other products to your order to make the shipping worthwhile!)

If adding a Paper Pumpkin subscription to your Stampin’ Up! order puts your order at or above $150, then you will receive Hostess Rewards as well! Even if you have a monthly subscription, you can purchase the Paper Pumpkin subscription on your order and it will use that subscription first before continuing on with your monthly subscription. Let me know if you have questions about this!

Watch this video to see how to assemble the February 2017 Paper Pumpkin Kit. Every month there is a video you can watch if you choose!  And remember, you can use the supplies in the box any way you like, you don’t have to make the exact design!

Go right now to my Paper Pumpkin page to sign up for a monthly subscription to Paper Pumpkin beginning with the March 2017 kit!

Then you won’t forget to do it by March 10th! Or if you prefer, make a note to add it to your next Stampin’ Up! order before March 10th and be sure to set up your account right when you get the email.

Shimmery Heart Die Cut Engagement Card

Shimmery Heart Die Cut Engagement Card

If you need an engagement card for an engagement party, use the Shimmery White Cardstock, which is beautiful in itself, and the gorgeous Bloomin’ Heart Thinlit Dies to make a Shimmery Heart Die Cut Engagement Card. 

Here is how I made the card.  The card base is Shimmery White Cardstock. The next layer is embossed with the Falling Petals Textured Impressions Embossing Folder. To me, this looks like little hearts, but I guess they are meant to be flower petals! It makes it hard to remember the name because I think the folder should be named “heart-something”! But it is a beautiful embossing folder and will be great to use on many, many cards.  The heart and little flowers are die cut with the Bloomin’ Heart Thinlits. It’s best to use the Precision Base Plate with the Big Shot since this is a more intricate die, and be sure to run it through twice, depending on your machine.  And I also highly recommend that you have the Big Shot Die Brush to use to get the little pieces out of the die and the die cut. Then adhere the little flowers on to the heart. I used the Dazzling Diamonds Glimmer Paper for the heart and flowers. And for a little bling, Rhinestone Basic Jewels are always good! The “Congratulations” greeting is from the Floral Phrases Stamp Set.

This card doesn’t photograph well because of the subtle shimmer of the Shimmery White Cardstock and the dazzle from the Dazzling Diamonds Glimmer Paper! In person, it looks very pretty and elegant.  You wouldn’t even have to have the Falling Petals embossed background, the die cut heart is pretty enough by itself on a card. You could even color the glimmer paper with a little reinker and Aqua Painter or brush to add some lightly colored flowers on the heart.  You can see this coloring technique that I did on some punched hearts on this card here on my blog.

They say June is the month for weddings, so maybe you need to start an engagement and wedding stack of cards!  It’s always nice to have some extra cards on hand.  When you make one card and like it, make a couple more of the same while you have the supplies out. You could also make this same card for other occasions, just by changing the greeting or leaving any greeting off. This Shimmery Heart Die Cut Engagement Card is well suited for an engagement card, wedding, birthdays, congratulations and many occasions.

Shop Stampin’ Up! During Sale-A-Bration!

Choose New FREE Sale-A-Bration Items Today from Stampin’ Up!

SAB 2017 Glimmer Paper Cards

Beginning today, you can choose from three NEW Sale-A-Bration products during the big Stampin’ Up! promotion going on through March 31. Just spend $50 on any Stampin’ Up! products and choose one FREE Sale-A-Bration item from the special brochure or the 2nd Release Brochure! You get to choose a free item for EVERY $50 you spend on your order, no limit! Just to make Sale-A-Brating more fun and exciting for you, Stampin’ Up! released three new choices today! Of course, all the other Sale-A-Bration free choices are also available.

Check out these new releases in THIS Sale-A-Bration Brochure today!

  • Reverse Words Stamp Set (wood – 143326, clear – 143319):  Two words in a watercolor wash type background.
  • Make a Medallion Photopolymer Stamp Set (143274):  These coordinate with the Layering Circles Framelits Dies.
  • 6″ x 6″ Glimmer Paper Assortment Pack (143831):  Four sheets of each color – Bermuda Bay, Mint Macaron, Sweet Sugarplum.  These coordinate with the suites in the Occasions Catalog.

Watch this video with Shannon West in the Stampin’ Up! Home Office showing off the sparkly new Glimmer Paper!

Now go check out what you want to order so you can get your hands on your free Sale-A-Bration items!

Shop Stampin’ Up! Online HERE  and choose your FREE Sale-A-Bration products with every $50 purchase (before shipping and tax)!

New Sale-A-Bration Choices Coming Tomorrow!

SAB 2017 Banner

We are about halfway through Sale-A-Bration, the biggest promotion of the year from Stampin’ Up!  Sale-A-Bration lasts until March 31, 2017 and since we are midway, Stampin’ Up! is introducing THREE new product choices you can get FREE with a $50 Stampin’ Up! purchase! You may have noticed the teaser in the Sale-A-Bration Brochure earlier!

Tomorrow, February 21, you will ALSO be able to choose one of these three new items with each $50 increment in your order, no limit!

A favorite, I would guess for sure, might be this new 6″ x 6″ Glimmer Paper Assortment Pack!

SAB 2017 Glimmer Paper

If you like medallions, you will want the new Make A Medallion Photopolymer Stamp Set to make cards like these!

SAB 2017 Medallion SU

And one more stamp set, Reverse Words, to make fun greetings like these:

SAB 2017 Reverse Words SU

More details tomorrow on all these new products! All the current Sale-A-Bration items will continue to be available, so you will have lots of choices with every $50 purchase!

Have fun Sale-A-Brating with Stampin’ Up!


Making a Birthday Card With Easy Adult Coloring

Making a Birthday Card With Easy Adult ColoringMake a birthday card with easy adult coloring using the Inside the Lines Designer Series Paper (143830) during the biggest promotion Stampin’ Up! has, Sale-A-Bration! Sale-A-Bration is in full swing now and we have about another month and a half to go. During Sale-A-Bration with every $50 purchase, you will get to choose a FREE Sale-A-Bration item from the special brochure.  One of the items you can choose is a pack of the Inside the Lines Paper which fits in with the adult coloring trend.  There are different patterns in the package of paper so you can choose what you like. There are many ways to use this paper as well.

At first glance you might think the only way to use this designer paper is to color every single image in the design.  You certainly CAN do that but it might take awhile. However, coloring is supposedly a stress-reliever so it might be good for us to do that on some of the pages!  If you are looking for an easy adult coloring method to make a card, just grab a sponge and color across the card with various colors of ink, or color randomly around on the card.  There is no wrong way.

For this card, I started with a Calypso Coral card base. Then I randomly chose five ink colors: Calypso Coral, So Saffron, Blushing Bride, Pool Party and Pear Pizzazz. I started sponging a line of ink going across the card front, the Inside the Lines Designer Series Paper, until I’d used all the inks and filled the card.  I did go back, since the card base was Calypso Coral, and sponged a little of that color in between each of the other colors.  I should have stopped before I did that, but it is okay! No one else is going to look at that card and say, “She never should have sponged that extra Calypso Coral on to the card!”

Inside the Lines Adult Coloring Birthday Card

The greeting is from the Better Together Stamp Setfound in the  Annual Catalog. I die cut that with the oval in the Stitched Shapes Framelits Dies. For an embellishment, I added the Pool Party 3/8″ Stitched Satin Ribbon.

I think my card turned out very pretty and was easy to make, if not a little messy on the fingers! Try the Stamping Sponges and cut them into smaller sized pieces if it suits your purpose. Some stampers have a  quarter or smaller piece of sponge designated for each Stampin’ Up! color. Always start lightly sponging, you can always add more ink.  This way you don’t get the color too dark to begin with.

To see another way to work with this Inside the Lines Designer Paper, check out how I made a card in THIS POST.

With your next $50 Stampin’ Up! order, you might consider choosing the Inside the Lines Designer Series Paper to make projects like this Easy Adult Coloring Birthday Card.

Shop at Stampin’ Up! Online 24/7!

Stress Relieving Adult Coloring Flower Card

Stress Relieving Adult Coloring Flower Card

One of the easiest things you can do to relieve stress is to do some coloring as in my Stress Relieving Adult Coloring Flower Card! There are all kinds of articles about how coloring, as we did as children, is a great outlet for stress relief and anxiety. Other crafts and things you do with your hands can also be, but at least with coloring there is no creativity necessary, you just color in the picture that is already in front of you. Perhaps that is why Stampin’ Up! came up with this Inside the Lines Designer Series Paper (143830) for a free item you can choose during Sale-A-Bration with a $50 or more purchase.  You’ll find it on page 11 of the brochure.

Sale-A-Bration is Stampin’ Up!’s biggest promotion of the year and one that dates back to the early days of Stampin’ Up! It has even become bigger and better from when I first joined Stampin’ Up! and we had a small pamphlet with, I think, four or maybe six stamp sets to choose from. Now we can choose from stamp sets, paper, ribbon and even a card kit! For every $50 you spend on any Stampin’ Up! products in the regular annual catalog or the Occasions Catalog, you can choose one free item in the Sale-A-Bration brochure. Just look for the items marked with the pink hot air balloon. Other products mentioned in the brochure are for sale to help you complete your project and are pictured as suggestions. Look for the hot air balloon with the word “Free!” on it!

There are no limits to your spending!  For EVERY $50 you spend, you choose one Sale-A-Bration item. If your order reaches $150, you also get Hostess Benefits! A big order of $250 or more will net you at least 10% in Hostess Rewards PLUS an extra $25.00 to spend! Go together with some friends if you want to be the Hostess and try to reach a big order. Even non-stampers can use some ribbon or Paper Snips scissors or other products!

So back to my Stress Relieving Adult Coloring Flower Card!  I cut a piece of the 12″ x 12″ Inside the Lines Paper to layer on a piece of Basic Black and then a card base of Melon Mambo. I could have colored the whole card, but for today I just chose this one flower to color and stand out on my card. I used the Stampin’ Up! Watercolor Pencils and a Blender Pen . No stress! Coloring is especially easy with the Watercolor Pencils because you don’t have to completely fill in the space. Go back over the coloring with the Blender Pen and the tiny bit of moisture in the Blender Pen will spread and blend the color you have laid down. Very easy and soothing, I think!

Not necessary, but just for fun I used my Wink of Clear Wink of Stella Glitter Brush to add a little sparkle. Unfortunately, you can’t see the glitter on this photo except maybe up by the leaf and the bee. I also tied a piece of Melon Mambo 1/8″ Stitched Ribbon around the card for an accent. I didn’t add a greeting to the front but I might just stamp a greeting inside the card or leave it blank so I can write a note. Remember, if you have a dark card base, just cut a piece of Whisper White to layer on the inside on which to write.

There are many ways to use this Sale-A-Bration Inside the Lines Designer Series Paper, from plain to fully colored.  You choose! Place your $50 or more Stampin’ Up! order and choose this Inside the Lines Paper as your free item! Then when you feel stressed, anxious, or depressed get out your favorite coloring medium and color at least a portion of the paper. Let me know if you find that relaxing and comforting! Perhaps part of the stress relief factor is because coloring takes us back to our childhood.

When you get your pack, look for the page I chose for my Stress Relieving Adult Coloring Flower Card and try just coloring a portion of the flower images.  After you are all “zen” perhaps you will go on to do some other stamping projects!

Shop Stampin’ Up! Online HERE!

Make a Valentine Card with a Die-cut Glimmer Paper Heart

Make a Valentine Card with a Die-cut Glimmer Paper Heart

Want to make a Valentine card with a die-cut glimmer paper heart? This card is a beautiful example of how to make a glittery valentine card pretty easily. And not only are hearts for Valentine’s Day, but this same card could be for a wedding or engagement or simply a nice card to send to someone special.

I was that someone special who received this card for Valentine’s Day from my dear friend – my friend I met on the first day of junior high in Mrs. Gordon’s math class in 7th grade/my college roommate/my Stampin’ Up! upline. It’s special to have a friend who has been with you through so many facets of your life.  From the minute she introduced me to Stampin’ Up! I became fascinated with stamping and making cards and especially all the creativity.

The photo doesn’t do this card justice, if you could see the sparkle in person you would really be impressed! It’s difficult to photograph glitter and glimmer!  The card base is Crumb Cake with a piece of designer paper for a layer behind the heart.  The heart is die-cut with the Big Shot and the Bloomin’ Heart Thinlit Die out of the Blushing Bride Glimmer Paper. So that the designer paper in the background doesn’t show through, she put a Whisper White die cut heart, made with the Sweet & Sassy Framelits Dies behind the glimmer heart.  The little pink die cut flowers are touched up with the Clear Wink of Stella Glitter Brush to give them some shine as well. And to top them off, my friend added a Rhinestone Jewel on each flower. For a final touch she stamped and cut a banner for a greeting out of Shimmery White card stock.

I hope you can see how this same design can be used as other types of cards, specifically a wedding or an engagement card, besides the beautiful Valentine card it is! Even using the Bloomin’ Heart Thinlit Die to make a heart out of any pretty paper will produce a beautiful card, but making a Valentine card with a heart die-cut from pretty glimmer paper really steps it up.

You can get any of these supplies at my Stampin’ Up! Online store.

Shop Stampin’ Up! Online 24/7!


Quick and Easy Last Minute Punched Hearts Valentine Card

Quick and Easy Last Minute Punched Hearts Valentine Card

As I write this blog post on Valentine’s Day, we are having a very stormy morning here in Houston! There are tornado watches and warnings out and I have my hall bathroom ready for shelter if necessary, but I hope not! Under the circumstances and because if you are looking for Valentine ideas today, you need something quick and easy at the last minute! So here is my Quick and Easy Last Minute Punched Hearts Valentine Card!

To make this card, I simply made a card base of Whisper White and stamped the Valentine greeting from the Sealed with Love Photopolymer Stamp Set. Then for quick and easy hearts, I grabbed the cute Sweetheart Punch and punched out several hearts from the Sending Love Designer Series Paper Stack.  The only hard part of this card was trying to decide which way to lay out the hearts!

I always say just keep playing when you are designing a card.  If you don’t feel you’ve got it right, just keep moving, adding, taking away, starting over.  You will know when you get it!  I first started laying these hearts out across the top of the card, more or less, but it just wasn’t right. Then I decided to concentrate a little more on the empty left side of the card and that seemed to work better.  Then I wanted to pop up a couple of hearts on Stampin’ Dimensionals.  Now I could add some Rhinestone Jewels or Enamel Shapes or some other glitz, but since I was going for a super simple quick and easy Valentine card, I wanted to just stop before I went past that! Sometimes you have to know when to stop when you are doing crafty things!

If you need additional ideas, just put Valentine in the search box on the right side of my blog and some past posts will come up!

And now I think I will concentrate a little more on the weather reports! Once the storm passes, we should have a nice day! Right now it is just thundering a little, not even raining, but it is coming.

If you don’t get roses and chocolates for Valentine’s Day today, you might want to treat yourself to a Stampin’ Up! order!  But I hope your loved one(s) make your day a very happy one!

Happy Valentine’s Day!


Last Minute Class Valentines For Kids

Foxy Friends Kitty Valentine

In case you are in need of some last minute class valentine ideas for your kids, here are some ideas I came up with. For several years now, two moms have asked me to come up with ideas for class valentines for their three kids and then we all get together and make all 75 of them for 3 classes! This year they were headed to a scrapbook retreat so I just came up with the ideas and gave them the materials and they made the valentines at the retreat the first night!

This year I decided on just 3″ x 3″ cards that were the card fronts only!  No folding required to save them time!  Just like the little valentines that you buy at the store and the kids sign on the back! I knew Elsie liked cats, so I came up with this kitty that can be made with the cute Foxy Friends Stamp Set.  This stamp set has SO many possibilities with all the animals you can make with so many stamps in the set. The kitty just fit in this Circle Punch and layered on a Scalloped Circle. Some of the punches and paper on this card are retired. You can adjust for what you own.

Foxy Friends Valentine

Here’s another class valentine designed for Carl using the Foxy Friends Stamp Set. This one has a fox instead of a kitty, and I printed out the greeting on my computer and printed it out on Whisper White cardstock.

There is also a coordinating punch, the Fox Builder Punchthat goes with this stamp set. If these moms had wanted to, they could have stamped and punched out the animals or maybe just part, like the head or tail.  However, this is something to consider when you are making multiples of something, like 25 valentines! You want to keep it as simple as possible! So just stamping worked out just fine!

You're A Hit Baseball Valentine

And for Wyatt, a baseball player, a baseball valentine card was perfect for him.  I dug out an old sports stamp set for the bat and a retired set with these cute stars. The baseball is a punched circle, sponged a little and the stitched lines are stamped with a set that came in a Paper Pumpkin Kit!  Again, I printed out the greeting on the computer and printed on Whisper White cardstock and punched out with a circle punch.

These class valentines really show that you don’t have to have official “valentine” stamp sets or paper to make valentines! Just look through your stash and see what you have and use that!

You can see the valentines we made last year if you need more ideas in this post HERE.  Again, nothing that would be labeled as a valentine stamp set! Just think of your child’s interests of things they like and go from there!

If you are helping your child make some valentines for their class, enjoy!  These years pass by much too fast!

For your own valentine pleasure, shop at Stampin’ Up! Online (after you get those valentines made!)