Author Archives: Karen Fontinelle

Broadway Bound Birthday Card With a Surprise Inside!

Broadway Bound Birthday Card

This is a fun card to make, a Broadway Bound Birthday Card with a surprise inside! From the outside, it looks like an ordinary card like we make all the time. I started seeing these cards around the internet and wrongly assumed how they were made.

Take a look at the inside of the card first:Broadway Bound Birthday Card Surprise Inside

Now you might, and I did, assume that there is a card base of Basic Black, with a panel of designer paper on the front and another panel of designer paper on the inside of the card, adhered to the full inside of the back of the front card base.  Well, it’s not!

I did start with a card base of Basic Black as usual. But the different step is to cut off 3 1/4″ of the front of the card base, leaving a 1″ strip for the card front instead! This way when you adhere the piece of designer series paper to the remaining portion of the card front, you will be showcasing both sides of the designer paper because when the recipient opens the card, they will see the opposite side of the designer paper!  Now if you did it the other way, adhering a piece of designer paper to the front of the card and adhering another piece of designer paper showing the other side to the inside of the card, this saves weight!  And it’s just something a little different!

Check out the pieces shown in the photo below.  I added a 1/2″ x 5 1/2″ strip of Gold Foil to put a little divider and accent on the front of the card.  When you adhere the designer paper to the card front, be sure to line up the designer paper with the corner and edges of the back side of the card base rather than the fold on the front of the card. (The gold strip in the photo is just laying on the black cardstock, it is not the proper placement.)

Broadway Bound Birthday Card Assembly

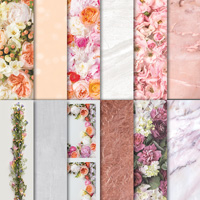
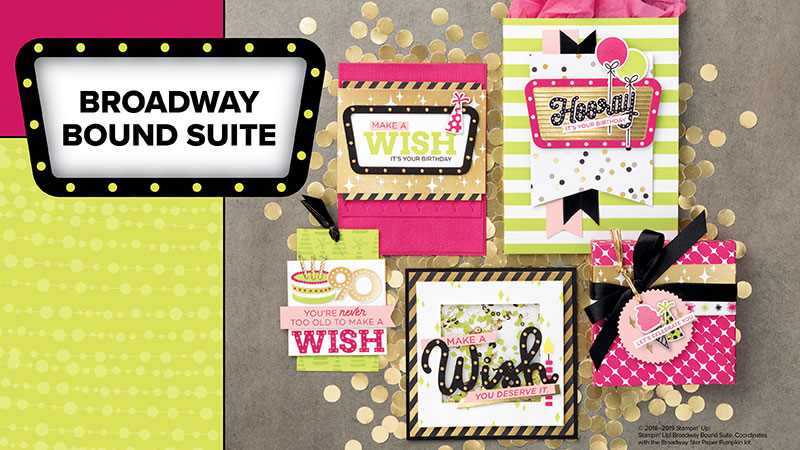
For this card, I used the Broadway Bound Designer Series Paper in the new catalog. It’s a little difficult to photograph because of the gold foil accents, but the paper is very pretty and fancy!  It will make lots of great birthday and other cards.

To complete my card, I stamped a greeting from the Picture Perfect Birthday Photopolymer Stamp Set. It is then die cut with the Stitched Shapes Framelits Dies and then layered on a Gold Foil  Scalloped Circle die.

Try this different way to make a card to use and appreciate our beautiful designer series paper. Something fun and different!

SHOP STAMPIN’ UP! ONLINE HERE!

Paper Pumpkin June 2018 Kit Broadway Bound Cards to Make

Paper Pumpkin June 2018 Kit Cards

These are the two designs of cards found in the Paper Pumpkin June 2018 Kit that coordinate with the Broadway Bound Suite. This kit is such a bright and happy card kit using the new In Color Lovely Lipstick and the bright Lemon Lime Twist.  If you aren’t a Paper Pumpkin subscriber, then you have missed out! Sometimes there are extra kits available that Stampin’ Up! puts in the Online Store that are available only to subscribers. So even though you are past the deadline for subscribing to Paper Pumpkin for the June Kit, you could sign up now and be ready for the July 2018 kit and possibly be able to order the June Kit or refill (without the stamp set or ink spot)!

Paper Pumpkin is the paper crafting kit that comes in the mail to you every month with a new project inside with all the supplies and directions. Probably the majority of the kits are to make cards, but other kits might be something else!  We’ve had gift bags, party favors, holiday decorations, treat holders, home decor, mini album…..always something fun!! And almost always a surprise!  I say why not treat yourself to Paper Pumpkin once a month?!

JOIN PAPER PUMPKIN HERE!

Today I made half of the cards in the kit exactly as the design indicated.  I usually like to make some as designed and then save some to make alternate designs. If I don’t think them up myself, I can always find other ideas online! Everyone likes to share!

Everything is included in the kit, even adhesives!  There are little glue dots on a small sheet and dimensionals if needed.  The only thing I needed to add was scissors to cut the twine and trim the greeting.  With your very first kit you will receive a special acrylic block on which to mount the stamps that come with the kit.  These are usually pretty cute and useful little stamp sets exclusive to the Paper Pumpkin kits that you can use in many other of your stamping projects!

You also get an ink spot in every kit to use so no worries about not having the correct ink color!  As a bonus, now that we have the Stamparatus, you might find these ink spots that you get in the kits are easy to use with the Stamparatus. With certain stamps and situations, it is easier to ink up the stamp on the Stamparatus with a small ink spot than a big ink pad.

A special thing about this Paper Pumpkin Kit in June is that it coordinates with the Broadway Bound Suite in the new Stampin’ Up! catalog. This means that you can use the products in the suite to continue making cards and projects similar to the Paper Pumpkin Kit…or even use both together!

Watch this Stampin’ Up! Paper Pumpkin video to see how cute this June Kit is!

You can join Paper Pumpkin today and be all set for the July Kit if you wish!  You do have to sign up by the 10th of any month to get that month’s kit.  Likewise, you can cancel or skip a month if you designate that in your account by the 10th of any month.

Accented Blooms Floral Hello Card For a Friend

Accented Blooms Floral Hello Card For a Friend

Today’s Accented Blooms Floral Hello Card For a Friend came from copying from a card in our Stampin’ Success magazine, a quarterly (used to be monthly!) magazine we Stampin’ Up! Demonstrators get with stamping ideas, business tips, and more!  One of my favorite things about being a Stampin’ Up! Demo all these years!  We all love receiving this magazine!  Actually, the article was about “CASEing”  CASE stands for “Copy And Share Everything”, so I went ahead and copied!  My card has some slight differences from the sample in the magazine.

This card uses one of the new In Colors, Lovely Lipstick.  How can you resist a color with that name?!  The card base is Lovely Lipstick and the designer paper layer is the new In Color 2018-2020 6″ x 6″ Designer Series Paper.

The main image is stamped from the Accented Blooms Stamp Set (remember to remove that piece in the center where the greeting goes before you stamp! (or you will get ink on it and stamp smudges of ink, but it will be covered with the punched greeting — don’t ask me how I know!).  It is stamped on a piece of Whisper White Cardstock using Memento Ink, colored in with Stampin’ Blends markers, and cut out by hand with Paper Snips. Now the sample in the magazine was stamped on Shimmery White and then the flowers were colored in using ink and an Aqua Painter. I forgot that, and since Whisper White isn’t great for watercoloring on because the paper can pill, I had to change tactics and chose the alcohol Stampin’ Blends markers instead.

The greeting is also stamped in the Memento Ink and cut out with the Tailored Tag Punch.  I popped it up on some Stampin’ Dimensionals.

The banner is Lovely Lipstick Cardstock.  I probably should have cut it a little longer, but it is fine as is.  I stamped using Versamark Ink with the top portion of the floral stamp just to get a watermarked look of flowers in the background on the banner.  This technique is good when you want just a little bit of interest, but nothing to take away from the rest of the card.

The cut out floral piece is popped up with Stampin’ Dimensionals also, but you could glue it down flat.  The sample used one of the Tinted Faceted Buttonsbut since I don’t own those yet I had to forego the cute button.  They also tied a bow with the Whisper White Solid Baker’s Twine, which I do have, but didn’t use.  There are all kinds of ways you can embellish your cards!

I’m happy with the way this card turned out!  The Lovely Lipstick is so bright, and the pretty flowers make it a happy card to send to a friend to say “Hello”. Try your hand at making a bright and happy card to send to someone today!

The Perfect Card To Celebrate Summer!

First Day of Summer on the Beach CardToday is the first day of summer, the Summer Solstice in the Northern Hemisphere. I think it has already been “summer” here in Houston, Texas for awhile now, but technically, today is the day! Depending on what you enjoy, this card might be the perfect card to celebrate summer!

Sometimes people say they are either “mountain” people or “beach” people. I don’t know that I am either-or, but I do love seeing the scenic mountains on trips (no mountains in Houston!!).  However, I also enjoy seeing the ocean any chance I get! Not necessarily going out in the water, unless I am just wading, but I love being on a beach and watching the waves! The air is fresh and feels so good. If I thought about a good summer day, maybe it would be sitting on a beach watching the waves breaking on the shore.

This card is just built on a piece of Whisper White cardstock.  I tore off the top portion of a piece of Crumb Cake cardstock for the sand and stamped a piece of driftwood from the stamp set Colorful Seasons.  The waves in the ocean are die cut with the Seasonal Layers Thinlits Dies.  The paper is Coastal Cabana, but any shade of blue will do.  I sponged a bit of white craft ink for the whitecaps. Now we have an Uninked Stampin’ Craft Pad and Whisper White Refill.  For the sky, I sponged on some Balmy Blue ink.  The sun is inked in with a sponge through a stencil. The stencil is made by punching a circle in a sticky note and using that for a stencil to sponge the sun with Daffodil Delight ink.  Such a fun little trick!

The greeting from the same stamp set is stamped in Crumb Cake ink. What a great saying, because the best way to relax is to “Just Breathe.” And there’s no better place to take in fresh air than at the ocean.  The chair is die cut with the Seasonal Layers dies in Real Red.  I LOVE this die cut chair, especially in red!

Here is another card I stamped two years ago which is also another good idea for spending the summer! This Sitting Here Stamp Set is still available in the new Stampin’ Up! Catalog on page 65.

If you are in the Northern Hemisphere,  hope you are enjoying your first day of summer! Probably the kids are out of school and you are planning a vacation. Take some time to stamp some cards for summer, or better yet, some summer scrapbook pages so they are ready to go when you get the photos printed.  Even though I made a card above, you could just expand the idea and make a scrapbook page out of it!  I hope you can make a perfect card for summer according to what your summer will look like!

Make an Easy Fancy Card With the Laser Cut Specialty Paper

Delightfully Detailed Laser-Cut Specialty Paper

You can make an easy fancy card with this new laser cut specialty paper. You barely have to do any work to make this beautiful card!  All you have to do is purchase the Delightfully Detailed Laser-Cut Specialty Paper.  This paper is White on one side and Vanilla on the other side so you have a choice!  This paper s 12″ x 12″ and comes in eight sheets, four each of two designs. It can all be cut apart to use as you wish as accents on cards and projects.  The paper is delicate and each sheet is separated by a piece of tissue paper so that it doesn’t all get tangled up!

On this card, the card base is the new In Color Grapefruit Grove.  I think it photographed a little darker than it really is.   I just chose one of the sheets of the laser-cut paper and placed it over the top part of my card.  Be sure to turn the paper to another area, another side if you don’t like what you see if you are doing your card this way!  I chose to leave the border edge on my card since it would appear natural on the bottom portion on this card, but the one that would have been on the left side has been cut off.

Once I knew which section of the paper I wanted to use, I lined it up over my card using my Grid Paper to help. I cut the laser-cut paper just a bit larger in case I messed up on sizing. I just eyeballed it and cut with scissors to remove that piece.

Delightfully Detailed Laser Cut Specialty Paper

Next, I placed that cut out piece over the top section of my card, lining up the bottom line according to my Grid Paper, held it tightly, and trimmed off the little bit of excess from the edges of the card.

When you are ready for gluing, there are a couple things you can do.  You can put tiny dots of the Multipurpose Liquid Glue or the Fine Tip Glue Pen on whichever portions of the paper that are large enough for a tiny drop of glue!  Or you can sponge some Liquid Glue onto the back of the laser-cut paper on the Silicone Craft Sheet, wax paper, or scrap paper.  The most important thing is to hold the paper down tightly so that it won’t pick up glue in the “holes” that got sponged.  You don’t want the laser-cut paper to move while you are sponging it.  Pick it up equally carefully and then adhere to the card base.

For the greeting, I chose one from the Love What You Do Photopolymer Stamp Set. It is stamped in Grapefruit Grove Ink and die cut with the Big Shot and the Layering Ovals Framelits Dies. To help it stand out, I also die cut a piece of Grapefruit Grove Cardstock with a scalloped edge in the same set of oval dies.

That’s all there is to it!  This Delightfully Detailed Laser-Cut Specialty Paper is really beautiful and easy to use!  Try some!

SHOP STAMPIN’ UP!


Abstract Impressions Floral Stamped Card

Abstract Impressions Floral Stamped Card

Now that summer is upon us, it’s time to enjoy flowers everywhere, like this Abstract Impressions Floral Stamped Card. This card is much like the Garden Impressions 6″ x 6″ Designer Series Paper except the flowers are stamped!

Sometimes I find I am only stamping a little bit on my projects and using the Big Shot and die cuts more, but it feels SO good to just stamp with a variety of stamps all over a piece of paper!  It’s much like adult coloring that is the craze these days!  But just get a stamp in your hand and go to town and you will enjoy it just as much!

The card base is Melon Mambo and is stamped with the Abstract Impressions Stamp Set.  This stamp set has 2- and 3-step stamping which means you can choose different colors or you can stamp “off” on scrap paper to lighten the ink and then stamp over it with full-strength ink. With this stamp set, you don’t even have to match up the images perfectly (in fact, I think the stamps are not even made to do that).  You can choose whichever flowers you like and stamp them however you like in whatever colors you like.

To make it a little fancier, I stamped on Shimmery White Cardstock, which I LOVE.  There is just the slightest glimmer to it.  Then, for fun, I colored some of the flowers with the Clear Wink of Stella to give them some extra shimmery pizzazz!  You can see it better in this close-up photo.

Abstract Impressions Floral Stamped Card Closeup

Underneath the greeting, I have a piece of Vellum Cardstock. I also added some Share What You Love Artisan Pearls to a few of the flowers.

Easy card with some basic stamping!  As you can see on THIS CARD, they are almost the same except today I did the stamping myself instead of using paper.

Today get out a stamp set, ink, and paper and stamp to your heart’s content!

SHOP STAMPIN’ UP! ONLINE!


Last Minute Father’s Day Card Ideas for Dads

Fathers day. Hands of dad holding greeting card

Happy Father’s Day to the wonderful dads out there…….the dads of our own kids and our own fathers and grandfathers!

If you need some last minute Father’s Day card ideas today, you might want to check out my blog post from a year or two ago with some of my past ideas HERE.

If you are in a big hurry, if you have a stamp with a tree (like Lovely As a Tree or Sheltering Tree) you can make a nice Father’s Day card.  Or some stars or hearts or an old alphabet stamp set to spell Dad……lots of ideas you can make in a hurry.

Enjoy your Father’s Day Sunday!

Tailored Tag Punch Father’s Day Wood Tile Card

Tailored Tag Punch Father's Day Wood Tile Card

If you need a Father’s Day card on Sunday and you have the Tailored Tag Punch, you can make a fun card like this Tailored Tag Punch Father’s Day Wood Tile Card.  I don’t know who thought of this idea of using the Tailored Tag Punch like this, but it is perfect for a Father’s Day card or any masculine card.

The card base is Early Espresso but the pieces are also layered on a piece of Early Espresso. I used the Wood Textures Designer Series Paper Stack for the paper punched with the Tailored Tag Punch to make the “wood tiles”.  You can start anywhere placing the punched pieces.  Just leave a little bit of space in between each of them to form your pattern.  For the very small spaces around the edges, you can just punch an end in the punch and glue onto the Early Espresso piece.  It’s easiest if you let the pieces hang off the edge and trim them later when placing them so you don’t have to cut smaller pieces.

Tailored Tag Punch Father's Day Card Assembly

Choose the pieces so they contrast or whatever effect you are going for.  I just chose different shades of the wood colored paper and kind of balanced them out.

For the greeting, I stamped the banner from Thoughtful Banners and then added the words, slightly curved, onto the block.  Luckily, they just fit!  When I punched the banner, stamped on Whisper White, it left a fair amount of white space, so I trimmed that off, which narrowed the banner, then I could punch out an Early Espresso banner on which to layer the stamped banner. It still needed something, so I grabbed a piece of 5/8″ Burlap Ribbon which I loosened up a bit by pulling off the two outer large threads.  It just adds a little texture to the card.

With the Tailored Tag Punch you could make a card with a bowtie like this one!

You could use other cardstock or other papers for the tiling. Let your imagination go! And change the greeting for whatever occasion.  But if you need a Father’s Day card idea, try this Tailored Tag Punch Father’s Day Wood Tile Card.

All About the Petal Promenade Designer Series Paper From Stampin’ Up!

Petal Promenade Suite

The Petal Promenade Suite is one of the most beautiful in the new Stampin’ Up! Catalog.  The designer paper, the Petal Promenade Designer Series Paper, is the real star of the suite!  Like some designer paper in the previous catalog, this paper is designed by photographing real flowers and making it into a paper pattern.

Watch this video below from Stampin’ Up! that describes how they designed the paper.  I love learning the “behind-the-scenes” secrets!

Even seeing this photo from the Online Store, you KNOW and I KNOW from experience that any designer paper made by Stampin’ Up! is ten times more beautiful in person that even the best photograph.

Petal Promenade DSP Sheets

I think this paper is going on my next order! There are some sheets that have elements that you cut apart.  All this paper is 12″ x 12″, so you will have plenty of paper to work with!

The video is very short, but if you don’t have time to watch it, just know that they photographed real flowers that they purchased and then designed the paper from those photographs.  I think there was some mention of photoshopping out a small spider!!  A ladybug on the flowers might have been cute!

To go along with this designer paper, there is the Beautiful Promenade Photopolymer Bundle containing the stamp set and the Beautiful Layers Thinlits Dies.  There are also some embellishments.  Check out all the products in this suite below:

If you like flowers, I think you will get a lot of use out of these photographic floral images on this beautiful Petal Promenade Designer Series Paper. And now that you know how it was created, you will appreciate it even more!  I know I will!

SHOP STAMPIN’ UP! ONLINE TODAY!

Did You Make a Father’s Day Card Yet?

Bubble Over Bottle Father's Day Card

Did you make a card for Father’s Day yet?  Father’s Day is Sunday, June 17th!  Although masculine cards seem to be a bit more difficult to make, I think there are actually lots of ideas to use with the products in the Stampin’ Up! Catalog now.  I had several different ideas I planned to try for a Father’s Day card, but once I looked in our inspiration book – the Stampin’ Up! Catalog – I found two ideas that I decided to combine!  Look on page 56 at the top.

I was thinking of using the Bubble Over Photopolymer Stamp Set for my husband’s card and making the bottle look like a beer bottle since he likes to try different kinds/flavors of beer.  When I looked in the catalog at the page with that stamp set,  I saw the sample on page 56 plus the actual Father’s Day card made by using stamps from the Thoughtful Banners Stamp Set.  This sample actually shows that you don’t need a “Father’s Day stamp set” to make a Father’s Day card!  I thought it was clever how they stamped a lot of words on the piece of cardstock from that stamp set.  You could choose the words that describe the man you are making the card for or you could even just stamp “Father’s Day” all up and down the paper.

Thoughtful Banners Words on a Stamping Block

To make my card, I chose Soft Suede for the card base and used a piece of the Nature’s Poem Designer Series Paper for the layer.  The bottle is stamped with the new Mango Melody ink on Whisper White and die cut with the Bottles & Bubbles Framelits Dies. I stamped the bottle a second time in Crumb Cake Ink, just the middle, so I could cut out that center section and adhere it to the bottle. For a decoration for the bottle (rather than a label) I stamped in Cajun Craze ink and punched with the 3/4″ circle punch the star stamp.

The Crumb Cake cardstock is stamped with a whole bunch of stamps on the acrylic block! I just chose words from the Thoughtful Banners Stamp Set that would be appropriate for a Father’s Day card. I tied a piece of the 1/4″ Copper Trim ribbon around the stamped piece, tied on another piece in a knot, and frayed the ends a little.

Bubble Over Bottle Father's Day Card Closeup

For the greeting I stamped the banner with the Thoughtful Banners stamp set and punched out with the Duet Banner Punch. Since I was using the sample in the catalog as an example, I punched out the Crumb Cake cardstock with the Tailored Tag Punch and stamped the extra words on it above and below the banner.

The greeting and the bottle are popped up with Stampin’ Dimensionals and the Mini Stampin’ Dimensionals.  Don’t forget about these minis because they are very handy on small pieces.

Here’s another idea for a card, one that I made my husband last year using the ever-classic Lovely As a Tree Stamp Set.

If you start early on a Father’s Day card, you can come up with more than one idea and choose which one will be best! Sunday will be here before we know it!  Time to make a Father’s Day Card!

Didn’t Get The June Newsletter? Here’s What You Missed!

June Newsletter Collage

If you didn’t get my June newsletter, here’s what you missed! On the first Tuesday of every month, I send out a newsletter to my mailing list subscribers with the latest Stampin’ Up! news and updates, and a variety of papercrafting and stamping projects – cards, techniques, scrapbook page idea, other projects! You can see in the collage above there was a mention of the brand new Stampin’ Up! Catalog and some of the new products featured in four project tutorials.  These tutorials include a supply list and instructions so you can create the same or similar project on your own! I had also included some special news about the June Paper Pumpkin Kit, and an article about how my new ink pads fit in my Color Caddy! I also had a beautiful scrapbook page featured. These projects are exclusive to my newsletter because my subscribers are special! That’s why you only see a partial image of the projects in the photo!

At holiday time, I send my subscribers an extra newsletter each week with an exclusive holiday project, the 12 Weeks of Christmas!  It is very well received and I love sending it out!

On other Tuesdays, I send out a shorter newsletter with one or two projects (sometimes I can’t resist more than one or two!) and any other Stampin’ Up! news or special offers. So if you are one of my mailing list subscribers you are always well-informed on all things Stampin’ Up! and get ideas for great projects to try!

When you sign up for my mailing list in order to receive my newsletters, you even get a FREE GIFT…..a guide to a dozen ideas for gift wrapping!  We all need to give presents and if you can make your own packaging, it saves money and a trip to the store!

Please join us on the Stamping With Karen Mailing List so you can take advantage of the news and ideas I send out every week!  Sign up in the box below!  You will receive a link to your FREE GIFT right away!


Subscribe to My Mailing List! 

FREE Welcome Gift!

Make an Easy Card With the Garden Impressions Paper

Easy Card With Garden Impressions

Do you ever start out with an idea for a card and end up with something entirely different, like I did making this Easy Card with the Garden Impressions Paper?  I planned to STAMP a card front much like this designer paper, but as I started looking at and pulling out the designer paper, various ideas came to mind.  Since I was short on time at the moment, I chose the easy route!  And there’s nothing wrong with that because with Stampin’ Up!’s pretty designer paper and coordinating paper and accessories, you can make a quick and easy card that looks beautiful!  Especially to the recipient who will love it because it’s from you, and because they will wonder how you could make such a beautiful card that they think they couldn’t possibly make (except WE know they could!).

I’m not sure I’m in love with the brand new color Petal Pink.  Maybe I just haven’t found the right coordinating colors with it. So for this card and this designer paper pattern, I chose to use Powder Pink, one of the In Colors from last year. This designer paper, Garden Impressions 6″ x 6″ Designer Series Paper, has so many pretty patterns in it! I wasn’t sure I would like it at first, but I think I do!  It has bigger, bolder patterns of flowers and also smaller patterns of colors. Also, there are lots of coordinating colors that go with it.

For this card (or actually the card I planned to make) I chose Powder Pink Cardstock for the card base.  Then it was just a matter of cutting the designer paper with the big flowers to 4″ x 5 1/4″ to fit the card front. I chose the Shaded Spruce ribbon from the Metallic Ribbon Combo Pack. Although it’s a bold color, it coordinates and it is narrow so not overwhelming.

The greeting is from the Abstract Impressions Stamp Set.  There are a lot of nice greetings in that stamp set.  I stamped it in Melon Mambo, another coordinating color, die cut with the Layering Circles Framelits Dies and layered that on a scalloped circle. The card was done!

Just looking at the designer paper gave me all sorts of card design ideas, not to mention the Stampin’ Up! catalog itself.  Be sure to use the resources you have right in front of you for ideas and inspiration if you need it!  Some days you will need inspiration and other days you will not!

I could have even added a bit more embellishment to this card, maybe with some pearls or dots or other bling or a little Wink of Stella on the flowers.  But most of the time, simple is plenty good enough!

Try your hand at making an easy card like this one using designer paper, maybe some ribbon, and a greeting.  You will have a beautiful card in minutes!  Here are some similar card design ideas I made with using designer paper (this particular paper just retired, but it’s the idea).

Just be sure you are using Stampin’ Up! supplies because the color coordination is one of the best features of the products.

Shop Stampin’ Up! Online For the Best in Papercrafting Products!

Sign Up Today to Join Paper Pumpkin and Get the June Crafting Kit in the Mail

Paper Pumpkin Stealing the Show Banner 2018

Today is June 10th, the last day to subscribe to Paper Pumpkin and get the June Paper Pumpkin Kit mailed to you mid-month!

JOIN PAPER PUMPKIN HERE TODAY!

Skip to the fun part of crafting with Paper Pumpkin!  Everything is precut and ready to go so that you can jump right in and start having fun! Everything you need will be in the kit to make the project!

For something special this month, the Paper Pumpkin June Kit coordinates with the Broadway Bound Suite in the new Stampin’ Up! Catalog!  This will give you even more creative opportunities!  Stampin’ Up! will provide ideas for using the Kit and the Suite!  This is something new this month!  I love this suite!

Broadway Bound Suite Photo SU

Just JOIN PAPER PUMPKIN NOW and you can decide later if you would also like some of the products in the Broadway Bound Suite.

Give Paper Pumpkin a try!  No risk, no obligation!  Try it for a month or more and see how you like it! The kits just keep getting better and better each month!  Plus, once you are a subscriber, you can go to the Online Store and check out any past kits or refills that are still available that might interest you.

But today is the deadline to subscribe and get the June Kit so don’t miss out!  Just click the button below and sign up!  It’s my personalized link to make it easy for you!

Join Paper Pumpkin

Graduation Card Ideas For 2018

Graduation Cards 2018

Now that my nieces have received their graduation cards, I think it is safe to post these, just in case you are still looking for graduation card ideas for 2018. The three sisters all graduated together – two twins and one graduating a year early!  What a wonderful time in their lives!

You may notice that some of these products I used are now retired, but maybe you already have them or they will just give you some ideas to come up with your own card ideas.  I wanted to kind of keep the cards similar since they were going to three sisters, but I also wanted each to be different.

Obviously I have used the Large Number Dies (retired) but another idea if you have the Large Letters Framelits would be to spell out “GRAD”.  If you don’t have dies or alphabet stamps, you can always use your computer and print what you want on cardstock and use that!

Use what you have!  The balloons come from the Happy Birthday Gorgeous Stamp Set.  The little black graduation cap is simply a black cardstock square with just a hand cut shape of a tassle.  There are fancier styles you can make if you are interested.  The card with the Gold Glimmer Paper is punched with the Star Confetti Punch (retired).  Use whatever appropriate stamp you have for the greeting, whether “Congratulations” or “Best Wishes” or “Good Luck”, etc.

Click HERE to see another graduation card I made last year.

I always say stars and hearts are good for most any occasion so don’t feel you must have a “graduation” stamp set.  A lot of other things will do!  The most important thing is that you make a card from the heart and send your best wishes for their future! Make a graduation card or two to have on hand in case a graduation announcement is on its way to you!

Shop Stampin’ Up! Online Here!

Enjoy Some Adult Coloring on Vellum in the Graceful Glass Suite of Products

Graceful Glass Suite

One of the new products I was excited to order in the new catalog was the Graceful Glass 6″ x 6″  Designer Vellum.  It arrived last night so I will be trying it out!  I’ve always loved the look of stained glass, and always wanted one of those stained glass designs to hang in a window…..or a lamp!  But I think I will settle for this vellum!  It will be fun to color and play with.  I also got the Painted Glass Stamp Set, but I did pass on the dies for now.  You can also buy the Bundle and save 10%.  This includes the stamp set and Stained Glass Thinlits Dies.

Watch this video by Brian Pilling at Stampin’ Up! and see some of the accessories that are available in the Suite.

The vellum designs really show off their colors when they are layered on a piece of white cardstock.  You can experiment with all kinds of coloring techniques and see which ones you like the best!

Shop Stampin’ Up! Online and get your hands on some of these new goodies.

Be sure to check out the Graceful Glass Suite in the new Stampin’ Up! 2018-2019 Annual Catalog!