

This blog post will be about placing glimmer paper under die cuts on a card so that you can use the beautiful new 6″ x 6″ Glimmer Paper Assortment Pack (143831) that you can earn FREE during Sale-A-Bration. You’ll find this Glimmer Paper Pack in the extra Sale-A-Bration Brochure that came out February 21 to give you a few more choices during Sale-A-Bration, which ends March 31.
I love the beautiful Special Reason Stamp Set and especially the Stylish Stems Framelits Dies. If you buy both in a Special Reason Bundle you can save 10% and you will be all set to go! It seems that Stampin’ Up! never wants us to be without flower choices! These dies are particularly unique in the way they can cut out the flowers so that makes them even more interesting.
This card isn’t what I started out making, and I have to say, I don’t like my card! But since it is really about how I made the card rather than if I loved it and since I’m a bit under the weather today, I don’t really care that this isn’t one of my favorite designs!
I was going to just die cut a big flower and two smaller ones and place the new Glimmer Paper underneath. But then I realized that what I was thinking of was having the top card layer popped up with Stampin’ Dimensionals, so placing the Glimmer Paper underneath was going to be just a wee bit trickier. I couldn’t just place the glimmer paper underneath the die cuts directly, seeing what I was doing. I was going to have to adhere the glimmer paper to the card base and have it lined up perfectly with the die cut images on the layer I was going to place over it.
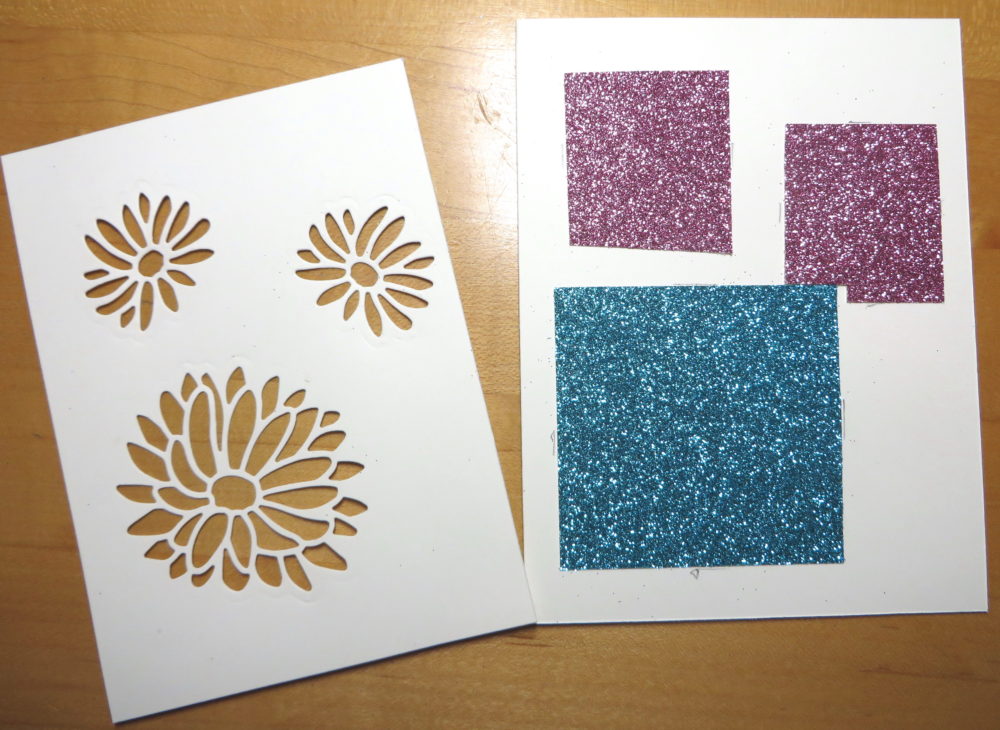
There was just a bit more playing around to make sure the color was under the entire area of the die cut flower without sticking out underneath the sides of the top layer or running into an adjacent flower. Once I thought I had it placed perfectly, I put a few pencil marks where the glimmer paper would go and glued down with my Multipurpose Liquid Glue.
Next I added the Stampin’ Dimensionals, with a few in the center of the card for support.

Finally I stuck on the top layer on which, of course, I had already die cut the flowers with the Stylish Stems Framelits Dies.
Now after I did that, I realized I should have already stamped a greeting on the card front! I did finally take a chance and stamped a happy birthday greeting from the stamp set but it doesn’t look that eye-catching on the card. But for today, “oh well”!
The card still looked like it lacked something so I die cut some glimmer paper leaves! They are pretty but I’m not sure they worked that well on this card. Maybe they did on the big flower, but then the little flowers didn’t have anything! So I took a chance and stamped some leaves with Mint Macaron ink around the little flowers. That didn’t look great so I added Clear Wink of Stella to the leaves. That didn’t do much, so I added the Gold Wink of Stella to the leaves! Finally I stamped the leaf veins and then I liked it a little better!
Maybe you like the card after all! In some moments I do, but I think I could do better. Sometimes you have to know when to STOP when you are designing something! My friend and I used to always say that back in the day when we were painting tee shirts and wine glasses and plates! Maybe I will give this card another shot later, but now you know one way to use the Glimmer Paper, one of the new releases for Stampin’ Up! Sale-A-Bration, with die cuts!