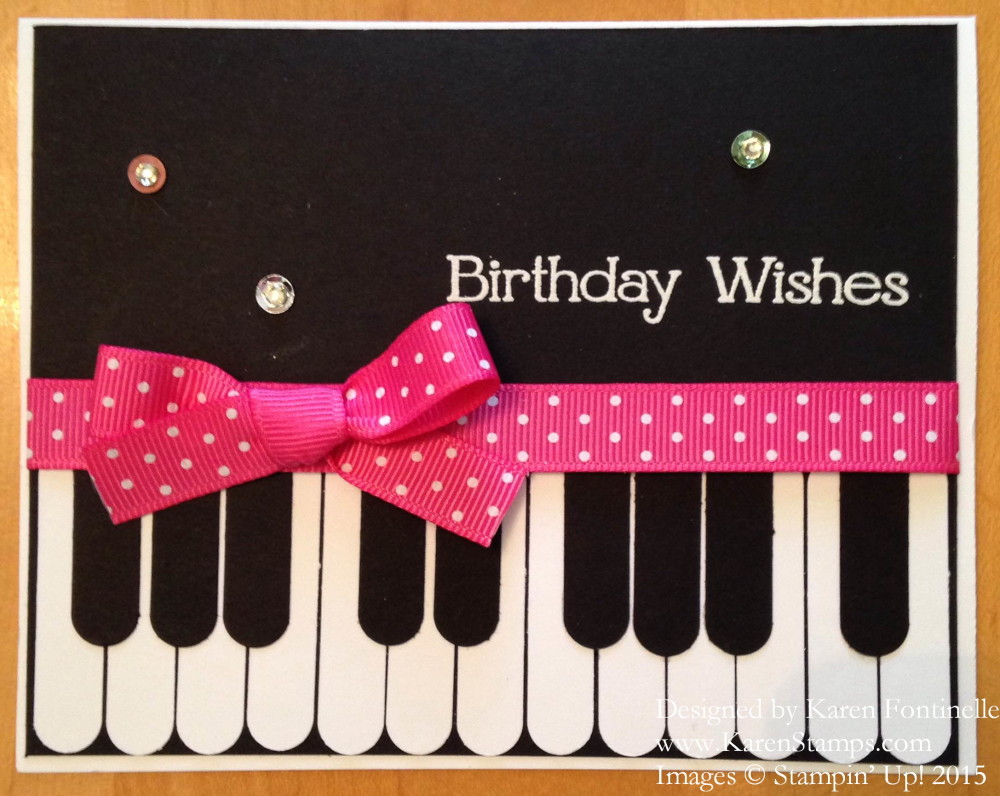
 If you know a piano player, you might like to make a piano card for them! It’s very easy to make a card like this in spite of how different and difficult it looks! You will need the Word Window Punch to make the piano keys. And that’s about it – really!
Make a card base with Whisper White card stock. Make a Basic Black layer on which you will build the piano. I heat embossed the greeting with the White Stampin’ Emboss Powder using the Heat Tool. Rub the Embossing Buddy around on the card first to eliminate static and keep the powder from sticking where you don’t want it.
Punch thirteen white piano keys with the Word Window Punch and line them up along the bottom edge of the black layer. When you know you have them fit correctly, adhere them to the black card stock. The back edge of them will be hidden under the ribbon. Punch nine black keys with the Word Window Punch and adhere them as shown over the white keys. Don’t glue down the very back end of the punched piece. You will need to trim the back end of the black keys to match the back edge of the white keys so they won’t stick out. Just trim them with the Paper Snips. Tie a ribbon of your choice around the layer as shown. Mine is a retired polka dot ribbon but you can use what you like. Make a bow or just tie a knot.
For a little more pizzazz I added some sequins and rhinestones in the sequin centers. Try the Brights Sequins in the new catalog.
Try a piano card! Make it suit the occasion with the proper greeting and ribbon!
Shop anytime at my Stampin’ Up! Online Store!
Remember the Stampin’ Up! Weekly Deals, good through Monday, June 15.

