Monthly Archives: June 2012

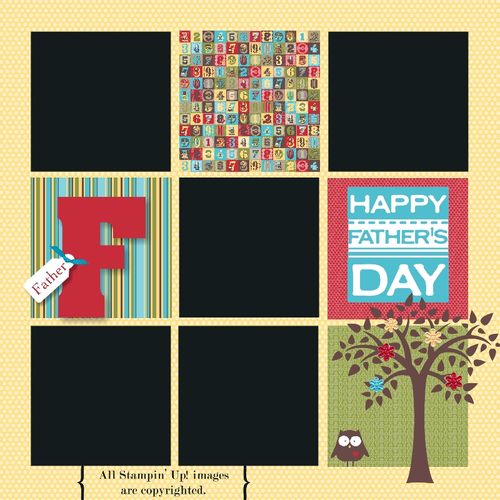
Father’s Day Scrapbook Page in My Digital Studio

Father's Day Page 2012-001

How about using My Digital Studio to make a Father's Day scrapbook page for photos of Dad and the children?  You can put it in a scrapbook (if you print it out) OR you can print it and frame it!  You most likely can find any size frame these days, particularly one made for scrapbook pages.  Add the photos where you see the black boxes. Or if you prefer, just use this design for a starting point and make it the traditional way with paper, ink and stamps!  Add your embellishments and you have a great Father's Day gift.  Personalize however you like!

For more information on My Digital Studio, click HERE.

It's very easy to either completely design your own page…or do like I did and start with a template in My Digital Studio and change it up how you like it!

Handmade Father’s Day Card Idea

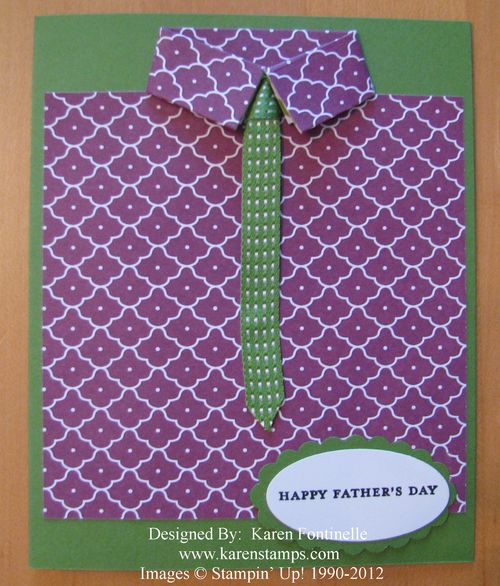
Handmade Father's Dad Card Idea


There are a lot of these Father's Day card ideas out there with the shirt and tie.  Usually the tie, and sometimes the shirt, is an origami technique, but I wanted something easier for a handmade Father's Day card idea.

For the shirt, I started with a piece of designer paper (this one is Summer Smooches #125409 from Stampin' Up! cut 4" x 5 7/8". At the top score at 5/8" and again at 1 1/4"….that is, if you want the collar to match the shirt (so that your designer paper is folded over twice). Otherwise, just score at 5/8" if you want the other side of the paper to show for the collar.  Either is great!  Where you want the collar to fold in, cut in at the sides one inch. That gives you the collar separated from the shirt so you can fold that much in toward the center.  Find the center of your paper (2") and fold those top tips to that mark making the collar. Use Stampin' Dimensionals #104430 under the collar edges to hold it down.  

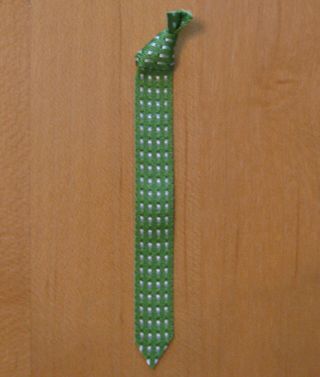
Before glueing down the collar, make the necktie.  I just used a piece of the new 3/8" Stitched Satin Ribbon in Gumball Green #126848 (p. 172), tied a little knot at the top and snipped off the bottom to make a point.  Then I stuck it down with a Mini Glue Dot at the top and one lower down.  You could also use a little mini brad for a "tie tac". After you have the tie in place you can stick down the collar edges.

Here is what the necktie looks like:

Ribbon Neck Tie

Adhere the Father's Day shirt to a card base and add a greeting and you are done!  So cute and relatively easy!

A Father’s Day Gift Idea for the Gardening/Yard Dad

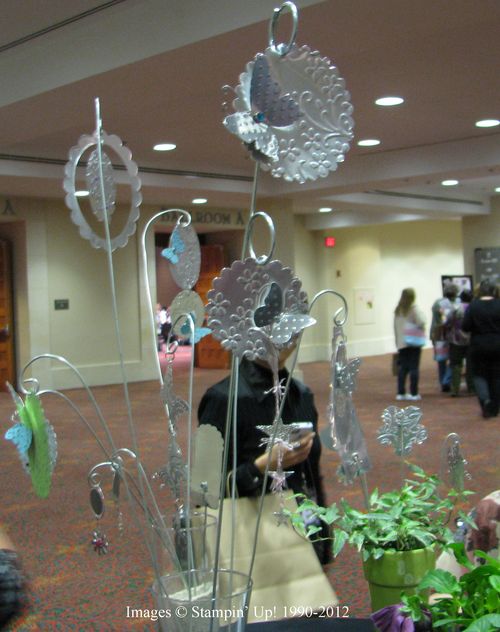
And what dad isn't involved in at least a little bit of gardening or yard work?  This is a Father's Day gift the children can make with some adult supervision by Mom.  Buy some roof flashing at a home improvement store, cut it out with your big shot and an appropriate die and then hang on a stake of some sort.

Metal Yard Art


This is one of my photos from the San Antonio Regional back in January where I learned to make these. As you can see, you can cut out most anything with your Big Shot and then punch a hole and hang it and stick it in the yard or in a pot of flowers or a plant.  Perhaps it will even scare off the squirrels from the garden….that's what we're trying to do in our garden!  But it is pretty and eye-catching no matter what!  The flashing has sharp edges until you run it through the Big Shot so you do need to be careful if children make this for Dad.  Use your imagination!  Once you make one I bet you'll have to make more!


Lovely As a Tree Father’s Day Card

Father's Day is sneaking up on us!  It's Sunday, June 17th….this Sunday!!  As you have heard time and time again, this stamp set, Lovely As a Tree  (p. 84) (now available in clear-mount!) is so versatile and well-loved….and perfectly suited for those difficult masculine/manly cards for any occasion.

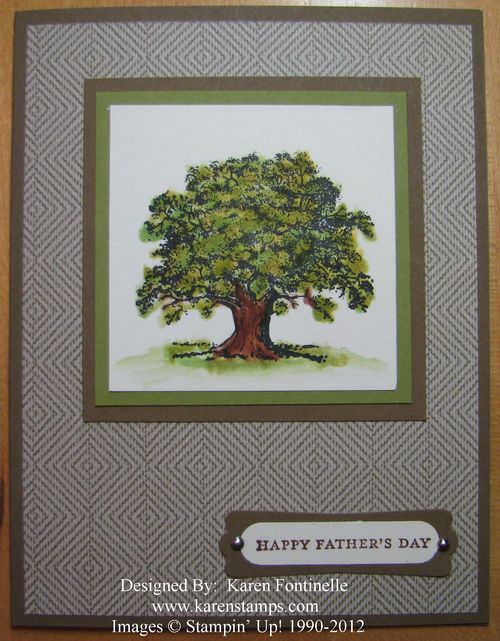
Lovely As a Tree Father's Day Card

I think the simplicity of this card will suit a father or any man in your life. You can use any background paper, layer the tree and add a greeting for whichever occasion.  Teeny Tiny Wishes is perfect for most occasions!

Just stamp the tree in Black Stazon ink and color in however you like.  I used a Blender Pen and various inks straight from the ink pad.  I started with a little yellow (the new Summer Starfruit) because someone used to always say use a little yellow with any green. Then I colored in with the new Gumball Green and Old Olive.  And there is nothing "artistic" about coloring in the greenery on the tree….just scribble on some color…really! It will look fine! The tree trunk is Soft Suede to match the card base and layers.  The designer paper background layer is the new Comfort Cafe #126898.  If you don't have the new papers yet, I'm sure you will be able to find something suitable in your stash. Well Worn from last year would be great…and don't overlook the subtle patterns on the back of the more dramatic sides of any designer paper.

To order Lovely As a Tree in either wood-mount or clear-mount or any other stamping supplies, please go to my Stampin' Up! Online Store HERE. Or contact me if you prefer and I'll put in your order for you!

Get started on your Father's Day cards right now if they need to be mailed..and check back this week for more Father's Day papercrafting ideas.

Stampin’ Up! My Digital Studio Digital Papercrafting

MDS Free 30-Day Trial LogoImage copyright Stampin' Up! 2012

My Digital Studio is the digital papercrafting software from Stampin' Up! You can make so many things with the program….scrapbook pages, journals, photo albums, swatch book, cards, invitations, party favors, framed art, calendars…and more! And it is not difficult to learn.  You can print from your own computer, another location, or for best color and quality use the Stampin' Up! printing service.

Version 2 of My Digital Studio is coming sometime later this year…but you don't need to wait!  If you purchase My Digital Studio NOW, you will receive the new version FREE when it is available!  Nothing to lose and everything to gain!

Try the 30-day Free Trial of My Digital Studio Express!  Why not?! Just use it for 30 days and see how you like it.  While you are using it during the trial period you can purchase any downloads you like, have your projects printed…everything. 

Every week Stampin' Up! comes out with new irresistable downloads. Check out the most recent ones HERE!

Find out about My Digital Studio HERE!

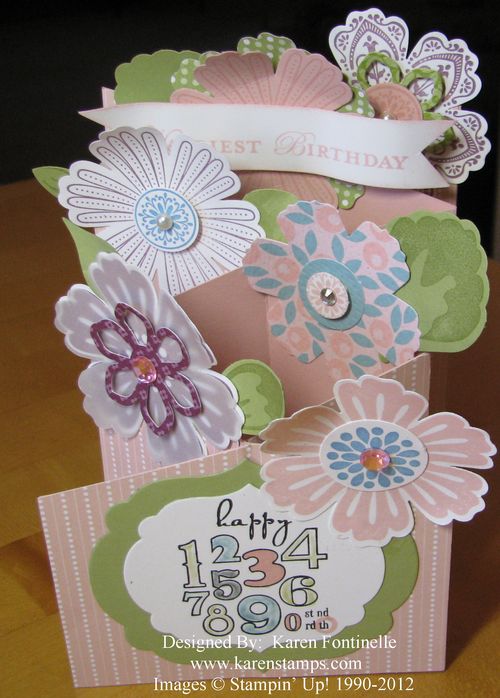
Cascade Mixed Bunch Birthday Card

Cascade Mixed Bunch Birthday Card Standing


Maybe this will be my last Cascade Card for awhile…especially with the stamp set Mixed Bunch and the matching Blossom Punch #125603 ….but then it makes such a great card, you never know!  When you are making a special card for someone, it's fun to go as over the top as you want.  I added some bling with Basic Pearls and Rhinestones plus the pink rhinestones that came in the (now retired) package of Blossom Builders die cuts.  I punched the leaves with the Blossom Petals Builder Punch #121808. The greeting on the front is from the stamp set Bring on the Cake. The banner in the background (that you can hardly see) is "Happiest Birthday" (and I can't remember the stamp set it is from!!).

Try a Cascade Card this weekend!

If you want to place an order, just go to my Online Store HERE!

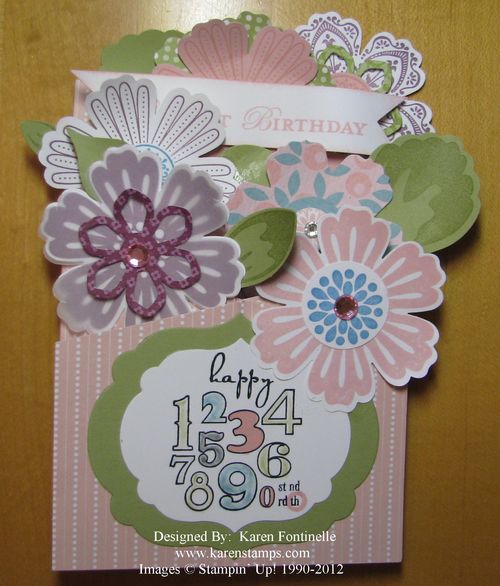
Here is the card folded flat for mailing.  I did use a larger envelope that I just had in my stash. Of course now you can make your own envelopes with the Simply Scored Scoring Tool #122334 and Simply Scored Diagonal Plate #125586.

Cascade Mixed Bunch Birthday Card

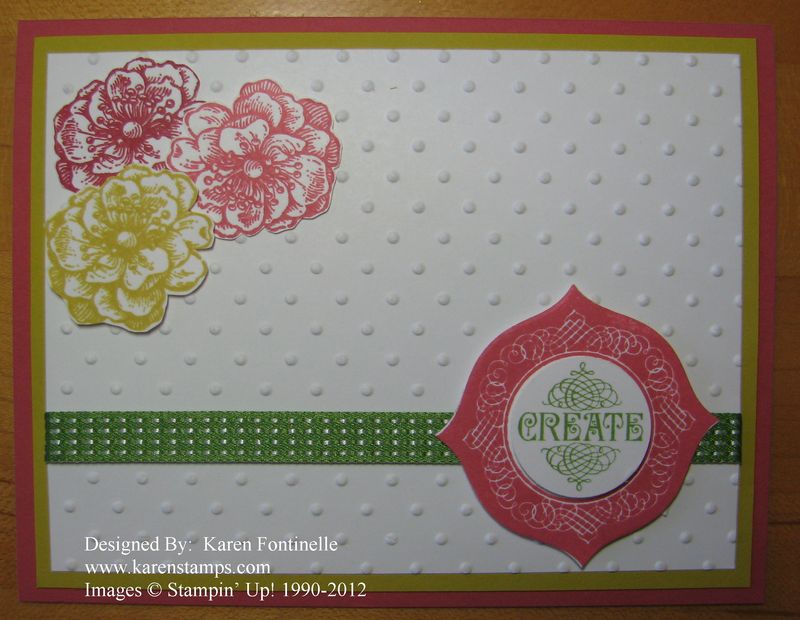
Layered Labels Create Card

Flowers and Create Card

Still playing with the new In Colors! The card base is Primrose Petals and the layer is Summer Starfruit.  Then Whisper White is embossed with the Polka Dot folder for a little interest.  The ribbon is the new 3/8" Stitched Satin Ribbon in Gumball Green #126848.  (p. 172)  Really cute!

I used two stamp sets:  Layered Labels (p.103) for the "Create" at the bottom, cut out with the Apothecary Accents Framelits Die (p.191) (#127003).  I stamped it again in Gumball Green so I could use the 1" Circle Punch for the word "Create" and popped it up with a Dimensional. The flowers are from Everything Eleanor (p. 112), a free stamp set we got at Stampin' Up! Leadership!  It's been a long wait until we could use it! But it is a beautiful stamp set with a little bit of lots of stuff….a label, a flourish, flowers, a little bird and a lovely circle design….well, you have to look at it yourself HERE.  The flowers I stamped in different colors and cut out by hand….it wasn't too bad!  Paper Snips #103579 make all the difference if you are cutting little things.

You could put some other greeting on this card and have something for almost any occasion!

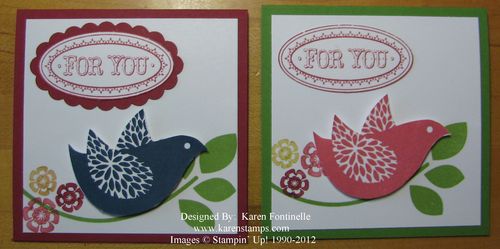
Betsy’s Blossoms 3×3 Note Cards

Betsy's Blossoms and Labels

Which card do you like better?  I couldn't decide so I made each one different….perhaps each label goes better with the color of the bird!  The bird, flowers and stem are stamped with Betsy's Blossoms (p. 72).  The label is from Layered Labels (p. 103), but I only punched out the center greeting with the Large Oval Punch #119855.  On the first card I mounted the label on the Scallop Oval Punch #119856.  On the second card I just mounted the oval straight onto the card.  I think maybe the second one goes better with the lighter colored bird, and maybe the Raspberry Ripple Scallop Oval goes better with the darker Midnight Muse bird!

These are little 3"x3" cards that can be used for little notes or a gift tag. Once you make one it's easy to keep making more and you should because they are handy to have on hand!

Want to get your hands on these new Stampin' Up! In Colors?  Shop Online HERE!

Marking Clear-Mount Stamp Positions

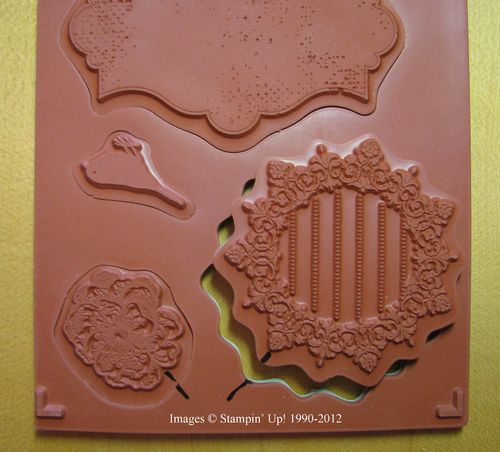
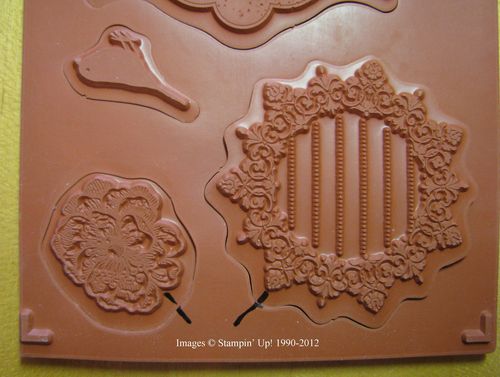
As I was going through my new stamps, I realized certain stamps are difficult to tell which way they fit back in to the rubber.  I don't know if you maintain your stamps this way, but I keep the rubber that I punch out the stamps from in the stamp case, and that way I can tell if I am missing any stamp in that set. You can just have the individual stamps in your case….this was just a tip I heard when the clear-mount stamps came out and I thought it was worth trying.

Some stamps that aren't a distinct shape….like the bird in this stamp set…make it difficult to know which way it fits the best in the empty shape. (Somehow this is very difficult to explain!) So I will just show you some photos now!

Marking Stamps

I decided to just mark one spot on the stamp and the excess rubber with a permanent marker so that when I put the stamp back I will match up the lines and it will fit perfectly back into the shape without having to twist and turn it to get it right.  Does that make sense??! If you look at the little bird stamp in this set, you can see that it will be easy to put back so no need for marking.

Marking Stamps2

It's probabaly easiest to recognize which stamps you might want to mark this way before you even pop them out of the rubber, that way you don't have to fidget with getting them back in the empty space properly.

Try it and see if it works for you!


Stampin’ Up! Take the Cake June Recruiting Promotion

SU Have Your Cake Recruit Promotion June 2012

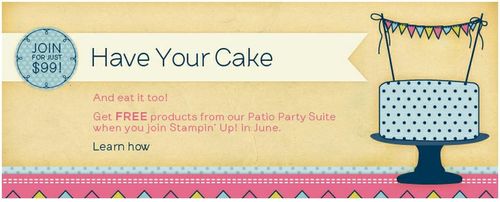
If you would like to get in on the fun of being a Stampin' Up! Demonstrator, why not join now?  You will start with a brand-new catalog that everyone is excited about AND you can take advantage of the new promotion just announced for new recruits! Not to mention you will be starting your own stamping business to provide a source of income for yourself or your family while having fun being part of Stampin' Up! 

The Take the Cake promotion runs from June 1 through June 30, 2012. Join the Stampin' Up! family during June, and not only will you get to choose up to $125 worth of products from the brand new catalog for your fully customizable Starter Kit, but you'll also get select products from our brand-new Patio Party Suite-all for the low price of $99! Plus, it still ships for FREE!

Page

Item

Description

Retail Value

44

126740

Make a Cake Set (wood-mount)*

$14.95

44

126742

Make a Cake Set (clear-mount)*

$11.95

165

126916

Patio Party Designer Series Paper

$10.95

199

127215

Patio Party Digital Collection DVD

$22.95

*Choose wood- or clear-mount; clear-mount set does not include clear blocks

For more information about becoming a Stampin' Up! Demonstrator, just click HERE.

To join, just sign up online on my website HERE by clicking the JOIN NOW button in the left column.

If you have questions or want to talk about this great business opportunity, just email me at Karen@KarenStamps.com anytime!

To view a flyer with more information about this offer, click HERE.


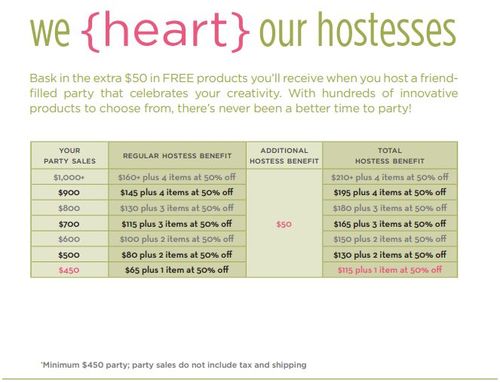
We {Heart} Our Hostesses Stampin’ Up! June & July Promotion!

SU Hostess Promo 2012

Can the day be any more exciting??!  New Stampin' Up! Catalog and new promotion for Stampin' Up! Hostesses!

SU Heart Our Hostesses Snip

For more information, you can also click HERE.

Here are some things to know:

  • Online orders are not eligible.
  • Orders must total $450 or more (excluding tax and shipping) to qualify.
  • Hostesses may use their additional hostess free merchandise on any regular catalog/mini catalog merchandise. However, hostess dollars cannot be applied to 50 percent-off items.
  • Orders larger than $450 are not eligible for additional hostess free merchandise dollars. For example, a $900 order will not receive an additional $100 in hostess free merchandise dollars.
  • This offer good through July 31, 2012.

To view the flyer about this promotion, please click HERE.

Keep checking back everyday to see what else is new in the wonderful world of Stampin' Up!


New Stampin’ Up! 2012-2013 Catalog Goes Live Today…and New Ink Pads!!

Today is the day we have all been waiting for!  The new Stampin' Up! 2012-2013 Catalog will go live today at Noon Mountain Time (Stampin' Up! Time).  There will be no ordering from midnight MT until noon MT.


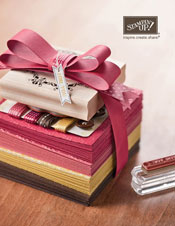
SU Catalog 2012-13

Click image to go to Stampin' Up! Catalogs page


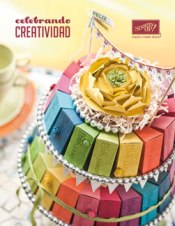
New Celebrando Creatividad 2012-13

SU Celebrando Creatividad 2012-13

Click image to go to Stampin' Up! Catalogs page


So while you're waiting, and while I'm driving back to Houston after helping my son move out of his apartment for three days, please enjoy this video from Stampin' Up! about the new firm foam ink pads by Shannon West, one of our many favorite Stampin' Up! employees!