
I saw a card using the Two-Tone Cardstock that Stampin’ Up! now carries that reminded me that the Two-Tone cardstock could be torn and look like ocean waves! That is how this Two-Tone Torn Paper Ocean Card came about! Tearing paper was something everyone was doing when I first joined Stampin’ Up! many years ago and then I didn’t see it for awhile. I think it is back now and a fun and easy technique to use!
The card base is Crumb Cake but the entire front of the card is covered. There is no Crumb Cake margin showing as I usually do. I cut several strips of different widths of the Two-Tone Cardstock in various colors in 5 1/2″ lengths to fit completely across the card. The other dimension of the strips doesn’t really matter since they are going to get torn to make different widths, so I cut some at 1″ and some at 2″ or 3″ wide. Two-Tone cardstock means that it has a white core which is perfect for looking like white caps on ocean waves! Also, one side of the paper has one color and the other side has the same color but in a different shade, lighter or darker. That gives you a lot of choices with just one sheet of paper!
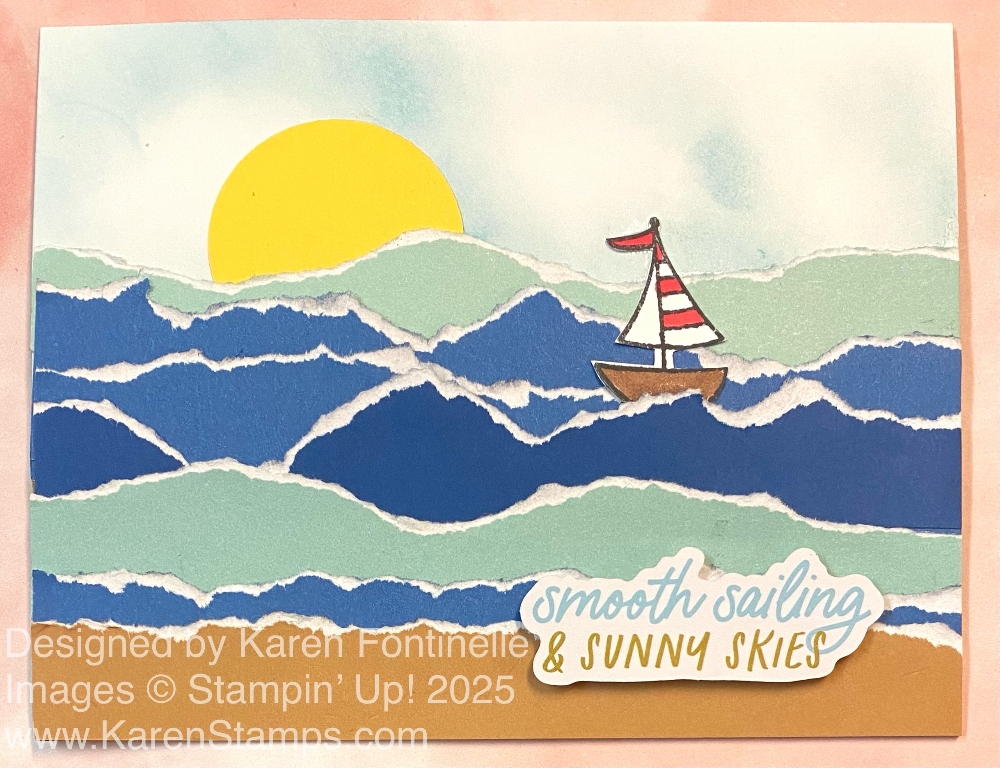
You can use whatever colors for water, sky, sand or landscape that you choose. My paper isn’t labeled and sorted yet, so I’m not positive about my colors. However, I believe I used Crumb Cake for the sandy beach, Pool Party and Night of Navy for the water, and just regular Daffodil Delight for the sun. I punched out the sun with a 1 3/4″ Circle Punch. You can use whatever size punch or die you have. The top piece of “sky” is Basic White, colored slightly with Balmy Blue ink and a Small Blending Brush. You could also use a sponge. I purposely left some areas of the paper whitish to look like clouds.
The trick to tearing strips is to tear the strip toward yourself with the side of the paper you want to use in the front to show off the torn edge. When you have some strips cut and torn, just play around with them a little bit and see how you like them laid out. You can apply glue only to the bottom edge of the strip, then you can adhere succeeding strips by slipping them behind the top of the bottom strip and so on. Or start at the top and work your way down. If you don’t like the way something looks, you can slip in a small torn piece or you can tear off the top edge of the paper a little more to fix it how you like it. The sun is just slipped in behind the top water strip.
I thought my card needed a boat, but I didn’t think I had one. Then I did remember there was a little sailboat in the Choose Happy Stamp Set. I stamped it in Memento Ink, colored with a brown and a red Stampin’ Blend marker, then cut it out carefully with scissors. I think it turned out to be a good size for my ocean! If you don’t have a sailboat stamp, just draw one yourself. It’s just a bowl shape for the boat and put a triangular sail on top.
The greeting is one I found in the Saying Something Ephemera Pack. When I came upon it, I knew it was perfect for this card! I popped it up with Stampin’ Dimensionals. Then you are finished with the paper strips on the card front, check and see if you need to trim off either or both sides of the card to even up everything. I like to use my very old Stampin’ Up! guillotine cutter, if you have that! But the Paper Trimmer will also work.
See what other ideas you can think of for using the Two-Tone Cardstock! I just thought of one myself!