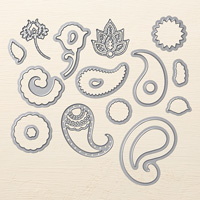
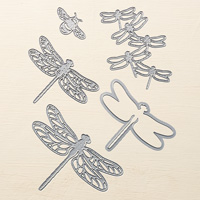
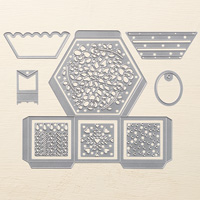
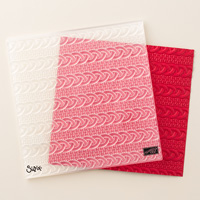
Sadness and fun at the same time! I hate to see some of my favorite products leave, but Stampin’ Up! never disappoints! There are always great new products on the horizon!
Leave a comment below if if you have any questions or opinions of the list! Or email me at Karen@Karenstamps.com.
Since some Stampin’ Up! customers are getting to order their Stamparatus stamp positioning tool recently once Stampin’ Up! received the early reservations and placed them in their shopping carts, I thought it was a good time to put the Stampin’ Up! videos up for you tutorial viewing pleasure! You may have seen some of these but Video #4 is a new one. Enjoy!
I might suggest wrapping some washi tape or similar type take around each magnet and leaving a couple inches of tail. This will help you have something with which to pull two stuck magnets apart or even just pick them up off the Stamparatus. Those are strong magnets to be sure! Don’t let them near your scissors either!
Also be sure not to store the Stamparatus with both plates still attached. When you fold them over they will not lie flat and may damage the hinges. Just pull them straight up and out and lay on top.
This Stamparatus tool will be in the new Stampin’ Up! Annual Catalog so you won’t have too long to wait if you missed the early reservation windows! In the mean time, the rest of us will come up with the expertise to help you when you order yours! I think it is a tool everyone will use and will want!
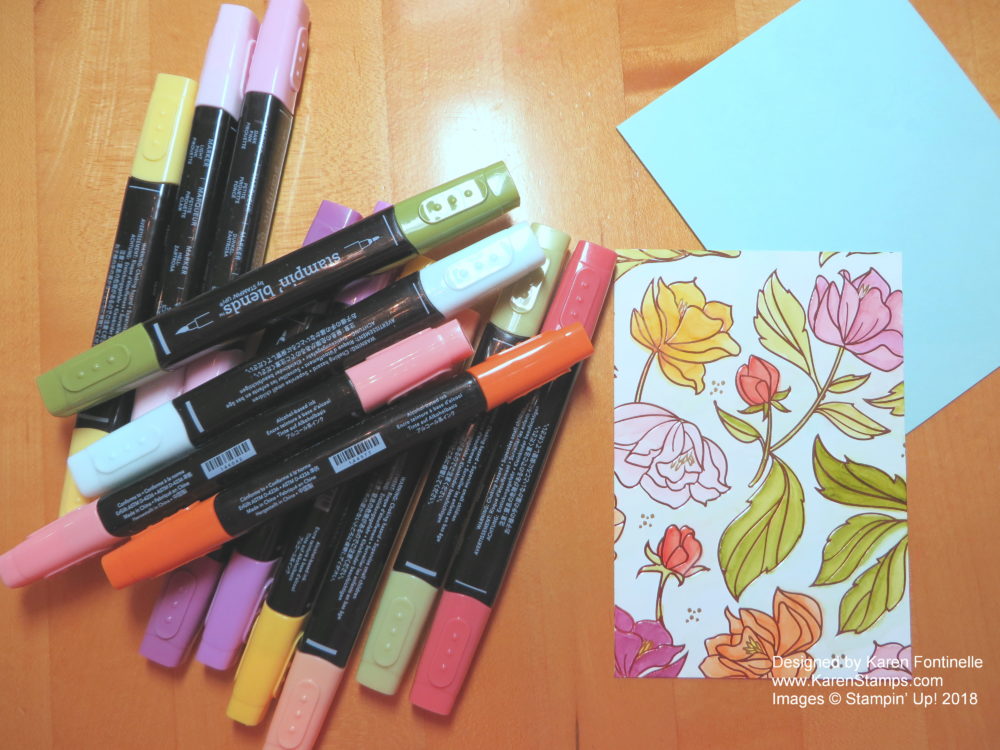
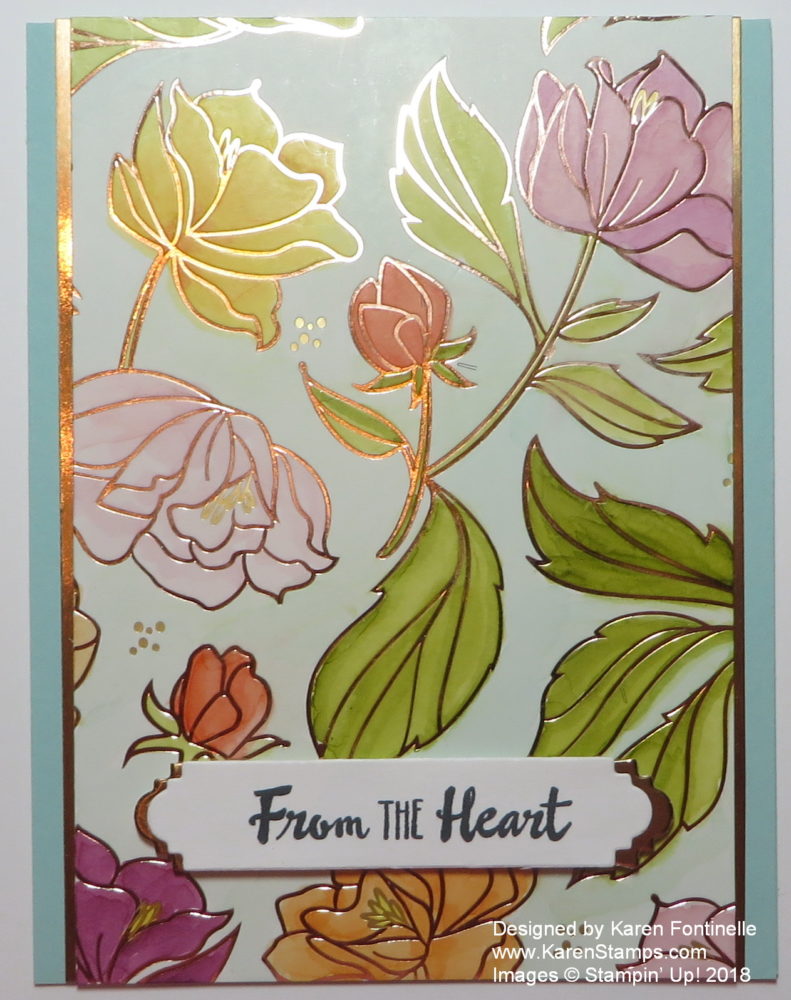
Today I am playing with two WONDERFUL Stampin’ Up! products, coloring on the Springtime Foils Paper with the Stampin’ Blends markers to make an all-occasion card. I was just experimenting with the actual coloring and trying different colors of makers, not trying to make the perfect card.
I love coloring with the Stampin’ Blends markers. There is just a certain feel to them that I like and that feels calming while you color! LOTS of people have loved the Stampin’ Blends, especially in recent months, which is causing a backorder situation at Stampin’ Up!, coupled with Chinese New Year in China where factories shut down for a period of time and causes delays in getting products to the market.
Here are the markers that are on backorder:
Bermuda Bay (Light and Dark)
Bronze
Calypso Coral (Dark)
Crumb Cake (Light and Dark)
Ivory
Pink Pirouette (Light and Dark)
Pool Party (Light and Dark – currently on backorder)
Pumpkin Pie (Dark)
Smoky Slate (Light and Dark)
I was told by Stampin’ Up! that if a customer ordered the whole Stampin’ Blends Collection, they would go ahead and ship the colors that are available now and send the backordered ones as soon as they are available. Now there is no price break for ordering the entire batch of markers, so if you only want individual markers, you aren’t missing out on anything. I would suggest ordering whatever markers you want as soon as possible because there might be more of rush on the markers when people find out they are getting scarce! It may be the end of April before Stampin’ Up! is re-supplied. If you want to take advantage of Sale-A-Bration, go ahead and order the Collection or any backordered markers so you can get your FREE Sale-A-Bration products! That will put you at the front of the line when the backordered ones come in rather than waiting until they are back in stock to order.
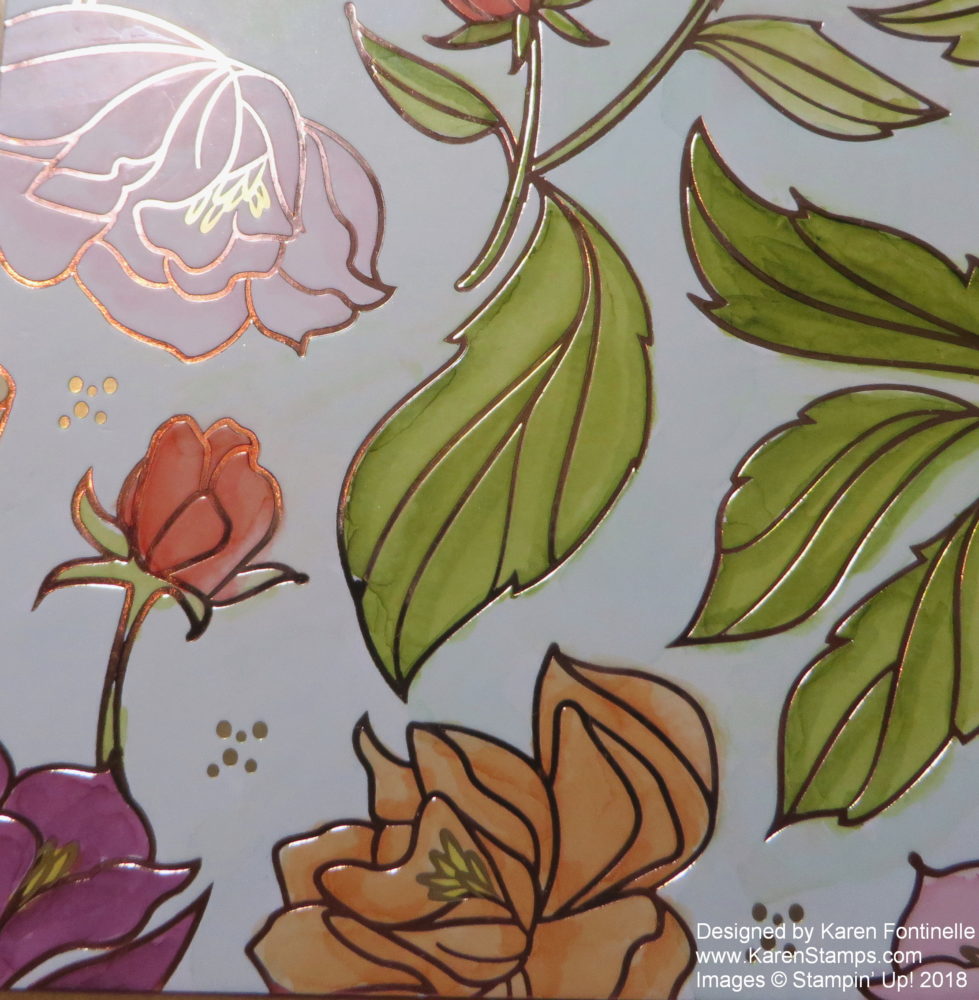
Here is a closeup of the coloring with the Stampin’ Blends markers. Since the Springtime Foils Specialty Designer Series Paper (FREE during Sale-A-Bration with a $50 order!!) has a glossy finish as well as the foil outlines, the markers color a little differently than on other paper. They do blend but I would say the colors maybe almost pool at times, sort of like watercoloring. So I’m seeing that they give a little bit different variation in blending and I’m not sure you can totally control it. So just go with it and enjoy the different look! You can also use regular Stampin’ Write Markers or sponge or brayer on ink. Lots of different techniques to try with this beautiful paper! Be sure to consider choosing it for your Sale-A-Bration gift.
And here I have assembled the card on a base of Pool Party with strips of the Copper Foilalong the sides. This card has the fold at the top to the panel goes all the way from the top to the bottom.
The greeting is from Petal Palette Stamp Set and then layered on a die cut piece of Copper Foil with a die from the Petals & More Thinlits Dies. For the copper piece underneath, I simply cut it in half so just the ends would look layered.
Order your markers soon! And earn your FREE Sale-A-Bration products with every $50 purchase. I know you will enjoy coloring on various papers with the new Stampin’ Blends like I did on this Stampin’ Blends coloring on the Springtime Foils Designer Paper to make this any-occasion card.
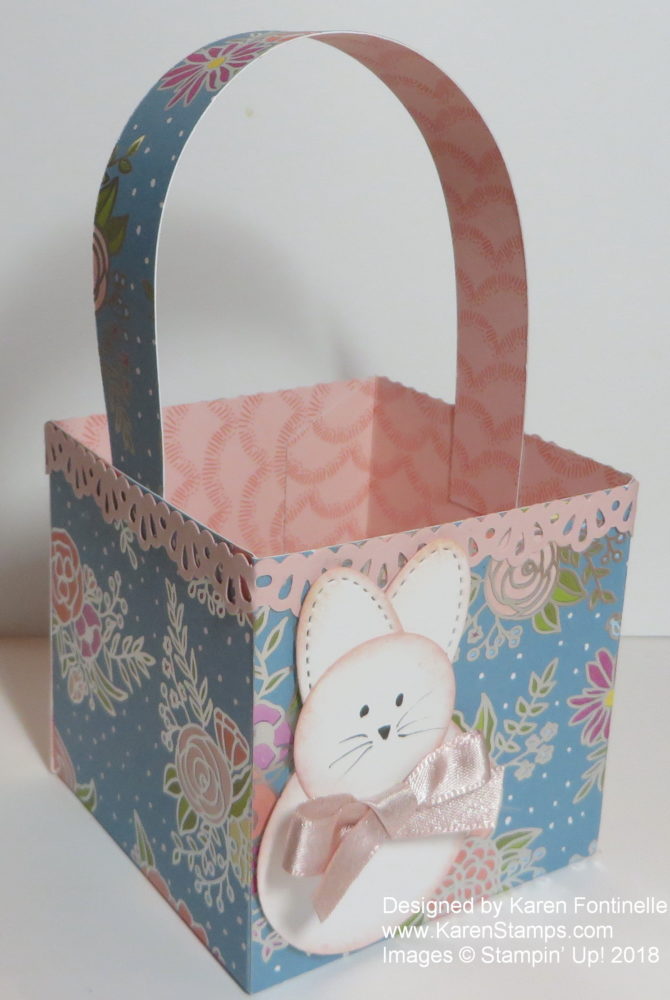
Easter is on its way, so let’s learn how to make an easy paper Easter basket with a punch art bunny using the Sweet Soiree Designer Paper. When I saw this paper, I knew it would make a beautiful gift box, but somewhere along the way it turned into an Easter basket! And what better decoration for an Easter basket than a cute punch art bunny!
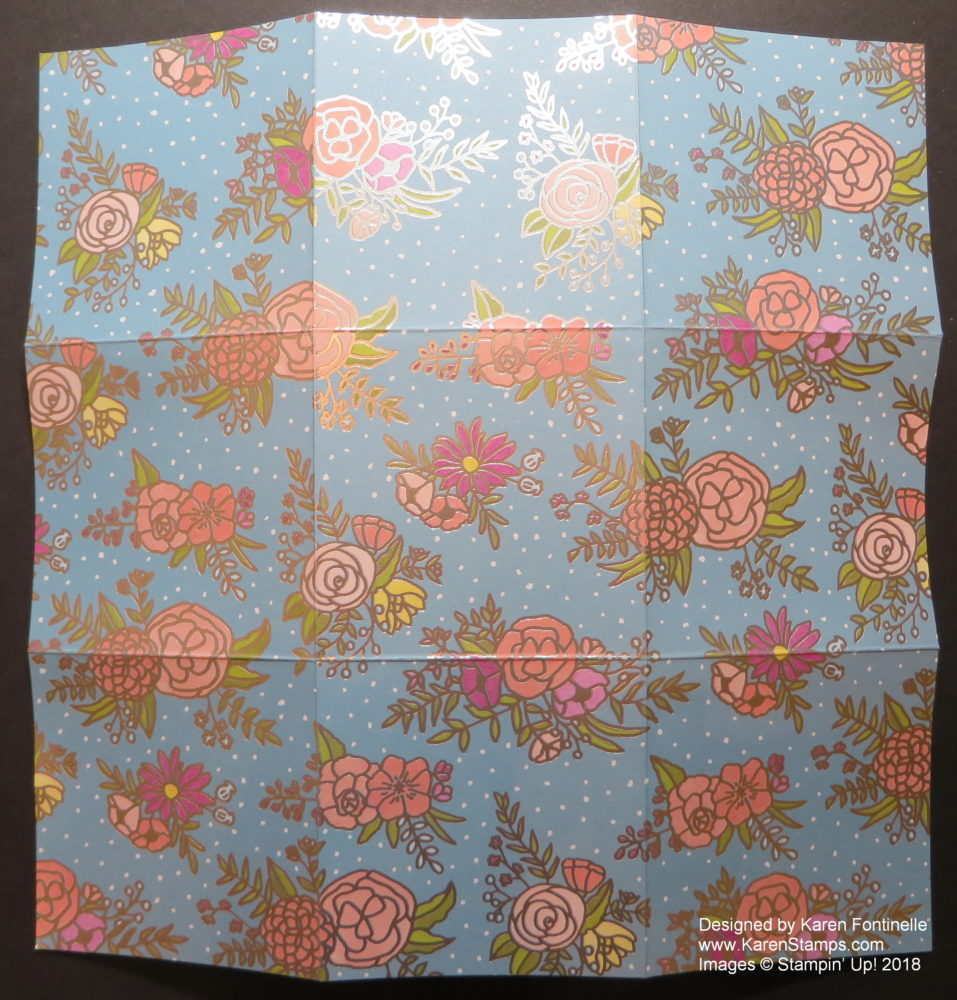
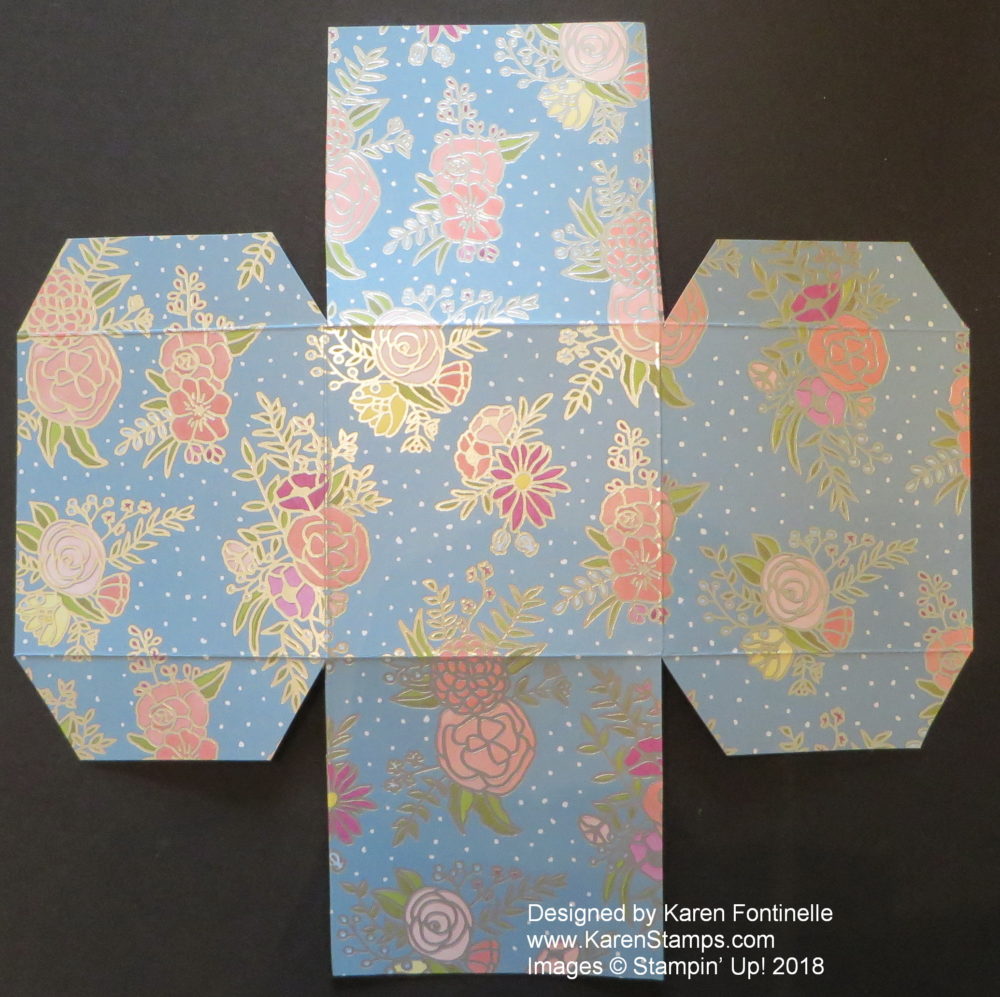
You can decide what size you want your basket to be, but I chose 3″ wide on each side, which meant I needed to start with a 9″ x 9″ piece of the Sweet Soiree Specialty Designer Series Paper. I just scored it at 3″ and 6″ on each of the two sides so that it looks like a tic-tac-toe board.
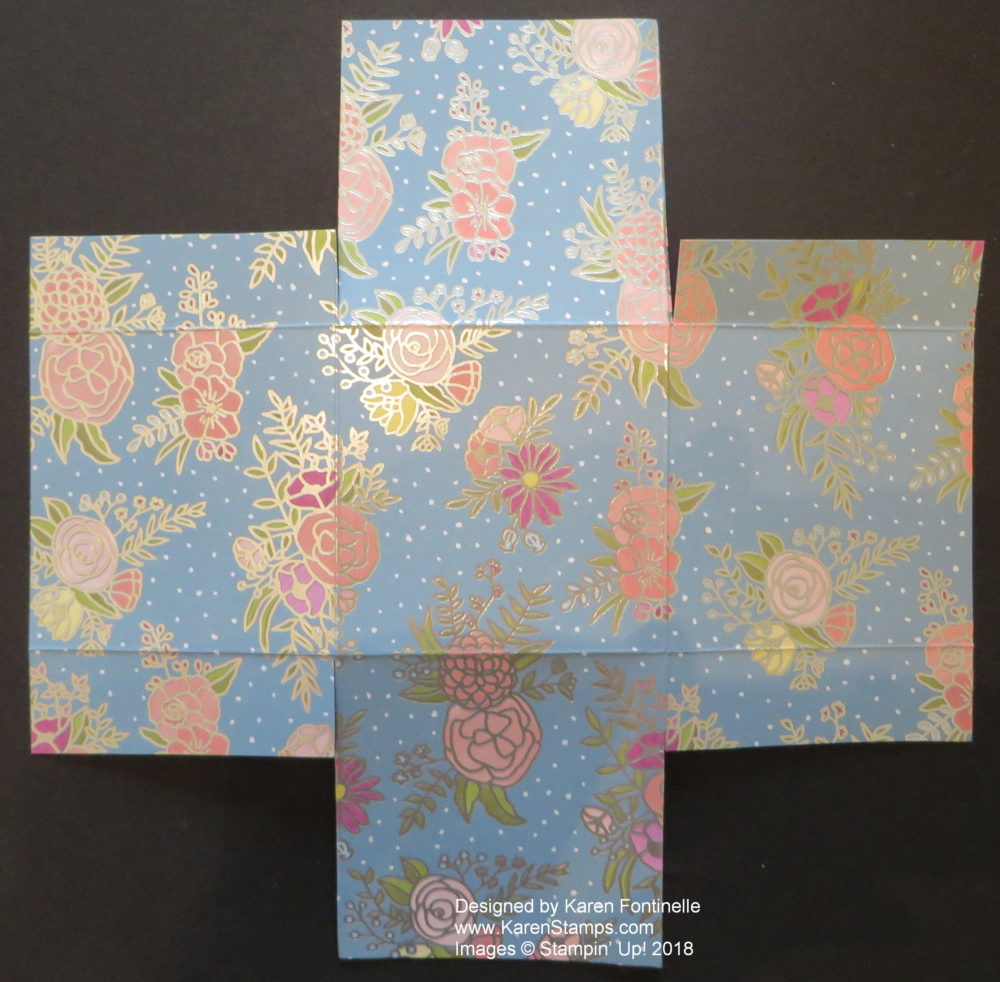
At this point, you can cut on the vertical score lines from the bottom up to the horizontal score line and down the same way from the top. Then you can crease all the score lines, fold in all the tabs, and make your basket.
To eliminate the bulk of all that paper, after I cut up to the score lines as above, I cut in from the sides as you see below in the photo. This makes “tabs” to adhere to the sides. The tabs do not have to be cut exactly straight. I just eyeballed that part. Then you can use Fast Fuse, or I used Tear & Tape Adhesive on the tabs.
Just for an extra tip, I cut the little angles on the tabs, just to keep them out of the way on the edges. Nothing special, just eyeballed it.
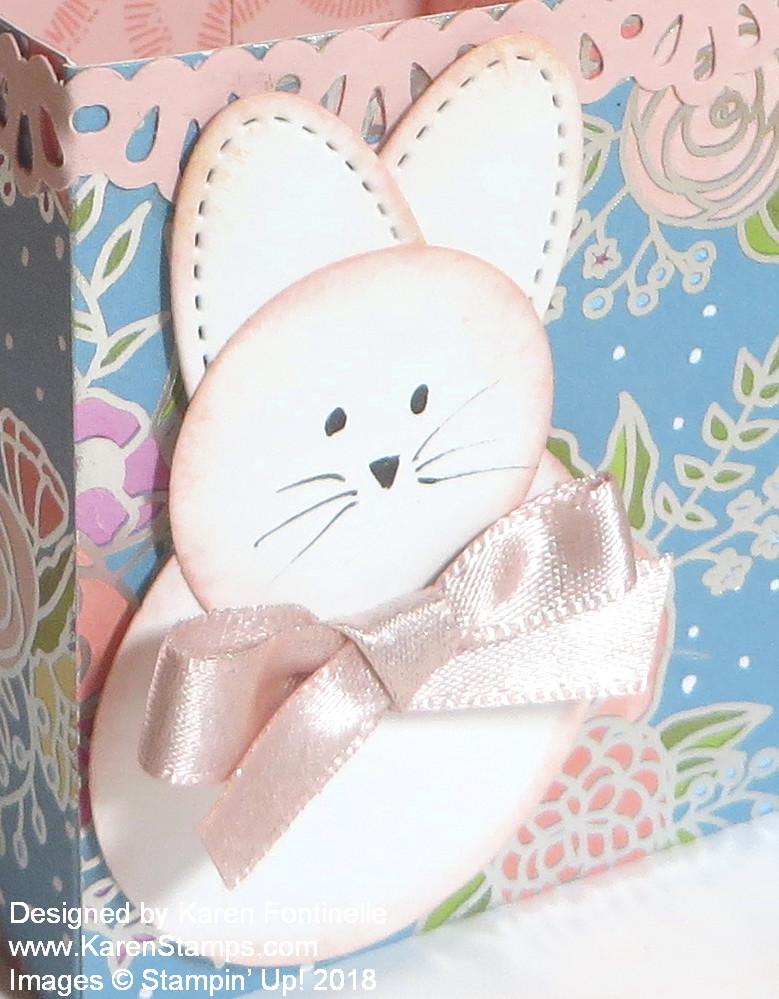
The handle for the basket is just a 3/4″ strip of paper, adhered inside the basket again with Tear & Tape. You could use brads or staples if you wanted to, or ribbon. For a little embellishment, I punched strips of Powder Pink Cardstock with the Decorative Ribbon Border Punch to decorate the top edge of the basket. I also made this 3/4″ wide but if I did it over I probably would make it wider.
The punch art Easter Bunny is fun to make! You can experiment with whatever punches you have. For this bunny I used the 1 3/4″ Circle Punch for the body, the 1 1/4″ Circle Punch for his head, and a small oval from the Stitched Shapes Framelit Dies for his ears. If you have a retired Oval Punch you can use that. I only needed one die cut because I just cut it in half for the ears. For the face, I just drew it in. Before adhering the bunny, I sponged the edges of the pieces lightly with Powder Pink Ink. I meant to color the inside of the ears with Stampin’ Blends in pink but I forgot! The bunny is popped up on Stampin’ Dimensionals on the front of the Easter basket. He/She still needed a bit of something so I tied a bow with Powder Pink 3/8″ Shimmer Ribbon.
The Sweet Soiree Specialty Designer Series Paper is so pretty by itself you can make bags, baskets, or boxes easily without having to do much else! The silver foil and colorful handpainted design of the flowers don’t require much embellishment. If you learn how to make an easy paper Easter basket with a punch art bunny with the Sweet Soiree paper, you will have a beautiful little gift or treat for someone special.
Unfortunately, this offer sold out very early! It was supposed to be available for 5 days, but it didn’t make it to lunch on the first day! It was stated “while supplies last” but we expected supplies to last a little bit longer!
You CAN still purchase Fast Fuse, but it will not be the special offer. Sorry for the inconvenience.
It’s an Adhesive Sale starting tomorrow, February 8 for 5 days only! Get a special deal on Fast Fuse Adhesive!
I LOVE the Fast Fuse Adhesive, but I have to admit I didn’t in the beginning! Finally I got the hang of it and now I think it is a great adhesive to use. It’s stronger than SNAIL and that is an advantage on some projects, especially 3D projects! The trick seems to be not pressing hard when you use it. There are videos galore with tips online!
From Stampin’ Up!:
As you may remember, the response to our Fast Fuse promotion last fall was phenomenal. In fact, your enthusiasm was so overwhelming we simply didn’t have the inventory to keep the deal running! So, as promised, we’re bringing back the Fast Fuse Adhesive deal for five days only—while supplies last! For those of you who are unfamiliar with this promotion, here’s how it works: When you buy ONE Fast Fuse Adhesive, you’ll get TWO Fast Fuse Adhesive refills for FREE!
This deal will start on February 8 and end on February 12. Remember, that’s five days only—while supplies last!
Be sure to mark your calendars and prepare to stock up and save with this fabulous deal!
Check out this gift bag I made last year which is the type of project Fast Fuse is really good for! Of course you can even use it on cards, too!
Watch this video from Stampin’ Up! with good tips on using Fast Fuse! Some people even think the secret to a light touch is to not even put your index finger on the top of the applicator! And like she says, sometimes you will have to get the adhesive going again and you will need to clean off the adhesive that accumulates sometimes on the case. But the adhesive is worth a little bit of effort!
If you want to TRY Fast Fuse or you want to stock up, I would order as soon as possible tomorrow, if you can, just in case there is a mad rush on the adhesive sale right off the bat! Hopefully they have FILLED the warehouse from floor to ceiling with Fast Fuse!!
Keep Sale-A-Bration in mind! Whether you want to stock up on Fast Fuse to spend your $50 or whether you get some Fast Fuse and maybe some other adhesives you need or cardstock or new stamp sets, remember that with every $50 increment, you can choose a FREE Sale-A-Bration product!
DO NOT begin your order today or you may have trouble with the special deal showing up on your order tomorrow! Just have your order and numbers all written out and ready to put in tomorrow! Or let me know and I can do it for you.
Try the Fast Fuse Adhesive tomorrow on the Adhesive Sale tomorrow and see how useful it is when you want a strong hold for your projects!
Did you get an ugly sweater for Christmas or some other present you didn’t like? Time to go shop at Stampin’ Up! and get yourself whatever you want! Might as well be good to yourself!
SURPRISE! The Stampin’ Up! Clearance Rack has been updated! New items have been added to the Clearance Rack in the online store! Supplies are limited, and with discounts up to 70%, products will go quickly. Shop now and stock up.
You will find cardstock, dies, ribbons, embellishments, designer paper, punches, and more! Of course it’s all “while supplies last”! Check it out right now! The Early Bird gets the worm!
This sale has surplus inventory at reduced prices and retiring products from the Holiday Catalog!
Don’t forget! Last day to order from the Holiday Catalog is January 2, 2018.
Last day to order from the Year-End Sales Event is January 2, 2018.
AND: You can “reserve” your Stamparatus, the new stamp positioning tool until December 30, 2017. This is an earlier way to receive your tool before it appears in the next annual Stampin’ Up! catalog!
Just go to my Online Store, sign in to your account, scroll down until you see the Stamparatus.
You will see a link to click to go through the reservation process. Just put in your name and credit card number.
Your credit card will NOT be charged until the Stamparatus has been received by Stampin’ Up! and put in your Shopping Cart.
At that point, you can go ahead and add to your order, if you choose, or just complete your order as always.
You will want to be the first kid on the block to own the Stamparatus! First reservations in, first Stamparatus out! Reserve yours today before time slips away. You can always cancel if you change your mind.
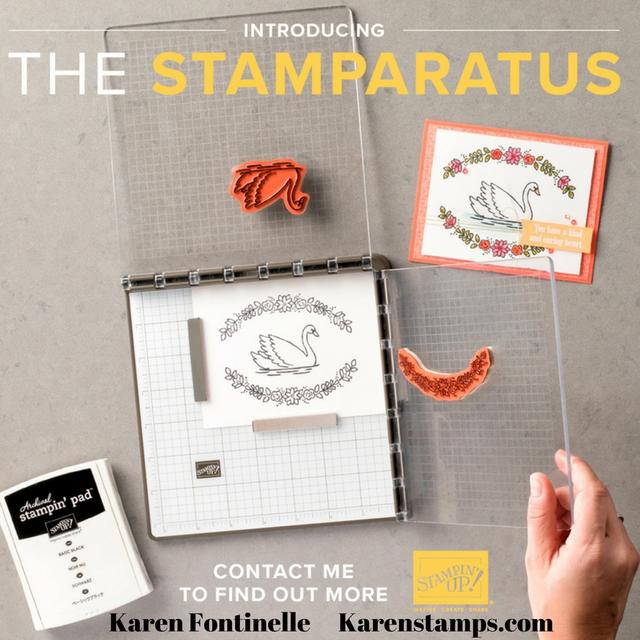
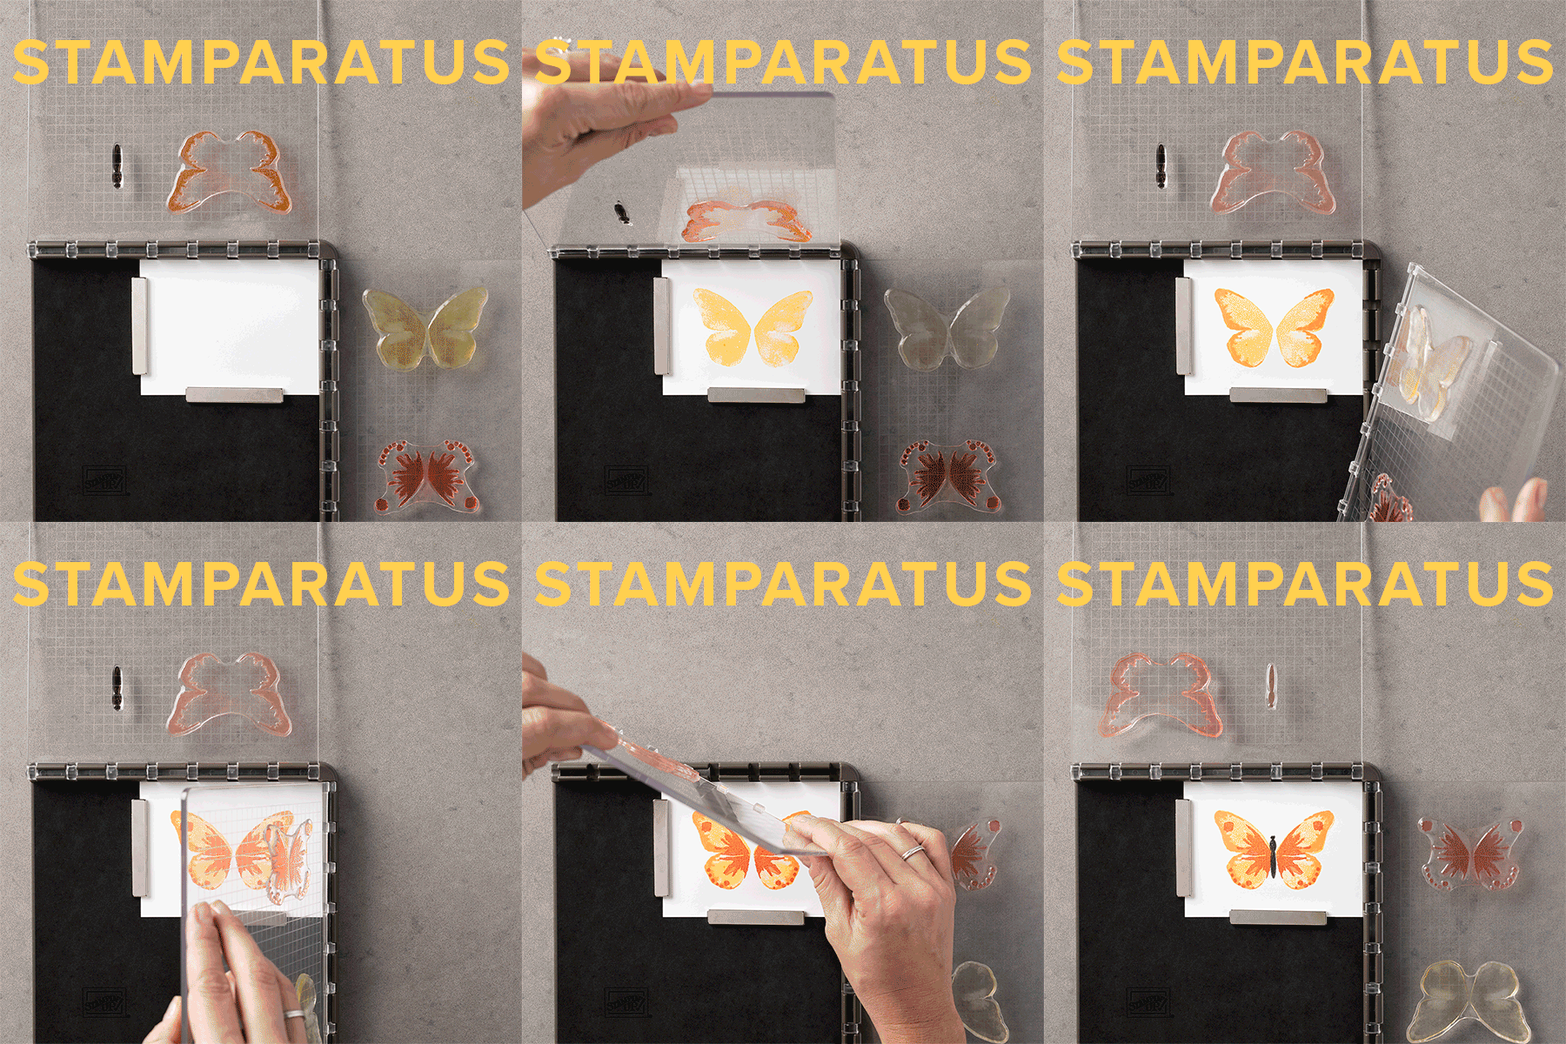
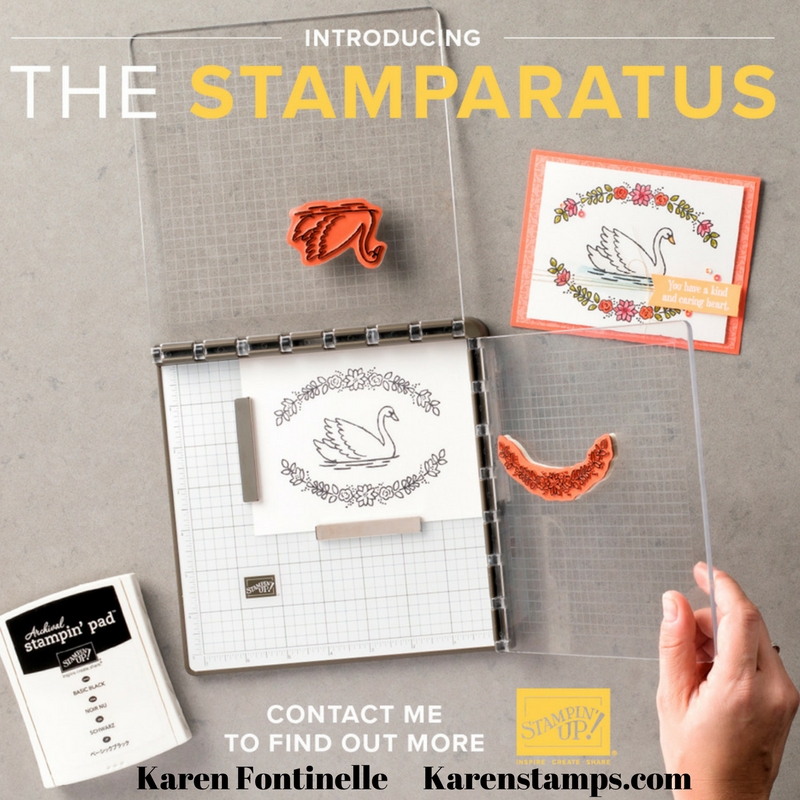
Have you heard about the new Stamparatus from Stampin’ Up! Although there are similar products on the market, Stampin’ Up! has made a stamp positioner with some unique features to make this an innovative stamp placement tool. You have to watch the video in its entirety to gather all the information and see all the features! I can’t wait to get one!
In order to get one, Stampin’ Up! is offering this different pre-order/reservation process. We already had one opportunity but the number of products they had available were reserved in minutes and the window closed. THIS time, the reservation window will stay open from today through December 30 no matter how many Stamparatuses (?) (plural??) are reserved! You CAN reserve one today beginning at 2:00 pm Mountain Time but there really is no rush – you have all month! However, orders will be fulfilled “first come, first served”. So if you reserve yours today, you will receive yours sooner than the person who reserves on December 30. These should be delivered beginning around mid-March. After this, you will be able to purchase one in the normal way when the new Stampin’ Up! Annual Catalog comes out next summer.
I need product details!
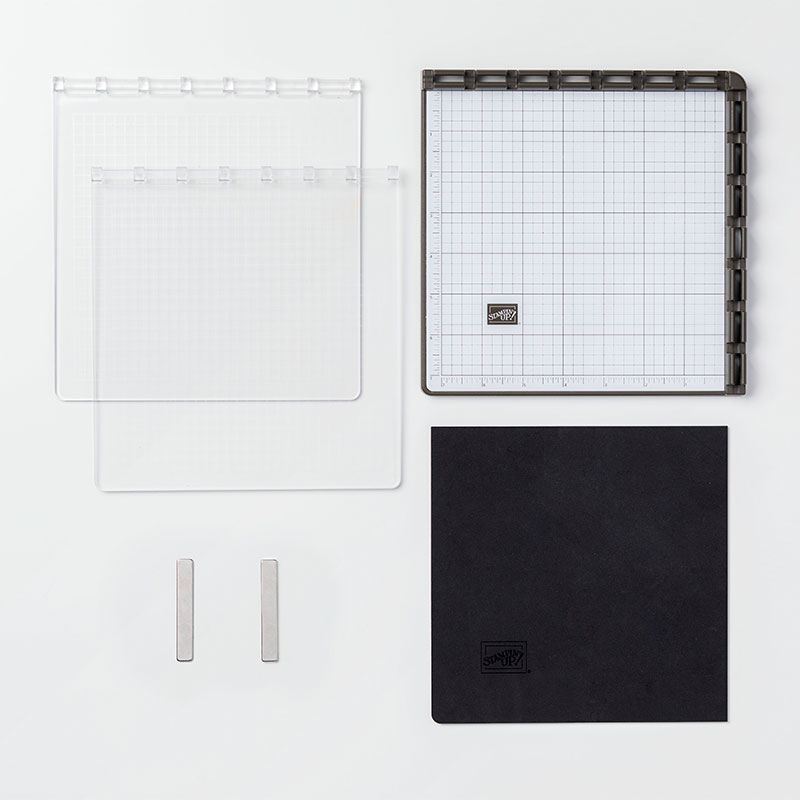
Compatible with Stampin’ Up!’s red rubber and photopolymer stamp
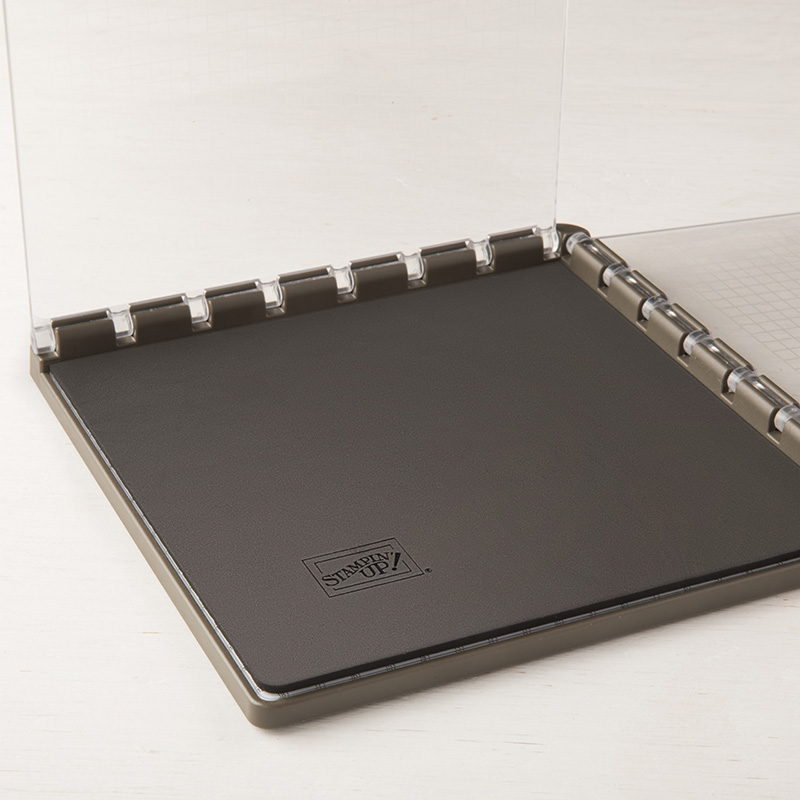
Foam mat to use with photopolymer stamps
Rulers and gridlines for quick measuring
2 open sides so you can stamp on larger paper
2 reversible plates: a total of 4 surfaces to work with
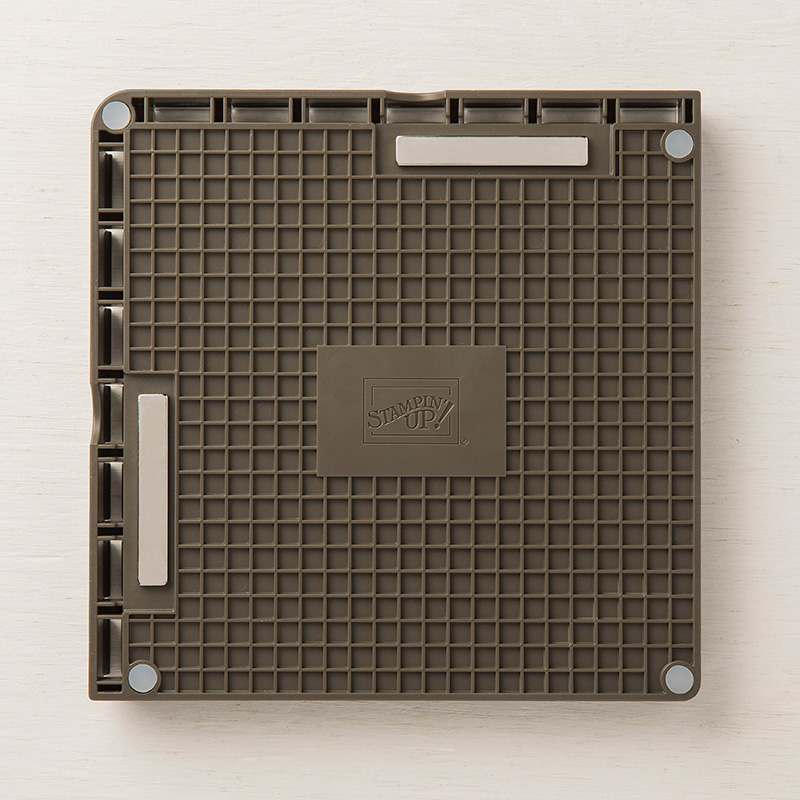
2 magnets to hold the paper in place
Magnet storage areas
Product dimensions are 8″ x 8″ x 7/8″.
Retail Price–$49.00 USD
It’s big news when something breaks the mold and changes everything. The Stamparatus will change the way you stamp, and before long, you’ll wonder how you crafted without it!
Why do YOU need one? You’ll fall in love with stamping all over again when you learn everything you can do with it!
Make multiples with ease
Consistently stamp crisp, clean images
If you want a darker impression, apply more ink and restamp—no need to start over
Make fewer mistakes, saving time and money
Easily create 2-step, 3-step, and 4-step stamped images using reversible plates
Develop new and specialized stamping techniques with adjustable stamping plates and precision placement
How to Reserve a Stamparatus
Go to my Stampin’ Up! Online Store HEREanytime from 2:00 pm MT (3:00 PM Central Time) on through December 30. If you already are my customer, just sign in to your Account like usual. If you are new, just take a minute (maybe ahead of time) to set up your account!
At the proper time, go to my Online Store and you should see a banner for reserving the Stamparatus. Click on that and follow the steps.
There is a limit of ONE tool per customer. If you already reserved one in the first window back in November, you can reserve one in this window.
Although you must enter your credit card information, you will NOT be charged until the tool is in your shopping cart and you finalize your order, when they are ready for delivery.
You will receive an email from Stampin’ Up! saying they received your reservation (might take a few minutes) and another when Stampin’ Up! has received your product and put it in your shopping cart. Be sure you don’t delete it accidentally from your cart! But you can cancel your reservation at any time. Once it is in your shopping cart (March?), you can add other Stampin’ Up! items like usual and finalize your order like any order (might still be Sale-A-Bration!). Please make sure at that time that if you’ve had an address change or credit card change that all your information is up-to-date.
That’s it! Enjoy your Stamparatus when it arrives!! Can’t wait!!!
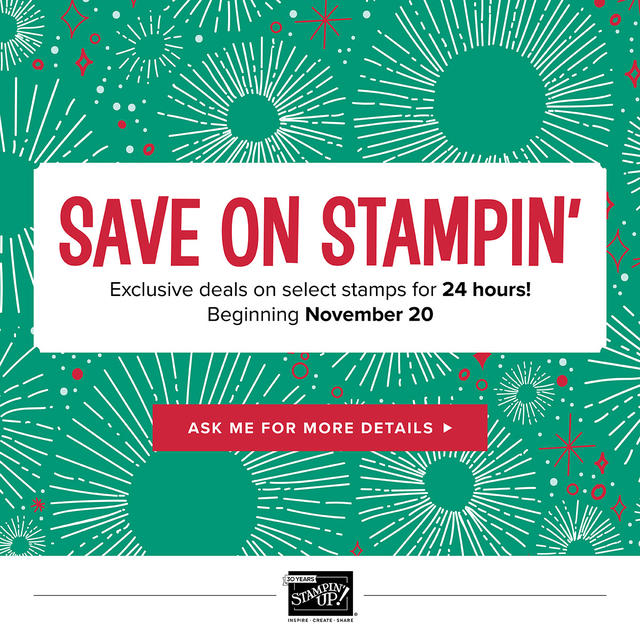
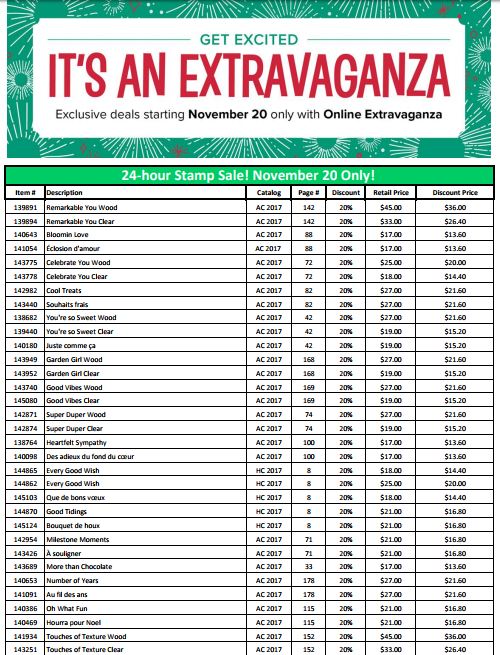
Today is the day! The Stampin’ Up! Online Extravaganza begins! Check out all these sales! And today, for 24 hours only, these select stamp sets are 20% off! Stamp Sale starts November 20 12:00 AM and ends November 20 11:59 PM.
These are the regular catalog prices show here. Take off 20% for the sale price! Or click any stamp set to see the sale price in the Online Store.
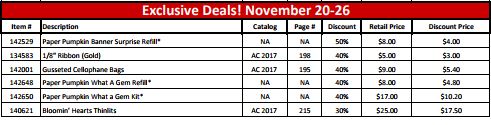
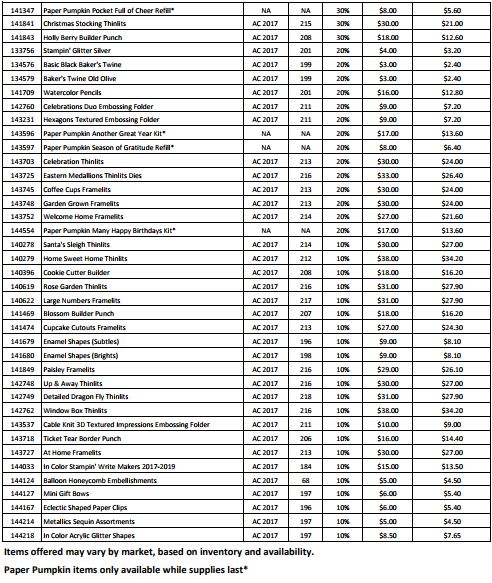
The next part of the sale are the Exclusive Deals for November 20-26. These are not the sale prices. Click on any item to go to the Online Store to see the sale price. These products 10% – 40% off!!
Beginning tomorrow, Monday November 20, 2017 Stampin’ Up! begins their Online Extravaganza! On Monday only, there is a 24-hour sale on select stamp sets! Stamp Sale starts November 20 12:00 AM and ends November 20 11:59 PM. Don’t delay! Choose the stamp sets from the list that you want!
In addition, beginning Monday Nov. 20 – 26, you can choose other items that are on sale! There are ribbons, thinlits, framelits, embellishments, Watercolor Pencils, In Color markers, punches, and more! Check the list! Click on the PDF below to print out the list. Tomorrow you will be able to go to my Online Store and see the sale items in the store.
Today you can look over the list and be prepared to order tomorrow if you want the stamp sale and other things or any other day if you don’t want to take advantage of the stamp sale.
AND – Once this sale ends on November 26, there will be some sort of FLASH SALE on Monday, November 27! Stay tuned to find out what that flash sale will be! Stampin’ Up! has not unveiled it yet!
Tomorrow, Monday November 20 check my Stampin’ Up! Online Store to see all the items on the Online Extravaganza Sale! Remember, the stamp sale is ONLY Monday, Nov. 20, but the other items will be on sale all week through Nov. 26.
Today, November 16, is the first day that we can all “reserve” the new Stamparatus, the Stampin’ Up! stamp positioning tool! Beginning this afternoon, the first “window” to “preorder” your Stamparatus, will open at 2:00 pm MT.
1:00 PM Pacific Time
2:00 PM Mountain Time
3:00 PM Central Time
4:00 PM Eastern Time
Here’s how to reserve your Stamparatus! You know you want one!
Go to my Online Store as if you were placing an order. You must have an account, which you do if you have ordered online from me before. Make sure you see my name and information on the top right corner of the Account page. If you don’t have an account, just look on the left side, under the Stampin’ Up! logo and click “Create Account”.
You will surely see some big banner about the Stamparatus! It is not there now as I write this. Click that and it will take you to a reservation page. Or here is the link to the Reservation Page (which is not “live” yet).
Fill out the form with your name and credit card number. Your credit card will not be charged today! It is just a “reservation”.
In early February, you will receive an email from Stampin’ Up! saying the Stamparatus is in your Shopping Cart! Be sure not to accidentally delete it or it will be gone!
Now you can add other products to your order like usual, at any time, or simply order the Stamparatus. Remember, in February it will be Sale-A-Bration (spend $50, get a Sale-A-Bration product FREE!) so it will almost be like getting a bonus for ordering the Stamparatus! The cost of the Stamparatus is $49.
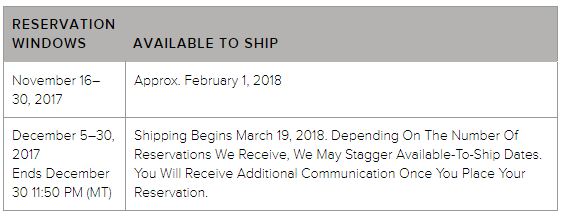
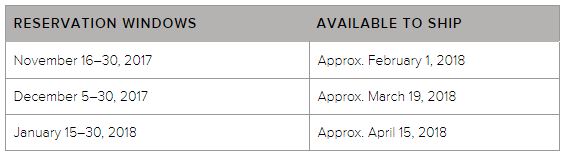
If you miss the November 16 -30 window, there will be two more “windows” during which you can reserve the Stamparatus. This November window will have expected delivery of the Stamparatus around February 1st. Reservations will be taken in each window only as long as supplies last. If you think you are interested, I would go ahead and try to do this November window. You can always delete your reservation.
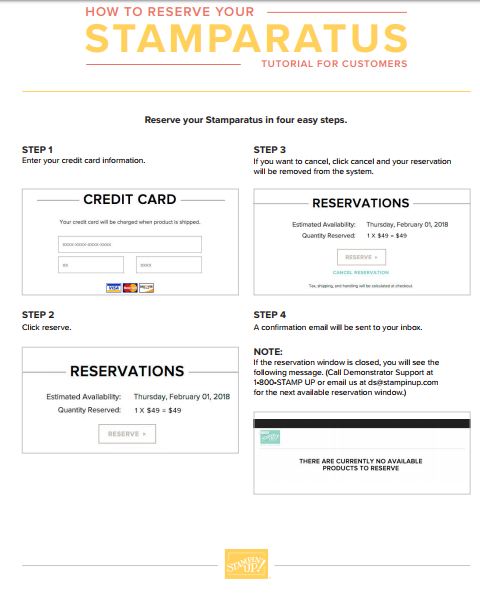
Here’s how to reserve your Stamparatus!
And if you missed the video from Stampin’ Up!, here is Carrie explaining all about it!
I know this is a busy time for everyone, including me, but if you are excited about the Stamparatus, I would try to put in your reservation TODAY or very soon. That way it will be done before Thanksgiving and hopefully they will not fill all the spaces! I would guess the website will be VERY busy right at the time it opens so just be patient. We often crash the website when something big is happening!!
If you have any questions, please let me know! Remember, this is just reserving the tool so you can get your hands on one around February 1st when Stampin’ Up! gets them in stock! I’m sure there will be heavy demand. Eventually it will be available in the new 2018-19 Annual Catalog and ordering will be as usual. This method is just to get it available to us as soon as possible!
A new tool from Stampin’ Up! that positions your stamps precisely, stamps multiples with ease, easily creates 2-step, 3-step, and 4-step stamped images, compatible with red rubber and photopolymer stamps, and more!
I feel like we should play “Jeopardy”! “What is the STAMPARATUS, Alex!”
Yes, we are getting a new stamp positioning tool called the Stamparatus! How about that name??! As you probably know, there are other similar products out there on the market, but Stampin’ Up! has stepped up all the features in order to be the BEST stamp placement tool on the market!
Watch the video below from Stampin’ Up! to hear and see Carrie explain how to use this new tool coming SOON!
Since this tool is brand new, first announced at the Stampin’ Up! OnStage event over the weekend and announced to the public yesterday, there is going to be a new way to order your Stamparatus! Sort of like a preorder! You will reserve your spot and Stampin’ Up! guarantees shipment as soon as the product arrives in the warehouse.
This is how it will work:
From Nov. 16-30, 2017 you can RESERVE your Stamparatus. There will be a limit of 1. Reservation quantities are while supplies last. I suggest you plan to reserve yours as soon as possible. You will be required to provide your credit card information, but it will not be charged until the product ships from Stampin’ Up! During this reservation window, the Stamparatus will likely ship around February 1st, 2018.
You will go HERE to my Stampin’ Up! Online Store on Nov. 16 (or after) beginning at 2:00 PM Mountain Time. You will click on the banner for the Stamparatus and follow the instructions. These are the steps you will take on the day you RESERVE your Stamparatus HERE.
You will need to have your own Stampin’ Up! online account set up, which is easy to do, if you haven’t ordered from me as yet. Just click HERE to go to my Online Store, then under the Stampin’ Up! logo on the left side of the page, you will click on “Create Account”. That’s all there is to it!
It’s a lot of information to take it all at once, but I think we will all figure it out! Basically, you can order/reserve a Stamparatus beginning Nov. 16 at 2:00 pm MT and it will ship around the first of February. This gives Stampin’ Up! a better way to control inventory since it is a new product.
If you aren’t ready to reserve the Stamparatus Nov. 16-30, the second window is Dec. 5-30 with availability approximately March 19, 2018. The third window to reserve will be January 15-30, 2018 with estimated availability April 15, 2018. The Stamparatus will be available in the new annual Stampin’ Up! catalog for 2018-19 and ordering will be as usual at that point.
When the Stamparatus is available after you have reserved one, the reservation will be put into your shopping cart in your account. At that time, whenever you are ready, you can add other products to your order if you like, just don’t delete the Stamparatus reservation from your account or you lose it! Then you just complete your order as usual and your order will be shipped to you.
Just circle November 16 2:00 PM on your calendar and check it out! If you really want to reserve a Stamparatus, go ahead and do it as soon as you can in that window of Nov. 16-30. Be patient with the website early on, I suspect a lot of people will be on it! I will be one of them!
Let me know if you have any questions! I will TRY to answer them! Watch the video, especially to the end to see the extra special features of the new Stamparatus, the new stamp positioning tool!
The new alcohol markers from Stampin’ Up!, Stampin’ Blends, are here and ready for purchase! These markers will take your coloring to new heights! Everyone can look like an artist!
The markers have dual-tips and each color has a light and dark shade. You can buy the markers individually or in a complete collection. The Memento ink is recommended to use with the alcohol markers. You can use Whisper White Cardstock, but it is recommended to use the Thick Whisper White Cardstock. The Shimmery White Cardstock also works well and is pretty as well! The ink from the markers is likely to bleed through the paper so you always want to have a scrap piece of paper of some kind underneath your work.
Watch these videos to learn more about the Stampin’ Blends Markers and how to use them! They really have a delightful feel to them when you color!
As you can see in the videos, you can start with the most basic coloring just to get used to the feel of the markers. Then add in blending and even blending different colors together rather than just the light and dark shades of one color. As Brandi showed at the end of her video, she used various colored markers to make different skin tone colors. You can be as basic or as stepped-up as you want! They are your markers to use!
I think you will find the Stampin’ Blends have a really nice feel to them when you color. And we know coloring is good for the soul! Just sit and color and relax, forget everything else for awhile! I remember how I used to love it when I was young if my mother would sit down and color with me because, of course, I thought she did the best coloring in the world! Now you can do the best coloring in the world with the Stampin’ Blends Markers!
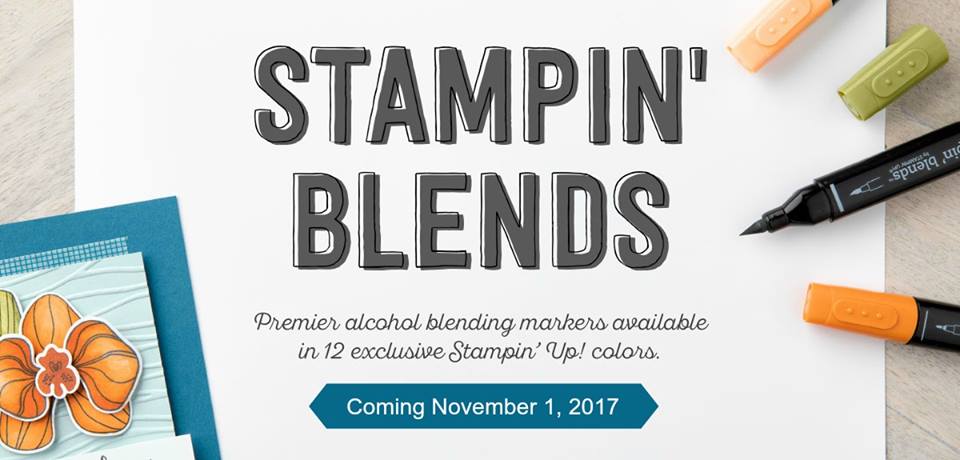
Stampin’ Blends, the new alcohol markers from Stampin’ Up! will be released for customers to purchase on Wednesday, November 1, 2017! They have been available for Demonstrators to order for a short time, but soon they will be available for customers, sooner than I expected!
Alcohol markers allow you to color and blend easily, making everyone look like an artist! These Stampin’ Blends come in 12 exclusive Stampin’ Up! colors. Each color comes in two shades. They are dual-tipped markers, one end a brush tip and one end a narrow tip. There is also a Color Lifter in case you want to remove some color to make something lighter. Two other markers that will be available are Bronze and Ivory.
While supplies last, there will be a limited-time stamp set called Color Me Happy plus a Color Me Happy Project Kit to make cards. These two items will get you started with the Stampin’ Blends!
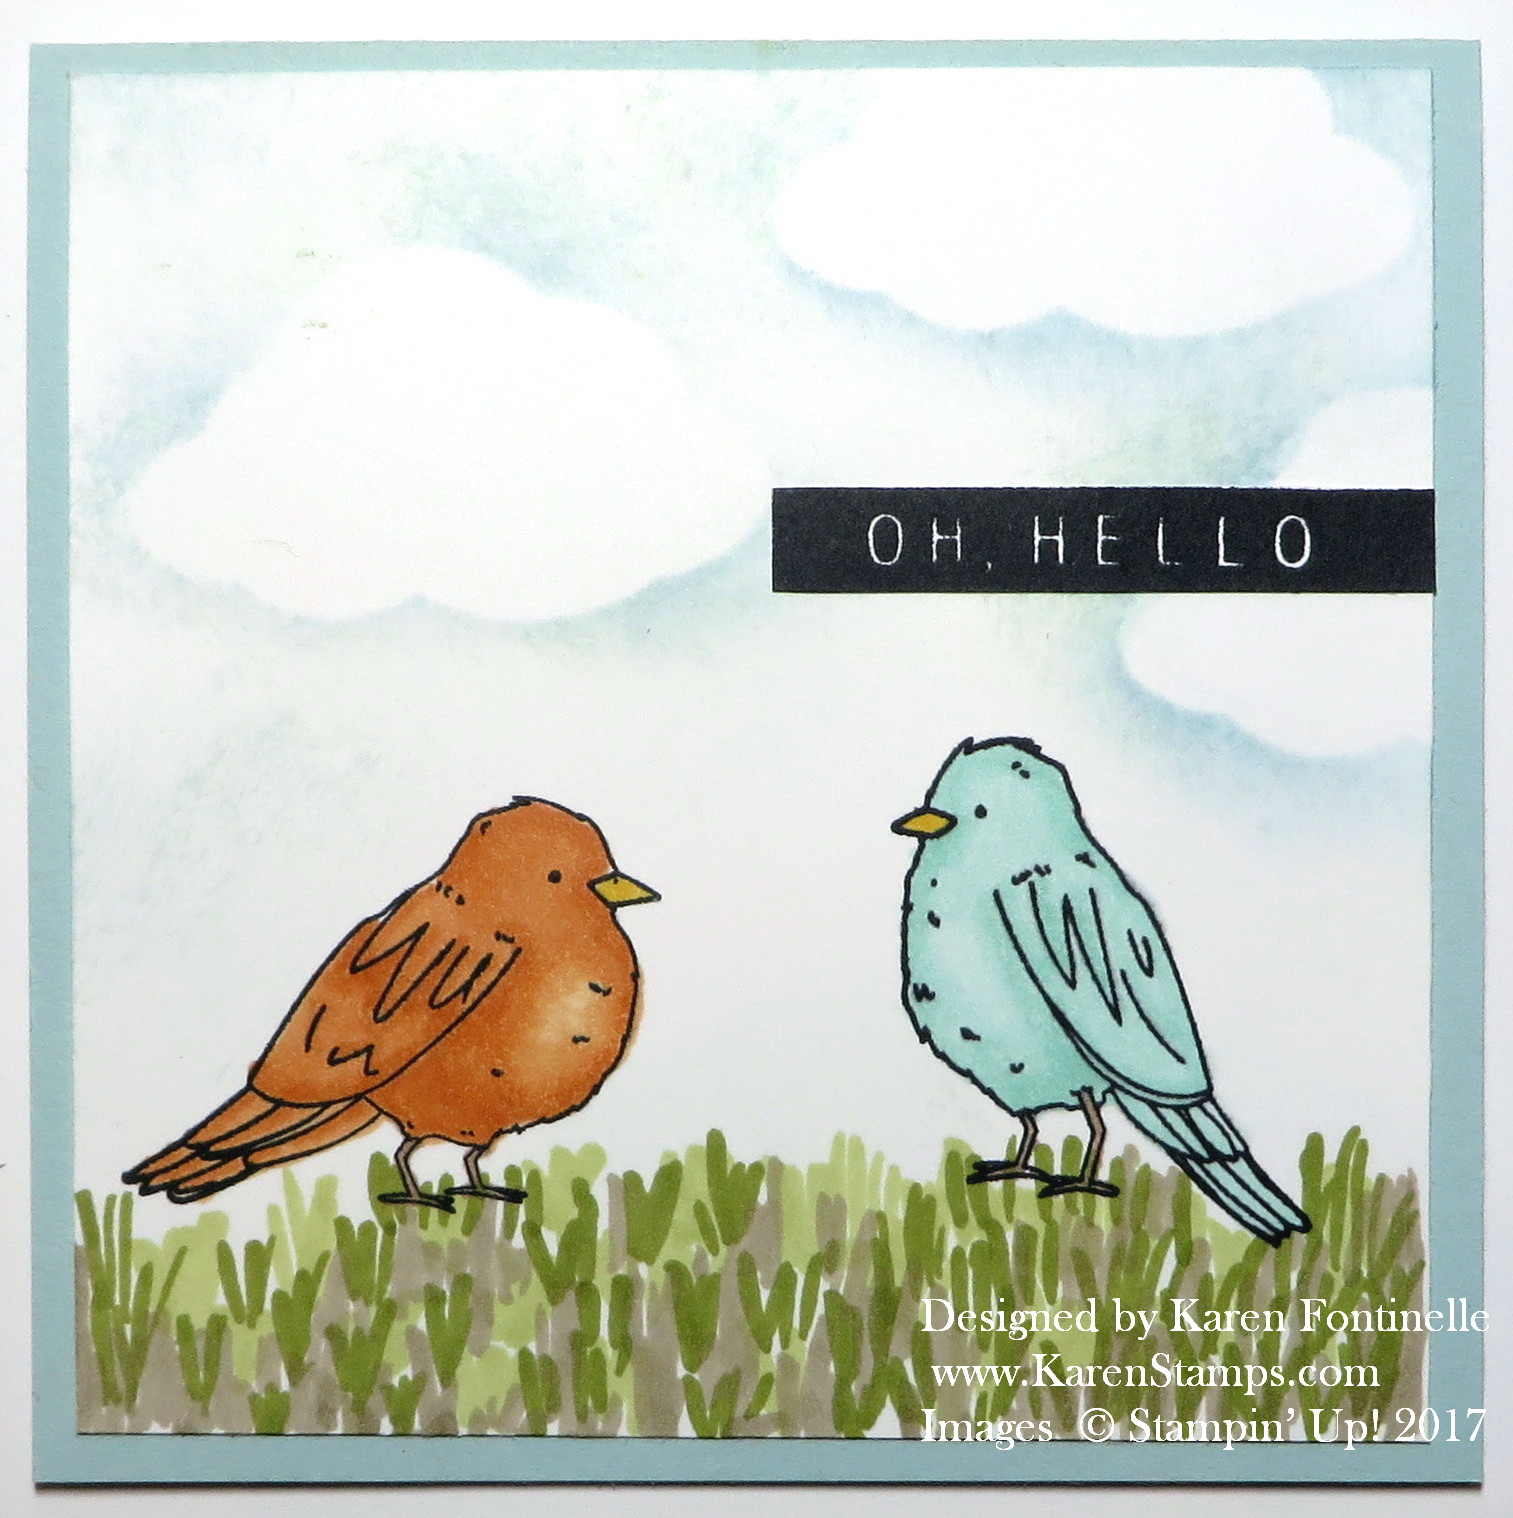
Here is a card I made by stamping the two birds in the Color Me Happy Stamp Set. It sort of copies one of the cards in the project kit, but without the extra embellishments.
This card is a 4 1/4″ square card with the fold at the top. The birds are stamped on a piece of Whisper White Cardstock. The Thick cardstock is recommended, as well as Memento Ink, which is what works well with alcohol markers. The birds are stamped and then colored with the Stampin’ Blends in Pool Party and Pumpkin Pie, plus Daffodil Delight for the little beaks and a touch of Crumb Cake for the legs. I decided to add some grass for the birds, so I just drew in the blades of grass willy-nilly with the Old Olive markers and kind of filled in with some light Crumb Cake. Next I sponged in the sky, with masked clouds, with Soft Sky Ink. The greeting is from the Color Me Happy Stamp Set and I stamped on a scrap, cut it out and adhered it to the front of the card. The card base is Soft Sky. That’s it!
While I haven’t done a tremendous amount of coloring yet, I have found the markers to be really easy to color with, very smooth, and very fun and relaxing! You can use just one shade for basic coloring. You can use both light and dark shades of one color and blend to soften the edge. Or you can use different colors together and blend and see how it looks! Just play!
The lids at each end are pretty tight to take off and put back on. Just make sure you hear it snap when you put the lid back on. That means it is sealed properly to keep the air out. The marker shape is square so no rolling off the table!
Stampin’ Up! has spent time testing these Stampin’ Blends for evaporation and life testing, and they feel confident with the results. There will be videos to help you learn to use these markers the best way.
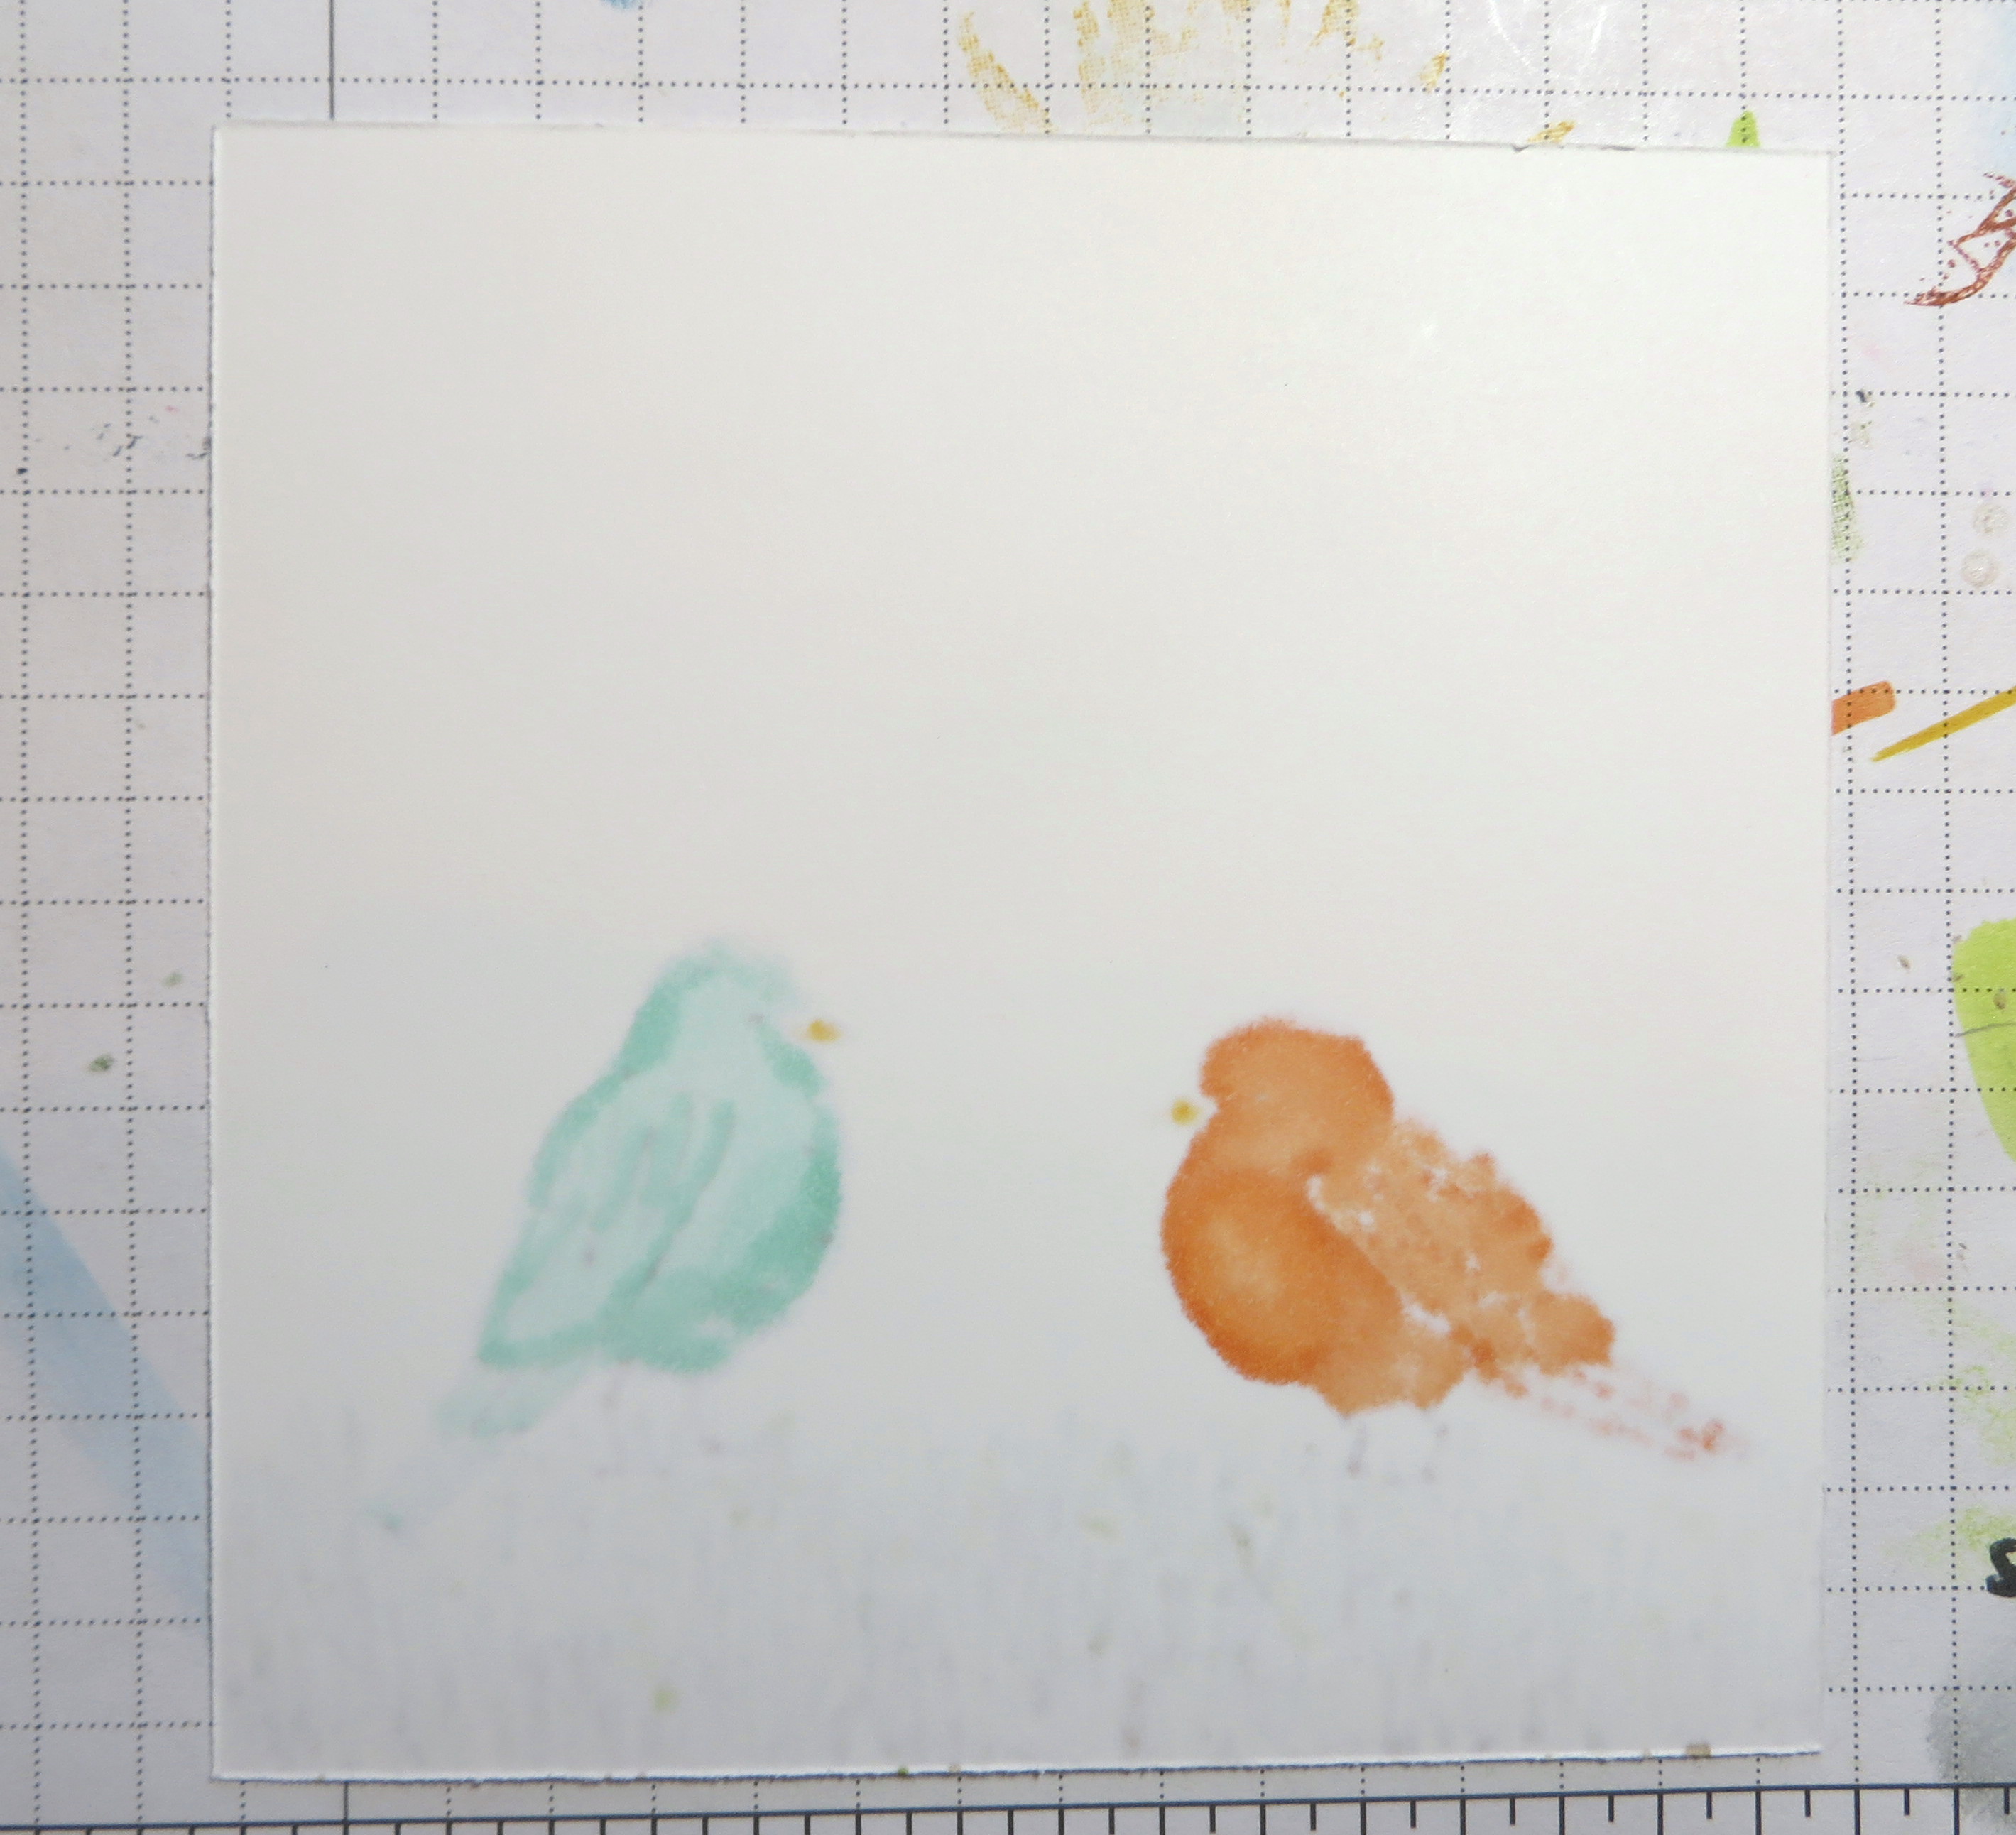
You will want to have a scrap piece or two of paper underneath when you color as the color does bleed through to the other side. Here is the back side of my birds which I colored on my Grid Paper. The markers haven’t bled through my Grid Paper, but if you want to be extra careful, just use a couple sheets of paper underneath.
It won’t be long and these Stampin’ Blends Markers will be available to purchase! Mark the date on your calendar! I’m sure you will hear even more about the markers as the time gets closer!