
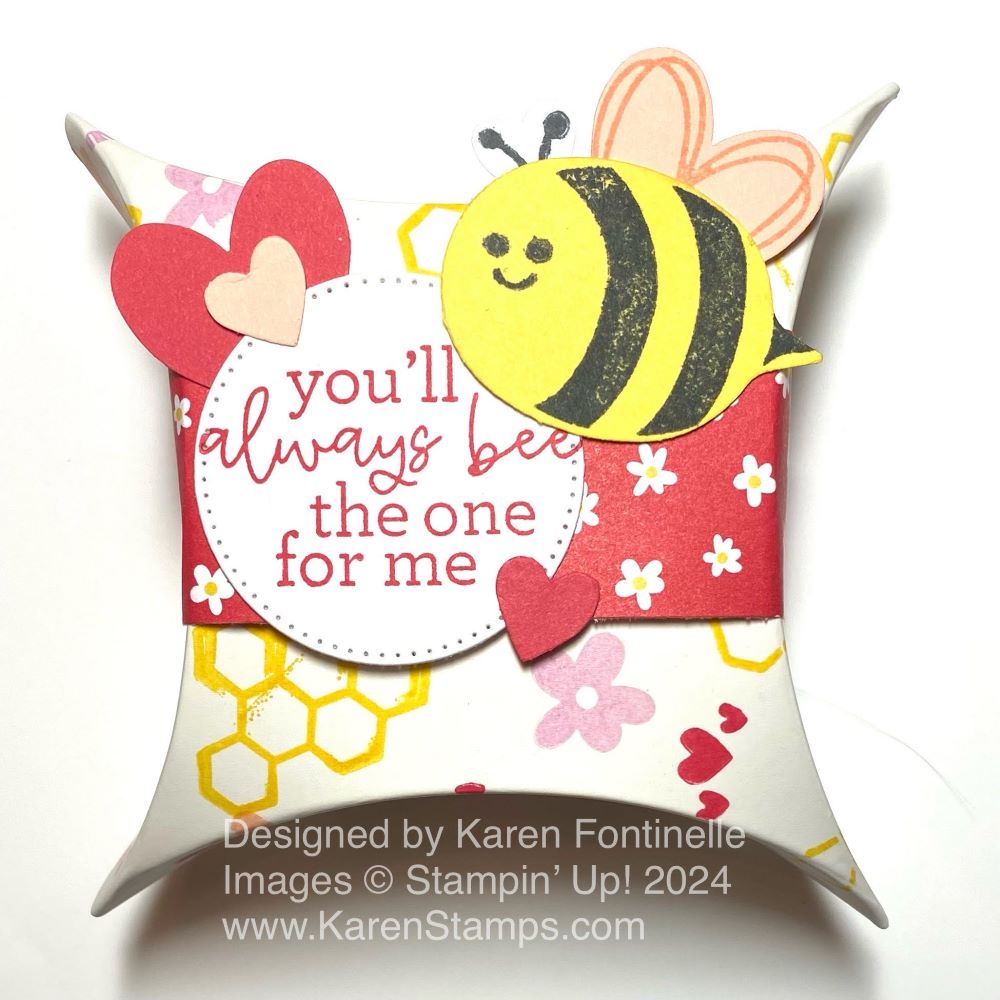
Wondering what to do with the Square Pillow Boxes in the Spring Mini Catalog? You can do many things with them, including decorating one for specific holidays such as this Bee Mine Square Pillow Box Valentine Treat. It is a little bit differently shaped box but holds a fair amount of candy or a small gift. These are easy to put together and already come with the adhesive on the sides. All you have to do is crease on all the score lines, and then in more of a squeezing kind of way, push it into the pillow shape, and then remove the adhesive covers making sure the sides are lined up properly.
Before assembling this box, you may want to color it with ink using Blending Brushes or stamp on it, as I did on this box. You do want to make sure the ink is dry. I found that mine dried very quickly, but immediately you don’t want to smear it. I think this is applicable if your ink pad is very juicy and the layer of ink is wetter and thicker.
I used the Bee My Valentine Stamp Set to stamp various images over the front and sides of the box. I didn’t do the back side of the pillow box but you could. Also, if you wrap around a belly band, it will cover some of the stamping. I stamped the honeycomb in Daffodil Delight, the hearts in Sweet Sorbet, and the flowers in Pool Party, Petal Pink, and Fresh Freesia. You can see in the photo below how I chose to stamp so as not to stamp on the sides that would be hidden on the inside of the box or the back of the box which I did not want to stamp.
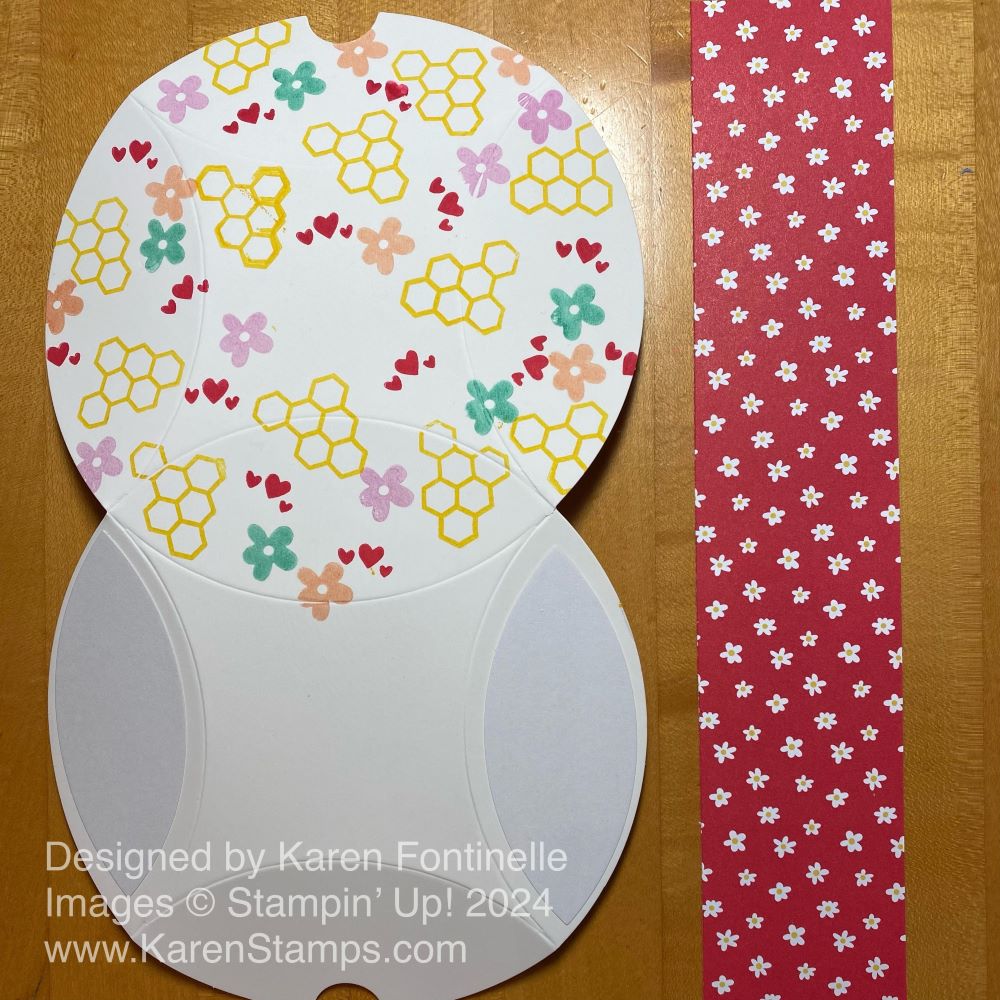
The strip of Bee Mine Designer Series Paper I chose for the belly band is 9 1/2″ long. Originally I cut the one in the photo at 2″ wide but later cut it narrower at 1 1/4″. You don’t even have to have a belly band to decorate the box.
When I watched a Facebook Live with Sara Douglass, CEO of Stampin’ Up! the other day when she made some Valentine pillow boxes, she placed her belly band around the box so that the opening was at the top of the box and not blocked by the belly band. This way the box can be opened without removing the belly band. However, you can run the belly band the other way if you feel you want the opening of the box to have that extra security to keep it closed.
For the belly band, I used this pattern with the tiny white flowers at 9 1/2″ x 1 1/4″. You can just cut the whole strip across the 12″ width of the designer paper and then shorten it after you see how much you want on your box. But 9 1/2″ seems to have plenty of overlap. Rather than scoring it ahead of time, just wrap it around the box and crease the band with your fingers at each edge. It won’t be a “perfect” fit since there are curves but it is very close.
To decorate my box and belly band, I stamped a greeting in the Bee My Valentine Stamp Set and die cut with a stitched circle in the Stylish Shapes Dies. I made the bee by using the Bee Builder Punch, punching out the bee body shape out of Daffodil Delight, and stamping the stripes and face with Memento ink. The wings were stamped on Petal Pink cardstock and with Petal Pink ink. The antennae are stamped in Memento black on Basic White. Then I used the Bee Builder Punch for the antennae (the heart shape), the wings, and some Sweet Sorbet and Petal Pink hearts.
There are lots of ways to decorate these boxes! Just play with them and see what you come up with. The boxes feel very sturdy. In my January stamping newsletter, I made a box that was embossed with the new Layered Florals 3D Embossing Folder first and then decorated with stamps and die cuts in the Painted Lavender Bundle in the Spring Mini.
Hopefully, you already own some of these Pillow Boxes so you can make some Valentine’s treat boxes, but you will have plenty of opportunities to use them in your papercrafting and gift-giving in the future if you order them now.