
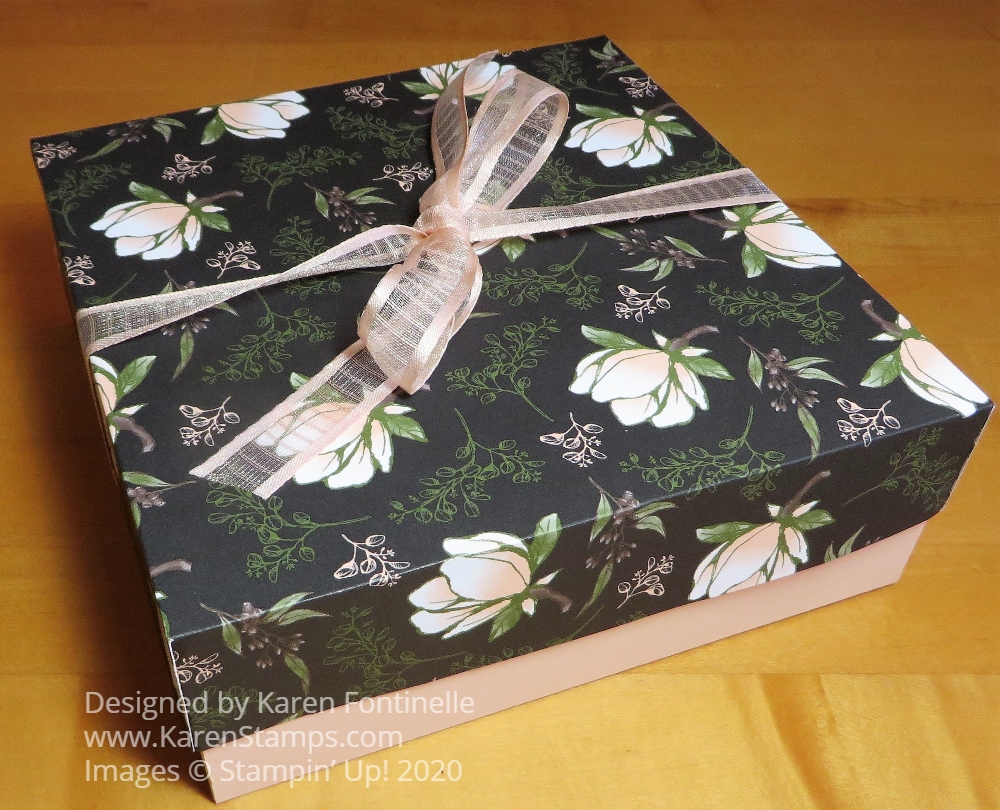
With Mother’s Day coming up on Sunday, birthdays, and maybe graduations, even if virtual these days, you need to learn How to Make a Magnolia Lane Gift Box. It is so simple, as you will see and will make your gift extra-special, not to mention saving you a trip to the store to find a gift bag or box at the last minute!
This particular box is 7″ square and you do need two 12″ x 12″ pieces of paper. The bottom of the box is made with Petal Pink Cardstock and the top with a piece of Magnolia Lane Designer Series Paper.
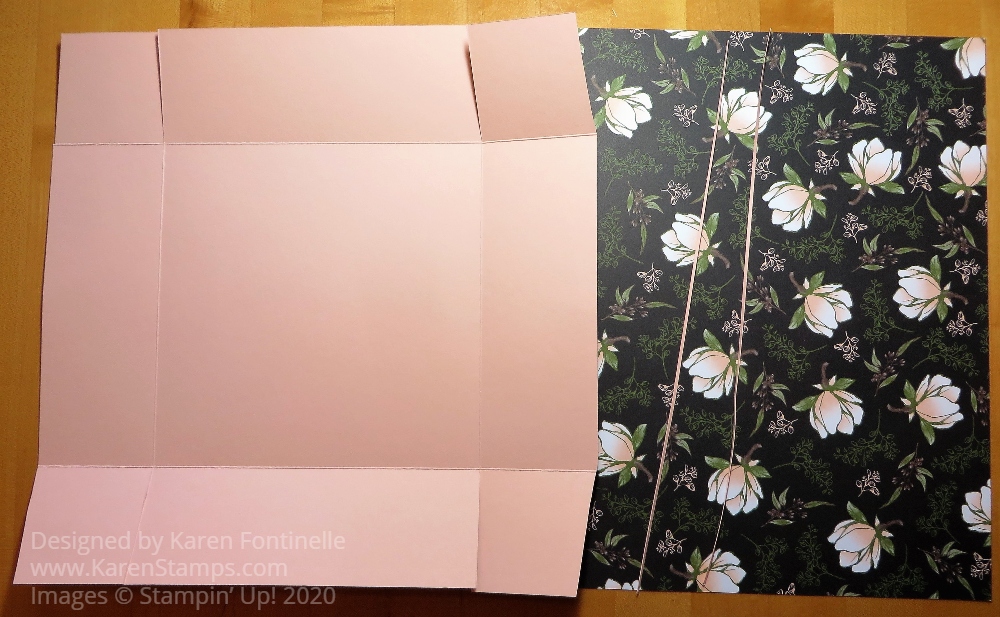
To begin making the bottom of the box, you will cut the tiniest sliver off the side of two sides that share a common corner. To determine a “sliver” you can just slide your paper the teeny tiniest bit past the cutting track. It might not be even 1 1/16″ wide but you could use that measurement if you want. This makes the bottom just the tiniest bit smaller so that the box lid will fit easily over it.
Next, score at 2 1/2″ on all four sides of the box. Crease well with a Bone Folder to make the folds crisp, like a box should be. Then cut the flaps on opposite sides of the paper on the score lines. If you want, cut a small wedge off all four corners just to make the box bottom a little neater when the sides all come together. In the photo below, you can see the slivers I cut off from the two sides of the paper, so you can see how narrow they are.
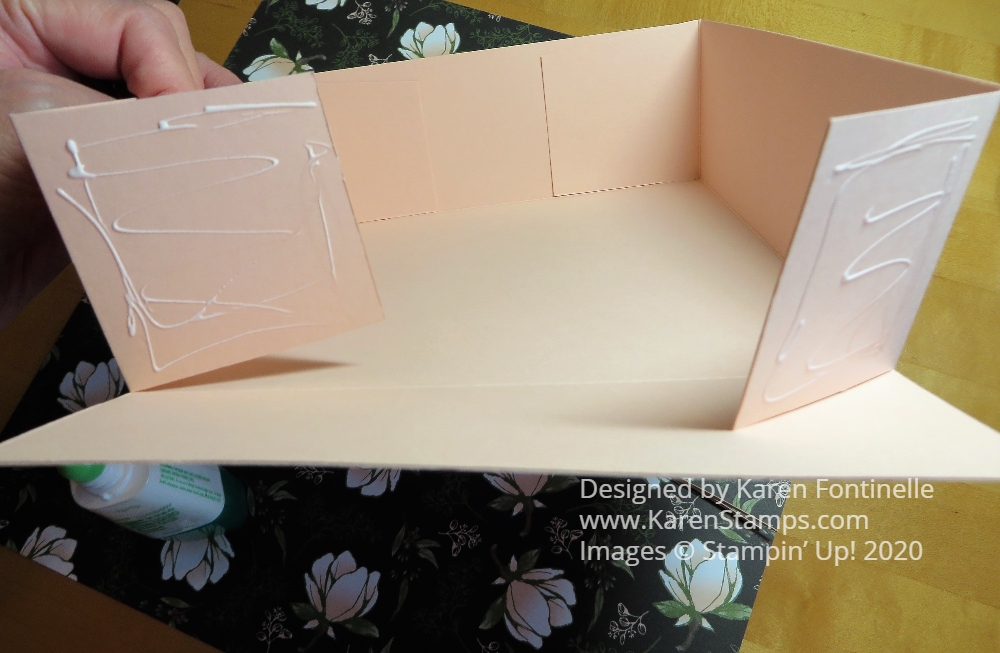
After creasing all the folds really well, assemble the box and use a strong glue to assemble. You could use Tear & Tape but I like to use Multipurpose Liquid Glue to give me that extra few seconds to make sure everything is lined up perfectly.
For the top of the box, I used designer paper but you could use cardstock too. The top piece is 10 1/2″ square. Make the top in the same way (except don’t cut off a sliver!). Score 1 3/4″ all around and cut the flaps in the same way. Assemble with glue and put the lid on the box!
Tie a pretty ribbon around the gift box like this Petal Pink 5/8″ Organdy Ribbon. Add a nice card or pretty gift tag and you’ve got something special!
Here is another gift box I made a few years ago after following a video by Donna Griffith at the Stampin’ Up! Home Office. It’s what I followed to make this gift box and she also explains how to make different sizes.
Now might be a good time to use up some designer paper that will be retiring that you have left and turn it into something useful by making boxes so you will be ready for all the new products coming out in the next Stampin’ Up! Catalog on June 3rd! And your gift wrap stash will be ready for any gifts with a few boxes on hand!