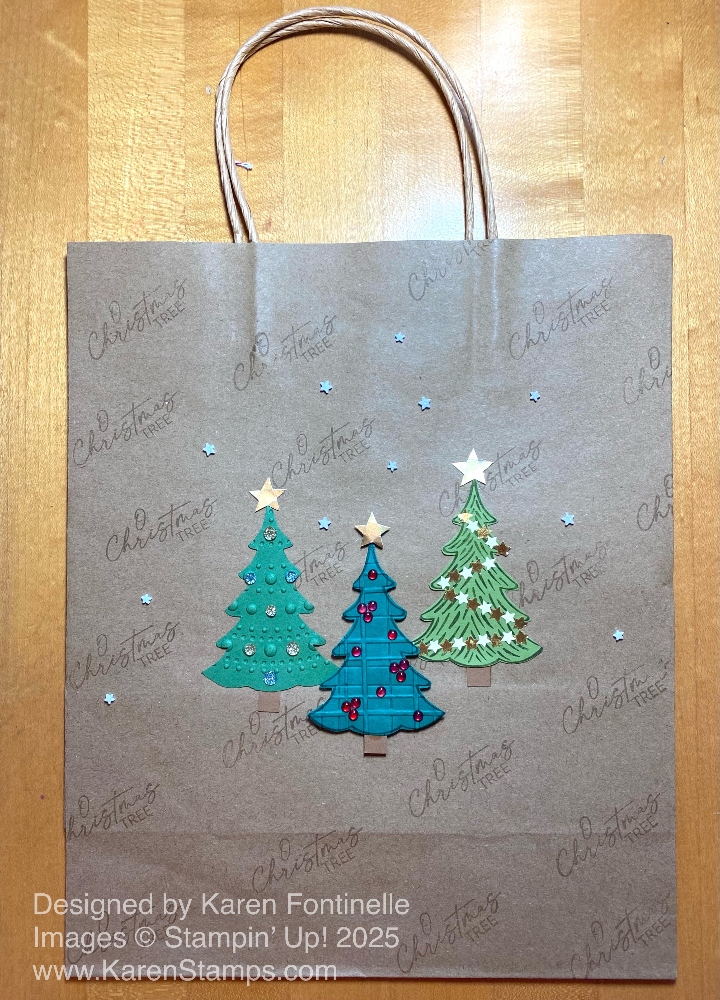
I guess it’s time to be wrapping holiday gifts, if you’ve done your shopping, that is! One of my favorite things to do is create decorative gift bags for any occasion, such as this Decorative Trees Gift Bag, perfect for a Christmas gift.
You may have shopping bags like this kraft one from shopping at certain stores, usually nice gift shops. Even if they have the store name on the front, you can usually cover that up with your decorating. You can also buy a pack of gift bags in various sizes like this one, or sometimes in white or colors, at a craft store. It’s just like making a card except on a larger canvas! Creativity knows no ends!
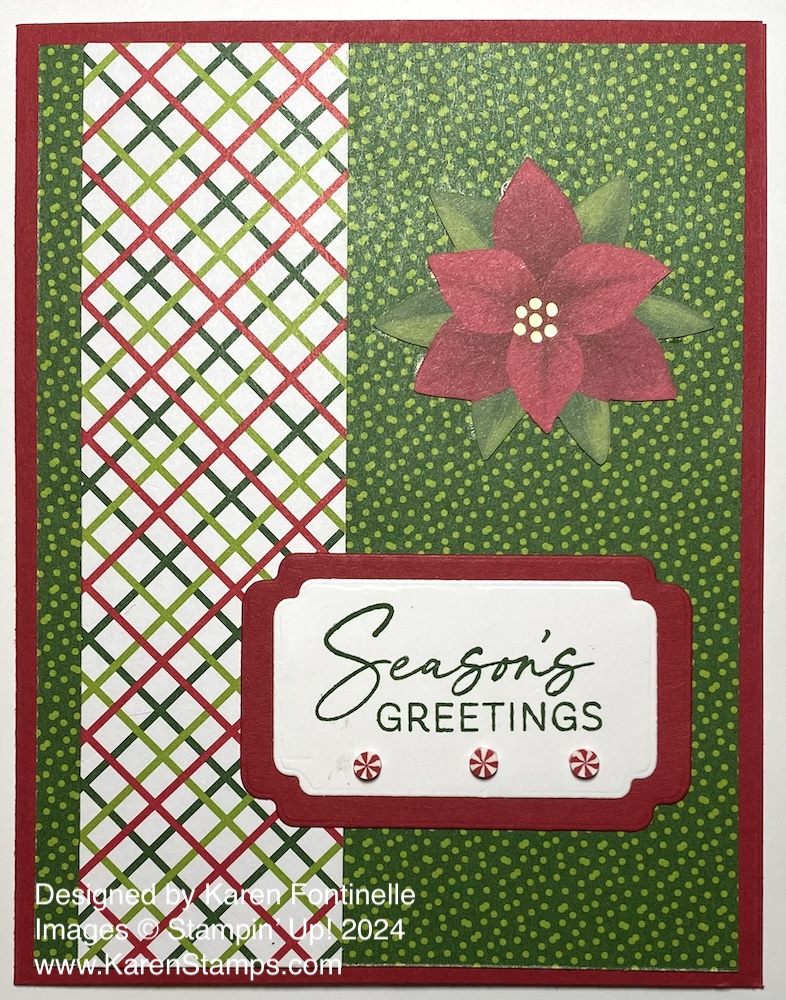
This gift bag is actually the third version of my original idea. Actually, it’s not even close to my first idea except for involving Christmas trees, but creativity often evolves as you work on your project. I saw the Decorative Trees Stamp Set on my shelf and it is still current, on the Last Chance List discounted 50%! When I looked it up in the Stampin’ Up! Online Store, I saw a cute idea for a card which I just translated to a bag. Perhaps you have this stamp set from last year or whenever it came out.
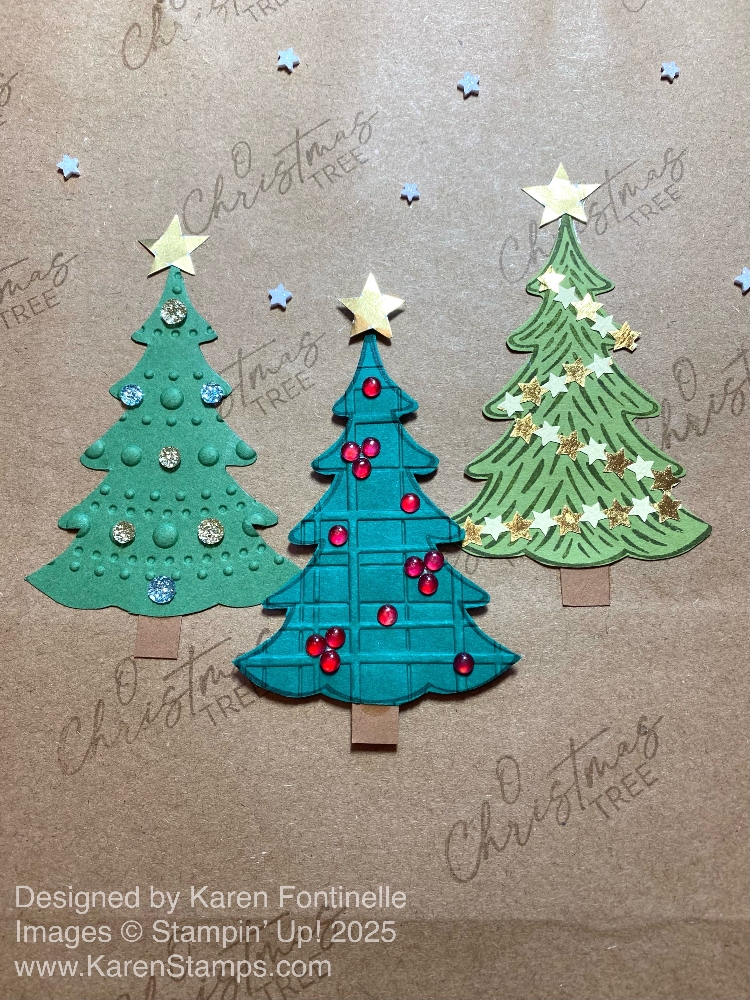
For the background on this bag, I stamped the greeting “O Christmas Tree” in the stamp set diagonally across the bag in Crumb Cake ink. Then I stamped three different colors of trees, just the outline, in Garden Green, Shaded Spruce, and Old Olive. I didn’t want to look for the dies, but there are some although not available at Stampin’ Up!, so I just cut them out by hand. The first two are embossed and the third on has stamping on the inside. The first one is embossed with the Dotted CIrcles Embossing Folder. The second one is embossed with the Forever Plaid folder. I added a little Pecan Pie trunk to each tree. The center tree is popped up with Stampin’ Dimensionals.
If you don’t have tree stamps or dies, just cut some out by hand! We’ve all drawn Christmas trees by hand at least when we were kids, so just channel your inner child! If nothing else, just draw a triangle!
Then the fun began! Decorative the trees and bag with embellishments! Use whatever you have! The first tree has current Traditional Sparkling Sequins in gold and Pool Party (which almost looks like silver). The middle tree has retired Cherry Cobbler and Clear Berries gems (some name like that). I colored the clear ones with a Dark Cherry Cobbler Stampin’ Blend marker to look like berries. Some are in sets of three, some single. The third tree has adhesive gold stars in a strand that a special friend brought me all the way from Japan! They fit perfectly on this tree! And because I came across them, I used the small white stars in the Shimmer Star Foam Stickers to look like little stars or even represent little snowflakes.
Even though my first idea was to use a white paint pen and form a tree shape by drawing small snowflakes on the kraft bag, I thought I should make something that other stampers could copy. But if you wanted that look, you could use white craft ink and a snowflake stamp. There’s always a work-around for ideas!
You probably have a bag of bags in your house somewhere so check it out and personalize a bag or even gift wrapping. If you run out of fancy wrapping paper, use the kraft-colored grocery paper bags or plain wrapping paper. You can always decorate these things with your stamping and scrapbooking supplies!