
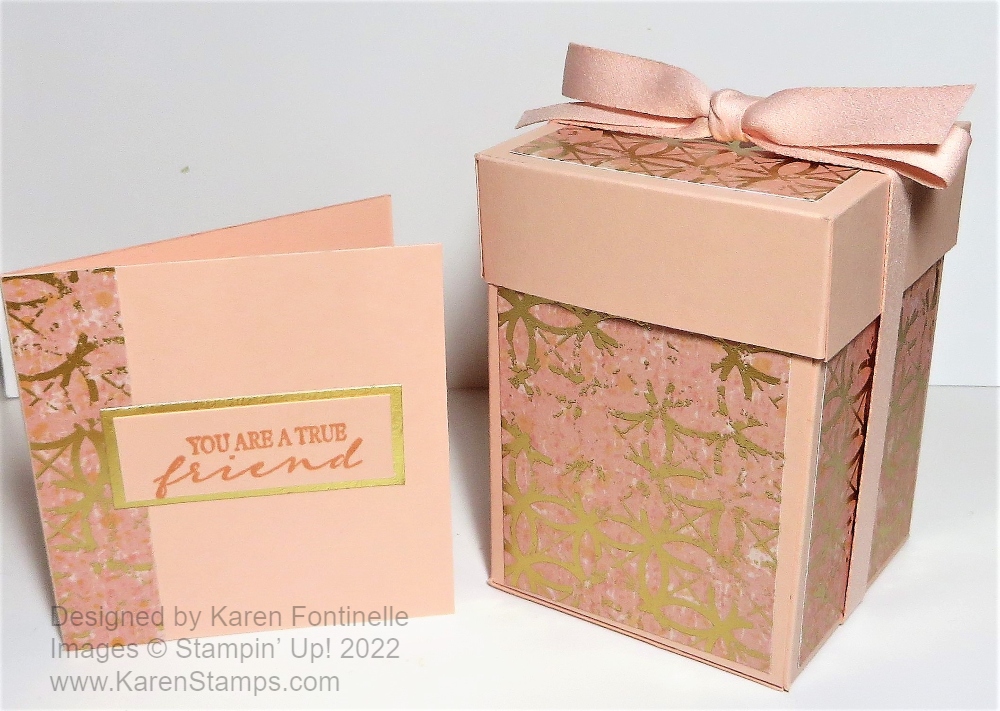
Make this elegant-looking gift box and matching card with an easy pattern and pretty designer paper! The gift box is the basic 2-4-6-8 box that has been around a long time and is a standard kind of box for paper crafters to make! Sometimes we just pinch in the sides and close up the top with ribbon or some other closure or sometimes we leave it open like a little gift bag. But for this gift box, I made an easy lid!
My real point in this project was to play with the new Texture Chic 12″ x 12″ Specialty Designer Series Paper. It is in the new Stampin’ Up! Annual Catalog and honestly, you might overlook it or not be impressed with it. But in person, the paper is GORGEOUS! The one side has textured gold foil patterns that look aged. It’s very different and very pretty when you see it! I even couldn’t resist making a little 3″ x 3″ card with just a scrap of the paper I used on the box!
The 2-4-6-8 gift box is the same as we have made many times! I used Petal Pink cardstock for the basic box and added the panels of the Texture Chic designer paper.
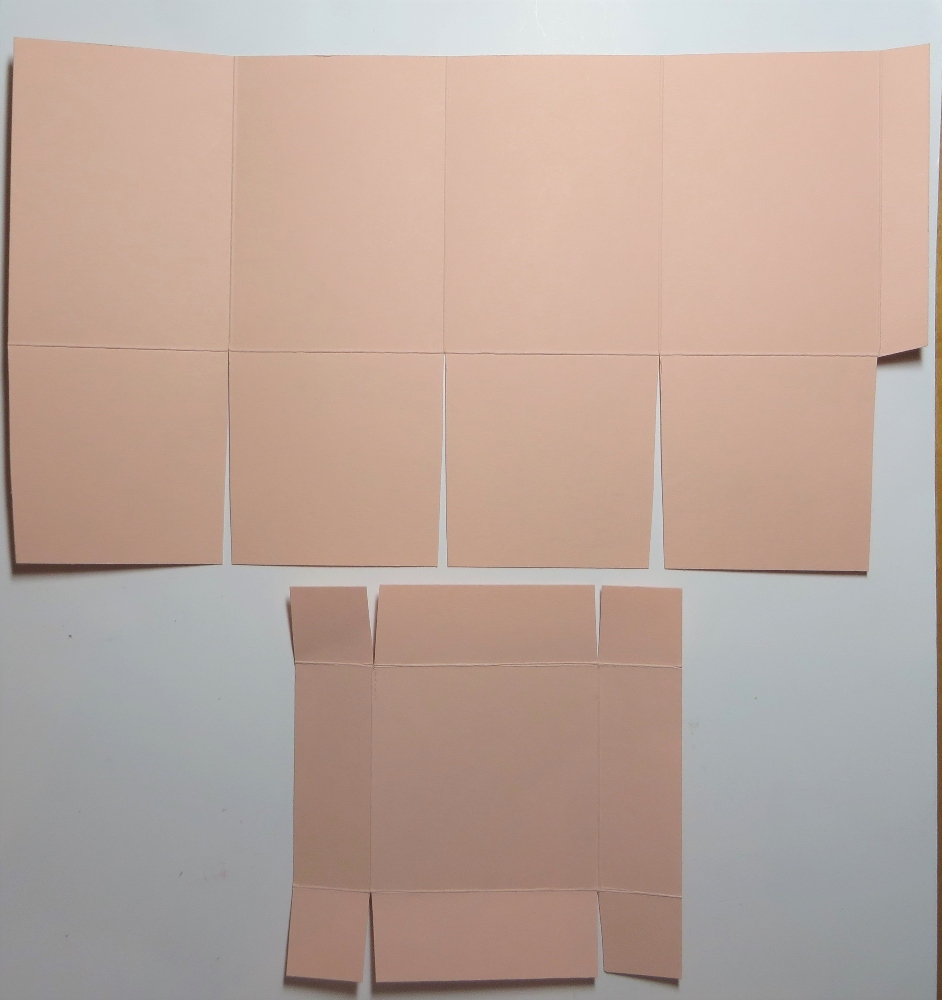
Cut a piece of cardstock 10 1/2″ x 6″. Scoring across the paper in landscape position, score at 2 1/2″, 5″, 7 1/2″, and 10″. Turn the paper to portrait position (narrow edge, up and down), score at 2 1/2″ to form the bottom flaps of the box.
Cut up on all those score lines in landscape position from the bottom up to the 2 1/2″ score line going across. This makes the bottom flaps for the box. Cut off that little 1/2″ piece at the end. You can cut straight up on the scored lines or cut them slightly angled just to have a little less bulk when you fold everything together.
For the box lid (in the photo below under the scored box piece), cut a piece of cardstock 4 1/2″ x 4 1/2″. If you score at 1″ on all sides, you may find that the lid will be too tight to fit on the box without squishing the box inward. So I scored just a “smidge” inside the 1″ mark. So actually I scored at 15/16″ instead of exactly 1″. That gave me the tiniest bit of extra space for the lid to fit properly. Cut up to the score line as you see in the diagram as you did for the box.
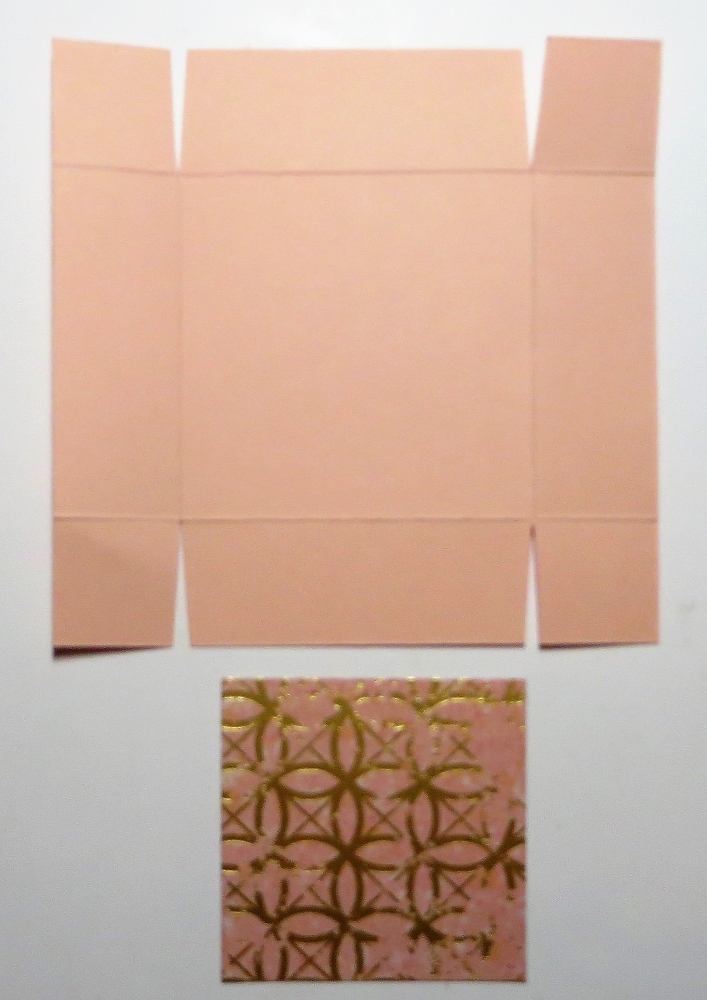
Now that you have the box and the lid cut, scored and ready to be assembled, decide how you want to decorate the box and lid. If you want to stamp it, do that before you assemble it. For my box, I cut panels of the Texture Chic Designer Series Paper at 3 1/4″ x 2 1/4″. You could make them slightly wider if you wanted smaller margins on the sides. For the lid, I cut a 2 1/4″ square of the designer paper. If you wanted to, you could cut smaller pieces of designer paper for the four sides of the lids. I left mine plain. You can adhere these papers after assembling the box and lid, but I think it is actually easier to do it while the box and lid are flat, so do it before you assemble anything.

To assemble the box and lid you can use your favorite adhesive, like Multipurpose Liquid Glue or Tear & Tape. Stampin’ Seal or Stampin’ Seal+ is good too. I like the liquid glue because I have that extra second to move the pieces to make sure everything is aligned properly. For the box, just leave it flat on the table, apply adhesive to the narrowest side flap, then fold the other side of the box over to overlap. That is easier than holding it in the air and trying to line up and press the sides together! Figure out which is the back side of the box and fold and adhere the bottom flaps accordingly. It might not matter much, but it’s best to have the box seam toward the back so it is not noticeable. Assemble the lid as well, keeping it all as straight as possible.
I had planned to tie the ribbon around the middle of the box, then thought about tying it around the sides of the lid. Then I got the idea to tie it vertically around the box and lid. This holds the lid on once you put a gift or treat inside. I used the brand new Petal Pink 3/8″ Soft Polyester Ribbon. Wow! I don’t know how to describe this ribbon! It really is soft yet it ties very nicely because it’s not flimsy. At first I thought it felt like a very soft, fine suede, but it also feels so soft it’s like satin. Order some and you can check it out yourself! It’s very nice!
After I had the box all made, I thought a small gift card would be nice to go along with the gift box! I cut a 3″ x 6″ piece of Petal Pink cardstock and scored and folded in half. I had a small scrap of the designer paper, so I just adhered that to the side of the 3″ x 3″ card and trimmed off the excess. I stamped a greeting from the True Beauty Stamp Set, simply because it was on my table and handy! I stamped it in Petal Pink ink on Petal Pink cardstock simply because I didn’t think introducing Basic White into the whole project would look very good. I added a layer of Gold Foil under the greeting.
Check out the beautiful Texture Chic Specialty Designer Series Paper in the Stampin’ Up! Annual Catalog so you can make a 2-4-6-8 gift box like this one!