Category Archives: Scrapbooking

Stampin’ Up! Exclusive Stamp Set for $5 with Purchase!

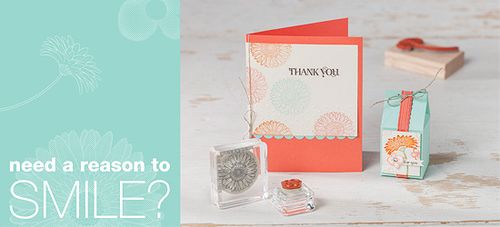
  Reason to Smile Image

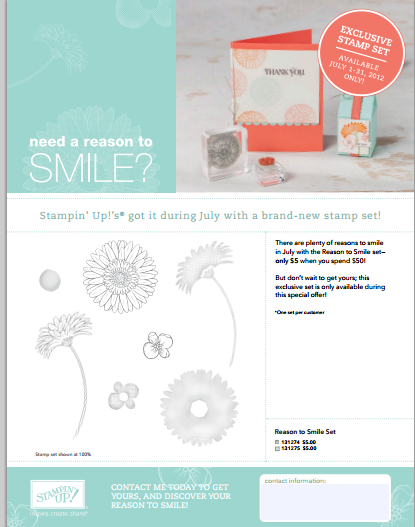
Would you like to purchase an exclusive Stampin' Up! stamp set for only $5?! You can get this cute stamp set with a $50 purchase! After you order $50 in Stampin' Up! products this month of July, you can add the Reason to Smile stamp set in either wood-mount or clear-mount. You will NOT be prompted to enter it so make a sticky-note right now by your computer so you will remember! (at least that is what I have to do!)

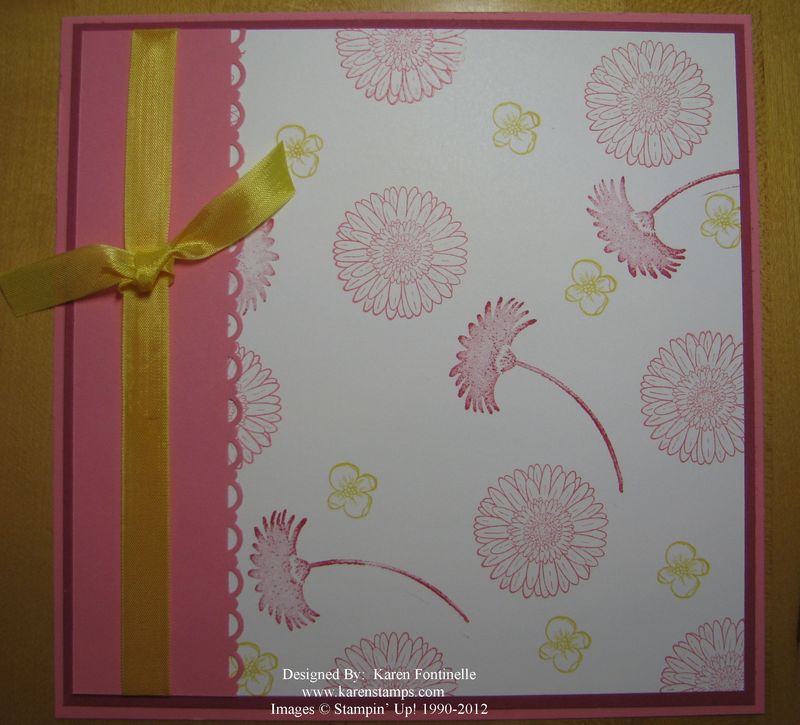
This stamp set will be great for either outline stamping to color in (or not!) or as two-step stamping where you stamp the color and then overstamp with the outline.

  • 131274 $5.00 (wood-mount)
  • 131275 $5.00 (clear-mount)
  Reason to Smile Promo Flyer
Click Image to Enlarge Flyer

Customer Order Details:

  • Spend $50 on any current Stampin' Up! products to get the exclusive Reason to Smile Set for just $5.
  • There is a limit of one (1) set per customer.
  • You will not be automatically prompted to enter the $5 Item Number for a qualifying purchase. 
  • The Reason to Smile Set is exclusive to this promotion and will not be available after July 31, 2012.

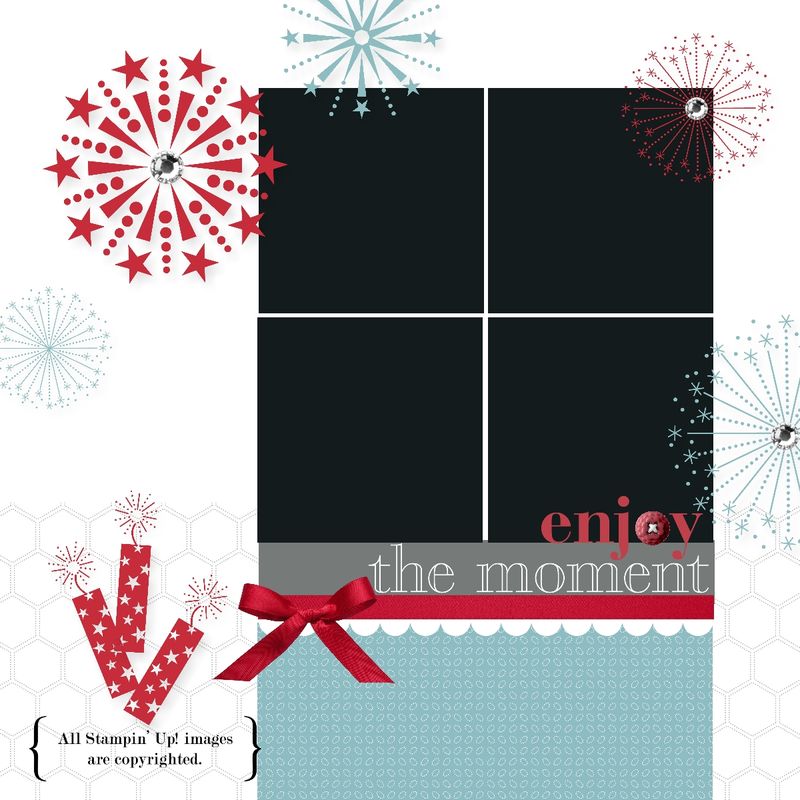
Make a Digital Scrapbook Page for July 4th in My Digital Studio

4th July-001

Plan ahead! Make a digital scrapbook page for the 4th of July using My Digital Studio!  Then just insert your photos of your family, neighborhood gathering or fireworks later and you are all set! Add some journaling in the lower area in a text box.

In My Digital Studio you can start with a template….almost any one will do…and then change whatever you want on it.  Even a pre-designed template is completely changeable to your design and needs.  But it does give you a starting point for your page.

Give My Digital Studio Express a try with the 30-Day Free Trial!  It is no risk and no obligation!  Just order it HERE in my Online Store…you'll see the box to click….download it to your computer…and you are ready to play! You can order more downloads as you need them if you want. Print any of your projects.  And if you purchase My Digital Studio now, when Version 2 comes out, you will get to upgrade for free!!

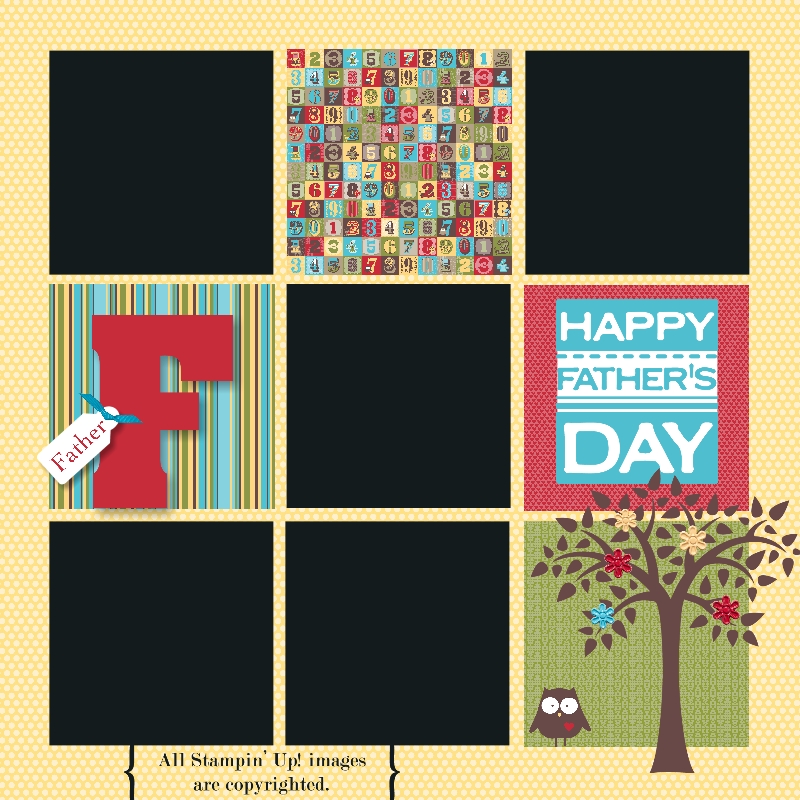
Father’s Day Scrapbook Page in My Digital Studio

Father's Day Page 2012-001

How about using My Digital Studio to make a Father's Day scrapbook page for photos of Dad and the children?  You can put it in a scrapbook (if you print it out) OR you can print it and frame it!  You most likely can find any size frame these days, particularly one made for scrapbook pages.  Add the photos where you see the black boxes. Or if you prefer, just use this design for a starting point and make it the traditional way with paper, ink and stamps!  Add your embellishments and you have a great Father's Day gift.  Personalize however you like!

For more information on My Digital Studio, click HERE.

It's very easy to either completely design your own page…or do like I did and start with a template in My Digital Studio and change it up how you like it!

New Stampin’ Up! 2012-2013 Catalog Goes Live Today…and New Ink Pads!!

Today is the day we have all been waiting for!  The new Stampin' Up! 2012-2013 Catalog will go live today at Noon Mountain Time (Stampin' Up! Time).  There will be no ordering from midnight MT until noon MT.


SU Catalog 2012-13

Click image to go to Stampin' Up! Catalogs page


New Celebrando Creatividad 2012-13

SU Celebrando Creatividad 2012-13

Click image to go to Stampin' Up! Catalogs page


So while you're waiting, and while I'm driving back to Houston after helping my son move out of his apartment for three days, please enjoy this video from Stampin' Up! about the new firm foam ink pads by Shannon West, one of our many favorite Stampin' Up! employees!


Graduation Photography Tips From a Mom

When you have a child graduating as we did this past weekend, it will be a momentous occasion, and if you are the family photographer you will undoubtedly be taking photos to document every second. Perhaps you will want to make a traditional scrapbook for the graduate or even a digital album or swatchbook with My Digital Studio for a quick and easy way to save and share your memories. Check out my graduation photography tips below.

IMG_1897

Here are my photography tips for graduation to ensure you HAVE those photos!

  • Think ahead about taking pictures at graduation, preferably at least a day ahead. Four or five years of college tend to sneak up on you and even with a year's notice you may find yourself unprepared for picture-taking at graduation.
  • Search your battery stash for a package of extra AA batteries, making sure you don't grab AAA batteries.
  • If there is no new package of AA batteries in your battery stash, stop all tasks and go to the store immediately to purchase at least one if not two (and maybe three) packages of batteries. It's really more important than having laundry done or the right pair of shoes packed.
  • Have an extra package of new batteries for your camera easily accessible in your purse before the big event.
  • If no new package of batteries is available in your stash and you don't really stop to think through how important it is to go out and buy new batteries right now, then grab a ziploc bag of loose batteries which perhaps are new ones taken along, but not used, on vacation or something recently. Surely they are brand new and will work.
  • If you suspect that your camera batteries may be close to wearing out during the graduation event, change the batteries in your camera during a boring speech while seated. Do not wait until your camera flashes "Change Your Batteries" during the singing of the school song and moments before the fireworks display to conclude the fabulous graduation ceremony.
  • If you are forced to change batteries in your camera, in the dark, while standing during the grand finale of the whole graduation ceremony, quickly take notice of which ends of the batteries are up and which are down before taking out the old batteries, then quickly insert the new batteries from the ziploc bag trying not to mix up the two groups of batteries.
  • If it turns out these spare batteries were indeed brand new, hooray for you! If not, just the act of changing the batteries will probably make your camera work for a few shots.
  • If after a few shots, these replacement batteries do not work because they weren't actually new batteries after all, quickly remove at least two and rub each end vigorously on your clothes and be assured that you will probably be able to get a few more shots out of this technique.
  • Always keep an extra package of batteries for your camera on hand because you never know when you might have a child graduate from college.  
  • If you are over the age of 30, (and you probably are), during the graduation speeches learn how to find and use the camera function on your cell phone, just in case. Did you know you can take video?? Learn how to slide the thing back for still shots so not everything is video.
  • Hope that someone with a better lens on their camera got a clear shot of your child receiving their diploma on stage because even if every other photo you took is perfect, that one will be blurry and unrecognizable.

IMG_1905

Steven graduation

A Box From Stampin’ Up!


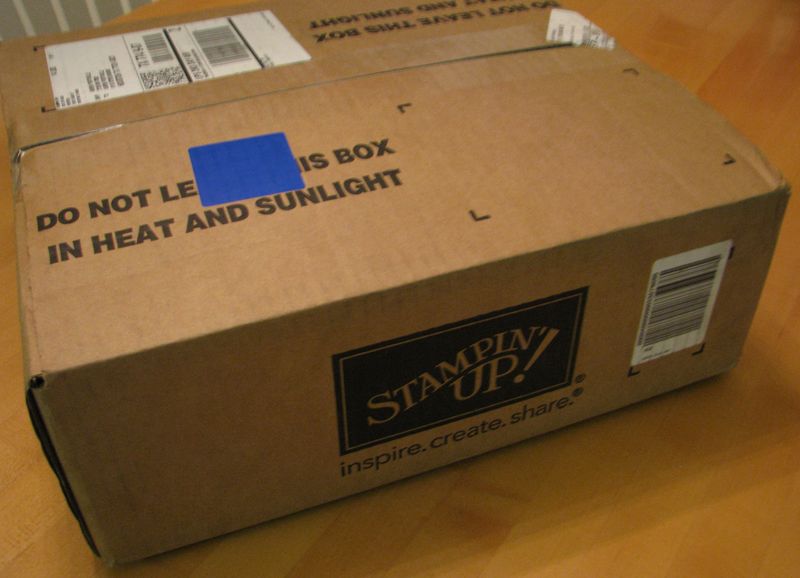
Stampin' Up! Box

I was so excited to get this box from Stampin' Up! Is there really very much that is as exciting as getting a box from Stampin' Up! delivered by UPS??! Especially when it is new catalog season??  I can't really tell you yet what was in my box except to say there was a new Stampin' Up! catalog, a new Celebrando Creatividad Catalog, and a bunch of new paper, ink pads, stamp sets and embellishments!  What fun!!

If you were a Stampin' Up! demonstrator, you might be getting a box like this delivered! There's still time to sign up to be a Stampin' Up! demonstrator, receive your new $99 Starter Kit made "Your Way", AND place a preorder if you wanted to of a few new products coming in the new catalog. Or you could sign up to be a Stampin' Up! demonstrator now and be all settled in and ready to pass out brand-new Stampin' Up! catalogs at your first Stampin' Up! party! You could start up your new business just that easy!

Where else can you start an exciting business of your own for only $99? With the new Stampin' Up! Starter Kit you may choose up to $125 worth of products for only $99, choosing either traditional stamping and scrapbooking products or digital papercrafting.  You will also receive a business supply pack valued at $65 to get your business started off right!

Just click HERE to get more information and then click HERE to sign up online in minutes!

Occasions Mini Catalog Nice Surprise!

 Stampin' Up! announced that because of the short time period between the end of the Occasions Mini Catalog and the new catalog, they would just make the carryover stamp sets available NOW!

So you can purchase any of these stamp sets without waiting!


 Stamp Set Name

 Item Number

 Wood-Mount

 Clear-Mount

 Baby Prints    

     125470    

 125472

 Love & Laughter

 125475

 125477

 Bordering on Romance

 125480

 125482

 Apothecary Art

 125525

 125527

 Mixed Bunch

 125535

 125537

 Tea Shoppe

 125545

 125547

 Mouthwatering

 125675

 125677

 Loving Thoughts    

 125843

 125845

 Salon de thé

 125934

 125936

 Etiquetas florales

 –

         125941        

 Art floral

 125964

 125966

To order any of these stamp sets, just go to my Online Store.  If you see my name in the upper right hand corner at my store, then you are in the right place!  Be sure to check the retired stamps and accessories and also the Clearance Rack (if you are ordering online).

How to Be Sure You Have Enough Stampin’ Up! Papers and Accessories

I came across a funny little write-up about creating a stash of fabric, but I have modified it to suit our stamping habit!  I think it is REALLY good advice!!! This will come in handy in a few days when the Stampin' Up! retiring accessories list is released on April 25th! Print it out now so you will know the right way to order!

  1. Buy designer papers that you like.
  2. Buy enough to do anything you might potentially think you want to do with it.
  3. Buy a little more, because you know by the time you use it what you have won't be enough and you will need more.
  4. Choose designs you know you family will simply love.
  5. Always buy extra.
  6. Did I mention you should buy more than you think you will need?
  7. Look over your paper often and think about what colors/patterns/designs you need to compliment and contrast what you already have.
  8. Buy the contrasting paper.
  9. Buy the coordinating paper.
  10. Buy extra of all of them because when you sit down to make your project, you still won't have enough.
  11. Always buy some accessories (ribbon, brads, glitter, markers) to coordinate with that paper.
  12. Add a few more accessories just to make sure you have enough for your projects.
  13. If you see a paper you think you might like in the future, buy it now before it disappears forever.
  14. Buy a little extra just in case to be sure you have enough for what you haven't decided to make yet.
  15. Repeat above steps until there is no room left in the house for the family….but know your children will move out someday and you can turn their bedrooms into craft rooms.
  16. If your children are already grown, tell them whatever is left of your stash when you grow old to please bring to the nursing home when they visit so you can touch it.

Hope that helps in your purchasing decisions!!

Shop Stampin' Up! Online HERE at my store.

If you would like to share this with your crafting friends, just click one of the share buttons below the post….or send them a link to this post!


Stampin’ Up! Sale-A-Bration Everyday Enchantment Paper

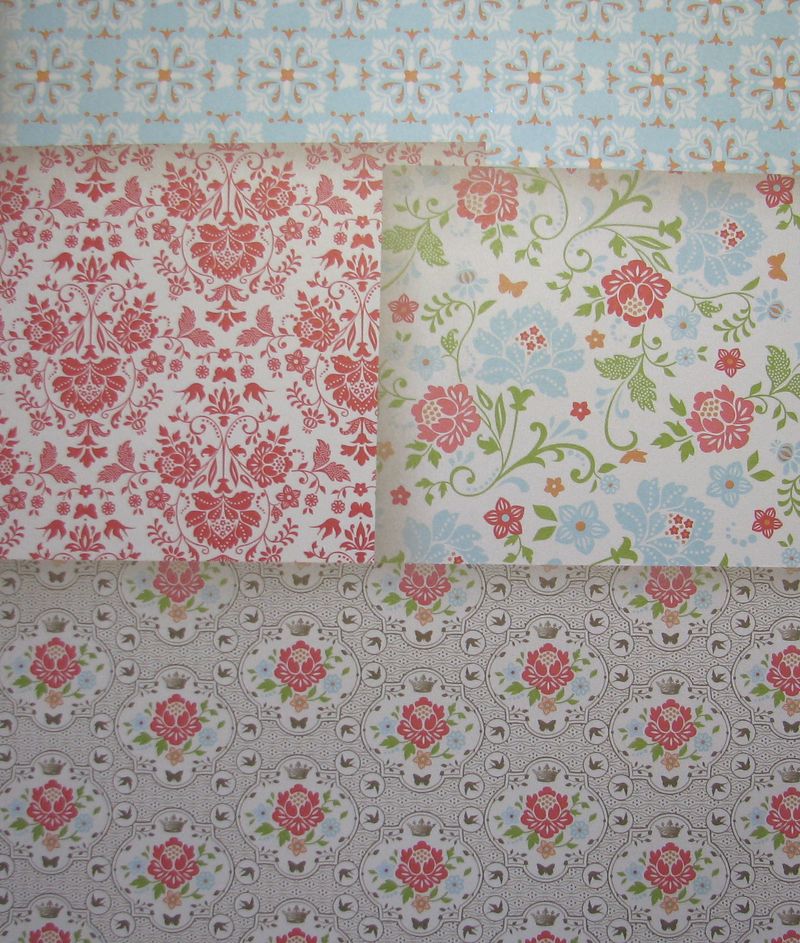
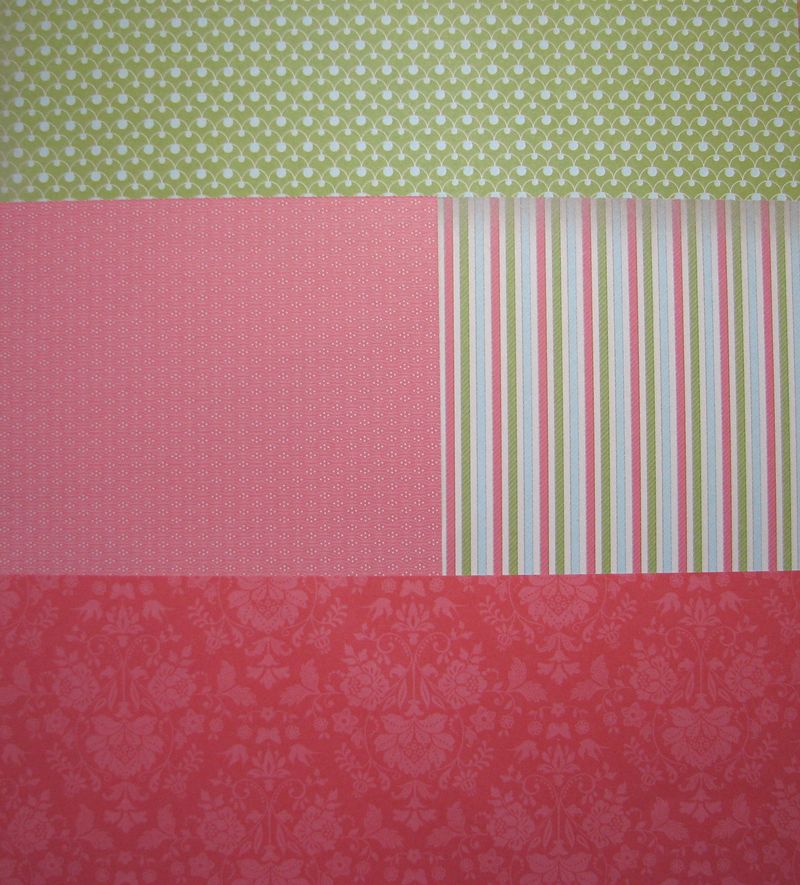
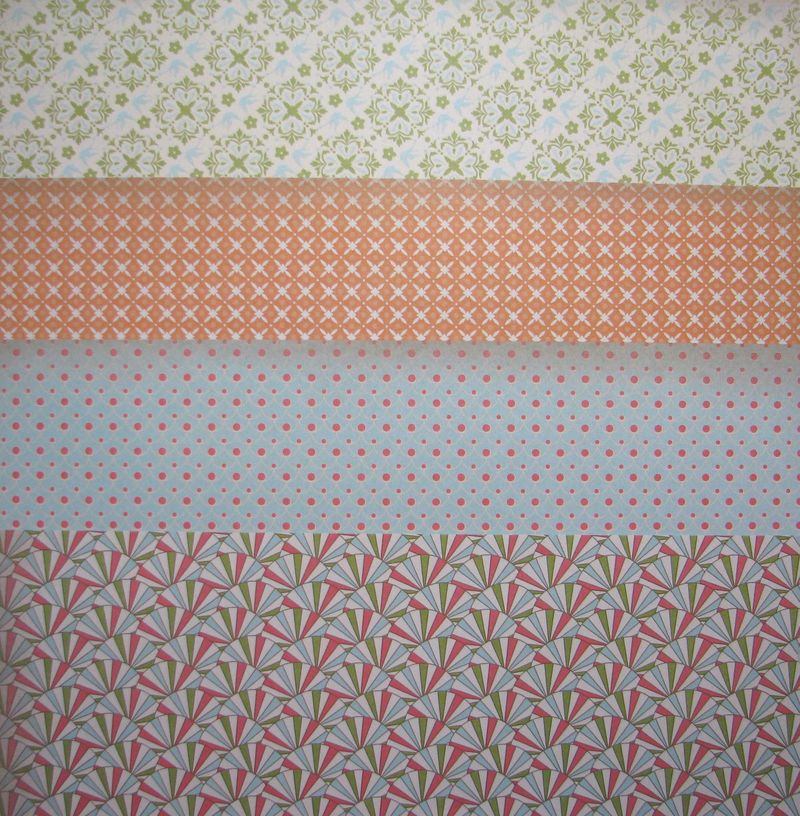
Stampin' Up! has lots of wonderful products in it's 2012 Sale-a-Bration Catalog that you can earn for free with a $50 order, but I have to say (and a lot of other people say too!) that my favorite is the Everyday Enchantment Designer Series Paper. Nothing is as good as seeing it in person, but maybe you can get a good idea of the look of this paper from these photos I took.

Everyday Enchantment DSP

Everyday Enchantment DSP2

Everyday Enchantment DSP3

You just need to place a Stampin' Up! order with me before March 31st of $50 or more (excluding tax and shipping of course!) and you can earn a free product in the Sale-a-Bration Catalog for every $50 you spend!  You can email with your order or just go to my Online Store HERE and place it yourself.  After you enter your order go ahead and enter the products you want for Sale-A-Bration.  The price should come up as $0.00.  Let me know if you have any questions!

The Everyday Enchantment Designer Series Paper may not be your favorite, but I'm sure you will find plenty to love in the Stampin' Up! Sale-A-Bration Catalog! It's the biggest promotion of the year!  Don't miss it!


How to Make an Easy Bow

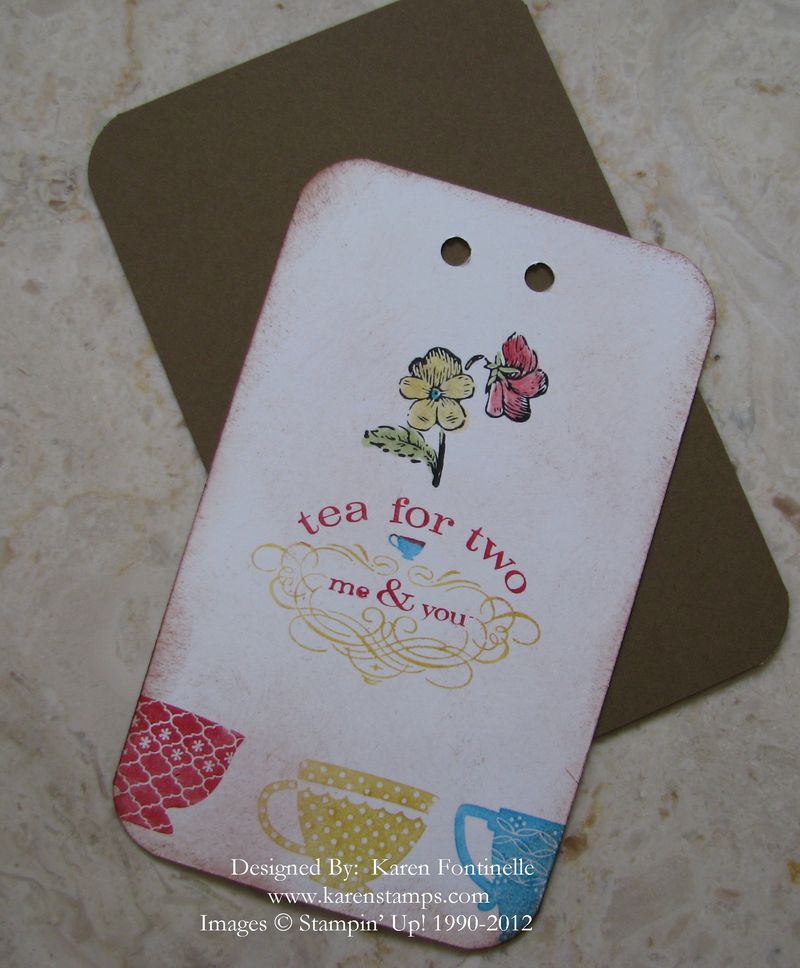
If you aren't good at tying bows, here is how to make an easy bow. Back when I first started stamping and joined Stampin' Up!, these were the kind of easy bows everyone made. I guess they were actually "fake" bows.  I don't remember what they were really called, if anything….maybe a "faux bow". I know my friend used these on all her daughter's wedding programs!

We used to use the Hand-held Rectangle Punch, but today I used the larger hole on my Crop-a-Dile.

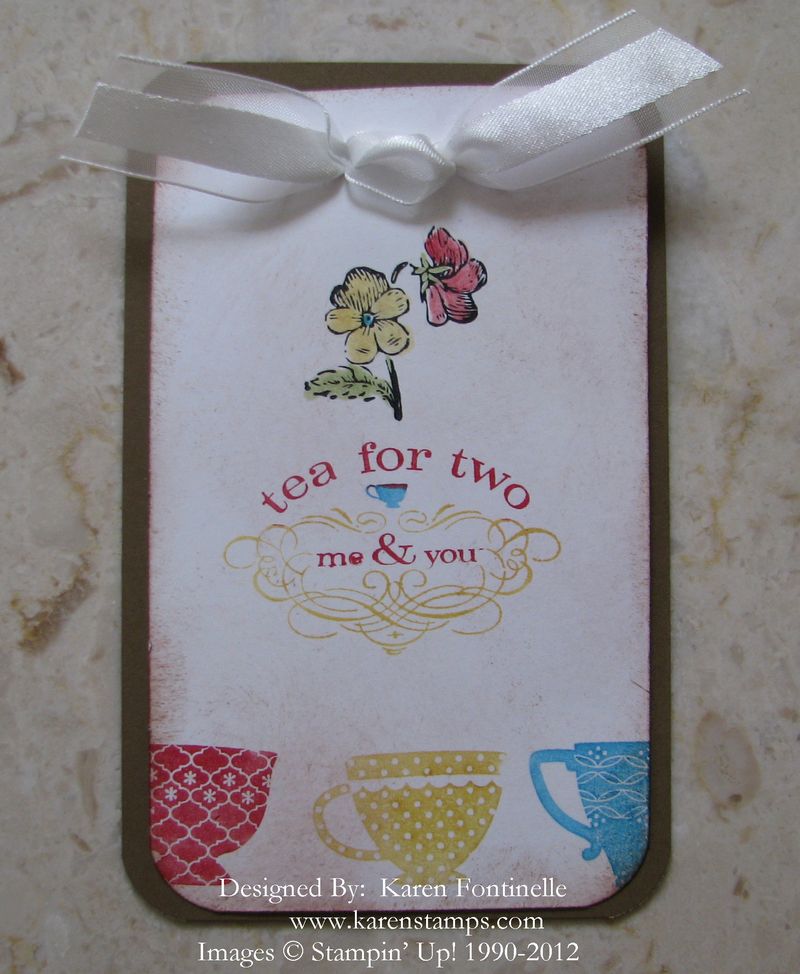
Tea Tag Bow

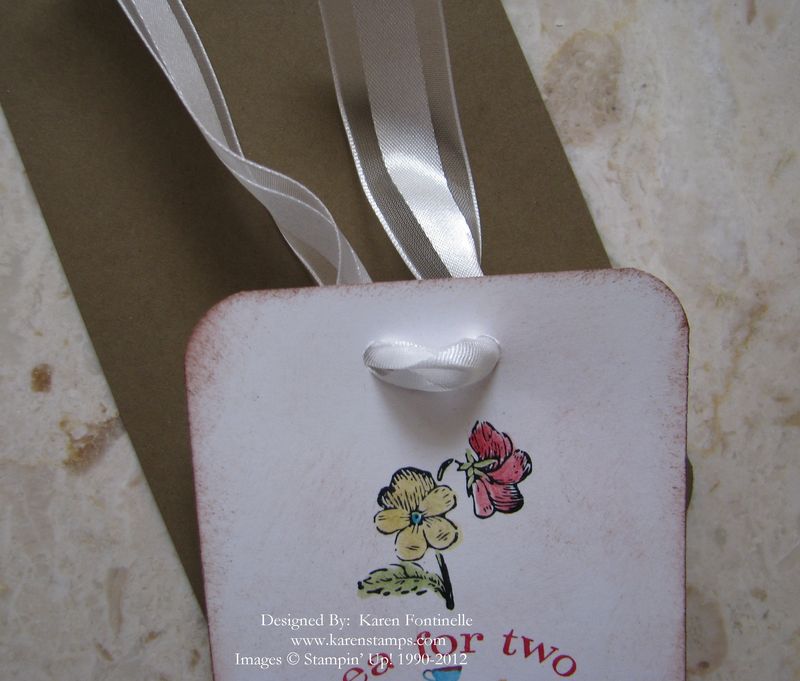
Next I put my ribbon through the two holes from the front.

Tea Tag Bow Front

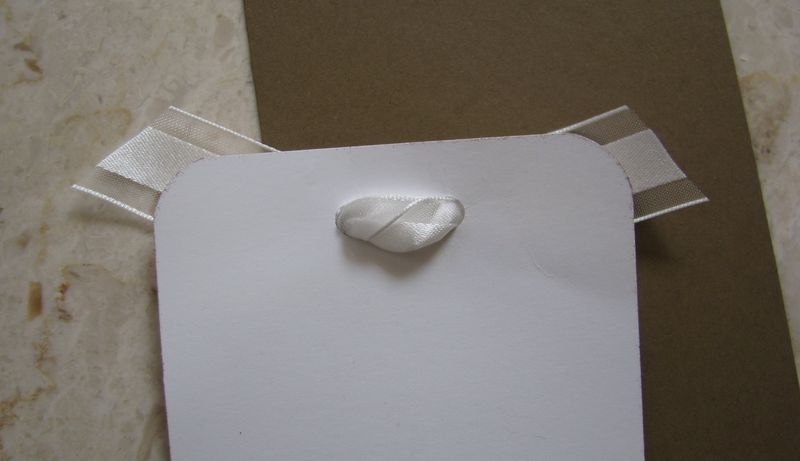
In the back, criss cross the ribbons and from the back, stick the ribbon back through the holes (the opposite of which side they went in).  You'll have to pull the ribbon over a bit to find the space to put the ribbon through.

Tea Tag Bow Back

When they come out on the front of the tag, just play with it to get it to look right and trim the ends of the ribbon.  Voila!  You have a decent-looking bow!

Tea Tag Bow Complete

You can use this easy bow-making method on cards, scrapbook pages, tags, bags, any projects!  Try it!

Stampin’ Up! Twitterpated Designer Buttons

IMG_9774
Images copyright Stampin' Up! 2012

I love these Twitterpated Designer Buttons in the Occasions Mini Catalog! You get two different colors and two different designs…..but I wonder if you realize how small and cute they are!  Here is a card on display at the Stampin' Up! Leadership Conference back in January, of course made even cuter by the whole container of buttons all scattered around it!

IMG_9777

Images copyright Stampin' Up! 2012

Here is another example of cute ways to use these little buttons!  The card on the left actually has stitching on it and real thread through the buttons, but if you weren't so inclined (I wouldn't be!) to get out your sewing machine, you would draw diagonal lines with your white Gel Pen or even score diagonally now that we have the Simply Scored Diagonal Plate. Then just stick adhere the little buttons with Glue Dots.

And if you wanted to, you could even jazz up these buttons further by adding some bling on top!

Pearl on Twitterpated Button

Little embellishments like these often add a lot to your project!  Be sure to add these Twitterpated Buttons #125579 or something similar to your next order!

Shop Stampin' Up! Online any time here at my Online Store.

Happy Birthday to Dr. Seuss!

Cat-in-hat

Dr. Seuss (Theodor Seuss Geisel) was born on this day in 1904 and I'm sure you don't need me to tell you about the children's books he wrote. Either you read them as a child or you read them TO your children..or both! As I remember, one of our kids' favorites was Fox in Socks.

In honor of Dr. Seuss, here is a stamping poem I made up myself!

Stamps.

Ink.

Paper.

Blocks.


Paper and such.

You can't have too much.


Paper and ink and blocks and stamps.

Ink on stamps and stamps on blocks.

Stampers with stamps come.

Stampers with ink come.

Stampers with stamps and ink and blocks come.


Look, ma'am.  Look ma'am. Sally Stamper ma'am.

Let's make cards with inks and stamps ma'am.

Let's make cards with stamps and blocks ma'am.


First, I'll make a quick trick card fold.

Then I'll make a card punch look old.


You can make a quick trick scrapbook.

You can bling out a fancy note book.


And here's a new trick, Sally Stamper….You can make a paper sampler.

Sprinkle on glitter on cards and pages.

Put ribbon and bows on boxes in stages.


Stamps and ink and paper and blocks.

So much fun, you can even stamp socks!


Stamps on blocks and ink on stamps.

Everyone can stamp and look like champs.


Here's a fun website about Dr. Seuss! http://www.seussville.com/

Attic Boutique Designer Series Paper for Scrapbook Pages

Attic Boutique Designer Series Paper

As I was playing with the Attic Boutique Side Notes and pulled out the Attic Boutique Designer Series Paper, this page on the right with the old-fashioned fountain pens really struck me.  I know my mother used to write with pens like that.  Actually, when I was in school, 5th grade second semester was when we were allowed to write in ink….and it was with a fountain pen like one of these….well, not quite as fancy!

Since I am such a fan of handwriting (I used to love to watch my mother write….she had such perfect handwriting….so did my 3rd grade teacher!) I thought wouldn't this page be perfect to dig out some of my mother's and maybe grandmothers' old letters and put some samples of their handwriting on this paper as a scrapbook page.  It can be paired with another sheet in the Attic Boutique collection as I have shown here for a two-page layout.

A lot of the Stampin' Up! Designer Series Paper is already "scrapbook layout-ready"……it's already so beautifully designed, all you have to do is add your photos or memorabilia and journaling.

Attic Boutique Designer Series Close-Up

I think a person's handwriting (good or bad) is so important and just brings the person to life when you see it.  That's why I advocate having at least some handwritten journaling or samples on your scrapbook pages rather than strictly computer-generated journaling.

If you want to order products from this Attic Boutique Product Suite in the Occasions Mini Catalog, just go to my Online Store or email me at Karen@Karenstamps.com.  Remember, with a $50 order you earn a free Sale-a-Bration product!

Stampin’ Up! Attic Boutique Side Notes Birthday Card

Attic Boutique Side Notes

You may have missed the Stampin' Up! Attic Boutique Side Notes #125413 in the Occasions Mini Catalog on page 24. It is a collection of die cut tags and accents that you can use any number of ways….on cards, scrapbook pages, gifts!  I hadn't played with mine yet but here they are all spread out on the table.  Next I got out my Attic Boutique Designer Series Paper #125407 and came up with this birthday card:

Attic Boutique Side Note Birthday Card

You can see that I stamped the birthday greeting on the Attic Boutique Side Note die cut with my stamp set Sincere Salutations and added a few little pearls.  Very easy, and with the Stampin' Up! coordinating products it turns out beautiful every time!

To order any Stampin' Up! products, please visit my Online Store HERE.

A Mardi Gras Scrapbook Page

Mardi Gras Scrapbook Page

Today is Mardi Gras…. French for “Fat Tuesday”, which refers to the last night for eating rich foods before Lent begins on Ash Wednesday. Mardi Gras is really a period of time, varying between cities, for festivities. We usually think of Mardi Gras in New Orleans but it is celebrated in many other places.  Galveston, TX has Mardi Gras festivities, parties, and parades, and they celebrated the past two weeks.

Beads are a big part of Mardi Gras….everyone wants beads, the fancier the better!  Usually they are thrown during the parade into the crowd but you’ll find them at parties and lots of places.  King cakes are popular decorated cakes with a tiny plastic baby baked inside.  Usually the person who gets the piece with the baby has a special privilege or obligation….like maybe they have to bring a king cake into the office the next day! The grocery stores are full of king cakes right now.

So if you were lucky enough to celebrate Mardi Gras, perhaps you would like to scrap your photos!  There is no faster way than to use My Digital Studio from Stampin’ Up! To make the page pictured above, I just started with a template, changed the color of the background paper and the punches along the side, added a photo box, added the crown “stamps” (known as brushes) and added a little text.

Stampin’ Up! is offering a free 30-day trial of My Digital Studio Express! This is the perfect opportunity to try your hand at digital papercrafting….and it’s not just scrapbooking!

Go ahead…..take the 30-day free trial and see what digital papercrafting is all about!  You just download it in minutes and you are ready to use it!