
During the Stampin’ Up! Creativity Now virtual stamping event for Demonstrators, one of the projects was a gift bag made with the Splendid Day Designer Series Paper. It was beautiful using that foil paper! Since I watched the recording a couple of weeks later, I had already cut up some of my designer paper. When I made a mistake scoring one of the sides of the bag, I had no extra matching designer paper to use! But a few days later I gave it another try rewatching the video and just used some different designer paper, the Rings of Love Designer Series Paper in the Sale-A-Bration brochure! This pretty fall paper is even FREE with a $50 purchase during Sale-A-Bration.
We’ve all made gift bags before. All you do is cut the paper and score it for folding and forming the bag shape according to the size and style you want. There are just different details. Will the top be open or closed, the sides straight or pinched in, tall or short, wide or narrow, the top closed with ribbon, a clip, staples, or something else? You have lots of options when you make any basic gift bag design!
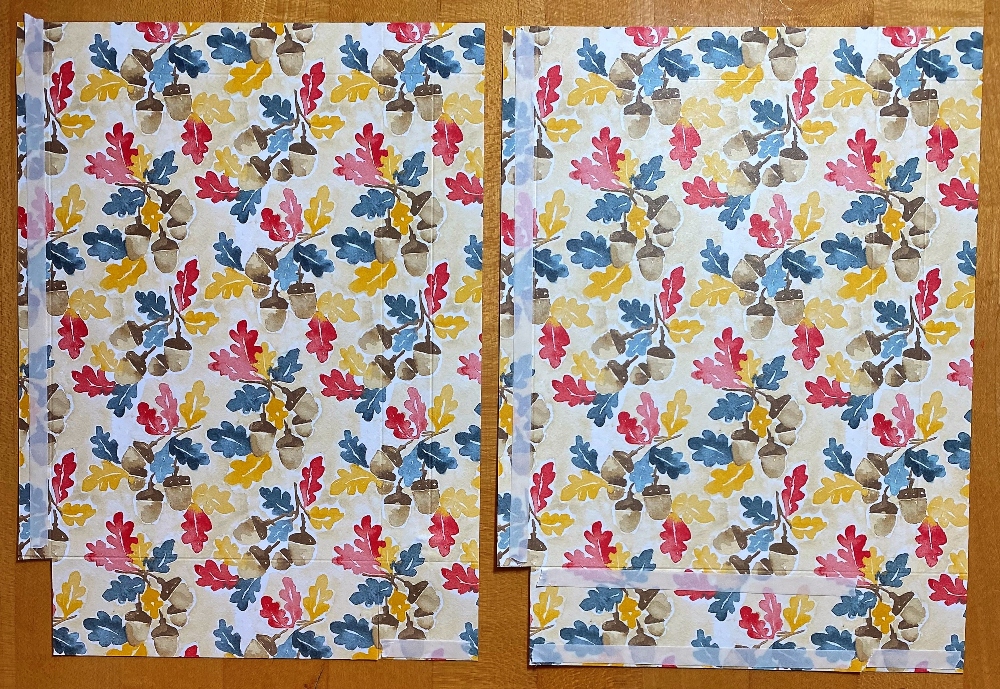
This gift bag starts with two pieces of designer paper cut at 7″ x 9 1/2″. Pay attention to the pattern of the paper so you know which end of the paper you want for the top and which for the bottom.
- Score the paper that will be the top of the bag at 3/4″ on both pieces with the paper horizontal in the Paper Trimmer. Then score at 8″ to make the bottom flaps for the bag. This will leave a 1 1/2″ area at the bottom of the bag.
- Turn the paper lengthwise and score at 1/2″, 5 1/2″, and 6 1/4″. On the 6 1/4″ score, don’t go all the way to the horizontal score line at the bottom. Stop before you get there! This will be the line to pinch in the sides of the bag eventually. Do the second sheet the same way. Make sure both paper designs are going the same way. The two papers should be scored exactly the same way.
- In the bottom left corner of both papers, cut away that small rectangle formed by the score lines. Over on the right bottom of the paper, cut a slit along the 5 1/2″ score line just up to the horizontal score line.
- Fold and crease all the score lines, gently using the Bone Folder. Apply Tear & Tape adhesive as shown in the photo below. You can also check your score lines and cutting using that photo. The adhesive is placed differently on the two papers so look closely. On the left paper, put adhesive along that first scored section and one small piece on that bottom right square piece next to the slit you cut. On the right paper, put adhesive on the same side section, then pieces on the bottom flap and the small bottom right section as on the first sheet. The adhesive goes on the side of the paper you want to show on the outside.
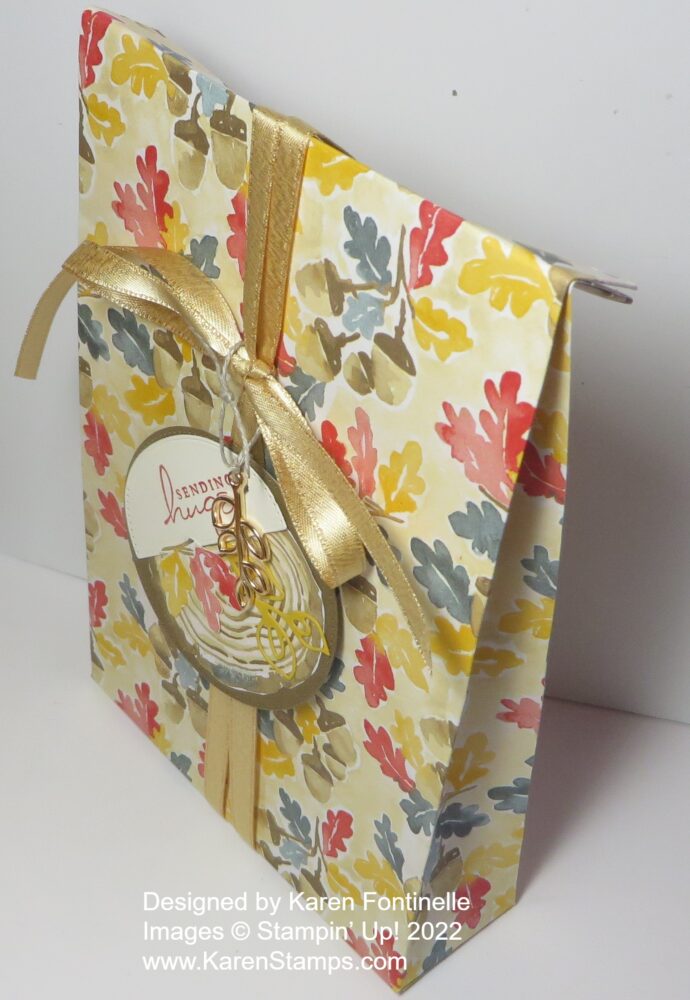
5. Adhere the sides together after the lines are creased and then do the bottom flaps. You’ll be able to see where everything goes. Try to have all the seams toward the back of the gift bag.
6. Once the bag is assembled, fold on the top score lines to close by folding to the front or to the back. I folded mine toward the back but you can do either. Be sure you put your gift inside before closing up with the ribbon!
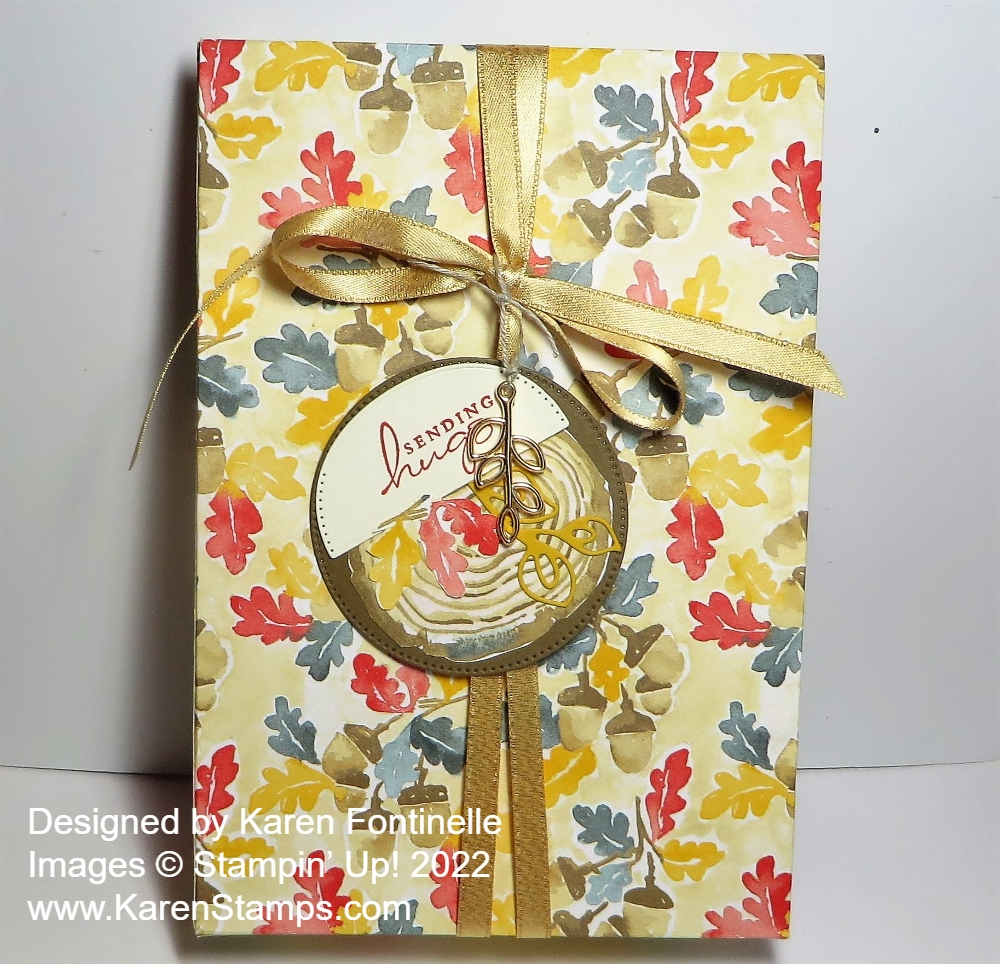
7. Tie ribbon around the gift bag from top to bottom to hold the top closed. I used the Gold 1/4″ Shimmer Ribbon on my gift bag. Add a gift tag if you want. (Directions for my tag are below.)
For my gift tag that you see hanging on the front of the bag, I used another sheet of the Rings of Love Designer Series Paper that had the tree ring slices on it. I cut out a circle from the Stylish Shapes Dies in the Annual Catalog from Soft Suede cardstock and adhered one of the tree ring slices on it that I cut out by hand. The greeting is stamped on the half circle die in the Splendid Stems Dies in Poppy Parade ink. I also cut out a segment of the colored leaves from the designer paper as well as a die-cut stem from the Splendid Stems Dies to tuck under the greeting a bit. I poked a hole in the tag off to the side and tied on an Open Leaf Trinket and tied this around the bow. You can have fun making any kind of tag that suits the occasion.
The front of the gift bag turns out to be 5″ x 8″ and about 1 1/4″ wide. You can place a few cards inside or a small gift or treat! Try this Rings of Love Gift Bag and Tag using this designer paper or whatever you have on hand for the occasion!