Springtime Vintage Card

Springtime Vintage Card

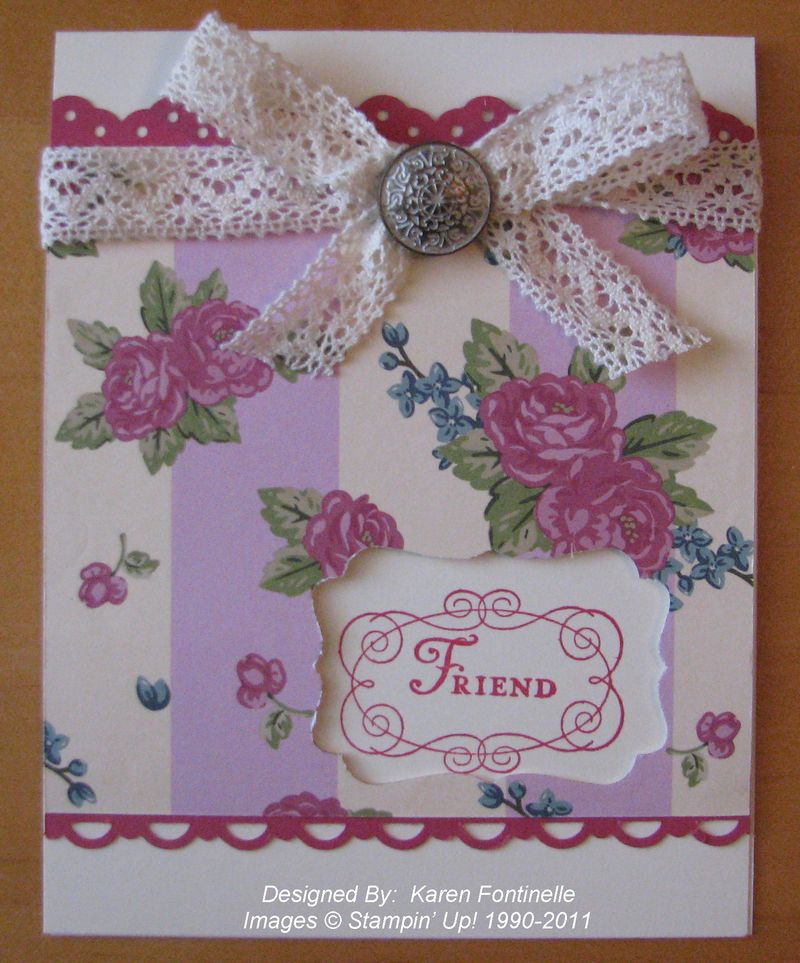
I'm playing with the Springtime Vintage Designer Paper #121782 today and came up with this card.  I used a piece of the designer paper and trimmed it with Rose Red and two different punches, Scallop Trim Border #118402 and Eyelet Border #119853.  Then I used the Decorative Label Punch #120907 to punch through the cardstock and layer of designer series paper.  I stamped inside that punched area then with the frame from "Charming" and stamped the word "Friend" inside from the stamp set "You're a Gem" in the Occasions Mini Catalog on page 25.  To finish it off, I tied some Victoria Crochet Trim #118481 around the front of the card and attached an Antique Brad #117273 over the top of the bow.

If you need some punches that I mentioned in this post, please visit my Online Store to place your order!  Don't forget about Sale-A-Bration…Spend $50 (before shipping and tax) and choose a free reward in the Sale-a-Bration Catalog!
Hot Air Balloon Card

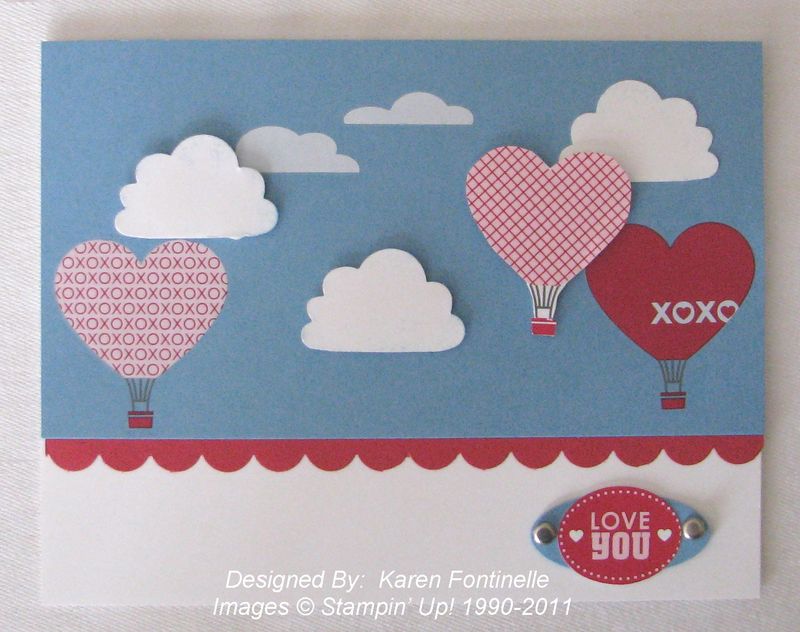
Hot air balloons always seem to be popular and almost magical as we see them gliding across the sky.  Many cities, including Houston, have an annual hot air balloon festival, which is really a spectacular sight.  But hot air balloons are a hot trend in papercrafting right now.  I decided to use up most of my "Love Impressions" Rub-Ons #121886 which Stampin' Up! gave us demonstrators as a gift!

Hot Air Balloon Card


Two of the hot air balloons are rubbed right on to the card.  The one with the cross-hatch balloon is rubbed on to a piece of Whisper White card stock and cut out, then popped up on Stampin' Dimensionals.  The two smallest clouds are also rub ons, but guess what the other three clouds are made from??  They are the frosting from the Build a Cupcake Punch #121807 in the Occasions Mini Catalog!  I sponged a little bit of Marina Mist ink around the edges of the "clouds" and two are popped up with Dimensionals.  Even the "Love You" is rubbed on to a piece of Whisper White card stock and punched out with the 3/4" x 15/16" Oval Punch #120908.  It would have looked good just applied straight to the card but I embellished it with an oval punch of Marina Mist card stock and two silver brads.

If you need an easy way to make a card, having some rub ons and card stock will do it!  To order any of these supplies, please visit my Online Store!  Don't forget, with a $50 order (before shipping and tax) you may choose a free Sale-A-Bration reward!


Scallop Square Die Birthday Card

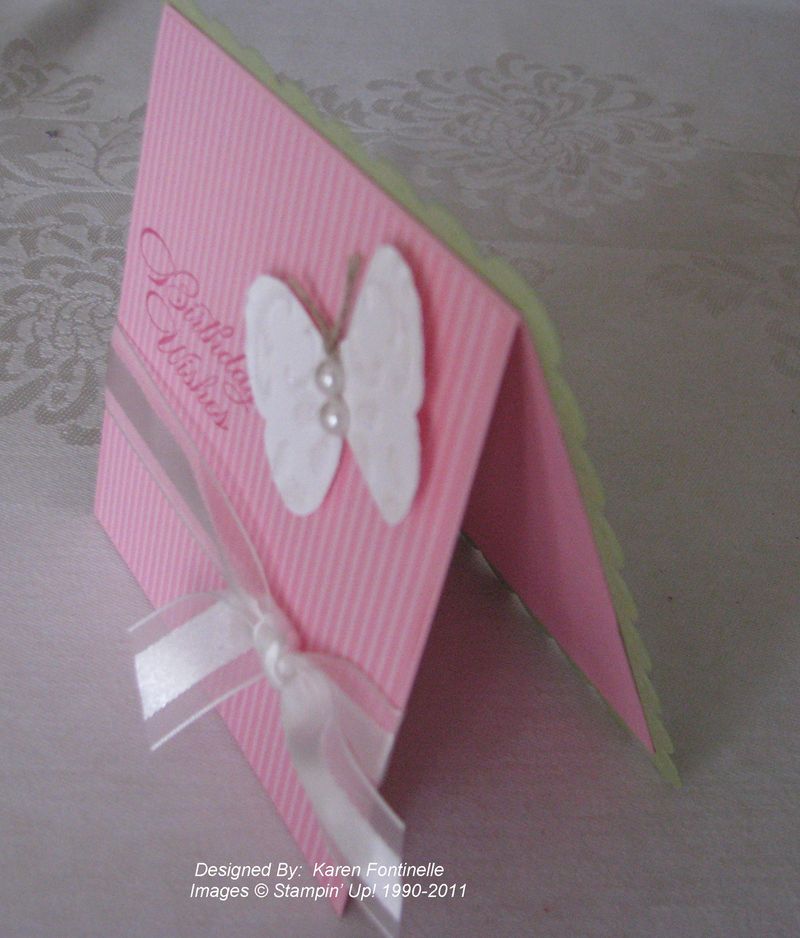
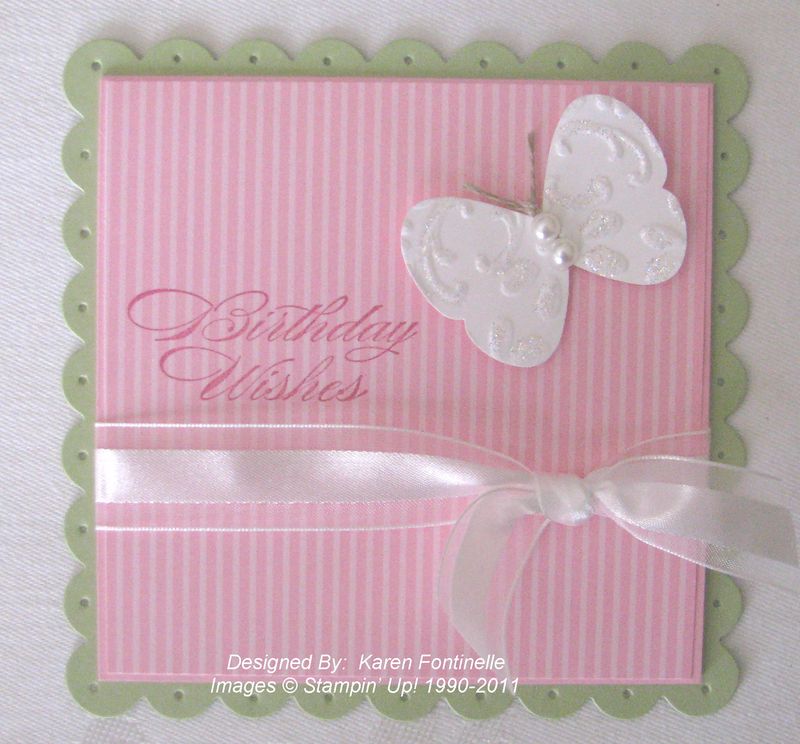
I got the idea for this card in a magazine, but made my card a little less formal.  I guess you might say it is actually a small card (about 3 7/8" square) adhered to the background cut with the Scallop Square Bigz Clear Die #115950.  I used some Pretty in Pink designer series paper from the Subtles Patterns Paper Stack #117152 on the front and stamped a birthday greeting from the stamp set Bring On the Cake in the Occasions Mini on page 13.

You can use this same format for a card for any occasion!

Scallop Square Birthday Card

Scallop Square Birthday Card

For an extra embellisment, I embossed a scrap of paper with one of the embossing folders and then punched it with the Butterfly Punch #119848.  With my Two-Way Glue Pen I added some Dazzling Diamonds Glitter.  For the antennae just tie a little Linen thread around the center. Add two Basic Pearls #119247 for some bling!

Another Stampin’ Up! Sale-a-Bration Video….Sweet Summer Project

Here is another video, this one by Carrie Cudney at Stampin' Up!, demonstrating a stamp set you can get for free during Sale-A-Bration until March 31.  She makes a cute and easy card you will love!  Perhaps seeing these videos will help you with your Sale-A-Bration choices when you place your order!  Enjoy!

You can find a list of the supplies for this Stampin' Up! project HERE.

And when you are ready to order Stampin' Up! supplies, please click HERE to go to my Online Store!  Let me know if you have any questions.

Have You EVER Thought About Being a Stampin’ Up! Demonstrator??

It's always a good time to sign up to be a Stampin' Up! Demonstrator, but right now, during Sale-A-Bration is an especially good time!  The Starter Kit, which is normally $175 is discounted 15% during Sale-A-Bration which means you can start your own business in minutes and become a Stampin' Up! Demonstrator for only $148.75 until March 31, 2011.

If you would like to hear directly from Stampin' Up! about the company and about becoming a Demonstrator, you will have an opportunity to attend a special phone call on Tuesday, February 22.  A Stampin' Up! staff member will give a short presentation for about 10 minutes and then take questions.  Space is limited on the call, first-come first-served.

If you would like to take advantage of this unique opportunity just to hear about Stampin' Up!, contact me at KSFontinelle@gmail.com and I will give you further information.  Also, you can find out about Stampin' Up! HERE.

Click on photo below for more information!

StarterKitphoto2

Be sure to contact me before Tuesday, Feb. 22 so I can give you the details on making this call.  There is no obligation and you won't be asked to sign up on the call.  You can just listen in and contact me later to ask questions or find out how to sign up!

Paper Daisy Brown Paper Gift Bag


Paper Daisy Paper Gift Bag

While still having fun playing with the Paper Daisies #119243, I got the idea to decorate a little gift bag.  For this project I used the Mini Lunch Sacks that were available in the Holiday Mini Catalog, but of course you could use this idea on any brown paper bag.

After folding over the top of the bag, I tied the 1/2" Stitched-Poly ribbon in Blushing Bride #119267 around from top to bottom and tied a knot right underneath the flower.  I put three Paper Daisies together, held together with a Clear Rhinestone Brad #113144.  They are sponged with Blushing Bride ink.  The flower embellishment is attached with a Stampin' Dimensional #104430 only at the top so the ribbon can be opened.  Last of all, I stamped a greeting from the stamp set "You're a Gem" on page 25 of the Occasions Mini Catalog. Actually, this is a great inexpensive Stampin' Up! set with little greetings perfect for little gifts.

If you need supplies for this or any other Stampin' Up! projects, please consider shopping at my online store HERE or contact me by email.

Paper Daisy

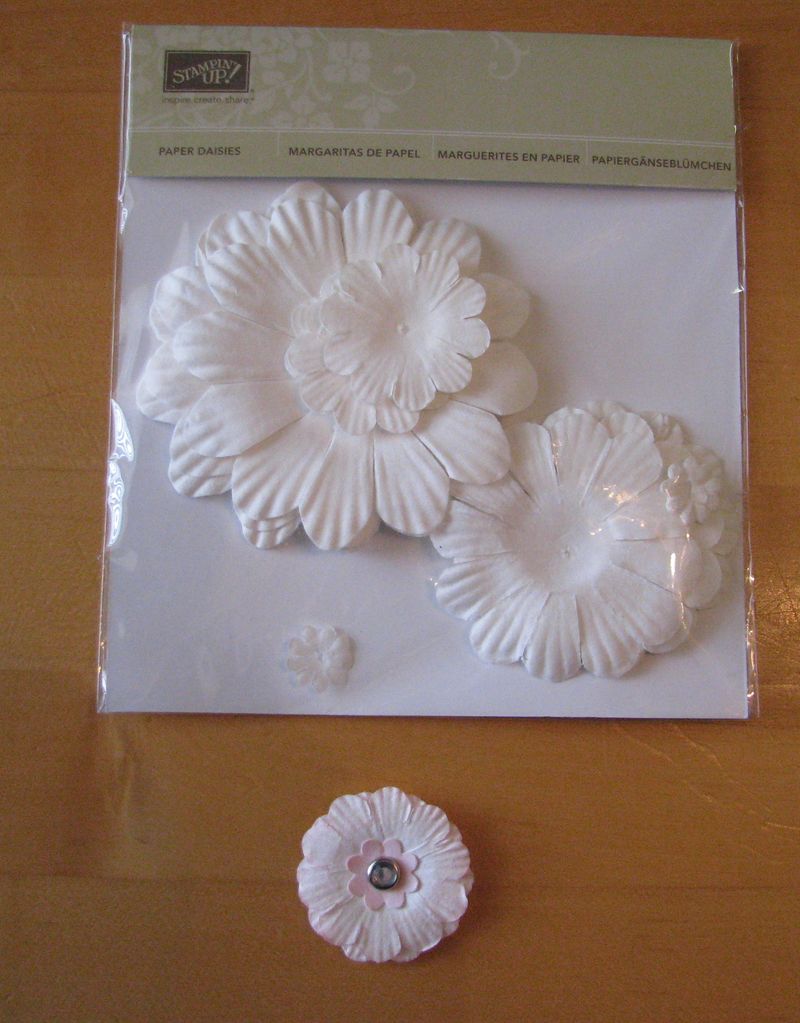
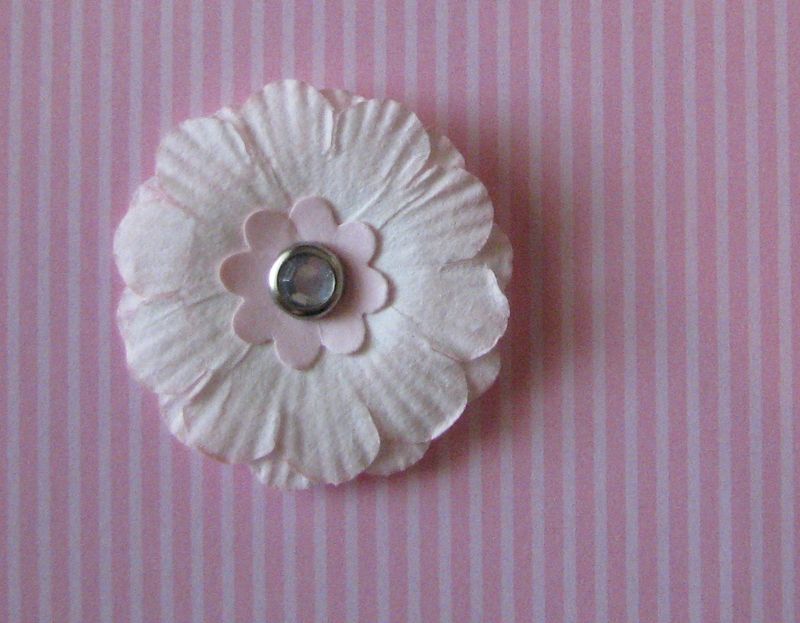
I'm making a card right now and thought the Paper Daisies #119243 might be a good embellishment.  I really hadn't used them yet except to experiment with coloring one with a Stampin' Write Marker.  (See page 188 in the IB&C to see how to color these with ink refills and water!) I wanted to leave these white and just couldn't get satisfied with how they were looking on the card.  Finaly I punched a small flower center with the Boho Blossoms Punch #119858 and added that with a Clear Rhinestone Brad.  So now it was better but still something was off. Then I thought about gently sponging some Pink Pirouette ink onto the Paper Daisies.  I did it very softly just around the edges of the flower and that seemed perfect!  Funny how it takes just one more little thing to get something exactly how you like it!

Sampin' Up! Paper Daisies

Here's a close-up of the flower.

Pink Pirouette Paper Daisy

If you need accents and embellishments for your Stampin' Up! cards, be sure to check out my Online Store HERE.

My Digital Studio Hybrid Sale-A-Bration Page

Doesn't this look like an adorable scrapbook page?!  It is a digital scrapbook page made with My Digital Studio using the "So Much to Sale-A-Brate Digital Content CD" #123681 that you can get FREE in the Sale-a-Bration Catalog with a $50 purchase!  The project is made by Stampin' Up!'s Sara Douglass who happens to be Shelli Gardner's daughter.  After making the digital page, she adds real buttons and embelllishments for added interest.  Click on the photo above to go to a page on my Demonstrator Business Website where you can watch a video of Sara explaining how she made the page!

If you have any questions about My Digital Studio please contact me.  It really is a fun product to work with.  Stampin ' Up! even has a website where you can learn, ask questions and share projects about My Digital Studio.  The website is www.mydigitalstudio.net  and is a great resource!

Valentine Diorama Card

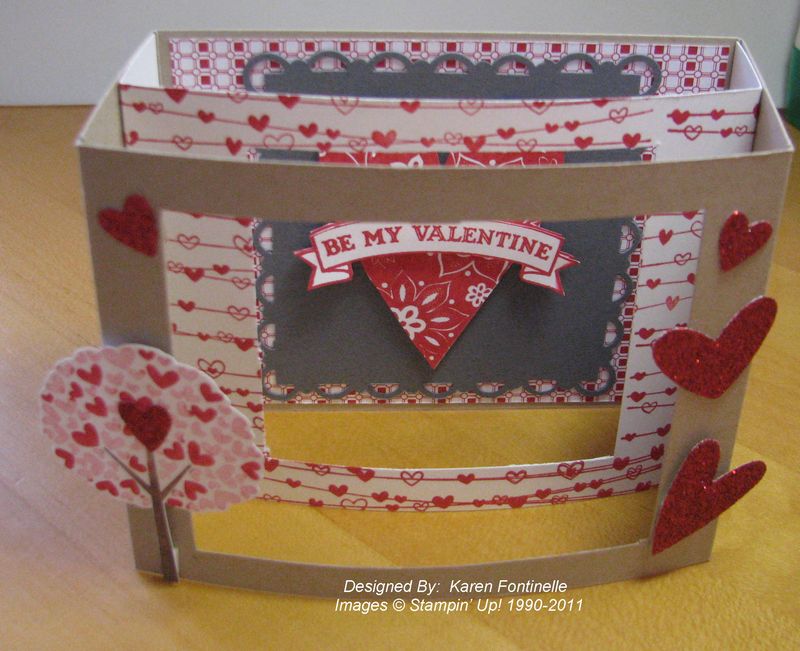
I almost forgot I wanted to make a diorama card for Valentine's Day! It's a little difficult to photograph so I'll show you the top view first.  A diorama card is essentially three layers:  the back, and then the front and middle with a window punched out so that you can see all the way through or so that it looks 3D.

Valentine Diorama Card

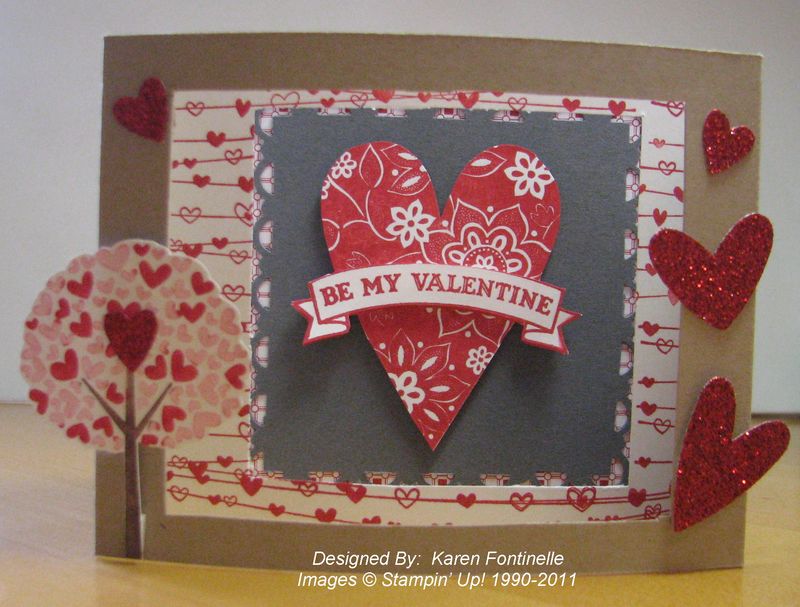
Here is the card straight-on.

Valentine Diorama Card front
I cut two sheets of card stock 8.5" x 3.5" and one sheet for the middle at 6.5" x 3.5".  This is another project that once you understand the basic idea, you can make any size you want.  Then just decorate and stamp how you like. 


Happy Valentine's Day!!


My Digital Studio Valentine

I wanted to make a Valentine in My Digital Studio the easy way!  I found a designer template that inspired me in the program and then just changed a few things.  See if you can find all the things I did!

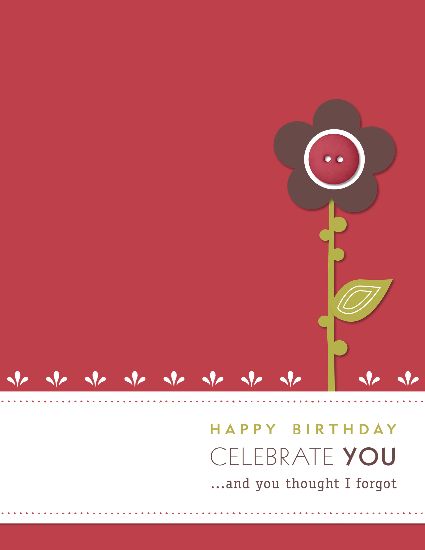
Here is the designer template.  It is a birthday card all ready to be printed….but you can change every single thing on it if you want.

My Digital Studio Birthday Card
Images copyright Stampin' Up!


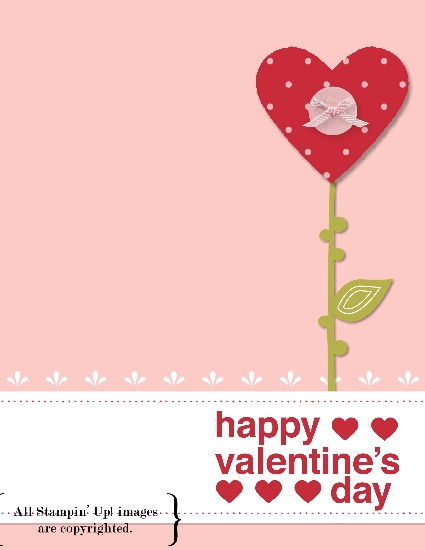
And here is the card for Valentine's Day I changed it to:

My Digital Studio Valentine

I changed the background to Pretty in Pink, deleted the flower and added a heart shaped punch and filled it with a polka dot designer paper.  I added a Pretty in Pink button and a taffeta bow on it.  Also, I deleted the greeting and found a valentine greeting instead and changed the color to Real Red.  With My Digital Studio I can also fill the inside of the card with a color or designer paper, add decorative elements, whatever greeting I want and I've got a whole card!  After printing, if I wanted to, I could add a real bow to the heart flower or a real button and ribbon.

My Digital Studio is easy for the beginner in digital papercrafting, yet has many things to explore so that you would never get bored as you progress in your ability!  To learn more about My Digital Studio software, please click HERE.


Cute by the Inch Valentine

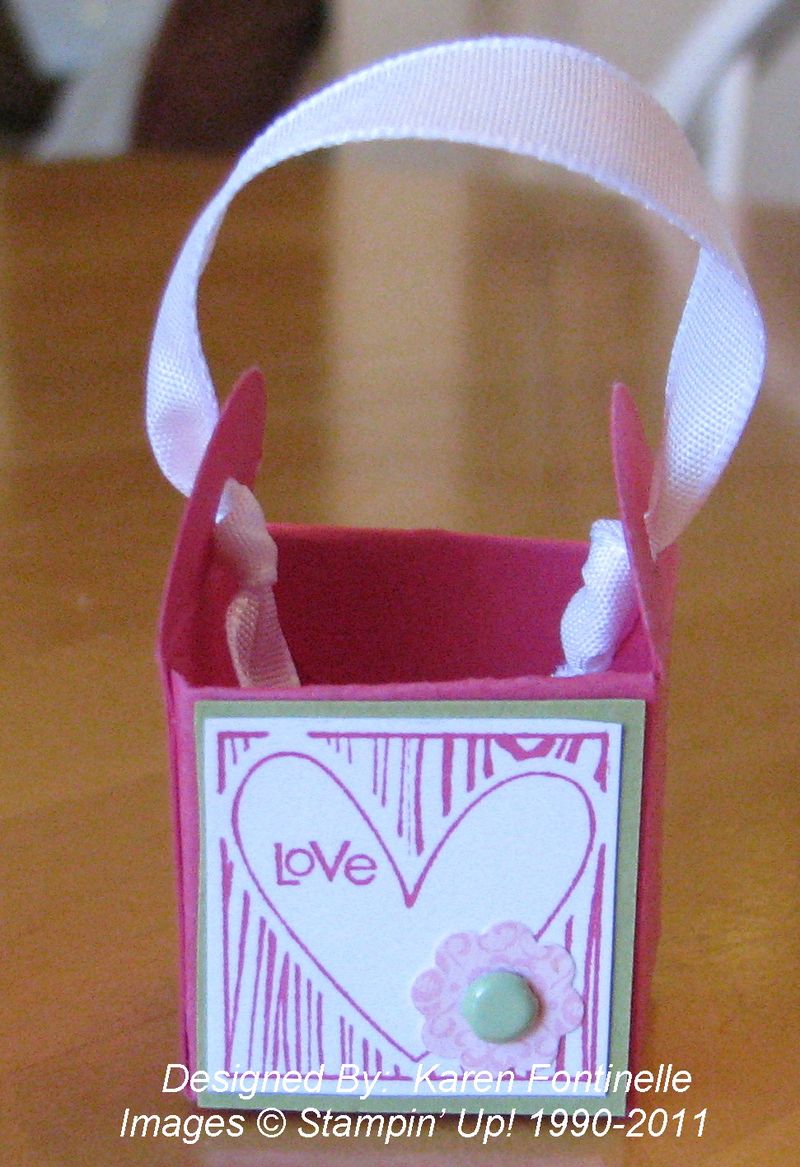
Just a little quickie I made playing with the Cute by the Inch Hostess stamp set and the Petal Card Punch #119273.  Punch four of the petals.  Trim off one side flap on all the petals. Line them all up side by side and you will see to glue the flap of one to the inside of the one next to it.  That way with all four glued together in a line, you can form a box and then glue the last flap.  I stamped the heart from Cute by the Inch, a stamp set you can earn when you hostess a workshop and punched a little flower to decorate.  It's just big enough to hold a Hershey's Kiss or a diamond necklace for Valentine's Day!!

Petal Card Punch Valentine Basket

Easy Valentine Craft

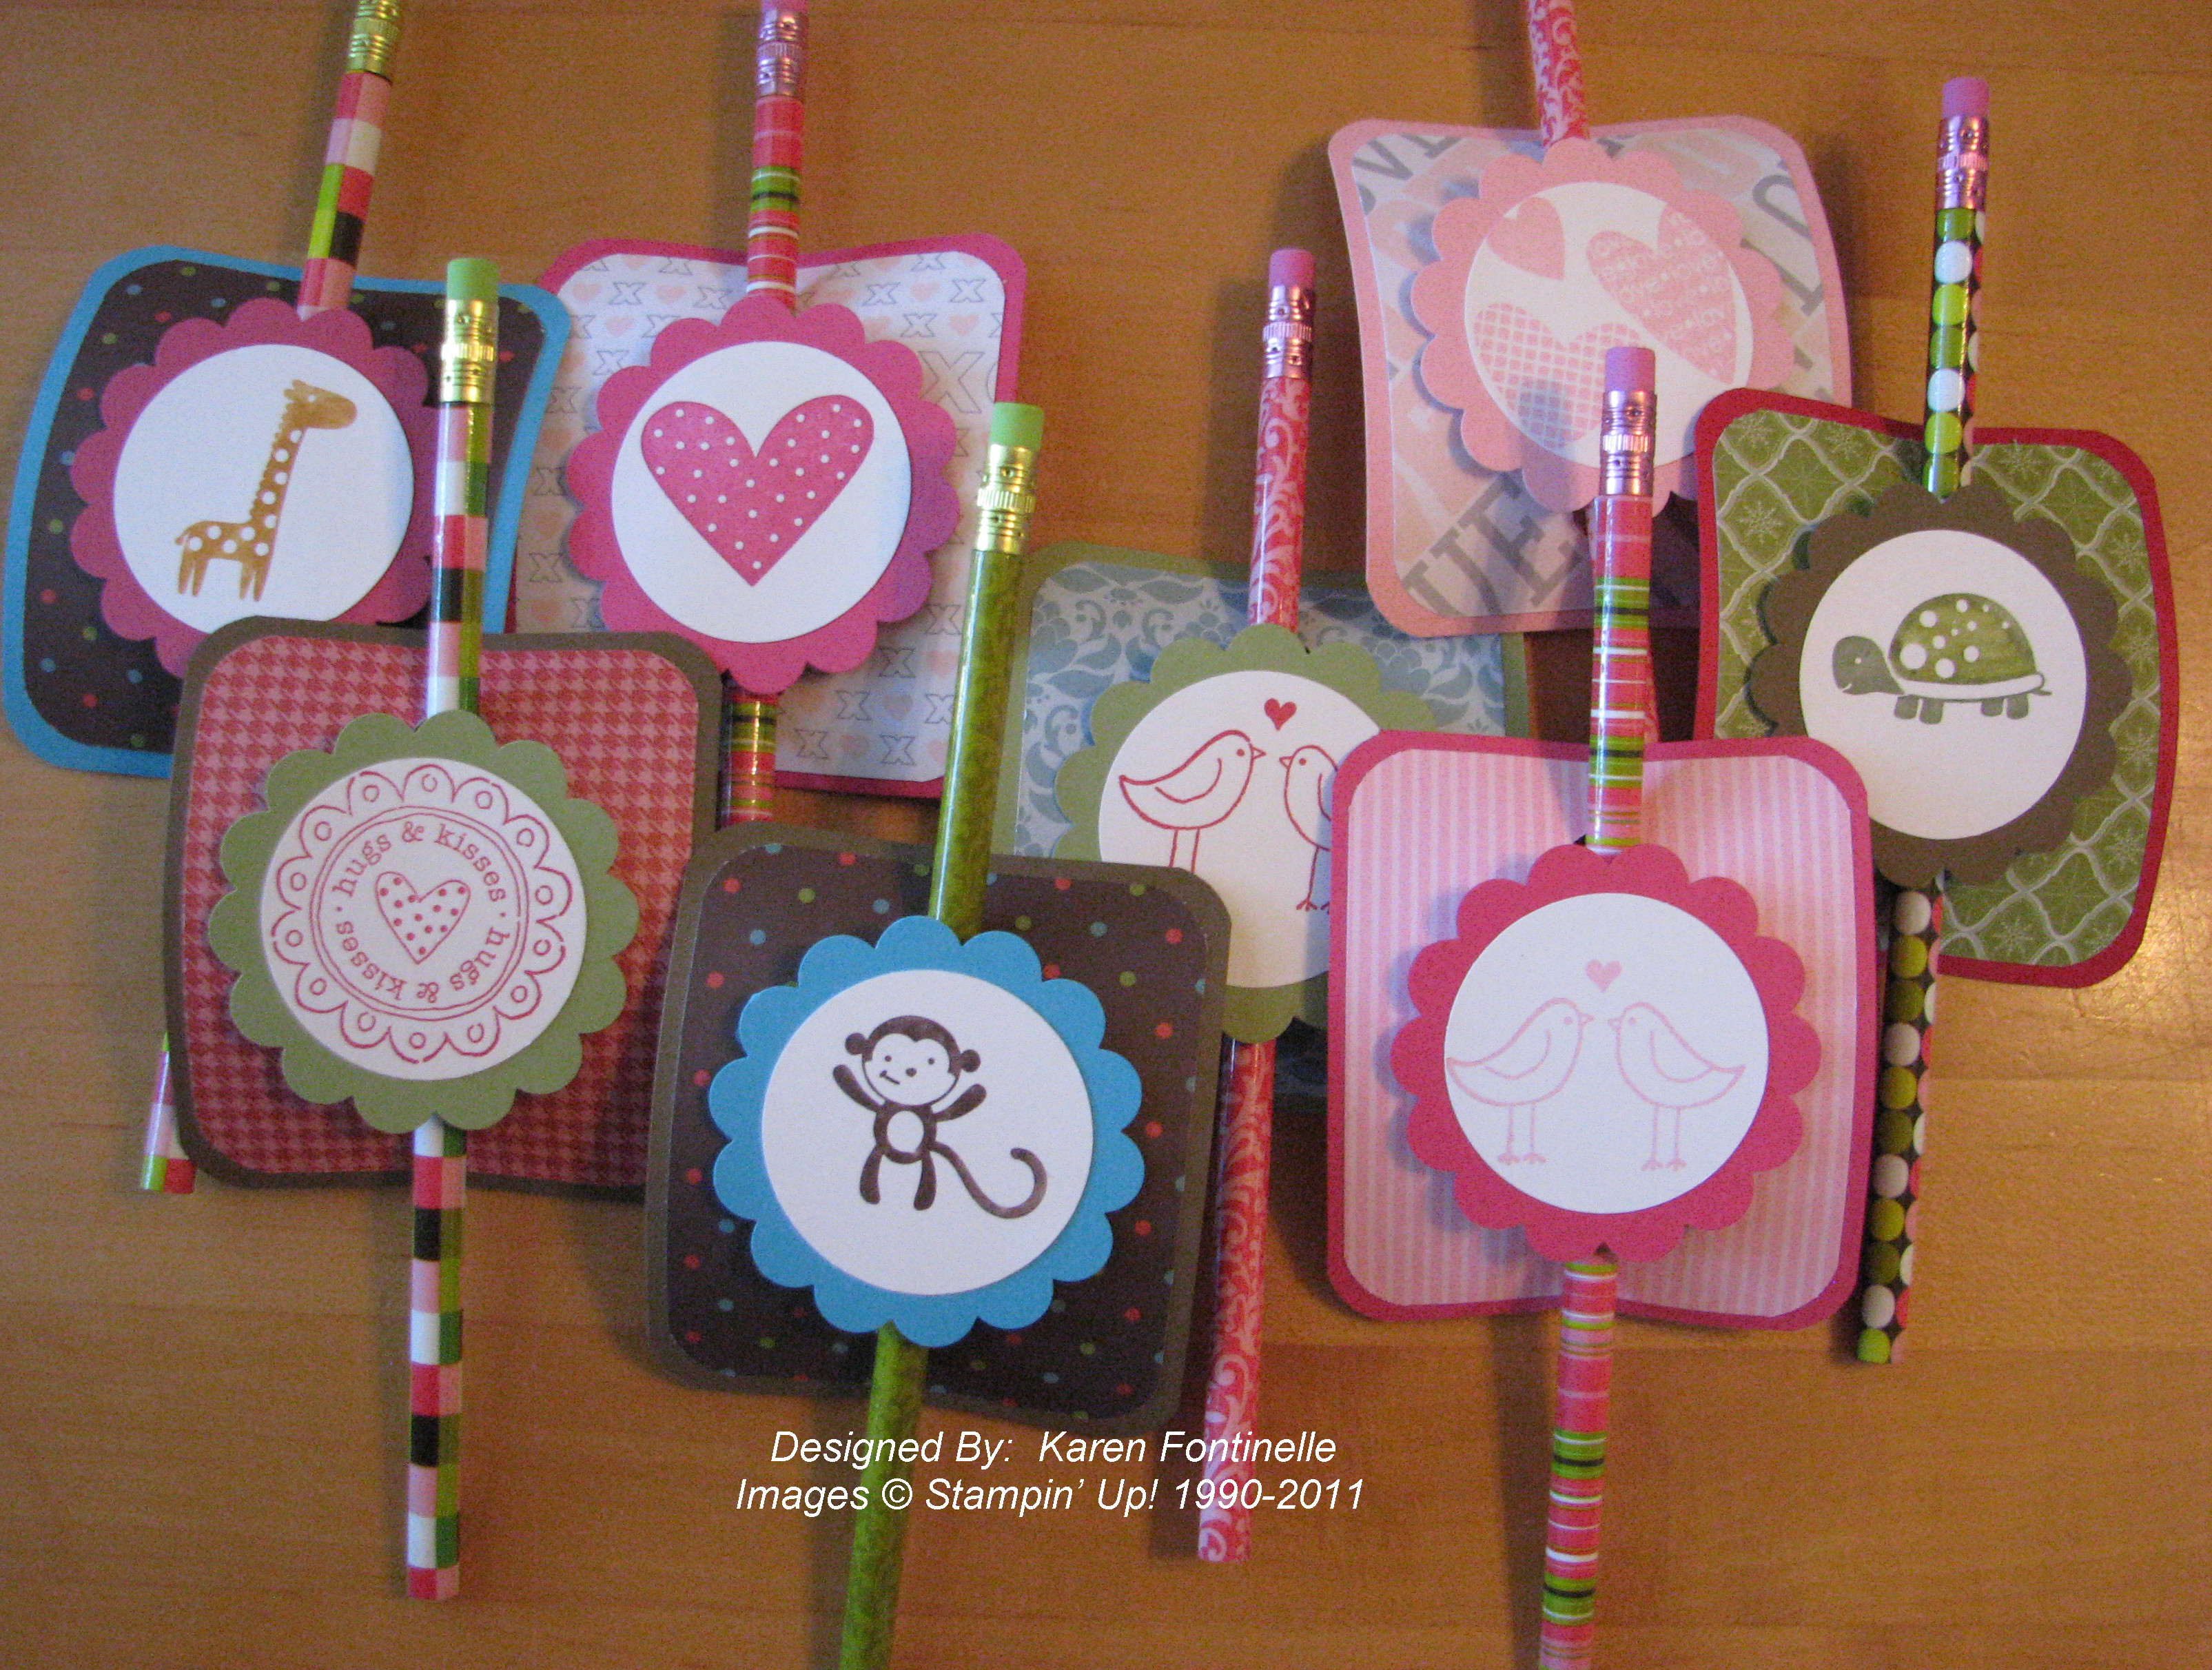
If you are looking for an easy valentine craft for kids or a school valentine idea, this is it.  I saw this idea in a scrapbooking magazine and I had extra valentine pencils taking up space in my messy room.  I cut a piece of cardstock 3" x 3 1/2" and rounded the corners with the 3/16" Corner Punch #119871.  Glue on any piece of designer series paper slightly smaller than the card stock, 2 3/4" x 3 1/4" after rounding its corners.  Punch two holes for the pencil with a 1/2" Circle Punch #119869.  Insert the pencil in the holes and then add something over the middle of the pencil.  I punched a 2 3/8" Scallop Circle #118874 and stamped on a 1 3/4" Circle Punch #119850.  For the boys I used the stamp set Fox & Friends….what cute little animals!!  For the girls I used the stamp sets Love You Much #113756 and I {Heart} Hearts.

Valentine Pencil Holders

There's space on the back to write a greeting.  Really fun and easy to make!

Valentine's Day in Monday, February 14th so not much time left!

Valentine Votive Candle Holder

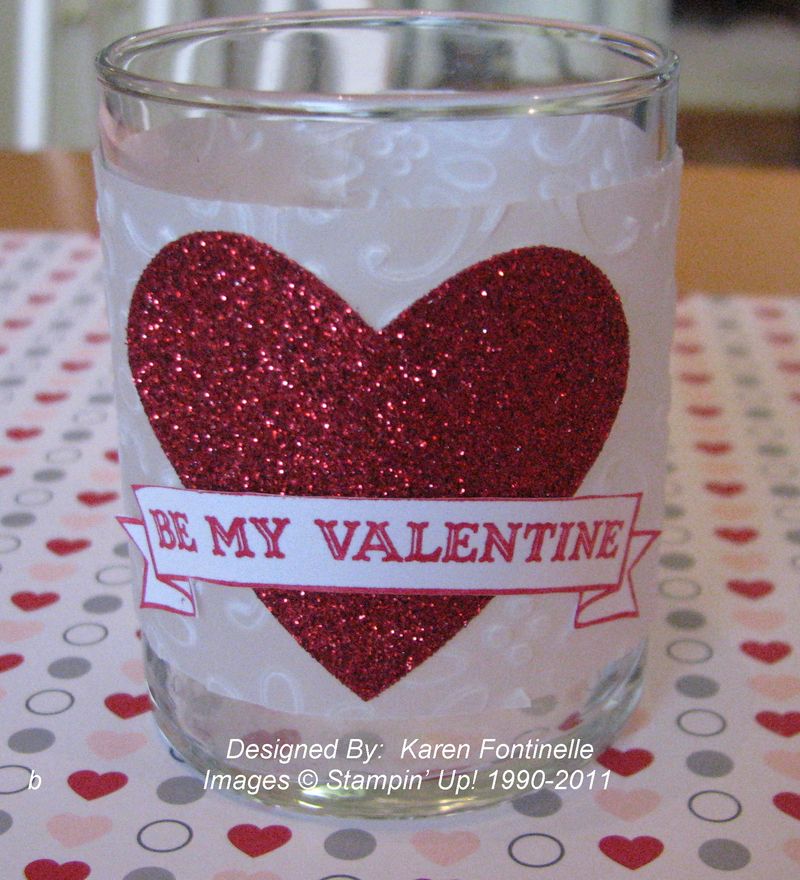
Need a quick and easy little gift for Valentine's Day?  All you need is a votive candle holder and some paper, ink and stamps….maybe a punch….maybe the Big Shot!

Valentine Votive Candle

You probably have these little glass votive candle holders around your house, or if you need to buy some they are easy to find.  All you need to do basically is wrap some paper around the glass and decorate!  I chose to emboss the Stampin' Up! White Vellum Card Stock #101856 with the Finial Press Embossing Folder #115963.  That looked so pretty just by itself!  And of course I had to use the Red Glimmer Paper #121790 in the Occasions Mini Catalog because it is so beautiful to punch a large heart….and no glitter falls off!  Again, it was plenty pretty with just the heart on the vellum!  I tried tying various ribbons around the middle but nothing seemed quite right.  Then I stamped the greeting with the "Be My Valentine" stamp #122045 in Real Red and just cut out the banner. Seemed perfect to me as a finishing touch!  There are lots of easy valentine craft ideas and this is one of them!  Wouldn't this be a great valentine craft for kids?!

And if you need to stock up on supplies for future crafting projects, just click HERE!

Valentine Triangle Treat Box

Valentine Triangle Box


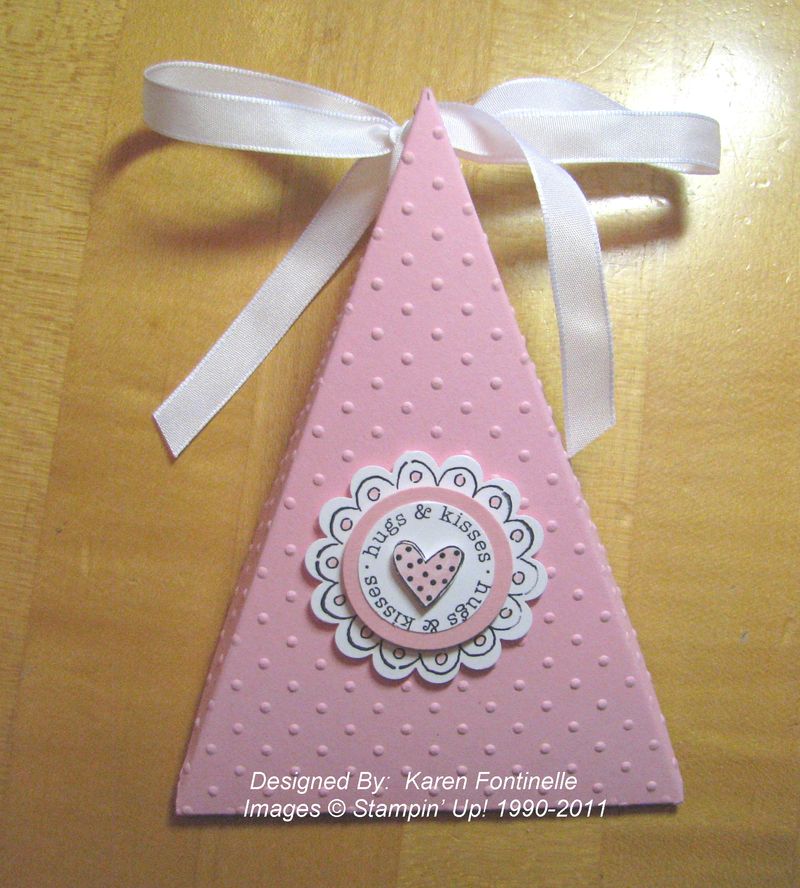
One of my blog readers today asked me about triangle boxes, and after cutting and folding a piece of paper to refresh my memory on how to describe to her how to make one, I thought why not make one for Valentine's Day!

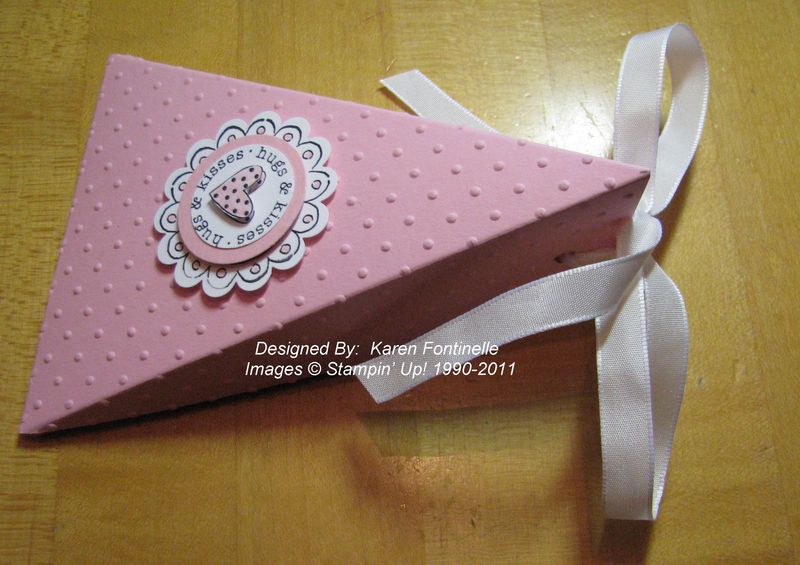
After scoring and folding, I ran the paper through my Big Shot in the Perfect Polka Dots Embossing Folder #117335.  I would say that embossing folder makes anything look good, but then I would say that for all of the embossing folders!  The decoration on the front is made with a stamp from the "Love You Much" stamp set #113756.  That's a cute set!  To make it a little fancier, I stamped the image twice so I could punch out the "hugs & kisses" with the 1" Circle Punch and a layer for that with the 1 1/4" Circle Punch.  I also stamped the heart again and just cut it out with my Paper Snips (you've got to have those for cutting little things!!).  You can pop up whichever layers you want with Stampin' Dimensionals.

Here is a view of the box from the side so you can see what it looks like.

Valentine Triangle Box


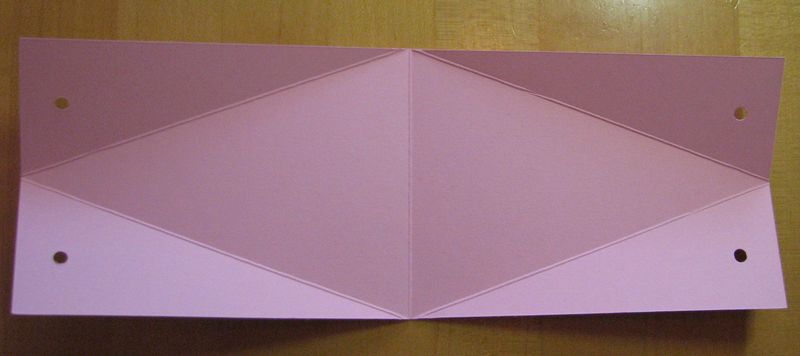
And here is the basic format for making the triangle box.  You can make any size you need.  My paper happens to be 4" x 11", scored in the middle at 5 1/2".  Measure at each end to find the center and put a pencil mark.  Then score on a diagonal from the center fold edges to that midpoint on each end.  Fold on all the scored lines and fold into your triangle box.  See where you want to punch the holes on the side flaps where you will tie the ribbon to hold the box closed.

Triangle Box Folds

Just stamp or decorate your box how you want and put a treat in it!

If you need card stock to start making triangle boxes and others, just click HERE to go to my Online Store and shop!  Don't forget….with a $50 purchase, you will get to choose a Sale-A-Bration free reward! Contact me if you have any questions.

Valentine Favor Tin

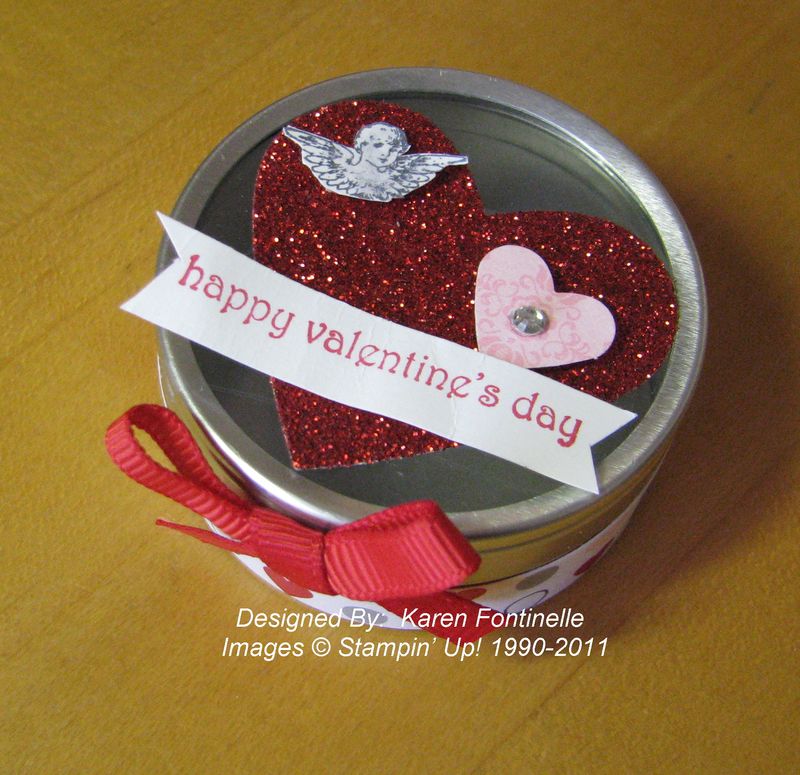
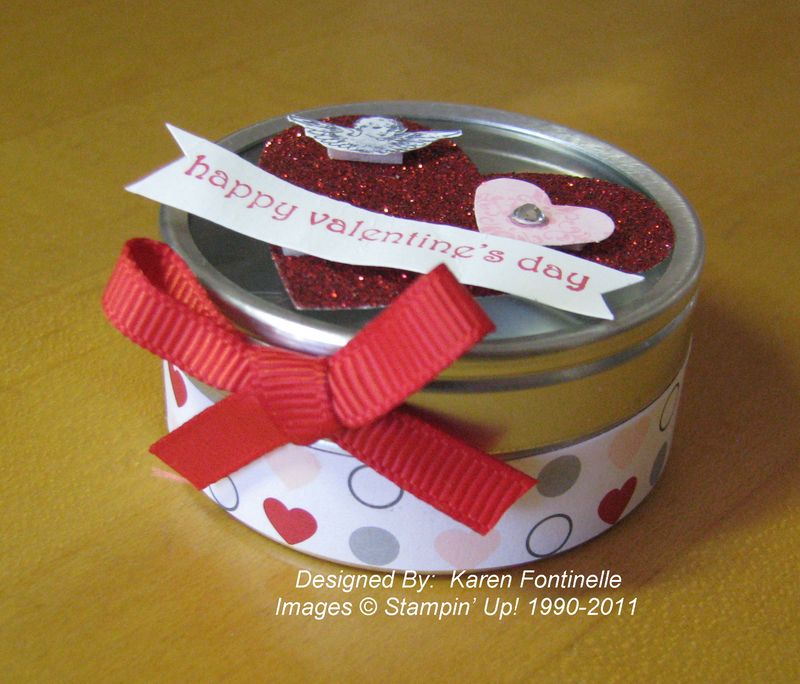
Having some of these little favor tins left over from our daughter's wedding, I thought I should decorate one for Valentine's Day.  They really are handy little things to have on hand!  What cute valentine gifts or valentine favors these will make!

Valentine Favor Tin

Valentine Tin

Supplies:

Stamps:  Teeny Tiny Wishes (greeting), Clearly for You (Occasions Mini)

Paper:  Red Glimmer Paper #121790, Love Impressions Specialty Designer Series Paper #121780, Love Patterns #124156, Whisper White card stock

Ink:  Basic Gray, Real Red

Accessories:  Full Heart Extra-Large Punch #119883, Heart Small Punch #117193, Basic Rhinestones #119246. Real Red Grosgrain Ribbon #109034, Stampin' Dimensionals #104430, Tombow Multipurpose Liquid Glue #110755, Wilton Favor Tin

Funny thing is,  the inspiration for the tin came from finding scraps on my table!  First I found a scrap of the designer paper, cut it a little shorter and wrapped around the tin.  I already have a glimmer heart punched out just waiting for a project and stuck that on.  The little red bow I found in my bag of scrap ribbon, already the perfect size! Actually, it looked plenty cute with just the DSP wrapped around the side and the glimmer heart stuck on top!

Now what to do with it?  Fill it with candy, of course!!  OR stamp some little valentine messages, coupon, or wishes.  Attach them to a strand of ribbon and you'll have a little valentine garland to pull out of the tin. OR just use it for your Valentine gift box!