Easy to Make Blooming With Kindness Flower Card

Blooming With Kindness Card

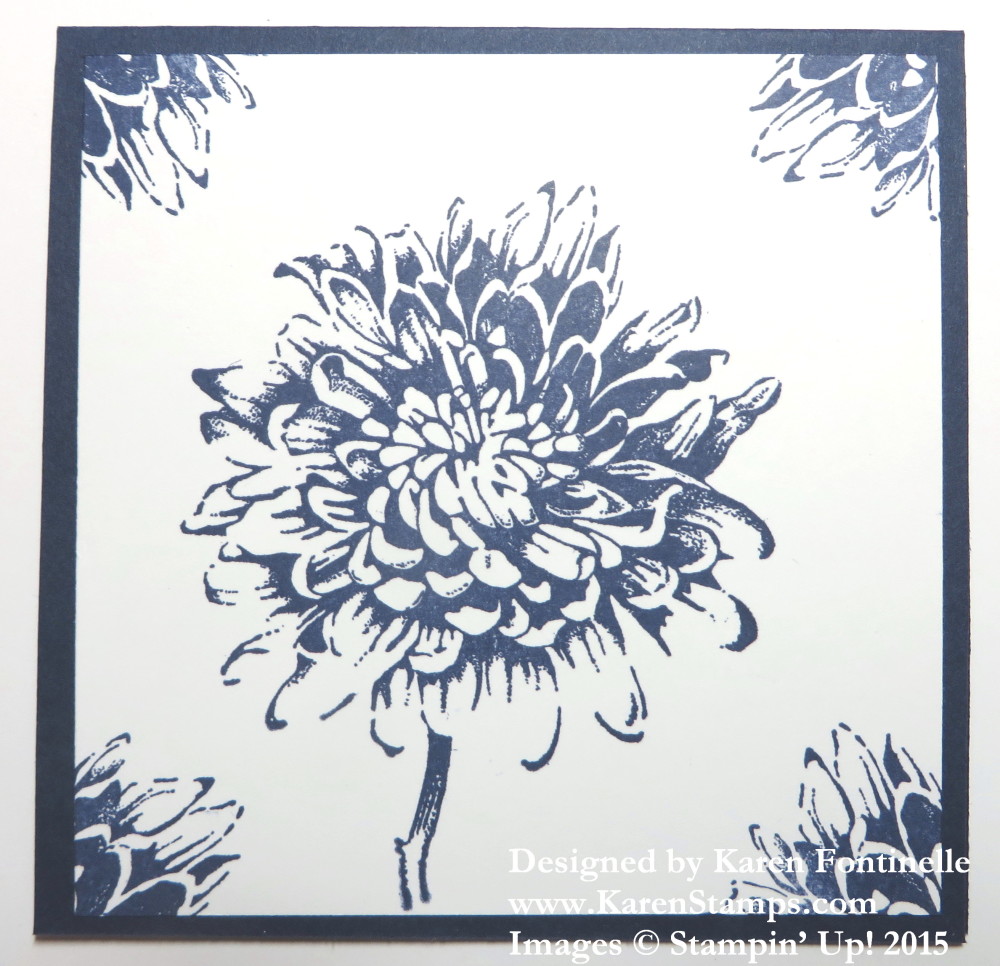
Sometimes it is so easy to come up with an idea for a card, and the Blooming With Kindness Stamp Set seemed to fit the bill for this easy card. While catching up on reading newspapers after our vacation to Death Valley last week, I saw a furniture store ad that had a pillow that caught my eye. The main image on the pillow actually looked a little like a retired stamp we used to have but I also thought of this Blooming With Kindness flower stamp. Then I just stamped a small portion of the flower in each corner of the Whisper White layer.  This is a 4″ x 4″ card.

On the inside of the card I stamped a larger portion of the flower in the lower right corner of a piece of Whisper White. A greeting can be stamped inside or I can simply write a little note in my own handwriting.

The card base is Night of Navy card stock 4″ x 8″ folded in half.  The layer is Whisper White 3 3/4″ x 3 3/4″ and the images stamped in Night of Navy Ink.

Here is a picture of my inspiration for this card:

Pillow Inspiration for Card

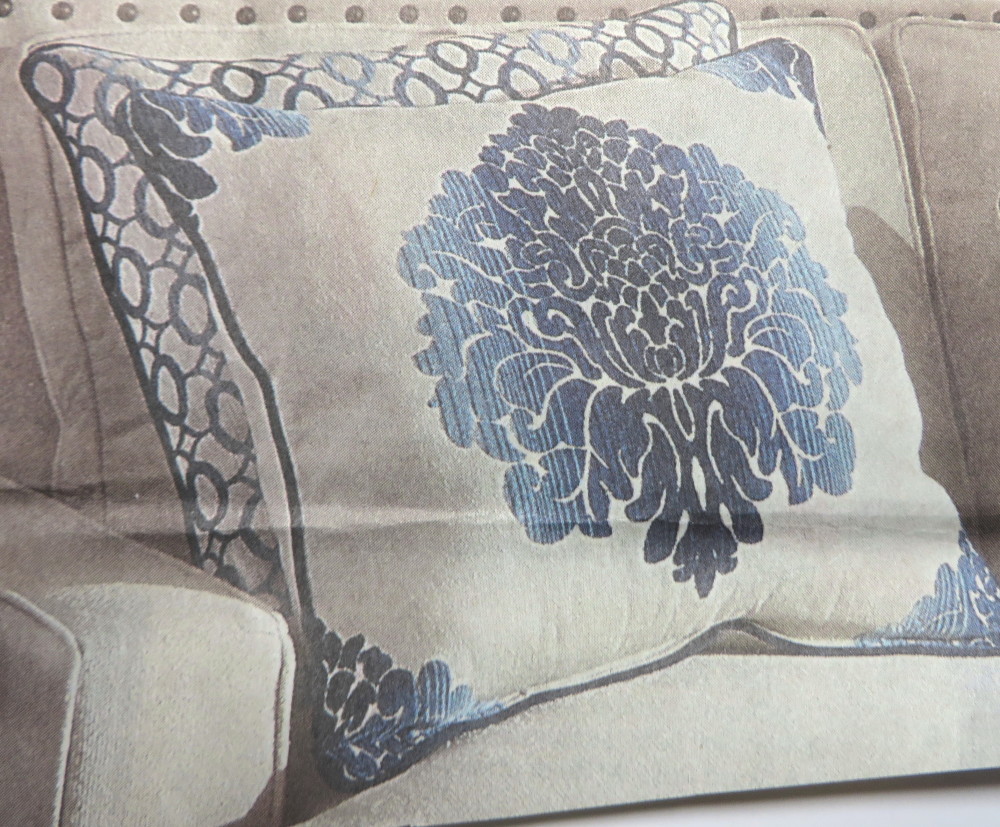
I think you will find that often home decors ads or pictures in magazines can really give you ideas for card, especially pillows! They are the accent pieces of the room and often the colors or the basic design pattern can catch your eye and make you think of how you could translate that into a card or other project. Think about that next time you are paging through one of your magazines.

We are often focused on the newest “mini” catalog, but don’t forget the beautiful stamp sets in the Stampin’ Up! Annual Catalog!  I have a few copies available if you do not have your own demonstrator that you work with and if you would like the hard copy of the catalog to look through. Just send me an email or leave a comment on this post.

This is about the last week for Stampin’ Up!’s biggest promotion, Sale-A-Bration!  Last day is the last day of the month, Tuesday March 31. Earn a free Sale-A-Bration product with every $50 purchase in current Stampin’ Up! products!  Just shop online RIGHT HERE!

Sale-A-Bration is also a good time to sign up to join Stampin’ Up! and become a Demonstrator! Not only do you get the Starter Kit chock full of $125 in stamping supplies plus some business supplies to get you started for ONLY $99, but during Sale-A-Bration you have two extra options to choose from:  Receive a FREE Simply Created Project Kit from the Occasions Catalog OR Receive two free Sale-A-Bration items of your choice. And remember, the Starter Kit is customizable now, no set products that you will receive.  You make your own list according to your likes and needs. As your upline, I can help you build your business in whatever manner you prefer. I’m happy to answer any questions you might have. It’s a very easy process to sign up, you will be a Demonstrator in minutes, and it just may be the best thing you could do for your life or for your family’s benefit.

Shop HERE during Sale-A-Bration until March 31!

Stampin’ Up! Coloring Techniques for You!

Maybe this is the end of your Spring Break, or the beginning.  Maybe you are snowed in or rained in. Maybe you are having a relaxing and lazy Sunday and would just like to sit back and watch some videos!  Here are some that Stampin’ Up! released the other day showing various coloring techniques that you might enjoy.

Coloring Techniques with Sale-a-Bration Papers:

Watch Carrie use the Sale-A-Bration Irresistibly Yours paper that is already embossed AND the printed Sheer Perfection Vellum Paper Stack!

Watercoloring with Blender Pens – A Happy Thing Stamp Set

When I first started stamping, Blender Pens were one of the main things we used! They are still tons of fun to use with ink pads or ink refills in many ways!  Get re-acquainted with your Blender Pens or order new ones!

Watercolor Wash Technique – For Being You Stamp Set

Have some fun by embossing with White Embossing Powder and the Heat Tool, then use the Aqua Painter and ink to do a watercolor wash!

Order any of the current Stampin’ Up! products and with a $50 purchase you qualify for a FREE Sale-A-Bration product!  Remember, besides the Sale-A-Bration Brochure, new Sale-A-Bration products were added! And a few more were added last week!!

SHOP HERE!!

I’m Back! Happy Spring!

Death Valley National Park Spring WildflowersToday is the first day of spring! We came back from our trip to Death Valley, California yesterday and even here in Houston, where things are green year round, we could see the trees leafing out in that bright green and our azaleas are bursting into bloom! We were excited to see some spring wildflowers in Death Valley on our vacation there this past week. Lots of these little yellow flowers in certain areas, but when you get up close you see they are pretty spread out.

Death Valley National Park Wildflowers

Death Valley National Park Wildflowers

Death Valley National Park Wildflowers

We had never been to Death Valley before and although I resisted going with every fiber of my being, it turned out to be a spectacular place to visit (as long as I could go back to the car when I got too hot or tired from hiking with my husband and kids!!). I didn’t know what to expect (except lots of hiking!) but as all national parks have done, it delivered more than we could have imagined. I certainly wouldn’t want to be there if it was any hotter, but these temperatures were doable and comfortable enough in the mornings and evenings. The hotel we stayed at was very nice and convenient, the food not so great and very expensive, and we kept our water bottles and  the gas tank filled up so we wouldn’t have to worry.

At times we were BELOW sea level and at times 6000 ft above. The views and expanse were amazing, just amazing!!! The silence in many spots was golden. The mountains were rock, not covered by trees like you usually see, so the landscape was quite different. At times it looked like piles of dirt and rock like you see where mining has gone on or where construction is going on. But then you could see the beauty in all the different kinds of rock and their colors and the way they were laid down or uplifted. And it doesn’t hurt that I’m married to a man who knows all this stuff and which way water runs and how these mountains and landscapes were formed. We even visited a volcano that went off as recently as 300 years ago! The wind was so fierce I was afraid we would all blow in over the edge, but of course my family walked around the rim while I waited in the car! Some parts of the park looked like a moonscape. We also stopped to see some very tall sand dunes. There were people laying out in their swimsuits on the sand as if it were a beach – but there was no water anywhere around!

Death Valley

If you haven’t visited some of the national parks, you are really missing something. I find them to be almost a spiritual experience to see these amazing creations on our earth and to witness the forces of nature going on under our own feet or in front of our eyes, invisible but taking place over eons of time to form these magnificent landscapes that we can enjoy.

Even while I was away, I didn’t forget that Sale-A-Bration was going on! It only lasts until March 31 so don’t delay or you might forget and miss out on your free product with every $50 purchase!

Shop HERE for the best in stamping and papercrafting supplies AND to earn your FREE Sale-A-Bration gift!

Save Some Green on St. Patrick’s Day with These Stampin’ Up! Weekly Deals & a SURPRISE!

Stampin' Up! Weekly Deal Mar 17 2015

Here are the new Stampin’ Up! Weekly Deals for March 17 – 23. Save on pretty ribbons and embossing folders!  And a fun stamp set!

And a SURPRISE!!!

SAB Banner Newest Items

Newest Sale-A-Bration Items

With the loss of the Blendabilities Markers, Stampin’ Up! has added some new items to choose for FREE with a $50 purchase during these last couple weeks of Sale-A-Bration!  All Sale-A-Bration items (except stamp sets) are available WHILE SUPPLIES LAST!

Shop at my Stampin’ Up! Online Store!  Sale-A-Bration ends March 31!

AND——–

Happy St. Patrick’s Day!

St. Patricks Day Pot of Gold and Lucky Shamrocks

Make Yourself a Triple Berry Basket

Berry Basket Die Triple Basket

A few weeks ago, after playing around a little with my new Berry Basket Die, I wanted to try to make a larger basket to actually hold some cards on my desk. Some I saw online were actually two or three baskets put together but I didn’t want the divider inside. So I figured out this arrangement:

Berry Basket Die Triple Basket Inside Assembly

You can see I cut off some of the basket sides in order to assemble this and glued two sides at the ends. I also took the strips that would be the handles and cut them to adhere the pieces together in the basket bottom. Then I covered the inside bottom of the basket with a piece of card stock that fit the length and width to give it a more finished look inside.  You’ll have to measure to get the best fit.

Berry Basket Die Triple Basket Inside

Then my berry basket was decorated with the pretty Painted Blooms Designer Series Paper, along the trim and for the flower.

I highly recommend trying the Coaster Board for making these baskets.  It will be a lot sturdier and stronger than card stock.  However, the card stock is cute and handy to use, too!

Get the Berry Basket Die and have fun making small baskets! How great they will be to make for Easter and spring!  The Handheld Stampin’ Up! Stapler is very fun to use with these baskets and makes them look like real baskets!

Don’t forget to check the Weekly Deals, too!  Last Day!

Shop Online 24/7 at my Stampin’ Up! Store! 


Easter Bunny Tag

Easter Bunny Tag

Last weekend I had SO much fun making twenty-four of these fun Easter tags with two of my customers/friends and one cute little girl for a group of children. I found the idea for the punch art bunny on Pinterest somewhere and fortunately the bunny fit just right on a tag made with the Stampin’ Up! Tag Topper Scalloped PunchI added some designer paper on the tag for the background and stamped the Easter greeting from a retired Hostess set (sorry!) right on the paper. We played with different combinations, like stamping on cardstock and punching out a shape, but in the end we just liked it stamped on the paper. That’s how you have to play around sometimes with rubber stamping until you just “know” you have the right design!

This is how you make the bunny:  The head is the Extra-Large Oval Punch. The body is the 1 3/4″ Circle Punch, cut in half. The ears are the Large Oval Punch with the pink insides made with the Word Window Punch.  We opted to fold down the top of the ear for cuteness!  The cute little heart nose is punched with the Owl Builder Punch. The eyes are just drawn in with a black marker and Miss Elsie did the whiskers with some wispy strokes with the Crumb Cake Marker! The rabbit paws are just 1/2″ circles.  The carrot is punched with the Modern Label Punch and then just trimmed down with Paper Snips. With the heart punch in the Itty Bitty Accents Punch Pack you can make the carrot topper and even fringe it with the Paper Snips if you want to make it look real.

The ribbon on the tag is the Tangelo Twist 3/8″ Satin Ribbon. It really goes well with the tag.

Hang this tag on an Easter basket or put the tag on a card for Easter. Or just make the punch art bunny on an Easter card.  Have fun with it.

If you need any of these supplies, you might be able to earn a FREE Sale-A-Bration product with a $50 purchase. Due to the Blendabilities not being available any more, other Sale-A-Bration items may sell out so if there is something you really want, don’t delay.

Don’t forget about the Weekly Deals and New Arrivals.

Shop at my Stampin’ Up! Online Store!


Happy National Pi Day 2015!

Illustration of a Pi Mascot Carrying a Pie

It’s National Pi Day and I won’t pretend to know very much about the subject of Pi! I much prefer the National PIE Day! Pi is the ratio of the circumference of a circle to its diameter, which is approximately 3.14159 and apparently very interesting to math geeks! Pi Day is celebrated on March 14 because the date reads 3.14, the beginning of the pi numeral. It will continue beyond the first few numbers after the decimal point, infinitely.

This year, 2015, makes Pi Day especially notable as the date can be expressed as 3-14-15, the first five numbers of pi (3.1415)!  Some people even get a thrill out of memorizing the digits of pi, including my youngest son who did that in high school calculus class. His record stood for a couple years, I think!

That’s about as far as my interest in Pi goes, but I did come across this piano piece for Pi Day! I think you might enjoy it!

Realize the Importance of What We Do In Our Personal Communications


At the Stampin’ Up! Leadership Conference this year, the keynote speaker was Jason F. Wright., an author and speaker. He spoke to the demonstrators about our Stampin’ Up! Statement of the Heart and how we make a difference with our handmade cards, handwritten letters and personal communication. This is something I feel very strongly about, that I worry our society is losing, because when I find a box of old letters, written in ink on paper, hand-addressed envelopes, I recognize and feel the person who wrote it. This is true with traditional scrapbooking, too.  When I hear someone say they don’t like to do the journaling because their handwriting is terrible, I think they are selfishly keeping something of themselves from the people ultimately looking at that scrapbook. Nothing typed or emailed can compare to the handwritten note or letter! I’m just as guilty, being in too much a rush to sit down and write a real letter. Think about how you used to feel when you went to the mailbox and found a letter from a friend. My mother wrote me letters almost everyday when I was away at college (everyone did think I got the most mail!).

Anyway, please take some time to sit down and watch and listen to this video of Jason Wright’s talk at Leadership. I guarantee you he is very funny and also very emotional describing some letters in his life.  Have a box of tissue handy! You’ll enjoy his stamping experiences also! And it will make you realize how important that paper and ink you are working with just might be to someone who receives your card or letter.

Hope you enjoy! Then go write a letter or send a card to someone! If you have a story about a special letter or card, please leave a comment. Here is the link to view the video if you need it:   https://youtu.be/iURdgEYuoso

“To love what we do and share what we love, as we help others enjoy creativity and worthwhile accomplishments…in this we make a difference!”

Stampin’ Up! Statement of the Heart

Paper Pumpkin Leftovers: Make an Easter Treat!

 February Paper Pumpkin Alternate Idea Easter Treat

If you don’t use up all the materials in your monthly Paper Pumpkin Kit, just save them and you might come up with alternate ideas in the future. Here I used  extra supplies from my February Paper Pumpkin Kit to make an Easter treat!  The kit contained these cello bags, the foldover tags for the bag topper, the cute clip, the pretty pink and gold baker’s twine, and the little banner tags. I stamped the Easter greeting with a stamp from Teeny Tiny Wishes (a must have word stamp set in my opinion!).

Then just add a cute bunny to the foldover tag! While that tag was used for Valentine treats as designed, it CERTAINLY is pretty for Easter – pink and gold! The punch art bunny is just made from the Small Oval Punchthe 3/4″ Circle Punch, and the Petite Petals Punch. Two of the petals from that punch make cute ears – just cut off the extra petals so you have enough to glue to the bunny head. The little pink bunny tail is made with a retired punch but you can use something similar. And top it off with a Basic Pearl Jewel Embellishment.

To start Paper Pumpkin coming to your house I recommend purchasing a 3-month subscription on a regular Stampin’ Up! order. It is on sale right now during March during Sale-A-Bration!  And since it is a $50 purchase, you will earn a free Sale-A-Bration product. I also suggest adding some other items to your order to take advantage of the shipping. More and More people are getting on the bandwagon, so don’t miss out!! It’s fun that comes in your mailbox!  Give one or more for gifts!

As a storage tip, some people like to keep their Paper Pumpkin stamps in extra Clear-Mount Stamp Cases for each kit and make a label to slip inside the stamp case cover. Or keep several sets in a larger Full Case for Wood-Mount Stamps.

The Good and the Bad from Stampin’ Up!

Just Kidding Card

Let’s start with the good!  Here is a new photopolymer stamp set, Just Kidding, released this month by Stampin’ Up! The designer of this stamp set said she created it to honor her long-time friends and their journey through life together with lots of laughter. I’m sure we can all appreciate that and know that probably the older we all get, the more we appreciate our dear friends. Now you can enjoy making funny and endearing cards to send to those special people with this new stamp set!

Just Kidding Photopolymer Stamp Set


Just Kidding Photopolymer Stamp Set         #140667          $15.95

To view ALL the photopolymer stamp sets available from Stampin’ Up! – some in the catalogs and some just shown online – please click HERE.

Blendabilities Update

Not such good news! Stampin’ Up! has discontinued the Blendabilities markers due to quality manufacturing issues.  When the tip is welded to the barrel, the welding process can leave microscopic (invisible) holes in the marker tip. This leads to accelerated evaporation of the alcohol in the ink. As Stampin’ Up! noticed more and more issues and complaints with these markers, they stepped up their quality testing and discovered that there was a serious problem with the entire line. While not all the markers were bad, the failure rate from the manufacturer was unacceptable to Stampin’ Up! After much consideration, they said, they decided to discontinue the product. You will need to contact your demonstrator if you are having issues with your Blendabilities or if yours were backordered. No backorders will be filled as all markers have been sent back to the manufacturer.

The good news, I suppose, is that the popularity of the Blendabilities with customers and demonstrators showed that we like alcohol-based markers! So Stampin’ Up! is looking into this. It will probably be awhile until this is all sorted out and Stampin’ Up! has all issues addressed and hopefully a new product to offer us.

With Blendabilities no longer available as a Sale-A-Bration option, it is anticipated that the demand on other Sale-A-Bration items will be higher than forecast. For that reason, all Sale-A-Bration items (with the exception of stamps) will now be “while supplies last.”

If you have Blendabilities that work, just enjoy them! Not all of them will have problems, and keep in mind, none of them were meant to last forever. There was even talk of possible refills for them down the line. But certainly they shouldn’t have arrived dry or dried out after just a few uses.  Be sure to store them flat, not on either end, so the ink will be distributed evenly.

The Memento Black Ink and Refill ARE still available to order!  The Memento Black Ink is great to use and isn’t just for Blendabilities.


Butterfly Berry Basket

Butterfly Berry Basket

I may not have the fancy dishes and table decorations that I saw on the Houston Azalea Trail last Friday, but at least I can make my own basket with the Berry Basket Die and decorate with the Butterflies Thinlits Dies #137360.

I got this idea from the sample in our demonstrator magazine, Stampin’ Success. Mine is made a little differently, but I copied the main elements. Stampin’ Up! made their sample with Coaster Board, a heavier material that would truly be better for making a sturdy basket. Rather than stamping a smaller butterfly, I just die cut the Best Year Ever Designer Series Paper available during Sale-A-Bration. The larger butterfly is die cut from the paper in the Sweet Taffy DSP.

Here are the new Stampin’ Up! Weekly Deals!

Stampin' Up! Weekly Deal Mar 10 2015

It’s always fun to see the new Weekly Deals! Stock up on two colors of Baker’s Twine and the bright and happy All Abloom DSP Paper Stack. If you’re looking for spring, get the Wildflower Meadow Stamp Set and matching embossing folder. There’s also Gold Glitter for pizzazz and you’ll love the Cotton Ribbon!

The Butterflies Thinlits Dies, as  I write this, are backordered and they can’t be ordered at this time. As soon as Stampin’ Up! gets more in stock, they will turn the number back on.

In the mean time, you can purchase the Berry Basket Die and any of the Weekly Deals in the Stampin’ Up! Online Store!

Celebrate Baby Ombre-Look Card for the New Parents

Celebrate Baby Card

New parents may get lots of baby cards, but yours will be extra-special if you give them a handmade baby card with a good baby stamp set like this Stampin’ Up! Celebrate Baby Stamp Set. It comes with many stamps with which to compose a greeting and then the cute little mobile stamp! I colored mine with Stampin’ Write Markers and turned it into a tag with the Tag Topper Scalloped Punch. You can round the bottom corners of the tag like I did with the Project Life Corner Punch The Pool Party 1/4″ Cotton Ribbon is just tied into a bow and adhered to the tag with a couple Glue Dots rather than tying it through the tag. The card base is Pool Party card stock with a Whisper White layer.

The dotted ombre layer starts with the Irresistibly Yours Specialty Designer Series Paper which you can earn FREE with a $50 purchase of any Stampin’ Up! merchandise right now during Sale-A-Bration. For the “ombre” look, which means graduated colors or tones of colors, I used three different ink colors starting with the darkest at the bottom. I don’t remember what I used so you can make your own choices! I may have started with Bermuda Bay, maybe Coastal Cabana and Pool Party. I just sponged on each color, blending them together where they met. The fun effect is using the Irresistibly Yours Paper which is embossed, so when you apply ink over it, the embossed design stands out! Then you take a tissue and rub over all the inked area just to clean off the embossed design to make it show up even better and get rid of any excess ink.

Since I stamped the greeting using two stamps in the set right on the card layer, it hit the embossed polka dots so has a look that you either like or you don’t. I think it makes the word “Welcome” look a little broken up, but I like the way the polka dots show up on the wider word “Baby”. You get two sheets each of six designs in the Irresistibly Yours pack of paper so you have a lot of creative potential there!

With a $50 Stampin’ Up! purchase during the month of March, you can choose a free product from the Sale-A-Bration Brochure HERE or  choose from the newest products Stampin’ Up! just released for Sale-A-Bration HERE.

Have fun shopping with Stampin’ Up! If you are new to Stampin’ Up! and need a catalog, please email me a Karen@KarenStamps.com.

River Oaks Garden Club Azalea Trail

Azalea Trail FlowersIf you live in the Houston area and the rain doesn’t get too bad today, you should consider a trip to the River Oaks Garden Club Azalea Trail today. This is one thing my husband and I have done every single year (except one) that we have lived here and we always enjoy it. We like to focus on the houses, because you often get to walk through the main floor in order to get to the garden out back. Sometimes you only get to see the yard and garden. We love to see beautiful homes, and of course the Garden Club ladies have them all spiffed up and beautiful flower (or vegetable – or ???) arrangements in every room (but unfortunately you can’t take pictures inside the houses!). I often love the smallest details the most, like the table arrangements or decorations. It’s a chance to see how the other half lives, as they say! Some of us can only dream!

Azalea Trail Home & Garden

This is the BACK of a house. How would you like this to be your backyard?!

Azalea Trail Fountain

Just a little fountain for the back of the yard!

Azalea Trail Garden Party Table

An outdoor table set for a lovely party.

Azalea Trail Garden Party Tulips

Close-up of the tulips on the table.

Azalea Trail Children's Table

A small children’s table set for a garden party!

Azalea Trail Table Decorations

Cute table decorations!

Azalea Trail Tulip Tree

A Tulip tree in bloom!  Spring is coming!

Azalea Trail Yellow Tulips

This is how I would like MY flowers to look!

Azalea Trail Fountain

Always my husband’s dream feature! This type of fountain reminds him of one from his childhood.

Azalea Trail Pool

Unusual pool in a newer house and grass unlike the usual in Houston WAY back in the far corner of the large yard.

Azalea Trail Home Backyard

Our house and backyard! (Just kidding!) Those plantings on the left are azaleas. About three flowers had bloomed! But oh my, when all those and the ones along the back of the yard burst into bloom, what a beautiful sight that will be! Azaleas aren’t always blooming on the Azalea Trail!

Azalea Trail Easter Table Decorations

Another fun table for an outdoor party!

Azalea Trail Easter Table Place Settings

Yes, my friends are invited over for an Easter garden party in my beautiful yard behind my beautiful mansion!

Alyssum and Purple Flowers

This house wasn’t even on the Trail but was across the street and had these beautiful flowers blooming in front! So many pretty houses!

Azalea Trail Home Overlooking Golf Course

We like to have many parties in our numerous outdoor spaces at our home overlooking a country club golf course!! I really did like all the “spaces” and levels at this home, not that there are too many days in Houston that you can sit outside and enjoy such a thing.

Azalea Trail Pool Fountain

Just a relaxing fountain in the pool!

Azalea Trail Basket of Freesia

A cute basket of white freesia (we think).

Azalea Trail Azalea Bouquet

And finally, some azaleas on the Azalea Trail (if only in a bouquet!).

If you want more information about the River Oaks Garden Club Azalea Trail, just click the link.

It’s Time to “Spring Forward”! Change Your Clocks!

Daylight Savings Time Begins 2015

Don’t forget! Daylight Savings Time begins Sunday, March 8 at 2 AM!  For most of us that means it is a good idea to change your clocks before you go to bed tonight! Remember, spring forward. So if it is 11:00 pm, set your clock to 12:00 midnight. My mother always hated losing that hour and feeling tired the next day! I can’t believe Daylight Time has arrived already. Maybe it will be a sign to those of you snowed in all winter that spring is really on its way!

Best Day Ever Dot Card

Best Day Ever Dot Card

With a $50 purchase during Stampin’ Up! Sale-A-Bration, you could choose this stamp set, Best.Day.Ever. as your free product! I stamped the dots at the bottom of the card front and after stamping the greeting on the tag, added a couple little hearts and the lined heart. Then I remembered the Itty Bitty Accents Epoxy Stickers I hadn’t used yet! I stuck one on the lined heart and was surprised that it had a completely different feel to it than I expected! It’s a fun embellishment!  The tag was punched with the Tag Topper Scalloped Punch and a bow added tied from Whisper White 5/8″ Satin RibbonAnd for a little more pizzazz, I added a few silver sequins from the Frosted Sequins, which are now on the Clearance Rack! Get some while you can!

Easy and fun card to make!  Get your stamping supplies at my Stampin’ Up! Online Store!

Add on some of the Weekly Deals, too!

Stampin' Up! Weekly Deals Mar 3 2015