Join Paper Pumpkin! Get the May Kit!

Paper Pumpkin Box

The Stampin’ Up! Paper Pumpkin Kits for April 2016 have been delivered to subscribers!  If you don’t want to miss out on the next kit in May, be sure to get yourself subscribed!

It’s easy to join!

  • Sign up on my Paper Pumpkin page HERE! (or just get more information)
  • Add a Prepaid Paper Pumpkin Subscription to your Stampin’ Up! order!  You’ll receive a code via email right after you order. It will tell you to set up your account on the Paper Pumpkin page and you will be set to go!
  • Sign up either way by May 10th to receive the May kit.
  • Watch for your Paper Pumpkin kit in your mailbox around mid-May!

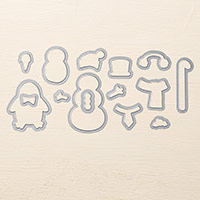
Everything you need comes in your kit! A stamp set, an ink spot, a clear block with your first kit, and all the paper and supplies you need to make the project.  Sometimes it is cards, sometimes it is something else.  It’s always a surprise.

No risk! If it doesn’t suit you, just cancel. If you are busy and want to skip a month, just go in to your account and pause your subscription. Resume when you are ready.

Give Paper Pumpkin as a gift! I send one to my daughter as a gift and if she is too busy, she just pauses her subscription for a month or two.

Who do you need a gift for and want something different?  Who do you know could use  a little “me” time to just sit down and relax while they have some crafting time? Who do you know would enjoy a little surprise gift who doesn’t even craft?  Paper Pumpkin is for everyone and anyone!

Take a look at April’s Paper Pumpkin Kit!  Sometimes there are plenty of extra pieces left over that you can make even MORE projects with! If you don’t like the project or you don’t want to make all the cards or whatever, just go with your own design and creativity.  Nothing says you can’t change it up!  Just have fun with it! That is what Paper Pumpkin is for!

Join Paper Pumpkin Today!

Make An All-Occasion Card with Everything Eleanor

Everything Eleanor All-Occasion Card

One of the Stampin’ Up! retiring stamp sets is Everything Eleanor , which is a set that has been around a long time, it seems, and is good for all-occasion and any occasion cards! It’s an elegant set of stamps that you can make as simple or formal as you like. I’ve always loved the flourishes and the special shaped images to use as a background.

This card has Lost Lagoon, one of the retiring In Colors, as the card base with a Whisper White layer. I stamped the flourishes in Mossy Meadow  and the cute background shape in Lost Lagoon (stamped off once first). The flowers were all stamped in Stazon Ink on a scrap and colored in and cut out.  I used my Aqua Painter and the ink in the lid of the ink pads ( Calypso Coral, So Saffron, Melon Mambo).  The bird is also stamped and cut out.

The greeting is from the stamp set A Dozen Thoughts. It is also on the retiring list.  I noticed that the wood-mount version is discounted so it is only $1.25 more than the clear-mount! For that little price difference, I would rather have the wood-mount! Once you mount the stamps on the wood blocks, the stamps are ready to go all the time! If you don’t mind the extra storage space that the wider case takes up!

Stampin’ Up! Retiring List

Check it out soon because some items have already sold out!  Don’t miss out on what YOU want!

*Due to high demand for retiring stamps, Stampin’ Up! will keep producing retiring stamps until May 22 (not accessories, which are only while supplies last).

Cherry on Top Easy Amazing Birthday Card

Cherry on Top Easy Amazing Birthday Card

Here is a Cherry on Top easy Amazing Birthday card!  If you are looking for a simple birthday (or most any occasion) card to make, this is one you should try. All it takes is a change of paper and/or greeting to fit any reason to send a card!

One of the retiring stamp sets I am going to miss is the Amazing Birthday Stamp Set! It is even discounted on the Retiring Stamps List. It has birthday-specific stamps but some of the other stamps you can use for other occasions, too!

The card base is Bermuda Bay, with a layer of Crushed Curry, both of which coordinate with the Cherry on Top Designer Series Paper Stack. My Cherry on Top Paper Stack had gotten lost in the shuffle somehow so I was glad to think about it again, find it, and use it because it has some fun, colorful papers in it. It’s “Happy” paper to use!

I used my Banner Framelits Dies to die cut the layered banner on the front of the card. If you like, you can save 15% by purchasing the Amazing Birthday Stamp Set and the Banner Framelit Dies together in the Amazing Birthday Bundle.  I had forgotten these two products came together in a Bundle!

All Bundles are being retired right now, but that doesn’t mean all the products individually are being retiring.  They are just taking apart the Bundles to make room for NEW Bundles in the new catalog and perhaps one of the items in the Bundle is retiring, such as the stamp set or the designer paper.

For a final embellishment, I wrapped some Gold Metallic Thread around the top of the banner. This is not retiring but you may as well put it on your order to have on hand because it is an inexpensive, fun bit of pizzazz to add to any of your cards or projects.

Try making this Cherry on Top Easy Amazing Birthday Card or change it up with your own design!

Stampin’ Up! Retiring Products:  Stamps and Everything Else!

Cherry on Top Washi Tape Card

Cherry on Top Washi Tape Card

The sun is finally shining today in Houston! No rain is forecast so I think it’s time for a bright and cheerful card like this one made with some of the Cherry on Top products! It’s all going away by the end of May (or while supplies last!). I got the idea for this card in our Demonstrator magazine we all receive quarterly. They used different paper and washi tape, but I was in the mood for the Cherry on Top designs!

The card base is made with Watermelon Wonder. The paper layered in the background is from the Cherry on Top Designer Series Paper Stack.  Then I took a smaller piece of Whisper White cardstock as a base and wrapped Cherry on Top Designer Washi Tape around it, leaving space for a greeting.

The word “Celebrate” is from the stamp set And Many Morewhich is retiring. It’s one of the stamp sets I hate to see go because I like the ones with lots of words and greetings in it. This stamp set is even discounted so if you need more words for your cards and projects (and who doesn’t?!) I would grab it for your collection.  I have the wood-mount.  Certain sets I like to have the wood-mount so the stamps are ready to go or if they are small I think they work better with wood-mount.

And Many More Stamp Set

For a little pizzazz, I added to Brights Candy Dots in Bermuda Bay to each side of the word. And then I tied a piece of Metallic Gold Baker’s Twine around the front of the card. Easy to do and fun to use my Cherry on Top Washi Tape!

Check out the Stampin’ Up! Retiring Products in my Online Store! This is the easiest way to see everything that is still available! When you are on the page of Retiring Products, choose either “Stamps” or “Everything Else”.  Then on the right side of the page, choose “View:  ALL” in the drop down box so you can just scroll through everything!

Shop Stampin’ Up! Online

Stampin’ Up! Retiring List PDF

Simple Birthday Card with Birthday Bouquet Paper

Simple Birthday Card with Birthday Bouquet Paper

Here is a simple birthday card to make using the retiring Birthday Bouquet Designer Series Paper.  I love this Birthday Bouquet paper, and if you do too be sure to order it while it is available! The ice cream cone patterned paper is layered on a card base of Mint Macaron cardstock.

The greeting is from the retiring stamp set Enjoy the Little Things Stamp Set. This stamp set coordinates with the Enjoy the Little Things Project Kit, which is really cute!  But even if you don’t have the kit, this stamp set has many useful greetings and cute little stamps. For a little embellishment, I just gathered some of the Gold Metallic Thread at the back of the punched circles and popped it up with Stampin’ Dimensionals.

You could use any greeting and any designer paper for a card, so keep this card layout in mind when you want something quick! Start with something simple and you can always embellish to your heart’s content!

Shop the Stampin’ Up! Retiring Products!

Retiring List 2016 PDF

Shop Everything Stampin’ Up!

Time to Say Farewell to Stampin’ Up! Products

Retiring Stampin' Up! Products

Yesterday the Stampin’ Up! list of Retiring Products came out.  Wow!  I was quite surprised at a lot of them, but we’ll see!  Stampin’ Up! doesn’t usually leave us hanging so I think whatever we are missing will be replaced with something better and nicer for us! Really, I haven’t taken it all in yet.  I did mark my catalog last night, using a Sharpie to mark the retiring products. Now I’ll have to go back through and take stock in my mind what all the things were!

 Shop Retiring Stampin’ Up! Products

Get the List

The Retiring List by Page Number

Excel File

(for your sorting pleasure!)

I hope you received my special newsletter yesterday with the list. If you didn’t, check your Spam folder just in case it went in there. If you are reading this and aren’t on my Mailing List, go ahead and sign up in the box and you will be good to go for receiving all the latest news on this catalog transition from the retiring catalog to the brand new catalog coming June 1st! Make sure you “Confirm” your email subscription after you initially fill out the form.  You will get an email with a link you need to click to make it all official.  Some people never do this little step and miss out! It’s a pretty standard practice with emails to make sure we have your permission.

As you can imagine, every excited stamper was on the Stampin’ Up! website trying to shop and get information as soon as the list came out yesterday so there were a lot of website problems, crashes and slowdowns. If you had any problems, try again today or tomorrow. Frustrating for sure, but it shows how much everyone loves Stampin’ Up! products!

Things to Remember:   

  • Accessories will be available while supplies last.
  • Due to high demand for retiring stamps, we’ll keep producing retiring stamps until May 22 (Accessories are only while supplies last).
  • The lists of retiring products will be updated every business day by 4:00 PM (MT).

Enjoy shopping!  Let me know if you have any questions! This is a fun time!

Shop Stampin’ Up! Online!

Gorgeous Grunge Timeless Elegance Thank You Card

Gorgeous Grunge Timeless Elegance Thank You Card

Sometimes when you think you are going to copy a card, it doesn’t turn out exactly like what you expected, like this Gorgeous Grunge Timeless Elegance Thank You Card. I was going to copy a card I saw in our Demonstrator magazine although I didn’t have the same stamp set or the same framelits. I substituted nearly everything and am undecided whether or not I even like this card!  What do you think?

The card base is made with Sahara Sand with a pattern from the Timeless Elegance Designer Series Paper layered on the front.  I found the already die cut shape in my package of Very Vanilla cardstock from (oops, maybe that one is already retired!) (I was thinking it was Deco Labels). I stamped the greeting from One Big Meaning. Then I used my Gorgeous Grunge Stamp Set to very lightly stamp to make a textured background.

Behind the die cut I adhered two pieces of the 1/4″ Cotton Ribbon (Melon Mambo and Pool Party) plus a stand of the Silver Sequin Trim. I also pulled off a few sequins from the trim and adhered them to the greeting die cut. It’s easiest to use the Fine Tip Glue Pen for tiny things like sequins.  And then I also used a few small and tiny pearls from the Pearl Basic Jewels.

So sometimes when you go to stamp something, you might surprise yourself with something very different than what you planned.  You just have to go with the flow and see where it takes you!

The Stampin’ Up! Retirement List is due to come out this afternoon at 1:00 pm MT (2:00 pm Central Time).  I will post the link to the list or whatever is available and all information as soon as I can.  That’s as much as I know at the moment!

Sounds like the Stampin’ Up! OnStage 2016 event in Salt Lake City was a big success and that everyone is excited about the new catalog!  The new catalog will go live June 1st. I should be able to give out/mail out catalogs to my customers when I receive them, probably around early to mid-May.  If you do not have a Demonstrator, I would be happy to be yours and mail you a catalog if you are interested in Stampin’ Up! products. Just email me with your contact information at Karen@KarenStamps.com.

If you have ordered from me as  “No Contact” customer, THANK YOU!, but know that I do not have your name or address. If you would like a catalog, just request one from me.

Shop Stampin’ Up! Online!

Watch for the Retirement List later today!

Make a Cute Mini Album For A Friend

Mini Album Cover

I thought you would enjoy seeing this cute mini album a friend sent me recently that she made! You can use it for inspiration to make an album of your own!  I think mini albums are one of the cutest things we can make with all our stamping supplies!

I’ve often said one of the best things about being a Stampin’ Up! Demonstrator is the people you meet. It was just chance that another Demonstrator saw my name on an email group I was part of and noticed I lived in Houston.  She invited me to come join a group of them for stamping, swapping and lunch out! What could be more fun than that?! We all got together once a month for a few years. It was great because most of us would never have met any other way. Most of us are still in touch one way or another even though some have dropped as Demonstrators or moved away. We just enjoy talking about stamping and Stampin’ Up! and having lots of laughs together. I wouldn’t have met these people without being a part of Stampin’ Up!Mini Album Inside1

When you open the album completely, this is what the inside looks like. So fun to discover all the cute tags and sayings my friend slipped inside!

Mini Album Inside2

In the photo below, if you fold the right portion back to the center, you see another pocket and cute little tag and envelope.

Mini Album Inside3

Such cute little things in the small envelope, not to mention a unique clasp for the envelope flap, tucking it behind the punched flower!Mini Album Inside4

And even on the back of the album is one more surprise!Mini Album Back

You can make something like this and put photos inside of your family or whatever occasion you are making the album for. You will find many ways to make mini albums online. This one is the same size as a regular card.

Just as I was thrilled to receive this from my friend and know how much thought and love she put into it, imagine how much one you make will make to someone special!

Join the Stampin’ Up! family and make new friends!

Tomorrow is the last day for Stampin’ Up! Weekly Deals as we have known them! After tomorrow we will have occasional “Special Offers” instead.  Lots of deals to choose from!  Be sure to check it out!

Tomorrow also begins the transition to the new Stampin’ Up! Catalog!  Demonstrators who attended the OnStage convention in Salt Lake City the past few days already received theirs and get extra-early ordering opportunities! Demonstrators who did not attend will be able to view the catalog online tomorrow and we’ll all be able to see projects made with new products. Customers will start receiving catalogs about mid-May and the new catalog goes into effect June 1. That means the Retiring List will be released tomorrow afternoon, 1:00 pm MT! If there are things you want, you can get a jump on ordering today or be ready to order as soon as the list is released. Some things will sell out most likely, you never know. More details will be released tomorrow about the Retiring List.

Join my Mailing List to keep up with all the news coming out from Stampin’ Up!

Try your hand at making a mini album for someone.  You’ll have fun making it and they will appreciate it!

Mini Treat Bag Thinlits Balloon Birthday Card with Envelope

Mini Treat Bag Thinlits Balloon Birthday Card with Envelope

One of the items on the final week of Stampin’ Up! Weekly Deals is the Mini Treat Bag Thinlits! That is what I used to make this Mini Treat Bag Balloon Birthday Card!  I used the Birthday Bouquet Designer Series Paper to make the treat bag. Then I punched a matching “real” balloon with the Balloon Bouquet Punch. To turn this into a birthday card, I added a card of Whisper White to slip inside and stamped with the smaller balloon from the punch adhered to the card. The larger balloon is on the bag.  And to finish it off, I used the Envelope Punch Board to make a matching envelope with another pattern in the pack of designer paper.

The Mini Treat Bag Thinlits DIes have been one of my favorite dies!  Be sure to check it out and perhaps add it to your next order!

Order Stampin’ Up! Products HERE!

Balloon Celebration Regals Colors Birthday Card

Balloon Celebration Regals Colors Birthday CardOne quick and easy way to make a birthday card is to use the Balloon Celebration Photopolymer Stamp Set and the Balloon Bouquet PunchFor this card, I simply chose to use colors from the Regals Family just because I don’t use those colors as much. But I’m happy with the colors when I look at this card!

To keep it easy, I just used the Whisper White Thick Cardstock for the card base. If you don’t have this paper already, you should add it to your next order.  It just is a little heavier than the regular Whisper White and you don’t feel that you need to add a layer for a little more heft in your card.

Then I had fun punching lots of balloons with the Balloon Bouquet Punch!  If you want to, you can stamp the shading on the paper first and then punch, or punch first and then stamp. Once you start punching balloons, punch extras because it is fun and because you might want to use them on another card or project!

The stars stamp and the greeting all come in the Balloon Celebration Stamp Setas well as the balloon strings, so you are all set!  You will be able to many kinds of cards with this stamp set to cover almost all occasions!  Have fun making this Balloon Celebrations Birthday Card!

Shop Stampin’ Up! Online 24/7!

It’s the Last Stampin’ Up! Weekly Deals!

 Last Week for Stampin’ Up! Weekly Deals!

Stampin’ Up! is changing things up!  This will be the last week for the Stampin’ Up! Weekly Deals as we know them. In the future, Stampin’ Up! will periodically have “Special Offers”. And of course there is still the Clearance Rack for bargains.

One of my favorite products is on the Weekly Deals:  the Mini Treat Bag Thinlits Dies!! And stars are so versatile!  They can be used for birthdays, congratulations, graduation, just for you, any occasion almost!  Be sure to take note of the Stars Framelits Dies!

Click on any of the photos below to see the product! You’ve got to add some of these items to your order this week!

Make a Paper Tassel with Stampin’ Up! Cardstock!

Paper Tassel

Did you ever think about making a paper tassel with your cardstock?  I didn’t until I saw this idea in a magazine!  Tassels seem to be the trendy thing right now, especially in jewelry.  Why not add them to your papercrafting?!

I’m sure you can modify these instructions to suit the look you want as you play around with the idea.

  • Cut card stock 6″ x 10″.
  • Cut strips 1/2″ x 10″.
  • Measure the center of each strip and put a pencil mark (just if you want something closer to perfection!  Otherwise just eyeball it!)
  • Lay the strips in a starburst pattern, glueing each one on top of the other.  I used the Multiipurpose Liquid Glue (sometimes know as the “green” glue for the color of the bottle!).  Let dry.  (See photo below)
  • With the center of the starburst in the palm of one hand, gently cup the strips together to form the tassel.
  • Take a piece of ribbon and lay it through the inside of the tassel so that you can tie it on to something later if you want.
  • Take another strip of cardstock (I used Gold Foil Sheets) and make the piece that ties around the bundle about one inch down from the top of the tassel. I used Fast Fuse to adhere the ends of the Gold Foil sheet.
  • That’s it!  Tie the tassel on to a package, a gift box, a banner, whatever you like!
  • Try variations like using different shades of the same color card stock or designer paper.

Paper Tassel Layout

JOIN PAPER PUMPKIN TODAY!!  GET A FREE STAMP SET IN YOUR KIT!

To celebrate shipping one million Paper Pumpkin kits, Stampin’ Up! is putting a bonus stamp set in the April kit!  The only way to get it is to be a subscriber and today is the last day to sign up to receive the April kit!  They will ship by mid-April so sign up today (April 10) to be a current subscriber!  No risk, no obligation!  Pause your subscription for a month or two when you want to (just don’t do it for April or you will miss the bonus stamp set!).

Paper Pumpkin Free Stamp Set April 2016

Click HERE to join Paper Pumpkin today and enjoy some crafting time for yourself!  You deserve it!

Remember the large selection of Stampin’ Up!  Weekly Deals that will come to an end in another week!

Stampin' Up! Weekly Deals Banner


Things To Do This Weekend: Join Paper Pumpkin, Join My Mailing List!

Paper Pumpkin Free Stamp Set April 2016

Paper Pumpkin has shipped One Million Kits  and to celebrate and thank the Paper Pumpkin subscribers, Stampin’ Up! is sending a free bonus stamp set in the April Paper Pumpkin Kit! Who doesn’t want FREE STAMPS?!

Join Paper Pumpkin by April 10th in order to receive the April Kit and get your free set of stamps plus a fully designed project with stamps, ink and paper that is all ready for you to just sit down and start creating! No need to design something yourself and get out your supplies!  Just open the box and start crafting. Talk about stamp therapy! It’s your time to relax and enjoy!

Join My Mailing List

If you are reading this blog post and like what you see on my blog, please join my Stamping With Karen Mailing List. You will get a monthly newsletter with stamping projects and directions plus all the latest Stampin’ Up! news. And with the Retirement List coming out soon and the new Stampin’ Up! catalog coming out in another month or so, you want to be on top of all the news!

You can also like my Stamping With Karen Facebook Page HERE and follow me on Instagram @StampingwithKaren.

Now go set up your account with Paper Pumpkin so you get the April Kit with the bonus stamp set inside!

National Beer Day Beer Stein

National Beer Day Beer Stein Card

Today is National Beer Day, in case you hadn’t heard so I made a Beer Stein card to celebrate! It’s also a good card for a man in your life who likes beer (or even a woman) for a birthday or other occasion. Very easy to make with some paper trimming and punches.

My stein base of Whisper White is 3″ x 3/4″ with strips of Hello Honey cut to fit inside.  They are about 7/8″ wide and 3 1/2″ long.  I chose to put a piece of Vellum over the top to make it look like a frosted glass like you might get in a restaurant.  The foam bubbles are made with punched circles and I even punched some Dazzling Diamonds Glimmer Paper for some tiny sparkly bubbles.  The handle is the largest oval punch with the Large Oval Punch punching the inside out.  My bubbles don’t show up very well on this photo.  You might like to sponge the edges a bit to make them stand out more.

I was wondering who thinks up all these “days”, but this one is actually rooted in history. National Beer Day is linked to the end of Prohibition and if you would like to read more about National Beer Day, check out this Fortune.com article HERE.

Whether you are a drinker or not, beer drinker or not, you might want to make a beer card to keep in your stash in case you have the perfect person to send one too!

There are some new items on the Clearance Rack so be sure to check that out! And all the Weekly Deals!

I wish you a Happy National Beer Day and I hope you celebrate at least by making a Beer Stein card!