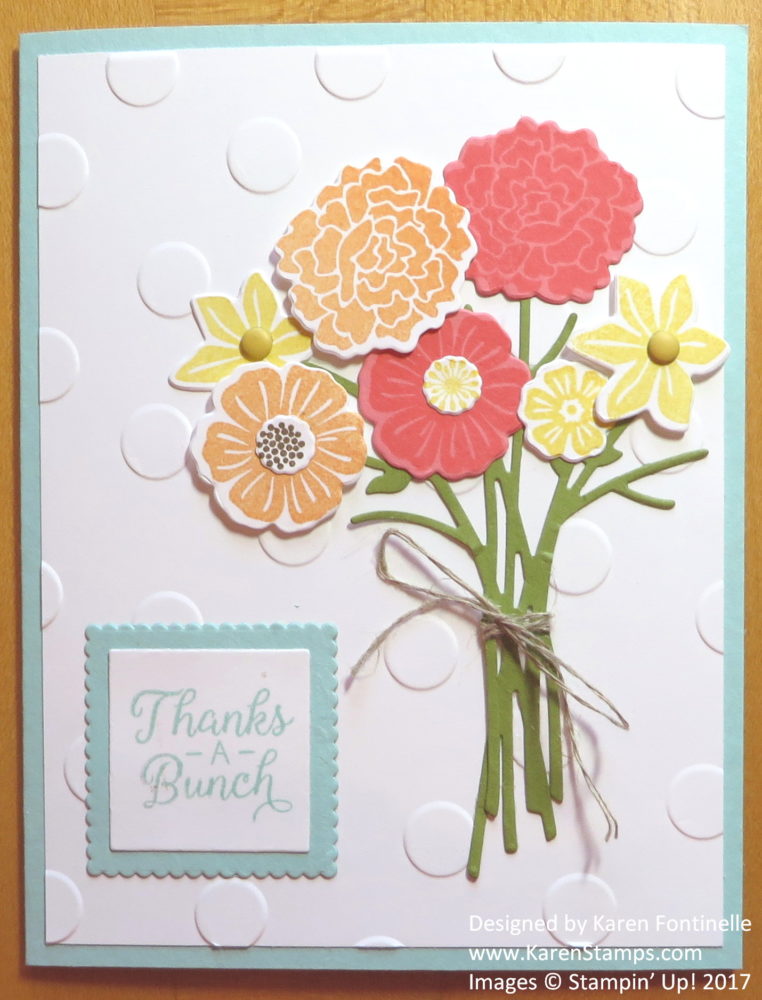
This really is a quick and easy card with the Fresh Florals Designer Series Paper. And if necessary, you can make one even quicker and easier probably than this one! Sometimes we need something simple and that can suit the occasion on a moment’s notice, and this card can do that just by the greeting that you add to it!
I started with a card base using the Thick Whisper White Cardstock, which is just a little heavier weight than the regular Whisper White Cardstock. The regular is okay, the Thick is just a little bit nicer to use on a simple card, a little sturdier. You can make the card base however you like, but for this card I cut the paper 4 1/4″ x 11″ with the fold at the top at 5 1/2″. You could even cut it like this but turn it sideways so the fold is on the left, but it would be wider than a regular card and not as tall. Just a slightly different look if you are in the mood for change!
The Fresh Floral Designer Series Paper is beautiful and comes in all the new In Colors. This pattern is Fresh Fig. To jazz it up, I used the Decorative Ribbon Border Punch. If you don’t have this punch yet, just use strips of Fresh Fig Cardstock down the sides. But this punch really does make a pretty accent along an edge so I do like it.
Now if I had the Fresh Fig 1/2″ Finely Woven Ribbon, I would have used that, but since I didn’t, I just used a strip of cardstock behind the greeting. You wouldn’t have to do this.
The greeting is made with the Label Me Pretty Bundle, a combination of the Label Me Pretty Stamp Set and the Pretty Label Punch. You can buy them separately, but the Bundle will save you 10%. To help the label stand out a little more against the designer paper, I just punched another label out of the Fresh Fig Cardstock and cut it in half from side to side, then glued it underneath the label for a layer. That leaves a tiny bit on the sides open, which wouldn’t have showed against the cardstock strip I had underneath, but I did punch another label and just cut off the sides and glued those under the sides of the label for a layer on each end. Tiny detail, but you can do it if you want! And why not add a couple of Rhinestone Jewels on the label as well?!
Here’s another very similar card I made with the Fresh Florals Designer Series Paper, this one in Powder Pink. Click HERE to see this card.
A couple reminders:
- Don’t forget to use your Bonus Coupons from July if you earned any! They will be in an email!
- Several states are having back-to-school sales tax holidays beginning this weekend and certain Stampin’ Up! products are eligible for this tax holiday! Check the chart here!
I do think the dates for Texas are incorrect on this chart, sales tax holiday in Texas is NEXT weekend, August 11-13, so make sure the dates for your state are correct and that you are not charged sales tax on your order for those particular items.
Don’t forget to just make simple cards sometimes, like this Quick and Easy Card With Fresh Florals Paper. Have some designer paper and stamp sets on hand that will do for multiple occasions! You can add extra embellishments, but you can also keep it simple!
To order your Stampin’ Up! supplies today, just click for the

 If you want to receive the August Paper Pumpkin Kit in another week or so, join Paper Pumpkin today! Today, August 10th is the deadline for the August Kit.
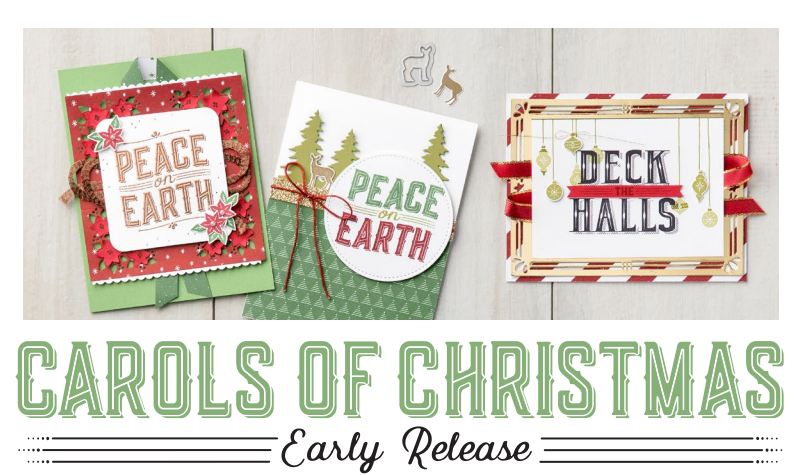
 I admit I wasn’t all that thrilled with this stamp set and bundle at first, or at least wanted to wait and see what was going to be in the Holiday Catalog. As usual, as I saw some samples that other Demonstrators were making during our preorder opportunity, I knew I had to have it and placed it on my order!