
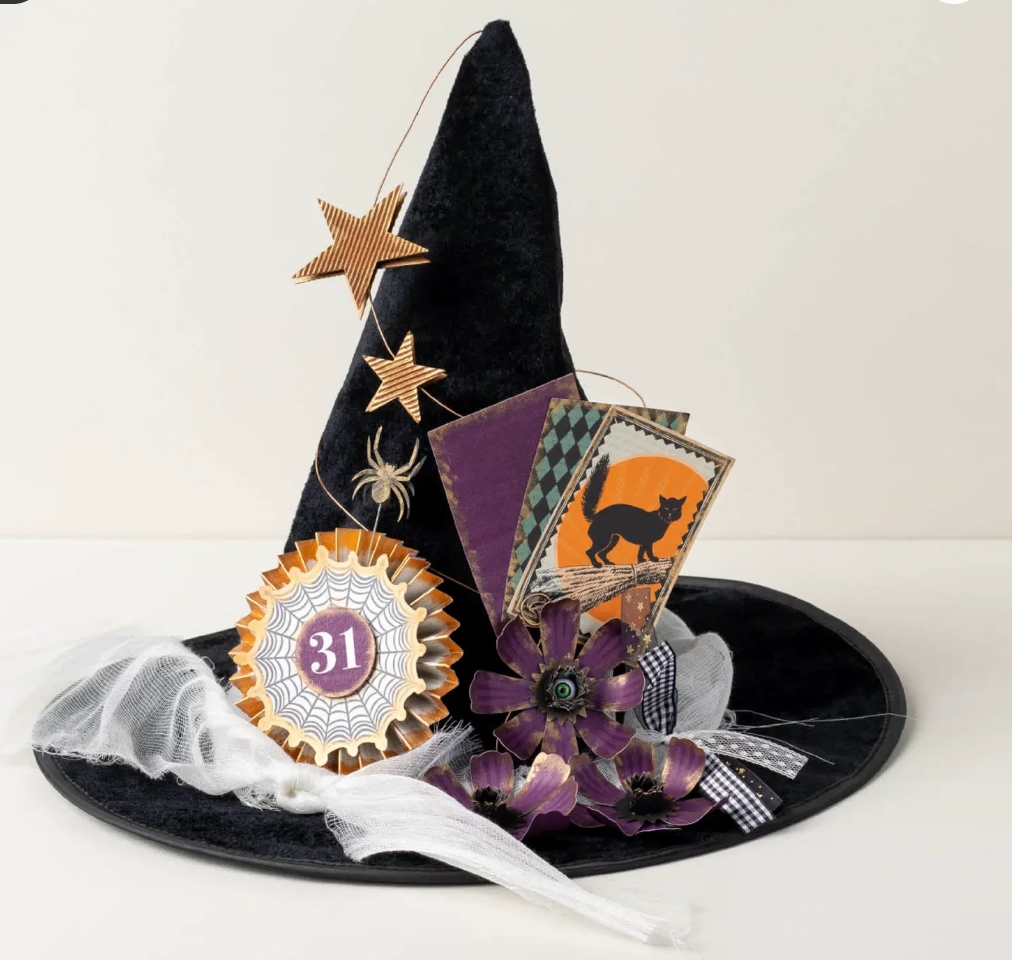
If you love decorating your home for Halloween as I do, you have to check out the Stampin’ Up! Kits Collection! There are TWO kits available that you and your family might enjoy making together and then having for years for Halloween decor!
The newest Kit is the Witchy Whimsy Hat Kit. This kit is even better than a similar one they had many years ago (which I still put out every year!). In this kit you get a REAL witch hat, kind of velvety, full size! Once you take it out of the small cello bag you can’t fold it back up and put it back in the bag, at least I couldn’t! But I was pleased that I didn’t have to make my own out of paper as in the previous kit a long time ago!
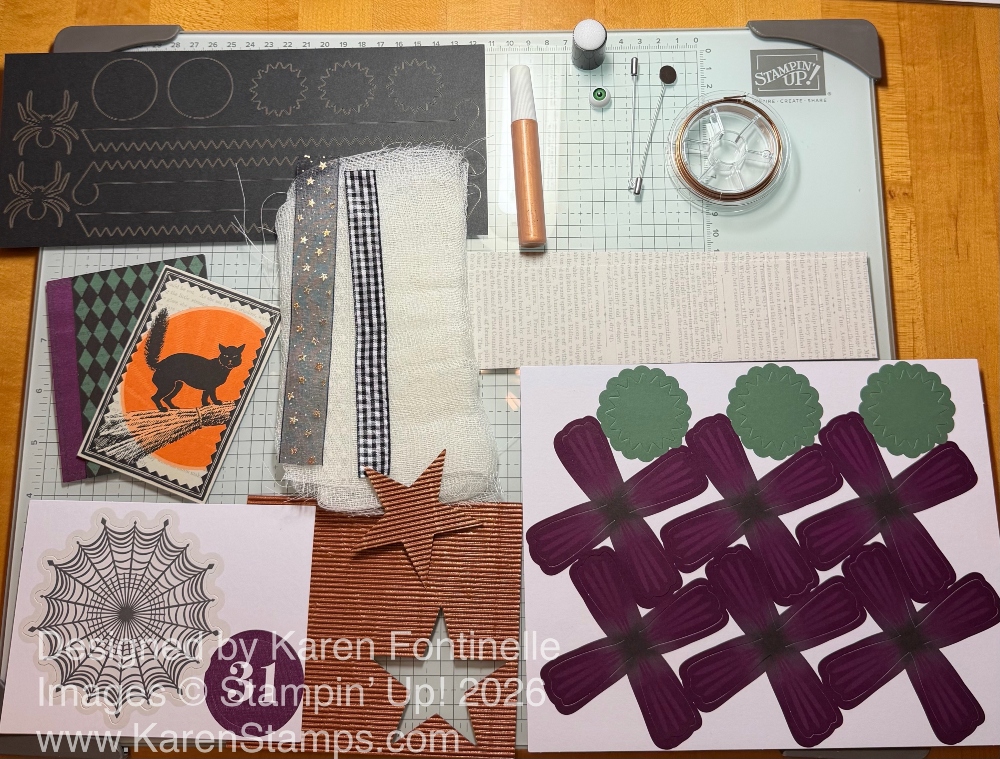
At first the directions in the kit look confusing and not very helpful. I suggest watching the Stampin’ Up! video (and slowing it down in speed and pausing after every step) to get the idea, then look back at the pictorial directions and you will understand them better. There are a couple of really fun things in this kit. There is a special coppery-metallic kind of paint and a Sponge Dauber to dab on various pieces in the kit to make them look a little distressed for a witch. No precise painting involved, just dabbing on paint here and there on some pieces. Really fun!
Also, the paper the diecut stars are punched out from, is really nice! It is corrugated and copper-colored. You will probably wish we carried that paper in our Online Store! The wire is rolled up on a spool so be careful as you open it, and then work with it a little to mostly straighten it so it is easier to work with. You will make something resembling a knot in one end, then stick the other end up through the inside of the hat to poke out from the top of the hat. The “knot” will hold it in place as you pull it through. Then you will wind it around the hat and hot glue at the bottom. The stars, one on each side of the wire, will be attached. I used Dimensionals as the directions called for but I think you could use hot glue as well.
Just proceed with all the pieces as directed in the video and directions OR do your own thing with the supplies. Either way, I think you will be happy with your witch hat creation! Be sure you have a block of time to work on it so you can enjoy the process. It is not really difficult, but it does take a little bit of time so don’t be in a rush.

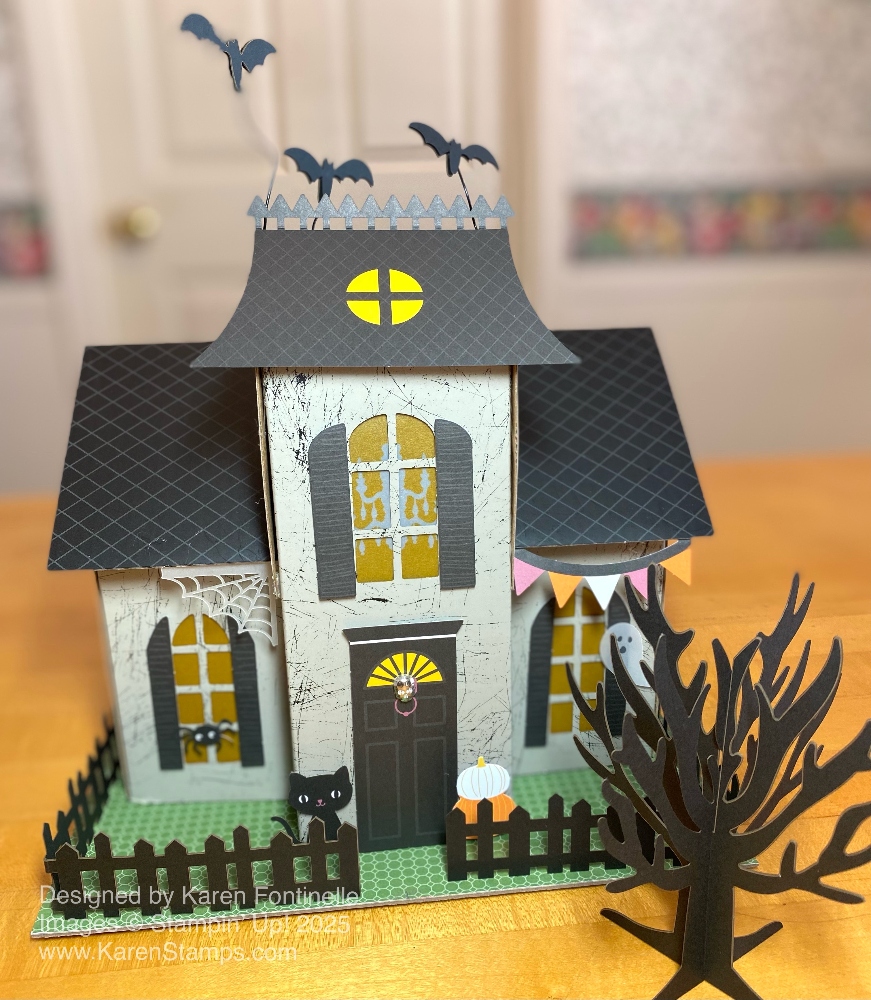
Another Halloween decor item you might miss if you don’t look through all the Kits in the Kits Collection, is the Haunted Home Kit from two years ago I think. I bought this at the time and it sold out almost immediately. More came in after Halloween and some people decorated the house on their own for Christmas! But now it is available in the Online Store. It is not difficult to put together. Start with the cardboard walls, add the vellum behind the windows, decorate the outside, and add the roof.

When I finished mine, I covered a sturdy piece of cardboard with a greenish piece of designer piece of paper to “resemble” grass and used hot glue to adhere the house to that base. I wanted it to be sturdy and I knew I wasn’t going to try to fold it up for storage or anything. You can see the base I made in the next photo.
Any of the Kits in the Kits Collection are fun to make and easy enough for anyone! They come with all the supplies (except maybe a glue gun is recommended) you need. You can follow the directions perfectly or change up the design according to your liking. Take a look at these Halloween crafts and get your order in! You still have time to receive your order and make the project in time for Halloween! Enjoy!