
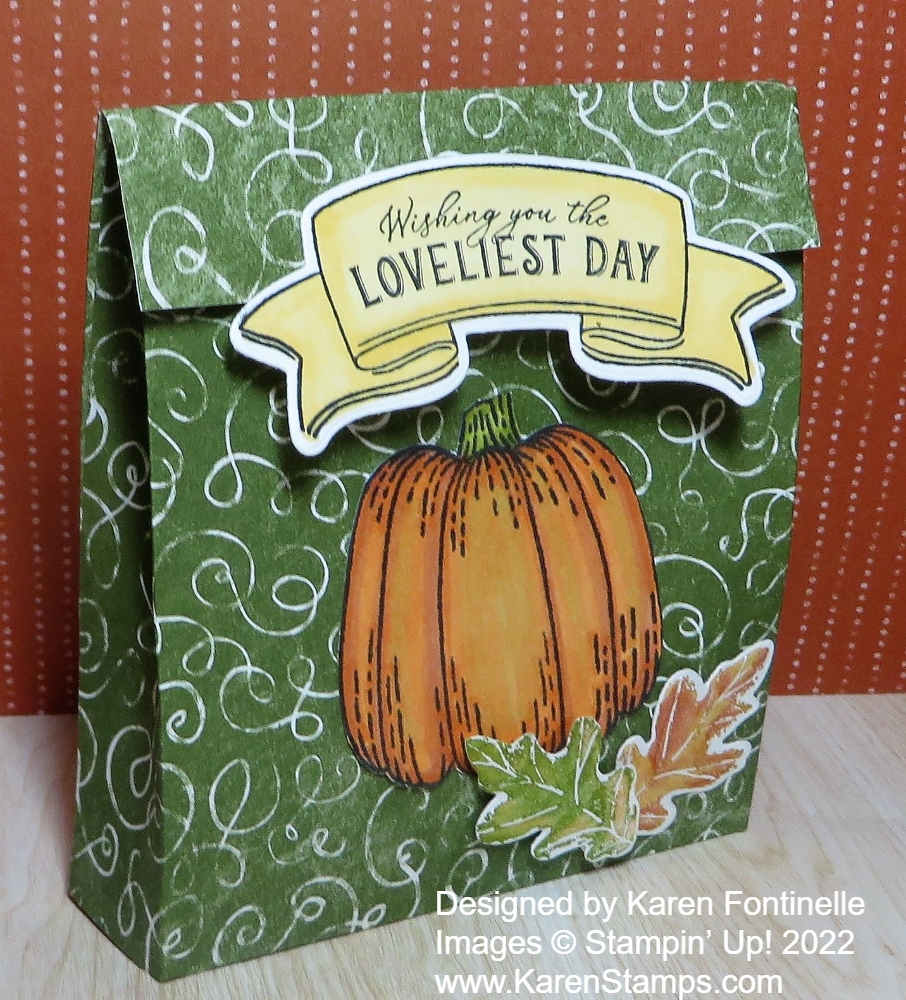
I hadn’t made a little treat or gift bag for awhile so I thought it was time for one for fall. You could give it to someone for Halloween because it has a pumpkin or it would be great for Thanksgiving. Maybe a little treat or party favor for Thanksgiving dinner!
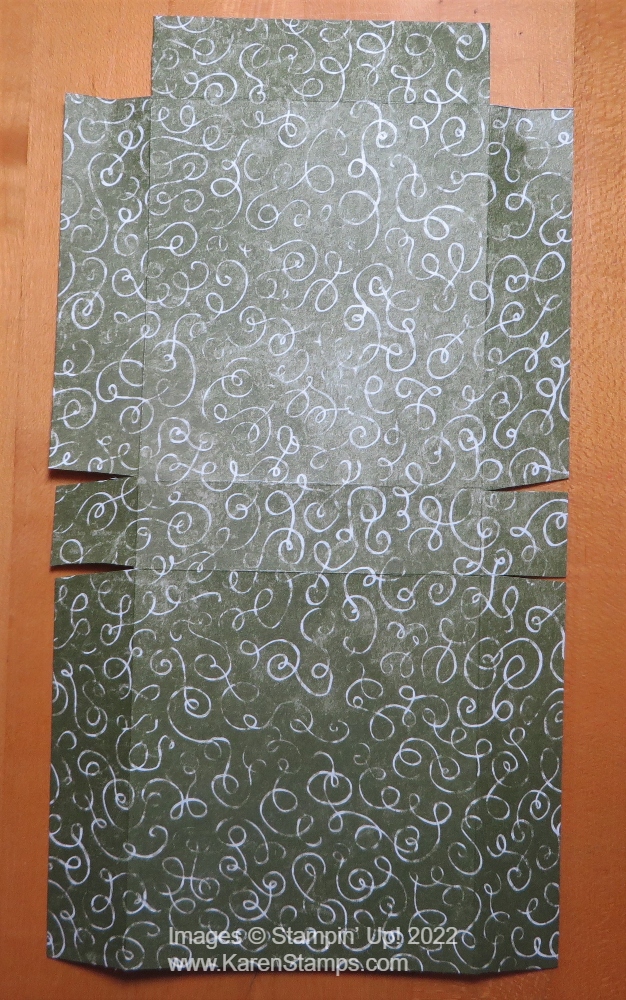
Start with a piece of cardstock or designer paper cut 6″ x 11″. Score it on the long side at 1″, 5 1/2″, and 6 1/2″. Turn and score on the short side at 1″ x 5″. Check the photo below to see how to cut off two corner squares and snip on the sides on the score lines up to the vertical score lines. You can angle your cuts just a little if you like so they fit a little better. Crease all the score lines and play with folding everything together so you see how it goes together.
I used a pattern in the Rustic Harvest Designer Series Paper to make this bag, but you could use a Garden Green cardstock or any color you like if you prefer. You could also make the bag with cardstock and add some layers or pieces of designer paper to decorate it.
Before you assemble the bag, it’s easier to have the pumpkin adhered to the front panel first. I used the Hello Harvest Stamp Set to stamp the pumpkin on Basic White Cardstock with Memento Ink, then colored in with Light and Dark Pumpkin Pie Stampin’ Blends. I added a touch of green also. You can play with whatever combination you like.
I also stamped two leaves with fall colors in the same stamp set. To ink up those stamps, I used Stampin’ Write Markers using fall colors like green, orange, yellow, and maybe some Cajun Craze. Just lightly color those markers on random areas on the stamp, breathe on the stamp to moisten it, then stamp.
The banner is also in the stamp set. I stamped it on Basic White and colored it with So Saffron Stampin’ Blend.
For all these elements, I used the Rustic Pumpkin Dies to cut out these pieces. You can glue down the pieces flat or pop some or all of them up with Stampin’ Dimensionals. Since the top flap of the bag folds over, you need something to hold it closed. You could punch two holes and tie a ribbon through or use some kind of clip, whether an old Stampin’ Up! one or one in your desk supplies. I adhered just the top of the banner to that top flap and just used a Stampin’ Dimensional to hold the flap shut. It wouldn’t be too hard for the recipient to open it.
After you assemble the bag, just push in the sides, especially at the top a little bit to get it to close. Or cut off the flap and just have an open top.
Make this little bag even if you don’t plan to put anything in it or give it away! It will make a pretty decoration for fall sitting out in your home!
Remember to check the Clearance Rack, refreshed yesterday! Some great bargains you can be using now!