Category Archives: Cards

For The Birds Thinking of You Card

For The Birds Mailbox Thinking of You Card

When I was ready to stamp, I just decided to pull out the For The Birds Stamp Set and ended up with this thinking of you card.  Sometimes there is no rhyme or reason for what I stamp. I might go to the shelf for a certain stamp set and something else will catch my eye. That’s one of the things I love about stamping –  there are so many options and choices and usually you can make any of them work.

These For The Birds stamps all have a saying underneath the image.  Some I like and some I don’t care for that much, but you can avoid using the saying if you don’t want it. Either cover it up with a post-it before you ink up and then remove it, or wipe the ink off, or cut the greeting off after you stamp. On this tag, I just cut off the words underneath the mailbox and made my own greeting with a stamp from Teeny Tiny Wishes. I cut out the greeting with the Bitty Banners Big Shot Die Framelits.

The tag is stamped with Stazon Black Ink and colored in with Stampin’ Write Markers – sort of! With the Blendabiities gone, I ordered some new Blender Pens on my last order. I still have my original set and one other but they are all a little ragged and dry. It was a joy to color with these new pointy Blender Pens!! There are so many options for coloring, but what I did today on this tag was to scribble some marker ink on the stamp case cover, then picked up that ink with a Blender Pen.  You can use the same one over and over and just scribble it on your Grid Paper (backordered right now!) or scrap paper until it is clear again. You can add more ink if you want your coloring darker, although you can’t “work” the coloring too much on just Whisper White paper.  Better to use Watercolor Paper. But I was using Whisper White and I did get it messed up a little bit – but let’s just say it’s an old mail box!! In some places where I wanted it darker, I used the marker directly. Depending on the colors, using markers straight on your image is too dark and heavy often times. That’s why Blender Pens or the Aqua Painter are so useful to have available.

Since the tag was too plain, I added some sponging with the Sponge Daubersjust a little Wild Wasabi and Soft Sky. And a little shadow with the Smokey Slate Marker.  I used the Tag Topper Scalloped Punch and adhered a bow with the Lost Lagoon 3/8″ Silky Taffeta Ribbon (which is on the Clearance Rack as I write this!).

The card base is a 4 1/4″ Whisper White square with a layer of Island Indigo card stock and a pattern from the All Abloom Designer Series Paper Stack.

Go look on your shelf of stamp sets and see which one jumps out at you and create something with it!

Reminder:  Last day for this week’s Weekly Deals!

Stampin' Up! Weekly Deals April 7 2015

Butterfly Thinlit Mother’s Day Card

Butterfly Thinlit Mother's Day Card
The Butterflies Thinlits Dies in the Occasions Catalog may soon be available again at Stampin’ Up! Due to the port situation on the west coast, lots of products have been backordered, due to no fault of Stampin’ Up! Now they are able to announce they “expect” to receive these in-demand dies, that are sitting on a ship, by later next week hopefully.

Here is part of the announcement from Stampin’ Up!:

We realize you and your customers may be disappointed you were not able to purchase the Thinlits in time to receive Sale-A-Bration rewards–especially in the discounted bundles. Therefore, from the day Butterflies Thinlits are again available through April 30, we are bringing you two special offers:

  1. Get the Butterflies Thinlits at a 15 percent discount–just $21.20!
  2. Buy any of the Butterflies Thinlits Bundles at the already-discounted price and choose one of three FREE Sale-A-Bration items (only available while supplies last)!
  • Best Year Ever Designer Series Paper (item 138633)
  • Best Year Ever Accessory Pack (item 138634)
  • Irresistibly Yours Specialty Designer Series Paper (item 138635)

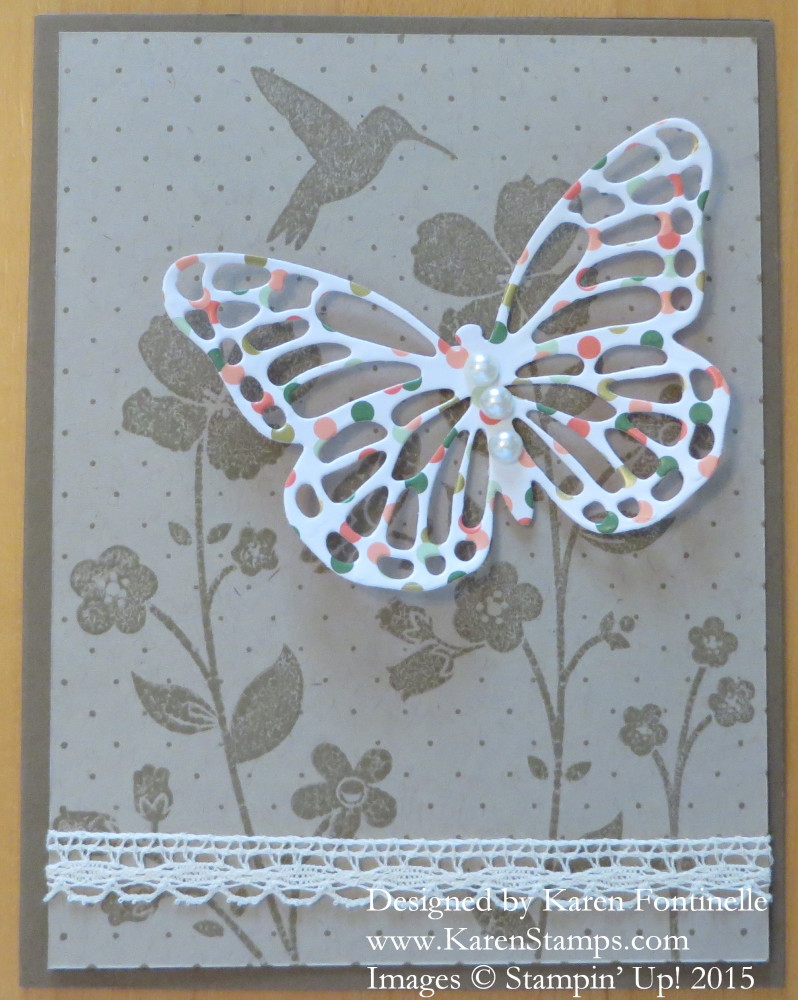
My butterfly card in the photo is made with a card base of Coastal Cabana card stock and the Best Year Ever Designer Series Paper. The butterfly is die cut from another piece of the DSP with the Butterflies Thinlits with a few Pearls for an embellishment.  The greeting is from the stamp set And Many More.  I bought the wood-mount stamp set since the stamps are small and I like to just be able to stamp without putting on a clear block. This would make a pretty Mother’s Day card, birthday, thank you, thinking of you, even sympathy.

So if you missed out on getting the Butterflies Thinlits Dies or would like the coordinating stamp set Butterfly Basics in the bundle, keep your fingers crossed that they will arrive at the Stampin’ Up! Distribution Center very soon! And you’ll get to take advantage of the discount or the already discounted Bundle plus a free Sale-A-Bration item.

Check out the Occasions Catalog while you are waiting!

Flower Patch Spring Birthday Card & Last Day Free Shipping!!

Flower Patch Spring Birthday Card

I’ve been thinking about making a flowery spring card. When I found this Whisper White card base with the Daffodil Delight layer already adhered and mixed in with the card stock, it became the start of the card I was going to make. Since the Brights Backgrounds Designer Series Paper Stack was already out on the table, I just used that for another layer and thought the spring flowers and leaves from the Flower Patch Photopolymer Stamp Set would make the perfect spring card. After you stamp some flowers, you can use the Big Shot and the Flower Fair Framelits Dies to cut the pieces out.  The Flower Fair Framelits Dies are on sale until Monday on the Stampin’ Up! Weekly Deals!

************************

Don’t forget today is the LAST DAY for FREE SHIPPING!!  Don’t miss out on the fun of not paying for shipping!  Woohoo!!  What a treat!

Shop Stampin’ Up! Online!

************************

Paper Pumpkin Snip

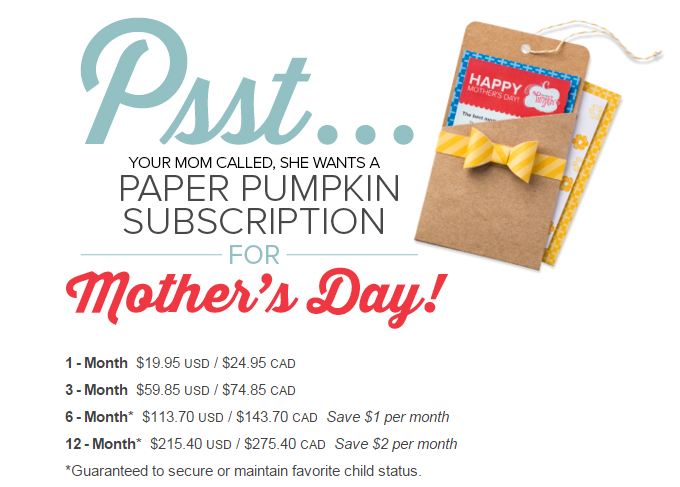
And if you want to try Paper Pumpkin, the papercrafting kit that comes to you in the mail once a month, subscribe today (April 10th)!  If you subscribe by today, you will receive your first kit in a few days when they ship about mid-April. Subscribe after April 10th and you’ll receive the May kit first. Only $19.95/month and that price includes shipping!

Or add a Prepaid Subscription to your Stampin’ Up! order (free shipping not offered on Paper Pumpkin kits).  Just choose the length of time you want. Receive an email with instructions on how to activate your account.  Give one as a gift!

Lots going on at Stampin’ Up!  FREE SHIPPING ends at 11:50 pm Mountain Time TONIGHT! Take advantage of it! SHOP HERE!


Oh My Stars!! Last Two Days of Free Shipping at Stampin’ Up!

Star Framelit Card

Oh my stars! I’ve always said we all need stars in our stamping collections! They can be stamps or punches or framelits, but we all need stars available to us. Stars can be used for so many occasions, so if you have stars, you can make a card.  This week the Stars Framelits Dies are on sale on the Stampin’ Up! Weekly Deals AND you can order them (and more!) with Stampin’ Up! free shipping, but only today and tomorrow. FREE SHIPPING ends Friday, April 10. Don’t miss it!

I made this star card by folding a piece of Basic Black card stock in half and placing the fold at the top and just below the top edge of the star framelit so that it would not be cut. That leaves the fold to form the card.  On the inside I also added a tiny strip of paper as a hinge for the top of the card. Then I die cut assorted stars in Daffodil Delight card stock and Brights Backgrounds Designer Series Paper Stack so I could play around with various combinations to make the card.  If you place one star framelit inside another, you can cut out the center as you can see I did on one star. Pop some of the stars up on Stampin’ Dimensionals if you like.

Here is the inside of the card.  Now I can stamp a greeting inside for whatever occasion I need.

Star Card Inside

Be sure you take advantage of the great Weekly Deals this week and especially the FREE SHIPPING! Remember, everyone needs stars!

Shop HERE at my Stampin’ Up! Online Store to make sure you get in on the FREE SHIPPING!  No minimum order!  Shop more than once if you forgot something.  It’s all FREE! (shipping, that is!)

Play Ball! Celebrate Baseball’s Opening Day! Go Astros!

Astros Opening Day Baseball Card

Today is Opening Day for Astros baseball in Houston, so why not celebrate with a card?! As I looked through some ideas I found this Starburst Sayings Stamp Set and I thought “Oh Happy Day” certainly expresses the feelings of baseball fans everywhere when baseball starts back up in the spring. I used Night of Navy card stock for the card base and added a fun layer of orange from the Sweet Taffy Designer Series Paper.  The middle strip of Night of Navy is embossed with the Decorative Dots Embossing Folder and the Big Shot.

The center medallion is stamped with Night of Navy ink and then die cut with a Circle Framelit. That way it would fit on a Starburst Framelit that is the right size for this card.  The starburst is cut from a Gold Foil sheet.  To make the wording pop on the medallion, I stamped again in Pumpkin Pie ink and just cut out the word Happy to adhere over the blue popped up on Stampin’ Dimensionals.

To give the card a baseball feel, I punched two Whisper White circles with the 1″ Circle Punch. Then I just drew on the baseball markings with Stampin’ Write Markers in Real Red and Smokey Slate.

And you can order any of these stamping supplies with FREE SHIPPING THIS WEEK!

Just go to my Stampin’ Up! Online Store HERE and order away!

(Don’t forget the Weekly Deals, too!  Order today and order from the new ones tomorrow!  Be sure to get the Magnetic Platform on sale if you don’t own one!)

No shipping charge April 6-10.

Order Now!

Paper Pumpkin Sew You Kit Cards

Paper Pumpkin Sew You Kit Cards

With each Paper Pumpkin Kit, the papercrafting kit that comes to you in the mail once a month, you can choose the make the project, whatever it might be, exactly as described or you can change up the design and perhaps add some extra materials of your own. This kit for March, Sew You, comes with little prepunched cards all ready for some embroidery! If you’ve never picked up a needle and thread (or it has been awhile!), the instructions with the kit tell you how to do it. It’s very simple. You can even change up the stitching if you like, as I did on the middle Thank You card. On the bottom card, I cut one of the black and white card bases in half and used that as a layer on top of my own Coastal Cabana card stock to which I added some Daffodil Delight Seam Binding Ribbon. The little acrylic stickers come with the kit. They are a fun little accent to add to the card!

Once you are a Paper Pumpkin subscriber, you can purchase any past kits that are available or any refills for the kits. Maybe you want to make more or maybe you missed a kit that you would like to have. The refill kits come with just the supplies, not the stamp set, so you might have to supplement with your own stamps and greetings but that shouldn’t be so difficult.

If you haven’t made your kit yet, here is a GREAT way to thread the needle without fighting with the multiple strands in the thread.  Just take a piece of paper, folded in half that will fit through the eye of the needle.  Lay the end of your thread inside the folded paper and insert through the needle. Your thread goes through easily and perfectly! I love it! There are all kinds of threading gadgets, but this tiny piece of paper worked great!

How to Thread the Needle

To purchase any Stampin’ Up! products, just visit my Stampin’ Up! Online Store HERE.  If you are interested in Paper Pumpkin, just click on Kits. Or if you would like to subscribe just month to month, sign up for Paper Pumpkin HERE.

Uh-Oh! My Paper Pumpkin Kit Doesn’t Work!

After being on vacation when my March Paper Pumpkin Kit arrived and then preparing for a tax audit, I am finally getting some time to play with my Paper Pumpkin Kit! This is a very versatile kit. Make the cards exactly as designed or double your options by cutting the card bases in half and using them as layers on your own Stampin’ Up! card stock! Add some embellishments, like ribbon, to tie around the card. Make invitations, birthday cards, thank you cards, any occasion cards. Probably many other ideas.

But I have to say, this kit was weird!  After making a card, it unmade itself and put everything back in the box!!!  How could that happen???!!!  Watch the video to see for yourself!!


Ok, my pathetic attempt at an April Fool’s joke!

 Happy April’s Fool Day! 

What tricks are you playing today?

Use Your Ribbon to Make an Easter Egg Card

Ribbon Easter Egg Card

Use your ribbon to make a colorful Easter egg! Use the Oval Framelits to cut an Easter egg shape in a card layer. I used adhesive (Fast Fuse) around the back edge of the oval and stretched the ribbon across the opening.  If I did it again, I think I would adhere the ribbon to a separate piece of card stock that fit underneath the oval opening. I used the three colors of ribbon in the Best Year Ever Accessory Pack in the Sale-A-Bration Brochure.  It also comes with buttons.  The bunny is stamped with Stazon and colored in with Stampin’ Write Markers and cut out with Paper Snips (not too hard!). The greeting is from the stamp set And Many More. For a little bling, I added some Rhinestone Jewels to the Easter Egg and a Pearl to cover where I cut through the bunny to reach that inner arm part that needed to be cut out!

Today is the second to last day of Sale-A-Bration!  The biggest promotion of the Stampin’ Up! year ends tomorrow, Tuesday March 31.  Don’t miss it!  With every $50 purchase, choose a free Sale-A-Bration product!

Are you on my Mailing List?  I sent out a last minute reminder for the end of Sale-A-Bration today! Just trying to take care of my customers!  Be sure to check your Inbox!  And if you aren’t signed up, do it today so you won’t miss a thing!

Shop Stampin’ Up! Online HERE!

The Easter Bunny is Hiding Some Easter Eggs!

Easter Card with Bunny and Eggs

This is such a fun and happy card to make! When you are making an Easter Bunny card hiding Easter eggs, it’s bound to be a happy card! I started with a piece of the Irresistibly Yours Specialty Designer Series Paper #138635 that comes in plain white with embossed patterns on it.  When you apply ink over it, the pattern magically appears! I used a Sponge Dauber with Pear Pizzazz ink. Then just take a tissue or paper towel and wipe just to get any excess ink off the embossed patterns.  It’s so fun! Half the work is already done for you with the embossing already printed on the paper.  You could of course leave it plain for an elegant card or to use on a fancy package.

I thought the Easter Bunny hiding eggs in those leaves on the paper would be a fun scene for an Easter card. I just punched out eggs from the Best Year Ever Designer Series Paper #138633 with the Extra-Large Oval Punch and the Small Oval PunchI wasn’t really planning to use both sizes but decided the two sizes looked cute together and why couldn’t the Bunny be leaving eggs of different sizes?!

The punch-art bunny is simply made with the 1 3/8″ Circle Punch, the Large Oval Punchand the Word Window Punch. His little nose is the heart on the Owl Punch. Just draw on some eyes and whiskers with Stampin’ Write Markers.

The greeting comes from two stamps from the Crazy About You Stamp Set.  The card base is Calypso Coral which coordinates with the Best Year Ever Designer Paper.

You can get either or both of these designer paper packs FREE during Sale-A-Bration, each with a $50 purchase, but only until Tuesday, March 31.  Sale-A-Bration ends at 11:50 pm MT (Stampin’ Up! Time) on Tuesday, March 31.  Don’t miss it! That’s THIS Tuesday, believe it or not!!

If you need just a little bit more to reach your $50, or $100, or $150 for Sale-A-Bration, be sure to check out the Weekly Deals or the Clearance Rack for just an inexpensive item to add! And they did add more items to the Clearance Rack the other day!! Or choose a download for My Digital Studio which anyone can use on their computer.

Feel free to contact me if you would prefer that I put in your order for you.  I’m happy to do so.

Sign up for my Mailing List today in the upper right corner to get one more reminder about Sale-A-Bration —and of course all my newsletters about stamping and Stampin’ Up!

To shop online, click the link below!

Shop at my Stampin’ Up! Online Store today and get your order in ahead of the last minute rush!

Easter Eggs Easter Card

Easter Eggs Easter Card

This Easter Eggs Easter Card was a complete surprise to me because I started out planning to make some totally different project! Once I reached into my Whisper White card stock scraps, I discovered these ovals already cut with the Ovals Collection Framelits  #129381 (as of today, these are on backorder). I don’t know what project they came from, but it was handy to find them! I immediately had the idea to stamp these ovals and decorate them as Easter eggs!  I pulled out the Work of Art Stamp Set and used the chevron pattern, the straight line, and the circle stamps in the set to stamp in various colors to give these ovals the look of Easter eggs!  I choose several ink colors from the Subtles family:  Calypso Coral, Wild Wasabi, Soft Sky, Pool Party, Blushing Bride, and So Saffron. You could also use the Brights or In Colors. I kept this card simple, but you could add glitter to the patterns or some other embellishments like pearls or rhinestones!

The card base is Pool Party.  The Whisper White layer is sponged a little at the top with Pool Party ink using a Sponge Dauber to look like sky.  The grass is a scrap strip of Old Olive and cut with the Fringe Scissors.  So easy! The bottom (chevron) egg is glued right to the layer with the Liquid Multipurpose Glue and the other one is popped up with Stampin’ Dimensionals. The greeting is stamped with two words on a clear block from the Crazy About You Photopolymer Stamp Set.  You an order this stamp set in any of the types:  wood, clear, photopolymer, digital. I chose photopolymer because I can see through the stamp to hopefully get the words lined up exactly where I want them. On this card I was able to put both words on the clear block and stamped on scrap paper first to make sure they were lined up and spaced correctly.  Then I just stamped right on the card. It was risky since I already had the rest of the card made!  Better to do the stamping first in case you mess up!  But I also knew that if I messed up stamping directly on the card I could go back and stamp on card stock and then adhere that to the front of the card like a banner or just a strip or a punch.

I might add that this stamp set, in any of the forms, is also available as a Bundle which includes the stamp set and the Hello You Thinlits!  AND you save 15%!

With the exit of My Digital Studio the end of May, as I was looking at these stamp sets and Bundles in my Stampin’ Up! Online Store, I saw the digital version of Crazy About You which includes the stamp brush set (the stamps) plus the Hello You Thinlits words!  All for only $9.95.  It is actually named the So Very You Stamp Brush Digital Download. You can use this whether or not you have MDS, just use it on your computer. But you can still buy My Digital Studio and use it as long as you like even though Stampin’ Up! won’t be supporting it or putting out new downloads. I’m sad to see it go!

Check out the Stampin’ Up! Clearance Rack today!  New items were added, only available while supplies last, of course!

All of this will count toward your order for Sale-A-Bration rewards with a $50 order, or multiples of $50.  Sale-A-Bration ends March 31, next Tuesday!  Don’t miss it!!

Clearance Rack Banner

Happy Easter Bunny Easter Card

Happy Easter Bunny Easter Card

From the minute I saw this Happy Easter Bunny single stamp I loved it! You’ll find it in the Stampin’ Up! Occasions Catalog. It’s just a “happy” stamp!  I kept this Easter card simple, just stamp and color.  And the coloring is easy and fun!

I stamped the image with Stazon Jet Black Ink and colored in the images with my Stampin’ Write Markers. You can purchase these markers in color families, some individually, and best of all, in the complete set with carrying case. If you purchase the Many Marvelous Markers, you will earn two FREE Sale-A-Bration products!  If you add some more products to your order to reach $150, you will earn three SAB products plus Hostess Benefits! That means you get to shop with $25 in Hostess Dollars!

The bunny is colored with Crumb Cake, the leaves are colored with three different “green” markers just for fun, and the eggs and flowers are just colored with random colors.  You choose! To jazz up the greeting “Happy Easter” I used the fine tip of the marker to go over the letters with Melon Mambo. And for a little extra bling, I pulled off some sequins from the Bermuda Bay Sequin TrimTo adhere any sequins, I put a tiny tiny dab of Liquid Multipurpose Glue on the card where I want to place the sequins and then place the sequin on the tiny glue dab.

I find it relaxing to sit and color, and Stampin’ Up! has several ways to do it. I had pulled out my Blender Pens and was going to scribble some ink from the marker on to the stamp case, then pick it up with the Blender Pen, but as it turned out I just colored lightly straight with the marker. But if you need a lighter look, you can try the Blender Pen.

There’s still time order the Happy Easter Bunny stamp and get it before Easter if you hurry.

Shop at my Stampin’ Up! Online Store today!

Easy to Make Blooming With Kindness Flower Card

Blooming With Kindness Card

Sometimes it is so easy to come up with an idea for a card, and the Blooming With Kindness Stamp Set seemed to fit the bill for this easy card. While catching up on reading newspapers after our vacation to Death Valley last week, I saw a furniture store ad that had a pillow that caught my eye. The main image on the pillow actually looked a little like a retired stamp we used to have but I also thought of this Blooming With Kindness flower stamp. Then I just stamped a small portion of the flower in each corner of the Whisper White layer.  This is a 4″ x 4″ card.

On the inside of the card I stamped a larger portion of the flower in the lower right corner of a piece of Whisper White. A greeting can be stamped inside or I can simply write a little note in my own handwriting.

The card base is Night of Navy card stock 4″ x 8″ folded in half.  The layer is Whisper White 3 3/4″ x 3 3/4″ and the images stamped in Night of Navy Ink.

Here is a picture of my inspiration for this card:

Pillow Inspiration for Card

I think you will find that often home decors ads or pictures in magazines can really give you ideas for card, especially pillows! They are the accent pieces of the room and often the colors or the basic design pattern can catch your eye and make you think of how you could translate that into a card or other project. Think about that next time you are paging through one of your magazines.

We are often focused on the newest “mini” catalog, but don’t forget the beautiful stamp sets in the Stampin’ Up! Annual Catalog!  I have a few copies available if you do not have your own demonstrator that you work with and if you would like the hard copy of the catalog to look through. Just send me an email or leave a comment on this post.

This is about the last week for Stampin’ Up!’s biggest promotion, Sale-A-Bration!  Last day is the last day of the month, Tuesday March 31. Earn a free Sale-A-Bration product with every $50 purchase in current Stampin’ Up! products!  Just shop online RIGHT HERE!

Sale-A-Bration is also a good time to sign up to join Stampin’ Up! and become a Demonstrator! Not only do you get the Starter Kit chock full of $125 in stamping supplies plus some business supplies to get you started for ONLY $99, but during Sale-A-Bration you have two extra options to choose from:  Receive a FREE Simply Created Project Kit from the Occasions Catalog OR Receive two free Sale-A-Bration items of your choice. And remember, the Starter Kit is customizable now, no set products that you will receive.  You make your own list according to your likes and needs. As your upline, I can help you build your business in whatever manner you prefer. I’m happy to answer any questions you might have. It’s a very easy process to sign up, you will be a Demonstrator in minutes, and it just may be the best thing you could do for your life or for your family’s benefit.

Shop HERE during Sale-A-Bration until March 31!

Stampin’ Up! Coloring Techniques for You!

Maybe this is the end of your Spring Break, or the beginning.  Maybe you are snowed in or rained in. Maybe you are having a relaxing and lazy Sunday and would just like to sit back and watch some videos!  Here are some that Stampin’ Up! released the other day showing various coloring techniques that you might enjoy.

Coloring Techniques with Sale-a-Bration Papers:

Watch Carrie use the Sale-A-Bration Irresistibly Yours paper that is already embossed AND the printed Sheer Perfection Vellum Paper Stack!

Watercoloring with Blender Pens – A Happy Thing Stamp Set

When I first started stamping, Blender Pens were one of the main things we used! They are still tons of fun to use with ink pads or ink refills in many ways!  Get re-acquainted with your Blender Pens or order new ones!

Watercolor Wash Technique – For Being You Stamp Set

Have some fun by embossing with White Embossing Powder and the Heat Tool, then use the Aqua Painter and ink to do a watercolor wash!

Order any of the current Stampin’ Up! products and with a $50 purchase you qualify for a FREE Sale-A-Bration product!  Remember, besides the Sale-A-Bration Brochure, new Sale-A-Bration products were added! And a few more were added last week!!

SHOP HERE!!

Easter Bunny Tag

Easter Bunny Tag

Last weekend I had SO much fun making twenty-four of these fun Easter tags with two of my customers/friends and one cute little girl for a group of children. I found the idea for the punch art bunny on Pinterest somewhere and fortunately the bunny fit just right on a tag made with the Stampin’ Up! Tag Topper Scalloped PunchI added some designer paper on the tag for the background and stamped the Easter greeting from a retired Hostess set (sorry!) right on the paper. We played with different combinations, like stamping on cardstock and punching out a shape, but in the end we just liked it stamped on the paper. That’s how you have to play around sometimes with rubber stamping until you just “know” you have the right design!

This is how you make the bunny:  The head is the Extra-Large Oval Punch. The body is the 1 3/4″ Circle Punch, cut in half. The ears are the Large Oval Punch with the pink insides made with the Word Window Punch.  We opted to fold down the top of the ear for cuteness!  The cute little heart nose is punched with the Owl Builder Punch. The eyes are just drawn in with a black marker and Miss Elsie did the whiskers with some wispy strokes with the Crumb Cake Marker! The rabbit paws are just 1/2″ circles.  The carrot is punched with the Modern Label Punch and then just trimmed down with Paper Snips. With the heart punch in the Itty Bitty Accents Punch Pack you can make the carrot topper and even fringe it with the Paper Snips if you want to make it look real.

The ribbon on the tag is the Tangelo Twist 3/8″ Satin Ribbon. It really goes well with the tag.

Hang this tag on an Easter basket or put the tag on a card for Easter. Or just make the punch art bunny on an Easter card.  Have fun with it.

If you need any of these supplies, you might be able to earn a FREE Sale-A-Bration product with a $50 purchase. Due to the Blendabilities not being available any more, other Sale-A-Bration items may sell out so if there is something you really want, don’t delay.

Don’t forget about the Weekly Deals and New Arrivals.

Shop at my Stampin’ Up! Online Store!


Happy National Pi Day 2015!

Illustration of a Pi Mascot Carrying a Pie

It’s National Pi Day and I won’t pretend to know very much about the subject of Pi! I much prefer the National PIE Day! Pi is the ratio of the circumference of a circle to its diameter, which is approximately 3.14159 and apparently very interesting to math geeks! Pi Day is celebrated on March 14 because the date reads 3.14, the beginning of the pi numeral. It will continue beyond the first few numbers after the decimal point, infinitely.

This year, 2015, makes Pi Day especially notable as the date can be expressed as 3-14-15, the first five numbers of pi (3.1415)!  Some people even get a thrill out of memorizing the digits of pi, including my youngest son who did that in high school calculus class. His record stood for a couple years, I think!

That’s about as far as my interest in Pi goes, but I did come across this piano piece for Pi Day! I think you might enjoy it!