Category Archives: Cards

Gold Glimmer Sleigh Ride Thinlits Peace Christmas Tag

Gold Glimmer Sleigh Ride Thinlits Peace Christmas Tag

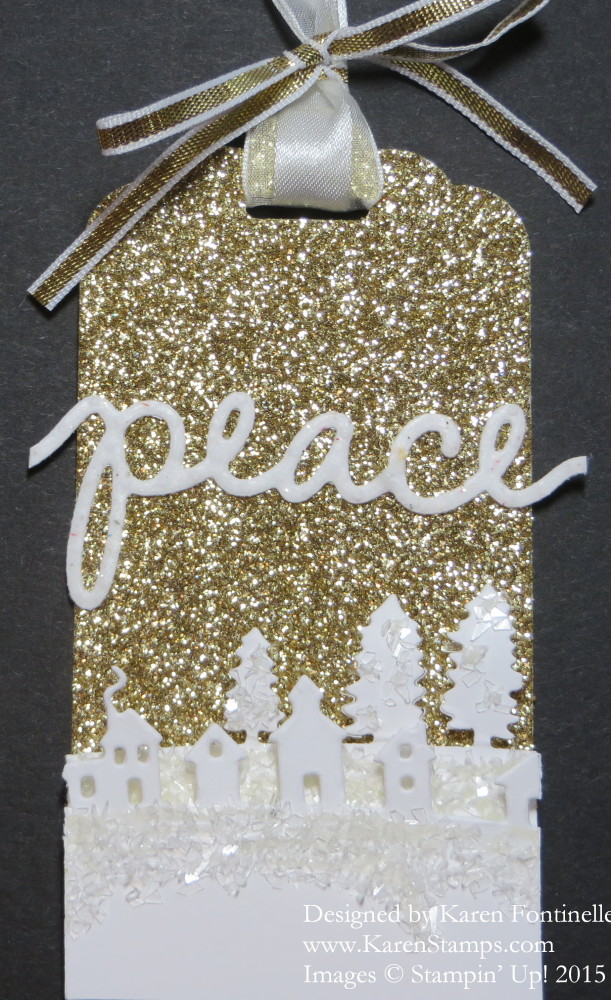
I’m into Christmas tags right now and came across something similar to this Gold Glimmer Sleigh Ride Thinlits Peace Christmas Tag on the internet. I wasn’t even looking for an idea using these Sleigh Ride Edgelits Dies but I found an idea that inspired this tag and I love it!

I cut a 2″ wide strip of Gold Glimmer Paper for the base since that width will fit in the Scalloped Tag Topper Punch.  Then I used the Sleigh Ride Edgelits Dies to cut Whisper White cardstock into the two rows.  I used the Multipurpose Liquid Glue to adhere some extra glitter from the To You & Yours Shaker Cards Project Kit that I just made. Normally I would use the Dazzling Diamonds Glitter. Whichever glitter you choose, apply it like snow just under the images and then pop up those two rows of die cuts with Stampin’ Dimensionals. Then I used the Christmas Greetings Thinlits Dies for the word “Peace”. Gotta love those word thinlits, past and present!

For the tie, I used my favorite ribbon of all time, the Whisper White 5/8″ Organza Ribbon and a piece of Gold 1/8″ Ribbon, another one of my favorites. If you had a little jingle bell, you could tie one on to the ribbon for a cute finished touch.

Hope you have time to make some Christmas papercrafting projects this weekend! There is so much to pick from! I hope this Gold Glimmer Sleigh Ride Thinlits Peace Christmas Tag inspires you to make something!

Shop Stampin’ Up! Online HERE!


To You & Yours Shaker Card Kit Cards

To You & Yours Shaker Card Kit Cards

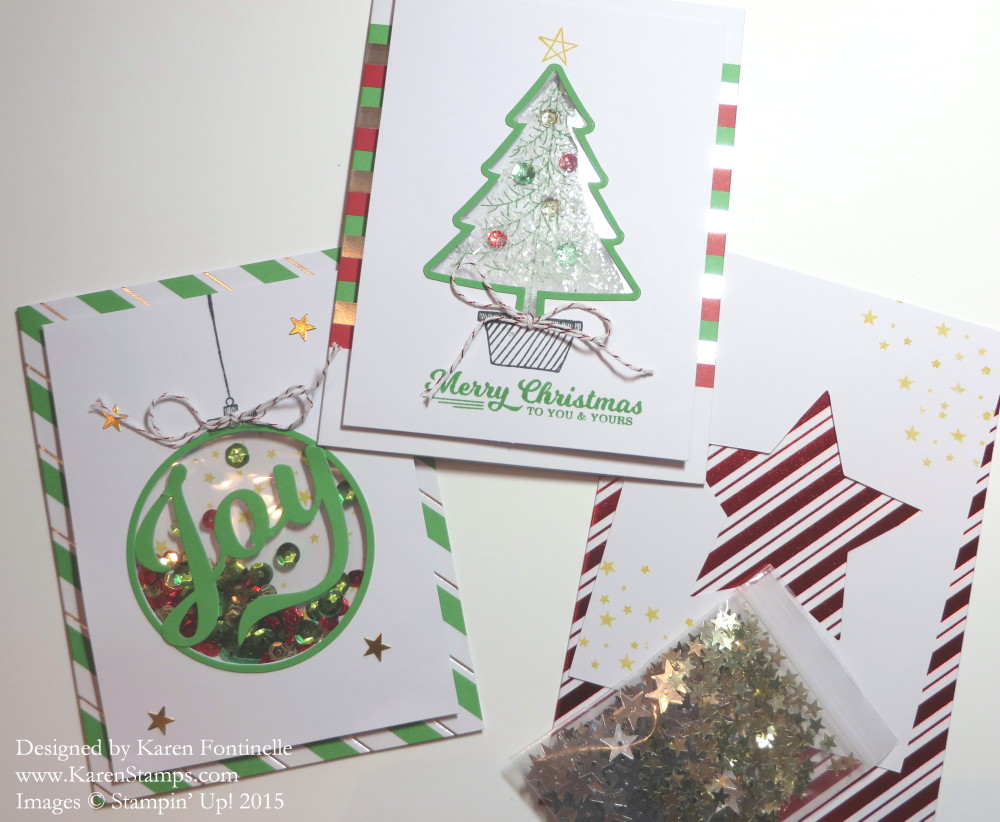
The card kit in the Stampin’ Up! Holiday Catalog, To You & Yours Shaker Card Kitwas one of the first things I ordered, but as quite often happens, only got around to making the cards yesterday!  The kit comes with lots of fun stuff! The card bases each have some shiny foil stripes on them and of course each shaker element has stars or sequins or glitter to put inside. The kit comes with die cut card fronts, window sheets to cover the opening and then narrow foam strips to apply behind that opening to form the pocket to hold the glitter, sequins, etc. Then there are sticker stars and two word elements to place over the window and pretty baker’s twine with which to tie a bow on each card. There is also some stamping to do on the card fronts and on the background sheet behind the shaker area.  The suggested stamp set to use is the To You & Yours Too Stamp Set. If you didn’t want to purchase this stamp set, you might find something you can use in your stash.

I didn’t get around to making the star card yet but I will do that today! It’s a nice way to spend an afternoon, working on Christmas cards!  Put on some Christmas music on your phone to have playing to get you in the mood!

There is still time to order this kit and make these To You & Yours cards and even get them mailed out before Christmas.  I do not see them as being backordered so get yours while you can!  The kit comes with envelopes also and all the pieces you need except for the stamps, ink, and basic adhesive (I used the Multipurpose Liquid Glue to adhere the window sheet to the back of the card front and also for the few sequins adhered to the Christmas tree). I also used Glue Dots to adhere the bows but you could use a dot of the glue. Dimensionals are included in the kit.

Here is the Stampin’ Up! video with tips for making the cards. I really suggest watching it.

Impress your friends and make your cardmaking easy! Make your own fun To You & Yours Shaker Card Kit cards by shopping at my Stampin’ Up! Online Store HERE.


Star Wars R2D2 Punch Art Birthday Card

Star Wars R2D2 Punch Art Birthday Card

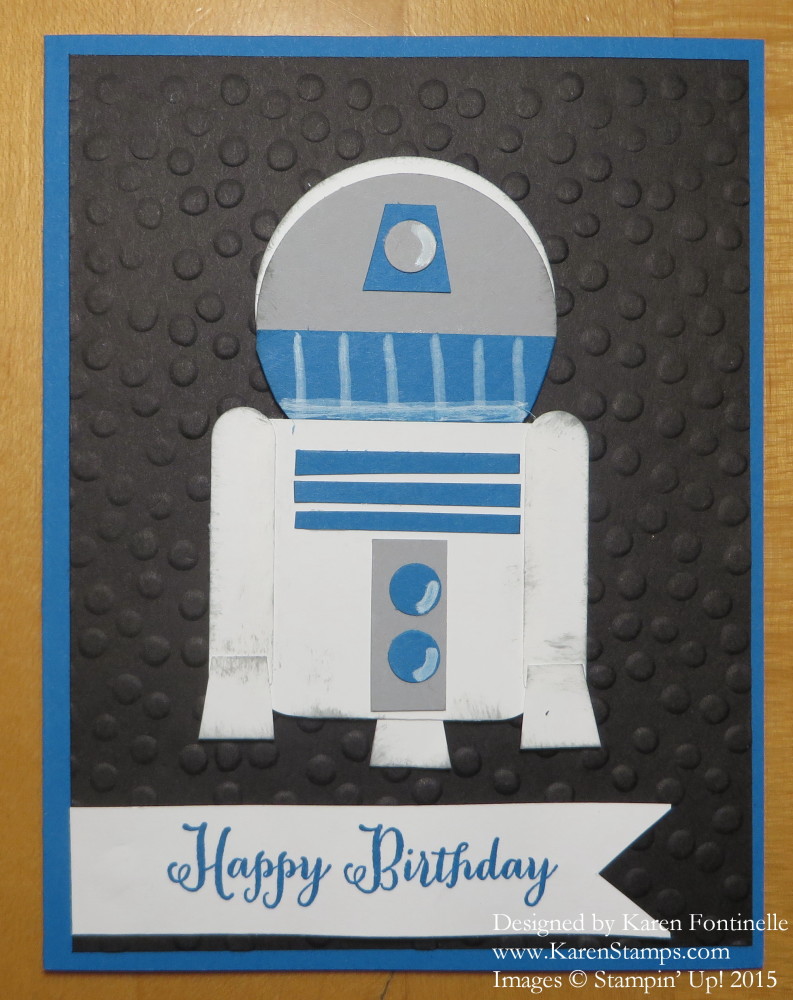
Before we get totally inundated in Christmas, after watching all the Star Wars movie promotions on TV I remembered I had made this Star Wars R2D2 Punch Art Birthday Card for my favorite son-in-law (my ONLY son-in-law, but a favorite nonetheless!). I’m trying to get slightly interested in Star Wars so perhaps I will go see the movie with my family at Christmas so I will know what everyone is talking about. I did see the first Star Wars movie way back when so I slightly know about the characters and such. Sometimes you just have to keep up with this stuff!

I found this idea to make R2D2 character on Pinterest or somewhere. I don’t think there were specific directions and when I made this card I was in a hurry to get it in the mail that day so I was lucky I remembered to take a photo of it, so unfortunately I can’t say for sure what size punches I used, but I am confident you can figure it out from the photo!

The head, of course, are two circle punches, the bottom blue piece another circle but trimmed into the shape shown. The body was probably just a rectangle with rounded corners on the bottom, punched with the Project Life Corner Rounder Punch.  The arms are made with the Word Window Punch (talk about a handy punch!) and the hands are just little scraps cut by hand. The little circles are probably cut with the Owl Punch (another super-useful punch). The background of the card is Basic Black card stock embossed with the Decorative Dots Folder.

If you want to see other Star Wars cards I have made, check THIS POST for a Yoda card and THIS POST for a Yoda and Darth Vader card.

Shop at Stampin’ Up! Online if you need any of the punches or materials to make this Star Wars R2D2 Punch Art Birthday Card or contact me if you have any questions or need help with your order.

Holidays Fancy Foil Vellum Embellished Ornaments Christmas Card

Holidays Fancy Foil Vellum Embellished Ornaments Christmas Card

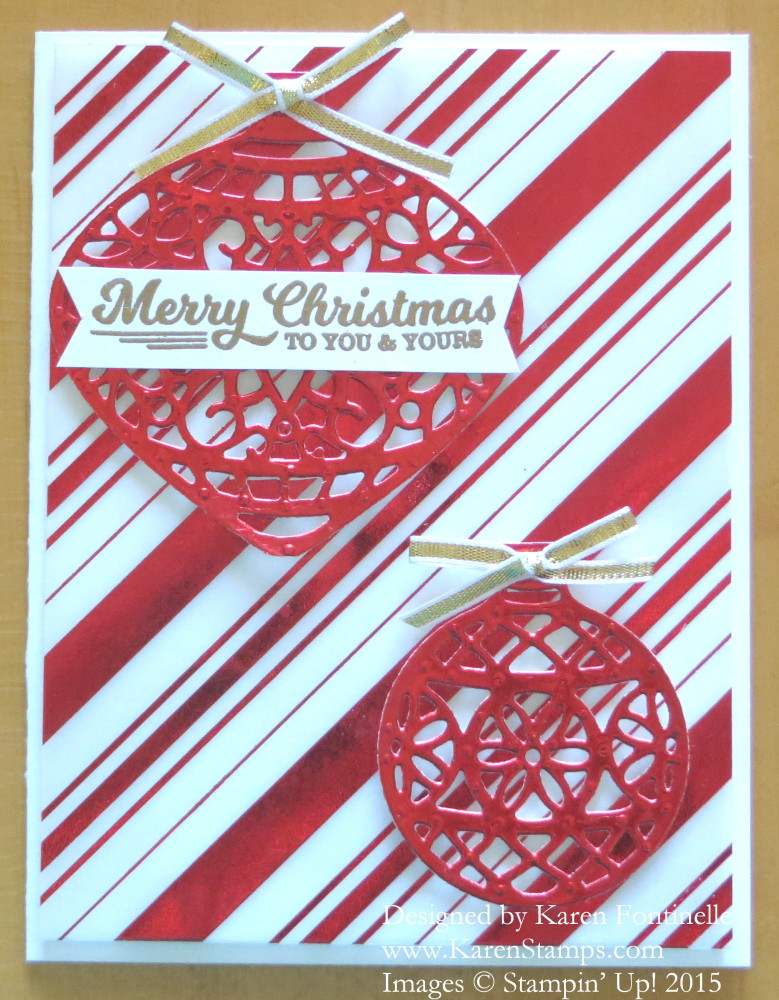
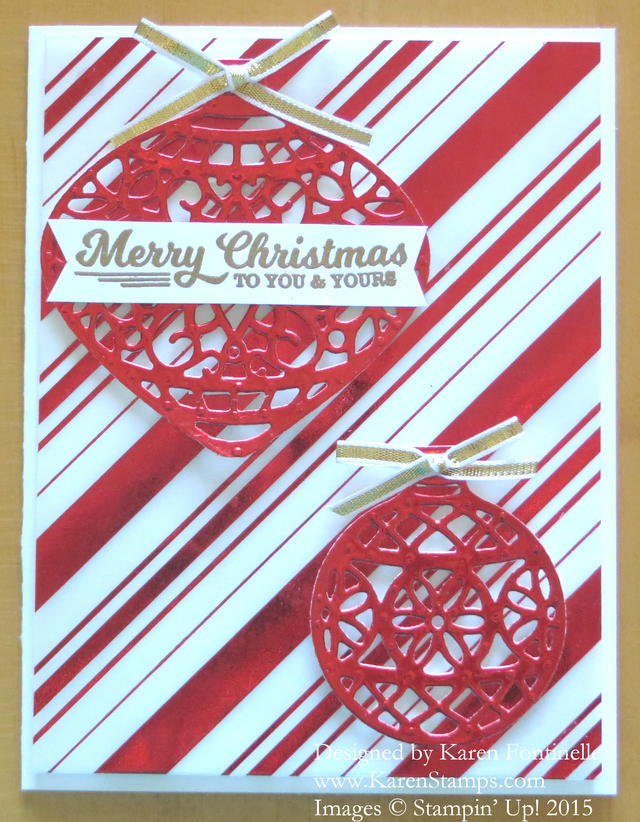
This Holidays Fancy Foil Vellum Embellished Ornaments Christmas Card adds some shine and bling to your Christmas cards.  All the shine makes it difficult to photograph and difficult to see the shine IN the photograph!  This is a pretty easy card, really, and yet looks very elegant.

I started with a card base made with the new Whisper White Thick CardstockIf you haven’t tried this “thick” cardstock, you should get some on your next order.  It’s just a little thicker and stronger than our regular Whisper White so it makes a good card base like all the colored card stock. Not that it matters that much, but it does feel a little better than just using the regular kind. Then I added a layer of the Holidays Fancy Foil Designer Vellum to a Whisper White layer using Glue Dots hidden behind the foil stripes on the vellum as best I could.  That’s the best way to hide your adhesive when using see-through vellum. Once the vellum was adhered to the Whisper White layer, I adhered this to the card base using Stampin’ Dimensionals to pop it up a little.

Next I die cut the ornaments using the Red Foil Sheets paper and the Delicate Ornaments Thinlits Dies with the Big Shot, of course!  I did the whole dryer sheets/waxed paper system and rolled the platform back and forth several times in the machine. Now I have ordered the Precision Base Plate to use with intricate dies such as these ornaments.  You will find the plate in the Holiday Catalog. In the beginning I heard mixed reviews about it, but recently I heard some rave reviews about it.  The only way to find out for sure is to try it for myself! So I will let you know! The purpose of the Precision Base Plate is to make cutting these intricate dies easier.

To finish off the card, I tied little bows with the Gold 1/8″ Ribbon (one of my favorites) and adhered them to the ornament tops with a Glue Dot.  You don’t always have to tie ribbon “around” something, just make it look like it is by adhering to the front with a Glue Dot or other adhesive.

To adhere the ornaments to the card, I cut tiny strips from the edges of the Stampin’ Dimensionals sheet to hide behind the widest areas of the ornaments. Yes, a little tedious but I felt it was the best way to adhere the ornaments to the vellum.  The greeting is stamped in Versamark and embossed with the Heat Tool and Gold Stampin’ Emboss Powder. The greeting is from the To You and Yours Too Stamp Set.

You can use this design idea in many ways, just by stamping ornaments on card stock or stamping and cutting out the ornaments and adhering them to the card front, or adding some different designer paper in the background.  So many easy ways to make a card!

I hope you are going to send at least a few handmade Christmas cards!  It is still plenty early to get them done.  Naturally you want to pick a design that is easy enough to duplicate. I am making several different designs of cards, maybe 5 or 10 or each design just because it is fun for me to make different ones.  So many great ideas out there!  Just stop the world and make cards!

There is still time to shop Stampin’ Up! It is suggested that you place your order by Dec. 17th in order to receive it by Christmas. Look through the catalog with different “eyes” and see what gifts you might be able to purchase for someone, or an assortment of items for a gift.

Check your supply of card stock and see if you need anything for your cards and Christmas projects! I had to order more Real Red card stock yesterday! How could I be low on Real Red?!

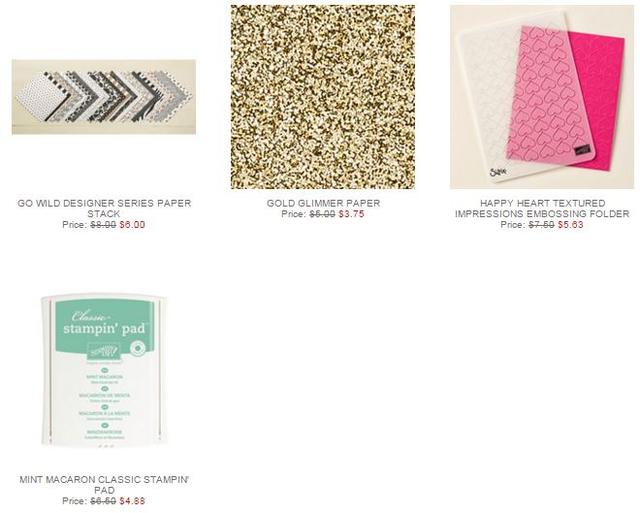
And here are the new Stampin’ Up! Weekly Deals!
Stampin' Up! Weekly Deals Dec 1 2015

If you need any materials to make the  Holidays Fancy Foil Embellished Ornaments Christmas Card just Shop Stampin’ Up! Online or contact me to put in your order for you.

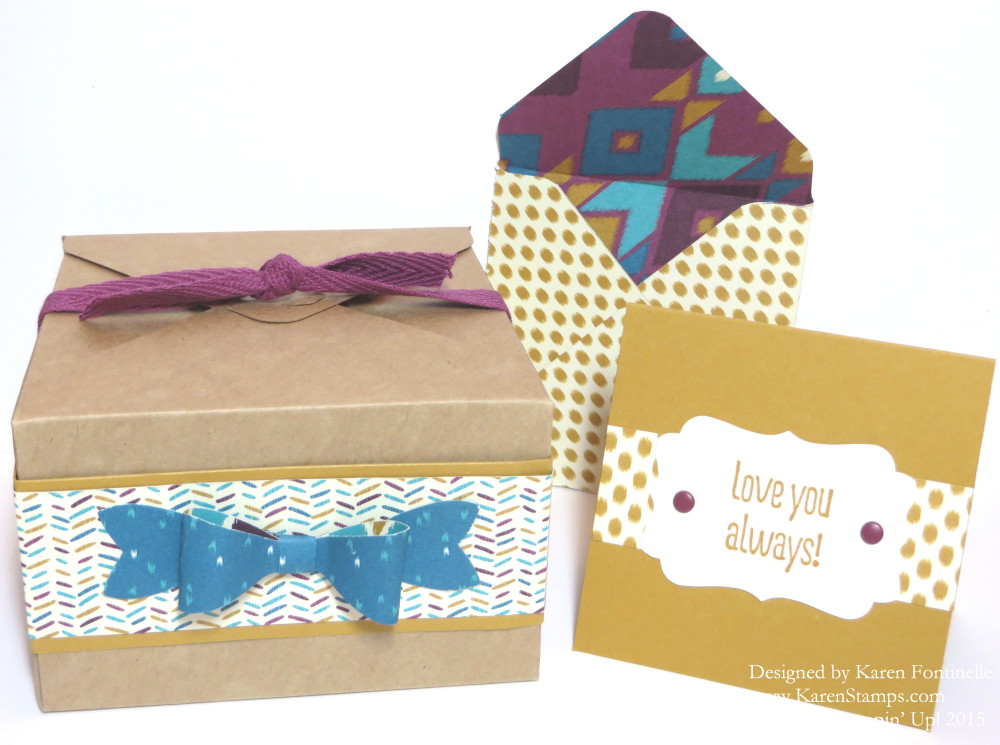
Online Extravaganza Bohemian Paper Gift Box, Card and Envelope

Online Extravaganza Bohemian Paper Gift Box Card Envelope

Today is the day, the day the Stampin’ Up! Online Extravaganza begins! And to show off some of the products available on the special, especially the first 24-Hour Flash Sale for Monday, November 23, I made a few projects with the Bohemian Designer Series Paper, the Gift Box Punch Board, and the Envelope Punch Board, plus the Bow Builder Punch!

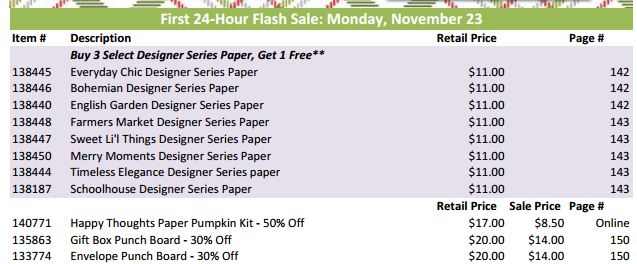
Online Extravaganza Flash Sale Mon Nov 23

On the 24-Hour Flash Sale, you can purchase any 3 of the listed Designer Series Papers and then get a 4th one free! These are the designer papers shown in the Annual Catalog on pages 142-143.  You can also get the Happy Thoughts Paper Pumpkin Kit, even if you are not a subscriber (yet!) for half price!  What a deal! And the Gift Box Punch Board and Envelope Punch Board are also on sale for 30% off! Those deals are only available today, Monday, and only while supplies last.

This sale begins at midnight Utah time (Mountain time) and runs for 24 hours for the first Flash Sale, but through November 30th for the entire sale!  It’s Stampin’ Up!’s answer to Black Friday!

But there are LOTS of other products on sale on the Online Extravaganza so be sure to check the entire 3 page list!!  Think what you could give others as a gift or what items you could use for gift-wrapping (lots of things!!), or simply what things YOU want!

Stampin’ Up! Online Extravaganza List HERE!

Shop Stampin’ Up! Online HERE!

You can add any other items to your order as well, including products from the Holiday Catalog.  Be sure to check out the products that will retire at the end of the Holiday Catalog. Also check the Stampin’ Up! Weekly Deals and Clearance Rack!

For any more details, read THIS POST.

Check out the Stampin’ Up! Online Extravaganza Flash Sale today and make your own gift box, card and matching envelope, then place your order today!

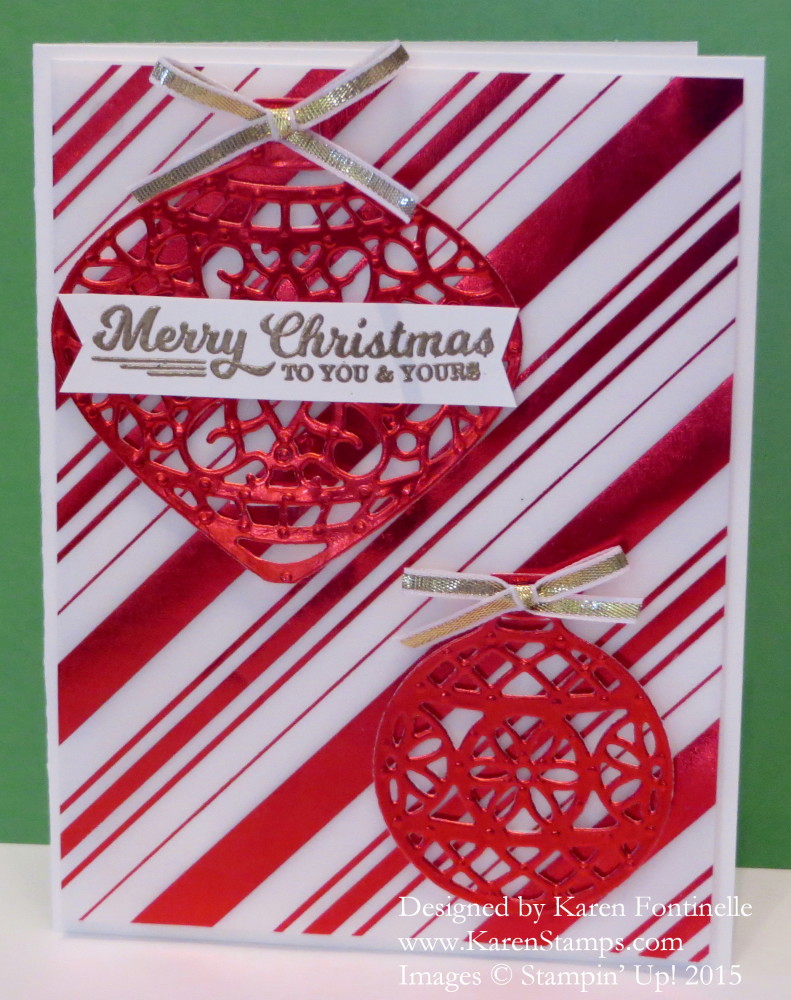
Make A Delicate Ornaments Christmas Card

Delicate Ornaments Christmas Card

Make this beautiful Christmas card using the Delicate Ornaments Thinlits Dies with red-striped Holidays Fancy Foil Designer Vellum and the shiny Red Foil Sheets.  The card base is made with the Whisper White Thick Cardstock and layered with regular Whisper White Card Stock.  The striped vellum is then attached to the regular card stock using Glue Dots underneath the stripes to try to hide the adhesive. I popped up this layer (the Whisper White plus the vellum) on Stampin’ Dimensionals.

In order to cut the Delicate Ornaments with the Big Shot, I used the dryer sheet and waxed paper technique!  I do not (yet) own the Precision Base Plate in the Holiday Catalog.  I had heard both good and bad about it, and of course I had plenty of other products I wanted to order from the Holiday Catalog.  Even I can’t have everything! But recently I have heard very good things about this plate and might be inclined to put it on an order soon. It is supposed to help greatly cutting out these intricate dies with all the little pieces. But today I used this sandwich:

  • Magnetic Platform (or regular platform)
  • Dryer sheet (new) (can be used over and over)
  • Card stock (in this case, the red foil)
  • Wax Paper (you could also try Parchment Paper)
  • Thinlit (cutting edge down)
  • Top cutting pad

I ran this through and rolled it right back again, then ran it through and back again. This worked perfectly, I only had a very few pieces to poke out of the ornaments, no problem at all. The design is so intricate that you really don’t even notice if a few tiny pieces do not all come out. I used some tiny pieces I cut from Stampin’ Dimensionals to pop up the ornaments on the red striped foil. Then I tied little bows from the Gold 1/8″ Ribbon.  The silver ribbon would have been pretty also.

The greeting is stamped with Versamark Ink and embossed with Gold Stampin’ Emboss Powder using the Heat Tool.  The stamp is from the To You & Yours Too Photopolymer Stamp Set.

It’s time to be making Christmas cards, if you haven’t already! Try these intricate dies and shiny paper to make a Delicate Ornaments Christmas card that will wow your friends!

Find all these great products in my Stampin’ Up! Online Store!


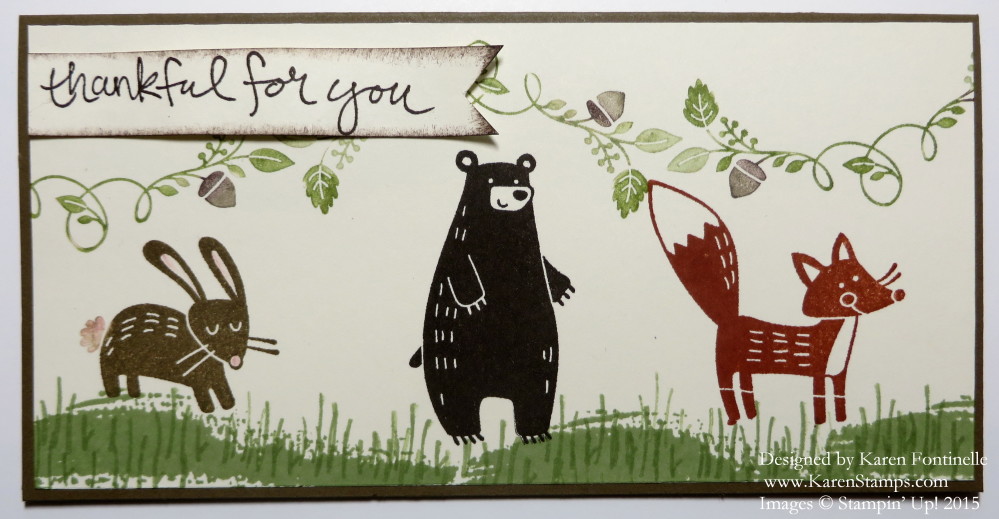
Thankful Forest Friends Animals Card

Thankful Forest Friends Animals Card

I absolutely love this Thankful Forest Friends Stamp Set, especially the cute animals, so today I made this Thankful Forest Friends Animals Card! After stamping the card, there wasn’t much room for a greeting, but I managed to fit one on.

The card base is Soft Suede, cut 6″ x 6″ and folded in half to be 3″ x 6″. The top layer is Very Vanilla. The animals are stampin in various brown inks, Soft Suede, Early Espresso and Cajun Craze for the fox. The leafy garland with acorns I colored in with various Stampin’ Write Markers. The grass is from the Sheltering Tree Stamp Set and I overstamped the blades of grass over the grass stamp. The greeting is also from the same stamp set.

You may think this stamp set is for Thanksgiving, but just think what cute baby cards you can make with these animals! Or make some cute scrapbook pages for baby or outdoor adventures!

Don’t forget to check out the Stampin’ Up! Weekly Deals!  Today is the last day for these.

Stampin' Up! Weekly Deal Nov 3 2015

If you need some stamps or accessories to make a card like my Thankful Forest Friends Animal Card, just click HERE to shop at Stampin’ Up!

Thankful Forest Friends Thankful for You Card

Thankful Forest Friends Thankful for You Card

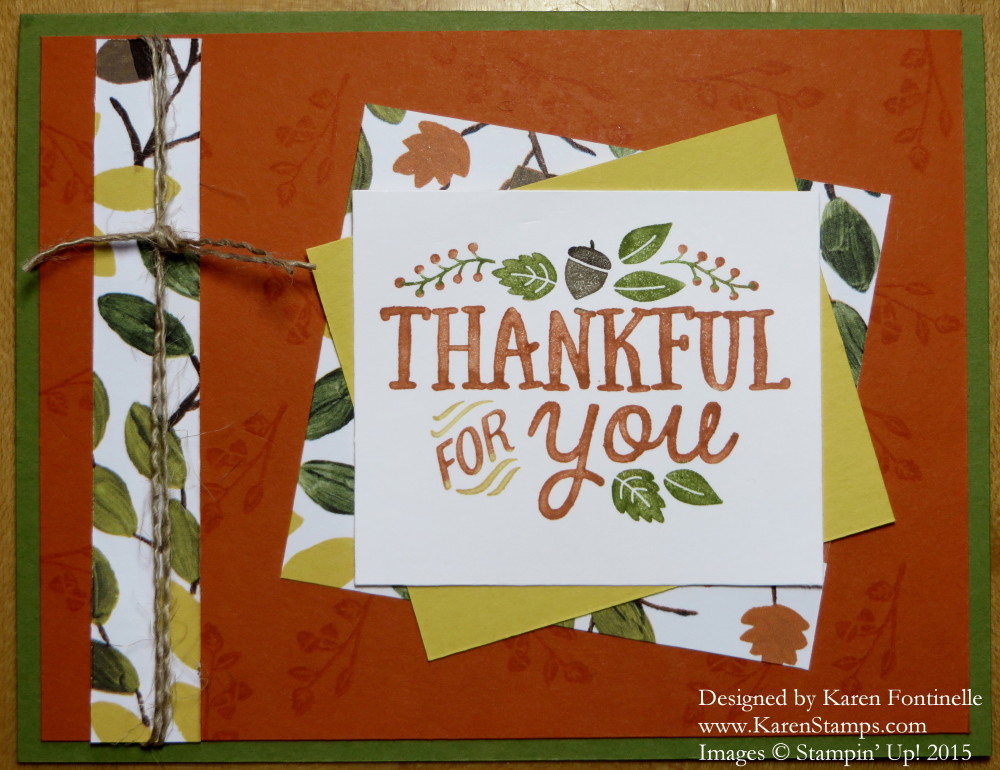
As long as I had my supplies out after decorating a bag in THIS POST, I decided to make this Thankful Forest Friends Thankful for You Card. I used to always say when you make one card, go ahead and make three cards of the same.  You’ll be able to use them eventually and you won’t have to get all the stuff out again.

This card uses the Thankful Forest Friends Stamp Set which I just ordered recently and I do absolutely love! The animals are so cute for any occasion and the words are great for Thanksgiving and any other thankful time!  Just don’t ink up the acorns and leaves if you want to send it in the summertime! Use markers to ink up only the words!

I don’t know what the term is or if there is one, but I had never tried the “staggered paper” look before.   Maybe it should be called tipsy paper, I don’t know! Usually I like things straight and even, but I thought I would live dangerously and stack these layers differently today! It’s okay, not sure I love it, but it’s okay and something different.  Maybe I will grow to love it! The designer paper is the beautiful Into The Woods Designer Series PaperThis stamp set and paper pack are both available in the Stampin’ Up! Holiday Catalog. This paper originated with one of the Stampin’ Up! artists handpainting these designs and then Stampin’ Up! did all their magic to turn it into our designer paper. This paper really is gorgeous! Just remember, every Stampin’ Up! paper is more beautiful in person, no matter how good it already looks online!

For a little interest, I pulled some threads out of the  1 1/4″ Burlap Ribbon.  Just cut off a length that you want to use, cut off the selvage edge on one side and you will be able to fray the ribbon to get however many strands you want to use as its own embellishment.  I used this Burlap Ribbon so much I had to order more! You might not think you would use it a lot, but you will! Burlap is so on trend right now and has been for awhile.

My card still needed a little something, so I stamped the little leaf stamp in the background with Versamark Ink.  Versamark has many uses, one being matching the card stock that you are stamping on.  You could get the same look if you stamped on the Tangelo Twist card stock with Tangelo Twist ink – and sometimes I do that as well!  Versamark Ink is also used in heat embossing.  I think the Versamark stamping gave the background and the card just a little something that it needed.

You don’t need to make this exact Thankful Forest Friends Thankful for You Card, you can also use the same basic design to make any other card. Try it!

Click to Shop Stampin’ Up!

Punch Art Turkey Thanksgiving Card

Punch Art Turkey Thanksgiving Card

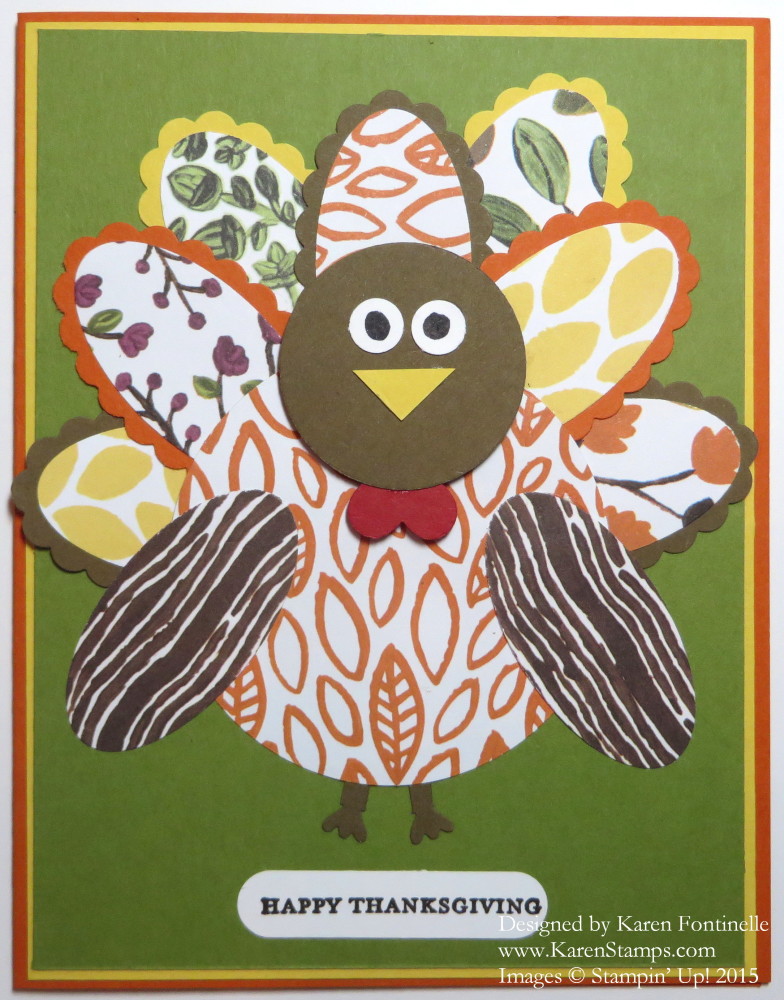
Is it too early for a punch art turkey card?! Probably not because Thanksgiving will be here before we know it!  Once I put up my Halloween decorations I know I will continually be changing them out through Christmas.  It all happens so fast!  Happy November!

Two years ago I made a punch art turkey Thanksgiving card, and I thought maybe it was time for an update. You can view it HERE. I made this card the same way, just used the current new paper, Into the Woods Designer Series PaperI only recently got this paper (even a Demonstrator can’t have it all!) and let me tell you, it is gorgeous!  I could barely stand to cut into it and punch pieces for my card!

To make the turkey body, I used the 2 1/2″ Circle Punch. The turkey head is the 1 3/8″ Circle Punch. The feathers are made with the Large Oval Punch and the Scallop Oval PunchAnd where would any project be without using the Owl Builder Punch?!  I used the Owl Punch for the turkey feet and for the turkey eyes.  The beak is hand cut from a scrap and the waddle is punched with the heart in the Itty Bitty Accents Punch Pack. The greeting is from the well-used Teeny Tiny Wishes Stamp Set and punched with the Word Window Punch.

This may be a  wild and crazy looking turkey, but that’s okay because I made it myself and used some beautiful paper! I played around with the feathers and placement and finally I was satisfied with it.  If you don’t feel right about your design the first time, just keep playing, move things around, change the colors, it will come!

You might enjoy this Stampin’ Up! video with the artist of these beautiful papers!

To purchase this beautiful Into the Woods Paper or any of the other supplies I used to make this Punch Art Turkey Thanksgiving Card, please visit my Stampin’ Up! Online Store HERE.

Masculine Birthday Card with Glimmer Leaves

Masculine Birthday Card with Glimmer Leaves

It’s November! Did you remember to change your clocks?  Time to “Fall Back”!

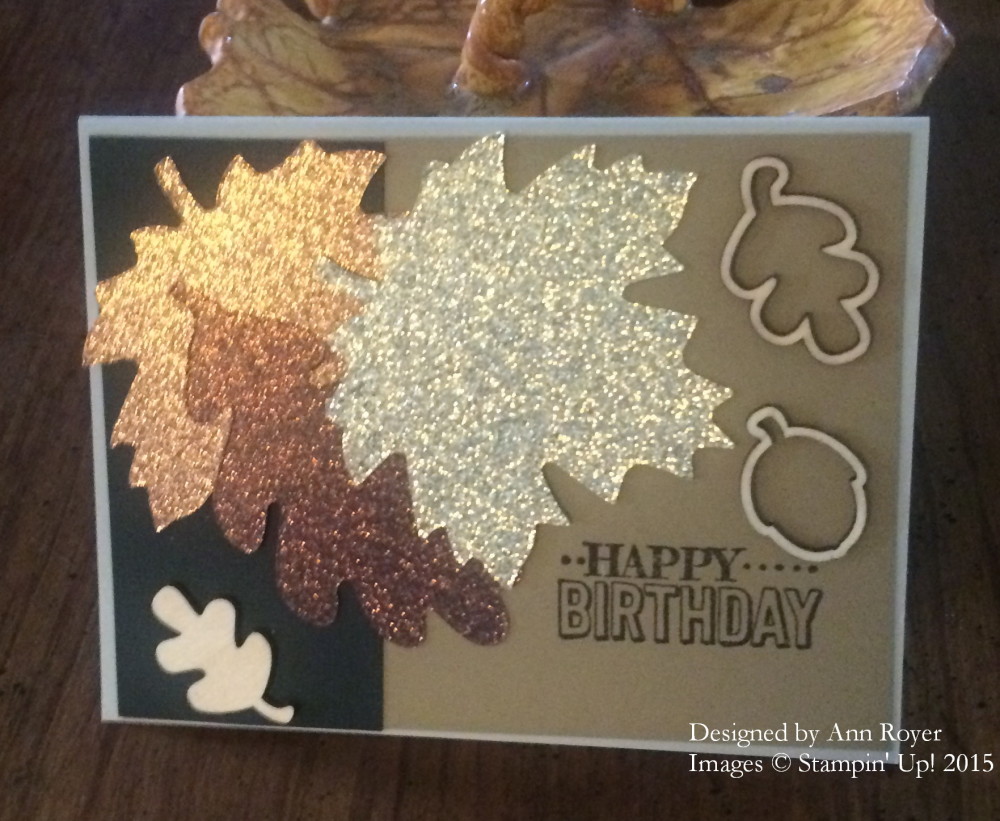
Today I have this beautiful masculine birthday card with glimmer leaves to show you that my husband’s cousin sent me in a text.  I thought it was such a beautiful card that I asked her if I could show it off on my blog!  She made it for her son’s birthday, so as you can see, it makes a great masculine card with the neutral background colors, the leaves, and the wooden elements. We are always looking for good cards to make for the men in our lives!

The leaves are made with three colors of glimmer paper, such as the Gold Glimmer Paper, and die cut with the Leaflets Framelits Dies using the Big Shot.  She also added some Autumn Wooden Elements (retired). Although this card is for a birthday, I think it would make a beautiful card for Thanksgiving or a Thinking of You Card or any number of occasions.

This masculine birthday card with glimmer leaves proves that you can use some glimmer and sparkle even for men!

Need some Glimmer Paper or a Big Shot to cut out those gorgeous leaves?  Just shop at my Stampin’ Up! Online Store or contact me to place your order for you.
 

Happy Halloween!

Halloween Cards

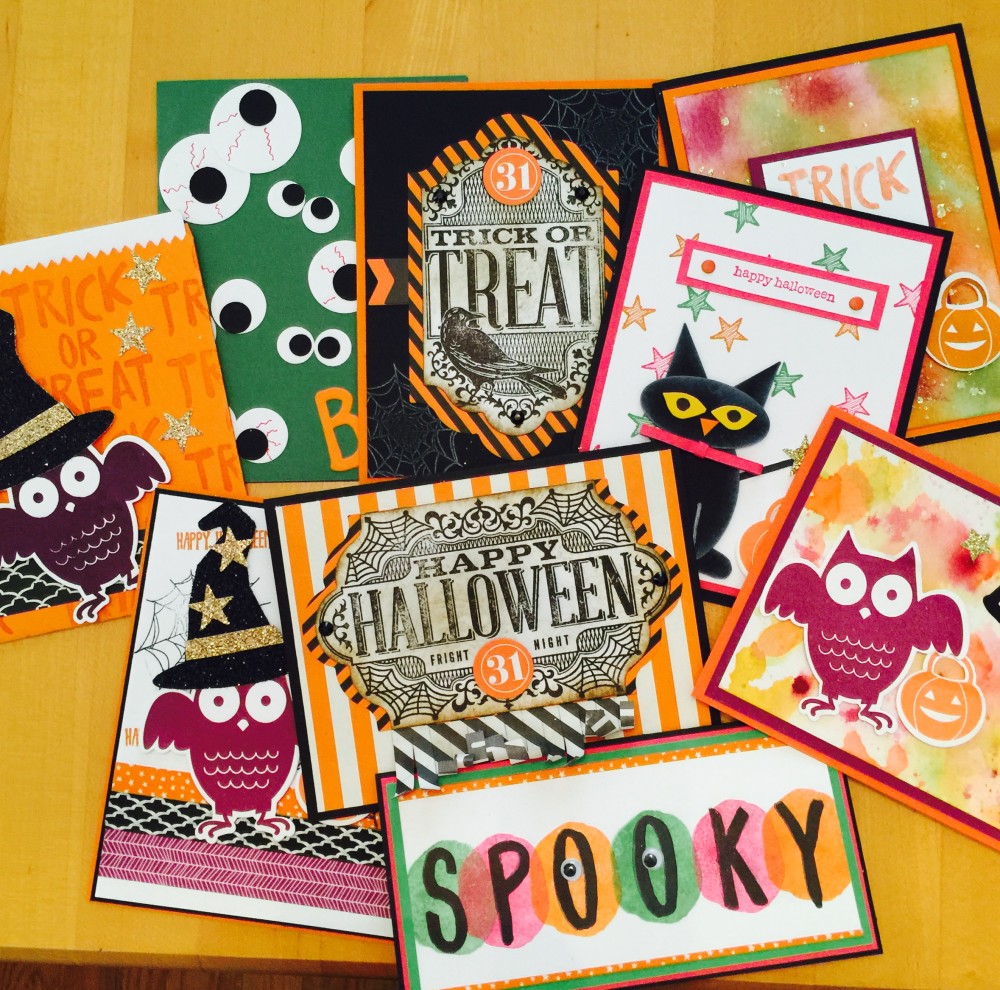
I can’t believe Halloween is finally here!  I still have Halloween projects I would like to make! As I was beginning to mail out some cards the other day, I just grabbed a bunch and took a photo. You will probably find most of these on other blog posts.  And now that Halloween is here, it is on to the other holidays!  Have fun tonight!  Watch out for the ghosts and goblins!

Happy Halloween!

Trick-or-Treat!

Punch Art Black Cat Halloween Card

Punch Art Black Cat Halloween Card

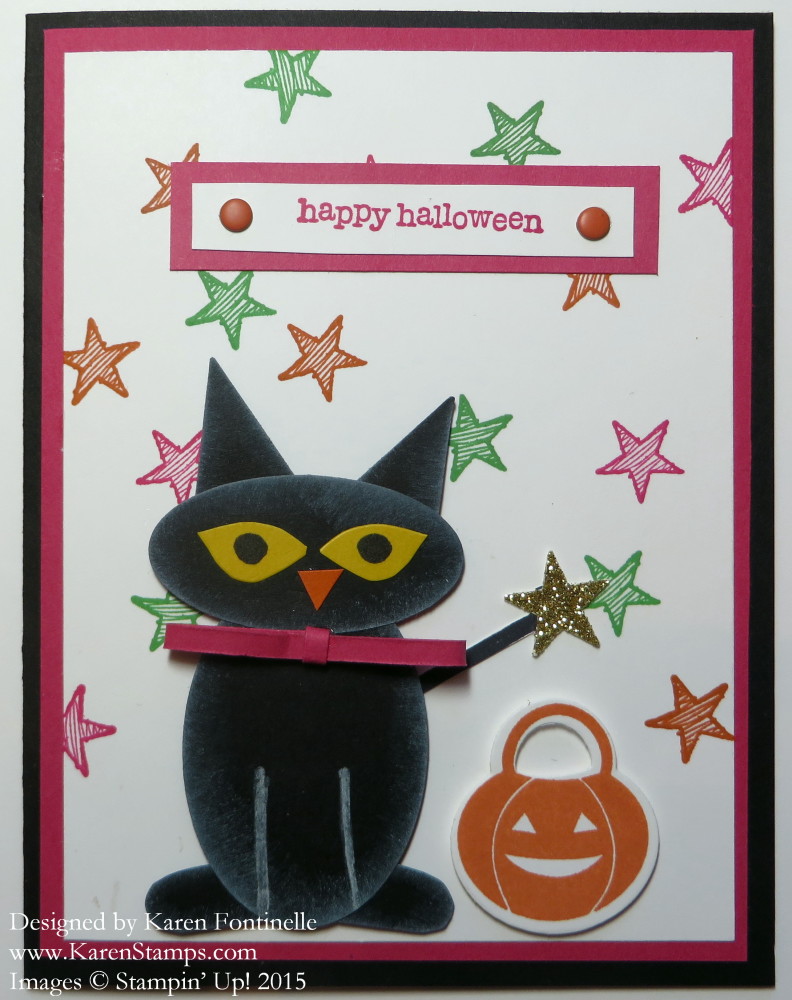
I would say this punch art black cat Halloween card has two levels of inspiration on it. One day I saw pink being used in Halloween decorations and I thought that would be a fun thing to do.  I added some bits of Melon Mambo to this card, in the layers, the stamped greeting and in the paper bow on the punch art cat. (Sometimes just seeing a scrap of paper on your work table will provide inspiration!) The cat came from a picture of a cat decoration of some kind in a magazine article I recently read on the plane (the only time I seem to get to catch up on my magazines!) that made me think of the shapes of our Stampin’ Up! punches.

I used the Extra-Large Oval Punch for the cat’s body and the Large Oval Punch for the head. The ears are the top tip of the Tree Punch.  The feet are the Word Window Punch, cut in half. The legs are drawn in with the White Stampin’ Chalk MarkerI don’t remember how I did the eyes!  Maybe I just cut the shapes by hand.  Possibly I used the leaf on the Bird Builder Punch and trimmed it.  Punches just make things easier but there is no reason why you can’t cut things out by hand if you don’t have the appropriate punch – or use something else and then modify the shape.

The greeting is stamped with a stamp from Teeny Tiny Wishes.  Have I ever mentioned how I think this is one of the best stamp sets to own??  It has so many greetings to use, both for holidays and generic.  Very useful.  You can never have too many sentiments and greetings to use. For a little pizzazz, I added two Brights Candy Dots.  I love those cute Candy Dots!  The little stamped stars are from the Something to Say Stamp Set.  The star on the wand is punched from Gold Glimmer Paper with the star punch in the Itty Bitty Accents Punch Pack. The jack-o-lantern is stamped with the Howl-o-Ween Treat Stamp Set and punched out with the Boo To You Framelits Dies.

If you are looking for some last minute Halloween card ideas, maybe this punch art black cat Halloween card idea will help you.


Howl-O-Ween Treat Halloween Trick or Treat Card

Howl-O-Ween Treat Halloween Trick or Treat CardIf you are looking for a colorful Halloween card, look no farther than this Howl-O-Ween Treat Halloween Trick or Treat Card. The stamps are both from the Howl-o-Ween Treat Stamp Set.  The greeting is colored with three different markers and layered on the front of the card. The pumpkin is stamped and then die cut with the Boo To You Framelits Dies.

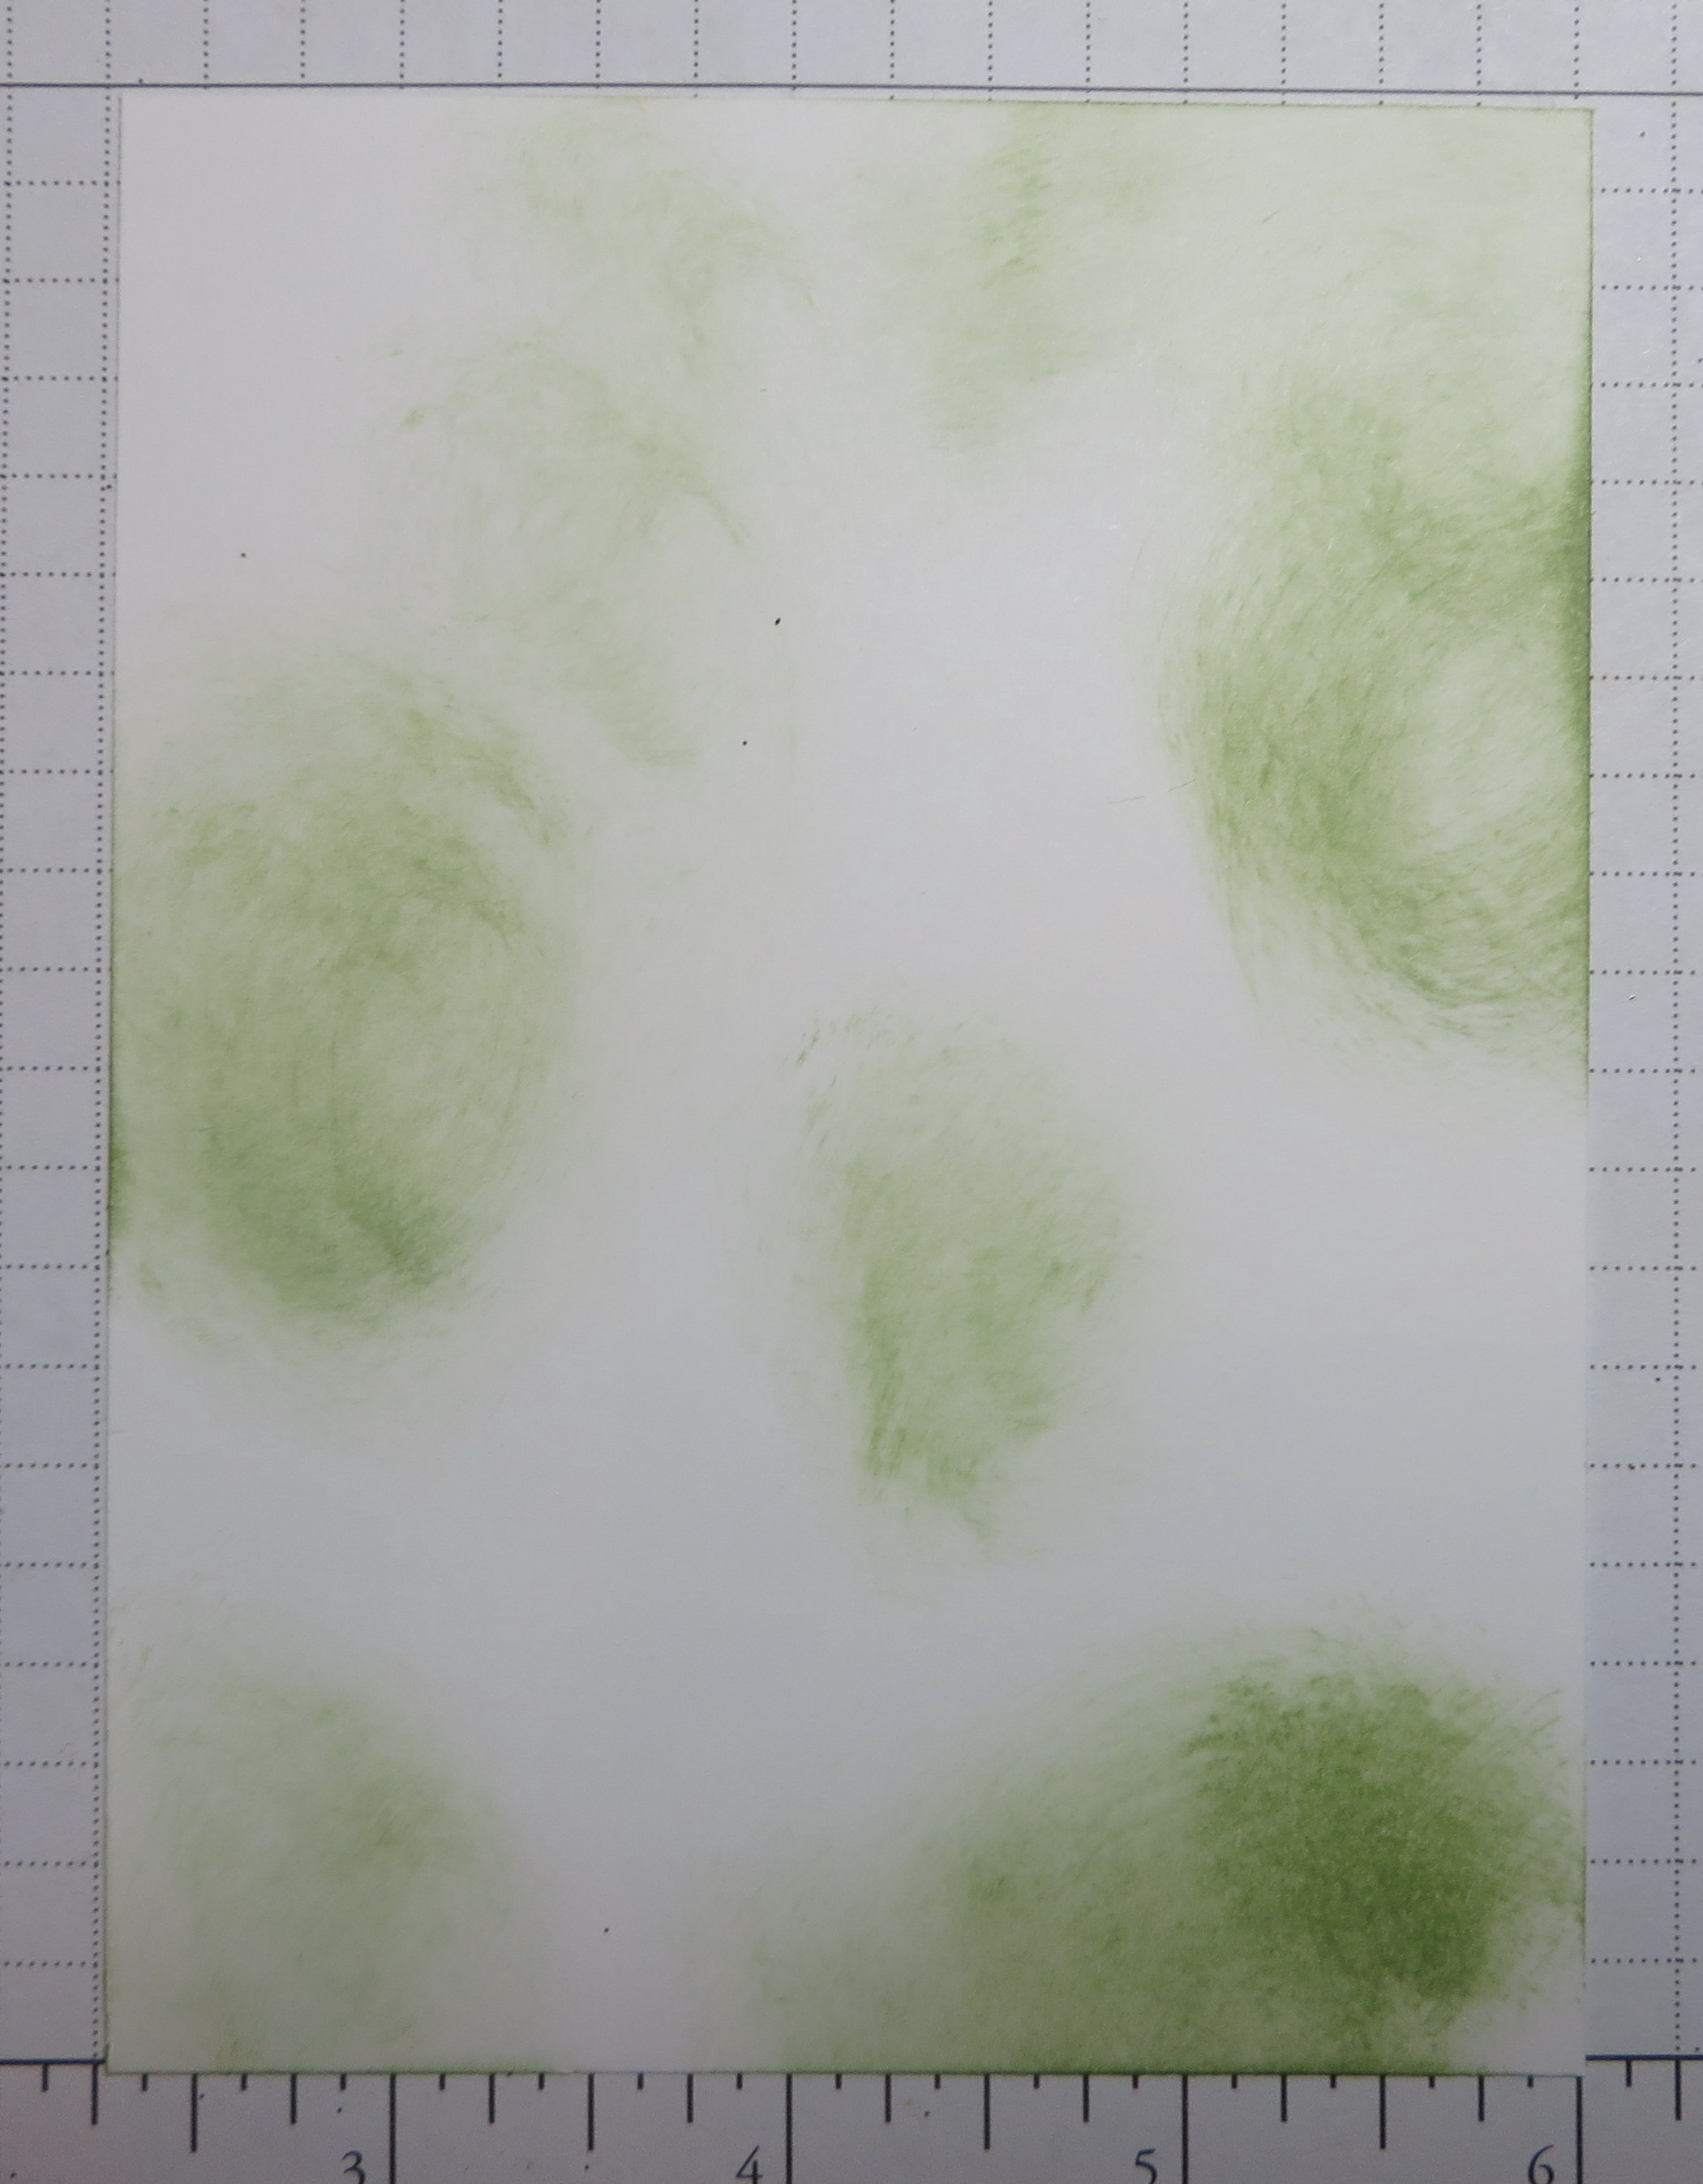
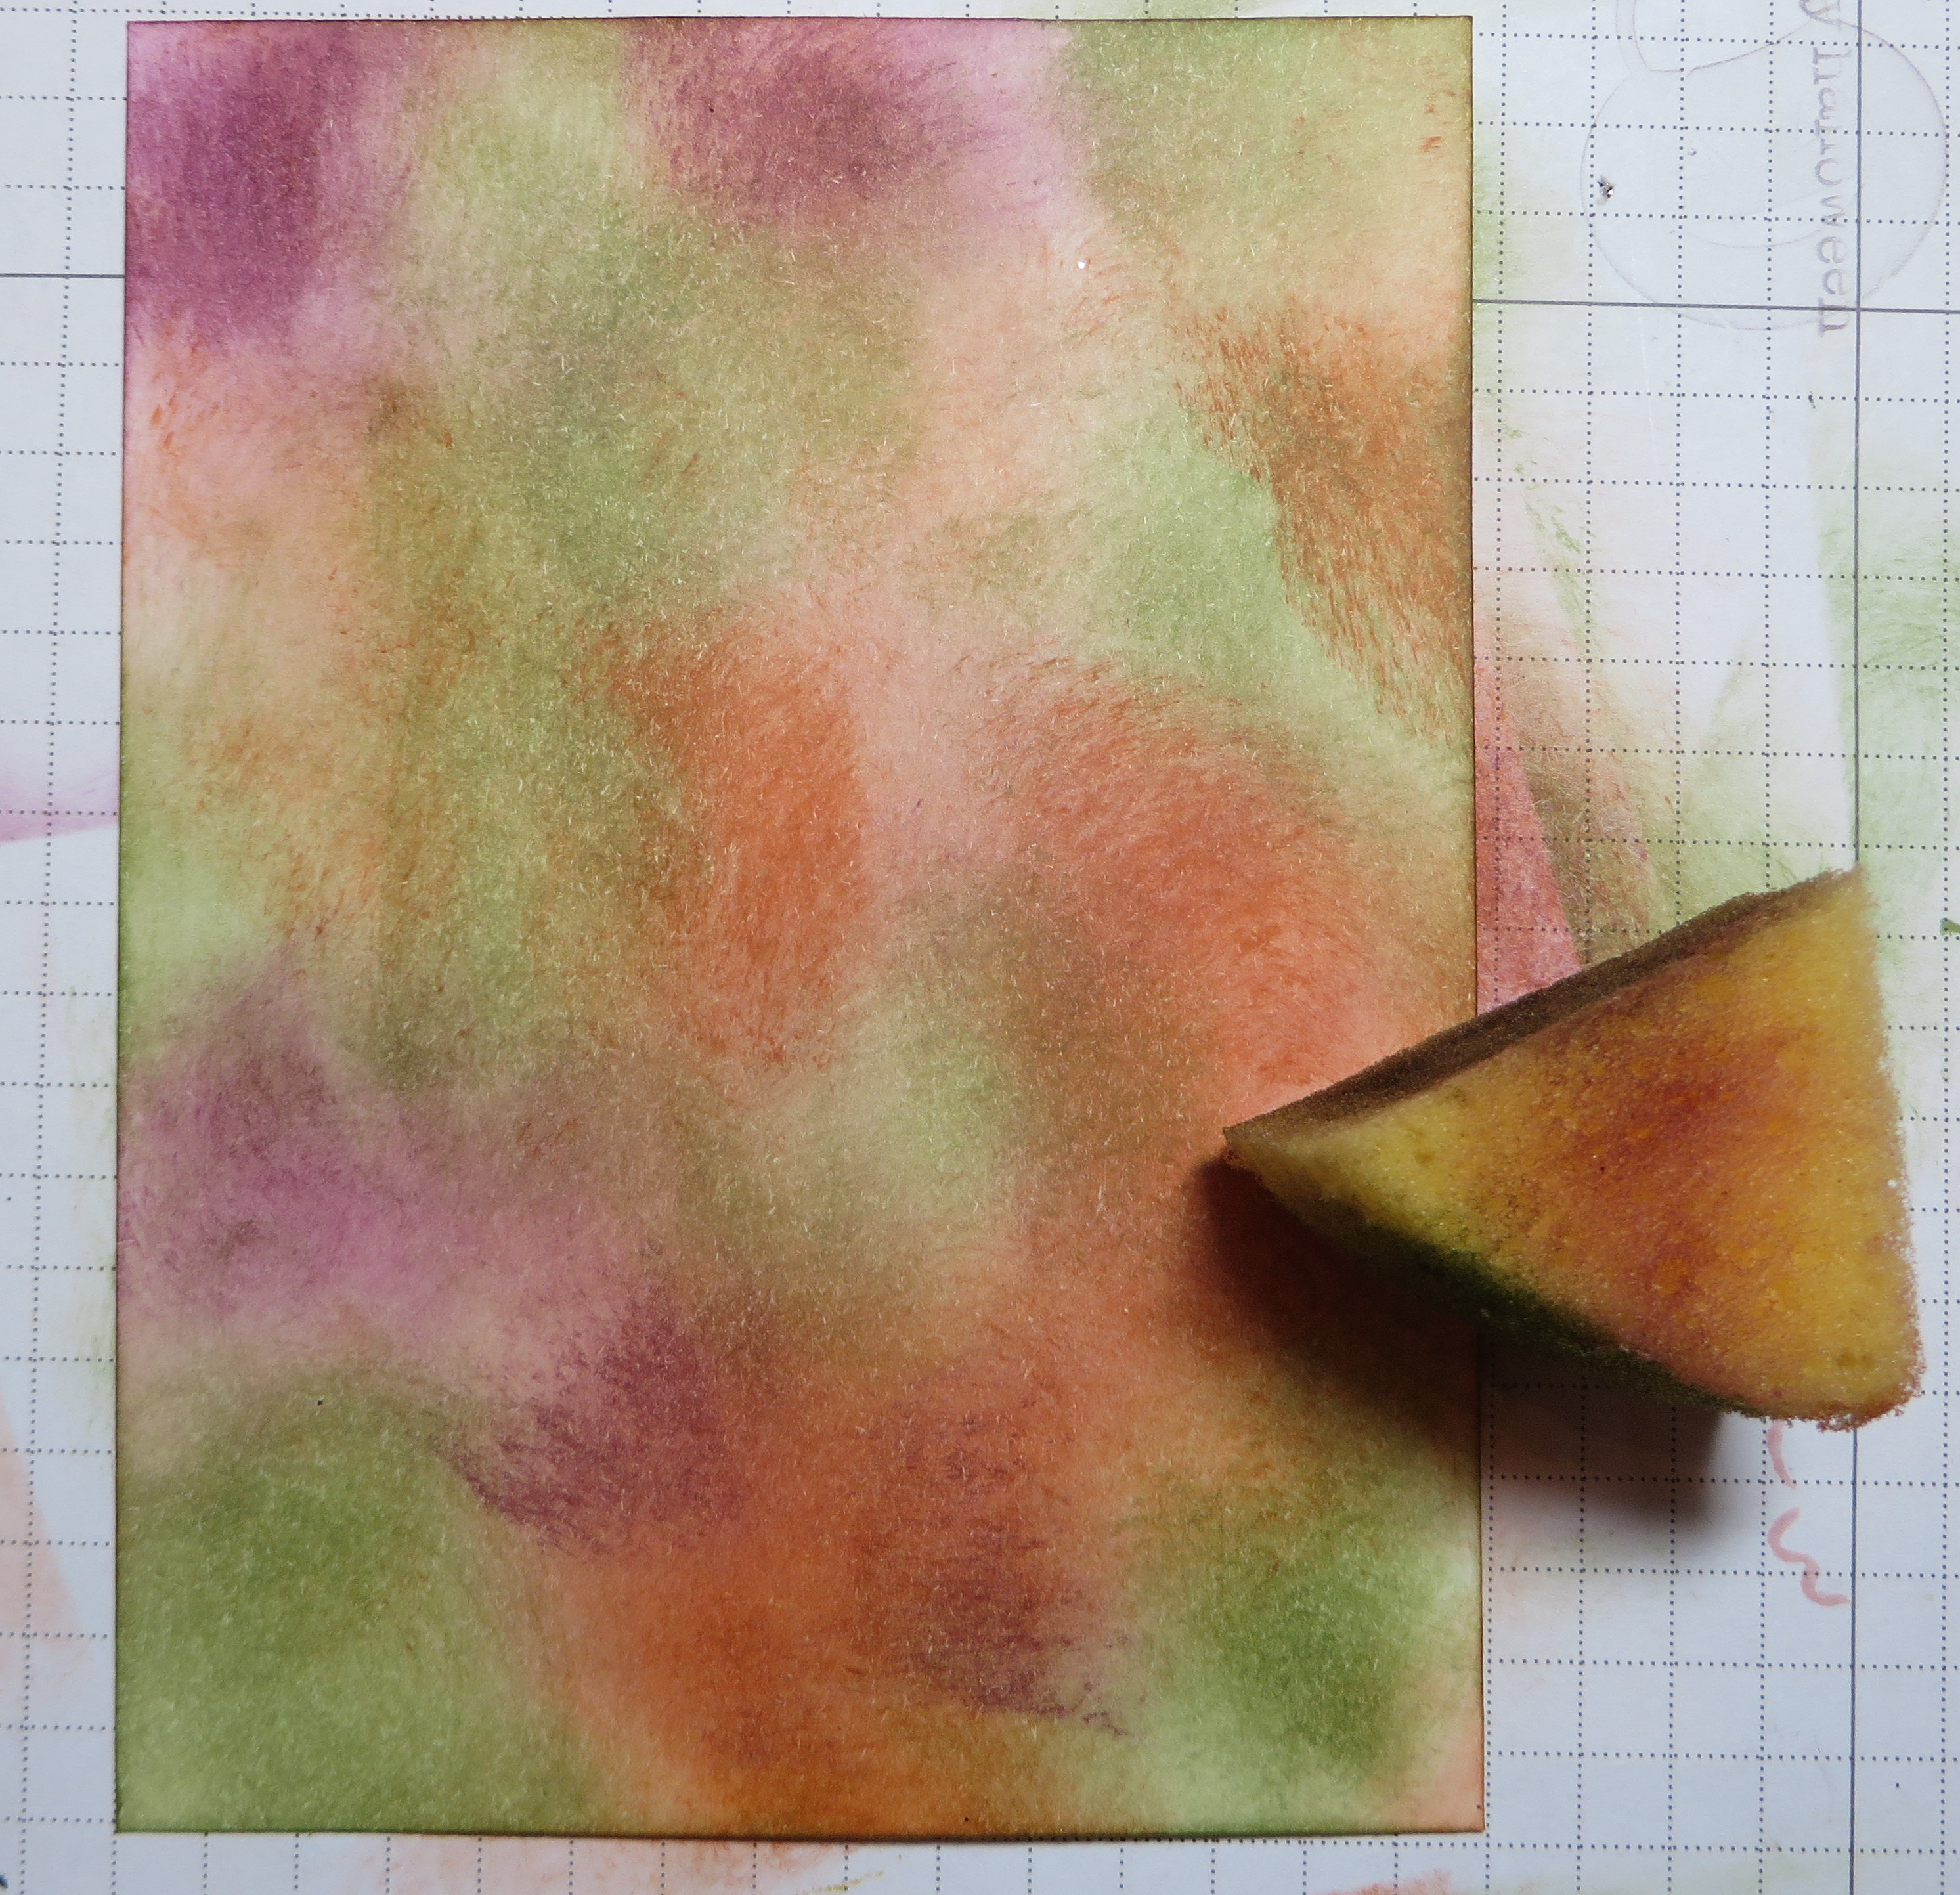
The background is simply a piece of Whisper White cardstock, with different colors just sponged on.  I have always cut the Stamping Sponges into pieces and used them that size.

Sponging

Sponging

After the sponging, I could see the card was going to need “something”, so I splattered the watered down Multipurpose Liquid Glue (the “green” glue, as we often say) over the card front and the greeting piece with my Aqua Painter, just like you would with a paintbrush. After applying the glue this way, sprinkle the card with Gold Stampin’ Glitter and then of course shake off.  You will have splattered sparkly glitter!  Really fun!

You have to hurry if you want to mail any Halloween cards to friends!  Halloween is Saturday, Oct. 31!

Did you know that Oct. 31st will be the last day of daylight savings time for this year?!  Time to “Fall Back” and get that extra hour of sleep!

*************

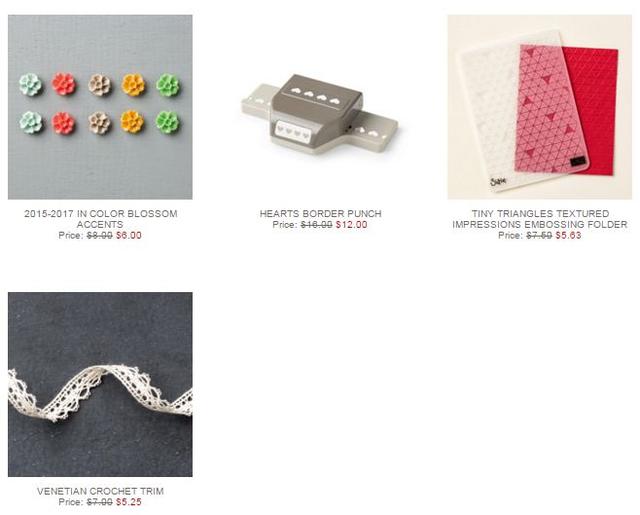
Here are the new Stampin’ Up! Weekly Deals!  Some fun things for jazzing up your cards and projects!

Stampin' Up! Weekly Deal Oct 27 2015

Click to Shop!

Shop for any supplies you need, whether for my Howl-O-Ween Treat Halloween Trick or Treat Card, or any of your other papercrafting projects at my Stampin’ Up! Online Store HERE.

Trick or Treat Watercolor Wash Halloween Card

Trick or Treat Watercolor Wash Halloween Card

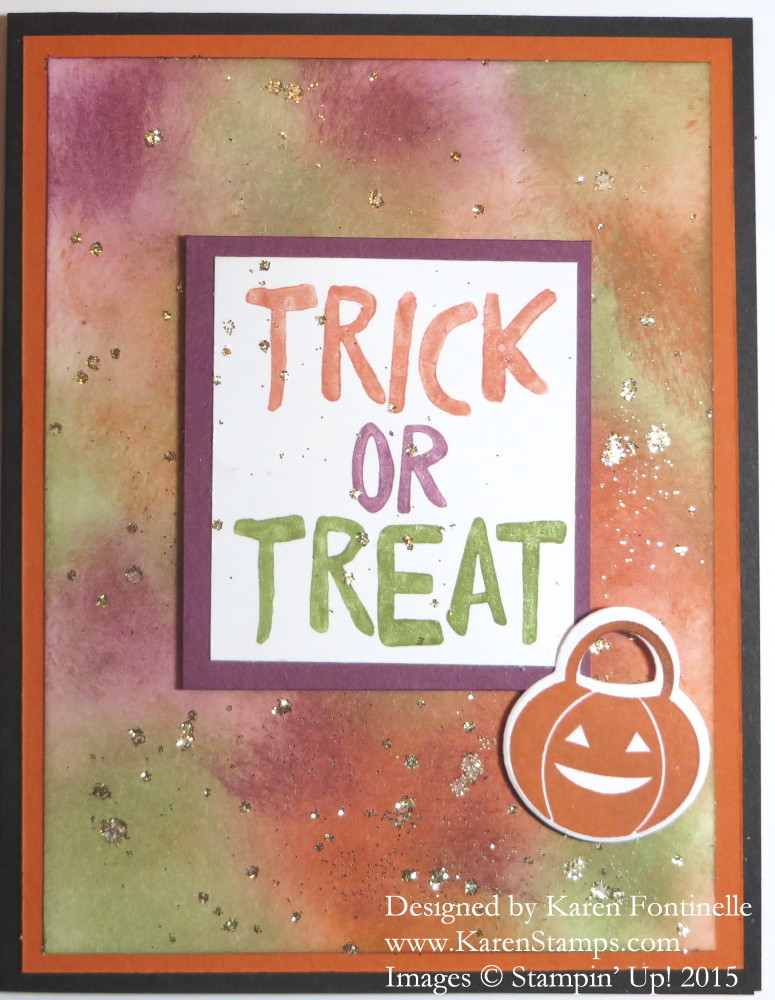
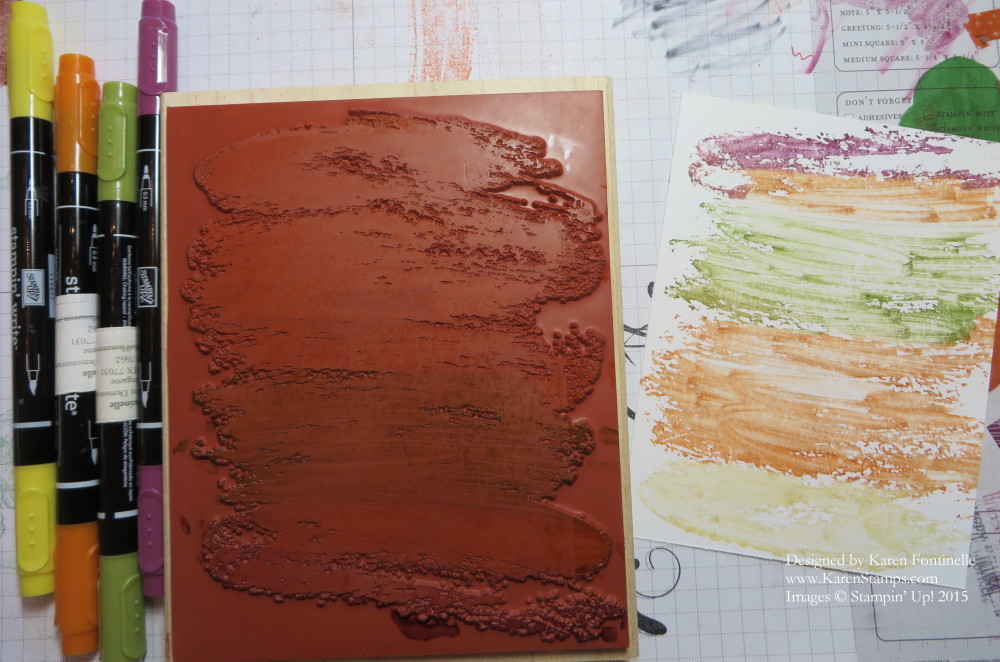
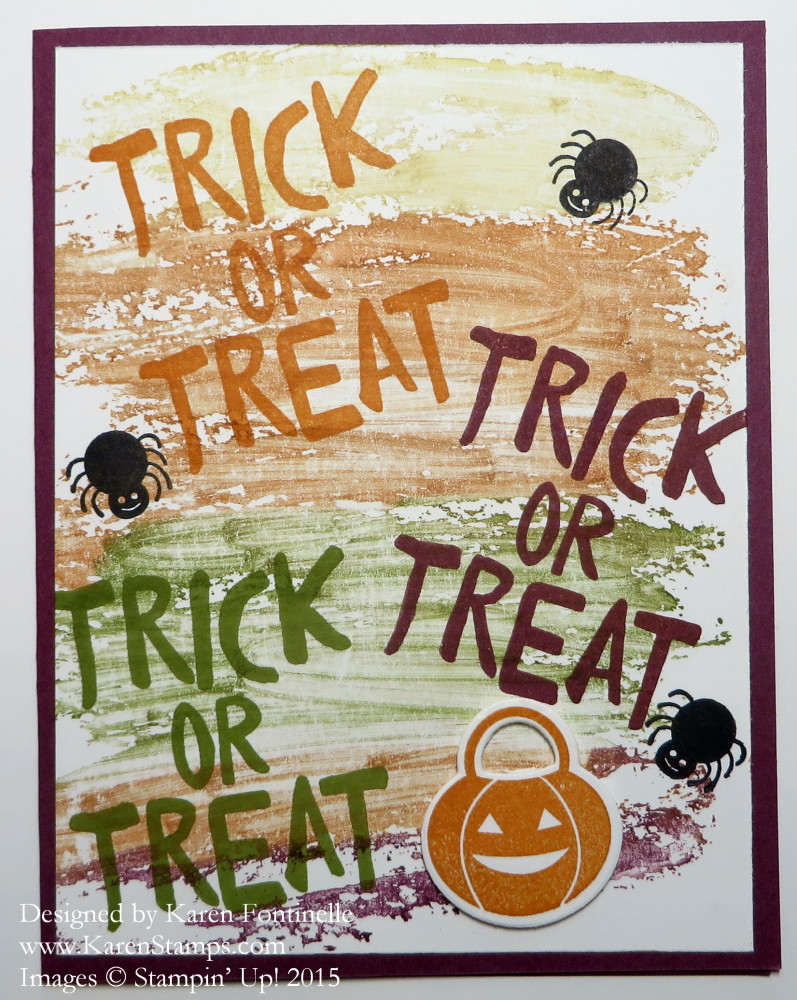
The other day I got this idea to use this background stamp to make this Trick or Treat Watercolor Wash Halloween Card.  The Watercolor Wash is a large background stamp, and I colored it with several markers to make a multi-colored background. After coloring with markers, be sure to “huff” (or breathe) on the inked stamp to remoisten the ink before stamping. I thought using Halloween colors with the Watercolor Wash stamp would be fun and interesting!

Watercolor Wash Stamp

I recommend getting these background stamps in the wood-mount version.  I just think it’s easier to use them on the wood block.  I think the really big stamps and the really little stamps are better wood-mounted, and you don’t have to do any mounting as they are all ready to stamp!

After stamping the background, I used the Howl-o-Ween Treat Stamp set for the “Trick or Treat” words, the pumpkin die-cut and the stamped spiders! It’s a fun Halloween stamp set plus comes with matching Boo To You framelits dies.  You can also purchase the Bundle and save 15%.

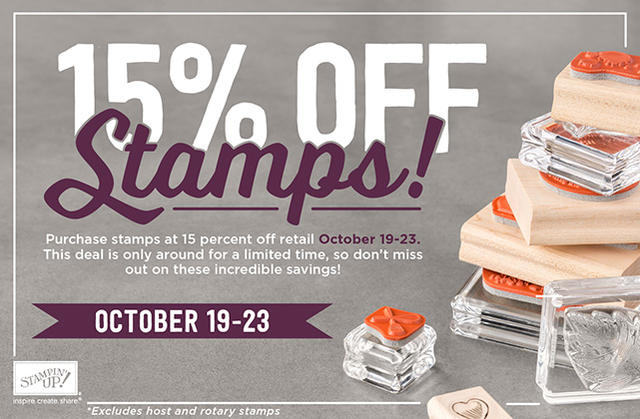
Don’t forget about the very short Stampin’ Up! Stamp Sale, which ends on Friday, October 23!!  That is tomorrow!  All stamps are 15% off!  Don’t miss out!

Stampin up Stamp Sale


Shop Online at Stampin’ Up! to get your great stamps on sale, but do it by Friday!

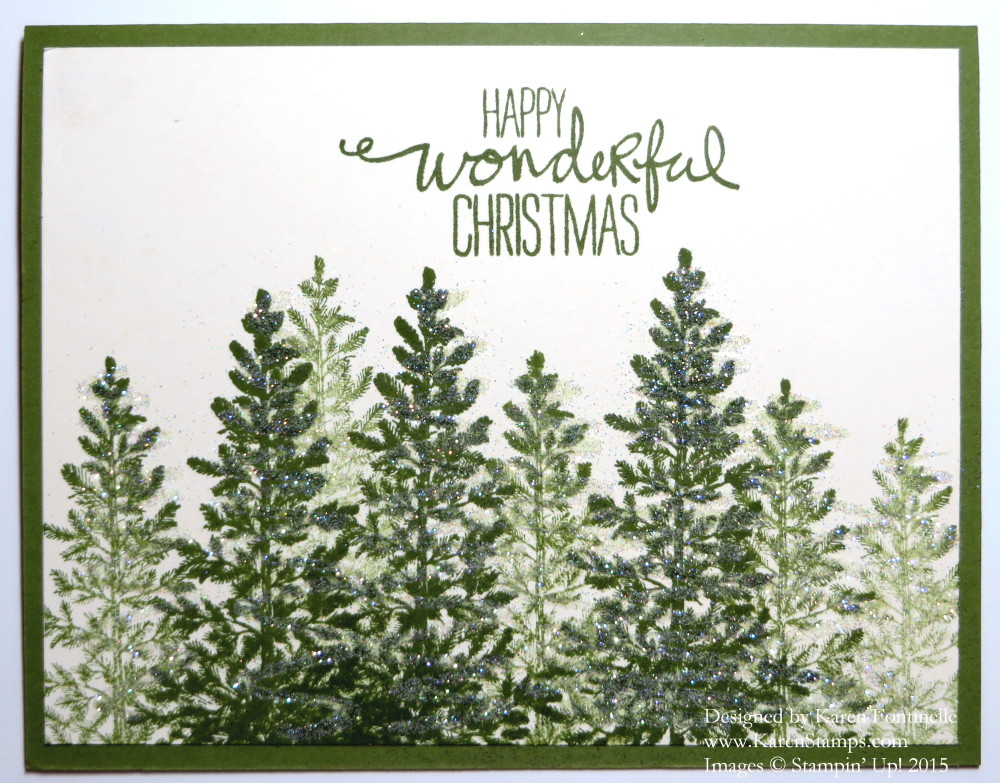
Lovely As a Tree Christmas Card

Lovely As a Tree Christmas Card

This Lovely As a Tree Christmas Card is one of the easiest and most beautiful Christmas cards you could ever make! With Stampin’ Up! having the 15% Off Stamp Sale this week,
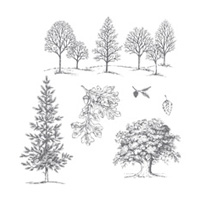
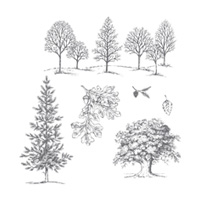
October 19 – 23, I would like to encourage you to make sure you have this stamp set, Lovely As a Tree,  in your collection.  If you have been with Stampin’ Up! for many years, you probably DO own it.  But if you are newer, you should know Lovely As a Tree is one of the most classic stamp sets Stampin’ Up! has ever sold! It has been around since 2001, I believe, which is around the time I started stamping. The fact that it is still in the catalog means that it is still very popular and still getting sales. This is a stamp set every stamper should own!

I saw the design of this card way back when I was first a demonstrator.  The stamping is so easy on this card.  Simply ink up the single evergreen tree and stamp.  Then immediately stamp again right next to that tree.  Since there is less ink on the stamp, that tree will stamp lighter. Then ink up the stamp again and stamp – and then stamp again without inking up.  Continue stamping this way over the Very Vanilla card front until it is filled with trees. Stamp a greeting at the top.  I used the greeting from the Wondrous Wreath Photopolymer Stamp Set.           

One of everyone’s favorite embellishments back then, and probably still, was Dazzling Diamonds Stampin’ Glitter. This doesn’t require any thought or expertise! Simply take the 2-Way Glue Pen and scribble on each tree from top to bottom. Shake Dazzling Diamonds Glitter all over the trees on the card front and dump off the excess.  You will be amazed at how beautiful your Lovely as a Tree Christmas Card is now!

Shop at my Stampin’ Up! Online Store for any supplies you need for this card!

Stampin up Stamp Sale