Category Archives: Birthday

Stained Glass Coloring Birthday Card

Stained Glass Coloring Birthday Card

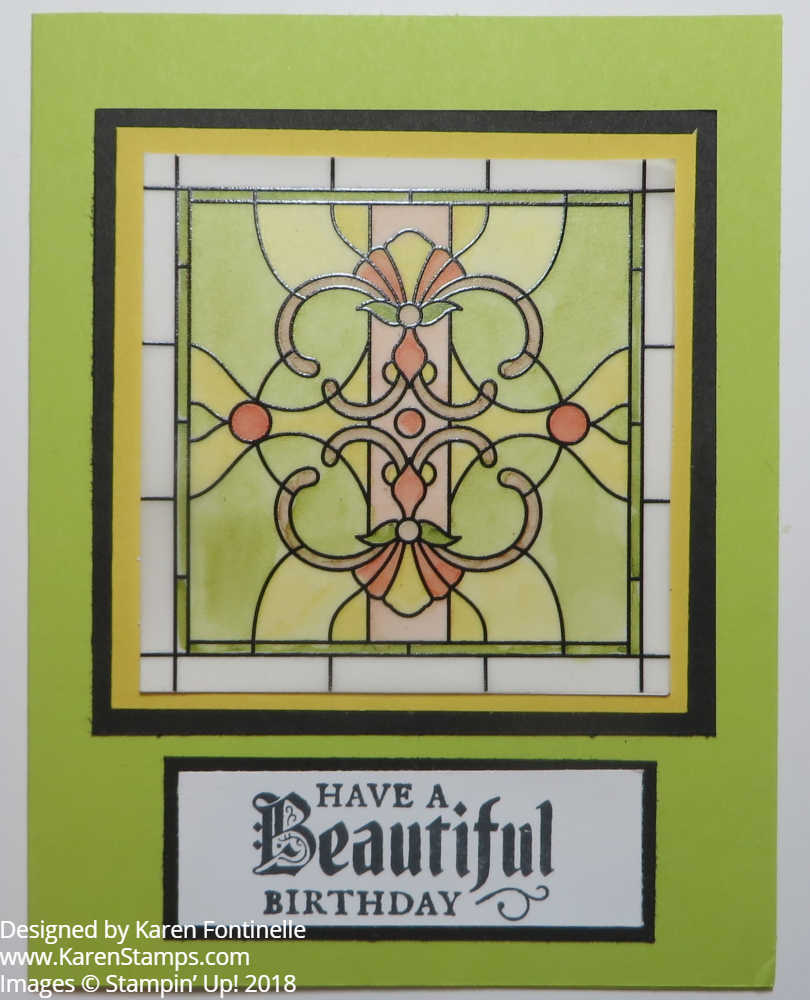
One of the most interesting and beautiful products in the new Stampin’ Up! Catalog has to be this Graceful Glass Designer Vellum with which I made this Stained Glass Coloring Birthday Card. It’s a stack of 6″ x 6″ vellum printed with stained glass images that you can then color in various ways.  You get 2 each of 12 different designs.  I have seen so many pretty cards made with this paper.

For my first attempt, I simply colored on the top side of the paper with the Stampin’ Blends markers.  I had no plan, really, just colored in as I went along.  Even the “dark” Stampin’ Blends markers color pretty lightly on this vellum, so you can go back over it if you want to make it darker.  If you adhere a piece of Whisper White cardstock behind the vellum, it will brighten up the colors of the markers.  You can also experiment with other colors of cardstock to put behind the stained glass for different effects.  You can also color with the Stampin’ Write markers but you might want to color on the back side of the vellum so the colors will not be too strong.  Just experiment and see.

I debated which green I wanted to use for the card base but settled on the Lemon Lime Twist Cardstock to just go ahead and make a bright card!  After adhering the vellum to a piece of Whisper White the same size for a backing, I layered that on a piece of Daffodil Delight.  But then I thought maybe it could use a layer of Basic Black so I added that.

In order to adhere the vellum to anything, make a small puddle of Multipurpose Liquid Glue either on the Silicone Craft Sheet or a piece of plastic or wax paper, and sponge the glue onto the paper, lightly.  This will not show through the vellum like almost any other adhesive will do.

The greeting is from the coordinating stamp set, Painted Glass Stamp Set. The stamps have that old style that goes with the stained glass look!  There are also Stained Glass Thinlits Dies if you would like to add that dimension.

I can’t wait to do a little more coloring with the various papers in the Graceful Glass Vellum package!

Shop Online at Stampin’ Up!

Broadway Bound Birthday Card With a Surprise Inside!

Broadway Bound Birthday Card

This is a fun card to make, a Broadway Bound Birthday Card with a surprise inside! From the outside, it looks like an ordinary card like we make all the time. I started seeing these cards around the internet and wrongly assumed how they were made.

Take a look at the inside of the card first:Broadway Bound Birthday Card Surprise Inside

Now you might, and I did, assume that there is a card base of Basic Black, with a panel of designer paper on the front and another panel of designer paper on the inside of the card, adhered to the full inside of the back of the front card base.  Well, it’s not!

I did start with a card base of Basic Black as usual. But the different step is to cut off 3 1/4″ of the front of the card base, leaving a 1″ strip for the card front instead! This way when you adhere the piece of designer series paper to the remaining portion of the card front, you will be showcasing both sides of the designer paper because when the recipient opens the card, they will see the opposite side of the designer paper!  Now if you did it the other way, adhering a piece of designer paper to the front of the card and adhering another piece of designer paper showing the other side to the inside of the card, this saves weight!  And it’s just something a little different!

Check out the pieces shown in the photo below.  I added a 1/2″ x 5 1/2″ strip of Gold Foil to put a little divider and accent on the front of the card.  When you adhere the designer paper to the card front, be sure to line up the designer paper with the corner and edges of the back side of the card base rather than the fold on the front of the card. (The gold strip in the photo is just laying on the black cardstock, it is not the proper placement.)

Broadway Bound Birthday Card Assembly

For this card, I used the Broadway Bound Designer Series Paper in the new catalog. It’s a little difficult to photograph because of the gold foil accents, but the paper is very pretty and fancy!  It will make lots of great birthday and other cards.

To complete my card, I stamped a greeting from the Picture Perfect Birthday Photopolymer Stamp Set. It is then die cut with the Stitched Shapes Framelits Dies and then layered on a Gold Foil  Scalloped Circle die.

Try this different way to make a card to use and appreciate our beautiful designer series paper. Something fun and different!

SHOP STAMPIN’ UP! ONLINE HERE!

Bridge Card Technique For a Birthday Card

Bridge Card Technique For a Birthday Card

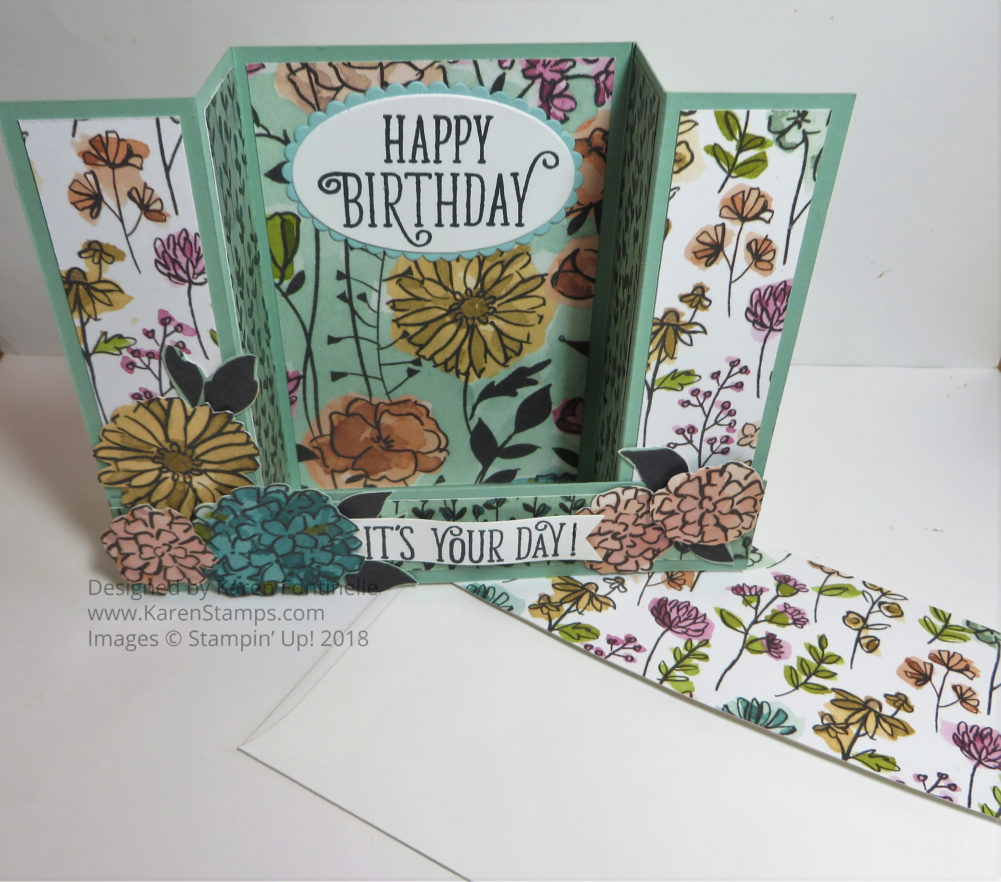
I wanted to make a special birthday card for my daughter, and I had seen pretty cards like this design, but I didn’t know what they were called. After some sleuthing, I found out this card design is called a Bridge Card.  With the new, beautiful Share What You Love Designer Series Paper, I was able to come up with this Bridge Card Technique For a Birthday Card.  It’s very easy, really!

This card is really just half a sheet of cardstock, some scoring, and a strip that goes across the front.  It even folds flat for mailing and fits in our Medium Envelopes. Amazing!

Start with a piece of cardstock for the card base that is 8″ x 4 1/4″.  Score at 1 1/4″, 2 1/2″, 5 1/2″ and 6 3/4″ on the long size of the cardstock. Fold and crease the score lines so that the card would stand up as you see in the photo.

Cut strips of designer paper to fit each of the panels. I used the new Share What You Love Specialty Designer Series Paper.  You’ll need four strips that are 1″ x 4″. They can all be the same pattern or two different ones as I did on this card. For the wider center panel, cut either a piece of Whisper White or Very Vanilla Cardstock or, as I did, designer paper at 2 3/4″ x 4″.

For the “bridge” part of the card, cut a strip 1 1/4″ x 5 1/2″ of cardstock. Add a strip of designer paper if you like, 1″ x 5 1/4″.  Adhere all the designer paper on the panels and then get ready to do the bridge piece.  You can adhere it so it is all the way at the bottom of the card or up a little higher.  It just depends on the design you want. To assemble, adhere the left side of the bridge piece to the left edge of top folded panel. Then, if you open up the right side of the card, flat on the table, you can adhere the right end of the bridge piece to the right side edge of the card.  Make sure you only have adhesive on the parts of the bridge piece that will cover the left front panel and the right front panel. Now you card should be able to open up and stand!

Bridge Card Technique For a Birthday Card Flat For Mailing

Embellish your card however you like.  I added birthday greetings and some flowers that I cut out of the designer paper.   I used the Happy Birthday Gorgeous Stamp Set for the greetings. If you would like an area to write a note or sign your name, make a panel to fit on the back side of the card and you will have plenty of room.

Once you try making one, you will easily see how it all goes together!  It seems amazing that it folds flat for mailing.  Speaking of mailing, if you want to decorate the envelope flap, cut a piece of designer paper that would completely cover the flap and adhere it to the flap.  Then take your scissors and trim off the excess around the flap! Now it’s your turn to try the Bridge Card Technique for a Birthday Card!

Supplies Found at Stampin’ Up! Online!

Naturally Eclectic Mini Treat Bag

Naturally Eclectic Mini Treat Bag

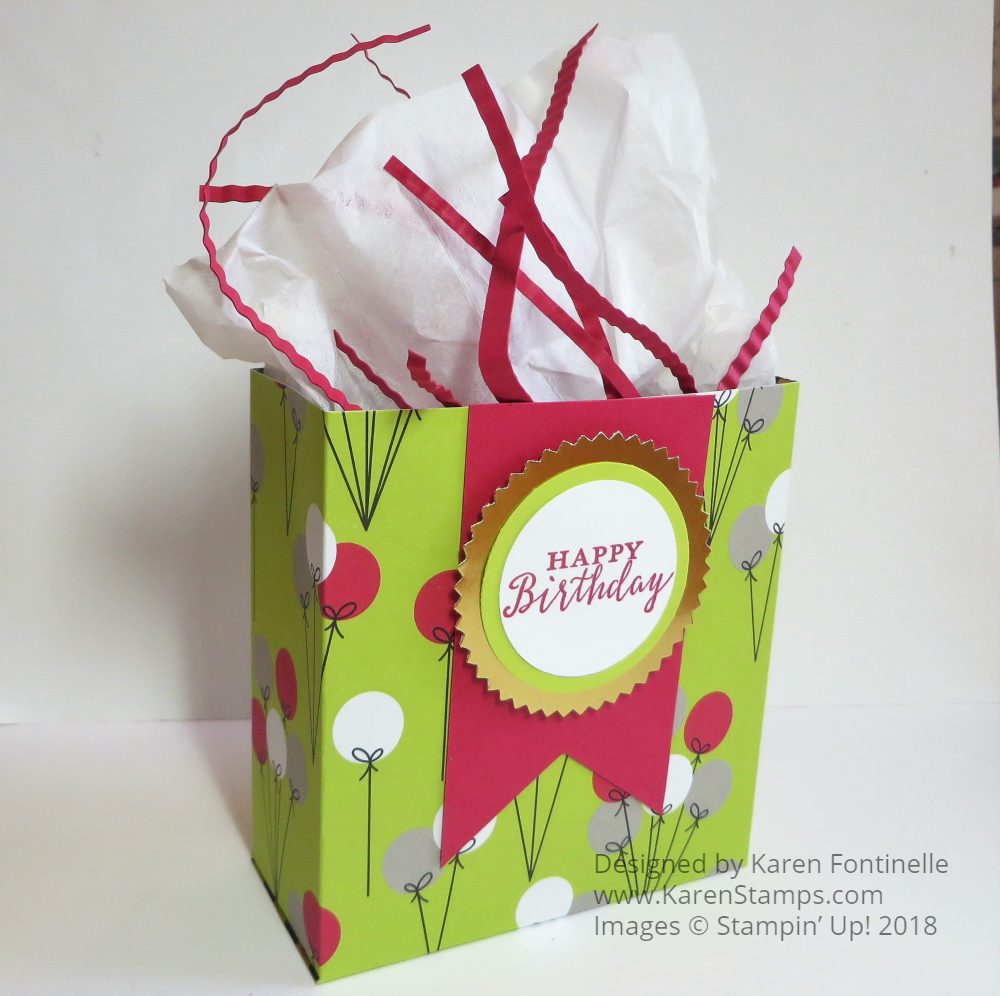
One of my favorite products that I hate to see retire are the Mini Treat Bag Thinlits Dies, which I used to make this Naturally Eclectic Mini Treat Bag. Through the years that Stampin’ Up! has had these dies, I have used them a lot!  And you can even make some variations, like folding over the top of the bag or cutting it down to make it shorter, even making somewhat of a 3D bag out of it!  You can use it to just put a card inside for a note or greeting, or you can slip a gift card or check inside for a gift.  It’s just a fun thing to make that is a little different that the recipient will not be expecting!

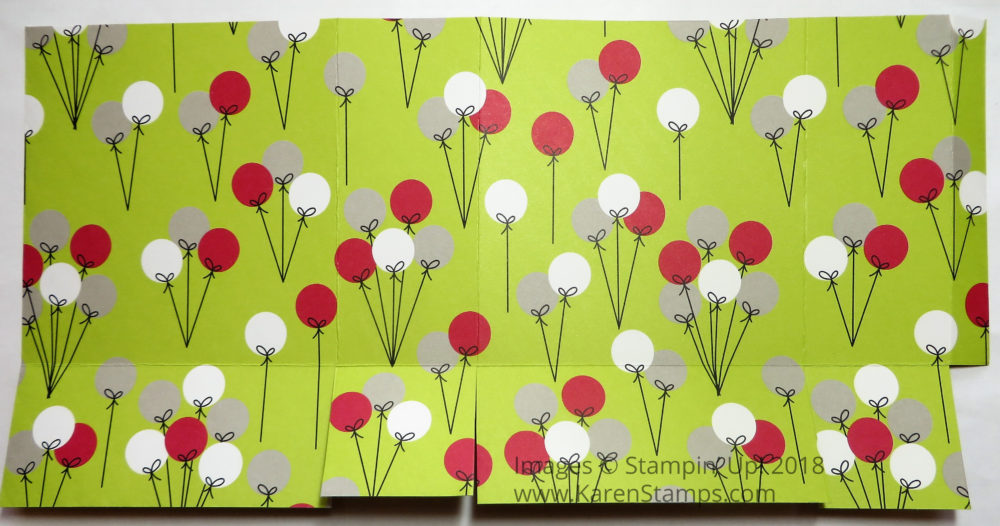
This mini treat bag is made with the retiring Naturally Eclectic Designer Series Paper.  Just two pieces of paper need to be cut to make the bag. It scores the bag pieces for you.  Just fold and glue!  Then embellish how you like.  I made a belly band with a one inch strip of Emerald Envy Cardstock and stamped an embellishment with the Label Me Pretty Stamp Set and the Pretty Label Punch.  I made a card to slip inside with an Emerald Envy back and Whisper White on the front ready for a greeting or note.

If you would like to have the Mini Treat Bag Thinlits Dies, be sure to put them on your order before May 31st!  You’ll be glad you did!

Shop Stampin’ Up! Online For Last Chance Retiring Products & More!

Easy Birthday Memories Birthday Card

Easy Birthday Memories Birthday Card

Here’s an Easy Birthday Memories Birthday Card that you could make with the delightful Birthday Memories Designer Series Paper if you get it before it retires!  I love red so I was particularly drawn to this pattern in the package!  There also is a coordinating framelits set that goes with this paper.

The Birthday Memories Designer Series Paper is unique because there are some framelit dies that fit some of the images in the paper so you can die cut those. These Birthday Friends Framelits Dies also coordinate with the Birthday Delivery Stamp Set. And the best part is that if you like all three of these items – the paper, the stamp set, and the dies – you can purchase them all in a Bundle and save 10%.  It’s the Birthday Delivery Photopolymer Bundle.  It’s almost always a good idea to go ahead and buy the bundle so you have everything you need! Stampin’ Up! does such a good job of coordinating lots of products with images and colors.

To make this card, I started with a Real Red card base.  If you are following the new Color Revamp, Real Red is not retiring, it is being moved to the Regals color family! Kind of surprising to me, but we’ll see how it works!  As long as they aren’t getting rid of Real Red!

Real Red is actually what taught me the quality of Stampin’ Up! products way back when I was a new customer. I saw no need to purchase the Stampin’ Up! cardstock and went to a craft store to buy paper at a discount.  I was thrilled to find a whole package of red cardstock AND envelopes!  What a deal!  But when I learned how that “red” compared to the Stampin’ Up! Real Red I could tell there was NO comparison!  Stampin’ Up! had the better red by far!  Even more than “by far”!  In my opinion, it is the BEST red anywhere!

I chose this red piece of designer paper for the card front and layered it on a piece of Whisper White with a thin margin, just to help it stand out against the Real Red card base.  Then I die cut a cake from the designer paper with a framelit. Next I needed something to make the cake stand out a bit, so I layered it on a Stitched Shapes Circle Framelit and even layered it lower on the circle rather than in the center. I don’t know why, but I liked it better in that position.

For some bling, I added the Silver 3/8″ Metallic-Edge Ribbon just adhered back and forth behind the circle piece. Then this whole focal piece is popped up on Stampin’ Dimensionals.

For the greeting, which didn’t fit on the circle as I had originally planned, I chose one from the Happy Birthday Gorgeous Stamp Set.  I also stamped “It’s Your Day” and “Happy Birthday” on a piece of Whisper White inside the card.  I could have used a greeting from the coordinating Birthday Delivery Stamp Set, but I happened to have this other stamp set handy.

So all in all, this is an easy birthday card to make, and easy enough to use the layout and just change up the theme and greeting by changing the paper and the sentiment.

This Bundle and all the separate pieces are on the Last Chance List of retiring products, so these will only be available until May 31 at the latest, while supplies last!

SHOP STAMPIN’ UP! FOR ANY PRODUCTS YOU HAVE HAD ON YOUR WISH LIST!

Eclipse Technique 16th Birthday Celebrate Animals Card

Eclipse Technique 16th Birthday Celebrate Animals Card

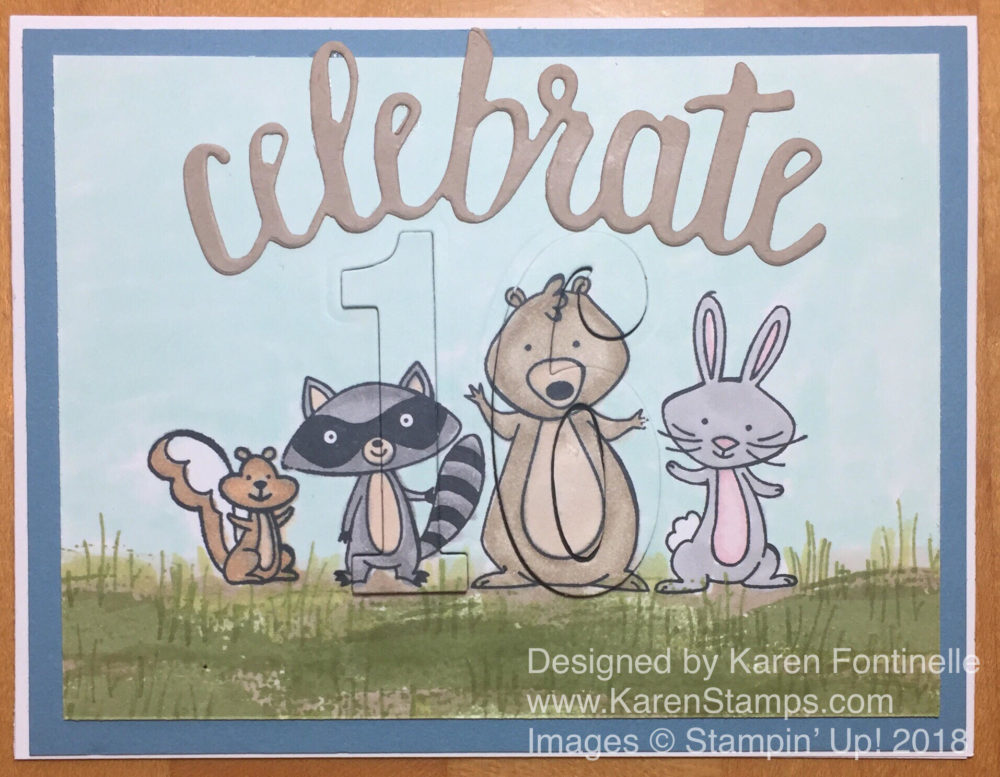
Sometimes you can just copy yourself as I did with this card because I love this stamp set and wanted to try the Eclipse Technique for a 16th Birthday card with the We Must Celebrate Animals!  Maybe not quite your typical 16th birthday card, but it was what I was in the mood to make that day! I love this stamp set and thought I would try the Eclipse Technique with the numbers.

Sadly, the We Must Celebrate Stamp Set is retiring the end of May.  I didn’t purchase it at first when it came out in the Occasions Catalog, but then I fell in love with it when I saw a lot of samples using it online.  Isn’t that what always happens?!  I even was so daring as to cut the animals apart carefully so I could use them separately, or even put them back together side by side on the acrylic block to stamp this card.

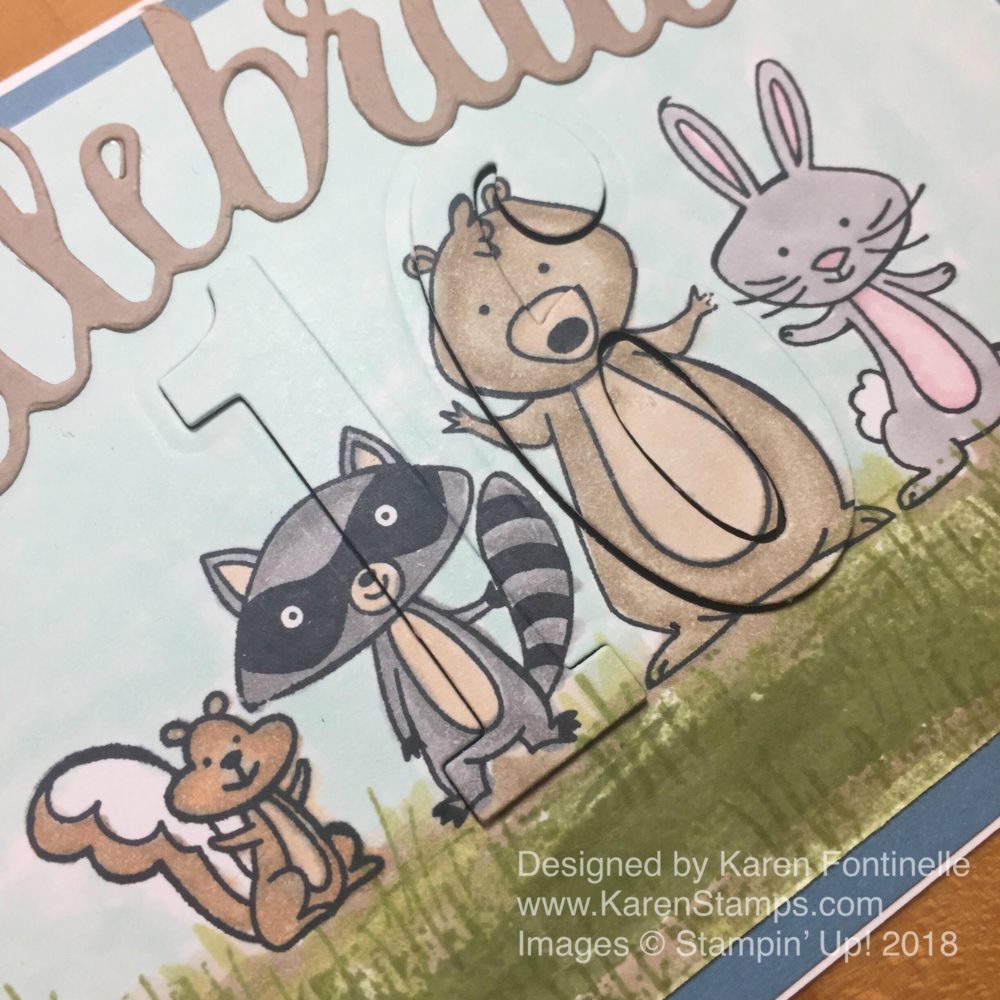
To do the Eclipse Technique, stamp the front of the card first, the do the die cuts. This must be a separate layer so that a darker layer will go underneath to make the numbers show up.  The darker layer underneath can either be the card base itself or just hide a darker layer underneath! After being die cut with the Big Shot, the numbers are then replaced in the space and popped up on Stampin’ Dimensionals.  I used the Large Numbers Framelits Dies, which I am also sad to report are retiring!  They are so great to use for birthdays and anniversaries and other special occasions, like graduations.  The coordinating stamp set, Number of Years Photopolymer Stamp Set is also going out.

Eclipse Technique 16th Birthday Celebrate Animals Card closeup

The card base is Whisper White Cardstock with a layer of Marina Mist.  I put a small layer of Basic Black behind the die cut numbers. The front of the card is colored in with Stampin’ Blends Markers.  The grass is stamped with two stamps from the Sheltering Tree Stamp Set.  First I stamp the large swath of grass and then I go back and stamp with the blades of grass stamp.  Maybe I fill in the empty spaces with a little bit of brown for a little dirt or even another shade of green.  The die-cut “Celebrate” is in the Celebrate You Thinlits Dies that were available during Sale-A-Bration, BUT this set will also be available in the upcoming Stampin’ Up! Catalog.

If you would like to see the same card I made without the Eclipse Technique, please click HERE.

If you love this animal stamp set, be sure to check it out on the Last-Chance list and get it before it is gone!

Some retiring items are already sold out, but you can see the ones that are still available by checking the Online Store rather than depending on the written list.

Try the Eclipse Technique on a card using whatever dies you think you can use, something like my Eclipse Technique 16th Birthday Celebrate Animals Card.


Easy Birthday Memories Birthday Cards

Easy Birthday Memories Birthday Cards

Images © Stampin’ Up! 2018

Take some time to make an assortment of easy Birthday Memories Birthday Cards using the Birthday Memories Designer Series Paper.  This paper, along with the coordinating Birthday Delivery Stamp Set and the Birthday Friends Framelits Dies.  All of these products are on the Last-Chance List of retiring products so don’t delay if you are interested!  And you can buy the stamp set, paper, and dies in a Bundle and save 10%!

The card with the vintage little girl is a z-fold card. All this means is you make the card base as usual, but then score the front of the card base at 2 1/8″, which is down the middle of the 4 1/4″ card front, and fold it back.  So, in essence, you just fold the front of the card back on itself in half!  Then add a front panel of whatever size you like, mainly one that will hide the greeting that you will stamp on the inside!  You can decorate each panel with designer paper or stamp as I did on the front panel.  That little girl always reminds me of paper dolls I used to have as a kid!

The card with the cakes doesn’t need much else since the paper pattern is so bold!  It makes you hungry just to look at that paper with all the beautifully decorated cakes!  Just adhere a layer of the designer paper to the Pacific Point card base with a Real Red layer in between to help the paper stand out.  The greeting is stamped in Real Red with a greeting in the stamp set and die cut with the Stitched Shapes Framelits Dies and layered on a scalloped oval in the Layering Ovals Framelits Dies.  This is popped up on Stampin’ Dimensionals with a bit of Gold Metallic Thread would around behind the greeting in a little “nest”.

The third card uses a simpler pattern in the Birthday Memories package and the birthday fox is die cut right from another piece of the designer paper!  How handy is that?!  You don’t even have to stamp and color the image! To spotlight him and his banner, stamped with a greeting from the stamp set, I die cut a large circle with the Layering Circles Framelits Dies.

All of these cards are pretty quick and easy to make, especially if you just copy mine and don’t think about a design.

Here’s another popular card I made earlier in the z-fold style.  It’s such an easy way to make a card yet the recipient will think you are a true designer!

If you are interested in any of the products in this birthday bundle, be sure to check if out in the Stampin’ Up! Online Store!  Then you, too, can make cards like these Easy Birthday Memories Birthday Cards!

Easy to Stamp All-Occasion Dahlia Card

Easy to Stamp All-Occasion Dahlia CardYou can make this Easy to Stamp All-Occasion Dahlia Card in just minutes and add whatever appropriate greeting you want! This Definitely Dahlia Stamp Set is just one large background stamp, and sadly, it is on the Last Chance List of retiring products.

If you love this big beautiful flower, it is time to order it! I also made these two cards with other products that are retiring the end of May……the 2016-2018 In Colors.  Particularly if you want these colors in cardstock, ink pads, or ink refills plus any accessories with these colors, you will want to put these on your order!  The colors I chose to use are Peekaboo Peach and Flirty Flamingo.

Now the funny thing is, with the Stampin’ Up! Color Revamp, one color that is “retiring” with the In Colors is actually coming back as one of the Brights Core Colors!  That color is Flirty Flamingo.  Read about the Color Revamp HERE in my recent blog post.

I have always particularly like these background stamps on the wood blocks. However, now with the Stamparatus, if you plan on purchasing this tool, I might recommend the Clear-mount version of Definitely Dahlia so that you can stamp with the Stamparatus. That way if you do not get a good impression the first time, you can reink the stamp, leaving it in place on the Stamparatus, and stamp again to fill in the image. But either stamp is good!  I still love the wood blocks too!

Sometimes we get wrapped up into the latest stamping idea, which is great, but sometimes we need to remember we can stamp quick and easy, simple cards like this Easy to Stamp All-Occasion Dahlia Card.

Shop Stampin’ Up! Online Today!

Sweet Soiree Fancy Cake Birthday Card


Sweet Soiree Fancy Cake Birthday Card

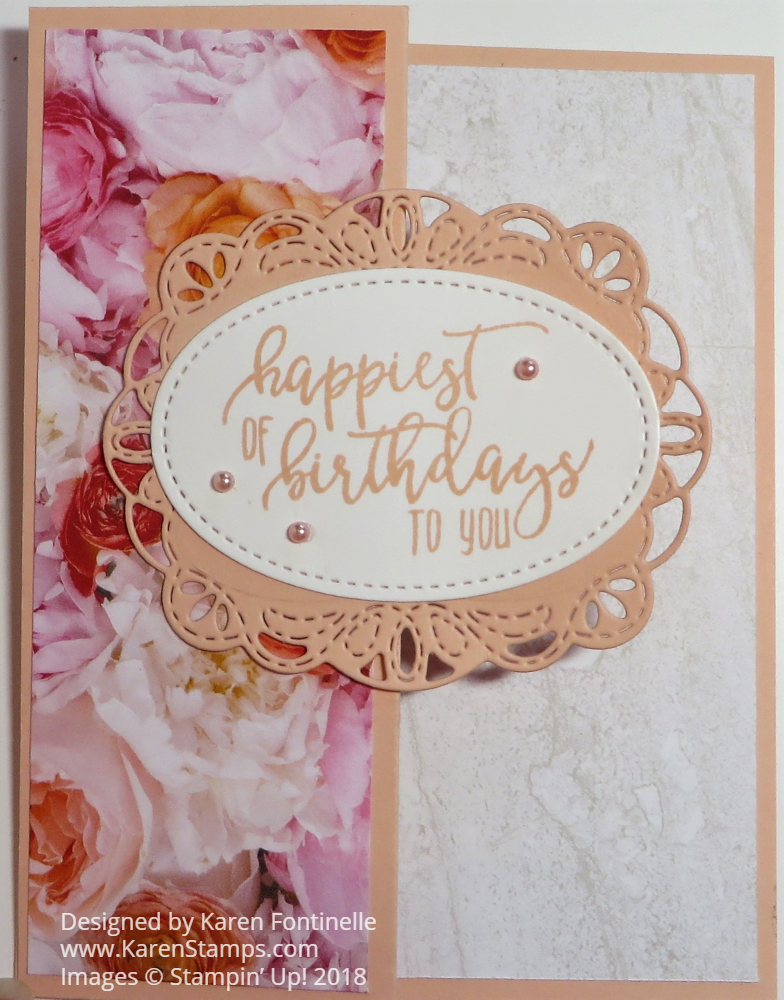
I was actually struggling to make a card with the striped side of this designer paper and one of the cakes I’d cut out by hand, when I flipped the paper over and made this Sweet Soiree Fancy Cake Birthday Card. As soon as I turned the paper over, the cake designs layered over the pretty Powder Pink card base, looked beautiful and perfect. There was no point in trying to force a card that wasn’t working when all I had to do was flip the paper over and make a simple card out of it! The Sweet Soiree Paper is so pretty!

To embellish the card, I adhered a strip of the Powder Pink 3/8″ Shimmer Ribbon across the bottom of the card.  It’s a real shame to cover up ANY part of a paper pattern as pretty as this one! Then I tied the bow separately to adhere on top of the ribbon.  Luckily I held off until I had the greeting ready.

I finally found a pretty small “Happy Birthday” stamp in the Beautiful Bouquet Photopolymer Stamp Set. I could punch it out with the 1 3/8″ Circle Punch after I stamped the birthday greeting using Powder Pink Ink and Whisper White cardstock and layered it on a small silver foil doily in the Metallic Foil Doilies package.

I played around with where to put this greeting on the card, when finally I figured out the best place was on the ribbon with the bow on the bottom of the greeting since there was some empty space there anyway!

This Sweet Soiree Fancy Cake Birthday Card is a very easy card to make since the paper is so pretty by itself.  How can it be retiring??!

Be sure to check out the retiring Stampin’ Up! products in the Online Store.


Make a Mini Treat Bag Birthday Card

Mini Treat Bag Birthday Card

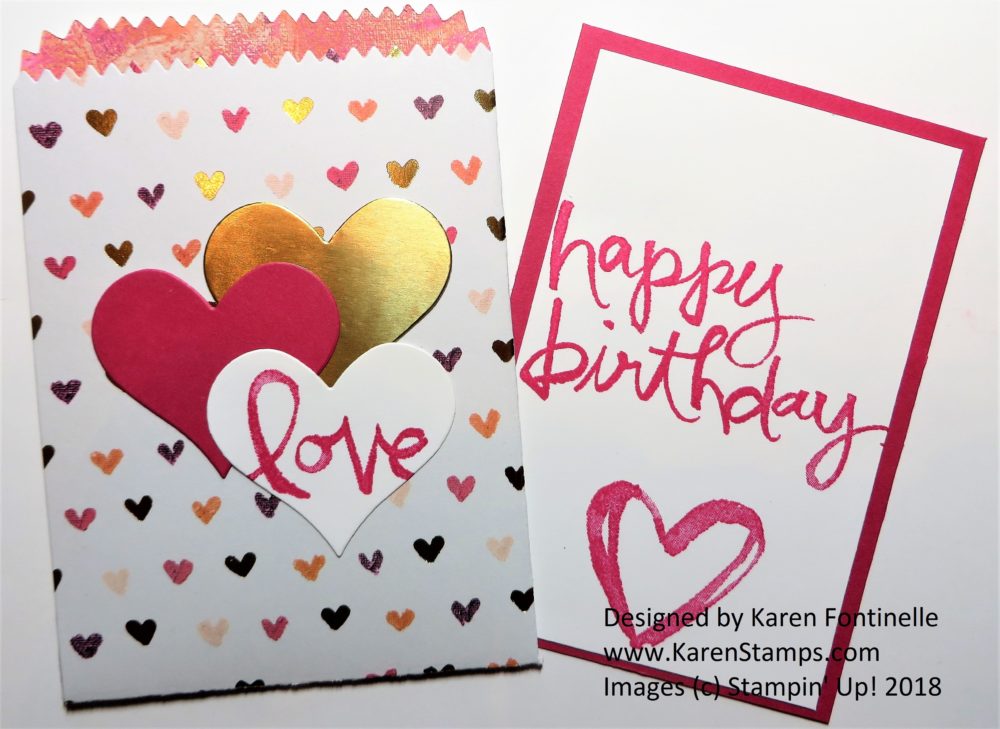
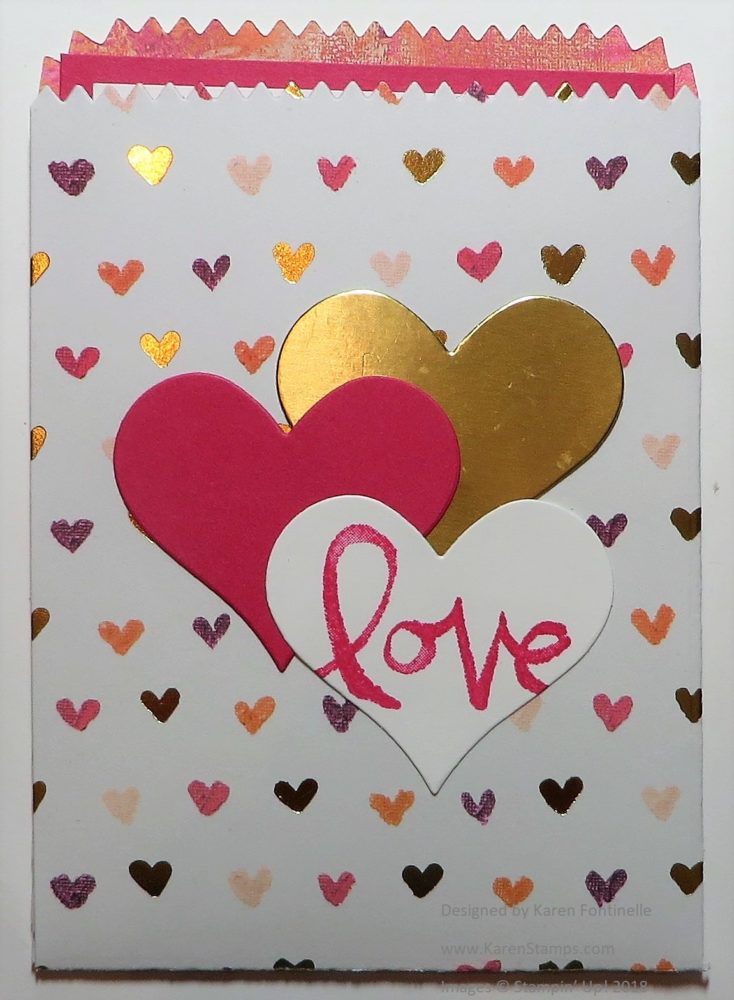
Make a Mini Treat Bag Birthday Card quick and easy using the Mini Treat Bag Thinlits Dies which are retiring!!  So sad!  I have loved these Mini Treat Bag dies since they came out and have encouraged everyone to buy a set!

You can use these dies to make more than just a treat bag!  Many times I make the bag plus a card to put inside, all of which makes up the greeting card as you see above.  You can also fold the top over and hold closed with a ribbon or belly band with a small gift or candy inside. So many different options.

To make this Mini Treat Bag Birthday Card, I used the Painted With Love Specialty Designer Series Paper.  This paper is in the Occasions Catalog and is retiring. You might have thought it was only for Valentine’s Day since it was in the Occasions Catalog, but this paper can be used lots of ways. Here I did choose the paper with the little hearts because I think it is such a cute pattern. Then I could coordinate with the heart die cut in the MIni Treat Bag Thinlits Dies and also the Watercolor Words Stamp Set.  This stamp set is also on the retirement list and is one of my favorites! I’ve always loved the font, the size and the greetings and images themselves in this set.

I used our Tear & Tape Adhesive, which is staying, to adhere the bag. The die cut puts score lines on the paper so it is easy to assemble.  I used Melon Mambo cardstock for the card inside and the heart on the front, plus Gold Foil for the other heart.  Very quick and easy!  I could even embellish the front of the card more if I wanted to.

See how I made a little treat bag for Halloween in THIS POST by folding over the top of the bag!  You can use the Search box on the right side of my blog to find more examples using the Mini Treat Bag Thinlit Dies.  They are so fun!  I don’t know what will take their place for me!  But we have to give up old products to make room for the new!

Mini Treat Bag Birthday Card with Hearts

Check out the Last Chance Products in the Stampin’ Up! Online Store so you don’t miss out on any of the great retiring products!

You just might want to make a Mini Treat Bag Birthday Card like this one for someone special!


Make Easy Cards Designed With 2016-2018 In Colors

Cards Designed With 2016-2018 In Colors

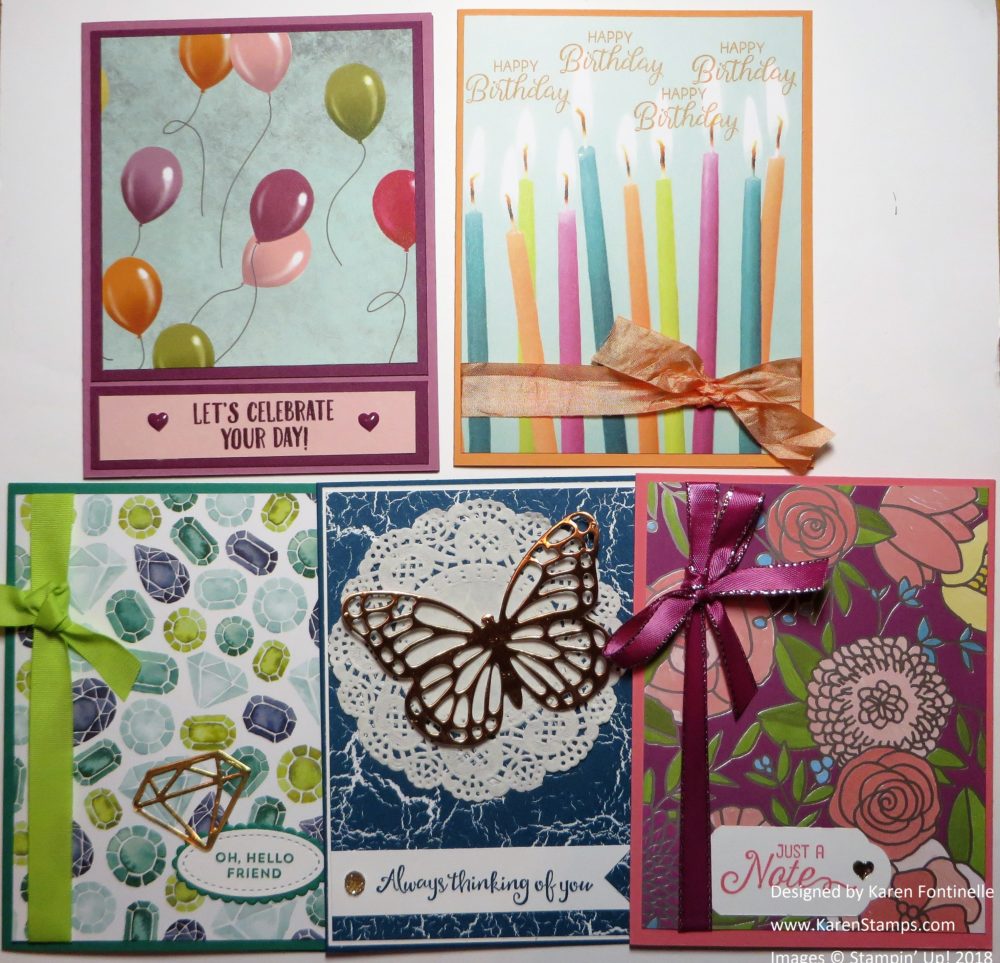
My mojo kicked into high gear thinking about the probable retiring 2016-18 In Colors, and these Easy Cards Designed With 2016-2018 In Colors are the result!  I wanted to make a card with each of the 2016-18 In Colors, which we all assume will be on the upcoming Stampin’ Up! retiring list, scheduled to be released this afternoon.

If you have any of these In Color ink pads and don’t have the ink refills, I would be ready to pounce on your order as soon as you see the retirement list today, if not sooner!  No one can predict, but in the past, the ink refills have sold out pretty quickly, and you don’t want to pay some higher price on an auction site later on!  Chances are, the ribbons and papers that have any of these In Colors in them will also retire.  To make these easy cards I chose designer papers that had these colors in them.  You can look at the back of your designer paper package for the list of coordinating colors (I always write them in marker, larger, on the back, so I can read them at a glance!  If you are under 40, you might not need to do this step!!) See how I do it in this post HERE. (It’s a very old post but the advice is the same!)

These easy to make cards use each of the retiring In Colors from 2016-2018. If you like them, stock up!

Check back around 1 PM MT and I will get up the Stampin’ Up! Retiring List and information as soon as I can! Assuming my computer is compliant!

My Stampin’ Up! newsletter will come out tomorrow with all the retirement information plus whatever other updates Stampin’ Up! has, so be sure you are on my Mailing List.  Sign up HERE.

Make easy cards designed with the 2016-18 In Colors getting inspiration from the ideas I posted above!

Shop Retiring Products from the Stampin’ Up! Annual Catalog and also the Occasions Catalog in my Stampin’ Up! Online Store TODAY after 1:00 PM Mountain Time (2:00 PM Central Time).


Animal Critters Celebrate With We Must Celebrate Stamp Set

Animal Critters Celebrate With We Just Celebrate Stamp Set

These Animal Critters Celebrate With the We Must Celebrate Stamp Set in the Occasions Catalog!  Aren’t they so cute?!  Actually I passed this stamp set up at first until I saw so many cute samples with these cute animals!  Then I had to have it!

The animals all come attached on one stamp, but, if you want, and if you are very careful, you can cut the animals apart. Actually if you are very careful, you can line the stamps back up on one block and stamp them all together, which is what I did on this card!  Then you can have it both ways, but it is very hard to alter your stamp like this! And the bunny is perfect to use right now for Easter and spring.

We Just Celebrate Animals Cut Apart

I happened to have a scrap already-folded square card so I stamped it and colored everything in with Stampin’ Blends markers. Of course the color shows through on the other side of the paper, so it was showing on the inside of the card.  I decided to just cut that front of the card off and layer it on a card base of Marina Mist Cardstock.

Next, for a greeting, I used my new Celebrate You Thinlit Dies.  You can earn it free during Sale-A-Bration with a $100 purchase.  I die cut the word “Celebrate” from Crumb Cake cardstock.  I like the word and the color on the card to complement the animals and critters. Very simple card, really, but cute!

Whatever you are are celebrating, I think you can use the We Must Celebrate Stamp Set to celebrate with these animals and critters!

Petal Palette Stampin’ Blends Stamped Birthday Card

Petal Palette Stampin' Blends Stamped Birthday Card

In the midst of stamping Easter cards yesterday, I came up with this birthday card stamped with the Petal Palette Stamp Set and colored in with the Stampin’ Blends markers. At first glance, you might not be all that impressed with the Petal Palette Stamp Set (I wasn’t!), but as usual, once I started seeing samples made with this set I was convinced I had to have it!  Besides the images, which are so pretty, there are some very nice words to use in the set.

The card base is Cherry Cobbler Cardstock with a layer of Basic Black.  The flowers are stamped on Whisper White in Memento Black ink and colored in with the Stampin’ Blends markers.  Some of the markers are backordered right now, but I suggest ordering the single markers, even if you want the whole collection, because then you will receive all of the markers that are available now and Stampin’ Up! will ship the backordered ones when they are resupplied. Even if they are backordered, I would suggest putting them in your Shopping Bag now so you will be first in line to get them when they come in stock.

I chose a greeting from Picture Perfect Birthday and die cut with the Stitched Shapes Framelits Dies.  Then that is layered on a scalloped oval die cut from Layering Ovals from Gold Foil. For some extra pizzazz I wound up some Gold Metallic Thread adhered to the back of the greeting.  This thread is only $3.00 so a great thing to have on hand or add to your order when you need a little bit more!

On the inside I put a piece of Whisper White cardstock since the Cherry Cobbler is so dark, and stamped one other flower from Petal Palette.

There you have it!  An easy birthday card made with stamping Petal Palette flowers and coloring in with Stampin’ Blends markers!

Shop Online at Stampin’ Up!

Make Your Own Soda Pop Bottle Greeting Cards and Projects

Make your own soda pop bottle greeting cards and projects with the fun Bubble Over Photopolymer Bundle from Stampin’ Up! This Bundle comes with the Bubble Over Stamp Set and the Bottles & Bubbles Framelits Dies together saving you 10%! Add a little more to your order and you can earn the Bubbles & Fizz Designer Series Paper FREE during Sale-A-Bration!

If you are new to Stampin’ Up!, Sale-A-Bration is the annual promotion, a favorite of everyone’s, where you can earn a FREE Sale-A-Bration product with every $50 purchase! This year Stampin’ Up! has added a $100 choice or two as well! And there are other benefits as well, like an extra $25 in Stampin’ Rewards with a $250 or more order, and a chance to earn two FREE stamp sets if you decide to join Stampin’ Up! as a Demonstrator!

This Bubble Over Bundle is of particular interest to me because I’d always heard my dad talk about when his father owned a “soda factory” in the small Illinois town where he grew up. They would deliver “sodie” (as I sometimes heard it called) to various school picnics, homecomings, etc. around the area. I’m not really sure how else it was sold. My dad enjoyed sometimes getting to drive the delivery truck (even though he was underage to be licensed at the time, but back in those days I doubt it mattered!). It turns out it was my great-grandfather who started this soda bottling works. I’d always heard my grandpa invented a certain flavor soda that everyone liked, although I don’t recall ever having any.

Amazingly, through a Facebook group about this town, I discovered that people were collecting and selling these bottles on Ebay!  In fact, there are plenty of bottle collectors and bottle cap collectors out there! Since I have discovered this, I have purchased several different glass soda bottles on Ebay, some with my great-grandfather’s name on them, some with my grandfather’s name.  I even found a photo of the inside of the bottling works and several of decorated cars in homecoming parades advertising the company! It is just so amazing to me that I have found these treasures that are part of my family history! If only I could tell my dad and grandparents!!!

You can make lots of cute cards and other projects with this Bubble Over Bundle and the FREE Sale-A-Bration paper, Bubbles & Fizz! Wouldn’t these be fun card ideas for teenagers?  And certainly the bottles might hold something other than soda!!  The bottles can be embossed with clear embossing powder to look like shiny glass.  The bottles can be die cut out of vellum cardstock to look like glass or frosted bottles.  These products would also make great birthday, congratulations, and celebratory cards and gifts!  Lots of creative ideas!

Watch and enjoy the Stampin’ Up! video above, and be inspired to make your own soda pop bottle greeting cards and other projects!

An Elegant Handmade Birthday Card For Someone Special

Elegant Birthday Card

You can make an elegant birthday card for someone special using the Sweet Soiree Specialty Designer Series PaperI think anything you would make with this fancy foiled paper with handpainted designs would look beautiful and elegant! Even this simple background has silver foil dots, plus the outlines of the flowers and leaves are silver foil.

To make this card, I started with a card base of Calypso Coral, one of the coordinating colors of the designer paper. I liked this dotted paper layered on Silver Foil.  I looked through the papers and decided on the flowered paper with the Marina Mist background and cut out some of the flowers to adhere to the front of the card.  If you have the Paper Snips scissors, it makes cutting out a little easier and you can just do it while you are watching TV!  After I cut out the bigger group of flowers, I also cut some of the smaller ones out of the scraps.

Before I glued down the flowers, I thought a little ribbon might be nice on the card.  The Calypso Coral 1/4″ Ombre Ribbon was perfect! I just adhered one strip across the card and then tied the bow on later.

With the ribbon on, I popped the large group of flowers up on Mini Stampin’ Dimensionals mostly, with a few of the regular size dimensionals. The smaller flowers I fit in alongside the large group and adhered with some Fast Fuse. (Only the Fast Fuse refills are available from now on.)

For the greeting, I chose the “Happy Birthday” from the Beautiful Bouquet Stamp SetNot only is this stamp set wonderful for all the flowers, but it has a great selection of greetings! I stamped it on a piece of Powder Pink Cardstock with Powder Pink ink, not quite knowing what I was going to do with it!  I ended up die-cutting with the Lots of Labels Framelits Dies but cut off the top of the diecut with the top edge of the card layer. For a little more pizzazz I added a Silver Foil diecut underneath.

I thought the greeting looked a bit plain so I stamped some small flowers on from the Beautiful Bouquet Stamp Set. It’s one of those things where perhaps I should have stopped before doing that! I nearly messed it up and I’m not sure I’m happy with it now.  I thought adding some of the teeniest pearls would help it, but I’m not sure.

As my friend and I used to say back in the day when we were painting t-shirts and wine glasses together, sometimes you have to know when to stop!  I should have stopped with just the stamped greeting on this card! But I doubt the recipient will be so critical!

If you want to make some beautiful, elegant cards and other projects, you might want to consider purchasing this Sweet Soiree Specialty Designer Series Paper.  Now there is also a stamp set and framelit dies in the Cake Soiree Bundle, if you want to get the whole works! If you want to make an elegant card for someone special, this paper will make your job easy!