Author Archives: Karen Fontinelle

Four Leaf Clover Smooch Spritzed with Gold

Four Leaf Clover Smooch Spritzed with Gold

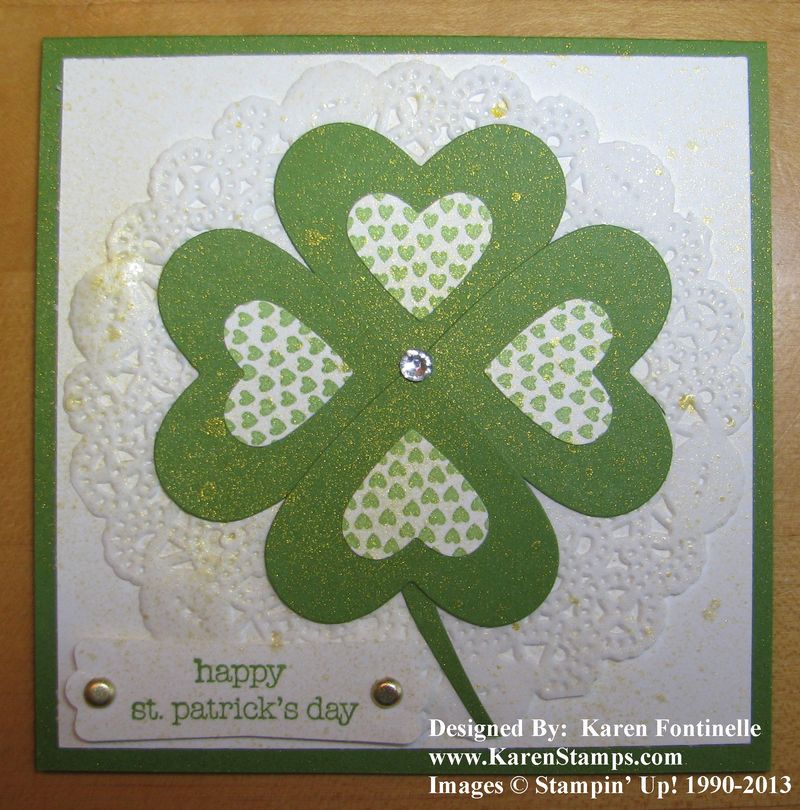
Soon it will be St. Patrick's Day, March 17th! Did you know you can make a four-leaf clover with hearts?  And why not a touch of Gold Smooch Spritz to your four-leaf clover for good luck?!  The hearts are die cut with the Hearts Framelits Dies, the white hearts being stamped with the Hearts a Flutter stamp set in Gumball Green. As I looked at my desk, I spied a Paper Doily and thought maybe that would work as a background for the clover.  It fit perfectly on my 4 1/4" square card. The greeting is stamped with the Teeny Tiny Wishes stamp set and punched out with the Modern Label Punch. I don't know if four-leaf clovers come with a rhinestone in the middle, but mine does!  Love those Rhinestone Jewels!

If you need to make a shamrock or four-leaf clover for a St. Patrick's Day card or treat, don't despair if you don't have an appropriate stamp…..just use hearts!

Shop Stampin' Up! Online here for all your stamping supplies!
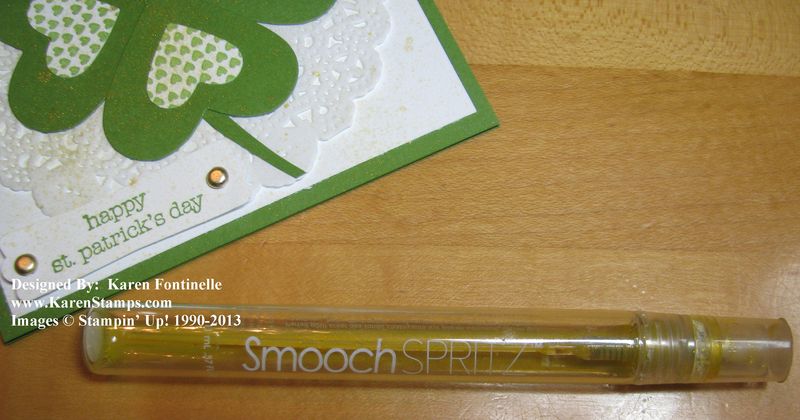
Stampin' Up! Smooch Spritz

Don’t Forget to Put the New Photopolymer Stamps on Your Stampin’ Up! Order!

The new Designer Typeset Photopolymer stamp set is available, so be sure to put it on your next Stampin' Up! order! Photopolymer might be a mouthful, but you will want to try it out!

Clear stamps have been available from other companies, but I've heard that some of them did not stamp a clear image like Stampin' Up!'s rubber. Stampin' Up! says they have searched for the right material and they have found it!

These will only be offered on a trial basis and not for any set period of time, so if you see something you like, you better get it then! If you love clear stamps, buy these so Stampin' Up! will produce more! Right now just this one set is available but they hope to release more in the coming months.

Designer Typeset Photopolymer Stamp Set  #132956       $13.95

Recommend clear blocks A, B, G, F, and I. Purchase separately.

Includes 57 pieces. (Don't faint! This is a good overwhelming feeling.)

I hope you enjoy the video.  You'll see some of the wonderful Stampin' Up! employees, get glimpses of the Stampin' Up! home office in Riverton, UT and and at the end see a bit of the beautiful atrium lobby!

Add these new photopolymer stamps to your next order before March 22 and they might bring you closer to a $50 ( or more!) purchase which entitles you to a free product during Sale-A-Bration!  But only through March 22!

Celebrate Easter with My Digital Studio

MDS Downloads_Mar 05 2013

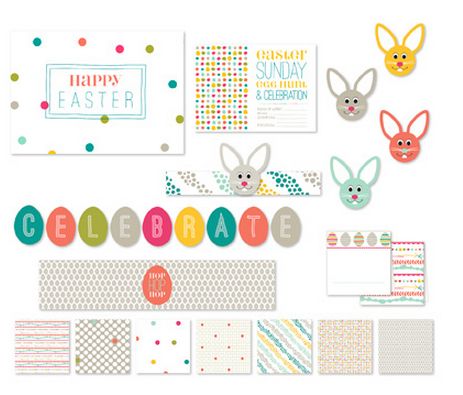
Let the Stampin' Up! digital papercrafting download for My Digital Studio help you make your Easter celebration a little easier!

This download, Celebrate Easter Ensemble, includes:

* 5-page décor designer template (8-1/2" x 11")
* Double-sided postcard template (5" x 3-1/2")
* 14-piece SVG stamp brush set 
* 7 Designer Series Papers 
* 8 embellishments

Get these downloads printed and make your own egg holders, napkin rings, mini baskets, cupcake holders, name cards, table tents, invitations and whatever your Easter imagination comes up with! 

Colors
Calypso Coral, Crushed Curry, Lucky Limeade, Melon Mambo, Pool Party, Sahara Sand, Taken with Teal, Whisper White

Click here to purchase this download or to look at each element more closely. AND view the other downloads for this week!

Click on the download to bring up the single download.  Right below you will see "More Images".  Click on those words, which brings up a closer view.  Then click on each image and finally the word "next" to see even more in that download.

If you don't own My Digital Studio already, take the 30-day FREE Trial of My Digital Studio! Buy the Celebrate Easter download, if you like, play around with it, print your projects, and get the full My Digital Studio experience!  No obligation! My Digital Studio is pretty intuitive, even for the beginner, but if you need more resources, I can help!

Go to my store now to check out My Digital Studio and all the downloads!

Best of 25 Years: Best of Flowers March 2013 Stipple Hydrangea

Stipple Hydrangea Best of Flowers Stamps for March

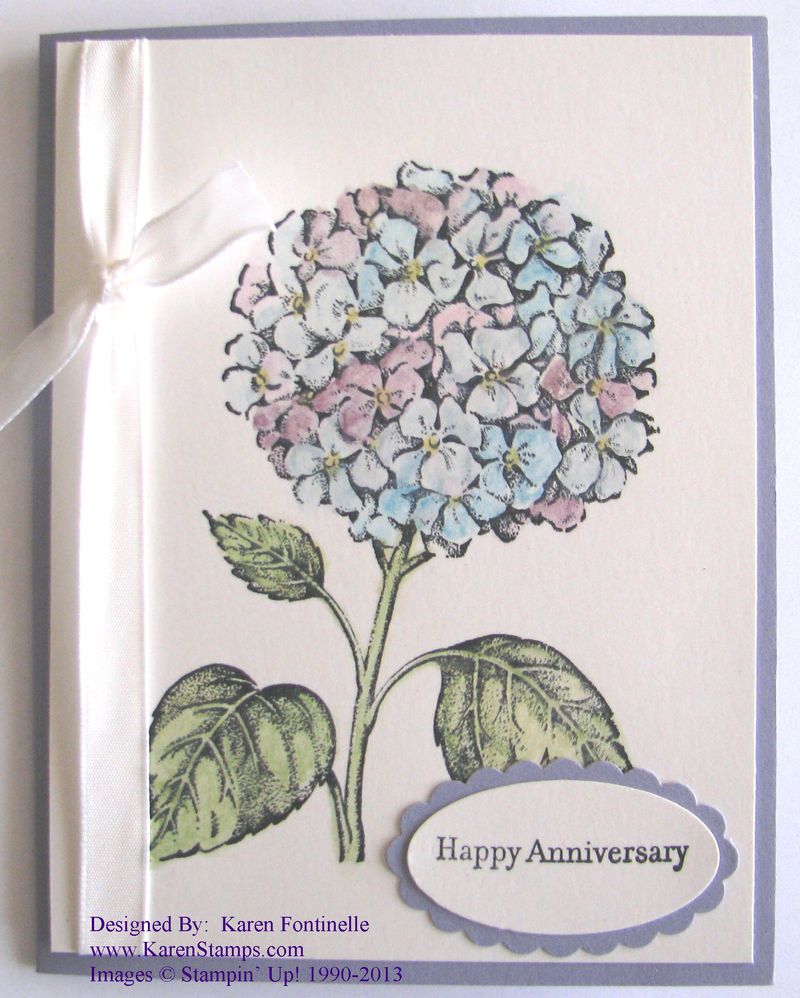
One of the many beautiful flowers in the Stampin' Up! Collector's Stamp Set for March, Best of Flowers, is one of my favorites, Stipple Hydrangea.  Way back when, it was the only flower in the set and was used in so many beautiful projects! If there was only one reason to buy the Best of Flowers stamp set, it would be to get this retired Stipple Hydrangea stamp! This was one of the premier stamps to use for stamping on tiles back then.

On this card, I stamped the hydrangea in Stazon Black ink on Shimmery White card stock. It is colored in with my favorite tool, the Aqua Painter, using various Watercolor Wonder Crayons. It isn't a huge artistic endeavor….just plop down some color from the watercolor crayons on the petals, not even filling in completely or anything, and move the color around with the Aqua Painter.  You can do it without being a watercolor artist!  But you'll look like you are!

Shop at my Stampin' Up! Online Store any time! Spend $50 and get a Sale-A-Bration product FREE!

Best of 25 Years March Best of Flowers

Secret Garden Flower Card

Secret Garden Flower Card

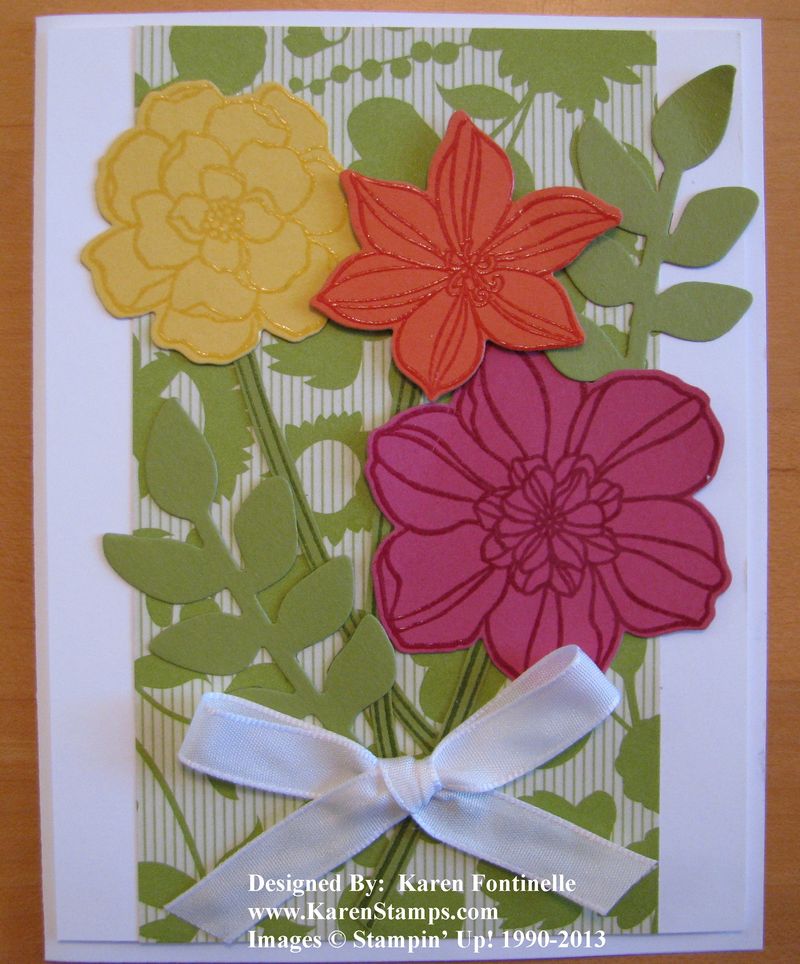
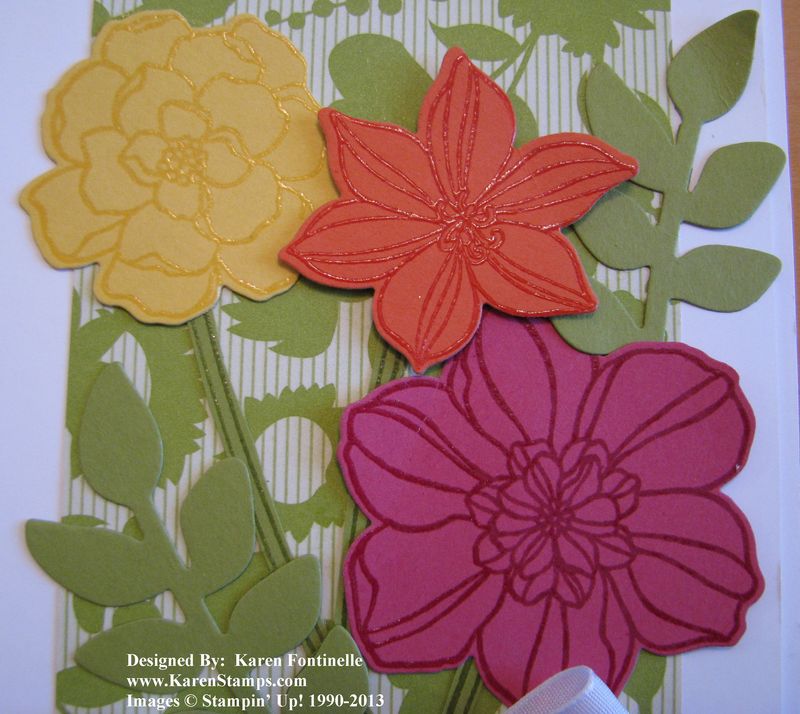
Today is such a beautiful spring day here in Houston. When I saw this green leafy page in the package of Summer Smooches Designer Series Paper, I decided that it might be a nice backdrop for the flowers in the Secret Garden stamp set.

I stamped the flowers with Versamark ink on the color of card stock I wanted them to be and used the new Stampin' Up! Heat Tool to emboss with Clear Embossing Powder. Since we have Secret Garden Framelits Dies I didn't even have to tediously cut out the flowers! I just rolled them through the Big Shot and they were cut out perfectly!  The stems I did cut by hand.

The most difficult part of the card was gluing things down in the correct order. And in the end, I glued the designer paper to the Whisper White card stock BEFORE I tied a ribbon around it.  But since there are no mistakes in stamping (!), I just made a bow out of the ribbon and stuck it on with a Glue Dot.  Who would know that wasn't my intention from the start?!

If you don't have any spring flowers blooming yet where you live, maybe you want to stamp some to enjoy!  Get out your bright colored card stock and inks and have fun!

You can also purchase the Secret Garden Stamps and Framelits Dies in a bundle in wood- or clear-mount and save 15%!

Go to my Stampin' Up! Online Store now and take a look around!

Remember, with Sale-A-Bration you get a free product from the Sale-A-Bration brochure with every $50 in product you buy!  Only through March 22!

Secret Garden Flower Card Embossing

Best of Flowers….March Best of 25 Years Stamp Set

Best of Flowers Flyer

Click image above to enlarge.

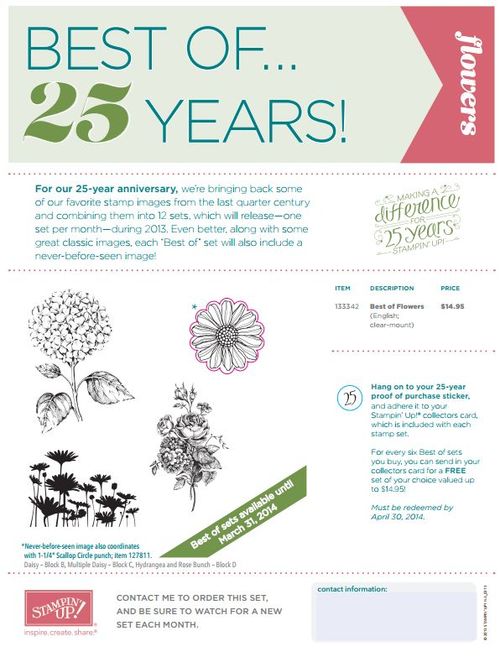
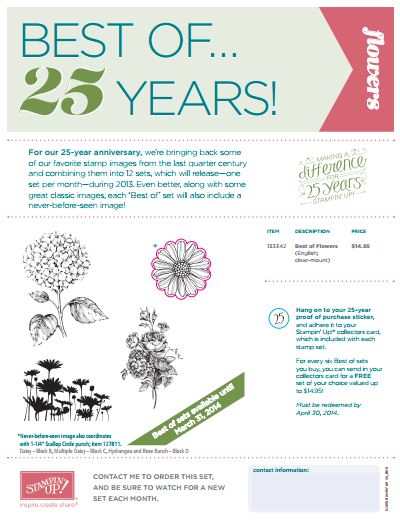
It's March and spring can't be too far off!  How about some flower stamps from Stampin' Up!? Three of these flower images are favorites from Stampin' Up! over the past 25 years…and one is brand new! This is another stamp set in the "Best of.." series to celebrate Stampin' Up!'s 25th anniversary.

Some things to remember:

  • All Best of stamp sets will include 3-5 images, including a never-before seen image, and will be priced at $14.95.
  • While we are releasing just one Best of stamp set per month (with a new theme each month), all of the Best of sets will be available until March 31, 2014.
  • A new flyer will be released every month for each new Best of set.
  • All Best of stamp sets are available in Clear-Mount only.

As a special incentive to collect the Best of stamps, we're including a collector's card and 25-year proof of purchase sticker with every Best of set. Collect six stickers, and send it in to redeem a FREE set of your choice valued up to $14.95! Free sets must be redeemed no later than April 30, 2014.

You can find this stamp set and others in this series in my Stampin' Up! Online Store.

To see all these special stamp sets, click here in my Online Store.

What is Photopolymer?? A New Kind of Stamp from Stampin’ Up!

Photopolymer Stamp Banner

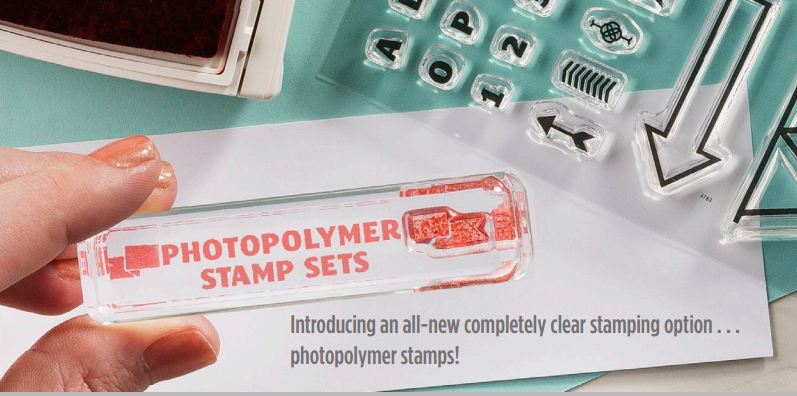
The question of the day is “What is Photopolymer?”  Well, apparently it is a new kind of stamp that Stampin’ Up! just introduced today!  Photopolymer Stamps!

I feel like we should play Jeopardy!  “A plastic that undergoes a physical or chemical change when exposed to light.”  “What in the world is photopolymer??”

Yes, a new month and a new kind of stamp!  Who would have guessed! Photopolymer stamps are clear and sticky to adhere to the clear blocks.  Clear stamp + clear block= perfectly placed stamped image!

Stampin’ Up! is excited to announce that we now have wood-mount, clear-mount AND photopolymer stamps! These new stamps are in addition to the usual stamps and are offered on a trial basis, based on popularity. There won’t be as wide a selection as the other stamps and will not be offered for any set amount of time…..so if you see something you like, don’t put off ordering.  They will come in a cello bag but you can purchase the stamp cases separately to keep them in if you wish.

From Stampin’ Up!:

What makes them so great?

  • They’re entirely transparent for perfect placement every time!
  • They are durable. The photopolymer material is designed to last.
  • Can you say sticky? (Don’t worry; in a good way.) These stamps stick amazingly well to our clear blocks.
  • They’re age tested. They won’t yellow or cloud up over time.
  • They use FDA, food-safe material. How far can you stretch your stamping creativity?
  • We could go on, but we’ll let you try them for yourself.

They are clearly a great choice.

Item Description Price
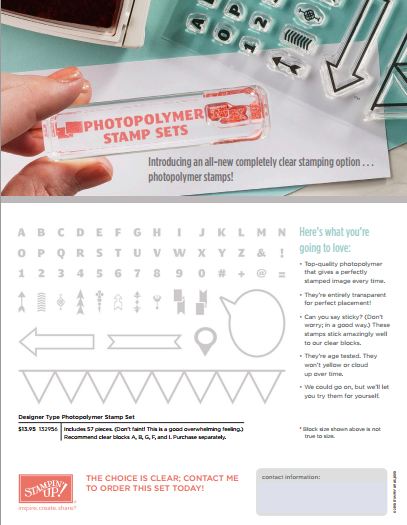
132956 Designer Typeset Photopolymer Stamp Set

Recommend clear blocks A, B, G, F, and I. Purchase separately.

Includes 57 pieces. (Don’t faint! This is a good overwhelming feeling.)

Click the flyer below to enlarge.

$13.95

Photopolymer Stamp Sets Flyer

Order these brand new stamps, photopolymer stamps, from Stampin’ Up! today!  Just go to my Online Store here. Add some other items to it (do you need clear blocks or stamp cases or the new foam ink pads?) and if you have $50 in product, you can choose a free product from the Sale-A-Bration brochure!

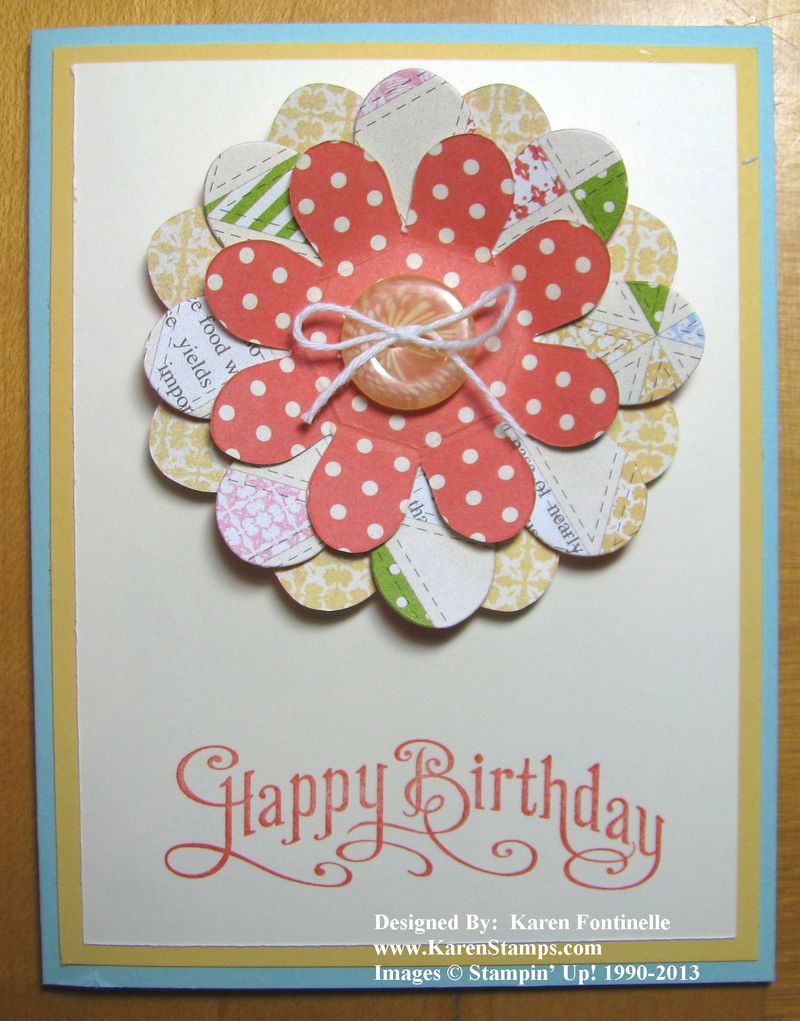
Tea for Two Flower Folds Birthday Card

Tea for Two Flower Folds Birthday Card

Recently I had a customer order the Flower Folds Die and it made me realize I hadn't used mine in a while. Maybe it has something to do with spring coming, but I've been having a ball making flower cards with this die. I'm not even making fancy flowers, just die-cutting the flowers out of designer series paper and layering them one on top of the other. I randomly picked the Tea for Two Designer Series Paper and am enjoying the pretty colors that coordinate (although I did use Pool Party which isn't one of the listed colors!).

You can just glue down each flower…but I put glue only in the center of each flower so that I could fold the petals up. Of course when you are mailing, unless you use a special padded envelope, you can't get too dimensional, but the recipient can "poof up" the petals after they receive it! I used a few Mini Glue Dots to adhere the button, tied with a White Baker's Twine bow, to the center of the flower.  The greeting is from the stamp set Perfectly Penned (a very useful set!). Remember, most any of our stamps you can purchase in wood-mount or clear-mount.  The rubber is the same in either case, it's just a matter of personal preference.

Don't forget….you could also cut out fabric flowers with this die!  It's not just for paper! And you can cut several layers at once!

Why not get out something you haven't played with in awhile like I did today with the Flower Folds Die? You might find a new streak of inspiration!

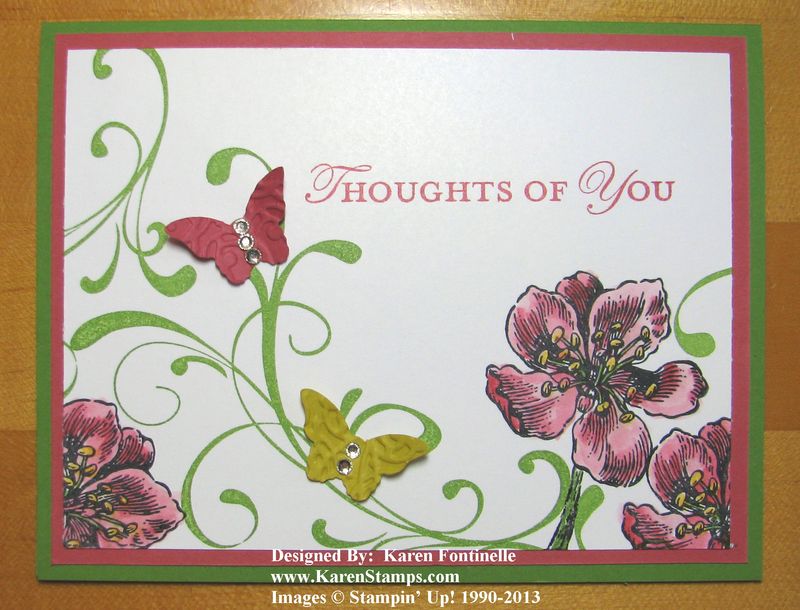
Everything Eleanor Azalea Card

Everything Eleanor Azalea and Butterfly Card

I don’t know if these flowers in the stamp set Everything Eleanor are azaleas, but they at least resemble them.  I know there are blizzards and snow in many parts of the country, but my azaleas are blooming! In fact, the annual River Oaks Garden Club Azalea Trail will be coming up the weekend after next.

Everything Eleanor is a beautiful stamp set, yet I haven’t used it a lot. I stamped the swirl with Gumball Green and stamped with flowers in Black Stazon so I could color them in. To color the flowers, I used my trusty Aqua Painter, which has water in the barrel, so it’s like using a paint brush with its own supply of water!  Since the flower images already have a lot of highlight marks on them (the little black lines), I colored in those areas with Primrose Petals ink first. Then I added a little more water to the dab of ink in the lid of the ink pad to lighten it and colored in the rest of the petals with the same color. When you are using Whisper White card stock rather than watercolor paper, you do have to be careful not to add too much water or work the coloring too much because Whisper White won’t hold up to it. But I can usually use it fine with just some light coloring.

The greeting is from Loving Thoughts.

Then I thought a butterfly or two might be in order. I punched out several colors plus one vellum one to see what I would like and Primrose Petals and Summer Starfruit won! I embossed both with the Lacy Brocade Embossing Folder, adhered them each with a Glue Dot, and added some Basic Rhinestone Jewels. The punch is the Bitty Butterfly Punch.

You could stamp a card like this and then add any kind of sentiment or greeting you wanted.

Stampin’ Up! has all the supplies you need to make this card!  Please visit my Stampin’ Up! Online Store here…..and don’t forget about Sale-A-Bration!  With every $50 purchase in merchandise, you get to choose one free product from theSale-A-Bration brochure.  Good until March 22!  But don’t wait until the last minute!

 .

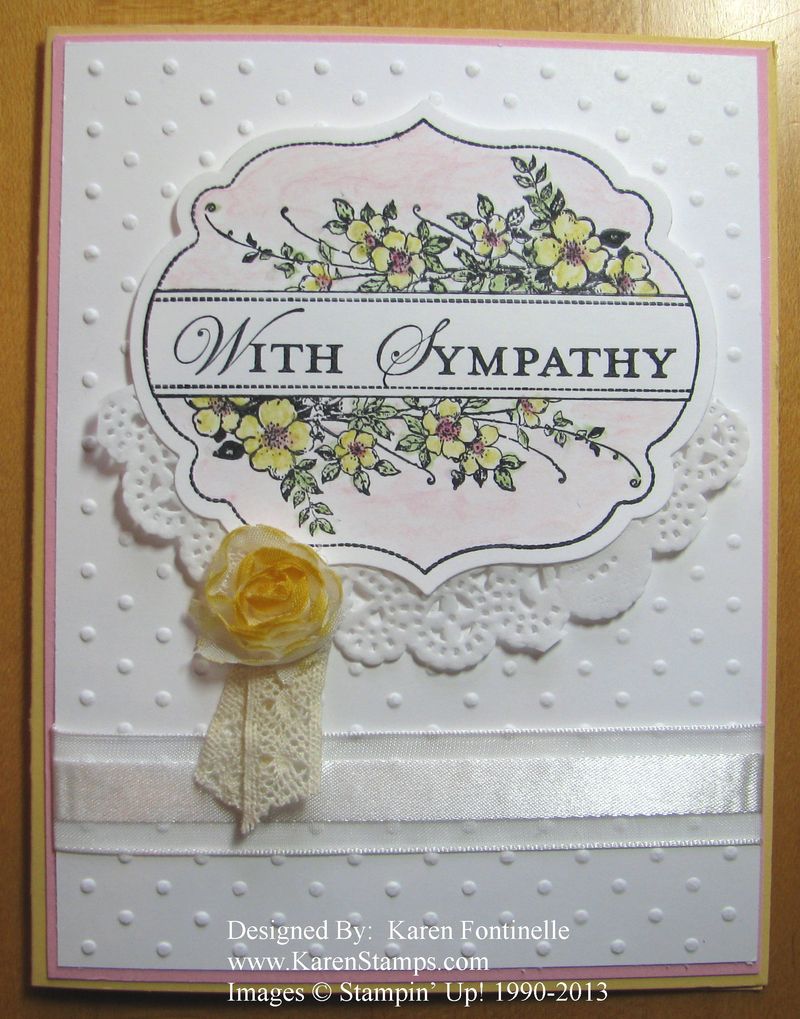
Apothecary Art Sympathy Card

Sympathy Card

Sympathy cards are the ones we all hate to have to make, yet hopefully they bring much comfort and caring to the recipient. And we all know from experience that when you lose a loved one, every expression of love and sympathy helps ease our pain.

Maybe making sympathy cards are one of the most important things we can do with our stamping and cardmaking. This one is fairly simple. The Apothecary Art stamp set gives the card some formality and elegance. It may look complicated to color in, but really it is not.  Just take a few moments to add a little color to the flowers and then the leaves are easy. The sentiment is stamped with the Loving Thoughts stamp set. I added half of a Tea Lace Paper Doily underneath. The Apothecary Art stamped image is cut out with the Labels Collection Framelits. The background is embossed with the Perfect Polka Dots Embossing Folder. The little flower is one from the Vanilla 5/8″ Flower Trim in the Spring Catalog and dipped in a little bit of Daffodil Delight ink (just tap or twist the top of the flower into the ink pad). The little bit of 5/8″ Victoria Crochet Trim and Whisper White 5/8″ Organza Ribbon are shown in the Stampin’ Up! Annual Catalog. (I know the vanilla of the crochet trim doesn’t really “match” the Whisper White, but I did it anyway!)

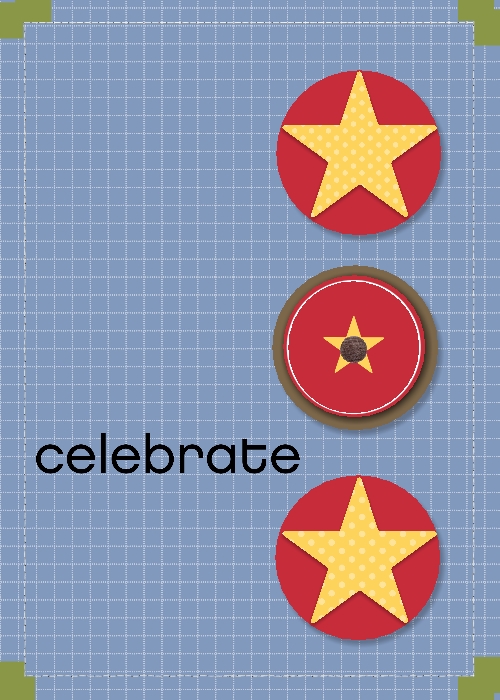
My Digital Studio Card for the Houston Livestock Show and Rodeo

Rodeo-001

The Houston Livestock Show and Rodeo is a big deal here in Houston and it is about to begin! Actually the World Championship BBQ Contest is going on now for three days and the Carnival has opened. Next week the actual rodeo and livestock show will open along with a musical act at the end of the rodeo each night. 

Houston really gears up for the rodeo! I made this card in My Digital Studio, starting with a design for a baby card! I just changed out the colors, one star, one button, and added a greeting. My Digital Studio is an easy way to design your own projects either using the templates that come with the program or designing completely on your own.

You can try My Digital Studio FREE for 30 days! You can design anything you want and even get your projects printed. You can purchase downloads that appeal to you and use those as well.  Just go here to my Online Store to get the free trial for My Digital Studio!  You'll enjoy it!  And if you attend the Houston Livestock Show and Rodeo, you will be all set to scrapbook pictures from the rodeo!

A Birthday Card with the Chalkboard Technique

Birthday Card Chalkboard Technique

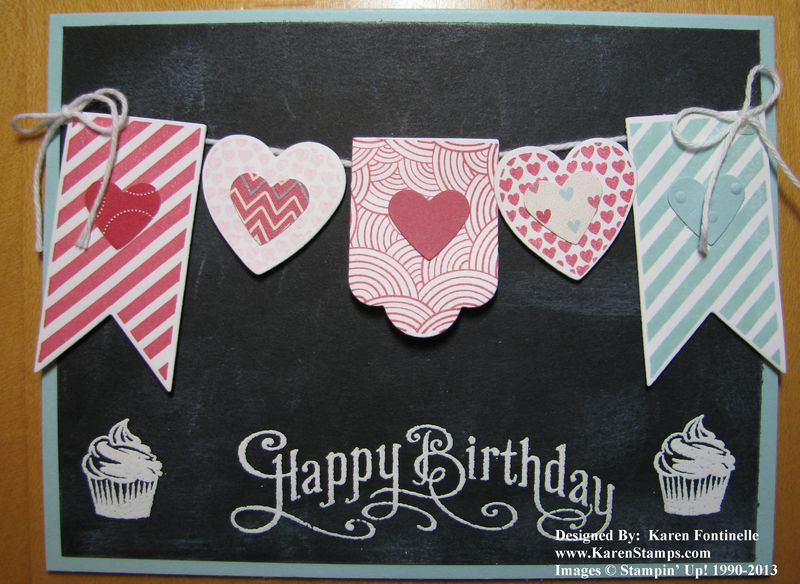
Some of us can’t seem to get enough of the chalkboard technique! Here is a birthday card using a banner and the chalkboard technique!

In case you are new to this chalkboard craze, the black card stock is stamped with Versamark ink and embossed with white embossing powder. You could also stamp with white craft ink. Then for me, the fun part is taking a small cloth or sponge or even your finger and smearing a little of that white craft ink onto the card to make it look like an old dusty chalkboard!  The look is not restricted to black card stock…lots of chalk boards were a dark green. Do whatever you want!  It’s your piece of art!

On this card, I used the More Amore Specialty Designer Series Paper in the Stampin’ Up! Spring Catalog, stamped with the Hearts A Flutter stamp set and cut out the banner pieces with the Hearts a Flutter Framelits Dies. Be sure to check out the Bundle if you are interested before you purchase!

Try out this technique!  It’s really fun and I love the look!  Once you are aware of it, you will see it in lots of advertising and lots of places!  Be trendy!  Try the chalkboard technique!

Rain or Shine Card for a Rainy Day!

Rain or Shine Card

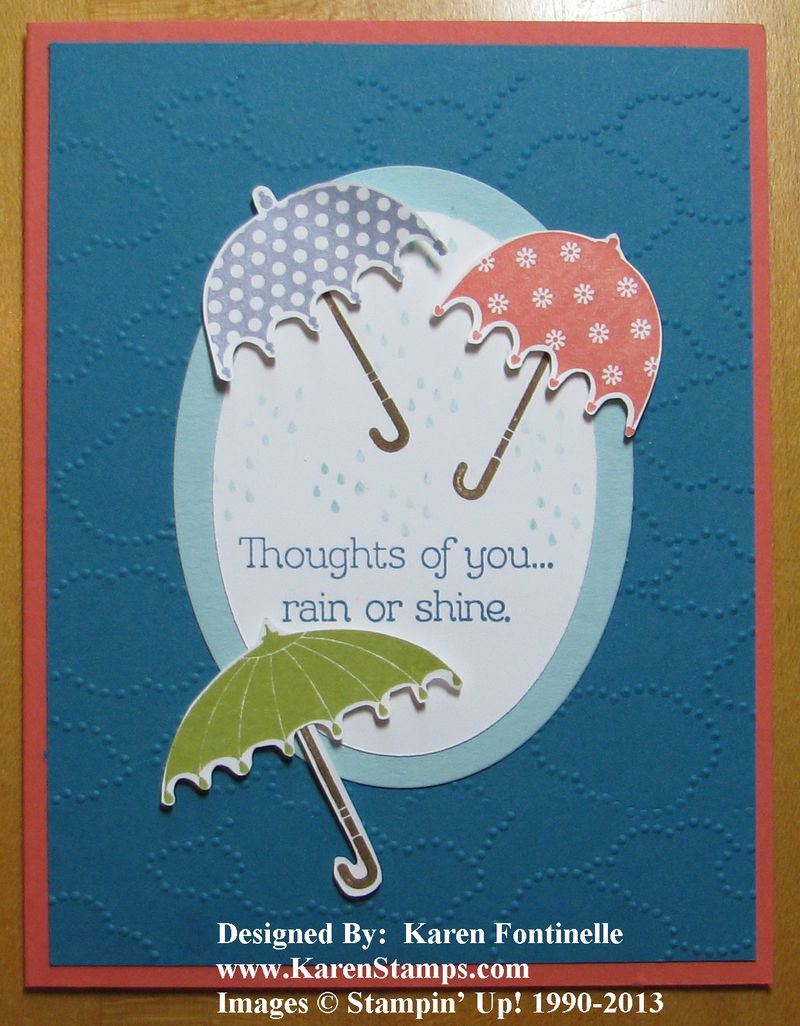
Today was supposed to be a rainy, stormy day here in Houston and we have had a little bit of rain at my house and some people are getting storm warnings, but nothing like I thought we would have. So I thought a card with dark blue clouds,Island Indigo and the Cloudy Day Textured Impression Embossing Folderusing the Rain or Shine stamp set in the Stampin’ Up! Spring Catalog would be perfectly appropriate today!

One of the top things people mention as the best thing about Stampin’ Up! is always their coordinating color collections. I used all 2011-13 In Colors plus two neutrals (Whisper White and Soft Suede) so I wouldn’t have to even think about what colors coordinated with what. The card base is Calypso Coral, the cloudy layer Island Indigo and the oval Pool Party.  The umbrellas are stamped in Calypso Coral ink, Wisteria Wonder and Lucky Limeade; the greeting in Island Indigo and the raindrops in Pool Party.

I just hand-cut the umbrellas but it wasn’t very tedious (at least if you have the Stampin’ Up! Paper Snips!) If you wanted to make it even simpler, you could cut straight across the bottom rather than go in and out the scalloped edges of the umbrellas, plus cut off the little top. Only one handle is cut out, the other two are stamped with Soft Suede.  The ovals were easy to cut, of course, with the Ovals Collection Framelits Dies.

For any stamping supplies you may need, Stampin’ Up! has the best! Visit my Online Store or contact me with your order.

Hostess Gift Wine Bottle Tag

Wine Bottle Tag

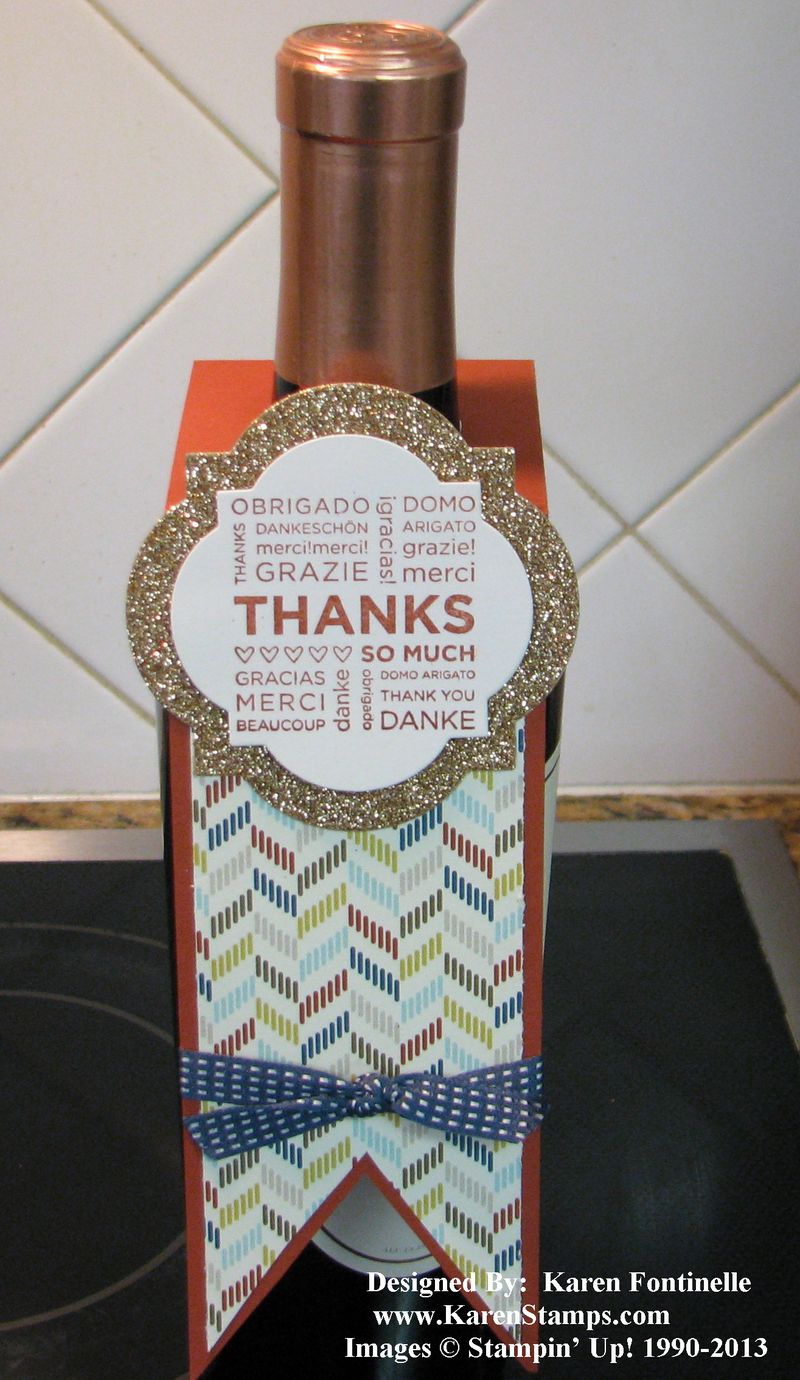
Often a good host or hostess gift to take to a party is a bottle of wine. When you are a stamper, you want to jazz up anything you can with some stamping! Here is an easy wine bottle tag to make in just a few minutes. And of course you could make the same kind of hanging bottle tag, but smaller, to go over water bottles or soda bottles or whatever!

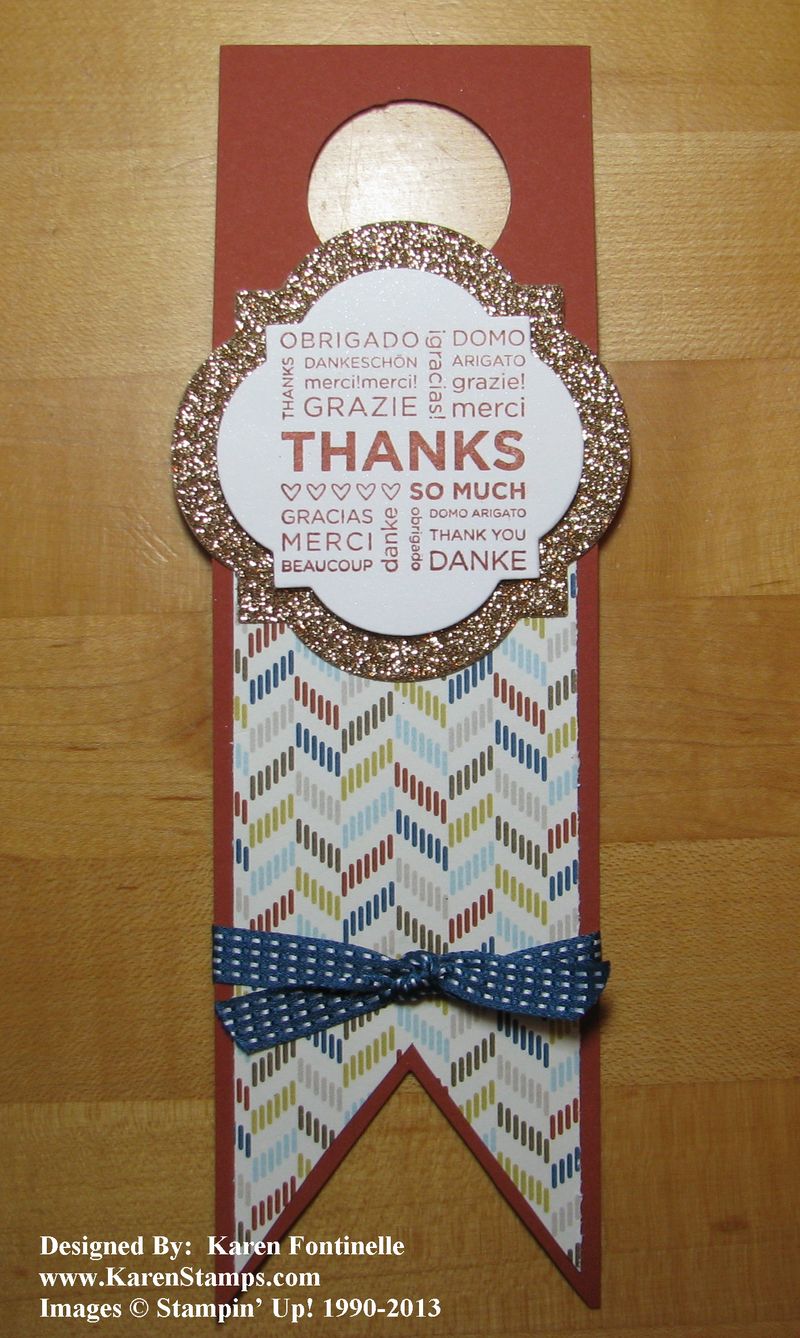
You will have to tailor the size of your hanging bottle tag according to the size of your bottle but these are the measurements I used:

  • Cut card stock 8 1/2" x 2 1/2"
  • Score at 2 1/4". Use the 1 3/8" Circle Punch to punch a hole in that area to hang over the top of the bottle. Fold on the score line.
  • Decorate your wine bottle tag!

Wine Bottle Tag for Hostess Gift

I used the Comfort Cafe Designer Series Paper for a layer. The "thanks" stamp is retired but seemed perfect for this project. It is cut out with the Window Frames Collection Framelits Dies (carried over from the Holiday Catalog) and layered on Champagne Glimmer Paper, also still available from the Holiday Catalog. The ribbon tied around the tag is the Midnight Muse 3/8" Stitched Satin Ribbon #126847.

Next time you are taking a bottle of wine as as hostess gift to a party, or even just decorating water bottles for a get-together, consider making a cute tag for the bottle!

Stampin' Up! has all the supplies you need at my Online Store here!

A Framed Birthday Collage for a Friend

Framed Birthday Collage for a Friend
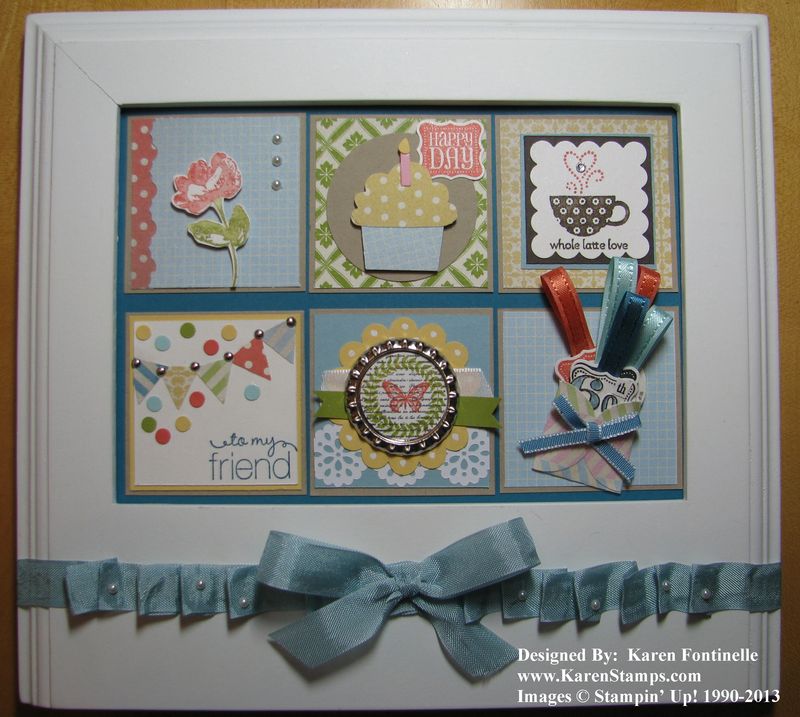
I love how this framed collage turned out for a dear friend's birthday gift! I often pick up frames that I like just in case I come up with a stamping project I can use them for. This white frame intrigued me because of the extra space at the bottom. I thought maybe I could stamp something in that area or do something with it. There were lots of possibilities, but it took having every ribbon I owned out on the table until I came up with this ribbon design that I liked! Of course, the frame would have been fine even plain.
When I need a gift for someone, I often try to see if there is something I can make. With stamping I can make a personalized gift. It saves a trip to the mall for the same old/same old kind of gifts, and I can make something I hope they will like and will be a unique gift that no one else will give them. Rubber stamping opens so many creative opportunities to you and it is an easy skill to learn and do.
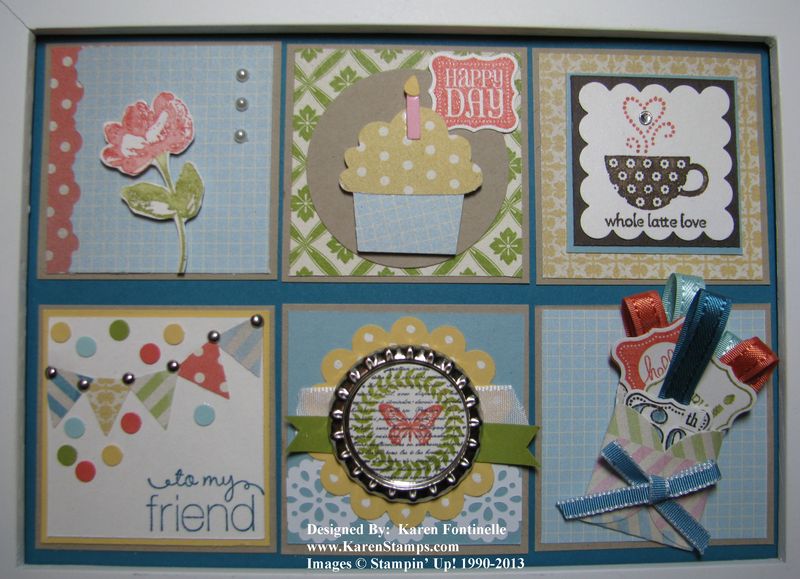
To make this I just measured the frame opening and did a little math…and just cutting some scrap paper samples…to see what size to make my squares. Then I just decorated each one with whatever idea I found or thought of. Don't ever let not having an idea stop you….once you sit down and play a bit, your creative juices will start flowing! And often, they overflow once you get going!!
Here is a close-up of the collage.
Framed Birthday Collage for a Friend Close-up
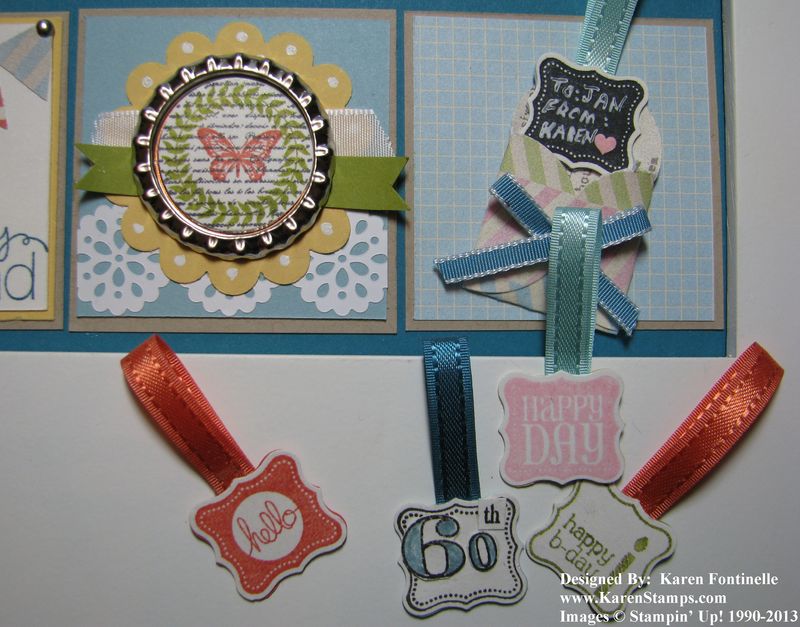
And here is a close-up of all the little tags I made to go in the tiny envelope.
Framed Birthday Collage Tags
Making collages like this to frame is a great gift idea because it is a personalized gift and can be as large or small as you like. Try one!
You can find any supplies you need at my Stampin' Up! Online Store here!