Category Archives: 3-D, Gifts & Things

Paper Pumpkin Buy One Get One Free (BOGO)!

Paper Pumpkin BOGO Ad

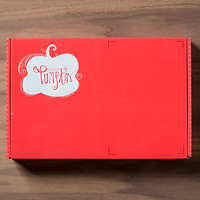
What is Paper Pumpkin anyway?  Paper Pumpkin is a surprise papercrafting kit from Stampin’ Up! in a cute red box, wrapped up delightfully inside.
Paper Pumpkin Feb 2014 Box

When the red box shows up in your mailbox around the middle of the month, you get all excited, open it, and find all the supplies you need inside to make the mystery project!  There is a stampin’ spot (mini ink pad), an exclusive set of photopolymer stamps, and all the materials die cut and ready to go, usually adhesive like glue dots or dimensionals, plus directions of course and a link to a video of how to make the project!
September Paper Pumpkin Kit 2014

September Paper Pumpkin Kit Contents

Then when you have some free time for yourself, or your child comes home from school to make a craft with you, or your grandchild comes over and wants to make something, or your sister, grandmother, mother, neighbor loves to make things but doesn’t know how, you sit down and assemble your kit! As you can see, it might be cards, it might be a calendar, a mini album, a home decoration, gift bags, treat bags, you name it! Follow the directions or do your own thing!  The box is yours! Just play and enjoy yourself!

Try out Paper Pumpkin now with the BOGO offer!  Just click HERE to join and use promo code BOGO.

Offer Dates: August 11–October 10, 2016

Use promo code “BOGO” at PaperPumpkin.com. Pay the regular price of $19.95 and get your second month for FREE!

If you subscribe with the promo code between now and September 10, you will pay full price for the September kit and get the October kit FREE. If you subscribe between September 11 and October 10, your first kit will be the October kit and you will get the November kit FREE.

The Fine Print:
IMPORTANT: Offer invalid if subscription is suspended or cancelled during the first two months. In other words, subscribers cannot cancel or suspend their subscription during their first two months—if they do, the offer is void. You can’t put your subscription on hold or cancel until after the first two full months.
After the first two months, the subscription will continue for $19.95 + tax per month (shipping included) unless cancelled or suspended. Ends October 10, 2016.
This offer is open to first-time subscribers only.
Not valid on prepaid subscriptions.
Ends October 10, 2016 (the last day to subscribe and get the October kit).

Except for the first two months of signing up for this offer (because you are buying one kit and getting one free) you can always cancel Paper Pumpkin if it doesn’t live up to your expectations or “pause” your subscription if you get too busy or are on vacation that month or whatever.  No risk involved with Paper Pumpkin!

What is better than a cute red box showing up in your mailbox once a month with a surprise inside?!

JOIN PAPER PUMPKIN TODAY! (receive the September kit and October kit FREE)

(Or wait until October 10 to receive the October and November kits).  Your choice!

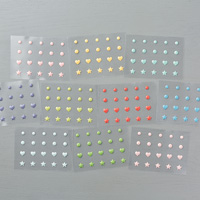
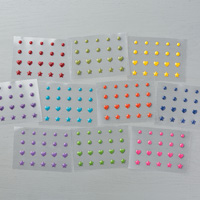
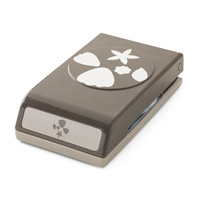
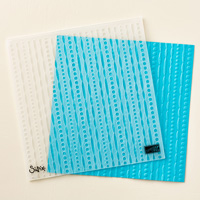
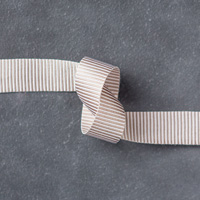
Here are some photos of past kits this year!

Paper Pumpkin January 2016

Paper Pumpkin March 2016

Paper Pumpkin April 2016

Paper Pumpkin May 2016

Paper Pumpkin July 2016

For more information or to join to Paper Pumpkin and start getting your Paper Pumpkin Kit in the mail from Stampin’ Up!, click HERE.

Cookie Cutter Halloween Candy Bar

Cookie Cutter Halloween Candy Bar

When we think of Halloween we think of candy, so why not decorate a chocolate bar for Halloween like this Cookie Cutter Halloween Candy Bar?! It’s so fun to make stamping projects for Halloween!

First I just wrapped the chocolate bar (with almonds!) in a piece of the Halloween Night Specialty Designer Series Paper. The size depends on your candy bar, just overlap it a bit in the back and make sure it’s a fairly tight fit. I just used a strip of Tear & Tape Adhesive.  The mummy is stamped from Cookie Cutter Halloween and colored lightly with a little Sahara Sand ink and my Aqua Painter.  The little ghost I had already cut out with the Home Sweet Home Thinlits Dies.  The greeting is stamped from Teeny Tiny Wishes.

Such a fun and easy treat or favor to make just for fun or for a party!  Check your pantry or grocery store and see what you come up with!

Shop the Holiday Catalog now at Stampin’ Up! Online!

The Stampin’ Up! Holiday Catalog Is Ready For You!

Holiday Catalog 2016 Banner

Today is the day!  It’s September 1st (can you believe it?!) and the Stampin’ Up! Holiday Catalog is LIVE!

SHOP THE HOLIDAY CATALOG HERE!

VIEW THE HOLIDAY CATALOG HERE!

Special Offers Week 1

AND Special Offers September 1-7! (Kind of like the old Weekly Deals!) Add these to your order!

New offers Sept. 8 and Sept. 15 also. Don’t know what they are yet, though!  You will love the Enamel Shapes!  Think about the Metallic Enamel Shapes, the star shapes, for the tops of Christmas trees!Stampin' Up! Holiday Houses

Go check out the Stampin’ Up! Holiday Catalog now!  Let me know what you think! If you do not have a Stampin’ Up! Demonstrator you are working with currently, contact me and I would be happy to mail you a catalog!

Shop All Things Stampin’ Up!


Home Sweet Home Halloween House

Home Sweet Home Halloween House

It’s so fun to play with the Sweet Home Stamp Set and the Home Sweet Home Thinlits Dies to make all kinds of little houses for holiday home decor, party favors, treat holders or gift box like my Home Sweet Home Halloween House.  You can make these as simple or as involved as you like.  Cut two pieces with the dies to make a house, then stamp or add additional die cuts, like for windows perhaps, and then glue it all together!  The Stampin’ Up! Holiday Catalog gives you photos of three types of houses – Halloween, Christmas, and a regular house. There are plenty of stamps and dies to embellish your houses for whatever occasion you like!

Purchase the Sweet Home Stamp Set and Home Sweet Home Thinlits Dies in a Bundle and save 10%!  #143516

For my Halloween house, I stamped the lines to look like the wood siding and die cut all the rest of the pieces. I put a gray ghost up in the top window! For the windows I just cut the black frames and cut pieces of Daffodil Delight yellow for the “light” behind them, sponged with a little Pumpkin Pie to look spooky for Halloween. I also sponged the house with Crumb Cake ink to look spooky.  The roof shingles are all die cut, plus I sponged those with Craft White ink. The little doorknob is one of the new self-adhesive Brights Enamel Shapes.

Home Sweet Home Halloween House Side

Home Sweet Home Halloween House Back

The new Stampin’ Up! Holiday Catalog goes LIVE in just a few days, on September 1st! You will be overwhelmed with fantastic choices for all the holidays coming up! If you are interested in Stampin’ Up! products and would like a catalog, just email me with your contact information and I would be happy to send you a complimentary catalog.

********

And don’t forget to order your Thoughtful Branches Bundle by August 31! This stamp set and dies has been extremely popular and you can make beautiful cards for all seasons with this set! You can even make a pumpkin out of the flower/tree top in orange!

Thoughtful Branches Samples

Shop Stampin’ Up! Online!

Candy Cane Christmas Tiny Treat Box

Candy Cane Christmas Tiny Treat Box

Sometimes the best gifts come in tiny boxes, just like this Candy Cane Christmas Tiny Treat Box. There is nothing simpler than this way of packaging a small gift or treat! The Clear Tiny Treat Boxes are food safe and acid free and only 2″ x 2″ x 2″ in size! You get 16 treat boxes in a package!

There are limitless ways to decorate and use these little boxes! You will have fun seeing what cute ways you can use these boxes. For this one, I assembled the flat-folded box, added the candy treats inside, and tied with the new Real Red 3/4″ Stitched Edge Ribbon (available September 1st in the new Holiday Catalog!). For the little gingerbread house on the front, I found that the smaller ones printed on the Candy Cane Lane Designer Series Paper on one of the sheets fit perfectly after I cut it out with my Paper Snips scissors. That’s all there was to it! Instead of candy, you could put a very small gift inside tucked inside some shredded paper or wrapped in some tissue paper. Instead of being able to see inside so easily, you could wrap designer paper around the outside like a wide belly band. Use these boxes for any occasions! They are great to have on hand!

Remember, the Stampin’ Up! Holiday Catalog goes live September 1st!  You will LOVE it!

Shop for Stampin’ Up! products online HERE!

Cookie Cutter Scarecrow Mini Treat Bag for Halloween

Cookie Cutter Scarecrow Mini Treat Bag for Halloween

Here’s something fun to make with the Cookie Cutter scarecrow on a Mini Treat Bag all ready for Halloween!  The Cookie Cutter Halloween Stamp Set is coming soon (September 1st!) in the Stampin’ Up! Holiday Catalog and coordinates with the Cookie Cutter Builder Punch (and there is a Cookie Cutter Christmas Stamp Set too that you won’t want to miss!).

I had already stamped and punched out the scarecrow another day and he was right there on my table so I colored him in with Stampin’ Write Markers and mounted him on a layer of Pumpkin Pie cardstock and Basic Black.

You already know how much I love the Mini Treat Bag Thinlits Dies!  When I got the idea to make a treat bag, I grabbed a piece of the new Halloween Night Specialty Designer Series Paper toward the back of the Holiday Catalog.  I think the little pumpkin pattern looks so cute with the scarecrow! I decided to fold over the top of the treat bag and tie closed with the Halloween Night Baker’s Twine.

Don’t forget to put the candy or treat in the bag before you tie it shut!  You could also make it like a little envelope with a greeting or gift card inside. So many uses for the Mini Treat Bag Thinlits Dies!

Holiday Catalogs are starting to arrive in mailboxes so be sure to watch for yours if you have been a regular customer of mine! Sometimes they get lost along the way, so let me know if yours doesn’t arrive by September 1st.  If you are new and would like a catalog, just let me know and I can send one to you.

Shop Stampin’ Up! Online 24/7!

For Your Viewing Pleasure: Holiday Catalog Videos by Stampin’ Up!

What could be more fun that watching videos using some of the new products in the Stampin’ Up! Holiday Catalog?!  Usually these are saved until after the catalog goes live, but this year Stampin’ Up! has released them early for all of you!

This new Holiday Catalog is so full of new products that 10 videos don’t even cover everything! But you will get a good idea while you wait for your catalog to arrive! One of my customers told me she received her catalog today so they must be on their way!

Once you watch the video above, the next one will appear.  But if you want to see the page where all the videos are or choose which ones you want to watch, just click HERE.

The new Stampin’ Up! Holiday Catalog goes live on September 1, 2016. Amazingly, August is half over so September is not far behind! It won’t be long!

If you are new to me and aren’t working with a Demonstrator currently, just email me with your contact information and I would be happy to mail you a catalog when they come out. Email me at Karen@KarenStamps.com.  You will love this catalog!!  It will be online Sept. 1st as well.

If you can’t wait until September 1st to order, you may want to become a Stampin’ Up! Demonstrator yourself!  We Demonstrators have been able to do a pre-order and you could too!  It only takes minutes to sign up!  Join the Stampin’ Up! family!  Let me know if you have any questions I can answer for you!

Enjoy the Stampin’ Up! Holiday Catalog videos!!

Time to Subscribe to Paper Pumpkin

Paper Pumpkin Box

Paper Pumpkin is the Stampin’ Up! papercrafting kit that comes to you in the mail once a month! It is so fun to check your mailbox and find that red box in there with crafting fun just for you!

The box contains an exclusive photopolymer stamp set, an ink spot (a 1″ square little ink pad!) and all the materials you need for the project, already cut and ready to go. Your first kit includes a clear block on which to mount the stamps.  You of course get instructions and even a video you can watch from Stampin’ Up! Make the kit as designed or do your own thing with the contents.

  • You can subscribe month by month for $19.95 a month, which includes shipping.

Click HERE for more information and to sign up!

Paper Pumpkin is almost always a surprise and not always cards.  There have been many different kinds of projects in the boxes. BUT every now and then, Stampin’ Up! offers a sneak peek.  You can see the sneak peek of the stamp set and find out what kind of project is in the August kit if you click this link HERE, or just wait and be surprised when your kit arrives!

To get the August kit in the mail, subscribe by August 10th.  Your kit will ship out soon after and you will receive it about mid-month. No risk, no obligation. Try it for a few months and if it is not for you, just go in your account and cancel or even just contact me and I will have Stampin’ Up! cancel for you. Or if you are busy and want to skip a month, just “Pause” your subscription! It’s as easy as that!

Here are videos for the May, June and July Paper Pumpkin kits for you to get an idea of what they are like! After you watch, just click the link below the videos to get your subscription started. As a bonus, subscribers are able to order any past kits or refills that are still available if you missed something you really liked.


GIVE YOURSELF A TREAT!  JOIN PAPER PUMPKIN!  YOU DESERVE IT!

(Go ahead!  You know you want to!)

Learn to Make These Cute Popcorn Boxes!

Popcorn Box Samples

Images (c) Stampin’ Up! 2016

If you don’t want to get coerced to buy these Popcorn Box Thinlits Dies, then don’t watch this Stampin’ Up! video with Donna Griffith from the Home Office! I was NOT interested in these (well, I’m “interested” in every single product Stampin’ Up! sells, but being as I can’t have it all, I have to limit myself!), but then I watched this video and these Popcorn Boxes sure look cute!!!

Just think how cute these would be as party favors, teacher gifts, Christmas gifts, neighbor gifts, treat holders, even popcorn boxes!! Just think of how you could decorate them for Halloween parties!! Or something in red, white and blue for July 4th! Yep, they just might have to go on my next order!!

Popcorn Box Birthday Blooms Sample

Images (c) Stampin’ Up! 2016

Popcorn Box Thinlits Dies

Put these Popcorn Box Thinlits Dies on your Stampin’ Up! order!

Pop of Pink Swirly Scribbles Polka Dot Scalloped Tag

Pop of Pink Swirly Scribbles Polka Dot Scalloped Tag

Here is a quick and easy project to make a Pop of Pink Swirly Scribbles Polka Dot Scalloped Tag. I simply punched a tag with the Scalloped Tag Topper Punch out of the polka dot pattern of one of the papers in the Pop of Pink Specialty Designer Series Paper. I first was going to use some other die cut flowers, but then I thought it might be fun to see how the Swirly Scribbles die cuts might work. I chose three colors in the Brights family:  Real Red, Pumpkin Pie and Daffodil Delight. I also die cut some green leaves.

The banner is stamped with the Thoughtful Banners Stamp Setboth on Whisper White and Real Red so that the greeting cut be cut and adhered to the Real Red banner. These were punched with the Duet Banner Punch. You can purchase this stamp set and the punch in a Thoughtful Banners Bundle and save 10%!

***Be sure to check out Paper Pumpkin today so you are ready for the FLASH SALE!  Purchase your first Paper Pumpkin Kit for only $5 beginning today, June 9th at 5:00 pm Mountain Time and ending on Friday, June 10th at 11:50 pm Mountain Time.

The first Paper Pumpkin Kit comes with a clear block on which to mount the stamps that come in the kit. Everything you need for the surprise project is inside the box!  Stamps, ink, and everything cut and ready to use!  You can follow the enclosed directions, watch a Stampin’ Up! video, or change up the project however you like.

Details

  • The price of the kit is $5 USD.

  • This offer is open to first-time subscribers only. Discount applies to one kit for June 2016. After the first month, the price for the subscription will return to $19.95 USD.

  • Offer starts on Thursday, June 9 at 5:00 PM (MT) and ends Friday, June 10 at 11:50 PM (MT).

  • Available for month-to-month subscriptions, not prepaid subscriptions.

JOIN PAPER PUMPKIN HERE TODAY!

Easy Botanical Gardens Gift Bag

Easy Botanical Gardens Gift Bag

Find out how quick it is to make this Easy Botanical Gardens Gift Bag! The other day after I made twenty-five treat bags with the Mini Treat Bag Thinlits Dies, I needed something to carry them in, and I wanted it to be decorative.  After all, presentation is everything, right?! So I grabbed a small kraft bag in my bag of bags and found this one. It already had printing on it from the store where I had gotten it from, so I cut a piece of Botanical Gardens Designer Series Paper wide enough to cover all that. To set it off a little bit, I cut strips of Hello Honey Cardstock, one of the coordinating colors that goes with this designer paper. I adhered one to the top of the designer paper and one strip to the bottom, then adhered the whole piece to the front of the bag. I looked in my pile of stray pieces that were already die cut, punched or stamped, and found this one die cut flower and some leaves from the Botanical Builder Framelits Dies and added an Iced Rhinestone Embellishment to the center of the flower. Done and very cute! If I wanted to, I could have added lots more flowers and embellishments to the bag, but for this purpose, this was fine.

Just grab a shopping bag of any size you have in your house and decorate with designer paper or card stock and embellishments!  Custom gift bag almost for free!  No special trip to the store to buy a gift bag! If you have this paper, try this Easy Botanical Gardens Gift Bag.

Shop Stampin’ Up! Online

Mini Treat Bag Thinlits Candy Treat Bags

Mini Treat Bag Thinlits Candy Treat Bags

I spent most of the day making a bunch of Mini Treat Bag Thinlits Candy Treat Bags for some people. Yesterday I posted one I made to get myself going and think about how I was going to decorate the treat bag. It’s best to have a simple design when you are making a quantity of anything, of course.  I used quite an assortment of papers for these! I used the Cherry on Top Paper Stack, the Love Blossoms Paper Stack, Birthday Bouquet, English Garden (retired), and the Botanical Gardens Designer PaperMost of these I had big enough scraps for at least one treat bag so I ended up with lots of different papers just to use up some of my current papers.

I scored the bag at 3 1/2″ from the bottom to make the foldover flap. Then I adhered a belly band around the treat bag (be sure to put the treat in first!) and stamped “Thank You” for the Tin of Cards Photopolymer Stamp Set. The word “Celebrate” is from the Any Many More Stamp Set that has all kinds of greetings in it.

It’s fun to make these mini treat bags!  You don’t only have to use them for candy or treats. You can use them for envelopes and slip in a simple card or a monetary gift.

Of course the main thing you need to make these Mini Treat Bag Thinlits Candy Treat Bags is the Mini Treat Bag Thinlits Dies and the Big Shot.

Shop Stampin’ Up! Online 24/7

Make a Birthday Bouquet Treat Bag with the Mini Treat Bag Thinlits

Birthday Bouquet Mini Treat Bag

I’m back to one of my favorite projects, using the Mini Treat Bag Thinlits Dies to make a special treat bag with the Birthday Bouquet Designer Series Paper. I love using the Mini Treat Bag Thinlits Dies for lots of projects! The basic way to use the dies is to make a treat bag with an opening in the top like any little sack and then embellish it. But this one I folded the top over and added a belly band to hold it closed.  It is filled with two chocolates and a tea bag. The die cut heart also comes in the die collection. I embossed the heart with the Decorative Dots Embossing Folder just to add a little texture. The small hearts are punched with the heart punch in the Itty Bitty Accents Punch PackThe word “Enjoy” is also one of the die cuts.  You really get a lot in the Mini Treat Bag Thinlits Dies!  The belly band is 8 1/2″ x 1 1/2″ and just folded around the bag.  The bag is scored at 3 1/2″ from the bottom if you want a score line to help fold the top over.

There are so many variations to making these treat bags and embellishing them! Check out my post HERE to see the other similar one I made,

We’re moving along in May so be sure you check out the Retiring Stampin’ Up! products list to see what is still available and what you want before they are gone May 31. Stamps are guaranteed though May 22 since Stampin’ Up! manufactures their own stamps in Kanab, Utah. Other products are only available while supplies last.  If you see it in the Online Store, then it is still for sale!

Stampin’ Up! Retiring List

Shop Stampin’ Up! Retiring Products

Birthday Bouquet Gift Bag for Mother’s Day

Birthday Bouquet Gift Bag for Mother's Day

If you need a quick gift bag for Mother’s Day or any occasion, it’s easy to make one with the Stampin’ Up! Gift Bag Punch Board or you can follow some directions online to make a bag. This gift bag is made with the pretty Birthday Bouquet Designer Series Paper.  I actually intended to use the side that is on the inside of the bag, but I didn’t think about which way the pattern was going when I used the Punch Board, so the hearts would have been upside down! When you are using the Gift Bag Punch Board, remember that what you are punching and scoring at the top of the board is actually going to be the bottom of your bag.  Make sure you check your paper pattern and make sure it is going in the correct direction! However, the pattern on the other side of almost any Stampin’ Up! paper is also going to be pretty and coordinating with what you are making so it worked out just fine to use this polka dot pattern for my gift bag!

I found a scrap of designer paper that was from a boo-boo awhile back, and really all that I could use it for would be cutting out the flowers by hand.  Depending on how much you like or hate to cut things out, you might prefer to stamp a flower rather than cut one out! But this worked for me.  I love these flowers on this paper so I just cut out around the flower and all its parts and didn’t worry about perfection.  If you leave a little border then perfection in cutting doesn’t matter! Having Paper Snips really does make the job of cutting things out a lot easier.

To make the snipped flower stand out on the bag, I punched a 2 1/2″ circle of Blushing Bride cardstock, then thought of putting a Tea Lace Paper Doily behind it. I had some doilies already cut in half so I decided that would be better. Then I added some White Jute Ribbon and a scrap of Venetian Crochet TrimSince I had a scrap of Watermelon Wonder 1″ Stitched Ribbon that was already tied in a knot, I just put the ends through to the back and had that little pop of color in the front holding the bag shut.

Birthday Bouquet Gift Bag Embellishment

I like the Gift Bag Punch Board for making small to medium size gift bags. It comes in handy sometimes!  If you take an afternoon and make a bunch at one time, you can have a supply of gift bags of all kinds on hand ready for when you need them! Almost any of the designer paper by Stampin’ Up! is pretty enough for gift bags, but I really like this Birthday Bouquet Paper for this Mother’s Day Gift Bag!

Join Paper Pumpkin! Get the May Kit!

Paper Pumpkin Box

The Stampin’ Up! Paper Pumpkin Kits for April 2016 have been delivered to subscribers!  If you don’t want to miss out on the next kit in May, be sure to get yourself subscribed!

It’s easy to join!

  • Sign up on my Paper Pumpkin page HERE! (or just get more information)
  • Add a Prepaid Paper Pumpkin Subscription to your Stampin’ Up! order!  You’ll receive a code via email right after you order. It will tell you to set up your account on the Paper Pumpkin page and you will be set to go!
  • Sign up either way by May 10th to receive the May kit.
  • Watch for your Paper Pumpkin kit in your mailbox around mid-May!

Everything you need comes in your kit! A stamp set, an ink spot, a clear block with your first kit, and all the paper and supplies you need to make the project.  Sometimes it is cards, sometimes it is something else.  It’s always a surprise.

No risk! If it doesn’t suit you, just cancel. If you are busy and want to skip a month, just go in to your account and pause your subscription. Resume when you are ready.

Give Paper Pumpkin as a gift! I send one to my daughter as a gift and if she is too busy, she just pauses her subscription for a month or two.

Who do you need a gift for and want something different?  Who do you know could use  a little “me” time to just sit down and relax while they have some crafting time? Who do you know would enjoy a little surprise gift who doesn’t even craft?  Paper Pumpkin is for everyone and anyone!

Take a look at April’s Paper Pumpkin Kit!  Sometimes there are plenty of extra pieces left over that you can make even MORE projects with! If you don’t like the project or you don’t want to make all the cards or whatever, just go with your own design and creativity.  Nothing says you can’t change it up!  Just have fun with it! That is what Paper Pumpkin is for!

Join Paper Pumpkin Today!