Monthly Archives: February 2015

Quick and Easy Valentine Top Note Purse Candy Treat Bag

Valentine Top Note Purse Candy Treat Bag

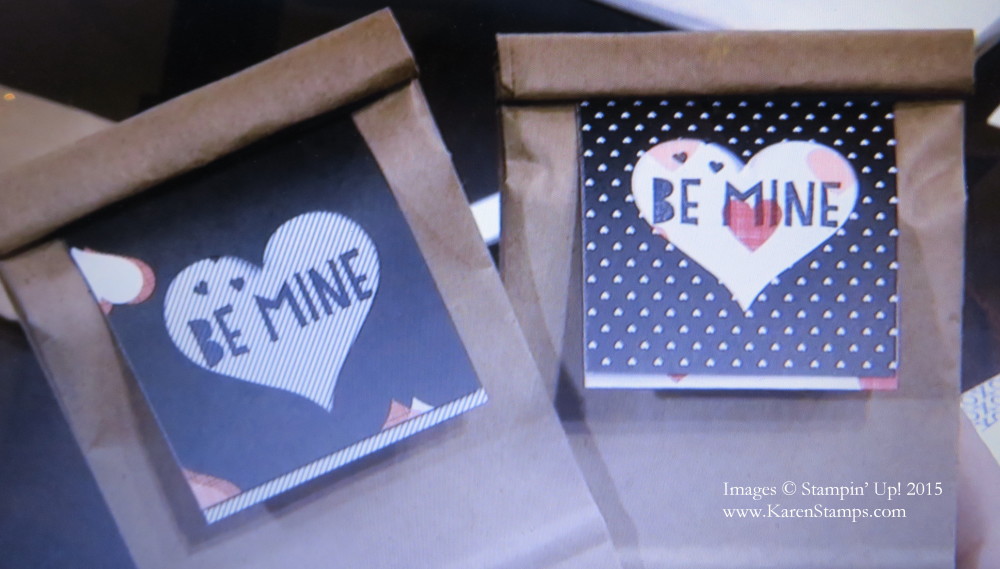
Looking for a last minute, quick and easy valentine treat?  Try the Valentine Top Note Purse Candy Treat Bag!  It’s very easy to die cut the Top Note Die with the Big Shot and the fold the one end over to look like a purse. Punch two holes in the fold to insert ribbon and tie knots in the ends or adhere to inside. I used the retired small cello bags from Stampin’ Up!, but if you had the medium Cello Bags you could turn the Top Note die the other way to fit the larger bag or just fold the bag down to the narrower size you want if it doesn’t quite fit. Fill the bag with candy or whatever treat you have and fold the top over. I adhered the bag to the inside of the purse using Fast Fuse and a little on the flap part of the purse to hold it down on the front.

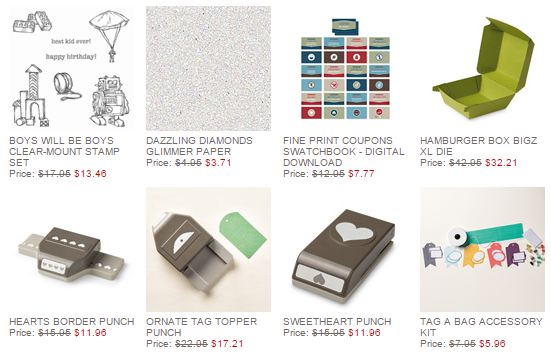
Decorate the front flap of the purse to your liking! I attached a Very Vintage Designer Button with a few Glue Dots. The bow on it is made with the Gold Baker’s Twine, just attached with a Glue Dot. It was too difficult to try to get the twine through the button so I gave up, made a bow and just stuck it on! For a little more bling, I punched two hearts from the Dazzling Diamonds Glimmer Paper with the heart punch in the Itty Bitty Accents Punch Pack.

If you don’t own the Top Note Die, I would cut a piece of card stock in a rectangle and fold over similarly. Maybe round the corners.  Then I would go order the Top Note Die because it is one of the all-time favorites!

Time is running out to get those class valentine treats done and valentines mailed out! Here’s what your table can look like when you are making valentines!

Valentine Making DayIf you think any of your friends can use a valentine treat idea, please click on one of the social media buttons below this post to share!  Or send them this link!

What’s New at Stampin’ Up! Today?

Lovely Amazing You Photopolymer Stamp Set

A brand new photopolymer stamp set is being released today by Stampin Up! that was introduced at the Leadership Conference!  It is called Lovely Amazing You and has such cute sayings in it! Can you resist “love you more than chocolate”?? Or “you make my heart happy”??

And here are some cute samples provided by Stampin’ Up!

Lovely Amazing You Stamp Set Samples

Click for More Information – Images (c) Stampin’ Up! 2015

Click HERE for PDF Flyer!

And here are the latest Stampin’ Up! Weekly Deals, good today through February 16, 2015. Remember, with a $50 purchase you can also earn a FREE Sale-A-Bration product!

Stampin' Up! Weekly Deal Feb 10 2015As you place any Stampin’ Up! order, always remember to check the top categories in the store in the left sidebar of the ordering site as shown below so you don’t miss anything!  Under HOME you see Weekly Deals, New Arrivals, Clearance Rack, 2015 Occasions Catalog and Returning Favorites. Easy to click and make sure you’re not forgetting something!

 You can do all your Stampin’ Up! shopping HERE at my Online Store!

Or contact me, if you prefer, and I’ll be happy to put your order in for you! Just email me at Karen@KarenStamps.com.

Flip Up Valentine Card

Flip Up Valentine Card

Can you believe it is Valentine week?! Valentine’s Day is Saturday, February 14th, so it is time to get those valentines made and mailed! Doesn’t making valentines remind you of being in elementary school and decorating a shoe box or lunch sack to hold all your class valentines? Just thinking about valentines probably reminds you of construction paper and paste if you made some of your valentines!  Maybe you even had doilies or glitter or maybe stickers if you were lucky!

This valentine is made with high quality Stampin’ Up! card stock and sophisticated adhesive, not construction paper and paste!  I got the idea to fold a sheet of Stacked with Love Designer Series Paper Stack in half and die cut a heart from the Hearts Collection Framelits DiesThe die is placed just below the fold at the top of the paper (be careful of the pattern you are choosing so that the design will be going the right way!) so that you can open up the heart at the fold. I also cut a smaller heart from Whisper White and stamped with a greeting from the Perfect Pennants Stamp Set. The little red heart is punched with the heart punch in the Itty Bitty Accents Punch Pack. I also punched two Basic Black arrows from the What’s Up PunchOne is adhered so that the tail end shows and the other so that the front tip of the arrow shows. The white heart is popped up with Stampin’ Dimensionals.

The heart is adhered to a piece of Real Red card stock embossed with the Perfect Polka Dots Embossing Folder. The red card stock is layered on the Basic Black card stock.  When you open the heart, you can see the pattern from the other side of the sheet from the Stacked with Love Paper StackIn order to have a greeting inside, I die cut a smaller Whisper White heart and stamped with a greeting from the You Plus Me Stamp Set. I love the color scheme of black & white and Real Red, Crisp Cantaloupe and Calypso Coral.  You can buy the paper stack and stamp set together in a Bundle and save 15%!

Flip Up Valentine Card Inside

Today is the last day for the current Stampin’ Up! Weekly Deals!  Be sure to order before 11:50 pm Mountain Time tonight!

Stampin' Up! Weekly Deal Feb 3 2015

Shop for all your Stampin’ Up! products at my Stampin’ Up! Online Store HERE!

Try making a flip up valentine for someone and mail it today! Your friend will certainly appreciate it!

Life in the Forest Valentine Card

Life in the Forest Valentine Card

Today I had fun playing with the Life in the Forest Stamp Set and made it into a valentine card! I think those two animals have something going on! I stamped them with Memento Black Ink on Whisper White card stock and colored in with Blendabilities Markers so that I could cut them out with my Paper Snips and place them on the “grass”.  The grass is two strips of Old Olive torn to give it that rough edge. The trees are stamped on the Brights Backgrounds Designer Series paper and cut out. The greeting on the card is stamped with the Just Sayin’ Stamp Set. The background of the paper is sponged lightly with Soft Sky ink.

It’s fun to play with these little animals and especially to color with the Blendabilities Markers. You must use Memento Ink and they work best using Whisper White Card Stock.  Just be sure to have something underneath the card stock when you color as the ink will seep through the paper. I love the feel of coloring with these markers. You don’t HAVE to do the blending and shading with them, if you like you can just color in with them.  Keep it fun and easy! But these markers really are fun to play with.

And you can get FREE Blendabilities markers during Sale-A-Bration with a $50 purchase!! I was quite surprised to see them offered as free items, but what a great opportunity to get some for yourself FREE with your $50 order! Let me know if you have any questions!

Shop at my Stampin’ Up! Online Store for all the great Stampin’ Up! products so you get your hands on them soon!

Don’t forget the Stampin’ Up! Weekly Deals, good through Feb. 9.

Stampin' Up! Weekly Deal Feb 3 2015

Click to Shop!


Valentine Candy Bar Treat

Valentine Candy Bar Treat

Valentine’s Day is getting close!  Here is an easy idea!  Just wrap a candy bar, whatever size, in card stock and/or designer paper and decorate. You will easily have a Valentine Candy Bar Treat! Make it as simple or as embellished as you like! For class valentines, you need to keep it pretty simple, maybe just designer paper and a punched out heart or two. For your loved one, maybe go crazy!

This sample is wrapped in Real Red card stock and then wrapped with a piece of paper from the Stacked With Love Designer Series Paper Stack.  I stamped a greeting from the You Plus Me Stamp Set. I chose the “you’re sweet” sentiment since I was doing a candy bar! The little hearts are punched with the heart punch from the Itty Bitty Accents Punch Pack.

You can do any size candy bar, from the jumbo ones down to the little snack size.  Better buy extra, though, so you can eat one while you stamp!

Shop Stampin’ Up! Online HERE!

Spend $50 and get a free Sale-A-Bration product!

Make a Cute and Easy Album from a Kit

Stampin' Up! So You Project Kit

So You Project Kit Images (c) Stampin’ Up! 2015

I saw this new So You Project Kit in the Occasions Catalog on page 48 but honestly it wasn’t on top of my wish list – until I saw Sara Douglass on stage at the Stampin’ Up! Leadership Conference last week show the album she made of her daughter and her friends out on a special date. I think they were going to make one for each of the friends! Then I watched the video shown below by Stampin’ Up! talking about this So You Project Kit album and saw how many things that are included, not to mention examples for each page IN COLOR that you could use – but certainly do not have to. The album holds 4″ x 4″ photos so you could get your Instagram photos printed to keep in this album! It’s the perfect size for a trip or a party or a shower or a new baby or graduation, certainly any occasion or holiday. Or just start it in a generic way and when you get a special photo, just stick it in there! On the catalog page, be sure to check out the extra supplies you might want to have on hand and the coordinating stamp set you could use. Of course, depending on your use, you might already have stamp sets you can use with it. Even if your photos are 4 x 6, they can be cropped to fit, most likely. I think it looks like a fun album and I’m putting it on my order!

Don’t forget, you will also get Sale-A-Bration FREE products with every $50 purchase! No limit! And at $150 you ALSO get Hostess Benefits! Talk to your friends and see if there is anything they would like to add to your order!

This kit would also make a great gift for any stampers, scrapbookers, or potential papercrafters!

Watch this fun video by Holly Linford from the Stampin’ Up! Home Office talk about the So You Project Kit.

To order your kit, just go to my Stampin’ Up! Online Store and place your order! I appreciate your business!

For Moms: Valentine Treat Bag Idea

Valentine Card Treat Bag

Moms, are you looking for some kind of treat idea for your children’s Valentine class parties or maybe just Valentine treats for the teachers? This is an idea I got from watching the live stream from the Stampin’ Up! Leadership Conference last week.  Sara Douglass (Shelli’s daughter) presented this idea on stage:  Take a sheet from the Stacked with Love Designer Series Paper Stack, and cut it in half lengthwise. Fold in half and punch the top layer with the Sweetheart Punch (on sale this week on the Weekly Deals!). Then stamp a greeting on the inside layer to show through the punched out heart.  I used a stamp from the You Plus Me Stamp Set.  I really just eyeballed it but you could mark the inside or use the Stamp-A-Ma-Jig

For this project I used the Chevron Tag a Bag Gift Bag. Put a treat inside, fold down the top edge, fold a Tea Lace Paper Doily over the top and use the Stampin’ Up! Handheld Stapler to attach the little card and hold the bag closed.

Valentine Card Treat Bag card insideOn stage at Leadership, this is the project Sara showed.  She used the Petite Cafe Gift Bags and just placed the little card at the top edge of the bag. Then she just rolled down the top edge, which also held the card in place! Very simple and easy!

Valentine Card Treat Bags Leadership
You can really use this idea with any designer paper, make the card wider if you want, embellish the bag more. I had to “push myself away from the table” to keep it simple and not add any extra stuff that it really didn’t need to a Valentine Treat Bag.

The Stacked with Love Paper Stack has turned out to be one of the most popular items in the Occasions Catalog! And it won’t just be for Valentine’s Day either. Hearts are good for any time and certainly the black and white sides of the paper will be easy to use always.

Get your Stacked with Love Paper Stack and the Sweetheart Punch today. Shop at my Stampin’ Up! Online Store.

Are You On the Stamping With Karen Mailing List?

email_clipart_computer

Do you love looking at new ideas for stamping and creating with Stampin’ Up! products? Do you like to learn more tips and ideas for using your stamping tools and accessories? Do you like to know what specials Stampin’ Up! is offering or when the next catalog is coming out? Do you generally like what you see on my blog? Then it’s time for you to sign up for my Stamping With Karen Mailing List!

Would you like a free gift just for subscribing to my monthly newsletter? Then sign up right now in the Stamping With Karen mailing list sign up box! It’s on the right at the top of my blog!  My February newsletter is going out as soon as I put the finishing touches on it and you don’t want to miss it! I have exclusive fun projects with complete directions that you won’t find on my blog or Facebook page. I usually send out a mid-month newsletter as well to remind you of any specials or send an extra project your way. And just for subscribing, you will get my FREE GIFT “A Dozen Creative Gift Wrap Ideas”.  

Be sure you CONFIRM your subscription by clicking on the link in the email you will receive within a few minutes after signing up.

I’d love to visit with your through my newsletter!  Sign up right now while you are here!

Make a Card of Hearts for Valentine’s Day

Card of Hearts

When coming up with this Valentine card, my main focus was using the Stacked with Love Designer Washi Tape. I’ve partially hidden it now with my hearts, but you can still see the black and white tapes and the  white with gold hearts. Washi tape is so fun and easy to use in many ways. And it’s forgiving because you can pull it back up and tape it down again. Just tear off the ends, no need to be perfect with the scissors or wrap around the edge of the card.

After getting the Washi Tape where I wanted it, I proceeded to die cut a bunch of hearts with the Big Shot and the Hearts Collection Framelits Dies I used Basic Black, Real Red, and Whisper White card stock as well as the Gold Foil Sheets and the Champagne Glimmer Paper  (or you could use the Gold). Then I just played around with the placement of the hearts until I was satisfied with the look. But THEN I got excess glue on the gold foil heart from the glimmer heart moving out of place when I put it upside down to add the Stampin’ Dimensionals – so I had to partially cover it with a small red heart! The greeting is from And Many Morea great stamp set with many phrases to use.

The card is layered on a Gold Foil Sheet and then onto Basic Black for the card base. If you are running short on the gold foil, you can cut out a piece of the center of the gold foil layer which will be hidden underneath the card layer.

Surprise your friends and loved ones by making a BUNCH of valentines and mailing them out! You never know what an impact a handmade card in the mail might make on someone! Everything these days is digital and email and text messages and all that, but a real card or letter in the mail is something special – and always has been. Make someone’s day special when they find a card from you in their mailbox!

Stampin’ Up! Weekly Deals February 3 2015

Stampin' Up! Weekly Deal Feb 3 2015

New Stampin’ Up! Weekly Deals out today until next Monday, February 9. The items that jump out at me of course are the three punches! The Ornate Tag Topper Punch is in the Occasions Catalog right now! And what’s more timely right now than the Hearts Border Punch and the Sweetheart Punch for Valentine’s Day, but really hearts are good year round.

At Leadership last week, Carrie Cudney of the Stampin’ Up! Home Office made a cute project using just the bottom of the Hamburger Box Die to hold cute little Cheerful Critters Notecards. Here is a photo from my laptop screen as I was watching from home!

Hamburger Box Die Note Card Holder
Check out all the Stampin’ Up! products by going through your Annual Catalog and the Occasions Catalog, as well as the categories in the left sidebar in my Online Store. When you place your order, remember you get to choose a free Sale-A-Bration item with every $50 you spend!

Stacked With Love Valentine Card

Stacked With Love Valentine Card

It was announced at the Stampin’ Up! Leadership Conference last week that the best-selling item in the Occasions Catalog is the Stacked With Love Designer Series Paper Stack! Maybe because Valentine’s Day is coming soon or that paper stacks are so cute and handy in their size?! Today I chose this pattern from the paper stack and designed this valentine card around it. (Yes, the circles are offset in the design on purpose!)

Originally I was just going to have the one heart and the little banner greeting on this card, but once I finished this card, it didn’t look right.  Either the heart needed to be larger or it needed to be up higher. I almost let it go, but decided to try adding a heart or more sizes. Once I added the second heart, it felt balanced and much better! The first heart I planned to emboss, probably with the Perfect Polka Dots like the upper heart, but decided to just add some lines with the Gorgeous Grunge stamp set. I tore pieces of the Tea Lace Paper Doily to place underneath the heart. I added a flower from the Rosette Trim in the Artisan Embellishment Kit (love those flowers!). The pearl on the other heart is also from the Artisan Kit. The greeting is one in the January Paper Pumpkin Kit!

It’s fun and easy to make your own valentines, just get out some paper, stamps and ink and go for it! Add some simple embellishments and you’ve got an original, creative card that you made yourself! What more could anyone want?!

If you want the Stacked With Love Designer Series Paper Stack or any other stamping supplies, please visit my Stampin’ Up! Online Store. Don’t forget, with Sale-A-Bration you choose a free product with every $50 purchase!