Monthly Archives: September 2014

Beautiful New Stamp Set “You’re Wonderful”


You're Wonderful Stamp Set

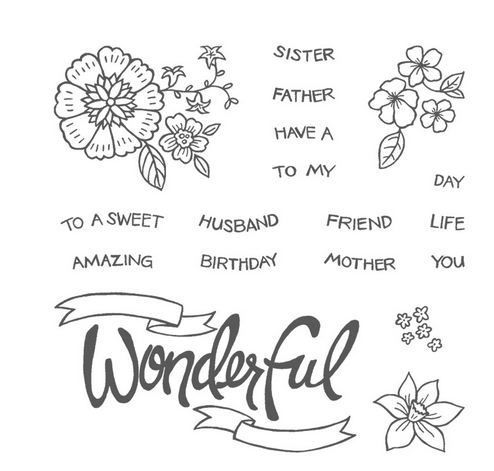
Surprise!  A beautiful new photopolymer stamp set for September from Stampin’ Up! this morning called “You’re Wonderful” #139158. You can read the story of the creation of this stamp set on the Stampin’ Up! Blog. Funny how the Undefined Stamp Carving Kit has actually led to the creation of new stamp sets as people discover their inner “designer” and creativity by carving their own stamp!

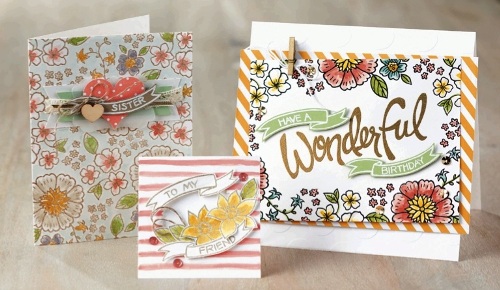
Here are some samples on the Stampin’ Up! blog using this lovely stamp set!

You're Wonderful Samples

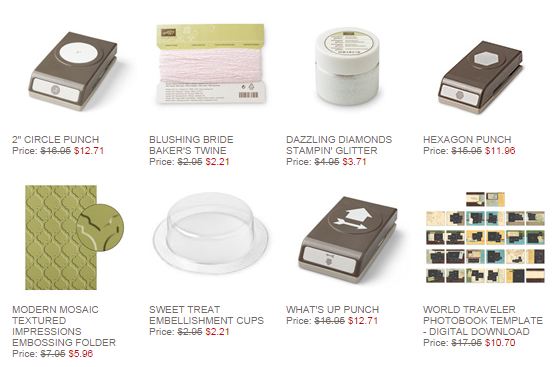
And here are the new Weekly Deals from Stampin’ Up! for September 9 – 15:

Stampin' Up! Weekly Deal Sept 9 2014

For sure I would say if you do not own the 2″ Circle Punch you should put that on your list! And what stamper can be without Dazzling Diamonds Glitter!  Be sure you have the 2-Way Glue Pen as well – works great for adhering the glitter! Dazzling Diamonds Glitter has long been the “go-to” product when your card needs just a little something for pizzazz. Everything else is good, too, just choose what you like!

To shop for any and all of these items and MORE, please visit my Stampin’ Up! Online Store HERE And I’m always happy to put an order in for you if you prefer.

Wondrous Wreath Easy Christmas Card

Wondrous Wreath Easy Christmas Card

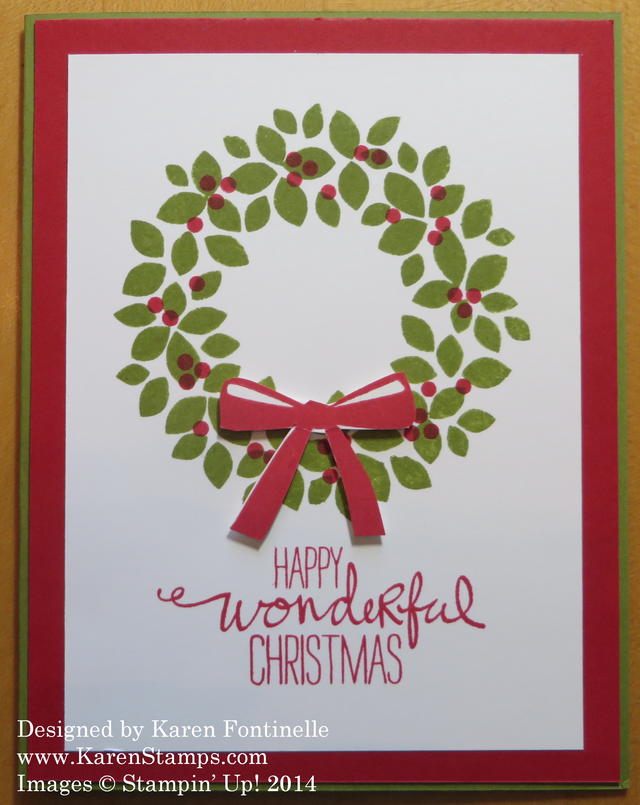
Make an easy Christmas card with the Wondrous Wreath Stamp Set. Yes, there are matching framelits and even the Bundle you can buy at a discount. But today I wanted just a quick card and made just this basic one – which I think turned out lovely in spite of myself! I intended to do the twostep stamping technique with the wreath, where I would ink up the wreath stamp but stamp it on scrap paper first and then stamp lightly on my paper, so I could overstamp with another leafy stamp to make some darker wreath leaves.  But I forgot. This wreath is full-strength Old Olive, overstamped with the red berries. The bow is stamped separately and cut out with Paper Snips and mounted on the wreath with Stampin’ Dimensionals. The greeting comes with the set and even includes a sentiment for inside the card, which is often lacking. The Holiday Catalog Christmas sets this year do include sentiments to use inside the card.

My point in making this card is that if you want to just use this stamp set the simple way, you can still make a beautiful card.  If you want to jazz it up by die-cutting the wreath and doing all sorts of fancier things to make a card, you certainly can – but you do not have to. Even keeping it simple, you could add drops of Crystal Effects on the berries to make those shine a little or add a dab of Dazzling Details or Dazzling Diamonds Glitter. Change the colors of the card base and layer.

Don’t Forget!

Last day for Stampin’ Up! Weekly Deals!

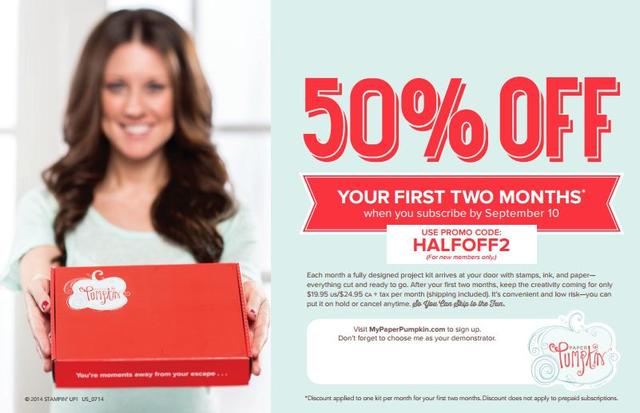
Sign up for the Paper Pumpkin papercrafting kit by Wednesday, September 10th to take advantage of the 50% off your first two months offer!  Use Promo Code HALFOFF2. Your first kit in the mail will be shipped by mid-September so you can get crafting!

Shop online at my Stampin’ Up! Online Store HERE any time!

Work of Art and Freaky Friends Halloween Card

Work of Art and Freaky Friends Halloween Card

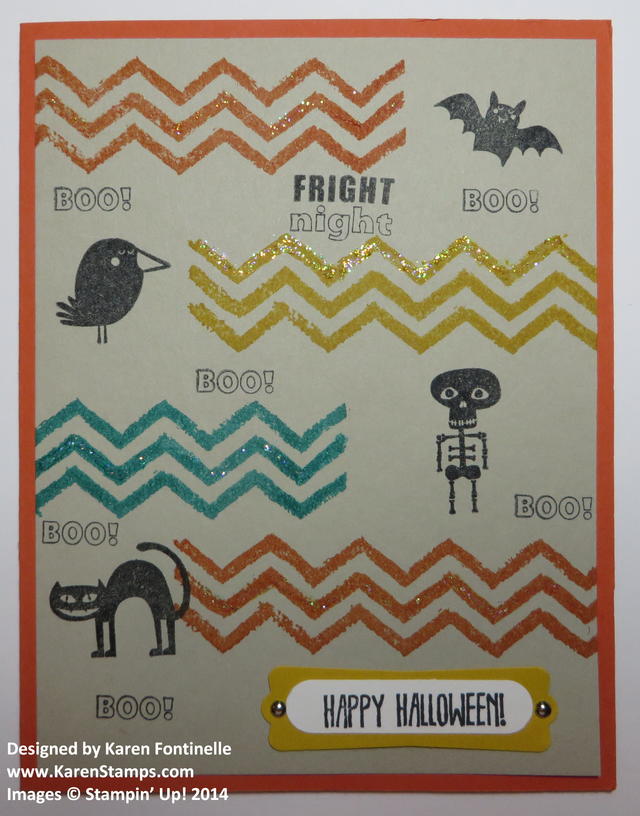
Sometimes you never know what you will come up with when you are stamping! I had already made a card with the Work of Art Stamp Set and thought maybe I could make a Halloween card with it. Maybe I could use the small figures in the Freaky Friends Stamp Set. And when I looked through my stamp sets for Halloween words, I liked the small-sized words in the Project Life stamp set, Holiday Cheer, The “Boo!” was fun to stamp so I stamped it more than once! The “Happy Halloween” is from the And Many More Stamp Set. For a little sparkle, I added some Dazzling Details over some of the lines.

Don’t forget!!  Just a few more days to get in on the Paper Pumpkin monthly papercrafting kit that comes to you in the mail in a cute red box at 50% off your first two months!!  Just use the Promo Code HALFOFF2. Regular price, which includes shipping, is $19.95 a month, so for only $10 a month, you can enjoy a surprise kit that will come in the mail to you complete with all supplies you need except adhesive. No thinking, no getting out supplies, just open the box and enjoy! To take advantage of this 50% off offer, you must sign up by September 10th! That is the last day to get this great deal!  It’s not just a great deal, it is a FUN deal!  You deserve it. Cancel or “pause” your subscription at any time, just do it by the 10th of any month to stop that month’s delivery.

Paper Pumpkin Box

Paper Pumpkin 50% Off Special

Sign Up HERE: https://mypaperpumpkin.com/en/?demoid=54345

Get Your Paper Pumpkin Kit HERE! Use Promo Code HALFOFF2


Paper Snips and the Motley Monsters DSP to Make a Halloween Card!

Motley Monsters Halloween Card

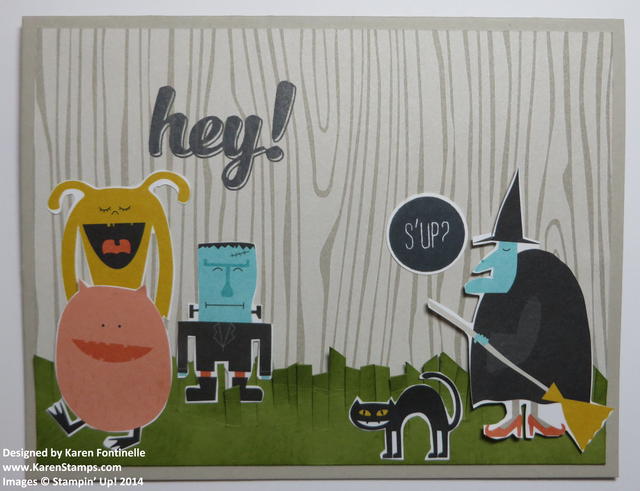
This is what comes from looking at the Motley Monsters Designer Series Paper, which has such cute Halloween monsters on it, and thinking, “Why not just cut out some of these cuties with my Paper Snips and make a Halloween card that way?!” And also looking through my stamp sets for a greeting and seeing this “S’Up?” stamp in the set Hi There. It struck me very funny at that moment! I used the Fringe Scissors for the grass and sponged it a little bit with Old Olive ink. The woodgrain background is actually the opposite side of the paper with the monsters on it.

Just a fun, silly card for Halloween!

If you love Halloween as much as I do, you’ll probably want to shop the Halloween and fall stamps, paper and embellishments in the Stampin’ Up! Holiday CatalogJust shop at my Stampin’ Up! Online Store any time!  AND be sure to check the Clearance Rack because there are a few Halloween items from last year on there at a great bargain!  Just add them to your order!

Using Blackberry Bliss and Color Me Autumn For a Fall Card

Blackberry Bliss and Color Me Autumn Fall Card

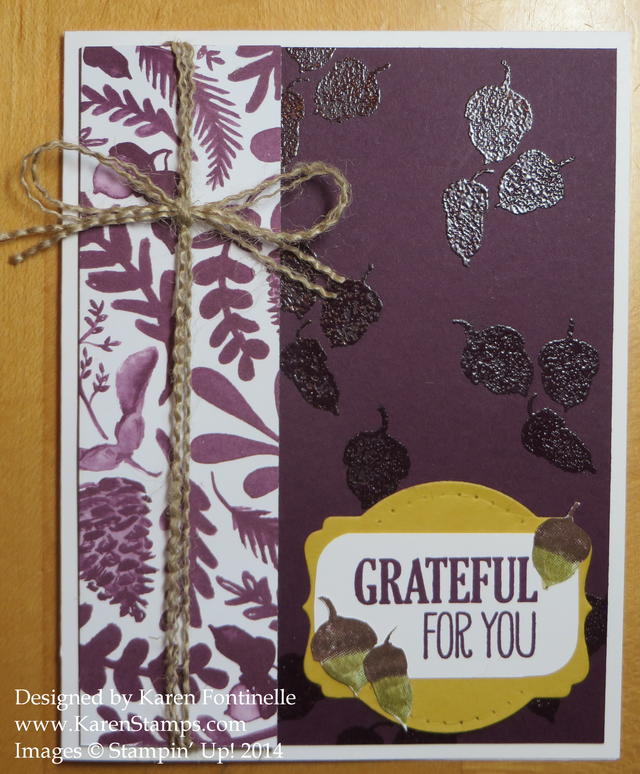
To get started on this fall card, I pulled out the package of Color Me Autumn Designer Series Paper because the colors and patterns on this paper are just so beautiful! I decided to use a strip of this piece with Blackberry Bliss art on it. After that I kind of lost my “mojo”! I stamped and stamped acorns using my Stampin’ Write Markers to color them, die cut them with various framelits, layered them on different colors of card stock – nothing was quite right! I also stamped several leaves and cut them out with my Paper Snips, but they didn’t seem to have a place on this card. I tried coloring just the word “Grateful” and stamping that on the banner stamp, but that didn’t do it. I tried different framelits and punched out the group of acorns with the 2″ Circle Punch.

Finally, I decided to cut out the three acorns and use them as accents on the greeting. The greeting was stamped on a rectangular piece of Whisper White card stock, but then I rounded the corners with the cute little Project Life Punch Corner. I used the Deco Labels Framelits Die to cut out a piece of Hello Honey card stock for the layer for the greeting. I even did a little paper piercing on the top and bottom curve. Then I adhered the little cut out acorns around the greeting.

For one more thing, I decided to emboss the acorns on the Blackberry Bliss layer with Clear Stampin’ Emboss Powder. It didn’t photograph too well, but it just gives a little dark shiny texture to the background. And then, one of my favorite things to do, I frayed a couple strands off the Burlap Ribbon to tie around the designer paper on the side.

It took me awhile with this card to get it to all come together!  Sometimes that happens and sometimes you can come up with a card in two minutes!  Just keep playing and you’ll know when you have it right!

For any of the supplies to make this card, please visit my Stampin’ Up! Online Store.

Watercolor Winter Simply Created Kit Cards

Watercolor Winter Pieces

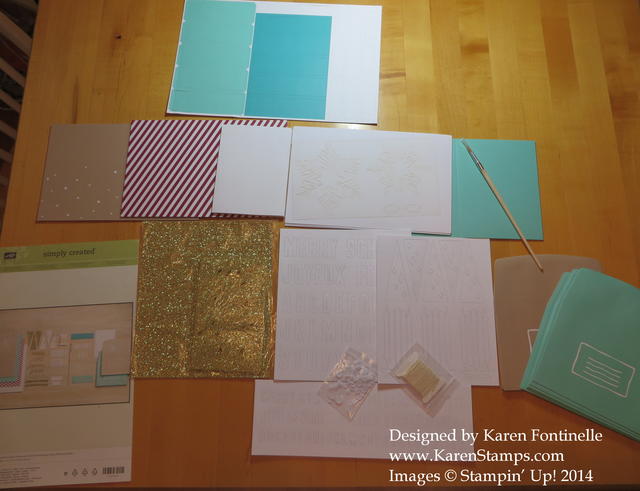
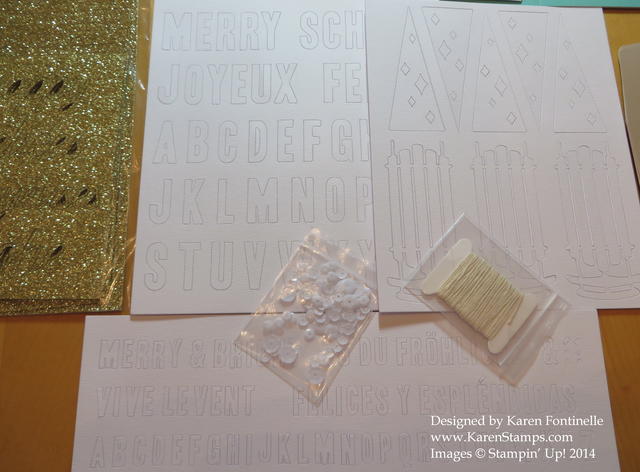
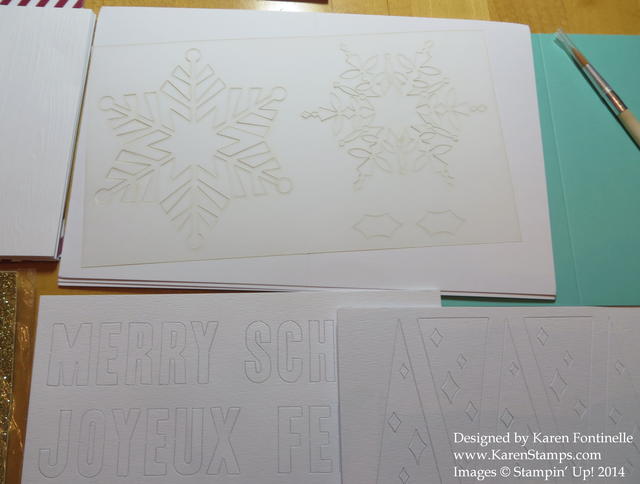
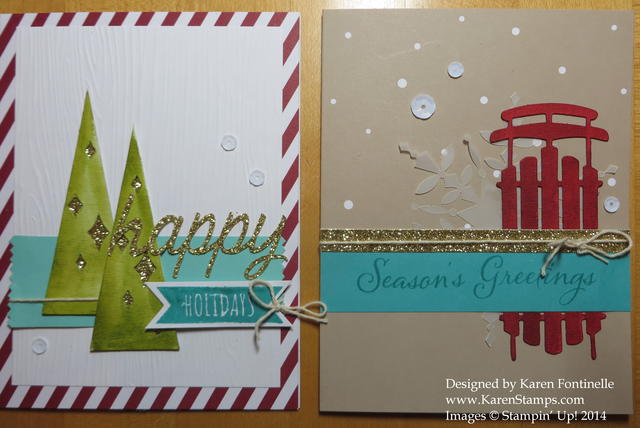
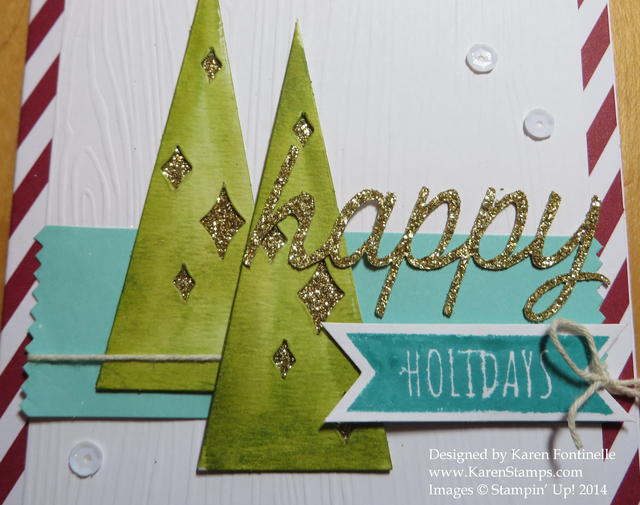
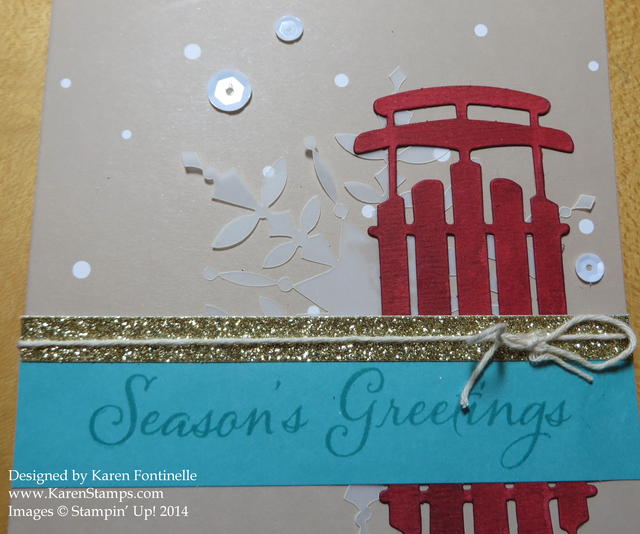
I was surprised when I finally opened up the Watercolor Winter Simply Created Kit package and saw ALL the pieces that come in it!  It took up half my kitchen table to lay everything out to show you! The kit has enough materials to make 20 cards and includes envelopes. You DO have to have some reinkers with which to watercolor the pieces, adhesive, and a couple of clear blocks for the stamps. I have to be honest and say I wasn’t pleased with the directions they put in the kit, and I think they should put color photos of each card so you have a better idea what to do.  I made one of each of two of the cards for today exactly like the directions say, which you will see below. I think when I strike out on my own making similar cards but not following the directions I will enjoy it more. I think it helps to lay everything out on the card before adhering parts to see if it all fits and see if you like it and which kind of adhesive you want to use. At the very end you will see a Stampin’ Up! video that helps in seeing how to make the cards.

Watercolor Winter Pieces2

Watercolor Winter Pieces3

Watercolor Winter Trees and Sled Cards

Watercolor Winter Tree Card closeup

Watercolor Winter Sled Card Closeup

I love the look of these cards, but you do need more things than come in the kit. You also need a Bermuda Bay ink pad and a greeting, like the Watercolor Winter Too stamp set that coordinates. But with a little patience and the right supplies, you can make a set of beautiful Christmas cards out of this Watercolor Winter Kit,whether following the directions or going out on your own!

Stampin’ Up! Weekly Deal Sept 2, 2014

Stampin' Up! Weekly Deal Sept 2 2014

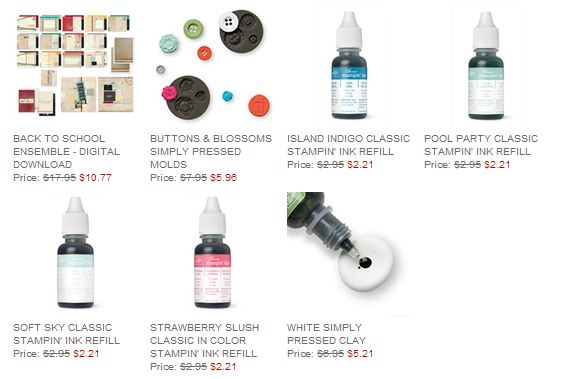
Here are the current Stampin’ Up! Weekly Deals for the week of September 2 through September 8. If you haven’t tried the Stampin’ Up! clay, this might be your chance!  Get the molds and the reinkers to color the clay – or get the reinkers for your ink pads while they are discounted! And how timely is the Back To School Ensemble Digital Download? Whether you have little ones going off to school about now or you still have all those “first day of school” photos tucked away in boxes somewhere, you can make a photo book or scrapbook pages, digital or traditional, with this Back To School download. Use it with My Digital Studio or whatever design program you have on your computer. You CAN get a trial version of My Digital Studio to use for 30 days and try out. It’s the full software and has some content and you can purchase any downloads you would like to use with it. But my suggestion, for the low price of $19.95, just buy the software and go for it!  You get an amazing amount of art and content on that software! I suggest the digital download version of the software My Digital Studio is easy to learn just by playing with it, plus there are plenty of tutorials online from Stampin’ Up!

Check out all the Holiday Catalog products and more in my Stampin’ Up! Online Store HERE!

If I missed sending you a Holiday Catalog or you are interested in Stampin’ Up! products and don’t have a Demonstrator, just email me at Karen@KarenStamps.com and I’ll get one out to you.  The best way to enjoy the Holiday Catalog is to hold it in your hands! But you can also see it online HERE.

Happy Labor Day!

Labor Day

This Labor Day weekend marks the end of summer. Some people go on trips this weekend, some go to the beach, some shop the sales, and some like us just relax and try to catch up on some things we need to do. I hope that whatever you are doing, you are enjoying yourself!,

Now that it is September, don’t forget about the ongoing Paper Pumpkin promotion. Until September 10th, you can get two months of Paper Pumpkin, the papercrafting kit in the cute red box that comes to you in the mail, for half-price! Just use Promo Code: HALFOFF2. Each kit normally costs $19.95 a month, which includes shipping, so basically you can get two kits for $10 each month during this special. That is WELL worth it as the kits have been getting better and better each month!  Chances are you will have some materials left over after you make the project to make other things.  You can follow the Stampin’ Up! directions for the project in the box or you can change it up however you like.  Everything is included except adhesive (and sometimes you even get glue dots or dimensionals in the kit anyway!).

Labor Day marks the start of another “stage” in the year, whether it means the kids are all back in school, summer is over, or it is time to get back to a “regular” schedule for us. Why not treat yourself to something new, just for you?! It’s time to take about 30 minutes for yourself for a little creative time without having to come up with a plan, a design, or dig out your materials! If you want to, you CAN do all of those things even with your kit, but you can keep it simple, too.  Paper Pumpkin kits are great for new crafters, non-crafters, people who don’t have a boatload of supplies, stampers WITH a boatload of supplies, crafters who never tried stamping and papercrafting, kids, grandmas, aunts, nephews, sons, you name it! Send a kit to your new college student for a little break in studying!

No obligation, no risk! Cancel your subscription if you need to OR just “pause” it for a month or two and then restart.  Order extra kits if you want to share one with a friend or someone special or for a gift. Just make your decision by the 10th of any month to take effect that month. And if you are ever not happy with a kit, please call Stampin’ Up! and speak to one of the delightful support people and they will try to make things right for you.

To order your Stampin’ Up! Paper Pumpkin Kit, just click HERE! On the sign-up page, just enter the Promo Code HALFOFF2 in the little box! Each month is a surprise (although I do know what the September kit is, so if you must know in order to make a decision, email me and I can let you know). It’s not always cards and it’s not always “not cards”.

Go ahead and sign up today  for the Paper Pumpkin Special so you don’t forget before September 10th! Get your first two months at half-price with this code HALFOFF2.
Paper Pumpkin 50% Off Special

Click to Get Your Kit!