Monthly Archives: March 2014

Let’s Get Digital with My Digital Studio During Sale-A-Bration

Let's Get Digital Bundle

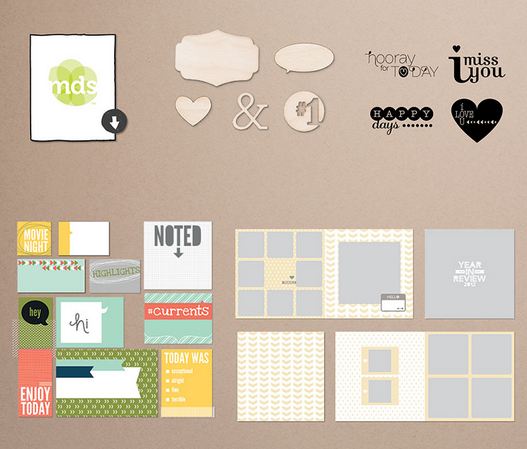
Don’t forget about the My Digital Studio products during Sale-A-Bration! My Digital Studio is the digital papercrafting software from Stampin’ Up! You can make way more than just scrapbook pages digitally. This is the Let’s Get Digital Bundle offered in the Sale-A-Bration Brochure as a suggestion to get to the $50 price point to earn a FREE Sale-A-Bration product. After purchasing this, or any other current Stampin’ Up! products or My Digital Studio products, you can choose a FREE Digital Ensemble during Sale-A-Bration (more stuff to play with on My Digital Studio!) or any other free product in the brochure.

Here is a video that gives you an inside peek at making a card in My Digital Studio. One of the things you will see is recoloring a stamp, one of the newer features! Closer to the beginning of the video you will see a color put behind a see-through word in order to change the background color. You can send layers forward and backward to achieve what you want. The best way to learn My Digital Studio is to get in there and play! It’s all pretty intuitive and you will learn it all in no time!

You can try My Digital Studio free for 30 days, although at a price of only $19.95 I feel confident you will like it when you try it and you should just go ahead and purchase the MDS software, either as a download (recommended) or the disc. Let me know if you have any questions.

)

Spring Is Coming! Houston Azalea Trail Cute Things!

River Oaks Azalea Trail 2014

Last weekend was the annual River Oaks Garden Center Azalea Trail 2014. We always like to go, especially to see the beautiful homes in that area of town. Usually you get to walk through a home and then outdoors to see the yard and gardens. Photographs are not allowed inside, unfortunately (I saw lots of things inside I would have loved to have photos of!) but they are allowed outside.

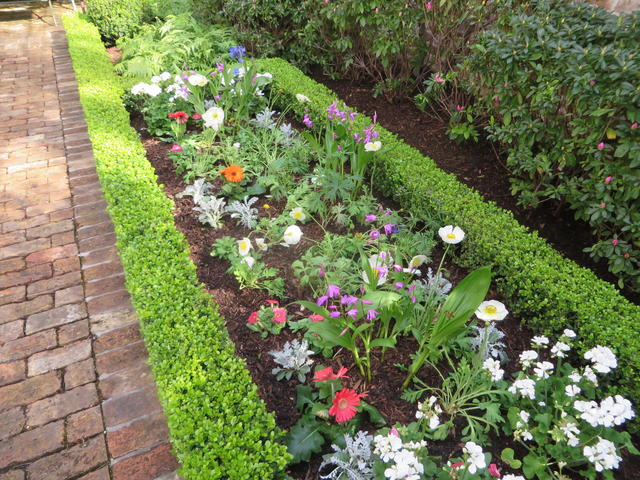
Here are some of the “cute” things I saw on the Azalea Trail! Just enjoy (I know you will!) or perhaps they will inspire some creative ideas, who knows?! Paper flowers are so IN these days, so no reason we couldn’t duplicate some of these ideas! But these are real, fresh flowers!

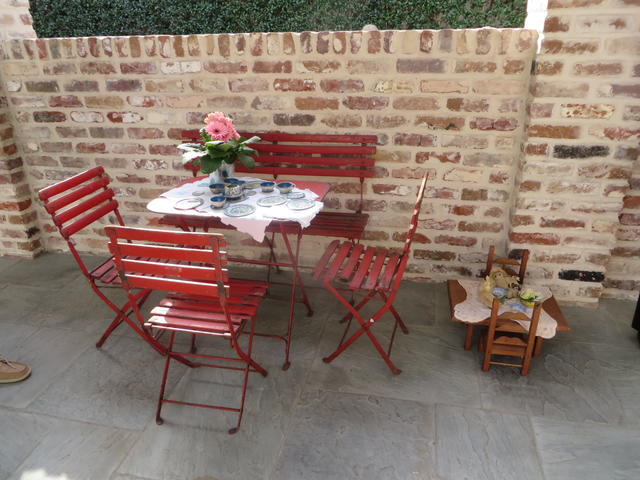
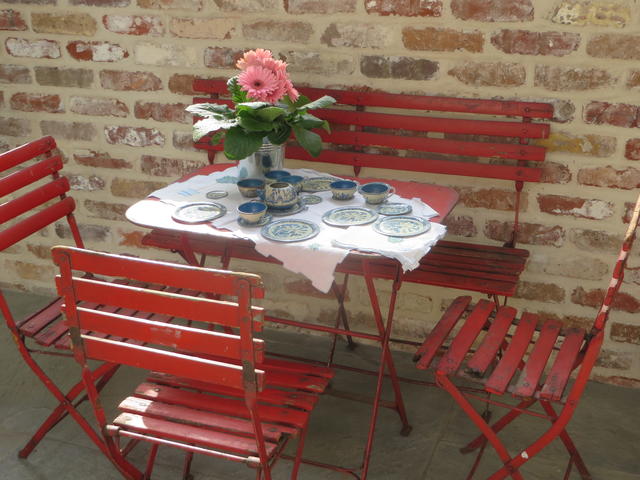
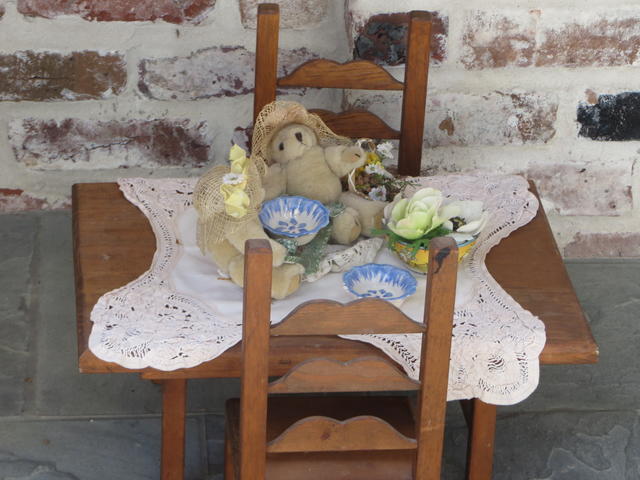
Loved these tables and chairs out on a patio!

River Oaks Azalea Trail 2014

River Oaks Azalea Trail 2014

River Oaks Azalea Trail 2014

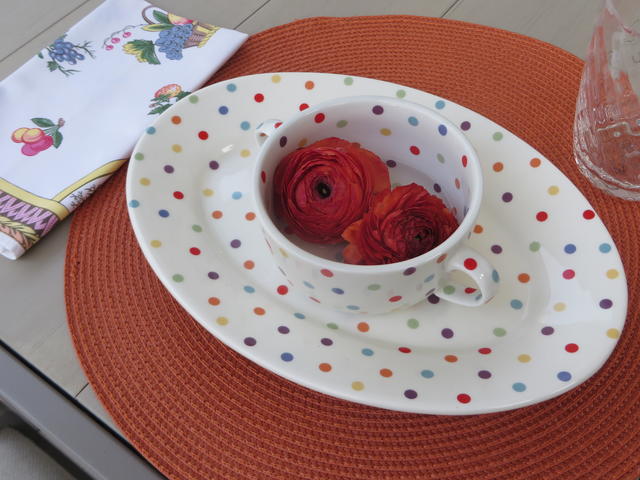
Cute polka dot dishes at a place setting on the patio! Make a card or bag with polka dots!

Polka Dot Dishes Azalea Trail

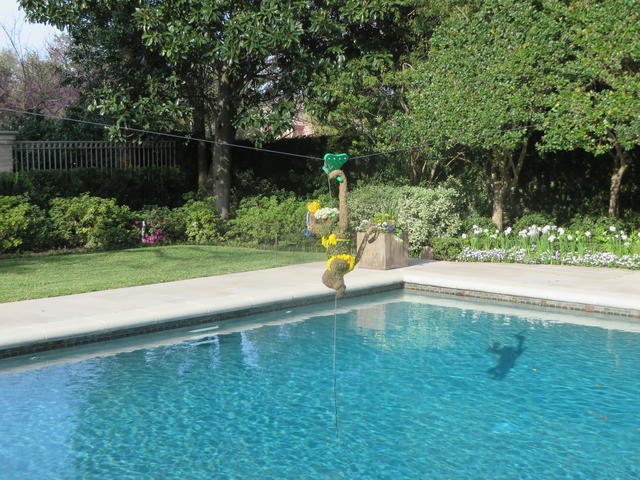
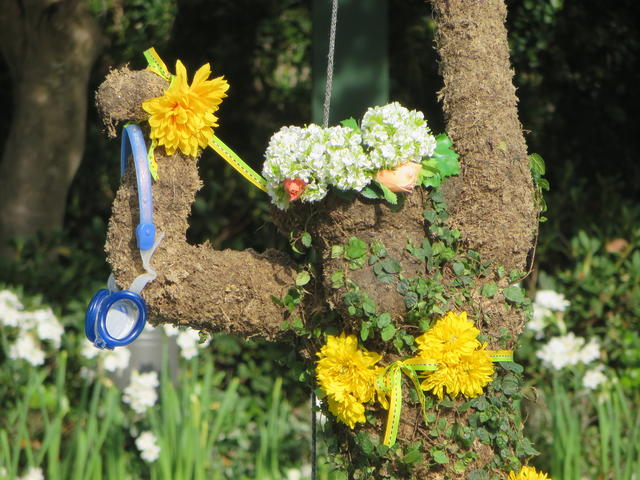
 Cute topiary on a zip line over the pool!

River Oaks Azalea Trail Zip Line Topiary

River Oaks Azalea Trail Zip Line Topiary

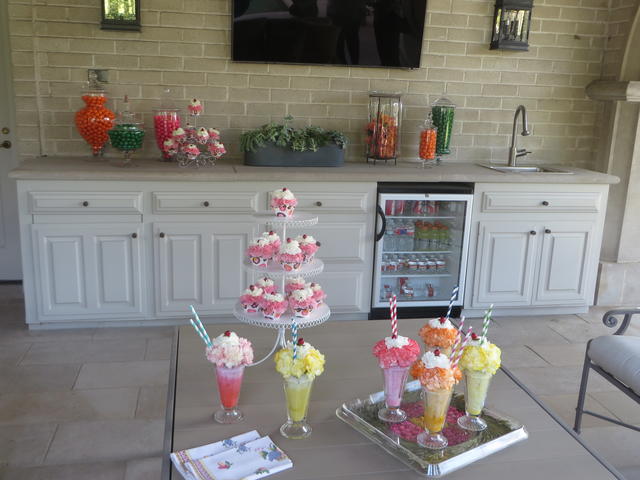
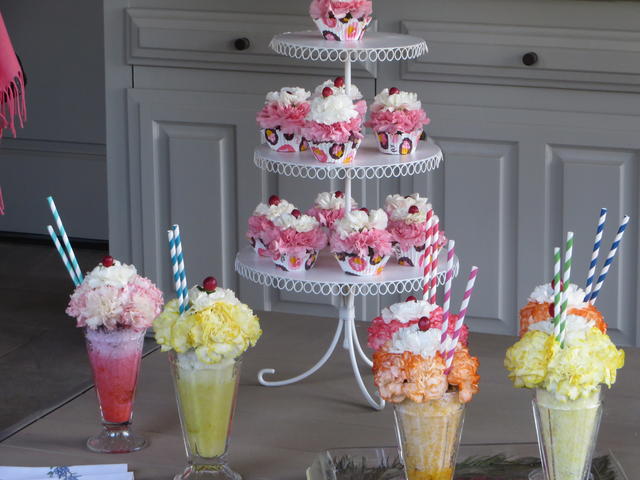
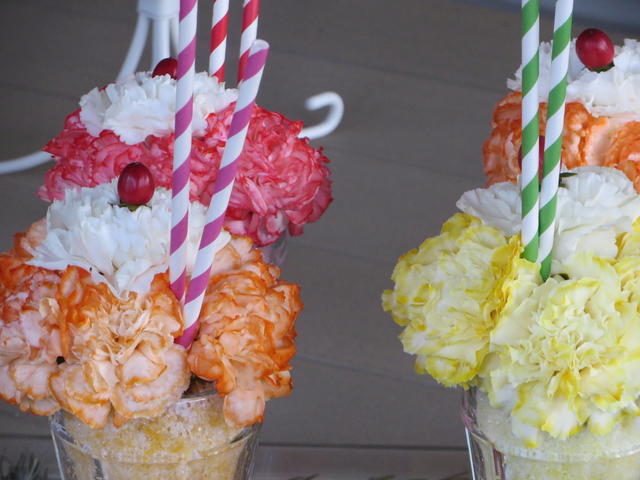
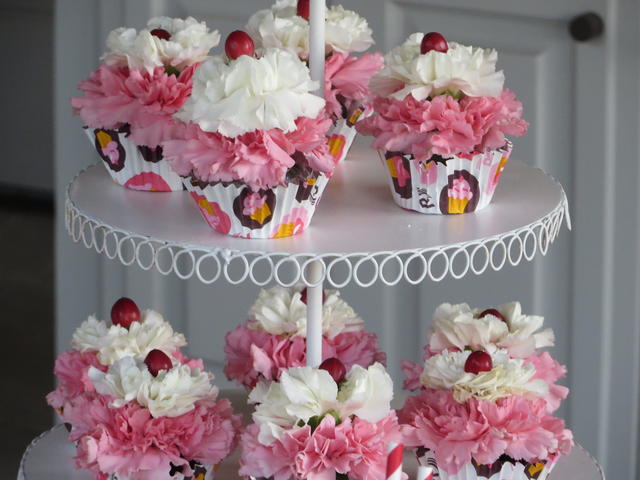
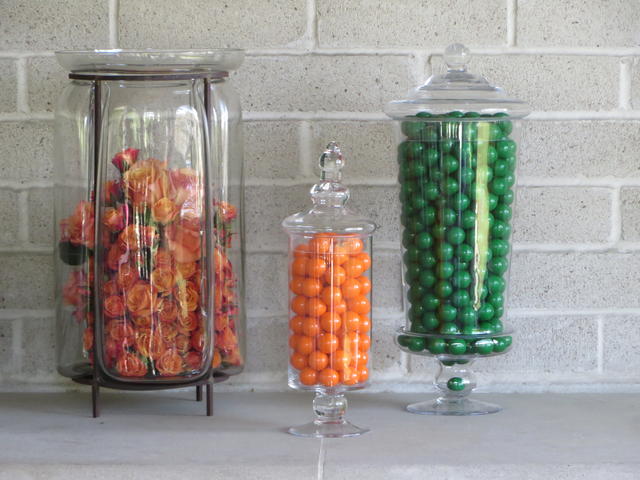
My favorite! Glass jars full of gumballs or candy, cupcakes made out of flowers, and ice cream sodas made from flowers! All out on a patio looking like it is ready for a party!

Azalea Trail Patio Flower Desserts

Azalea Trail Patio Flower Desserts

Close-Up of Flower Sodas

Flower Cupcakes on Azalea Trail

Azalea Trail Candy JarsI hope you enjoyed these pretty photos and that they give you some kind of inspiration. For example, you could use the photo right above to make a card using orange and green – or stamp orange and green polka dots – or punch out orange and green circles – whatever it is that strikes you! Have some fun today looking for inspiration and think ahead to spring!

New Stampin’ Up! Weekly Deals & Sweetie Pie Stamps & MDS Downloads!

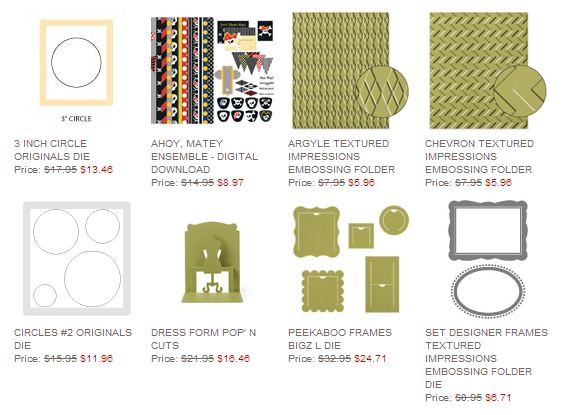
Here are the new Weekly Deals from Stampin’ Up!, good today through Monday, March 17. Click the image below!

Stampin' Up! Weekly Deal Mar 11 2014

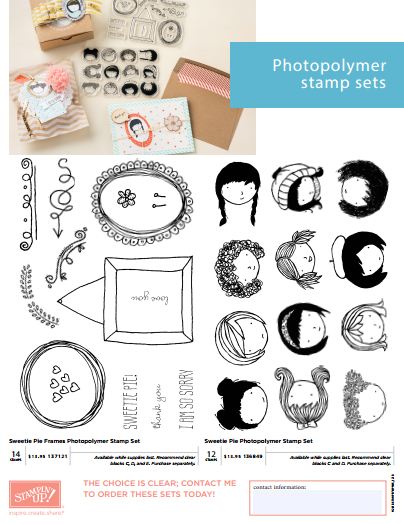
As an extra surprise, here are some new Photopolymer Stamps (clear stamps for clear blocks!) designed by a Stampin’ Up! employee! Read her story about the stamp set on the Stampin’ Up! blog at www.Stampinup.com. Click the image below to enlarge the flyer!

Sweetie Pie Photopolymer Stamp Sets

Sweetie Pie Frames Photopolymer Stamps

Sweetie Pie Photopolymer Stamps (faces)

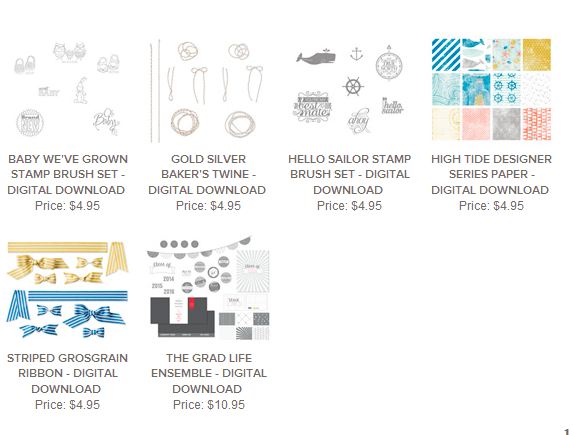
And even some new downloads for My Digital Studio, our Stampin’ Up! digital papercrafting program. Buy or try the software for My Digital Studio and then you can always pick up new downloads you like as you go along. Click the image below

MDS Downloads Mar 11 2014

Get all of these Stampin’ Up! products and deals at my Stampin’ Up! Online Store HERE. Everything counts toward a $50 purchase which earns you a FREE product from the Sale-A-Bration Brochure! Hurry! Sale-A-Bration ENDS March 31, 2014.

Where Would We Be Without Alexander Graham Bell and the Telephone?

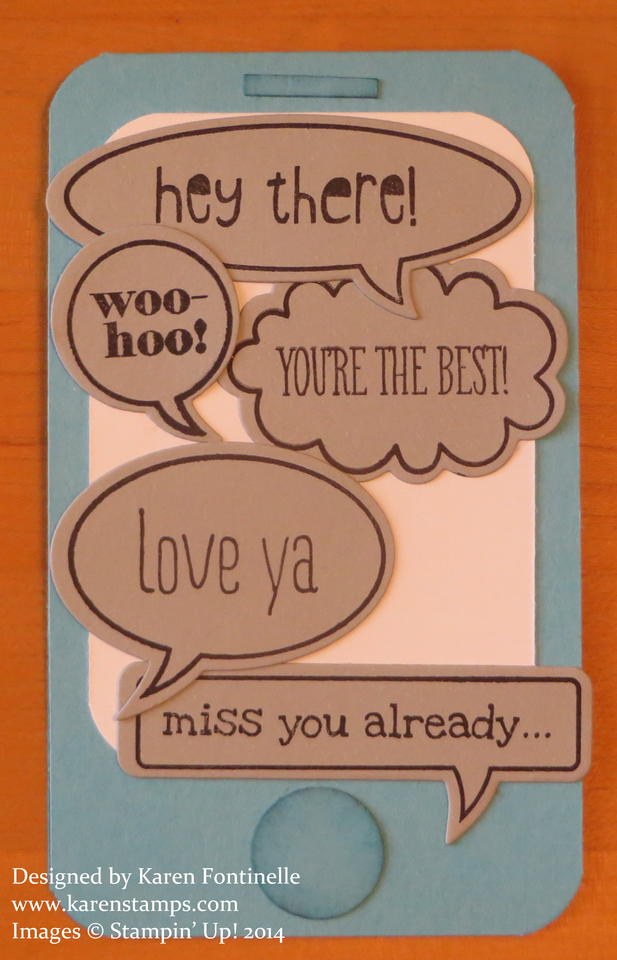
Punch Art iPhone

Today is the anniversary of the first telephone call by Alexander Graham Bell in 1876, just three days after he received the patent for his invention. This is the day he spoke the famous words into the transmitter, “”Mr. Watson—Come here—I want to see you!” and his assistant, Mr. Watson, was able to hear them in the next room. He had an interest in the deaf as his mother and the woman he married were both deaf.

Do you think Alexander Graham Bell would be amazed at how far his invention has taken us? Even from the time I was growing up the telephone has changed so drastically! Do you remember the rotary dial, party lines, and toll calls a few miles away? We used to call my grandparents by letting the phone ring only once as the signal they should call us back so the phone call wouldn’t be counted against our monthly allotment. I think maybe it was called the 40-call phone or plan or something. And of course the phone company owned the phones and you would have to wait for them to come out to install one or fix one.

To commemorate this telephone anniversary, I found this punch art smart phone made by a Canadian demonstrator named Allison.  She made them for Valentines. I thought they would also make darling birthday cards for teenagers, and I might just make another one for that purpose! It’s simple to cut the paper and the words come from the Just Sayin’ Stamp Set and the Word Bubbles Framelits Dies. You can also buy this stamp set and framelits in a bundle and save 15% by buying them together.  Choose wood- or clear-mount.

  • To make the phone, cut a piece of card stock 10″ x 3″, score at 5″. Use the 3/16″ Corner Rounder punch to round the edges.
  • Cut Whisper White for the screen 3 3/4″ x 2 1/2″. Round the corners.
  • Punch a 3/4″ circle for the button and sponge around the edges.
  • Cut a tiny strip for the ear piece at the top.
  • Stamp whichever sayings you like from Just Sayin’ and die cut with Word Bubbles Framelits. I used Smokey Slate card stock and Black Stazon ink.

This is a fun and easy card to make!  I hope you will try one and think about the changes in the ways we use telephones!

To purchase that great bundle with the Just Sayin’ Stamp Set and the Word Bubbles Framelits, just go to my Stampin’ Up! Online Store. Remember, your $50 purchase counts toward Sale-A-Bration and you will get to choose a free product from the Sale-A-Bration Brochure! Only a few weeks left! Sale-A-Bration ends March 31.

Make Your Own Tulips Card

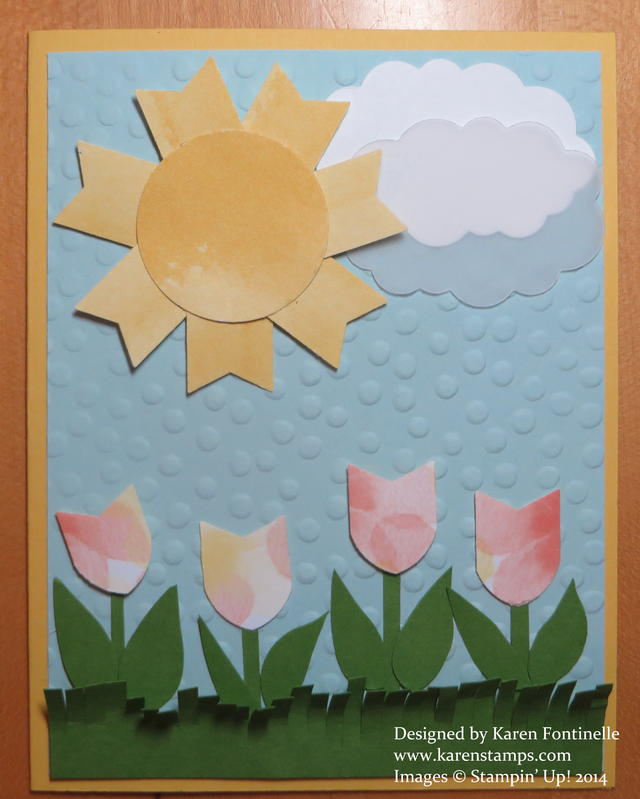
Make Your Own Tulips Card

I started off making this card using the Banner Punch to make a sun, like I have seen other people doing online. The Banner Punch is one of the FREE items you can get in March during Sale-A-Bration with a $50 Stampin’ Up! purchase! Just punch a circle (mine is 1 3/8″) and punch some banners to make the sun’s rays. Such a clever idea! I used the Watercolor Wonder Designer Series Paper since it has the color variation already on it in the design. The background Soft Sky paper is embossed with the Decorative Dots Embossing Folder, also in the Sale-A-Bration Brochure. And I hadn’t even played with the Word Bubbles Framelits enough to realize one of the dies looks just like a cloud! I die-cut one in Whisper White and noticed a scrap piece of Vellum card stock on the table so I die cut that piece for a “wispy” see-through cloud!

Since my backordered Fringe Scissors came the other day, I snipped some grass for the bottom of the card. If you are waiting for Fringe Scissors they will probably be on the way soon! They are fun to play with!  While playing with the Banner Punch, I thought the banners, with rounded corners on the bottom, could look like tulips! I have an old corner rounder punch, but this is the current 3/16″ Corner Punch. You could also just round off the corners with your Paper Snips.

If you punch the little banner first and then try to round the corners, you’ll have a hard time holding on to that little piece. You can cut a longer strip 5/8″ wide, round the corners first, then insert it into the banner punch by holding the rounded end sticking just the end you want punched into the banner from the top rather than the side of the punch, so just the “tail” end of the banner will be punched.  That way you can make your “tulip” the length you want it. Cut your tulip stems by hand.  The leaves I punched with the Bird Punch but then trimmed them by hand because I needed the leaves smaller. In punching the “tulips” I was just practicing with scraps of the Watercolor Wonder paper when I realized that the other side of the yellow had the soft varied colors that would good as flowers.

So after making the sun with the Banner Punch, making tulips with the Banner Punch was just a happy accident!  Sometimes you never know what you will end up creating when you sit down to stamp!

For any punches or stamping supplies you need, and to take advantage of Stampin’ Up!’s biggest promotion of the year, Sale-A-Bration, be sure to shop at my Stampin’ Up! Online Store!

Stampin’ Up! Peachy Keen Card

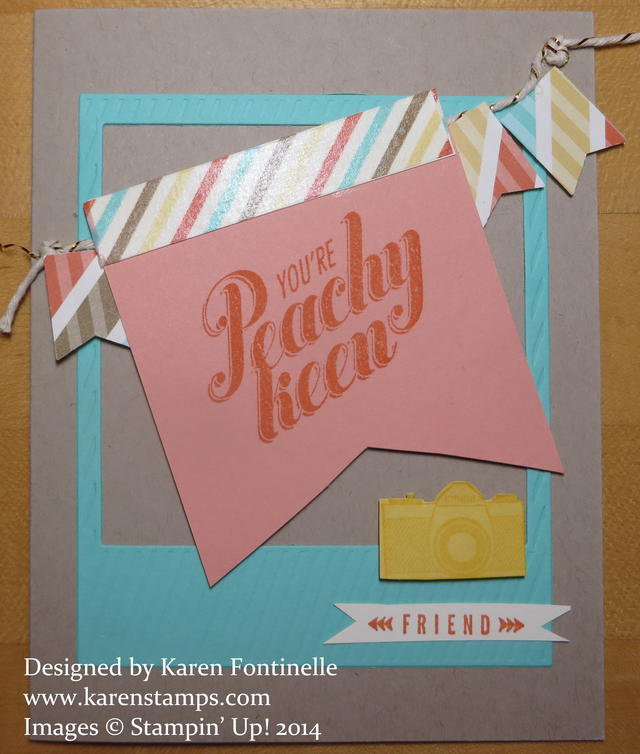
Stampin' Up! Peachy Keen Card

This Peachy Keen card is an example of how the Stampin’ Up! catalogs are really idea books. I simply copied this card from the Stampin’ Up! Occasions Catalog (except for using Crumb Cake as the card base!). I doubt I would have thought of all these elements without getting the idea from the catalog!  I used the On Film Framelits Dies to make the “polaroid-look” picture frame. If you look closely in the photo you can see the embossed diagonal lines. You can also ink up the framelit and that will make the lines more pronounced. The little banners I punched from the Retro Fresh Designer Series Paper with the FREE Banner Punch in the Sale-A-Bration Brochure!  This is the month for Sale-A-Bration which ends March 31 so don’t let it slip by! Just purchase $50 in current product from Stampin’ Up! and choose a free gift from the SAB Brochure. The little camera is stamped and then cut out with Paper Snips. I used a little Retro Fresh This and That Designer Washi Tape on the top of the banner. The stamp set is called Peachy Keen, amazingly enough!

All of these products are together in the same suite, Retro Fresh, in the Occasions Catalog.

If you would like to make this Peachy Keen card and more projects just go to my Stampin’ Up! Online Store to check out all these products and more!  Be sure to look at the Weekly Deals and Clearance Rack to find some bargains!

Make the World a Better Place with Starburst Sayings and Retro Fresh

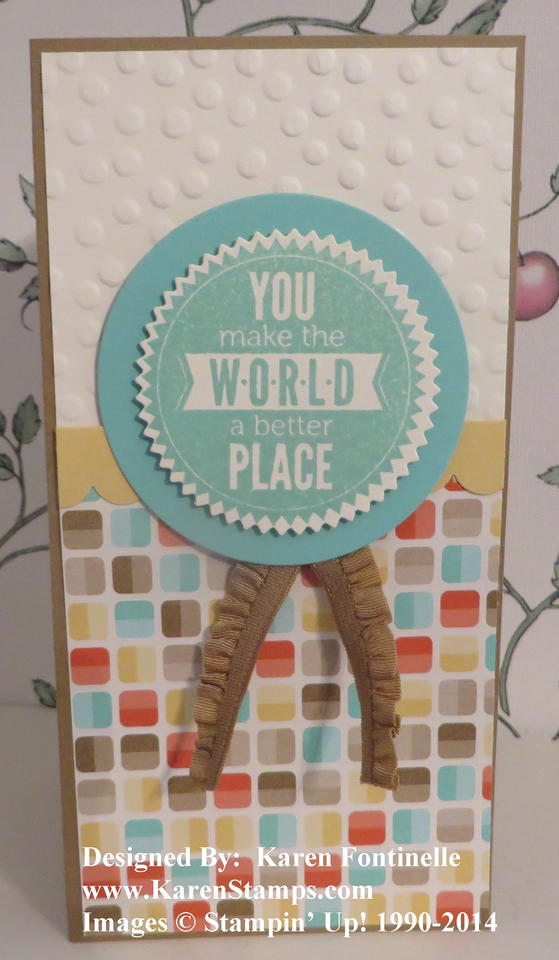
Starburst Sayings and Retro Fresh

I can’t believe I haven’t really played with the Retro Fresh Designer Series Paper but it came out today to make this card along with the Starburst Sayings Stamp Set and Starburst Framelits Dies.  I decided to make a 6″ tall card.  Just cut your card base 3″ x 6″ and fold in half. Just something different. I also used the Decorative Dots Embossing Folder for the Very Vanilla piece on the top of the card.  You can get the Decorative Dots folder FREE with a $50 purchase during Stampin’ Up! Sale-a-Bration during March.  It’s really a cute folder! The scalloped strip is So Saffron.  The ribbon pieces are Baked Brown Sugar Ruffle Stretch Trim.

Just get out some designer paper and card stock and play!  See what patterns appeal to you that day and then see what the coordinating colors are that go with it.  Before you know it, you will have a lovely card or other project!

You can purchase the Starburst Sayings Stamp Set and the Starburst Framelits TOGETHER in a Starburst Bundle for a 15% savings!  Be sure you choose some Retro Fresh Designer Paper as well just because you will really like it!  You can find my Stampin’ Up! Online Store right HERE.

It’s Mardi Gras Time! Let the Good Times Roll!

Mardi Gras 2014 Card

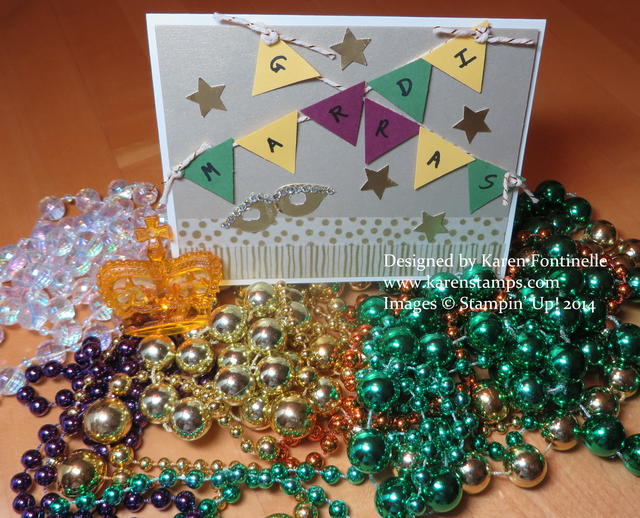
It’s time for Mardi Gras! Mardi Gras means “Fat Tuesday” in French and is the celebration the day before Ash Wednesday, when Lent begins. Mardi Gras is the last night of eating rich, fatty foods before the religious obligations of Lent. Of course everyone has heard of the parties and parades in New Orleans during Mardi Gras, but actually celebrations are held in lots of places. There are big, fancy parties with delicious food and parades with floats and throwing of beads and other trinkets. These are just a few of my beads, not from going to the real Mardi Gras, but from going to Mardi Gras parties for a few years. The man who hosted the parties was from Louisiana so the food was great and the live music great! Not to mention the little parade through the tables of the party when they would toss some beads!

My card is made from a base of Very Vanilla with a Brushed Gold card stock layer (hard to tell in the photograph). I decided to make little Mardi Gras banners with the Triangle Punch “strung” on Gold Baker’s Twine and then I just hand-lettered the banners. To jazz up the card a little I decided to add some Watercolor Wonder Designer Washi Tape at the bottom. I also punched a few stars from the Goil Foil. Can you figure out how I made the little mask? I folded a piece of the Gold Foil and stuck it in the wing piece on the Bird Punch, just so the fold line would not be cut. I thought it kind of looked like a mask! I dug out the retired Crop-A-Dile to punch a hole or two in the mask to make the eyes.  Then I added a string of Rhinestone Jewels to decorate the mask.

Make something with gold, green and purple today to celebrate Mardi Gras. The colors have meaning: purple for justice, gold for power and green for faith. There are lots of interesting articles online to read about Mardi Gras! It’s quite the day and celebration!

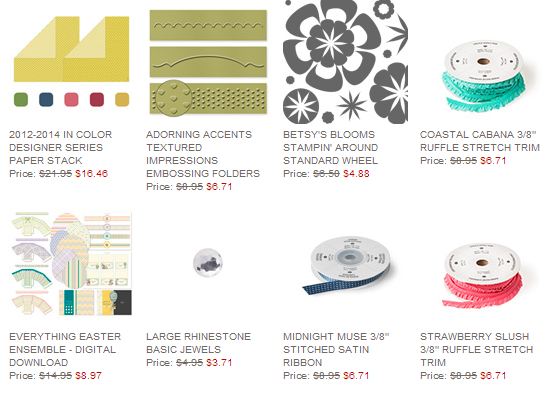
Here are the Stampin’ Up! Weekly Deals:

Weekly Deal March 4


These are good through next Monday night! Have fun shopping at my Stampin’ Up! Online Store!

About the Texture Boutique Embossing Machine

Texture Boutique Embossing Machine

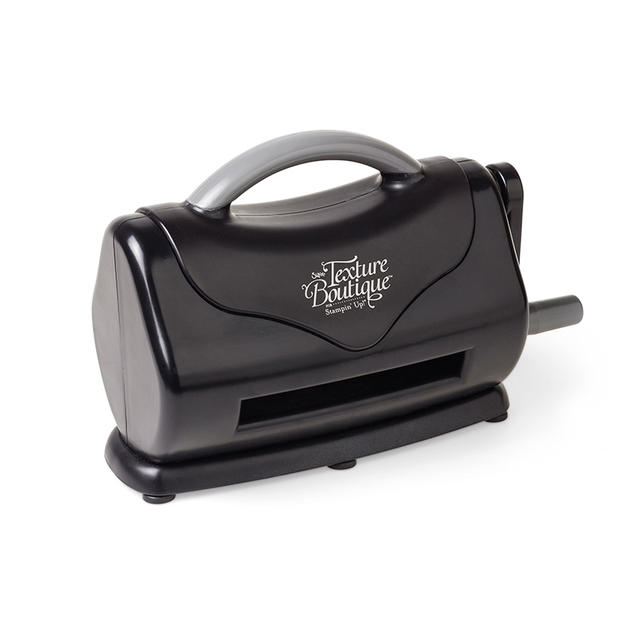
This handy-dandy Texture Boutique Embossing Machine has been having a few problems (in some cases), so of course Stampin’ Up! is working on solving those problems. Some people have had a problem getting a good embossed image with this machine, so Stampin’ Up! is working with the manufacturer to fix this issue. It does come with a shim, which you should be using if you do own the machine. This machine was planned to be introduced in the next new Stampin’ Up! Catalog, but since a certain number were ready early, Stampin’ Up! had an early launch after Leadership.

Stampin’ Up! will turn off the item code on March 8 so it will no longer be available to order until the new catalog is released while they work with the manufacturer on a permanent fix. If you are getting good embossing, then of course go ahead and use your machine. Or you might find that the less detailed embossing folders work just fine in your machine. I’ll keep you posted of any new developments.

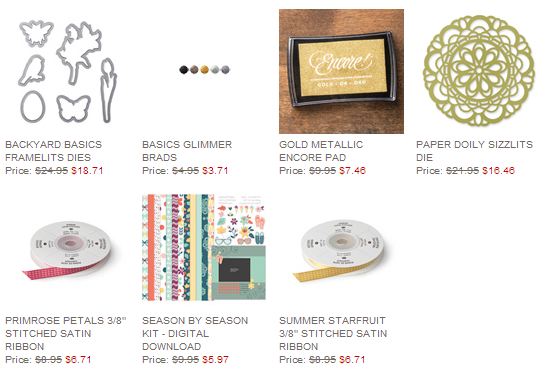
Don’t forget about the Stampin’ Up! Weekly Deals!  Today is the last day for this group! Just click on the picture to go to my Stampin’ Up! Online Store for more information on these deals!

Stampin' Up! Weekly Deal Feb 25 2014

These Weekly Deals and any other current Stampin’ Up! products count toward Sale-A-Bration, so be sure you order at least $50 to earn a FREE Sale-A-Bration Product!  We are already in the last month of Sale-A-Bration!  Can you believe it is March?!!

High Fashion for the Oscars at the Academy Awards

Academy Award Fashions 2014

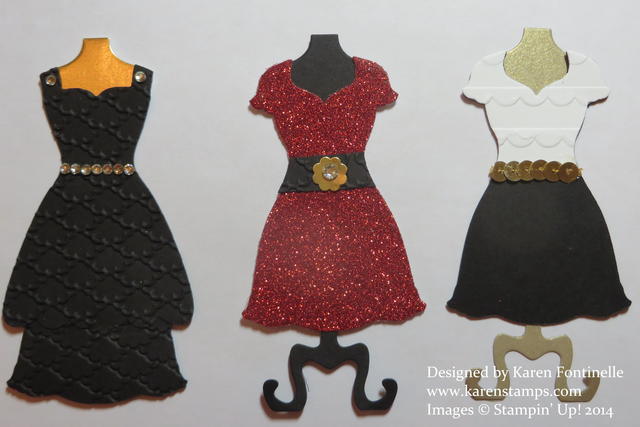
When we watch the Academy Awards or any of these glamorous awards shows, most people are pretty interested in what outfits the stars are wearing on the Red Carpet! I’ve been busy with my Stampin’ Up! Dress Up Framelits making fancy dresses that I’m sure we will see the stars wearing tonight!!

Oscar Dresses for the Red Carpet

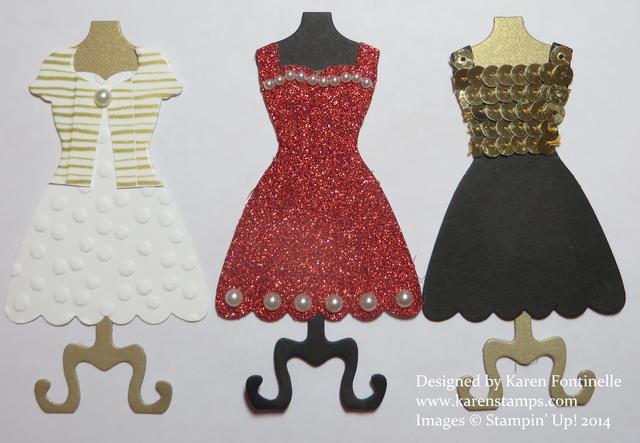
Here are some more Red Carpet dresses for the Oscars tonight!  Which one do you like?

Dresses for the Academy Awards

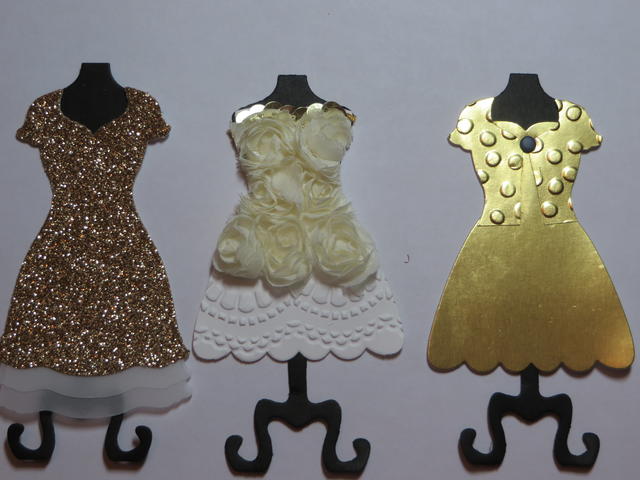
Who are you wearing tonight??!  Gold is in so do you think we’ll see lots of gold on the Red Carpet?  This was like playing with paper dolls!

Have fun at the Oscars!  Check out the fashions!

A Punch Art Cowboy for Rodeo Time in Houston!

Houston Rodeo Punch Art Cowboy

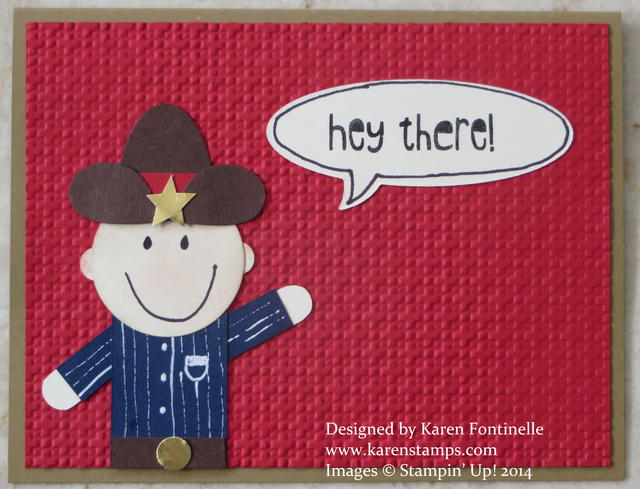
It’s time for the Houston Livestock Show and Rodeo and here’s my cute little punch art cowboy ready to rodeo! The rodeo is a huge event in Houston, Texas that starts with World Championship Bar-B-Que Contests (if only I could be going around to all those places sampling ribs and brisket!!!) and has a rodeo parade, carnival, livestock show, auctions, shopping, more food than you can imagine and of course the actual rodeo performances and concerts by favorite artists afterwards. School kids go to see the farm animals and maybe get to see a baby chick hatched or a cow milked. There are even real trail rides that start from afar and travel into Houston, camping out overnight in Memorial Park and then participating in the parade downtown.

Here is my card I made in honor of the start of rodeo time in Houston! I got the idea for the punch art cowboy from several versions I saw online. Can you figure out the cowboy hat?  It’s an oval punch, with one end cut off and turned vertically and two “wings” (or are they leaves?) from the Bird Punch with a little red band underneath. The shirt and arms are just rectangles, and I used the Signo Gel Pen to draw some lines on the shirt free-handed.

The word bubble is from the stamp set Just Sayin’ and cut out with the Word Bubbles Framelits. You can also purchase the Bundle with the framelits and the clear- or wood-mount stamp sets and save 15%!  Now since I hadn’t paid attention to the Word Bubbles, I put my cowboy on the wrong side of the card! So I had to turn the word bubble over after I cut it out with the framelit, stamp the words inside without the outer border and then draw in the outline by hand. Then the word bubble was pointing toward the cowboy! Too bad they didn’t have some rodeo words to use! Of course an alternative would be to get the Word Bubble and Just Sayin’ Downloads for My Digital Studio and print out the exact words I wanted.

If you live in here, I hope you get to enjoy the Houston Livestock Show and Rodeo in one form or another! The real benefit of the rodeo is the scholarships it gives to many kids for their education.

Check out my Stampin’ Up! Online Store today! Don’t forget about Sale-A-Bration:  just purchase $50 in current merchandise and earn a FREE product from the Sale-A-Bration Brochure!

Also:  Weekly Deals for Feb. 25

Stampin' Up! Weekly Deal Feb 25 2014

Have fun stamping with Stampin’ Up!