Monthly Archives: December 2013

Christmas Card Day 2013

Little did I know that today is officially “Christmas Card Day”! December 9 honors Sir Henry Cole of England who created the first commercial Christmas card in 1843.  Apparently Sir Henry was a very busy man and since the custom was to hand write each Christmas card back then, he just didn’t have time. He hired a London artist to design a card for him to send his friends.  The center panel was a drawing of a family celebrating, each side panel has a charitable scene. The London artist, John Calcott Horsley, made 1000 lithographic copies of the card but Sir Henry Cole colored each one by hand! (too bad he didn’t have Stampin’ Up! markers and Blender Pens!)

I was going to declare today National-Make-Your-Christmas-Cards Day, but I guess I don’t need to! We’ve already been inspired by Sir Henry Cole! He was busy too, yet he got his cards sent out! We can do it too!

Christmas Card Day

Do the “assembly line” method:  Cut, cut, cut; score, score score; stamp, stamp, stamp; punch, punch, punch! Not only do you not have to think what comes next, but you get into “muscle memory” so your hands just do it automatically!  It’s the fastest way to make a bunch of cards.  And you don’t have to make ALL your cards the same.  If you like several designs, make ten of each design. That’s what I will do!  Make sure you have envelopes and stamps, too!

The post office would like you to mail by December 21 for Priority Mail in order for it to arrive by December 24. Did you know you can do almost everything online instead of going to the post office?  It is one of the most amazing inventions of my lifetime to eliminate standing in line at the post office!  One time, honest to goodness, I was the ONLY person in the line and I STILL had to wait for someone to wait on me!!!  I know, some post offices are better than others, but mine has always been slow (except on Saturday morning right before closing! You want to see great and speedy customer service?!)

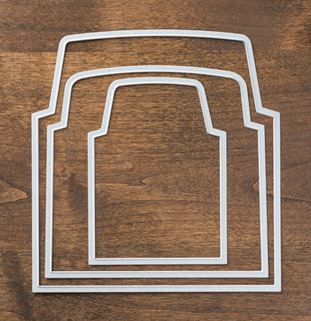
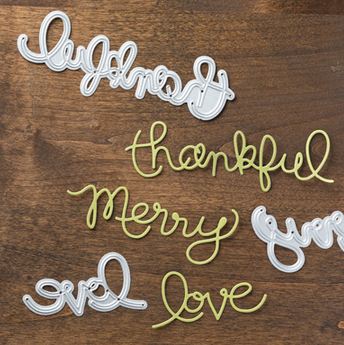
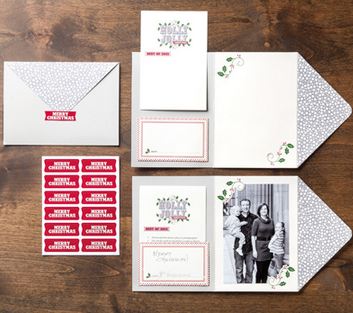
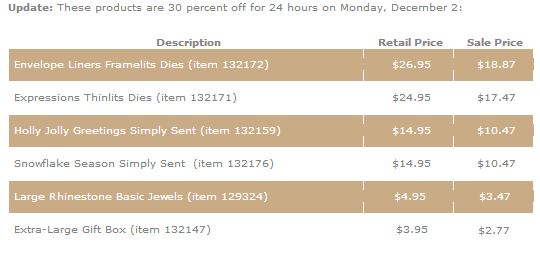
For anything you need for making Christmas cards (except postage stamps!), please visit my Stampin’ Up! Online Store! (If you wait until tomorrow, I hear there is going to be a Clearance Rack Blitz!)  But check out the Weekly Deals available only until tonight!


Christmas Collectibles Ornament Christmas Card

Christmas Collectibles Ornament Christmas Card

The Christmas Collectibles ornament stamp set of course is perfect to have for making your own Christmas cards.  Even better if you have the Christmas Ornament Punch #132152 to go with it. And you can have both in the Bundle and save 15%. Or you can buy each one separately. It’s so easy to just stamp the ornament shapes and punch out and stick on a Christmas card.  If you want to take it to the next level, add some rhinestones or pearls to the ornaments or tie a little bow on top.

This card started out with the red striped paper from Seasons of Style Designer Series Paper going to be the layer with Whisper White over it. I decided to cut out the center to save some paper to use another time since I love it.  Well, once I had that “frame” I really liked it as a frame! I decided to just insert the ornaments within the frame rather than just having the stripes be a decorative border. Next I decided to pop up the frame with Stampin’ Dimensionals and have the ornaments be “3D” as well, just hanging from the top of the frame by the Cherry Cobbler Baker’s Twine.  The twine is adhered to the back of the frame using Dimensionals as well as on the back of the ornament.  But then I discovered that if the ornaments were going to freely hang, they might get flipped around and the backside would show.  So I stamped three more ornaments, punched out, and glued on the back so either side can show on the card.  Probably not a card you want to mass produce but easy enough to make for someone special.

Have you made your Christmas cards yet?

Make a Paper Mache Star Christmas Ornament

Paper Mache Winter Frost Star

Make this easy paper mache star Christmas ornament for your tree or for a package decoration that the recipient can keep as an extra gift! Look in your stash or go to the craft store and get some of those paper mache ornaments like this star. Cover with designer series paper and embellish and you’ve got yourself a lovely Christmas ornament!

Paper Mache Winter Frost Star Ornament

I just traced around the star on a piece of Winter Frost Designer Series Paper.  This particular sheet has a shiny foil look to it so it is especially beautiful! If you pay attention to how you are tracing the paper and which direction you traced around the star you might get it to fit exactly right! Otherwise, place it so that it fits the best on your ornament and if there is any excess you can trim it off with your Paper Snips or retrace a little. Just get it as close as you can.  It doesn’t have to be perfect!  Adhere the paper to the ornament with some Tombow Multipurpose Glue making sure it sticks well along the edges.

Paper Mache Winter Frost Star Ornament Back

Put the same or another pattern of paper on the backside. Also adhere a narrow strip of designer paper around the side of the ornament.  Mine was about 1/2″.

Paper Mache Winter Frost Star Side

And then decorate to your heart’s content – or even leave it plain depending on your paper.  I made a rosette out of a 12″ strip of designer paper.  I think it was about 2″ wide and scored with my Simply Scored Tool every half inch. I glued the ends together and then scrunched it into the rosette shape and adhered with a blob of hot glue in the center. Then it was ready to go on the front of the ornament with another blob of hot glue. The finishing touch was the beautiful Frosted Finishes Embellishments.

Look in your stash and see what you have!  It’s cold and frosty across a big part of the country, including Houston – well, cold, not frosty (yet!) – so a good day to stay in and make Christmas ornaments, cards and crafts!  Enjoy!

See Stampin’ Up!’s Donation to the Today Show Toy Drive 2013

Two days ago I happened to change the TV channel to NBC and the end of the Today Show was on and here was Sara Douglass, daughter of Shelli Gardner, Founder and CEO of Stampin’ Up!  Every year Stampin’ Up! donates to the Today Show Toy Drive.  Sara says in the video that the company is donating $650,000 in papercrafting products to the Toy Drive!  This year, though, Stampin’ Up! didn’t tell us in advance that they would be on the show so it came as a complete surprise!  Shelli wasn’t there herself as she is still recuperating from her horse accident a few months ago (quite well, I believe!) and Sara has had experience doing it in the past anyway. It’s great to know Stampin’ Up! is making such a generous donation and getting national exposure to the company. And I love the scrapbook pages Sara is holding up!  Sara always does great presentations on stage at Convention and she does a good job in her television appearance as well representing Stampin’ Up!


New Stampin’ Up! Weekly Deals for December 3

Stampin' Up! Weekly Deal Dec 3

Click to Shop

It’s Tuesday so it’s a new Weekly Deal from Stampin’ Up! What jumps out at me?  The Hearts Collection Framelits Dies!!  We may be totally focused on Christmas right now, but you know Valentine’s Day will be “up next” after New Years. Go ahead and get some Hearts Framelits now on sale so you’ll be ready to cut those Valentines in February!

Of course don’t miss ANY punch and Scallop Circle Punches are always fun! And how many Fun Flowers have we made out of paper and fabric? The Fun Flowers Bigz L Die is great to have. Make some beautiful fabric flower pins and sell them! Merry Minis Punch Pack – I certainly love the little star! And the little ornament shape and tree are perfect for your cards right now! The Paper Doily Sizzlits Die is gorgeous to make although it takes a little patience sometimes to perhaps poke out the little pieces! But sometimes you cover part of it with another layer and don’t need to punch out all the pieces! It’s beautiful to have in your collection. Wisteria Wonder Chevron Ribbon – kind of like punches, you might as well have it! The Chevron ribbon in the different colors is beautiful and great to use. And for you My Digital Studio fans, another download, especially on sale, is always welcome – Think Back Photobook TemplatesThis download has questions to ask parents, grandparents, anyone, to find out about their life and get the memories flowing so that they can be recorded for your family history. I can’t tell you how valuable and treasured this information will be to you when your loved ones are no longer with you.

If you don’t have My Digital Studio, you can do a 30-Day Free Trial OR you can go ahead and purchase the My Digital Studio Software because it is only $19.95. It really is quite a deal.  You get the software plus a TON of content to use in your projects.  And it’s not just about digital scrapbooking AT ALL! Make cards, invitations, home decor, photobooks, framed art and more!

Check out the new My Digital Studio Downloads for this week HERE.

Stampin’ Up! Cyber Monday Specials Are Here!

Yesterday I gave you a heads up on items from Stampin’ Up! that would be 30% off today only! In fact, today is the last day for the entire Stampin’ Up! Holiday Sale so be sure to check that list one more time! Think outside the box and perhaps find things you can give as gifts to someone else. But, of course, don’t forget YOURSELF!

CYBER MONDAY SPECIALS

# 132172   Envelope Liners Framelits Dies (not just for making pretty envelope liners!)

Envelope Liners Framelits Dies


#132171   Expressions Thinlits Dies

Expressions Thinlits Dies


#132159   Holly Jolly Greetings Simply Sent Kit

Holly Jolly Greetings Simply Sent Kit


#132176   Snowflake Season Simply Sent Kit

Snowflake Season Simply Sent Kit


#129324   Large Rhinestone Jewels

Large Rhinestone Jewels


#132147   Extra-Large Gift Box

Extra-Large Gift Box


Just go right now to my Stampin’ Up! Online Store, check all the categories in the left sidebar of the store’s page so you don’t miss a thing! Let me know if you have any questions or need help ordering. I’m happy to put the order in for you.

Cyber Monday Specials at Stampin’ Up! and More!

The Stampin’ Up! Holiday Sale has been ongoing since November 20 and now will come to an end on Monday, December 2, 2013. Don’t miss it! But be sure to check back tomorrow, Cyber Monday, when Stampin’ Up! will have these products on a special Cyber Monday Sale!!

Stampin' Up! Holiday Sale Cyber Monday Specials

Here are the links to my Online Store where you can see the products. Keep in mind the sale price will not show today (Sunday, December 1st). Don’t try to order or even put on your list until tomorrow!

You can also add to your order (you won’t believe this!) Valentines!!  Well, you know it will pop up soon right after Christmas!  This way you will be ready with your supplies!

A Whole Lot of Love Stampin' Up! Valentines

Click to Read Flyer

A Whole Lot of Love Stamps

Click to Read Flyer

You can purchase these products beginning today, December 1st, at my Stampin’ Up! Online Store HERE. On that page, click on the product and then you can read more about the details and also click the magnifying glass to enlarge.

And one more thing!  The last “Best of 25 Years” stamp set is released today. This stamp set is called “Best of Sale-A-Bration”. All of these stamp sets are available until March 31, 2013. You can see all of the stamp sets HERE.

Best of Sale-A-Bration Stamp Set

PS:  Don’t forget to check the Stampin’ Up! Clearance Rack every time before you order!  New things may have been added!

Absolutely tomorrow, Monday December 2 Cyber Monday, go to my Stampin’ Up! Online Store and check out the Cyber Monday specials and all the other items on the Holiday Sale, plus the items I mentioned in my post above!  Whew!  Happy Shopping!

Making Festive Flurry Ornaments

Festive Flurry Ornament Kit from Stampin' Up!

No snow in Houston except on my kitchen table where I played with my Stampin’ Up! Festive Flurry Ornament Kit and made some of the beautiful ornaments. Once you assemble these ornaments you can use them as ornaments, as package toppers, on a super-fancy card, or string them together to make a garland. Lots of ways to use them which you will think of as you make them!

There are no written instructions in the kit but there is a good video from Stampin’ Up! you can watch. I would say be a little more patient with the hot glue as you “squish” your ornament together toward the center than on the video because I’m sure in the interest of time, they didn’t make you wait and watch the full time it takes for the hot glue to set up in the video. If you have the Stampin’ Up! Silicone Craft Sheet it makes it a little easier to work with the hot glue.

Let’s start at the beginning! You will receive ten sheets with die-cut pieces to make your ornament plus a stack of the glitter layer pieces. Just punch out the pieces. You will see two of the pieces, the blue snowflake and the glitter snowflake are pre-scored so that is helpful. Carefully fold on these score lines. Those narrow tips are a little delicate so take your time and remember nothing has to be perfect! I suggest doing the longest points with the fold lines so the fold is “up” and the smaller ones with the  fold “down”. It’s going to be almost like rosettes you have probably made in the past, one fold up, one fold down and so on. Check to make sure you have all the pre-scored lines folded around the ornament and then “practice” squishing them toward the center hole. Once you are sure they will all fold and work together correctly, it’s time to glue. You can put a puddle of hot glue on your silicone craft sheet and then place the snowflake so the center hole is in the glue and “squish” the ornament toward that center and hold until the glue sets and you can safely set it aside. Once you have the blue snowflake and the silver glitter one made in this fashion, you can layer all the ornament pieces together and that is the easy part! Don’t forget the beautiful large rhinestone in the center! Attach a piece of ribbon on to the back if you want to make a hanger.

I also tried, as another demonstrator suggested, just putting glue around the inside edges of the center hole and not using the big puddle of hot glue, and then squishing it to the center. This did seem to hold just as well and didn’t take as long to set up as the big puddle of hot glue.

And for my last try, I attached the snowflake to a small circle on the back as I was gluing it, punched or the center you punch out of the blue snowflake. I thought this worked the best, maybe gave it a little stability while the glue was setting up.

Once you discover what works easiest and best for you and what you want to make, I think you’ll be able to breeze through these ornaments just fine. You will find the Stampin’ Up! video on the sale page for the Festive Flurry Ornament KitThese are SO beautiful you MUST give them a try!!

Festive Flurry Ornament