Monthly Archives: November 2012

A College Graduation Swatchbook from My Digital Studio

MDS Swatchbook Cover

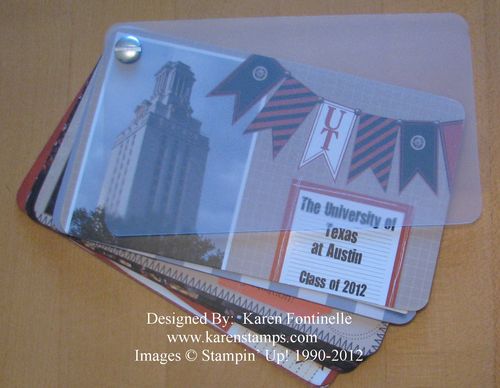
I  may have mentioned before that I was working on a swatchbook in My Digital Studio, the Stampin' Up! digital papercrafting software, of my son's graduation photos. Finally I remembered to take some pictures of the swatchbook all made up! You can see there is a plastic cover on the front and back of the book and the whole thing is held together by the rivet in the corner. It is small….only 5 1/2" x 3 1/4", but that's why it is so cute and fun!  And don't think the small size kept me from squeezing in as many photos as I could! I have a hard time leaving out any photos because I think each one is valuable in its own way!

Graduation Swatchbook

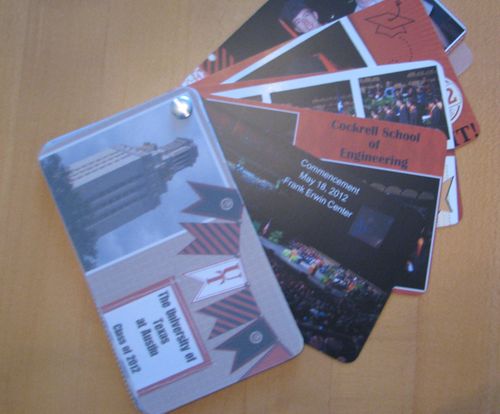
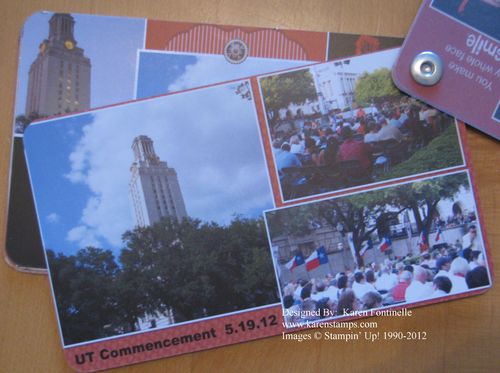
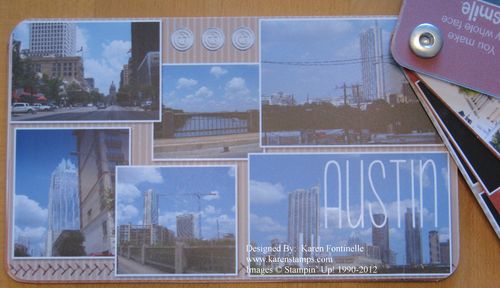
The MDS Swatchbook just swings open. It has 26 pages to design. So I kept my pages in order skipping every other page because those then would be the backsides of the front pages. If that is a hard concept to wrap your head around, as it was for me, make a little swatchbook out of scrap paper and label your pages so you know what you are doing! When you start doing the backsides of the pages then you are working from the end to the front….so page 2 (the last page in your series) is on the back of page 1. It's confusing to explain even though it is very simple! And if you are not putting pages in order, then it doesn't matter anyway!

Graduation Swatchbook

Graduation Swatchbook

And printing prices for My Digital Studio have recently been reduced!  You CAN print any MDS projects yourself or at another printing company, but if you do it through Stampin' Up! you are assured of a quality product and precise Stampin' Up! colors. You can check out information about Stampin' Up! MDS Print Products HERE.

Start with the Swatchbook Template on My Digital Studio and make some cute little swatchbooks for Christmas gifts with those digital photos just sitting on your computer! I recommend purchasing MDS 2+ to get the most bang for your buck! You can get the software and "some" content with just MDS 2 for less money but the full version has SOOOO much content it really can't be beat!  But you do have choices, so whatever works for you….including just doing the Free 30-Day Trial!  No risk, and you can purchase downloads you want, print projects you make…everything….all during the trial period.  If you really want the hard discs, those are coming out soon! I recommend the download, though, so you can get it instantly and always have access to it.

Check out the information on My Digital Studio here.

Get on My Mailing List for the 12 Weeks of Christmas!

Winter Mail Box
As my gift to my mailing list subscribers and customers, I have been sending out a weekly email with a Christmas idea to make. We are now on Week 7 of the 12 Weeks of Christmas campaign.  You've already missed the first 6 weeks, but you can still sign up and get the remaining six weeks of emails! Just subscribe to my mailing list at the top of the column to the right!  It's that easy! We are on gift ideas now and next will be tags and gift-wrap ideas. Each is a project you can do with a supply list and complete instructions.  If you need any supplies, you can order from my Stampin' Up! Online Store. Mainly I hope the ideas inspire you to create some projects yourself as cards and gifts for those on your list. You can copy or you can follow your own creative thoughts!
Sign up now for my Mailing List to receive the 12 Weeks of Christmas emails plus my monthly email with the latest Stampin' Up! news and project ideas!

Heart of Christmas Gift Box

Image copyright Stampin' Up! 2012

I have loved this single stamp, Heart of Christmas, in the Stampin' Up! Holiday Catalog since I first saw it! I love the sentiment! This is a project from Stampin' Up! They made a box with Crumb Cake card stock, decorated with some Snow Festival Designer Series Paper and 1/8" Old Olive Taffeta Ribbon. To display the Heart of Christmas sentiment, they made it very decoratived with the Apothecary Accents Framelits Dies. Notice the cute little heart punched out of the bottom of the label and backed with Glimmer Paper!  What a great project!  You could also use the Kraft Gift Boxes as well for something similar. Wouldn't this be a cute gift box under the Christmas tree?!

To shop for any stamping supplies for so many projects, just shop online at my Stampin' Up! Store here.

Here is the supply list Stampin' Up! provided:

Stamps
• Heart of Christmas*

Paper
• Crumb Cake Cardstock
• Very Vanilla Cardstock
• Snow Festival Designer Series Paper
• Champagne Glimmer Paper*

Ink
• Cherry Cobbler Stampin’ Write® Marker
• Old Olive Stampin’ Write Marker

Stampin’ Up! Accessories
• Old Olive 1/8" Taffeta Ribbon
• Stampin’ Dimensionals®
• Owl Punch
• 1/16" Circle Punch
• Big Shot™
• Fancy Favor Bigz™ XL Die
• Apothecary Accents Framelits™ Dies

Veterans Day November 11th

November 11 has become known as Veterans Day but originally it was Armistice Day, which was the end of World War I …Nov. 11, 1918. Perhaps a lot of our grandparents served in World War I. After the second World War and the Korean War, the Congress changed the word Armistice to Veterans to commemorate American veterans of all wars. That was June 1, 1954. In 1968, Veterans Day became one of the holidays celebrated to accomodate three-day weekends.  However, many did not agree with this and wanted Veterans Day to be celebrated on the exact date.  In  1978, after President Ford signed a new law in 1975, the holiday was returned to its original date of November 11th. If the day falls on a Saturday or Sunday, then it is observed by the government on the Friday before or Monday after.

You can visit the Department of Veterans Affairs website here.

Veterans Day is not to be confused with Memorial Day.  Veterans Day is to thank living veterans for their service to all of us.

Thank you to all of our veterans!!

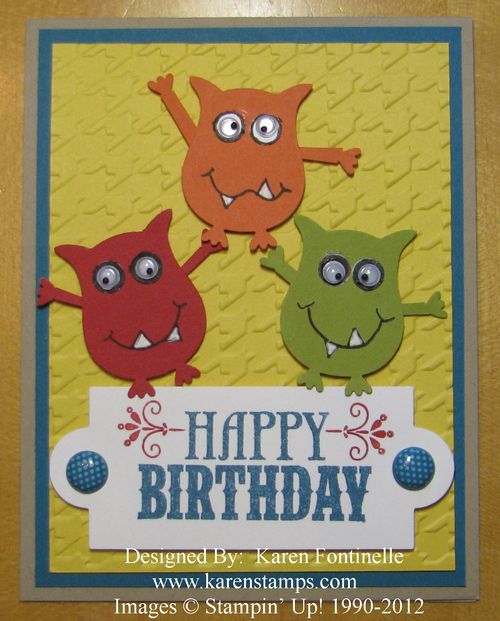
Owl Punch Three Monsters Male Birthday Card

Owl Punch Three Monsters Male Birthday Card

In trying to think of a birthday card to make for my son-in-law, I was a little stumped this year.  Last year I got an idea for a Star Wars card that I probably mostly copied from an idea I saw online.  I thought it turned out great and he liked it!  Right up his alley! But this year, the other things I knew he liked were a little harder to come up with in a card. When I saw an idea of using the Owl Punch somewhat like this, I decided to go with a "generic" monster/sci fi/comic character/whatever card for him. This is what materialized and I like it!

The Owl Punch is one of the greatest tools you can own! Not that I think of these things, but other stampers come up with a multitude of ways to use our Stampin' Up! punches and make them worth their weight in gold for crafting! To make my little monsters (or whatever they are!) I punched the owl, drew on his mouth and teeth with a Stampin' Write Black Marker and colored in the teeth with the Signo Gel Pen. For the arms I stuck a little strip of paper in to punch just the feet of the owl and then cut the strips to make arms. I punched out the white eye circles with the Owl Punch although I colored them in with black around my Googly Eyes.

The sentiment is from the stamp set You're Amazing and die-cut with the Big Shot and the Apothecary Accents Framelits Dies.  The brads are the  3/8" Designer Printed Brads.

If you are looking for a male birthday card, for child or adult, this is a good one and fun to make!  If you prefer just stamping your monsters, there is the Make a Monster stamp set!

You can order any and all of these products and more from my Stampin' Up! Online Store.  Go there today….and also check the Clearance Rack if you are doing an online order!

Day of Gratitude Thanksgiving Turkey Favor

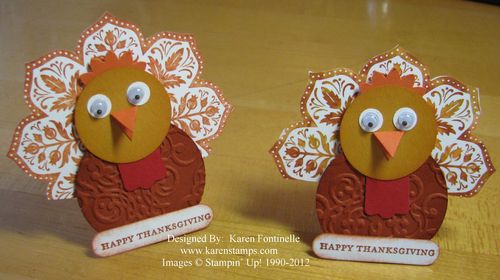
Day of Gratitude Thanksgiving Favor Turkeys

The Day of Gratitude stamp set by Stampin' Up! can also make a great turkey favor for Thanksgiving! If you need a little something for your Thanksgiving table, class favors for the kids, or just some fun little decorations for Thanksgiving these will fill the bill. Of course there are many variations you could do after you get started.  I often think I am going to copy something exactly and end up with my own version.

Instead of the "Happy Thanksgiving" from the must-have stamp set Teeny Tiny Wishes (and I do recommend for these small stamps that you spend the extra money and get the wood-mount) you could write a person's name for a place card at the table. The body is punched with the 1 3/4" circle and the head with the 1/4" circle punch. You could stamp a little texture on the circles or run one or both through the Big Shot with an embossing folder like I did on the body.  I used the Lacy Brocade folder in the Stampin' Up! Holiday Catalog. The gobble-thing is half of the Modern Label Punch. The beak is just cut by hand. The thing on top of the head is from the Boho Blossom Punch. The tail feathers are the medallion in the Day of Gratitude stamp set. I tried to get them each multi-colored but I don't think the colors contrasted enough. You could also color each section with a different color of Stampin' Write Markers. The feathers are adhered with Stampin' Dimensionals on the back of the turkey.

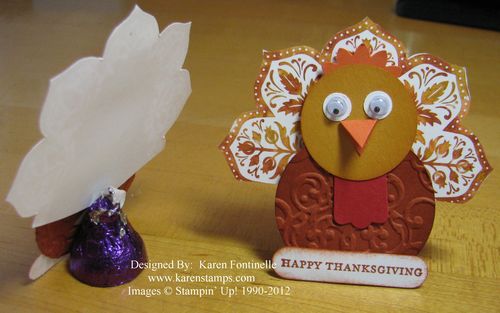
I would probably use some candy like Hershey Nuggets for the back, but I don't have any (amazingly!) so I used some Hershey Kisses.  It worked just as well.  If I used a Nugget, I would cover it with a strip of designer paper first.

Day of Gratitude Thanksgiving Favor Turkeys Back

For the eyes, you can just punch out black and white circles, or since I had some Googly Eyes left over from Halloween, I used those.  You probably have some in your craft stash, too!

Just a fun little Thanksgiving treat!  Hope you enjoy!

It’s Election Day! Go Vote!!

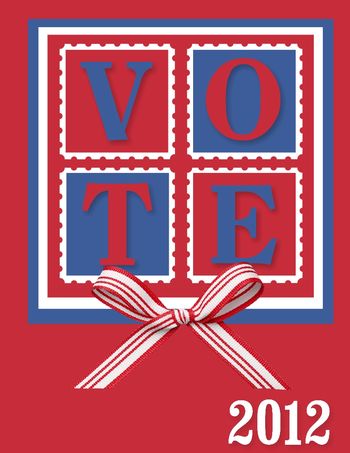
Election Day 2012 Digital Card

Images copyright Stampin' Up! 2012

One thing I love about My Digital Studio is the ability to create something for any occasion….even Election Day! It's hard to believe it is finally Tuesday, November 6, 2012Election Day in the USA! Although there are lots of candidates and proposals to vote on in most precincts across the country, the Presidential election is what most people are focused on today and every four years. No matter what, we all need to exercise our right to vote today….unless, of course, you have already voted early! It is our duty and obligation as American citizens to visit the voting booth and cast our ballot in the best interests of our community, state and country.

Day of Gratitude Thanksgiving Autumn Card

Day of Gratitude Thanksgiving Autumn Card

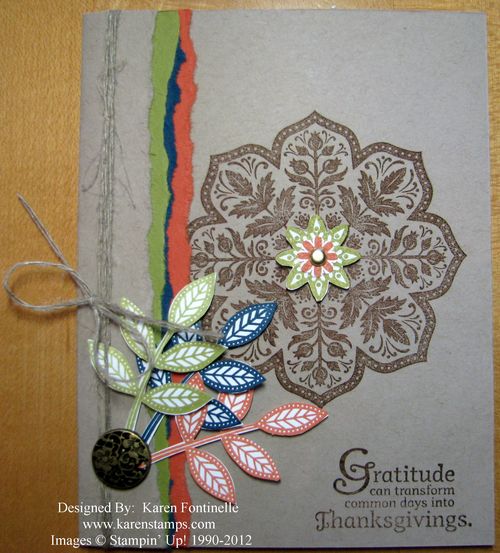
It's November now so our thoughts turn to autumn and Thanksgiving.  The stamp set Day of Gratitude is a beautiful one for any season, but it seems to really stand out at this time of year. On this card, I took the idea from the Stampin' Up! Catalog, where only a portion of the card is shown on page 26. I don't know how Stampin' Up! made their card, but this is how I made mine! The colors used work beautifully together…Crumb Cake for the card base, Soft Suede for the medallion and Tangerine Tango, Lucky Limeade, and Midnight Muse. The Antique Brad really adds some elegance to this card.

To make this card, I tore off the front of the card base, leaving just that small margin you see. Then I took increasingly wider pieces of the colored card stock and tore those, adhering them to the back side of the front cover piece. Finally I took a new 4 1/4" x 5 1/2" piece of Crumb Cake card stock and glued it to the underside of that front flap with all the colors (stamp it first!). The leaves are hand cut, but that was pretty easy with my Stampin' Up! Paper Snips.

There are lots of beautiful cards, scrapbook pages and projects you can make with this Day of Gratitude Stamp Set. If you are putting in an order, I would also add the Antique Brads, Paper Snips….and DON'T FORGET:  we have a new paper trimmer…the Stampin' Trimmer!  It's been in the new catalog, but just became available this month. I think Stampin' Up! improved any and every feature anyone might have complained about on the old trimmer.  Click on the link for the trimmer and you will also see a video about the features of the new trimmer.

Start stamping your Thanksgiving cards and projects now so you won't be rushed!

Change Your Clocks! Daylight Savings Time Come to an End!

CST-001

Images copyright Stampin' Up! 2012

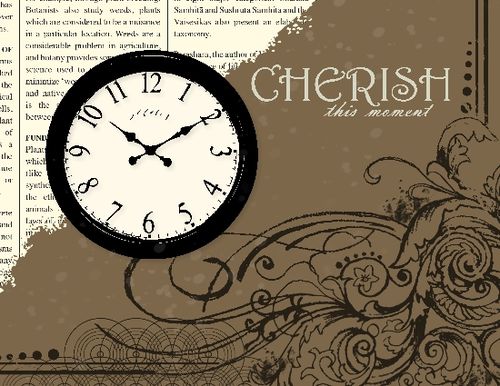
Change your clocks! Daylight savings time is coming to an end! Tonight…or tomorrow…however you want to look at it…it's time to change your clocks back to Standard Time. If you are up at 2:00 am, turn your clock back to 1:00 am.  Or whatever time it is when you go to bed, just turn the clock back one hour…although then you might think "It's not so late after all!" and opt to stay up another hour!  This is the night my mother always loved…time to turn back the clock, or "fall back", and gain an hour!  An extra hour of sleep! Or an extra hour to stamp, if you want to think of it that way..and who wouldn't??! I know lots of us seem to have our creative peak very late at night! And once you start being creative, you really can't go to sleep for quite awhile!

To remind us all to change our clocks, I made this little card in My Digital Studio! I started with the First Edition designer series paper and Soft Suede card stock. Then I found the Torn Edges stamp to make the First Edition paper look old and torn. I found the clock stamp, put a circle punch behind it so you couldn't see through the clock, and added a decorative overlay for that corner image.  And in MDS2+ there's even a splatter tool, which I changed to a "watermark" color.  The sentiment was actually an embellishment that I found and used the new "recolor" tool to change it how I wanted.

If you haven't tried My Digital Studio yet, take advantage of the FREE 30-day Trial!


Button Buddies Summer Starfruit Birthday Card

Button Buddies Summer Starfruit Flower Birthday Card

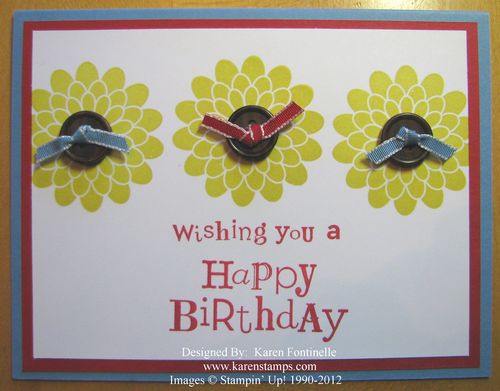
Just playing with the stamp set Button Buddies….and my Color Coach!  I started off thinking I would make this stamp look like fall flowers…and then I looked at my Stampin’ Up! Color Coach which gives you color suggestions of combinations.  Usually you feel like you wouldn’t have thought of that combination on your own, but lo and behold, the Color Coach usually is right! Once I chose Summer Starfruit, the Color Coach suggested Real Red and Marina Mist….so that’s what I used for my card. After stamping my flowers, I added the new Naturals Designer Buttons in the Stampin’ Up! Catalog, tied with a bit of Real Red and Marina Mist 1/8″ Taffeta Ribbon.

The greeting is stamped with stamps from the Hostess stamp set Wacky Wishes. See a trick I used for stamping the greeting over on my Facebook page.

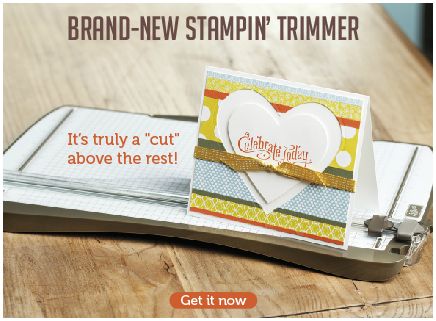
New Stampin’ Up! Paper Trimmer!!!

SU Paper Trimmer

Finally the new Stampin' Up! Stampin' Trimmer is available! It was featured in the Stampin' Up! Annual Catalog, but just was not available until now. You can see some close-up photos of it in the catalog on page 180. I can't believe they packed so many features into one product! One of my favorites is that the base is larger so that for most of your common cuts, you won't even need to extend the ruler. Also, there is space for both the cutting blade and the scoring blade, so I'm actually using the scoring blade right after making my cut and not having to reach for my bone folder.

Watch the video by Brian Pilling of Stampin' Up!


Here is the list from Stampin' Up!:

Features of the All-New Stampin' Trimmer

  • An extra-wide 6-1/4" cutting base and an extended 14-1/2" ruler
    • The extra-wide cutting base provides a large work area and is marked in 1/4" (4 mm) increments, allowing for small measurements. 
    • The right-side grid helps you measure and cut very thin strips.
    • The extended cutting arm has a stabilizing leg to provide a sturdy and steady cutting surface for longer cuts. 
    • When fully extended, the extended cutting arm sits flush with the trimmer base, providing more accurate and consistent measurements across the entire surface.
    • The cutting base and track include a full ruler, incorporating measurements down to 1/16" and grid lines that mark each quarter inch. 
    • All rulers and measurements on the base are printed under a plastic cover so your measurements won't wear off.
    • The base has nonskid feet, which keeps the Stampin' Trimmer securely in place on your work area.
  • A full 12" cutting and scoring track
    • The extra-long cutting track has space at the top and bottom so you don't have to take the cutting and scoring blades out when you're not using them. 
    • The track gives you enough space to cut or score a full 12" (30.5 cm) without having to remove or switch out handles. 
    • The cutting track locks in place for secure storage or transport. 
    • The track includes an insertion point for cutting and scoring blade handles so you can easily insert handles into the cutting track.
  • Specially designed handles and cutting track to ensure straight cuts
    • The hook on the scoring and cutting blade handles keeps the handles stable so the cuts are as straight as possible.
    • Handles come in two colors: dark for cutting, light for scoring. 
    • The precision tip on the cutting blade allows you to pinpoint precisely where you're cutting.
    • The point on the side of each handle shows you where the blade will cut, making it easy to see exactly where your cuts and scores will begin.
  • Storage compartment under base
    • The storage compartment holds scoring and cutting tools such as a Bone Folder, Simply Scored Stylus, extra scoring and cutting blades, and even business cards. 
    • Separate compartments within the storage compartment keep your tools organized, and the clear cover makes it easy to see what you've stored.
    • Product details: item 126889; $29.95

If you want to be one of the first customers to own the new Stampin' Trimmer, just go to my Online Store and place your order!


Free Stampin’ Up! Foam Ink Pads for Hostesses and New Recruits!

SU Inkredible 2012

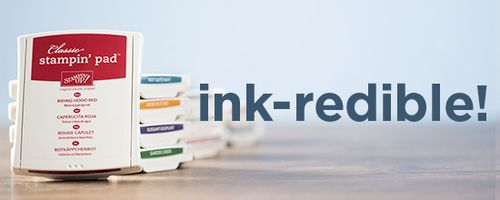
Want the new Stampin' Up! foam ink pads…FREE??!  Stampin' Up! has two ways for you to get free ink from November 1 – December 16!

  1. Hostesses who hold a minimum $450 party will get a FREE collection of Classic Stampin' Pads! Contact me about booking YOUR party!
  • Hostesses can choose from Brights, Subtles, or Regals-a $49.95 value!  Plus, the free ink is in addition to the regular hostess benefits-INK-redible!
  • Online orders that reach the magic $450 will also qualify this time for this special Hostess benefit. Customers will be prompted to select their qualifying ink collection with a $450 order. They will be required to use one of the following item numbers in order to select their free ink collection. 

132652 Brights Classic Stampin' Pads
132653 Subtles Classic Stampin' Pads
132654 Regals Classic Stampin' Pads
Note: This only applies to orders placed through a DBWS subscriber's Online Store.

    2.  New demonstrators who join Stampin' Up! during the promotion period will get a FREE collection of Classic Stampin' Pads with their Starter Kit! Is the time right for you to become a Stampin' Up! Demonstrator and start your own stamping and scrapping business? Find out more about joining the Stampin' Up! family here! I'm also happy to talk to you about it as well as I'm sure you have more questions. There are lots of ways to run a successful Stampin' Up! business….and "successful" means how YOU define success!