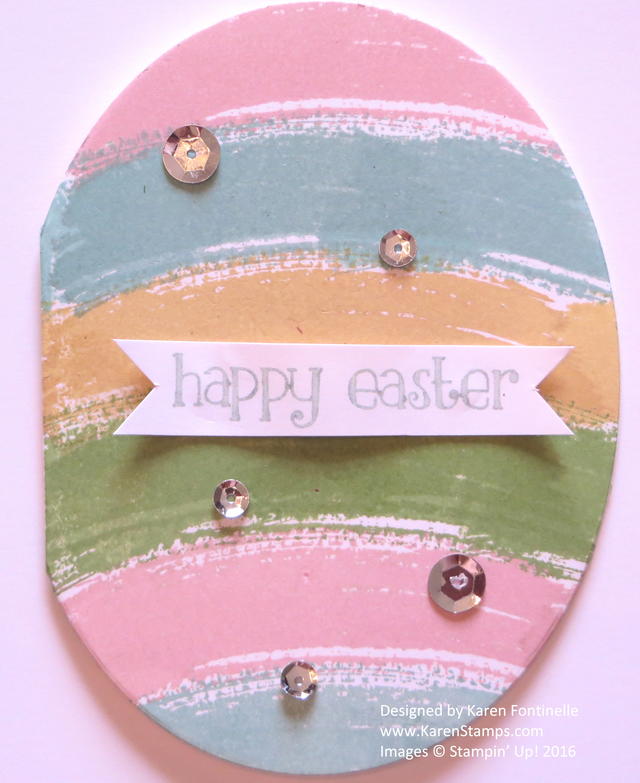
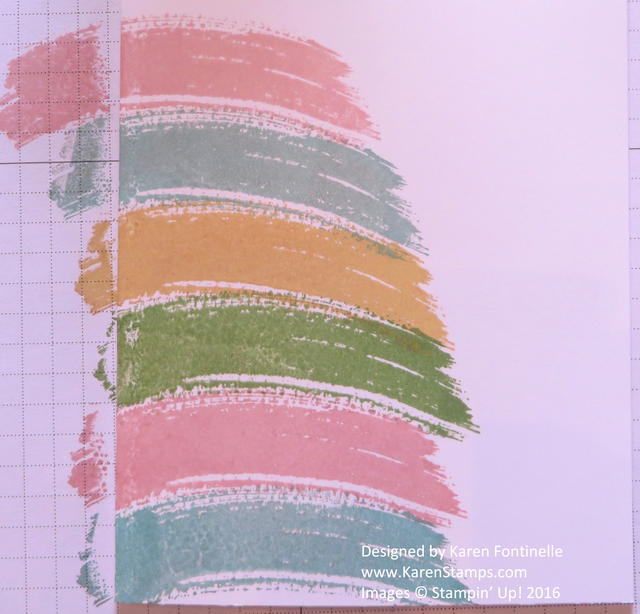
This is a fun and easy Easter Egg card to make! Fold a Whisper White card base in half as you would normally do to make a card. Bring over the Oval Framelit Die you wish to use on the card and lightly pencil where the die will fit on the card. You want the right side of the card to be just inside the die so that the fold will not be cut. Lightly put some pencil marks so you can see how far over to stamp the curved image from the Work of Art Stamp Set. Depending on the size die you use (I used the largest one below the scalloped edge oval die.), you may need to extend the stamping off to the side. Even if you overstamp the stripe you made, it won’t really make that much difference. Or you can stamp the stripe again to balance it out. But this technique is very forgiving.
In this photo below, you can see how I did the stamping, although it didn’t extend to the left side far enough so I had to make the area larger.
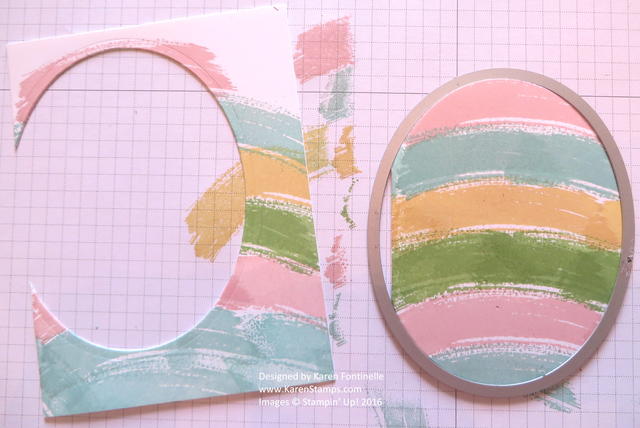
Once you have enough area inked up with the Work of Art stamp, use the Big Shot and Oval Die to die cut the oval Easter Egg shape. Be sure you have the middle of the card fold INSIDE the edge of the die so it won’t be cut to hold the card together. Otherwise you will end up with two die cut ovals! See photo below.
Add a greeting. I inked up the Happy Easter greeting on the Easter Lamb Wood-Mount Stamp and stamped just the words on a strip of Whisper White. You can curl it a bit with a Bone Folder if you want it to look like a banner. Then I added some sparkly silver sequins to the card for some bling!
Have fun making a card like this! Use various colors, adhere the egg to the front of a card, whatever your imagination comes up with! Try stamping an Easter Egg card before Sunday!


