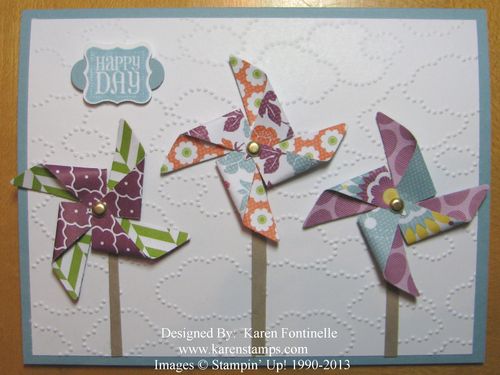
I tried out my new Pinwheel Sizzlit Die yesterday and used the Cloudy Day Embossing Folder for the background on my card. Both of these products can be found in the new Stampin’ Up! Spring Catalog. If you don’t have a Stampin’ Up! Demonstrator and would like a copy of the Spring Catalog, please email me. I’ll be happy to mail one to you. Be sure to scroll down to see my little tutorial on using the Pinwheel die.
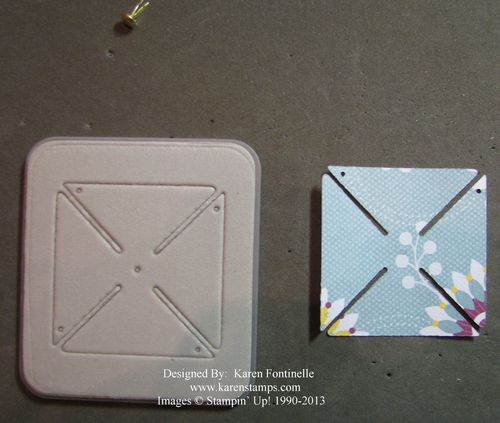
The Pinwheel Sizzlit Die was really fun to play with! Just put a little piece of paper over the die, run it through your Big Shot Die-Cutting Machine, and you have a pre-cut pinwheel to work with!
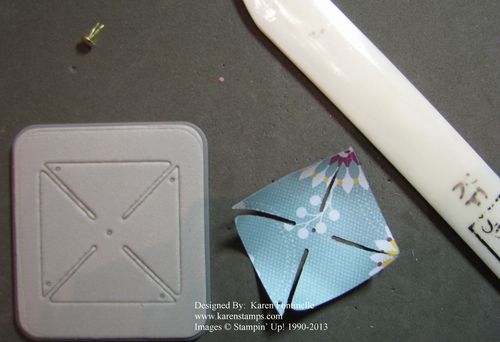
I found that if I curled the paper a bit with my Bone Folder, it made it easier to fold the corners over to the center. Just a tiny bit, to loosen up the paper.
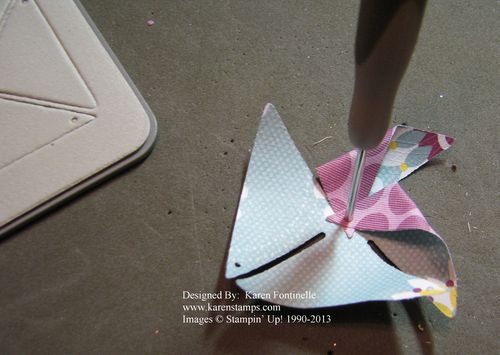
Then, using your Stampin’ Pierce Mat and the Paper-Piercing Tool, fold the corners with the little holes in them over to line up with the center hole in the die-cut. You can use the Paper-Piercing Tool to keep them lined up. While holding the corners in place as best you can, remove the piercing tool and insert a brad through the center hole. Unfold the brad on the back and press down securely to flatten.
It’s fun making pinwheels, and won’t they really give your cards and scrapbook pages a feeling of spring….when spring arrives!
The little greeting on my card is a stamp set in the Spring Catalog called Ciao, Baby! It is punched out with a new punch coming during Sale-A-Bration (Jan. 22 – Mar. 22), Petite Curly Label Punch. It seemed to still need something, so I punched a scrap piece of paper with the Word Window Punch, cut out a section for the middle to give me two shorter pieces and used those for the ends.
If you want any of these Stampin’ Up! products, just visit my Online Store here.


