Tag Archives: Nests of Winter Designer Series Paper

Nests of Winter Thinking of You Card

Nests of Winter Thinking of You Card

As I was looking through my designer papers, I realized some of them have not been used for quite awhile with Halloween and Christmas projects taking the focus plus new products coming out pretty frequently. From that perspective, I made this Nests of Winter Thinking of You Card. If you wanted to, you could make it into a holiday card with a different greeting.

This paper has been around for awhile but it is still available! It came out last year in the Holiday Mini Catalog along with the Winterly Tree Tops Bundle of stamp set and dies. That Bundle was retired in April 2025, but the pretty Nests of Winter Designer Series Paper is still available! It does say “Low Inventory” as I write this so if you want to purchase it or get another package if you already have some, better hurry! It wasn’t a package of paper I would have chosen, but we used it in a virtual Stampin’ Up! event last fall and I loved it! Before the paper is gone, I decided to set it aside and make a card with it!

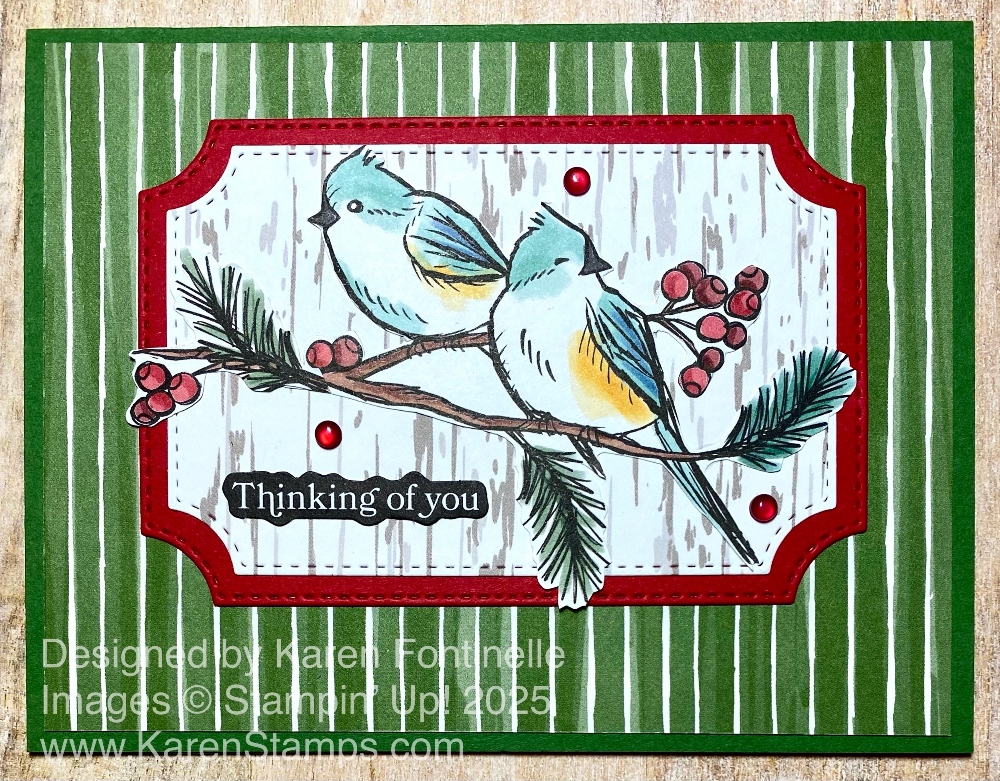
The card base is Garden Green Cardstock with a layer of the green striped pattern on the back of one of the featured papers. What I really like was this pair of birds sitting on a branch with red berries. I cut it out by hand with my Paper Snips, then layered the birds on a diecut piece of the Nests of Winter Designer Paper. It was cut out with the Branching Out Dies found on page 50 in the September-December 2025 Holiday Catalog, and then layered on a diecut of Real Red. You could also use Cherry Cobbler. The birds and the layers are all adhered flat on the card but you could pop up the birds or the layers with Stampin’ Dimensionals.

The greeting is one I found in the Greetings For All Ephemera Pack. There are ephemera packs in the Annual Catalog on page 25 and in the Holiday Mini on page 15. If you don’t own any ephemera packs yet it’s time to get some! They are fun and easy to use. At first I thought this diecut greeting in the ephemera pack would be too small for this card, but once I placed it on the diecut piece, I really liked it there! If you wanted this to be a Christmas card, just add a different greeting…or just a winter card!

I couldn’t resist adding three small Cherry Cobbler & Pearl Adhesive-Backed Berries to the card front to match the berries on the paper! These are also “Low Inventory” so bette grab them if you want them. They are great for Christmas cards or any time.

This Nests of Winter Designer Series Paper just appealed to me when I came across i t, looking for something different from all the Christmas and Halloween paper. Often we get so caught up in all our new things, we forget about our older products. This was a pretty paper and I was inspired to use it for something different! Check your designer papers and see if there is something you haven’t used in awhile!

SHOP STAMPIN’ UP! ONLINE HERE!

Nests of Winter Sending Thanks Card

Nests of Winter Sending Thanks Card

I realized I hadn’t used this pretty designer paper in a while so I looked through it and picked out this pussy willow pattern. I hadn’t even used this In Color cardstock in a long time so all in all, this Nests of Winter Sending Thanks Card is what turned out.

The card base is the 2023-2025 In Color Copper Clay. The pussy willow layer is in the Nests of Winter Designer Series Paper. I bought this Suite for a virtual Stampin’ Up! event back in June. Honestly, I wasn’t too thrilled with the choice for this event, but after seeing the Demonstrators making their cards and projects with products in this Nests of Winter Suite, I was enthused to use it!

The focal point of the card, in the center, is made with a base layer of Copper Clay cardstock cut at 3 1/2″ x 3 1/2″. The layer is a bark-like pattern on the other side of the pussy willow pattern cut at 3 1/4″ x 3 1/4″. The two birds are easily cut out with the die in the Winterly Tree Tops Dies. This is such a great idea Stampin’ Up! has been doing with a lot of the designer paper. Certain images can be cut out with one of the dies in the Suite or Bundle! It’s great! I simply glued everything down flat on the card using the Multipurpose Liquid Glue and Stampin’ Seal.

The greeting is in the Winterly Tree Tops Stamp Set although it is longer than you see on this card. The stamp also includes “& much love” but I only wanted the “Sending Thanks”. I inked up the stamp, but then I wiped off the “& much love” at the bottom of the stamp using my Simply Shammy. It was then diecut with one of the Stylish Shapes Dies. The greeting is stamped in Copper Clay ink.

That’s all there is to this card! Pretty easy and you can swap out some of the different designer papers if you like.

If you’d like to see some other cards I made with the Winterly Tree Tops Stamp Set and Dies and Nests of Winter Designer Series Paper, click HERE. These are cards that I made during the Creativity Now virtual event I “attended” last summer as a preview for new products coming in the Holiday Mini Catalog. That is where you will find this Suite and products.d

Don’t forget the 3-day Stamp Sale going on at Stampin’ Up! today and tomorrow!

SHOP STAMPIN’ UP!

Nests of Winter Thinking of You Birds Card

Nests of Winter Thinking of You Birds Card

I’ve been playing with this upcoming suite that will be in the Holiday Mini Catalog in September after making some cards at a virtual Stampin’ Up! event for Demonstrators. I’m a little surprised at how much I like this Nests of Winter Suite Collection.

To make this card, I slightly copied one of the three cards we made at the virtual Creativity Now event using this diecut frame. The card base is Crumb Cake but I completely covered it with a 5 1/2″ x 4 1/4″ piece of the Nests of Winter Designer Series Paper. I tried several different papers, but I needed something not too busy for the background.

To make the frame, I chose Shady Spruce cardstock. Garden Green would have been another good choice. The other day I just placed the frame die haphazardly on a piece of cardstock and diecut it. I wasn’t thinking that it needed to be straight and that actually, it is better to cut the piece of cardstock in the size of the rectangle you want and then center the die inside that piece. The die itself does not cut out the border. On this card, I popped up the leafy frame with Stampin’ Dimensionals.

The birds are stamped from the Winterly Tree Tops Stamp Set with Memento ink and colored in with Stampin’ Blends alcohol markers. I almost used Watercolor Pencils as we did on a couple of cards we made at Creativity Now. I used the Winterly Tree Tops Dies to cut out these two birds. You will be able to purchase both stamp set and dies in a Bundle. I popped up the birds, also, on Stampin’ Dimensionals.

The greeting is in the Winterly Tree Tops Stamp Set but I only used a portion of the stamp. I chose to use the Cherry Cobbler Stampin’ Write Marker to ink up just the words on the stamp I wanted to use. I stamped on Basic White, then diecut this banner shape using the Stylish Shapes Dies. It was the perfect size for this card.

One of the embellishments in the Suite is the Earth Tones Shimmer Gems. These are so pretty, not too bulky, and come in different colors. I used five of these whitish gems to place randomly around the birds. I think they are really pretty and add just a touch of sparkle! You will like these for fall cards and projects, not to mention the holidays.

This is a sneak peek and I know it’s hard to wait when you see things you like but can’t buy yet! But I do like this Suite and think you will, too.